
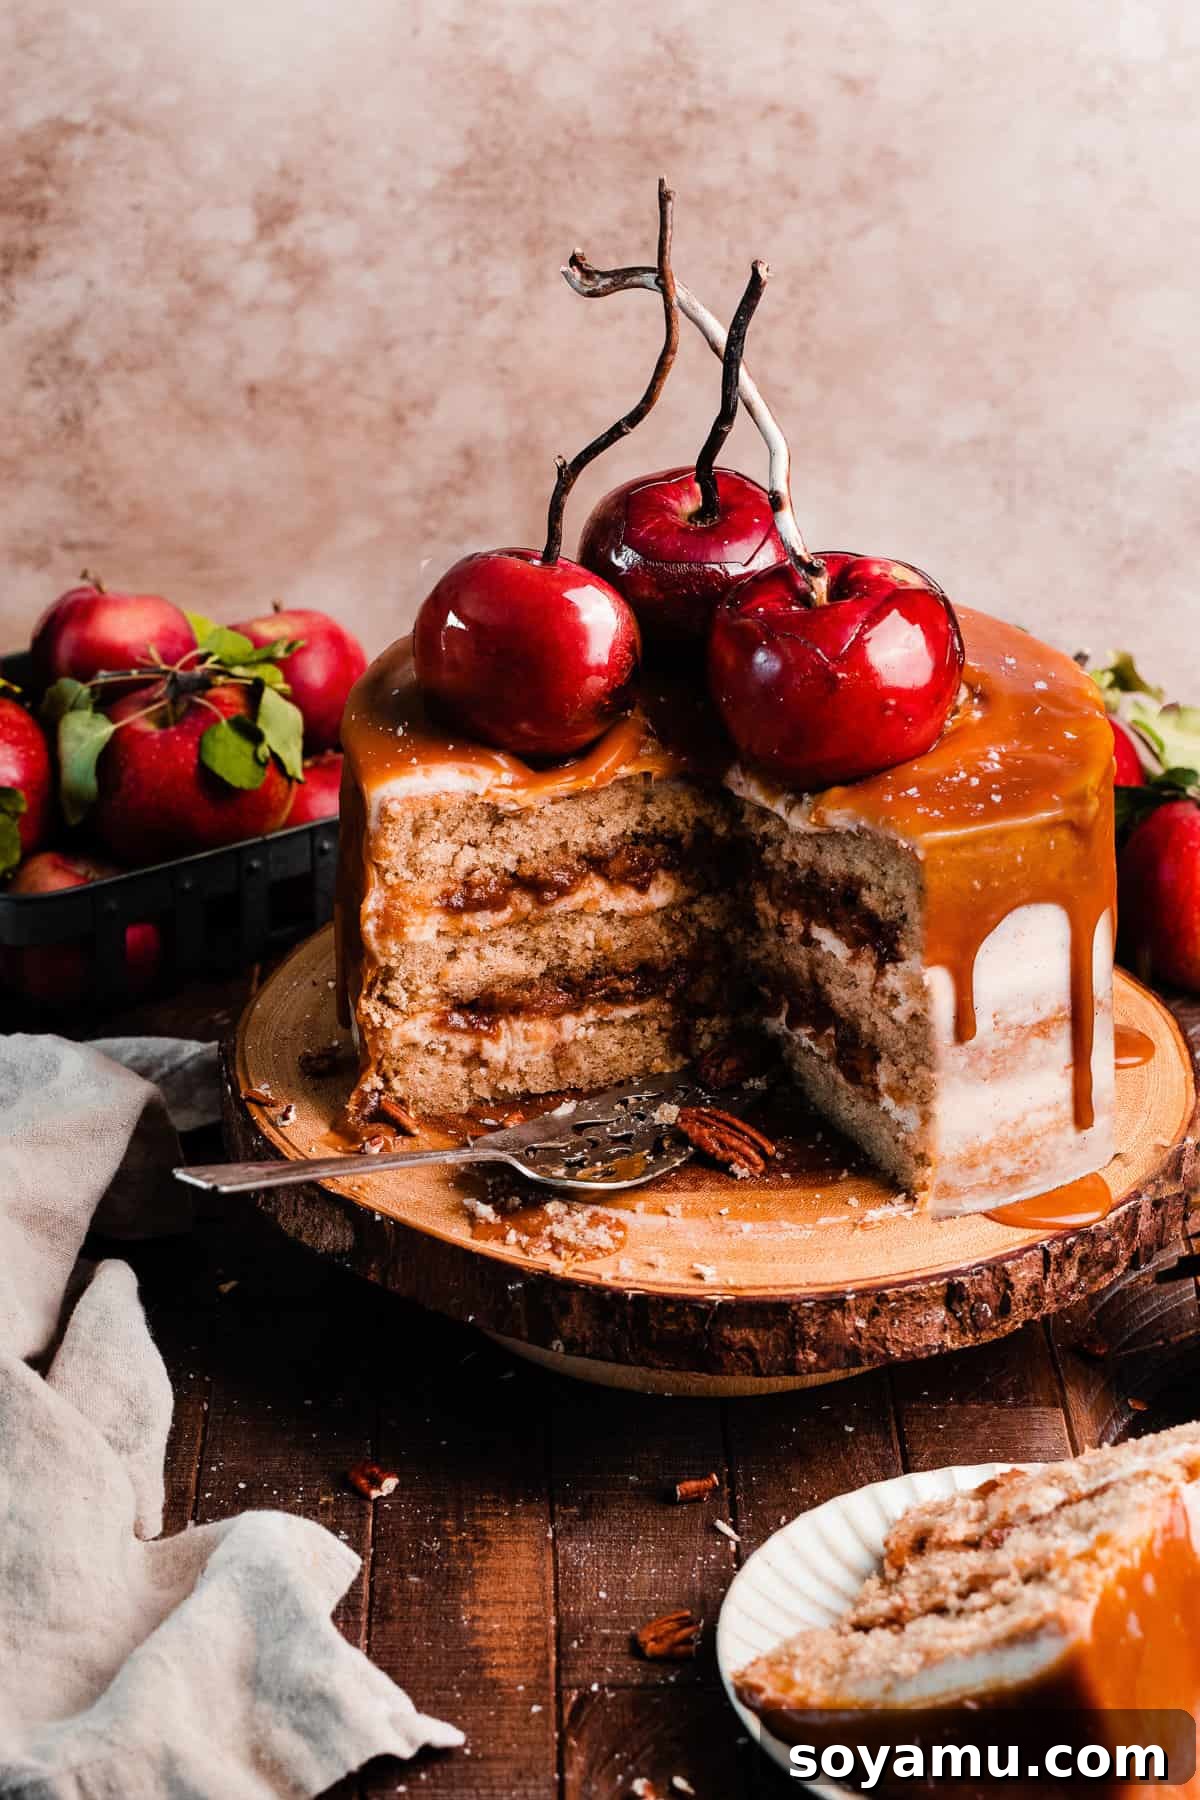
Decadent Caramel Apple Cake: Your Ultimate Fall Dessert
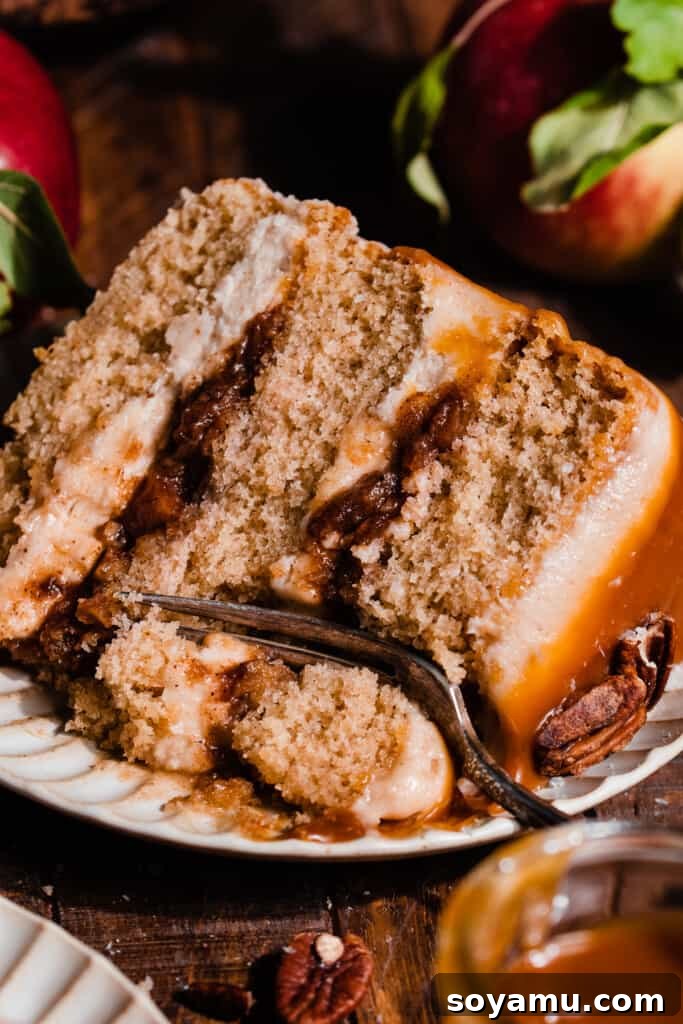
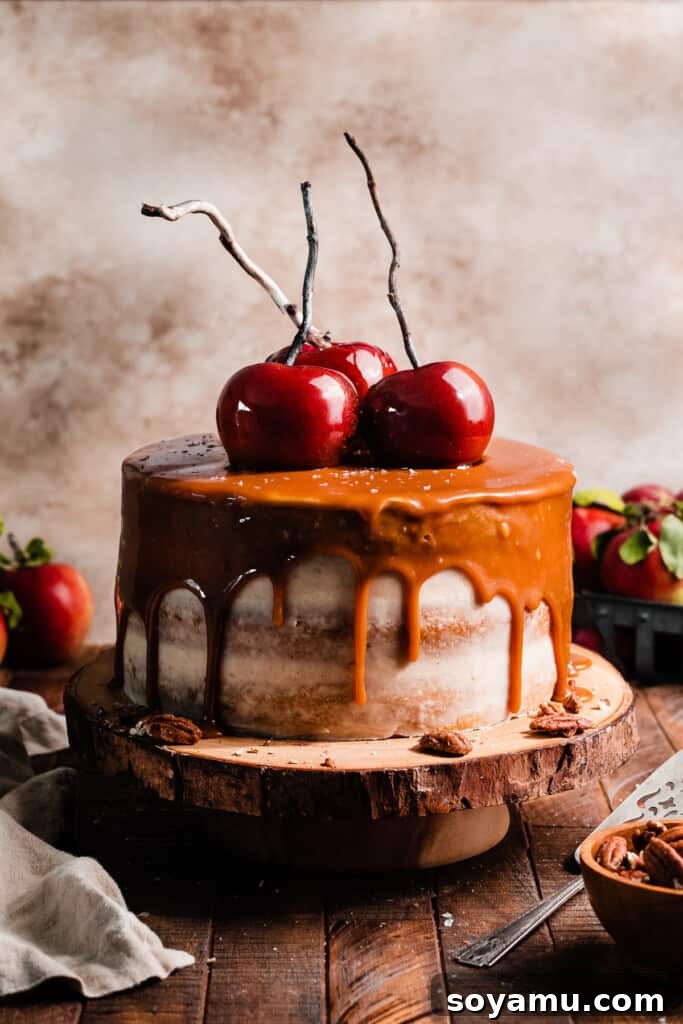
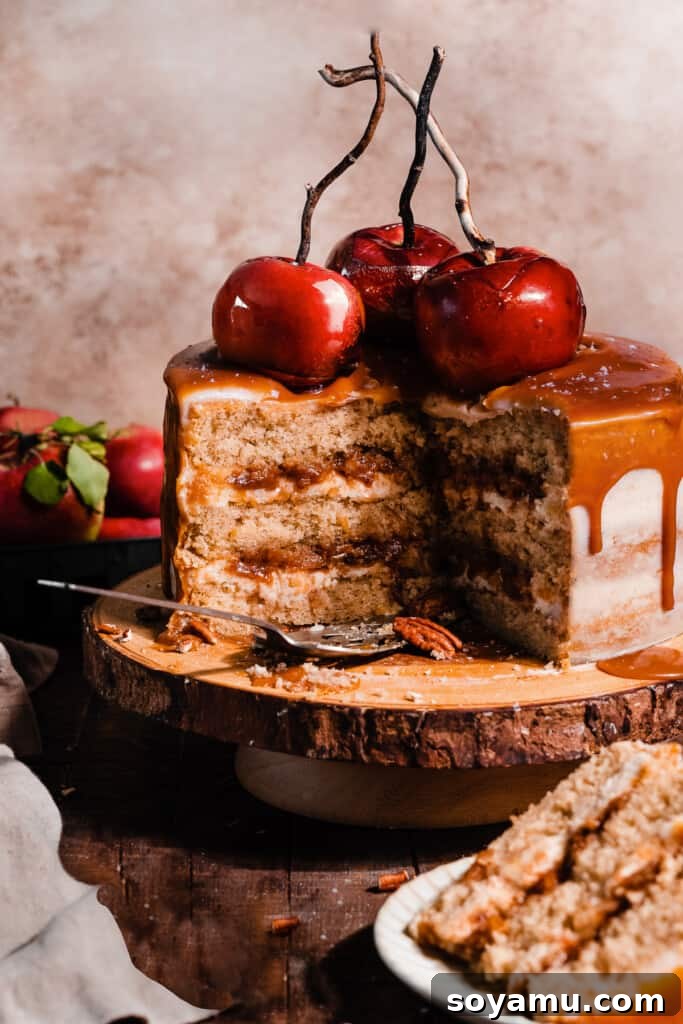
Step into the cozy flavors of autumn with our exquisite Caramel Apple Cake. This show-stopping dessert boasts perfectly moist, spiced vanilla cake layers, generously filled with tender caramelized apples, and a luscious drizzle of homemade salted caramel sauce. For an added textural delight, you can sprinkle in crunchy pecans (optional!), and the entire cake is enveloped in swirls of rich brown butter cinnamon cream cheese frosting. Crowned with an irresistible salted caramel drip and whimsical homemade candy apples, this recipe truly captures the essence of fall in every single bite. It’s not just a cake; it’s an experience!
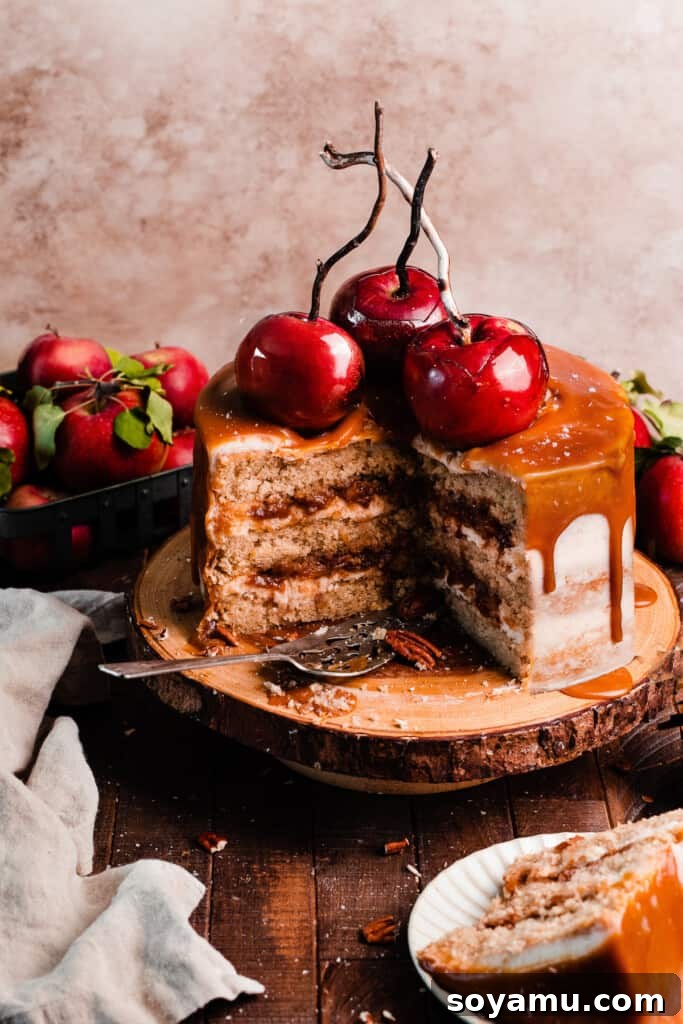
Why This Caramel Apple Cake Will Become Your Fall Favorite
Prepare to fall in love with this extraordinary Caramel Apple Cake for many reasons. Each element is carefully crafted to deliver a symphony of flavors and textures that perfectly embody the spirit of autumn.
- Ultra-Moist Spiced Vanilla Cake: Forget dry, crumbly cakes. Our recipe delivers layers of incredibly plush, tender vanilla cake infused with a warm blend of cinnamon, nutmeg, and a hint of cloves. This spiced foundation provides the perfect backdrop for the rich apple and caramel flavors.
- Irresistible Spiced Apple Filling: The heart of this cake lies in its homemade apple filling. Diced apples are gently sautéed with brown sugar and a medley of warming spices until they’re beautifully tender and caramelized. This stovetop method ensures each piece of apple is bursting with sweet and spicy goodness, creating pockets of delightful flavor between each cake layer.
- Silky Brown Butter Cinnamon Cream Cheese Frosting: This isn’t just any frosting! We elevate classic cream cheese frosting by browning the butter first, adding a depth of nutty, toasted flavor. Combined with a generous swirl of cinnamon, this frosting is unbelievably smooth, creamy, and provides a luxurious counterpoint to the sweetness of the cake and filling.
- Show-Stopping Salted Caramel Drip: For an elegant finish that also amplifies the flavor, a rich, glossy salted caramel drip cascades down the sides of the cake. The touch of salt perfectly balances the sweetness, making each slice even more addictive and visually stunning.
- The Ultimate Seasonal Treat: Whether it’s a holiday gathering, a special occasion, or simply a cozy weekend indulgence, this Caramel Apple Cake is designed to impress. It’s a celebration of fall’s bounty, making it an ideal centerpiece for any autumn celebration.
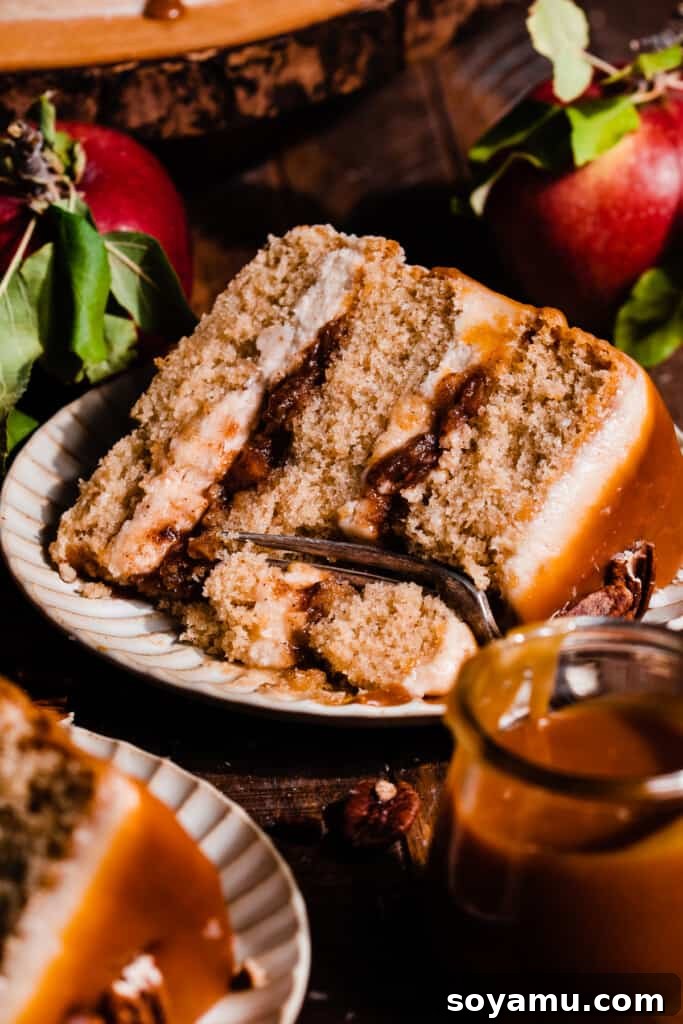
Essential Ingredients for Your Caramel Apple Cake
Creating this masterpiece starts with understanding the role of each ingredient. While most are common pantry staples, paying attention to specific types and temperatures will significantly impact your final result. For precise measurements and detailed instructions, please refer to the complete recipe card at the bottom of this page.
- Apples: The star of our filling! We recommend firm, crisp baking apples that hold their shape well when cooked. Honeycrisp, Gala, Golden Delicious, Fuji, or Pink Lady are excellent choices. Granny Smith apples can also work if you prefer a tarter note, but a mix often provides the best balance of flavor and texture. Avoid overly soft varieties like McIntosh, which can turn mushy.
- Cake Flour: A game-changer for light and tender cakes. Cake flour has a lower protein content than all-purpose flour, resulting in a finer, softer crumb. For the best results, always spoon and level your flour, or even better, use a digital kitchen scale. Scooping directly from the bag can compact the flour, leading to a denser cake. (1 cup of cake flour typically weighs around 110 grams, compared to 130 grams for all-purpose flour.)
- Sour Cream: Full-fat sour cream adds incredible moisture and a subtle tang to the cake, contributing to its rich flavor profile. Ensure it’s at room temperature before mixing to incorporate smoothly into the batter without curdling.
- Butter: For both the cake and frosting, quality butter makes a difference. We prefer salted butter for its enhanced flavor, but unsalted works equally well – just adjust the added salt in the recipe accordingly. Always bring your butter to a proper room temperature (softened but still cool) for optimal creaming.
- Eggs: This recipe uses a combination of whole eggs and an extra egg white. The egg yolks contribute richness and moisture, while the egg white helps create a lighter, fluffier texture. Like butter and sour cream, eggs should be at room temperature to ensure they emulsify correctly with other ingredients, creating a smooth, cohesive batter.
- Milk: Any milk (2% is a good standard) should also be at room temperature. Cold milk can shock the butter mixture, causing it to separate.
- Vanilla Extract: Invest in a good quality, pure vanilla extract. Its warm, aromatic notes are crucial for enhancing the overall flavor of both the cake and the frosting.
- Spices: Cinnamon, nutmeg, and cloves are the quintessential fall spices that give this cake its warm, inviting aroma and taste. Freshly ground nutmeg will yield the most vibrant flavor.
Recipe Adaptations & Creative Variations
While this Caramel Apple Cake recipe is perfect as is, it’s also incredibly versatile! Feel free to experiment with these suggestions to make it your own.
- Dairy-Free: For a dairy-free version, substitute butter, milk, sour cream, and cream cheese with your preferred trusted dairy-free alternatives. Be sure to choose options specifically designed for baking and frosting for the best results.
- Gluten-Free: I have not personally tested a gluten-free version of this cake. However, many bakers have success using a high-quality 1:1 gluten-free baking flour blend in place of cake flour. If you try this, please share your results!
- Apple Varieties: As mentioned, any firm baking apple will work beautifully. Don’t limit yourself to just one type! A mix of Honeycrisp for sweetness, Gala for mildness, and a touch of Granny Smith for tartness can create a more complex flavor profile in your apple filling.
- Homemade Cake Flour Substitute: No cake flour on hand? No problem! For every cup of all-purpose flour, remove two tablespoons, then add two tablespoons of cornstarch. Sift this mixture thoroughly (twice is ideal) to ensure the cornstarch is evenly distributed, mimicking the light texture of true cake flour. This step is crucial for achieving that signature soft crumb.
- Time-Saving Cake Layers: In a pinch, you can use a high-quality boxed spiced cake mix for the cake layers. Focus your efforts on making the decadent apple filling, homemade caramel, and brown butter cinnamon cream cheese frosting from scratch to maintain that gourmet touch.
- Canned Apple Pie Filling: If using store-bought apple pie filling, drain excess liquid and chop the larger apple pieces into bite-sized chunks to ensure easier slicing of the finished cake. To enhance the flavor, stir in additional cinnamon, a pinch of nutmeg, and a tiny dash of ground cloves to taste, as canned fillings can sometimes lack depth.
- Nuts: Pecans add a wonderful crunch, but if you’re not a fan, you can easily omit them. Alternatively, try chopped walnuts for a different nutty flavor, or even toasted hazelnuts for a unique twist.
- Different Pan Sizes: This recipe is designed for three 9-inch round cake pans. If using two 8-inch pans, you might need to increase the baking time slightly. For a 9×13 inch sheet cake, the baking time will be significantly shorter. Always adjust baking times and check for doneness with a toothpick.
Step-by-Step Guide to Baking Your Caramel Apple Cake
Follow these detailed steps to create a truly unforgettable Caramel Apple Cake that will impress everyone.
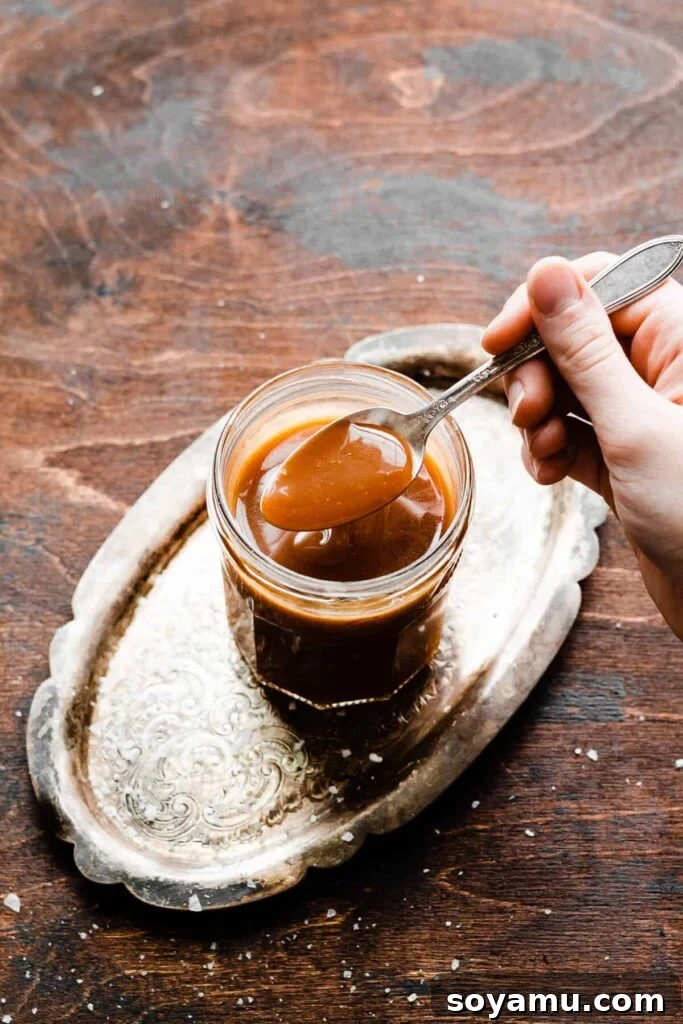
Step 1: Craft Your Homemade Salted Caramel Sauce. Begin by preparing your homemade caramel sauce. This involves carefully cooking granulated sugar until it melts into a beautiful amber liquid, then whisking in butter and heavy cream. Patience is key here to prevent burning. Allow the caramel to cool at room temperature until it thickens to a rich, drizzly consistency. This essential component can be made up to a week in advance and stored in the refrigerator, ready for assembly.
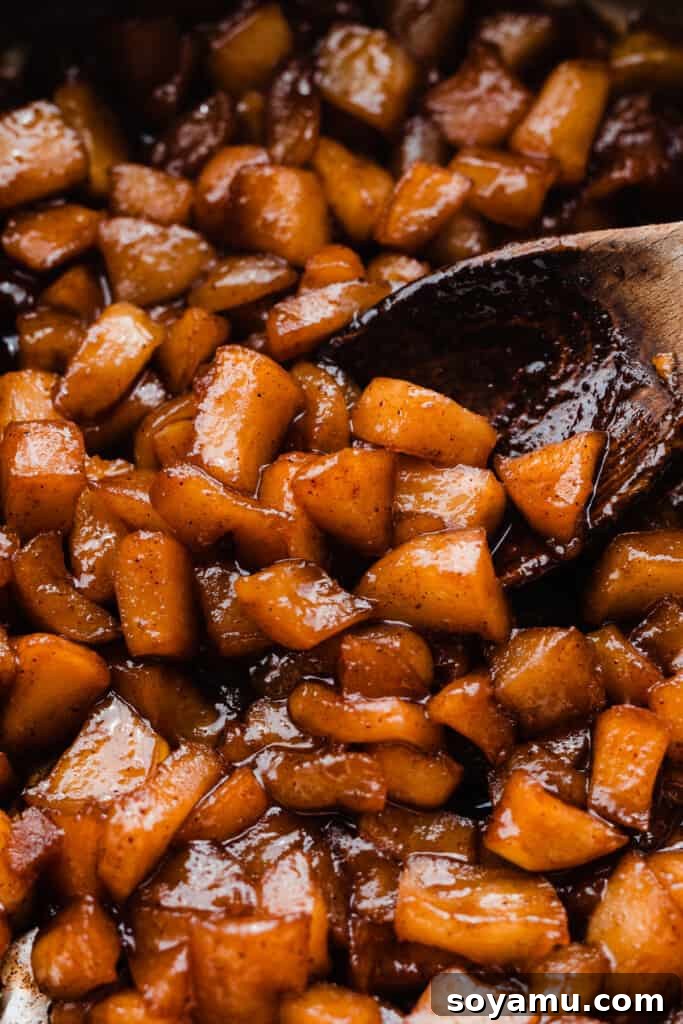
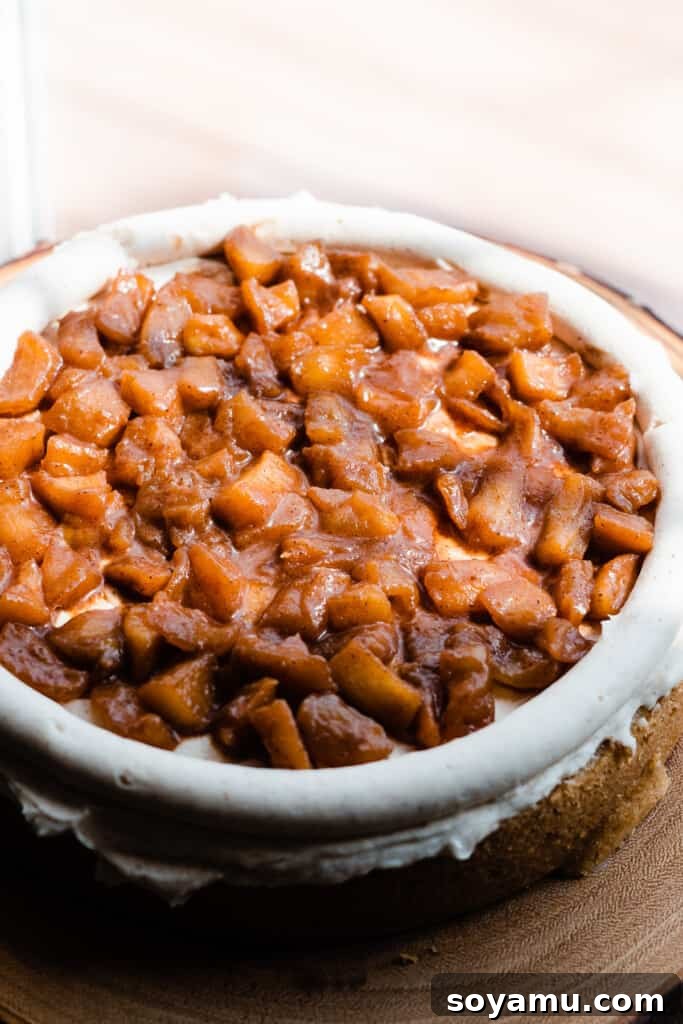
Step 2: Prepare the Spiced Apple Filling. Peel and dice your chosen apples into small, uniform pieces. In a medium saucepan, combine the diced apples with butter, brown sugar, cinnamon, nutmeg, and ground cloves. Cook this mixture over medium heat for approximately 8-10 minutes, stirring occasionally, until the apples are tender-crisp and beautifully caramelized. If the liquid evaporates too quickly, add a small splash of apple cider or water to keep it saucy. Once cooked to your desired tenderness, transfer the apple filling to a bowl and set aside to cool completely. This can also be prepared up to two days ahead and stored in the fridge.
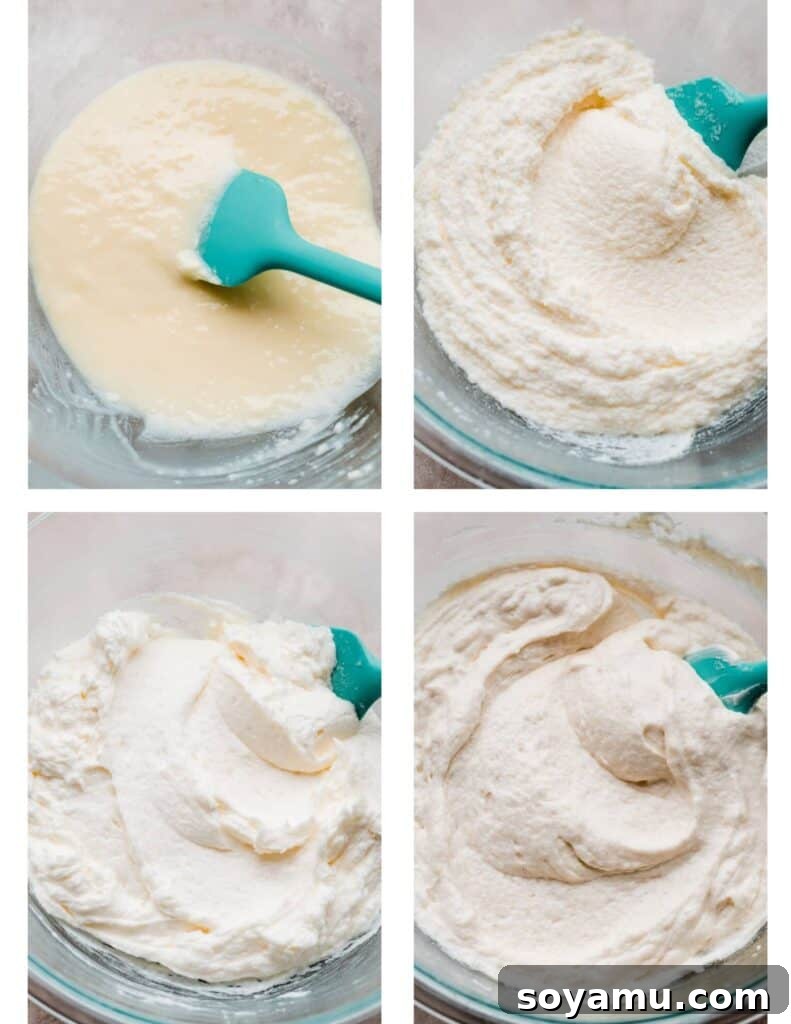
Step 3: Mix the Moist Cake Batter. In a large mixing bowl, cream together the softened butter and vegetable oil until light and fluffy. Gradually beat in the granulated sugar, then add the eggs and egg white one at a time, mixing well after each addition until fully incorporated. Scrape down the sides of the bowl to ensure everything is evenly combined. Stir in the room-temperature sour cream and vanilla extract. In a separate bowl, whisk together your cake flour, baking powder, baking soda, salt, and additional spices (cinnamon, nutmeg, cloves). With the mixer on low speed, slowly add half of the dry ingredients to the wet mixture, followed by the room-temperature milk, and then the remaining dry ingredients. Mix until just combined, being careful not to overmix, which can lead to a tough cake.
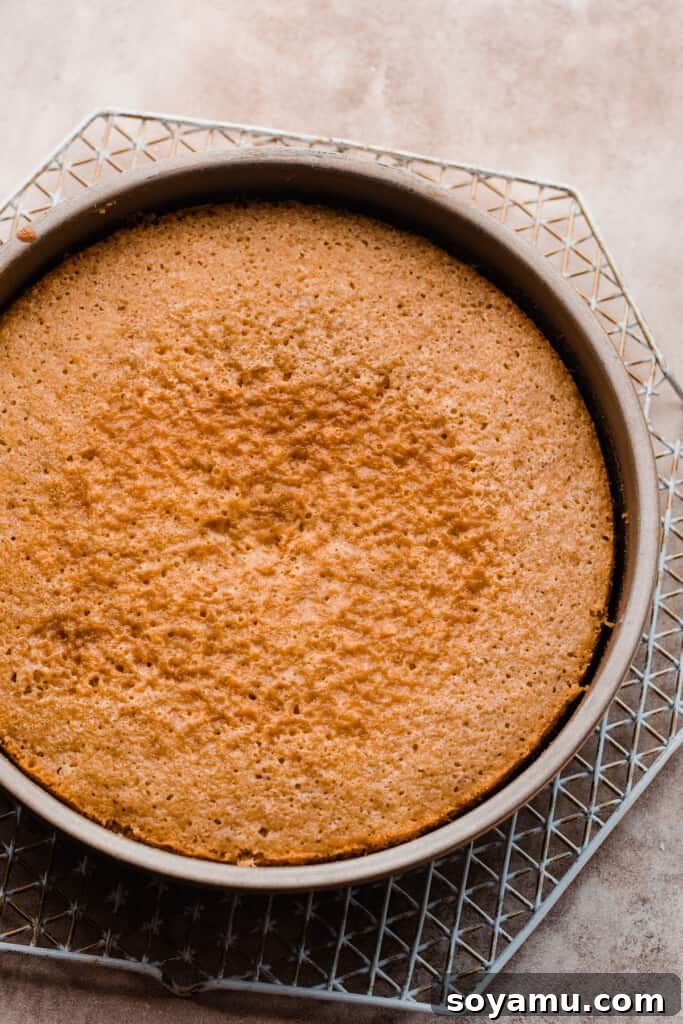
Step 4: Bake the Golden Cake Layers. Prepare three 9-inch round cake pans by greasing them thoroughly, lining the bottoms with parchment paper, and flouring the sides. Divide the prepared cake batter evenly among the pans (a kitchen scale ensures consistent layers). Bake in a preheated oven according to the recipe instructions, typically until a toothpick inserted into the center comes out with moist crumbs. Allow the cakes to cool in their pans on a wire rack for about 10-15 minutes before inverting them onto cooling racks to cool completely. Patience is crucial here; never frost warm cakes!
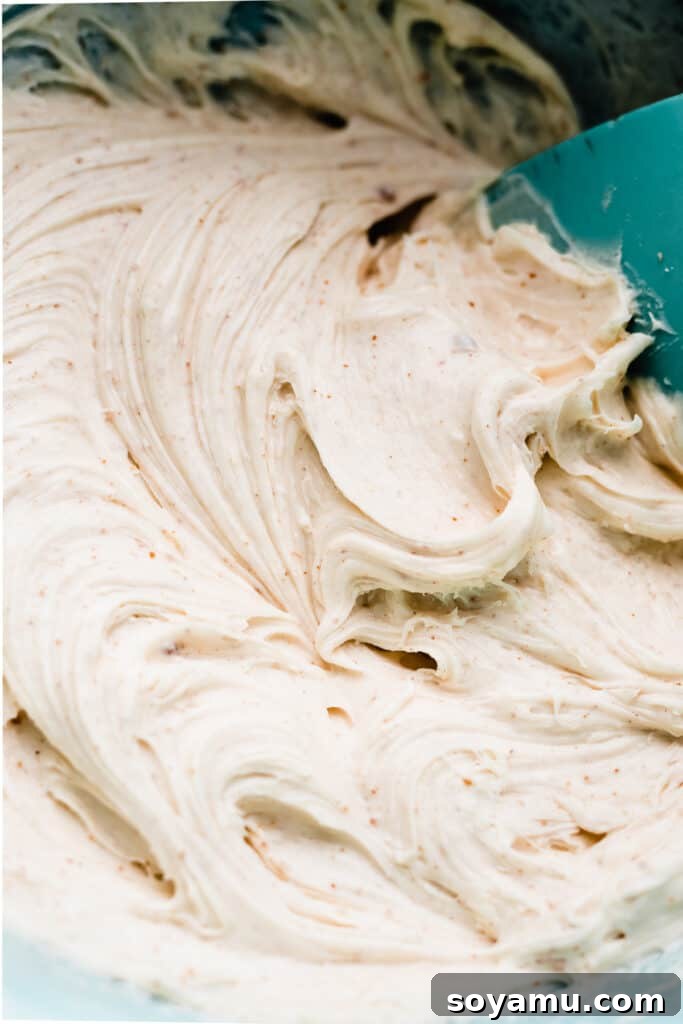
Step 5: Prepare the Brown Butter Cinnamon Cream Cheese Frosting. The star frosting! First, brown the butter by melting it in a saucepan over medium heat, stirring continuously until it turns a rich amber color and smells nutty. Let it cool slightly. In a large mixing bowl, beat together the cooled brown butter, cream cheese (both at room temperature), powdered sugar, vanilla extract, a pinch of salt, and cinnamon until light and fluffy. Add a splash of apple cider or heavy cream if needed to achieve a smooth, spreadable consistency. Remember to beat the cream cheese in last to prevent the frosting from becoming too soft or “weepy.”
Step 6: Frost & Assemble Your Masterpiece. Place your first cooled cake layer on a serving platter or cake stand (using wax paper strips underneath can keep the platter clean). Spread an even layer of brown butter frosting over the cake, then pipe a border of frosting around the edge to create a dam. Fill the center with a generous amount of your spiced apple filling, a drizzle of salted caramel sauce, and a sprinkle of chopped pecans if using. Carefully place the second cake layer on top and gently press to secure. Repeat the frosting and filling process for the second layer. Finally, add the third cake layer. Apply a thin, even “crumb coat” of frosting all over the entire cake, smoothing it with an offset spatula or cake scraper. Chill the cake in the refrigerator for 20-30 minutes to set the crumb coat. This locks in any loose crumbs. Once chilled, apply the remaining frosting, striving for a smooth and even finish on the top and sides. Chill again for at least 30 minutes before decorating further or serving.
Serving & Storing Your Caramel Apple Cake
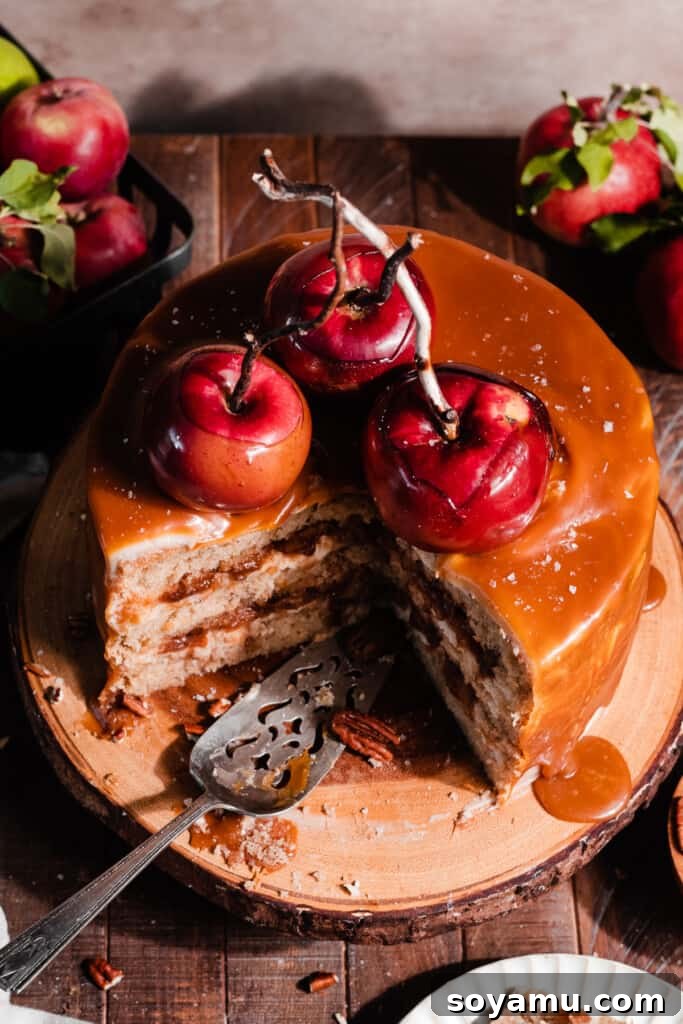
For the best experience, allow your assembled Caramel Apple Cake to chill in the refrigerator for at least 30 minutes, or even overnight, before slicing. This helps the frosting and layers set, making for cleaner cuts. Apply the final salted caramel drip once the frosting is firm. If you’re adding homemade candy apples as a garnish, place them on top just before serving for maximum visual impact.
To ensure optimal flavor and texture, let the cake sit at room temperature for about 15-20 minutes before serving. This allows the frosting to soften slightly and the cake flavors to fully develop. Serve generous slices alongside a scoop of vanilla bean ice cream or a dollop of fresh whipped cream for an extra special treat. If you’re an apple lover seeking a simpler cake, be sure to try our delightful Apple Upside Down Cake!
Store any leftover cake tightly covered in the refrigerator for 2-3 days. While the cake remains delicious, it may start to dry out slightly once cut, so ensuring it’s well-sealed is key to preserving its freshness and moisture.
Expert Success Tips for a Flawless Caramel Apple Cake
Achieving a bakery-worthy cake is easier than you think with these professional tips and tricks:
- Avoid a Dense Cake: The key to a light and fluffy cake lies in careful mixing. Always ensure your butter, eggs, milk, and sour cream are at proper room temperature. When combining wet and dry ingredients, mix only until just combined – a few streaks of flour are fine, as you’ll finish mixing by hand with a spatula. Overmixing develops gluten, leading to a tough, dense cake.
- Prepare Your Cake Pans Meticulously: There’s nothing worse than a cake sticking to the pan! Thoroughly grease your baking pans with shortening or butter, then line the bottoms with parchment paper rounds. Grease the parchment, then dust the entire pan with flour, tapping out any excess. This creates a non-stick barrier, ensuring your cake layers release easily and intact.
- Invest in an Oven Thermometer: Oven temperatures can vary wildly from what the dial indicates. An affordable oven thermometer provides an accurate reading, which is essential for consistent baking results, preventing under-baked or over-baked cakes.
- Use a Kitchen Scale for Accuracy: Flour measurements, especially, can vary significantly depending on how it’s scooped. A food scale ensures precise ingredient amounts, guaranteeing the perfect batter consistency every time. This is especially critical when working with cake flour.
- Cool Cakes Completely: Resist the urge to frost warm cakes! Warm cakes will melt your frosting, leading to a runny mess. Ensure your cake layers are completely cool to the touch before starting the frosting and assembly process. For quicker cooling, you can even pop them in the refrigerator for a short period once they’ve cooled on a rack for an initial 20-30 minutes.
- Chill Between Frosting Layers: After applying the crumb coat, chilling the cake for 20-30 minutes helps set the frosting, making it easier to apply the final, smooth layer without pulling up crumbs. If your frosting becomes too soft while working, simply pop it back into the fridge for 10-15 minutes to firm up.
Frequently Asked Questions About Caramel Apple Cake
Got questions about baking this delightful cake? We’ve got answers!
Yes, absolutely! If you’re looking for a smaller cake, you can easily halve this recipe. Bake the batter in two 8-inch cake pans for thinner layers, or use one 8×8 or 9×9 inch square pan. If using a single square pan, I recommend slicing it horizontally to create two thinner layers, which makes it easier to fill and serve. Alternatively, if you have two 8×8 or 9×9 pans, you can divide the batter between them.
You certainly can! This full recipe yields approximately 36 standard-sized cupcakes. If you halve the recipe, you’ll get about 18 cupcakes. Adjust baking time accordingly; cupcakes usually bake for a shorter period, often around 18-22 minutes. Keep an eye on them, as doneness varies by oven.
For the best apple filling, choose firm baking apples that maintain their texture when cooked. Excellent choices include Jonathan, Golden Delicious, Honeycrisp, Gala, or Fuji. These varieties offer a great balance of sweetness and firmness. While some people enjoy Granny Smith apples for their tartness, I personally prefer a slightly sweeter, less tart apple for this specific recipe. Avoid very soft apples like McIntosh, as they tend to break down too much and become mushy in the filling.
Yes, you can! For best results, freeze the unfrosted cake layers wrapped tightly in plastic wrap and then foil. They will last for up to 2-3 months. Thaw them in the refrigerator overnight before frosting. You can also freeze individual slices of the frosted cake, wrapped well, for about 1-2 months. Thaw individual slices in the refrigerator or at room temperature.
Make-Ahead Tips for Stress-Free Baking
To simplify your baking process and enjoy fresh cake with less last-minute stress, consider preparing certain components in advance:
- Cake Layers: Bake your cake layers up to 24 hours in advance. Once completely cooled, wrap each layer securely in plastic wrap (and then foil for longer storage, or if freezing) and store them at room temperature on flat plates. This will keep them moist and fresh until assembly.
- Apple Filling: The spiced apple filling can be made up to 2 days ahead of time. Store it in an airtight container in the refrigerator. Before using, give it a good stir. If it seems too thick, add a tiny splash of water or apple cider to loosen it slightly, bringing it back to a saucy (but not runny) consistency.
- Frosting: The brown butter cinnamon cream cheese frosting can be prepared 1 day in advance. Store it in an airtight container in the refrigerator, covered directly with plastic wrap to prevent a crust from forming. Before frosting the cake, let it sit at room temperature for 10-20 minutes, then re-whip it with your mixer until it’s smooth, fluffy, and spreadable again.
- Caramel Sauce: The salted caramel sauce is incredibly stable. Prepare it up to 1 week ahead and store it in a jar in the refrigerator. Gently warm it slightly before drizzling to restore its fluid consistency.
Special Tools for Baking Success
While not strictly mandatory, certain tools can make the process of baking and decorating this stunning layer cake significantly easier and more enjoyable:
- Cake Turntable: If you bake layer cakes frequently, a cake turntable is an invaluable investment. It allows you to rotate the cake smoothly, making frosting the sides and creating a professional finish a breeze.
- Piping Bag & Piping Tip: For creating that neat frosting border around your filling or adding decorative swirls, a reusable piping bag fitted with a Wilton 1A or 2A round piping tip is ideal. In a pinch, a sturdy plastic bag with a corner snipped off will also work.
- Acrylic Discs: When decorating with candy apples or other top heavy garnishes, small acrylic discs placed on top of your cake before adding decorations can protect the frosting from damage and make removal of garnishes easier before slicing.
- Parchment Rounds: Save yourself time and effort by having pre-cut parchment rounds on hand. They fit perfectly into 8-inch or 9-inch cake pans, eliminating the need to trace and cut each time you bake. Even if they don’t cover every inch, they will still prevent sticking effectively.
More Apple-Inspired Recipes to Love
If you adore the comforting flavors of apples, explore these other delicious recipes:
- Caramel Apple Cider Cookies
- Salted Caramel Apple Galette
- Cranberry Apple Crisp
- Homemade Apple Fritters
- Caramel Apple Crumb Cake
- Apple Cider Old Fashioned Cocktails
- The Best Recipes to Make During Apple Season
Discover More Decadent Layer Cakes
Craving more impressive layered desserts? Here are some other favorites:
- Incredible Funfetti Cake
- Perfect White Birthday Cake
- Salted Butterscotch Crunch Cake
- Peach Cobbler Cake
- German Chocolate Cake
- Best Yellow Cake with Chocolate Frosting
- Mojito Cake
Did you enjoy this recipe? We’d love to hear from you!
Please consider leaving a comment and a star rating below to share your experience. Your feedback helps our small business grow and inspires other bakers. Simply click the stars in the recipe card header below to leave your rating!
Caramel Apple Cake
Stephanie Simmons
2 hours
45 minutes
0 minutes
2 hours
45 minutes
12
slices
Pin
Rate
Ingredients
Salted Caramel Sauce
- 1 cup granulated sugar , 210 grams
- 6 tbsp salted butter, cubed, 85 grams
- 1/2 cup + 1 tbsp heavy cream, 135 grams
- generous sprinkle flaky sea salt
For the Apple Filling
- 4 medium apples, 5 & 1/2 cups, 775 grams, or 27 ounces diced. I used a mix of honeycrisp & golden delicious
- 1/4 cup salted butter, cubed, 57 grams
- 1/2 cup brown sugar, packed, 110 grams
- 1 and 1/2 tsp cinnamon
- 1/4 tsp ground cloves
- 1/2 tsp nutmeg
- 2 tbsp apple cider, See substitute in notes below
- 2/3 cup chopped pecans, optional
For the Cinnamon Vanilla Cake Layers
- 3 and 1/2 cups cake flour, spooned & leveled or weighed out , 385 grams
- 3/4 tsp salt
- 1 and 1/2 tsp cinnamon
- 1/2 tsp nutmeg
- pinch of ground cloves
- 1 tbsp baking powder
- 3/4 tsp baking soda
- 1/2 cup + 2 and 1/2 tbsp salted butter, softened at room temperature , 148 grams
- 1/2 cup vegetable oil, 108 grams
- 2 and 2/3 cups granulated sugar , 560 grams
- 3 large eggs, at room temperature
- 1 large egg white, at room temperature , use fresh, not boxed
- 1 tbsp + 1 tsp vanilla extract
- 3/4 cup full fat sour cream, at room temperature , 180 grams
- 1 and 1/2 cups milk, at room temperature , 360 grams
For the Brown Butter Cinnamon Frosting
- 2 and 1/2 cups salted butter, cubed, 565 grams
- 8 ounces cream cheese, at room temperature , 226 grams
- 6 to 7 cups powdered sugar , Start with 6 cups, add more to taste – 690 to 805 grams
- 2 tbsp apple cider, or heavy cream
- 1 tbsp vanilla extract
- pinch of salt
- 3/4 tsp cinnamon, plus more to taste – i always add more, but start light if you don’t want a ton of cinnamon
For the Candy Apples (Optional)
- 3 medium apples
- 3 tbsp corn syrup, 60 grams
- 1 cup granulated sugar , 210 grams
- 1/4 cup water, 60 grams
- 1/4 tsp cinnamon
- 4 wooden skewers or popsicle sticks
US Customary – Metric (Conversion not active due to JS removal)
Instructions
-
Make Caramel Sauce: Prepare the Salted Caramel Sauce following the easy, 10-minute recipe provided (linked in the blue text). Allow it to cool at room temperature for approximately 20 minutes, or until it reaches a desired thickened, drizzly consistency.
Make-Ahead Tip: This caramel sauce can be cooled, transferred to a jar, and stored in the refrigerator for up to 2 weeks. Gently reheat before use if it becomes too firm.
1 cup granulated sugar,
6 tbsp salted butter, cubed,
1/2 cup + 1 tbsp heavy cream,
generous sprinkle flaky sea salt -
Make the Apple Filling: Rinse and peel your apples, then dice them into small, bite-sized chunks. Add all the apple filling ingredients (diced apples, salted butter, packed brown sugar, cinnamon, ground cloves, nutmeg, and apple cider) to a medium pan. Cook over medium-high heat for 15 to 18 minutes, stirring frequently to prevent sticking. If the liquid dries out, add an additional splash of apple cider or water to maintain a saucy consistency. Taste the apples around 15 minutes and continue cooking until they reach your preferred level of tenderness. Transfer the cooked apple mixture to a medium bowl to cool completely (this can be done at room temperature or expedited in the refrigerator).
Make-Ahead Tip: The apple filling can be prepared up to 2 days in advance and stored in an airtight jar in the refrigerator.
4 medium apples,
1/4 cup salted butter, cubed,
1/2 cup brown sugar, packed,
1 and 1/2 tsp cinnamon,
1/4 tsp ground cloves,
1/2 tsp nutmeg,
2 tbsp apple cider,
2/3 cup chopped pecans -
Prep the Cake Pans: Prepare three 9-inch cake pans for baking. First, preheat your oven to 350℉ (175°C). Rub shortening or butter generously all over the inside of each pan, ensuring an even coat. Cut a round of parchment paper to fit perfectly inside the bottom of each pan (tracing your pan bottom is the easiest method, or use pre-cut rounds). Place the parchment on top of the greased pan bottom, then grease over the parchment paper as well. Finally, add a handful of all-purpose flour to each pan, rotating and tapping the pan to coat the entire greased interior with flour. Tap out any excess flour. This meticulous preparation prevents sticking and ensures easy release of your cake layers.
-
Make the Cake Batter: In a medium bowl, whisk together all the dry ingredients: cake flour, baking powder, baking soda, cinnamon, nutmeg, ground cloves, and salt. Set aside.
In a large mixing bowl, using an electric hand mixer or stand mixer, cream the softened salted butter for about 30 seconds until it’s smooth and creamy. Add the vegetable oil and continue creaming with the butter for another minute. Next, add the granulated sugar and beat on high speed for a full 2 minutes; the mixture should become light, fluffy, and pale. Incorporate the eggs one at a time, beating on medium-high speed for 45 seconds after each addition. Beat in the single egg white. Finally, add the room-temperature sour cream and vanilla extract, mixing on medium-low speed until just combined.
With the mixer on low speed, slowly add half of the dry ingredient mixture to the wet ingredients. Once a few streaks of flour remain, pour in the room-temperature milk. When the milk is almost fully incorporated, add the remaining dry ingredients. Mix just until a few streaks of flour are visible, then turn off the mixer and use a rubber spatula to gently fold and ensure everything is combined. Be careful not to overmix the batter, as this can result in a dense cake.
3 and 1/2 cups cake flour, spooned & leveled or weighed out,
3/4 tsp salt,
1 and 1/2 tsp cinnamon,
1/2 tsp nutmeg,
pinch of ground cloves,
1 tbsp baking powder,
3/4 tsp baking soda,
1/2 cup + 2 and 1/2 tbsp salted butter, softened at room temperature,
1/2 cup vegetable oil,
2 and 2/3 cups granulated sugar,
3 large eggs, at room temperature,
1 large egg white, at room temperature,
1 tbsp + 1 tsp vanilla extract,
3/4 cup full fat sour cream, at room temperature,
1 and 1/2 cups milk, at room temperature -
Bake the Cakes: Evenly divide the cake batter among your three prepared 9-inch cake pans. For the most consistent layers, you can use a kitchen scale to ensure equal batter distribution. Bake the cakes in your preheated oven for 19-24 minutes. For optimal results, bake the first two pans together, and then the third pan on its own after the first two are done. This helps maintain even oven temperature and consistent baking. The cakes are ready when a toothpick inserted into the center comes out with moist crumbs and the cake tops spring back when gently pressed; the centers should not jiggle.
Allow the baked cake layers to cool in their pans on a wire rack for 10-15 minutes. Then, carefully invert them onto cooling racks to cool completely. Remember to gently peel off the parchment rounds from the bottoms of the cakes before frosting. Fully cooled cakes are essential for proper frosting and assembly.
-
Make the Brown Butter Frosting: To brown the butter, melt the butter in a large, light-bottomed saucepan over medium heat. Continue cooking, stirring occasionally, until the butter turns golden brown, smells nutty, and small brown bits form at the bottom of the pan. This process usually takes about 5-8 minutes. Immediately pour the browned butter into a heatproof bowl to stop the cooking, and let it cool completely to room temperature. You can speed this up by placing it in the fridge or freezer, stirring frequently.
In a large mixing bowl, beat the cooled (but still liquid) brown butter together with the room-temperature cream cheese until smooth. Gradually add the powdered sugar, 2 cups at a time, mixing well between each addition. If the frosting seems too stiff, add the apple cider or heavy cream one tablespoon at a time until it reaches a smooth, spreadable consistency. Stir in the vanilla extract, cinnamon, and a pinch of salt until just combined.
Note: If your frosting becomes too soft or “weepy” at any point, place the bowl in the refrigerator for 10-15 minutes to allow it to firm up before re-mixing.
Make-Ahead Tip: Brown butter can be made up to 2 weeks ahead and stored in the fridge. Let it come to room temperature before using, then proceed with the recipe, beating it with the cream cheese last. The finished frosting can be made 1 day ahead, covered tightly, and chilled in the fridge. Let it sit at room temperature for 10-15 minutes and re-whip before use.
2 and 1/2 cups salted butter, cubed,
6 to 7 cups powdered sugar,
2 tbsp apple cider,
1 tbsp vanilla extract,
pinch of salt,
3/4 tsp cinnamon,
8 ounces cream cheese, at room temperature -
Assemble the Cake: Place your first cooled cake layer onto a cake stand or turntable. To keep your serving platter clean, you can tuck wax paper strips under the edges of the cake. Spread approximately 1 and 1/3 cups of the brown butter frosting evenly over the first layer using an offset spatula. Pipe a sturdy border of frosting around the perimeter of the cake layer. Fill the center with about 3/4 cup of the spiced apple filling (approximately 194 grams), then drizzle with salted caramel sauce and sprinkle with a handful of chopped pecans (about 1/3 cup, if using).
Carefully place the second cake layer on top, pressing gently to ensure it’s level. Chill the cake in the refrigerator for 5-10 minutes; this helps set the layers and prevents them from sliding during further assembly. Repeat the frosting, filling, and nut process for the second layer. Add the final cake layer on top. Apply a thin, even layer of frosting all over the entire cake – this is your “crumb coat” designed to trap any loose crumbs. Don’t worry about perfection at this stage. Chill the cake in the fridge for 30 minutes to set the crumb coat. Then, apply the remaining frosting, using a cake scraper or offset spatula to smooth the top and sides of the cake for a polished finish. Chill the entire cake for another 30 minutes, or until the frosting is fully set, before covering it (with plastic wrap or a cake lid) or serving.
Tip: If your frosting starts to soften too much while you’re working, place the bowl (or the entire cake, carefully) back into the fridge for a short period to firm it up.
-
Make Candy Apples (Optional): This step is purely for decorative flair but adds a significant “wow” factor! Insert wooden skewers or popsicle sticks firmly into the tops of your apples. Line a baking sheet with parchment paper and lightly spray it with nonstick spray. In a medium pot, combine corn syrup, granulated sugar, water, and cinnamon. Stir until the sugar dissolves, then bring the mixture to a boil over medium heat. Once boiling, stop stirring. Insert a candy thermometer and monitor the temperature; the syrup needs to reach 300°F (149°C), which is the “hard crack” stage. This typically takes about 5-8 minutes. Once the correct temperature is reached, immediately remove the pot from the heat and allow the syrup to rest for a few minutes to let the bubbles subside. Carefully dip each apple into the hot sugar syrup, rotating to coat completely. Let any excess drip off, then place the coated apples on the prepared baking sheet. Once the candy shell has hardened and cooled, you can add them to your cake! Consider using small acrylic discs placed on top of the cake (underneath the candy apples) to protect your frosting.3 medium apples,
3 tbsp corn syrup,
1 cup granulated sugar,
1/4 cup water,
1/4 tsp cinnamon,
4 wooden skewers or popsicle sticks -
Serve + Store: Serve your magnificent Caramel Apple Cake once it has been chilled as directed in the assembly steps. Slice into as many portions as you desire! Store any leftovers, tightly covered to prevent drying, in the refrigerator for 2-3 days. Please note that once the cake has been cut and exposed to air, it will naturally begin to dry out a bit, so ensuring it’s sealed properly is important for maintaining its delicious moisture.
Notes
Nutrition
Serving: 1 slice
Calories: 1249 kcal
Carbohydrates: 160 g
Protein: 10 g
Fat: 66 g
Saturated Fat: 34 g
Polyunsaturated Fat: 9 g
Monounsaturated Fat: 18 g
Trans Fat: 2 g
Cholesterol: 185 mg
Sodium: 743 mg
Potassium: 269 mg
Fiber: 3 g
Sugar: 129 g
Vitamin A: 1736 IU
Vitamin C: 3 mg
Calcium: 173 mg
Iron: 1 mg
Nutrition information is automatically calculated and should be used only as an approximation.
Like this? Leave a comment below!