
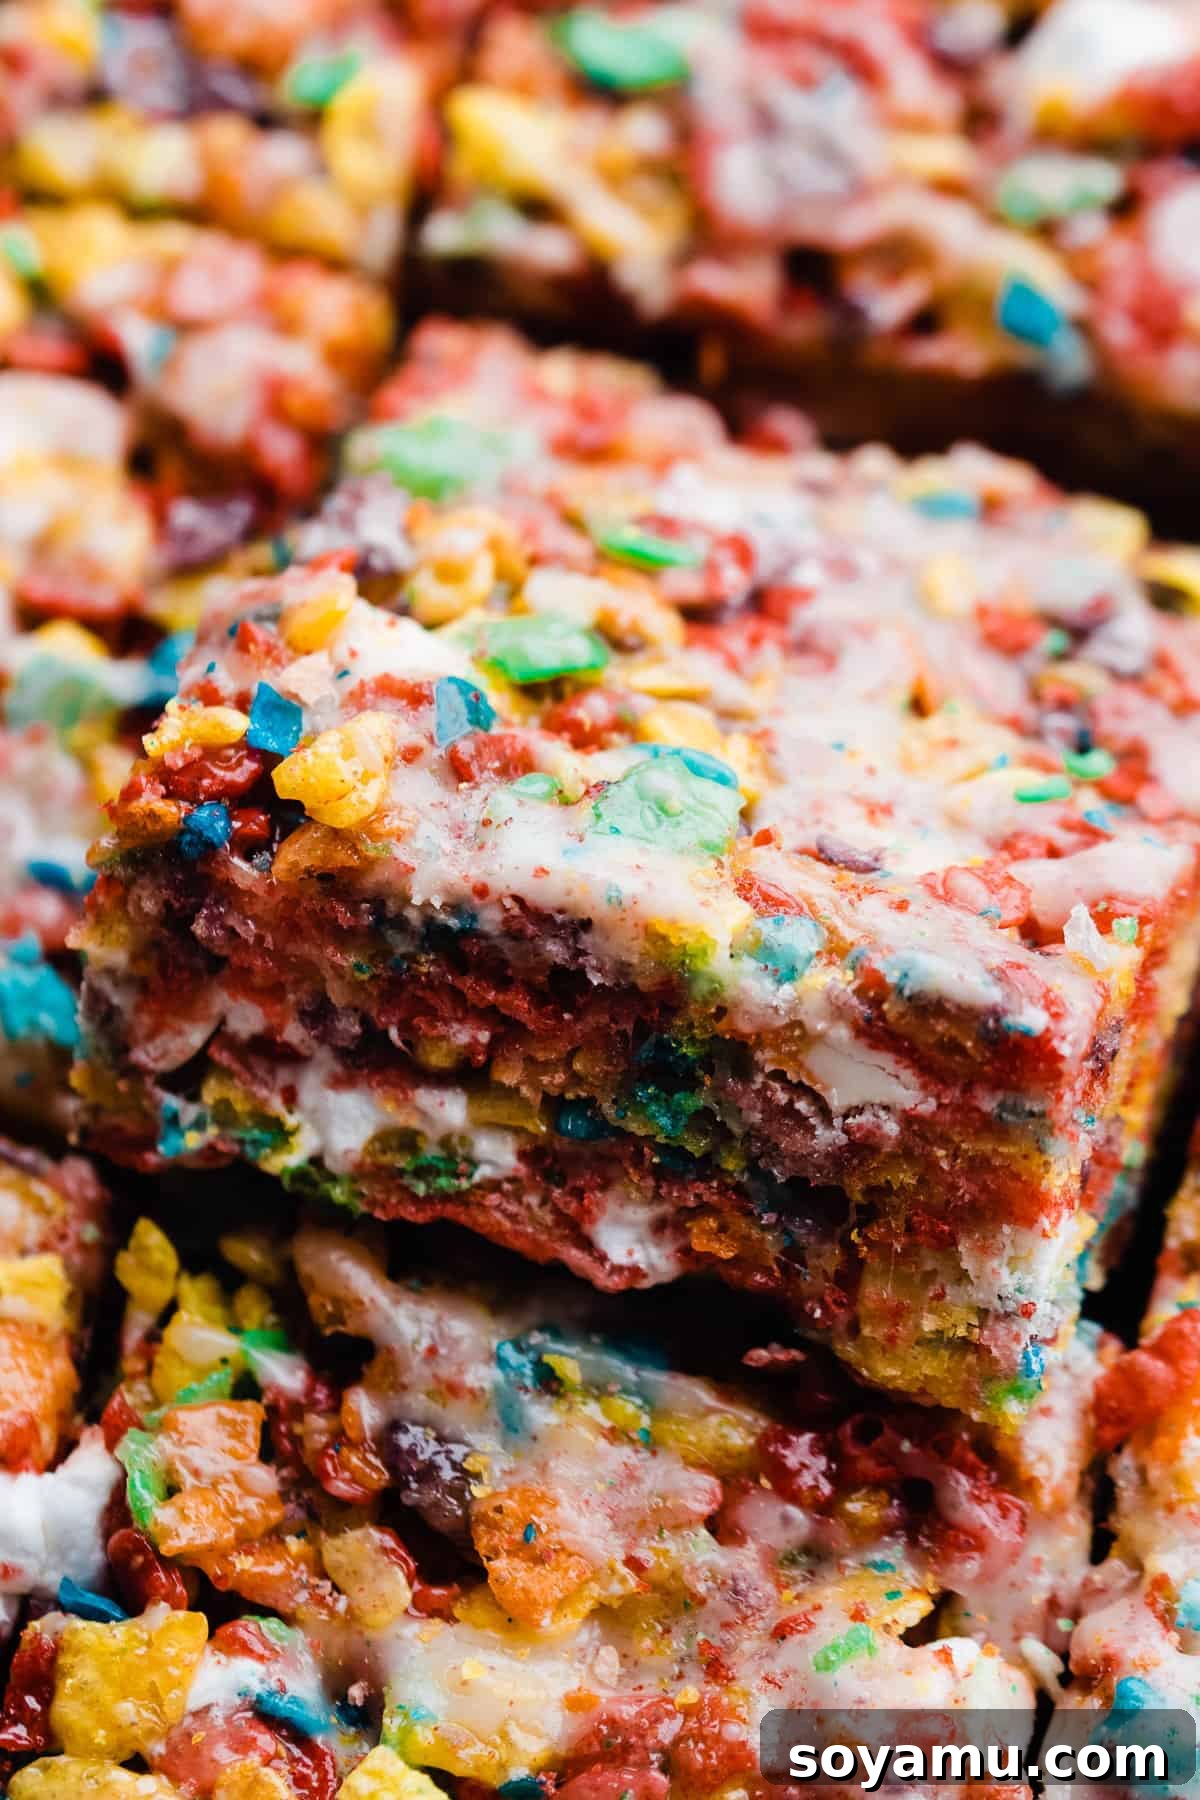
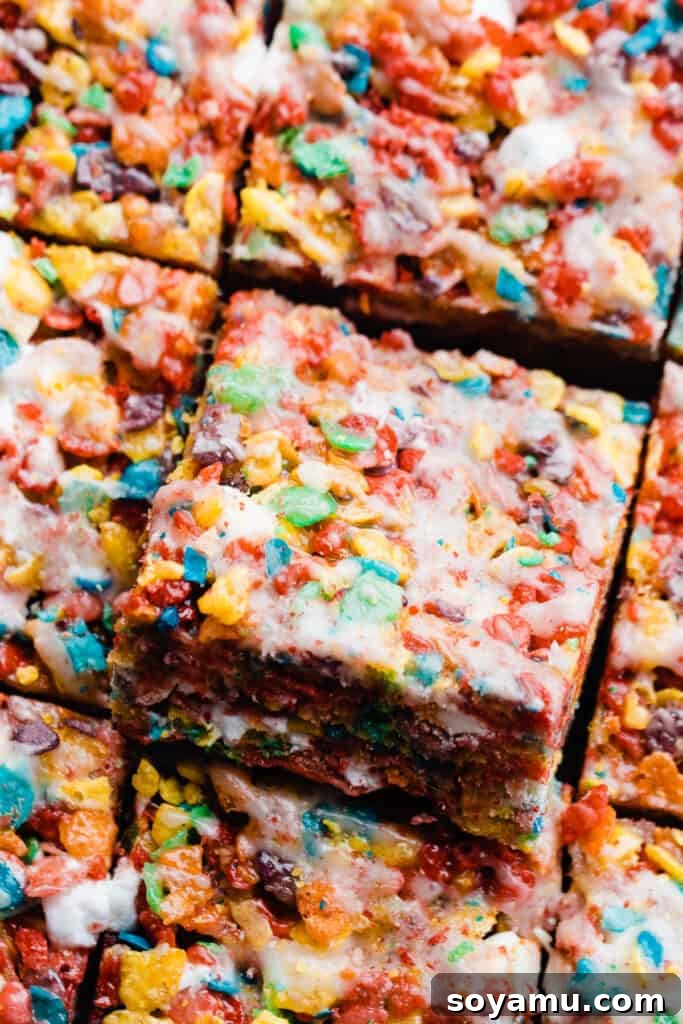
Welcome to the ultimate guide for crafting the most incredible Fruity Pebbles Treats you’ll ever taste! Far from your average cereal bar, this recipe elevates a beloved childhood classic into a truly gourmet experience. We’re talking deeply flavored brown butter, perfectly gooey marshmallows, the irresistible crunch and vibrant sweetness of Fruity Pebbles cereal, and a delicate cereal glaze that ties everything together. Each bite offers a delightful symphony of flavors and textures, making this nostalgic, no-bake dessert a true celebration for your taste buds. Get ready to recreate a cherished memory with a sophisticated twist that’s guaranteed to impress!
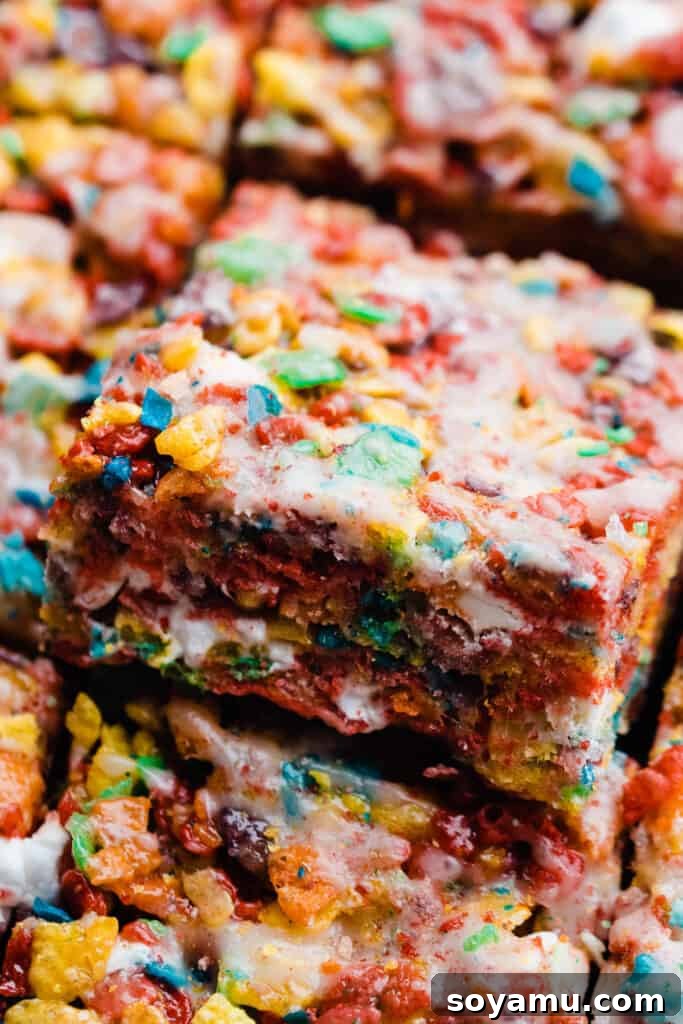
Why You’ll Adore This Fruity Pebbles Treat Recipe
These aren’t just any cereal treats; they’re a revelation! Here’s why this particular Fruity Pebbles recipe is about to become your new favorite go-to dessert:
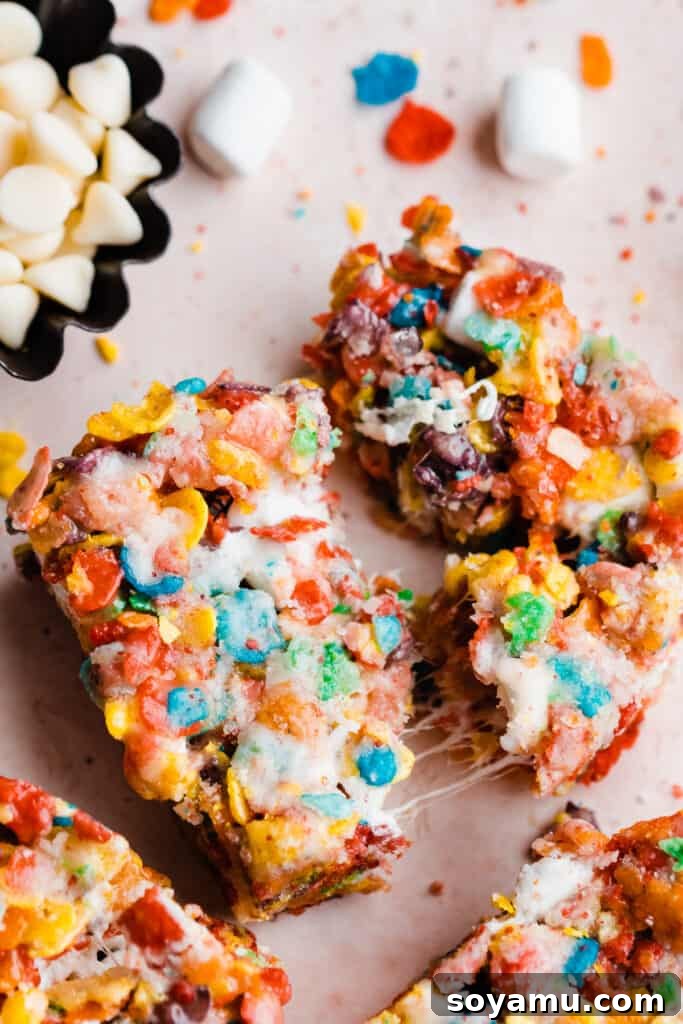
- An Explosion of Flavor & Texture: Prepare for a sensory adventure with every bite. The rich, nutty notes of brown butter provide an unexpected depth, beautifully contrasting the sweet and fruity cereal. You’ll find a perfect balance of chewy, gooey marshmallows and delightful crunchy cereal, often complemented by pockets of melted white chocolate chips. This recipe delivers all the joyous nostalgia of a classic Rice Krispie treat, but with an exciting, vibrant fruity twist that truly sets it apart. It’s a sophisticated upgrade to a simple pleasure.
- Effortlessly Easy & Quick: Craving something sweet but short on time? This no-bake dessert is your answer! Requiring minimal ingredients and coming together in approximately 20 minutes, it’s perfect for busy weeknights, impromptu gatherings, or simply satisfying a sudden sweet tooth. Its straightforward nature makes it an ideal baking project for kids, allowing them to participate in the fun of creating a delicious treat.
- Incredibly Customizable for Every Preference: This recipe is wonderfully versatile, designed to fit various dietary needs and taste preferences. Easily swap out Fruity Pebbles for other favorite cereals, adjust the sweetness by omitting the glaze, or make it dairy-free or gluten-free with simple substitutions. Whether you’re accommodating allergies or simply experimenting with new flavors, these treats can be tailored to be uniquely yours.
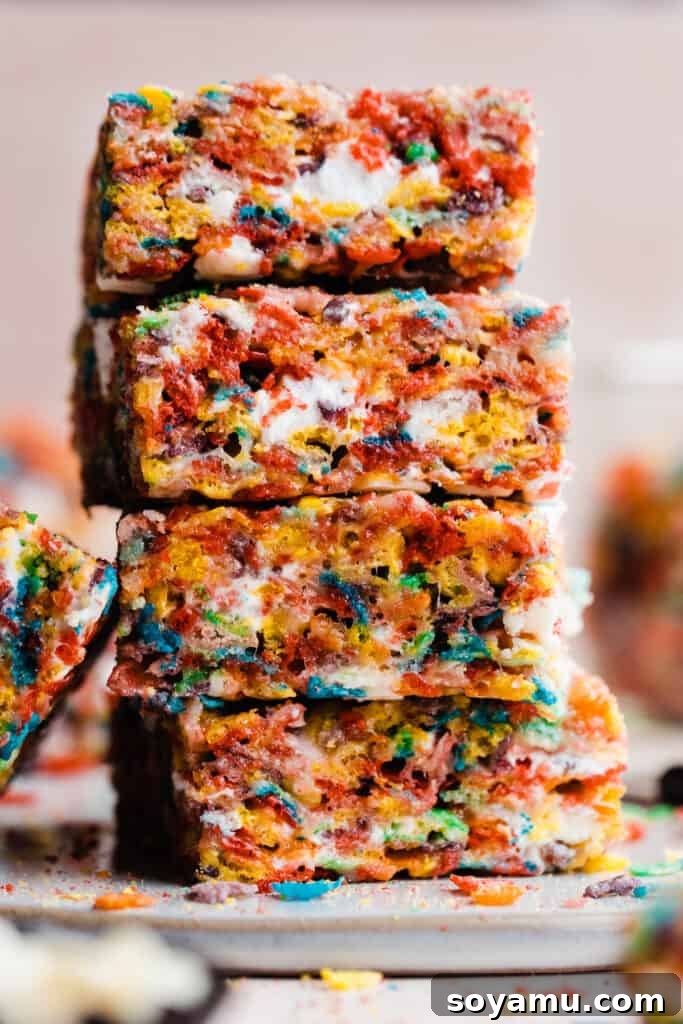
Essential Ingredient Overview
Every great recipe starts with quality ingredients. Here’s a closer look at what makes these Fruity Pebbles treats so special:
- Brown Butter (The Secret Weapon): This is where the magic truly happens! Taking just a few extra minutes, browning the butter transforms it from a simple fat into a rich, nutty, and subtly caramel-flavored ingredient. This process adds an incredible depth of flavor that beautifully balances the sweetness of the Fruity Pebbles cereal, making these treats uniquely irresistible. We recommend using salted butter for an enhanced flavor profile that really pops, but unsalted butter works perfectly fine if that’s your preference.
- Mini Marshmallows: These are crucial for achieving that signature gooey texture. Mini marshmallows melt more quickly and evenly than larger ones, ensuring a smooth, consistent binder for your cereal. A portion of them will be melted, and a small addition stirred in at the end adds delightful pockets of extra chewiness.
- Fruity Pebbles Cereal: The star of the show! Its vibrant colors and distinct fruity flavor are what give these treats their iconic appeal. You can easily find Fruity Pebbles (or a quality off-brand equivalent) at most grocery stores. The crunchy texture remains even after mixing, providing a wonderful contrast to the soft marshmallows.
- Pure Vanilla Extract: Don’t skimp on quality here! Real vanilla extract elevates the overall flavor, adding a warm, aromatic note that complements both the brown butter and the fruity cereal beautifully. It enhances the sweetness and rounds out the dessert’s profile.
- A Pinch of Salt: Often overlooked, a small amount of salt is vital for balancing the intense sweetness from the marshmallows and cereal. It highlights the other flavors, preventing the treats from being overly saccharine and ensuring a more complex and enjoyable taste experience.
- White Chocolate Chips (Optional but Recommended): These add another layer of creamy sweetness and a subtle textural difference. They melt slightly into the warm marshmallow mixture, creating delightful bursts of chocolate flavor throughout the bars. If you’re a white chocolate fan, don’t skip this!
Flexible Ingredient Substitutions
This recipe is incredibly accommodating, allowing you to tailor it to your dietary needs or simply experiment with different flavors:
- Alternate Cereal Choices: While Fruity Pebbles are iconic, this recipe is incredibly adaptable! Feel free to experiment with other cereals. Popular choices that work wonderfully include classic Rice Krispies (for a traditional touch), Chocolate Rice Krispies, Cocoa Pebbles for chocolate lovers, Cinnamon Toast Crunch for a spicy-sweet kick, or even Corn Flakes for a simpler base. The key is to choose a cereal with a good crunch that holds up well.
- Dairy-Free Adaptation: Making these treats dairy-free is simple. Replace regular butter with your favorite plant-based butter (like Miyoko’s Kitchen or Earth Balance) and ensure you use dairy-free white chocolate chips if including them. The brown butter effect can still be achieved with many dairy-free butters.
- Gluten-Free Version: To make these treats entirely gluten-free, simply swap Fruity Pebbles with a certified gluten-free cereal. Look for options with smaller pieces, similar to Rice Krispies, such as gluten-free rice krispies, gluten-free fruity pebbles, or gluten-free chocolate krispie cereals, which will provide the best texture.
- Vegan-Friendly Option: For a completely vegan dessert, use your preferred vegan marshmallows (often made with tapioca or agar-agar) and a high-quality plant-based butter. Ensure any white chocolate chips used are also certified vegan.
Crafting Your Fruity Pebbles Treats: A Step-by-Step Guide
Follow these easy steps to create your perfect batch of brown butter Fruity Pebbles treats:
Step 1: The Magic of Brown Butter & Melting Marshmallows. Begin by preparing your pan; lightly grease and line a 9×9 inch or 8×8 inch baking dish with parchment paper, leaving an overhang on the sides for easy removal later. In a large, heavy-bottomed pot or Dutch oven, melt the butter over medium heat. Continue cooking, stirring occasionally, for about 5 to 7 minutes. Watch carefully as the butter transforms: it will bubble, then foam, then deep golden brown flecks will appear at the bottom, and a rich, nutty, caramel-like aroma will fill your kitchen. This is the hallmark of perfectly browned butter. Once it reaches this beautiful deep golden hue, immediately add the mini marshmallows to the pot. Stir continuously until the marshmallows are completely melted and create a smooth, gooey mixture with the browned butter. It’s important to melt them thoroughly to ensure a cohesive treat.
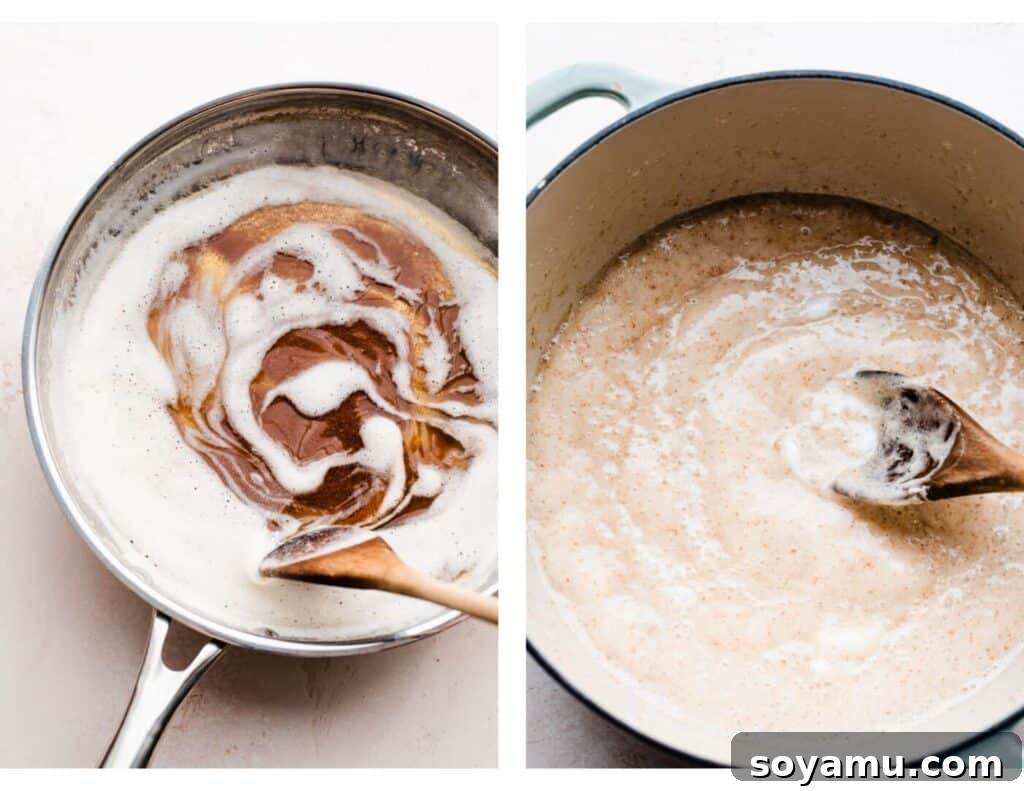
Step 2: Incorporate the Cereal and Delicious Mix-Ins. Remove the pot from the heat. Promptly pour the Fruity Pebbles cereal into the warm marshmallow and brown butter mixture. Using a sturdy spatula, stir gently but quickly until the cereal is evenly coated. Be careful not to overmix, as this can crush the cereal and make the treats too dense. Now, it’s time to add your delightful mix-ins: stir in the white chocolate chips and the additional mini marshmallows. The residual heat will slightly soften the chocolate and marshmallows, distributing them beautifully throughout the mixture, adding extra pockets of gooey goodness and creamy sweetness.
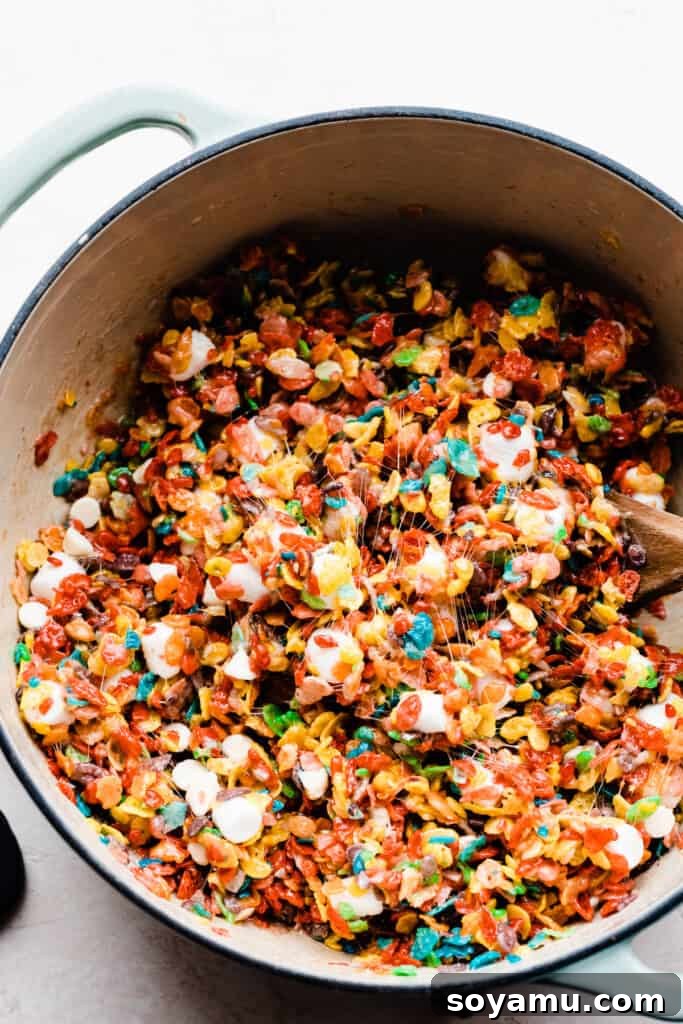
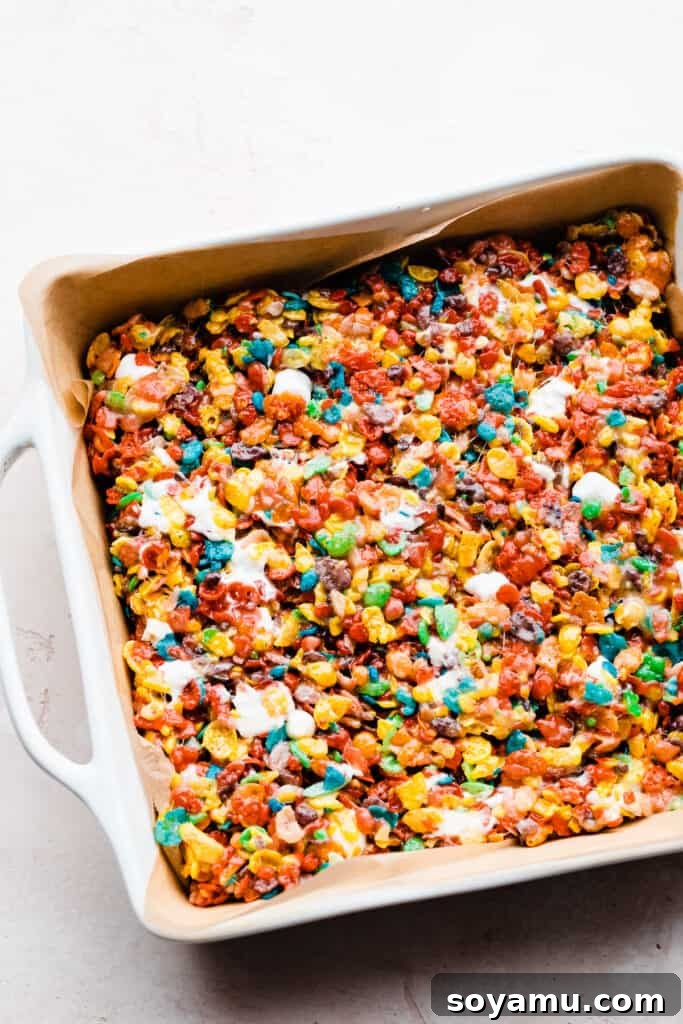
Step 3: Press into Your Prepared Pan. Once thoroughly mixed, transfer the vibrant cereal mixture into your greased and parchment-lined 9×9 or 8×8-inch pan. Using a buttered spatula or the back of a greased spoon, gently and evenly press the mixture into the pan. Avoid pressing too firmly, as this can lead to overly hard treats. A gentle, even pressure is all you need to achieve the perfect texture. Allow the treats to set at room temperature for at least 30 minutes to 1 hour before slicing. This resting period allows them to firm up just enough to cut cleanly while retaining their delightful chewiness.
Step 4: Drizzle with the Irresistible Cereal Glaze. For an extra touch of sweetness and visual appeal, prepare the optional cereal glaze. In a small bowl, whisk together powdered sugar, a splash of milk (or water), a hint of vanilla, and a handful of finely crushed Fruity Pebbles cereal. The crushed cereal in the glaze adds a fantastic textural element and reinforces the fruity flavor. Mix until smooth, adding more powdered sugar (a tablespoon at a time) if you desire a thicker consistency, or a tiny bit more liquid for a thinner glaze. Once your treats have slightly set, artfully drizzle this colorful glaze over the top. Let the glaze set for a few minutes before slicing and serving.
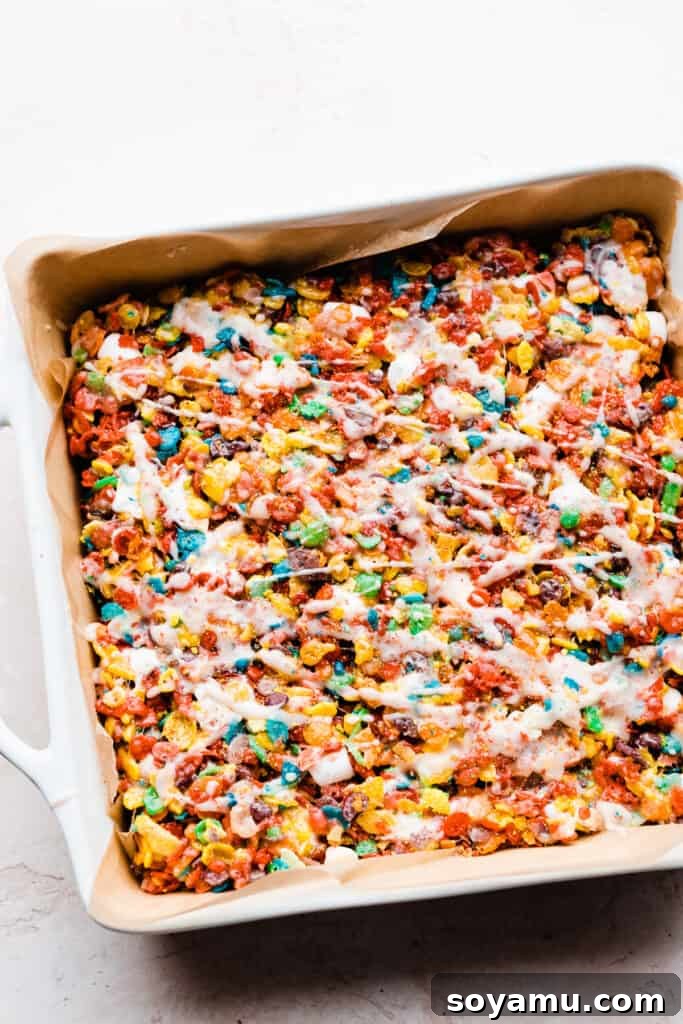
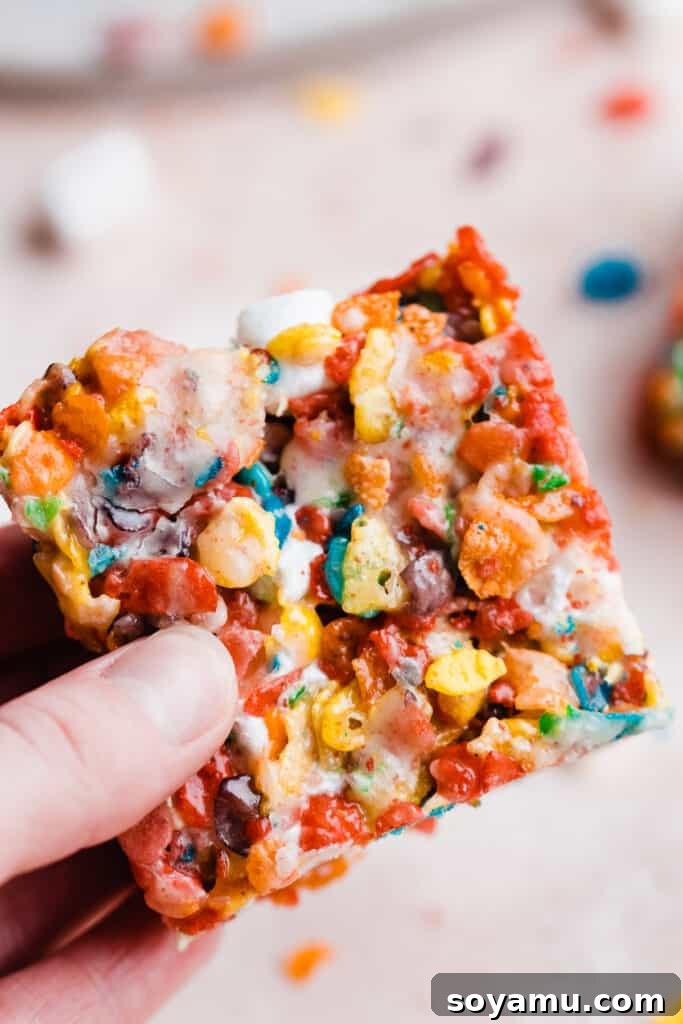
These sensational treats are more than just a dessert; they’re a playful, delicious twist on a cherished childhood classic. Their vibrant colors, irresistible flavors, and satisfying textures ensure they’ll be the first to disappear from any platter. Get ready for compliments and requests for the recipe!
Serving and Storing Your Fruity Pebbles Treats
Proper serving and storage are key to enjoying these delectable treats at their best.
Serving: After preparing, allow your Fruity Pebbles marshmallow treats to set for at least 30 minutes to 1 hour at room temperature before slicing. This ensures they firm up enough for clean cuts while maintaining their signature gooey, chewy texture. While you can speed up the setting process by placing them in the fridge for 15-20 minutes, many find the texture to be superior when they set naturally at room temperature, as it keeps them softer and more pliable. Cut them into squares of your desired size, remembering that these rich treats are quite satisfying.
Storing: For optimal freshness, store any leftover sliced treats in an airtight container at room temperature. They will remain wonderfully chewy and flavorful for 4-5 days. Avoid refrigerating for extended periods unless you prefer a firmer texture, as cold can make them harder. If they do become a bit stiff, a quick 10-15 second zap in the microwave can bring back some of their gooeyness.
Expert Tips for Perfect Fruity Pebbles Treats
Achieving cereal treat perfection is easier than you think with these insider tips:
- Thorough Marshmallow Melting is Key: Ensure your marshmallows are completely melted into a smooth, uniform liquid. Any lingering lumps will result in a less cohesive and potentially crumbly treat. Stir constantly over medium-low heat until no individual marshmallow pieces are visible, and the mixture is entirely smooth.
- The Buttered Spatula Trick: Marshmallow mixture is notoriously sticky! To easily press your treats into the pan without making a mess, lightly grease your spatula or the back of a spoon with butter or cooking spray. This simple trick prevents sticking and helps you achieve an even layer effortlessly.
- Don’t Overcook the Butter: While browning butter adds incredible flavor, be careful not to burn it. Keep a close eye on it, stirring frequently, and remove it from the heat as soon as it reaches a deep golden color and nutty aroma. Burnt butter will impart a bitter taste.
- Mix Gently and Quickly: Once the cereal is added, work quickly to combine it with the marshmallow mixture. Overmixing can crush the delicate cereal pieces, leading to a denser, less airy treat. Gentle, swift folds are best.
- Resist Over-Packing: When pressing the mixture into the pan, apply gentle, even pressure. If you pack it too tightly, your treats will turn out hard and dense instead of soft and chewy. A light hand creates the ideal texture.
- Fresh Marshmallows Matter: For the best gooey results, always use fresh marshmallows. Older, stale marshmallows tend to be drier and won’t melt as smoothly, affecting the overall texture of your treats.
Frequently Asked Questions (FAQs)
Absolutely! This recipe doubles beautifully. If you choose to double it, simply use a larger 9×13 inch baking pan to accommodate the increased volume of the mixture. Ensure your pot is large enough to handle all the ingredients.
Yes, you can easily halve this recipe. Use an 8×8 inch pan for a thinner layer of treats, or opt for a loaf pan if you prefer a thicker, more substantial bar. Adjust all ingredient quantities accordingly.
Certainly! This recipe is incredibly versatile when it comes to cereal choices. Feel free to substitute Fruity Pebbles with other cereals like classic Rice Krispies, Cocoa Pebbles, Cinnamon Toast Crunch, or even your own personal favorite. Refer to the “Ingredient Substitutions” section above for more recommendations and ideas.
While you can technically freeze them, it’s generally not recommended for optimal texture. Freezing can alter the consistency, making them a bit firmer and less gooey once thawed. If you must freeze, wrap individual treats tightly in plastic wrap, then place them in an airtight freezer-safe container for up to 2-3 weeks. Thaw at room temperature before serving.
These treats are best enjoyed within 1-2 days of making them, when they are at their freshest and chewiest. However, they will remain delicious in an airtight container at room temperature for up to 4-5 days. For parties, making them the day before is ideal.
Creative Recipe Variations to Explore
Get creative and make these treats truly your own with these exciting variations:
- Explore Different Cereals: As mentioned in the substitutions section, the possibilities are endless! Beyond Rice Krispies or Cocoa Pebbles, consider seasonal cereals, granola for a healthier twist, or even crushed cookies for an extra indulgent bar.
- White Chocolate Wonders: If white chocolate isn’t your favorite, feel free to omit the chips entirely. Alternatively, for a different presentation, melt some white chocolate and drizzle it decoratively over the cooled bars instead of the cereal glaze. You could also use milk or dark chocolate chips for a rich contrast.
- Microwave Convenience: No stovetop? No problem! For college students or quick kitchen-free prep, you can make these in the microwave. Melt the butter in a microwave-safe bowl (you can still brown it by microwaving in 30-second bursts for 3-6 minutes, stirring between each). Then, add marshmallows and microwave on high for 1 minute, stir, then microwave for 1-2 more 30-second bursts, stirring until fully melted and smooth. Proceed with the recipe as directed.
- Add Sprinkles & Food Coloring: Boost the fun factor by adding a few drops of food coloring to the melted marshmallow mixture before adding the cereal for an even more vibrant base. Stir in colorful sprinkles with the cereal or sprinkle them on top before the treats set for an extra festive touch.
- Nutty Additions: For those who enjoy nuts, chopped pecans, walnuts, or even toasted almonds can add a delightful crunch and earthy flavor. Stir them in along with the white chocolate chips.
Helpful Tools for Success
These tools will make preparing your Fruity Pebbles treats even smoother:
- 9×9 Inch Square Pan: A sturdy ceramic or metal 9×9 inch square pan is ideal for achieving the perfect thickness for these treats. An 8×8 inch pan can also be used for thicker bars.
- Large Dutch Oven or Heavy-Bottomed Pot: A Dutch oven is a fantastic kitchen workhorse! Its heavy bottom ensures even heat distribution, which is crucial for browning butter without burning and melting marshmallows smoothly. A large saucepan will also work.
- Sturdy Spatula: A heat-resistant silicone or wooden spatula will be your best friend for stirring the sticky marshmallow mixture and pressing the treats into the pan.
Discover More Irresistible No-Bake Desserts
If you loved how easy and delicious these treats were, explore more delightful no-bake recipes:
- No-Bake Cookie Dough Bites
- No-Bake Black Forest Pie
- Amazing No-Bake Peanut Butter Pie
- No-Bake Nutella Tart
- Mini No-Bake Apple Pie Cheesecakes
Even More Easy Dessert Recipes to Try
Expand your baking repertoire with these simple yet sensational dessert ideas:
- One-Bowl Chocolate Chip Banana Bread
- Best-Ever 5 Ingredient Brownies
- PBJ Thumbprint Cookies
- Jumbo Bakery-Style Monster Cookies
- Triple Chocolate Skillet Brownie
- Biscoff Swirled Blondies
Did you whip up this delightful recipe? We’d love to see it! Snap a photo and share your experience below!
Be sure to follow bluebowlrecipes on Instagram and tag #bluebowlrecipes with your gorgeous photos! You can also share your masterpiece on the bluebowlrecipes Facebook page. We can’t wait to see what you create!
★★★★★
Brown Butter Fruity Pebbles Treats
Stephanie Simmons
15
mins
10
mins
9 to 18
squares
Ingredients
-
3/4
cup
salted butter,
170 grams -
one
10-ounce bag
mini marshmallows, divided,
you’ll need 4 and 1/2 cups, plus an additional 1/3 cup -
4 and 1/2
cups
Fruity Pebbles cereal -
1
tsp
vanilla extract -
pinch
of
salt -
1/3
cup
white chocolate chips,
optional
For the Cereal Glaze
-
1/3
cup
powdered sugar -
1 and 1/2
tsp
milk or water -
splash
of
vanilla extract -
handful
of
crushed Fruity Pebbles cereal
Instructions
-
Prep: Lightly spray a 9×9 inch baking dish with cooking spray and/or line it with parchment paper, leaving an overhang to easily lift the treats later. Gather all your ingredients.
-
Make the Fruity Pebbles Treats: Add the butter to a large Dutch oven or heavy-bottomed saucepan over medium heat. Continue cooking the butter, stirring occasionally, for about 5-7 minutes until it becomes foamy, turns a deep golden brown, and develops a rich, nutty aroma. Immediately add 4 and 1/2 cups of mini marshmallows to the browned butter and stir continuously until they are completely melted and smooth. Remove the pot from the heat. Promptly add the Fruity Pebbles cereal and stir gently until well combined. Stir in the white chocolate chips (if using) and the additional 1/3 cup of mini marshmallows until just distributed.
-
Press into Pan: Transfer the mixture into your prepared pan. Using a buttered spatula or the back of a greased spoon, gently and evenly press the mixture into the pan. Avoid pressing too firmly. Let rest at room temperature for at least 30 minutes to 1 hour before slicing.
-
Glaze (Optional): While the treats are setting, whisk together all glaze ingredients (powdered sugar, milk/water, vanilla, crushed Fruity Pebbles) in a small bowl until smooth. Adjust consistency with more powdered sugar or liquid as needed. Once the treats have set, drizzle the glaze evenly over the bars.
-
Serve & Store: Once the treats have set (and glaze, if used), slice them into squares and enjoy! While you can quicken the setting time by chilling them in the fridge for 15-20 minutes, they often have a softer, more gooey texture at room temperature. Store any leftover sliced treats in an airtight container at room temperature for 4-5 days.
Nutrition
Serving:
1
piece
,
Calories:
271
kcal
,
Carbohydrates:
26
g
,
Protein:
1
g
,
Fat:
18
g
,
Saturated Fat:
12
g
,
Polyunsaturated Fat:
1
g
,
Monounsaturated Fat:
5
g
,
Trans Fat:
1
g
,
Cholesterol:
42
mg
,
Sodium:
234
mg
,
Potassium:
39
mg
,
Fiber:
0.2
g
,
Sugar:
15
g
,
Vitamin A:
975
IU
,
Vitamin C:
4
mg
,
Calcium:
22
mg
,
Iron:
1
mg
Nutrition information is automatically calculated, so should only be used as an approximation.