
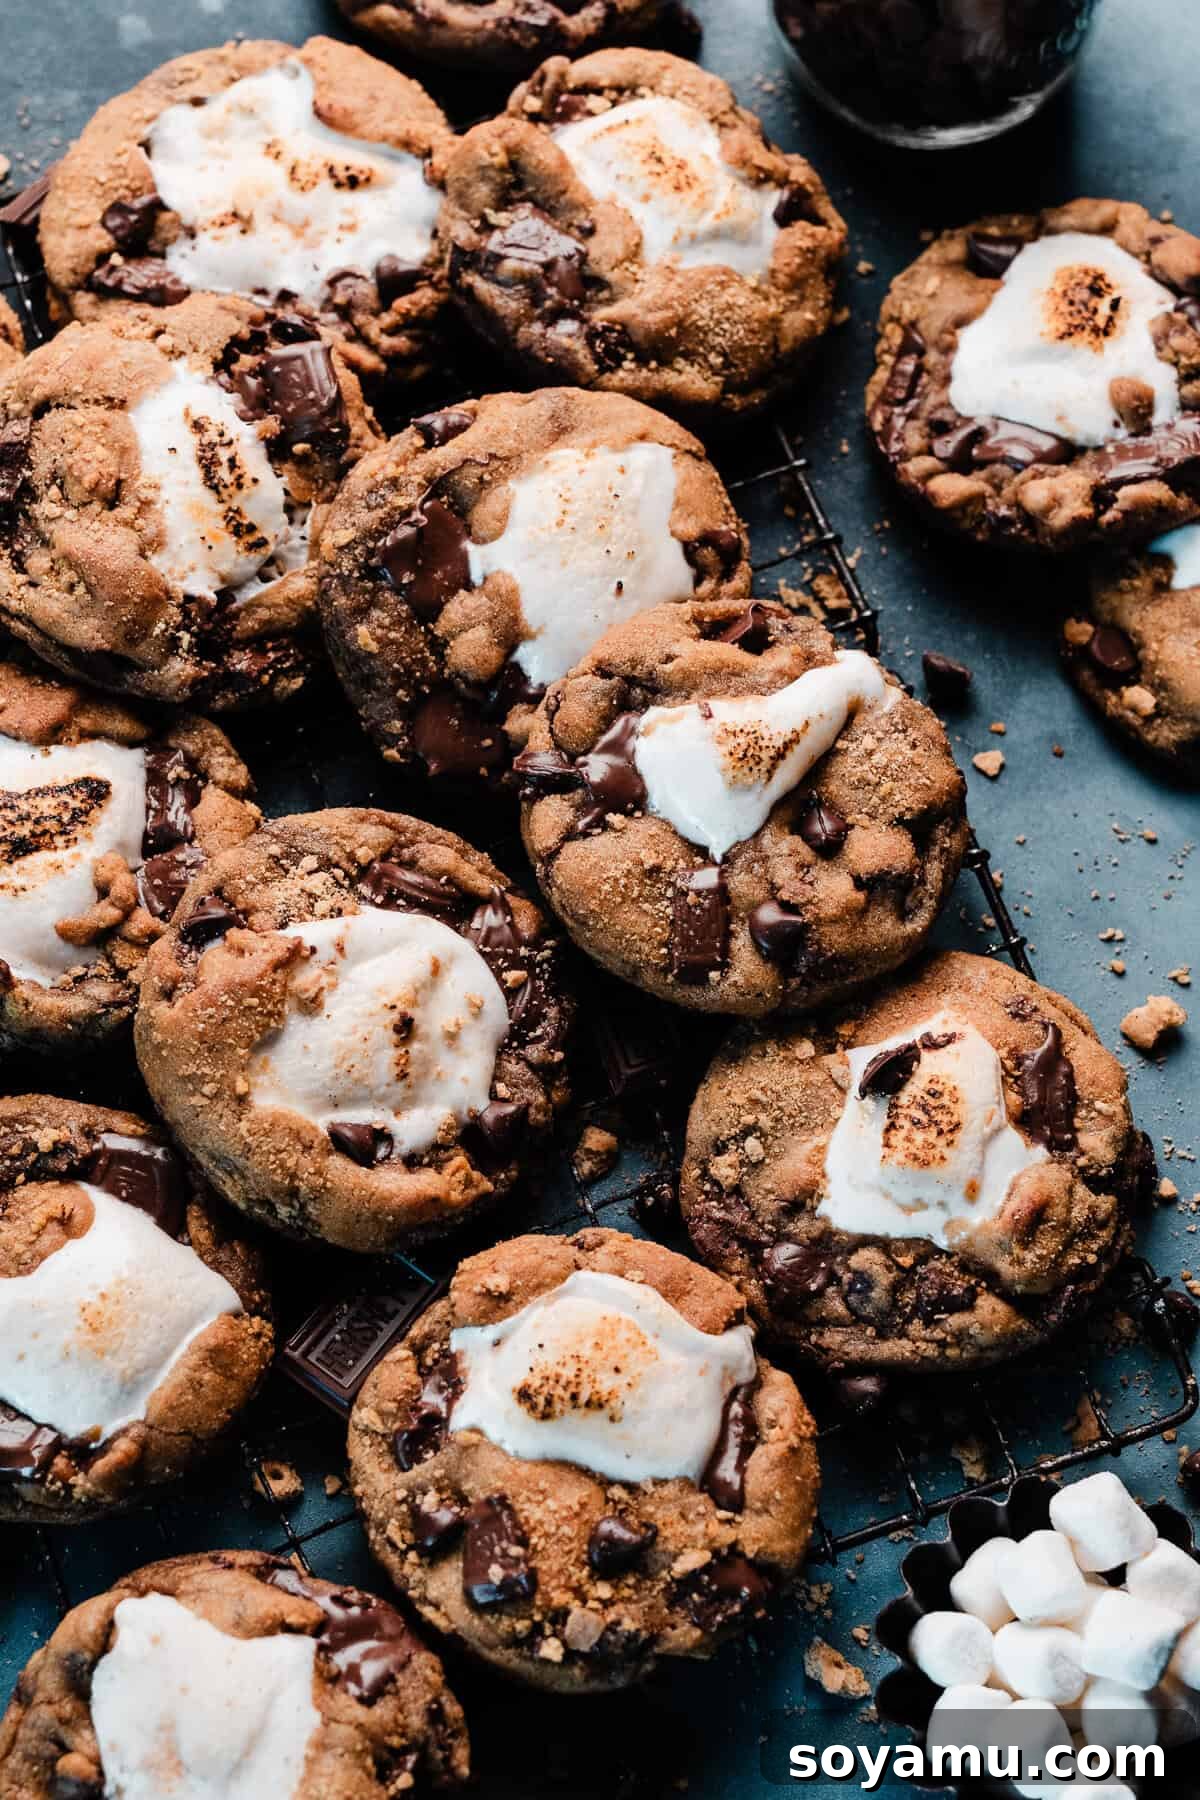
Ultimate Marshmallow Stuffed S’mores Cookies: A Thick, Chewy, & Gooey Bakery-Style Delight
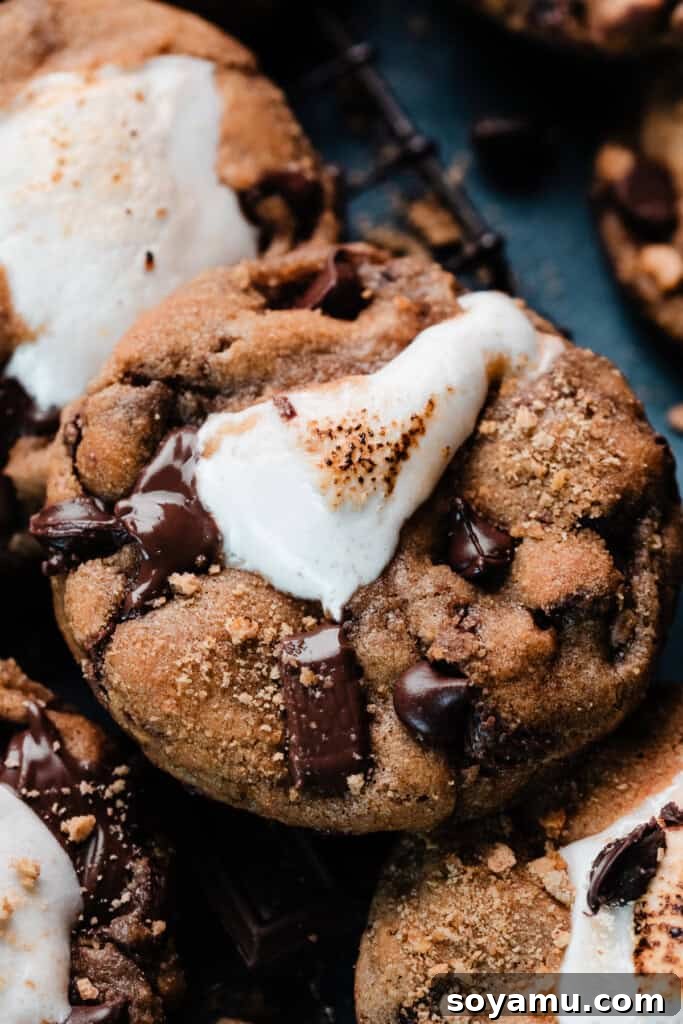
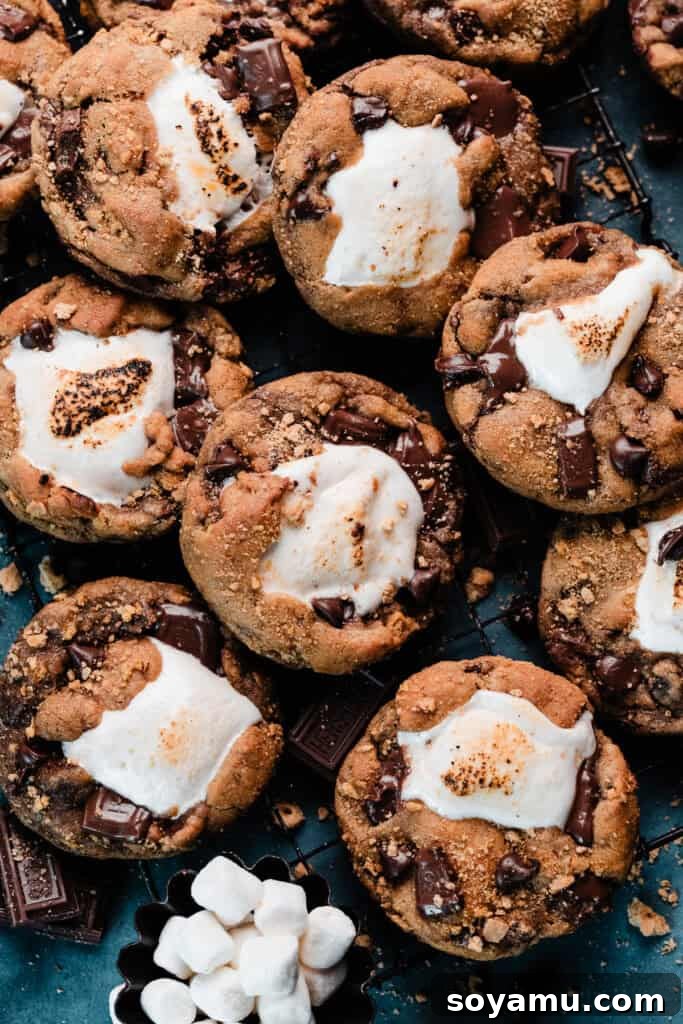
Prepare to fall in love with these unbelievably thick and chewy S’mores Cookies, crafted to bakery-style perfection! Each indulgent cookie is generously packed with the classic flavors of graham cracker crumbs, rich Hershey’s chocolate pieces, and an abundance of decadent chocolate chips. But the real magic lies within: every single cookie is lovingly stuffed with a fluffy marshmallow, then rolled in extra graham crumbs, and baked until it reaches a state of gloriously gooey perfection. It’s the quintessential taste of s’mores, reimagined for your kitchen, bringing all the nostalgia without the need for a campfire!
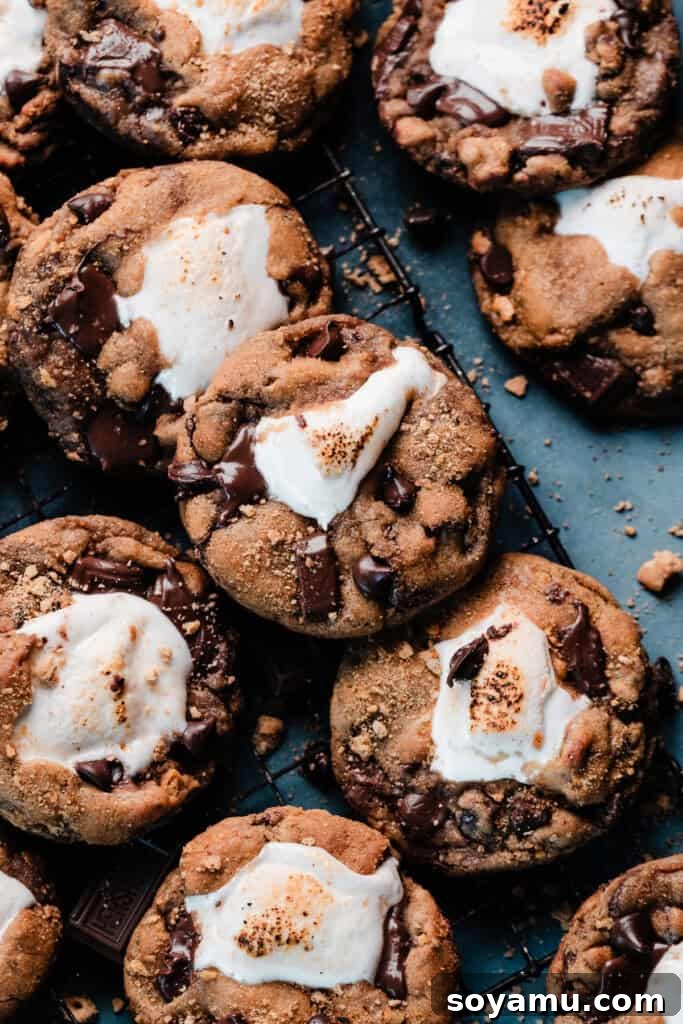
This beloved recipe has evolved! Originally shared in June 2020 as chocolate chip cookies adorned with homemade marshmallow cream and chocolate ganache, it received a significant update in June 2024. We’ve refined it to truly capture the authentic and irresistible essence of classic S’mores. If you fondly remember the earlier version, please don’t hesitate to reach out via the comment section at the bottom of this page, and we’ll gladly share it with you.
Why These Chewy S’mores Cookies Will Become Your New Favorite Treat
Forget the hassle of building a campfire and embrace the pure joy of these incredible S’mores Cookies. They’re not just a dessert; they’re an experience, designed to bring back cherished memories with every single bite. Here’s why you’ll be baking these on repeat:
- Unrivaled Chewy Perfection: These aren’t your average cookies. Each one boasts a delightful thickness and a wonderfully chewy texture that rivals your favorite bakery’s finest creations. They hold their shape beautifully while remaining soft and moist on the inside, providing that satisfying bite every time.
- Explosion of Authentic S’mores Flavor: We’ve infused every inch of these cookies with the iconic taste of s’mores. The dough itself is a symphony of finely crushed graham crackers, generous chunks of rich Hershey’s bar pieces, and creamy chocolate chips. For an extra layer of crunch and flavor, each dough ball is then lovingly rolled in additional graham crumbs before baking, creating a multi-textured delight.
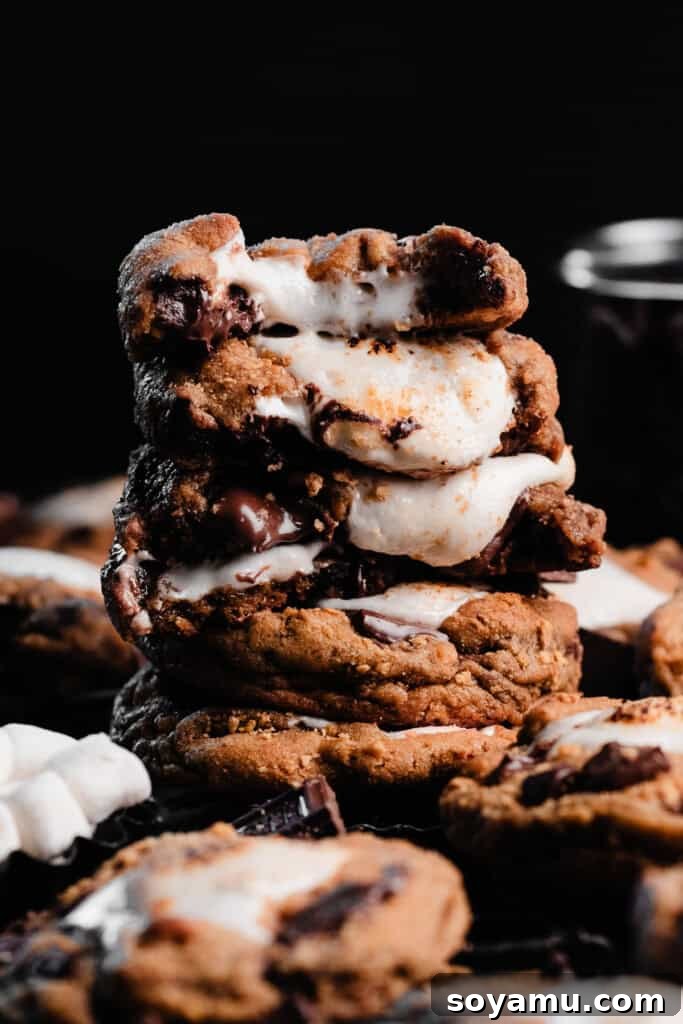
- Magically Gooey Marshmallow Core: The ultimate s’mores experience demands a molten marshmallow center. We’ve achieved this by stuffing a whole marshmallow into the heart of each cookie. As they bake, these marshmallows transform into a warm, stretchy, and incredibly gooey surprise that oozes out with every break, creating that signature pull-apart moment that is simply irresistible.
- Effortless Nostalgia, No Campfire Required: Get all the comforting, nostalgic vibes of a fireside s’mores session without any of the smoke, sticky fingers, or outdoor setup. These cookies deliver that classic taste conveniently in your kitchen, making them perfect for any time the craving strikes.
- Impressive & Shareable: Whether you’re making them for a party, a family gathering, a potluck, or just a special treat for yourself, these cookies are guaranteed to impress. Their bakery-worthy appearance, combined with their sensational flavor and gooey center, makes them a standout dessert that everyone will adore and ask for again and again.
Essential Ingredients for Your Perfect S’mores Cookies
Crafting the perfect s’mores cookie begins with selecting the right ingredients. Below is a detailed overview of what you’ll need, along with important tips for each component to ensure the best possible outcome. For precise measurements and step-by-step instructions, please refer to the comprehensive recipe card at the bottom of this post. You can also use the table of contents at the top of the page (below the first image) to navigate directly to the recipe details.
- Butter: For the most robust and delicious flavor, I highly recommend using salted butter. However, unsalted butter works perfectly well if that’s your preference; just be sure to add an extra pinch of salt (about ¼ teaspoon) to your dry ingredients to balance the sweetness. Crucially, allow your butter to come to room temperature before you begin baking. Cold butter is notoriously difficult to cream properly, which can affect the overall texture and rise of your cookies. Melted butter in this recipe contributes to a chewier cookie.
- All-Purpose Flour: Precision with flour is absolutely key to achieving that ideal chewy texture. The most reliable method is to spoon your flour gently into the measuring cup, then level it off with a flat utensil (like the back of a knife). Alternatively, and for the most accurate results, use a kitchen scale to weigh your flour (347 grams is ideal). Scooping the measuring cup directly into a bag of flour can compact it, leading to an excessive amount of flour and potentially dry, dense, and crumbly cookies.
- Eggs: Always use large eggs, and ensure they are at room temperature. Room temperature eggs emulsify much better with the butter and sugar, creating a smoother, more uniform dough. This superior emulsion traps more air, which contributes to a more tender and perfectly structured cookie.
- Vanilla Extract: Don’t skimp on quality here! Pure, real vanilla extract will impart a deep, aromatic flavor that truly elevates your cookies. Artificial vanilla simply doesn’t compare to the complex notes that real vanilla brings to baked goods.
- Chocolate Chips: The choice of chocolate is yours! Semi-sweet chocolate chips offer a balanced sweetness that complements the other s’mores components beautifully, preventing the cookies from becoming overly sweet. However, feel free to experiment with milk chocolate chips for a sweeter profile, or even dark chocolate for a richer, more intense cocoa flavor. Chopped chocolate bars or chunks also work wonderfully, providing varied pockets of melted chocolate throughout the cookie for an artisan feel.
- Hershey’s Bars: While classic Hershey’s milk chocolate bars are traditional for s’mores, any good quality milk chocolate bar that you enjoy will work perfectly. Chopping them into irregular pieces adds to the homemade charm and ensures delightful bursts of melty chocolate in every single bite. This also helps with the iconic s’mores flavor profile.
- Graham Crackers: I strongly advocate for using whole graham crackers rather than pre-made crumbs. By crushing them yourself, either by hand or in a sturdy bag with a rolling pin, you’ll achieve a delightful mix of fine crumbs and small, satisfying chunks. This variety in texture adds another dimension to your cookies that pre-packaged crumbs just can’t replicate. The coarse texture also helps them stand out in the dough.
- Marshmallows: Standard full-size marshmallows are ideal for stuffing into the center of these cookies. Their size ensures a significant, gooey core when baked. Avoid mini marshmallows for stuffing, as they may melt too quickly and disappear.
- Sugars (Dark Brown & Granulated): The combination of dark brown sugar (for moisture, chewiness, and a slight caramel note) and granulated sugar (for crisp edges, structure, and proper spread) is essential for achieving the perfect cookie texture and flavor balance.
- Baking Powder & Baking Soda: These leavening agents work in harmony to give the cookies their ideal thickness and a soft, slightly risen texture. They contribute to the chewy, yet tender, crumb.
- Salt: A pinch of salt is crucial for enhancing all the other flavors. It balances the sweetness, brings out the depth of the chocolate and graham crackers, and prevents the cookies from tasting flat.
Creative Substitutions & Delicious Variations for Your S’mores Cookies
While this recipe delivers the ultimate classic S’mores Cookie, it’s also incredibly versatile! Feel free to get creative and tailor them to your personal taste. Here are some ideas for substitutions and exciting variations to inspire your next baking adventure:
- Gluten-Free Adaptation: While I haven’t personally tested a gluten-free version of this specific recipe, adapting cookie recipes for gluten-free flours can sometimes alter the texture significantly, especially with the added moisture from the marshmallow. If you decide to experiment, look for a high-quality 1:1 gluten-free baking flour blend that contains xanthan gum for best results, as this gum helps mimic the elasticity of gluten. Be prepared for potential slight variations in texture.
- Dairy-Free Option: Easily make these delectable cookies dairy-free by substituting your favorite plant-based butter sticks (it’s crucial to use sticks, not margarine, as its higher water content can affect consistency and spread) and utilizing dairy-free chocolate chips and chocolate bars. Ensure your chosen marshmallows are also dairy-free if that’s a dietary concern.
- Peanut Butter Cup S’mores Cookies: For a delightful and intensely flavorful twist, swap out the classic Hershey’s bar pieces for an equal amount of chopped peanut butter cups. The combination of peanut butter, chocolate, and marshmallow is absolutely divine and adds a rich, savory-sweet complexity that peanut butter lovers will adore.
- Different Chocolate Varieties: Don’t limit yourself to just semi-sweet and milk chocolate. Experiment with dark chocolate for a more intense cocoa flavor, white chocolate for a sweeter, creamier touch, or even a mix of different chocolate types for a multi-layered flavor and texture experience within your cookies.
- Spiced S’mores Cookies: For a warm, autumnal, and cozy twist that complements the graham cracker flavor beautifully, consider adding a pinch of ground cinnamon (¼ to ½ teaspoon) or a tiny dash of nutmeg to your dry ingredients. This subtle spice elevates the overall profile.
- Espresso Powder Boost: A secret ingredient for enhancing chocolate flavor! Add a teaspoon of instant espresso powder (not brewed coffee!) to your dry ingredients. It will deepen the chocolate flavor significantly without making the cookies taste like coffee. It simply amplifies the richness of the cocoa.
- Mini Marshmallows in the Dough (Caution Advised): I haven’t thoroughly tested incorporating mini marshmallows directly into the cookie dough itself, as they might melt too quickly and cause the cookies to spread excessively, losing their structural integrity. For now, I highly recommend sticking to the stuffed large marshmallows. However, if you’re feeling adventurous and want to try, consider adding them towards the very end of the baking process as a topping or sprinkling them on top halfway through baking. I will update this section if I conduct successful experiments!
- Caramel Swirl Addition: For an extra layer of gooey sweetness, after stuffing and before baking, you could try drizzling a very small amount of thick caramel sauce over the dough balls. Be cautious not to use too much, as excessive caramel could make the cookies spread too much or stick to the parchment paper.
Crafting Your Perfect S’mores Cookies: A Step-by-Step Guide to Gooey Perfection
Following these steps carefully will ensure you achieve perfectly thick, chewy, and gloriously gooey S’mores Cookies every time. Pay close attention to the details, and you’ll be rewarded with a truly bakery-worthy treat that tastes like pure campfire magic!
Step 1: Prepare the Cookie Dough Base
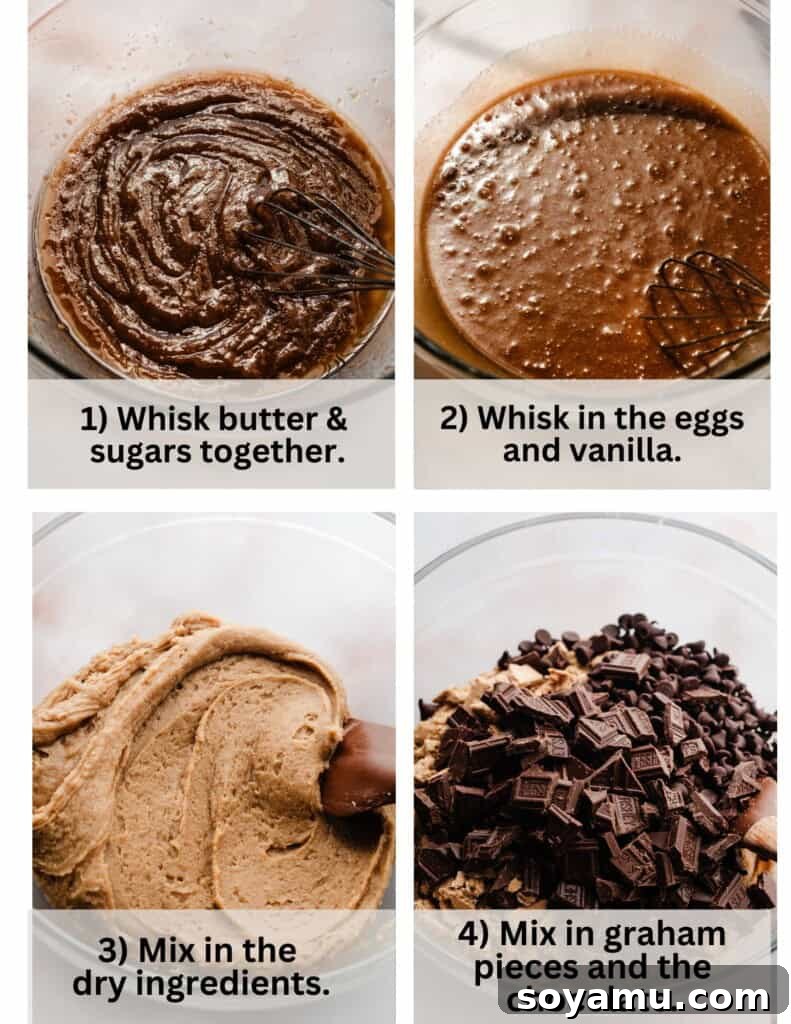
Begin by melting your butter in a large mixing bowl. Once the butter is fully melted, add both the dark brown and granulated sugars. Whisk these ingredients together vigorously for about 30-60 seconds until they are thoroughly combined and the mixture appears smooth and well-integrated. Next, incorporate the room temperature eggs and vanilla extract. Continue to whisk vigorously until the mixture is light, smooth, and perfectly emulsified, which should take approximately 30-45 seconds. This careful preparation creates the rich, flavorful, and properly textured foundation for your exceptional cookies.
Step 2: Fold in the Dry Ingredients and All Your S’mores Mix-ins
In a separate bowl, whisk together your all-purpose flour, baking powder, baking soda, and salt to ensure they are well combined. Gently add these dry ingredients to the wet mixture, folding them in just until no dry streaks of flour remain. Be extremely careful not to overmix at this stage, as overmixing can develop gluten, which leads to tough, less tender cookies. Once the flour is almost incorporated, gently fold in the star of the show: the roughly chopped Hershey’s bar pieces, your semi-sweet chocolate chips, and the freshly crushed graham cracker pieces. Mix just until all these delightful additions are evenly distributed throughout the dough.
Step 3: Assemble and Coat Your S’mores Cookies with Graham Crumb Goodness
This is where the magic truly begins! Place your extra finely crushed graham cracker crumbs for rolling onto a small, shallow plate. Using a cookie scoop (approximately 3 tablespoons or 55 grams), portion the cookie dough into uniform balls. Take each dough ball and flatten it into a disc in the palm of your hand. Carefully place one full-size marshmallow directly in the center of the flattened dough. Gently wrap the dough around the marshmallow, pinching the edges firmly to fully encase it, while leaving just a tiny bit of the marshmallow peeking out at the very top. Next, roll the sides of each marshmallow-stuffed dough ball in the graham cracker crumbs, ensuring an even and thorough coating around the entire circumference (avoid rolling over the exposed marshmallow top). This adds a beautiful texture and an irresistible extra layer of graham flavor. As you finish assembling, pre-heat your oven to 365°F (185°C) and line a few large cookie sheets with parchment paper, preparing them for baking.
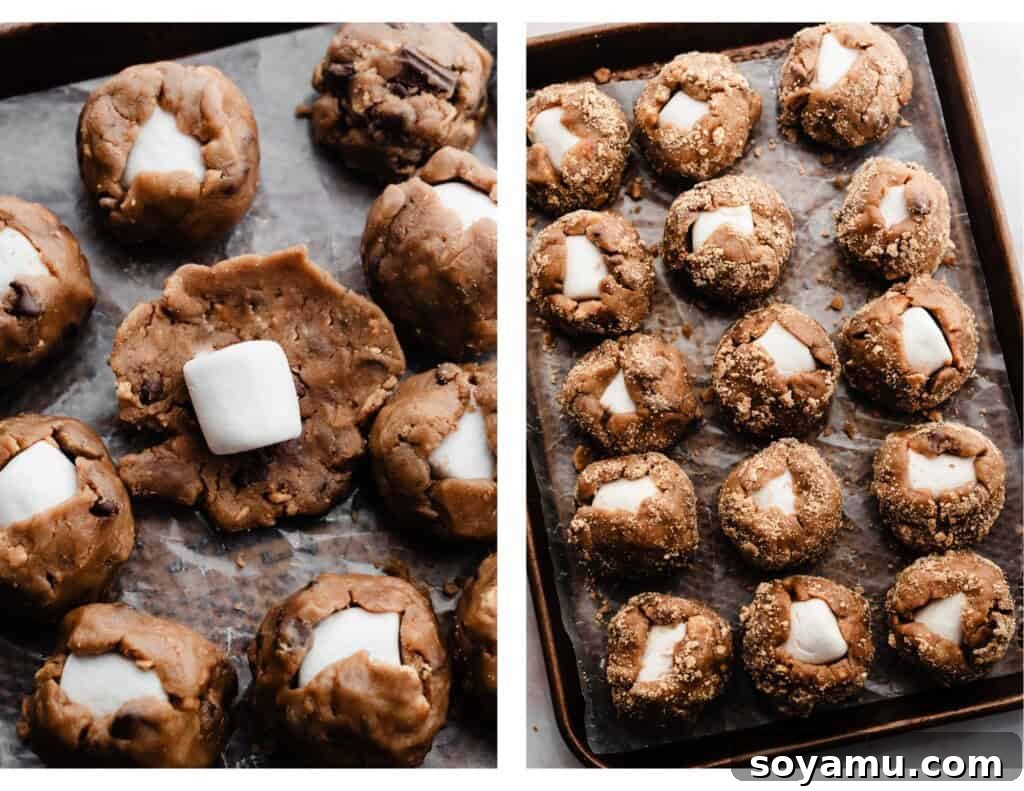
Step 4: Crucial Chill Time for Perfect Marshmallow Centers
Do not, under any circumstances, skip this vital step! Carefully transfer your assembled and graham-coated cookie dough balls onto a plate or tray and place them into the freezer for a minimum of 30 minutes. The dough needs to be solid to the touch before baking. This freezing step is absolutely essential to prevent the marshmallows from melting away entirely into your cookies during the baking process, which can lead to a flat, overly spread-out, and disappointing result. Freezing them helps the dough set and hold its structure more robustly around the marshmallow, ensuring that glorious, molten, and gooey center you crave. Some bakers have also found that using vegan marshmallows can offer additional stability if you’re particularly concerned about melting.
Step 5: Bake to Gooey Perfection
Arrange about 5 chilled cookies on each prepared baking sheet, ensuring you leave ample space (a good few inches) between them, as they will spread significantly during baking. Place the remaining dough balls back in the freezer while the first batch bakes. Bake for approximately 8-10 minutes. The cookies are done when the edges appear *just* set and lightly golden, and the centers might still look slightly soft or even a little underdone – this is precisely the perfect moment to remove them from the oven! They will continue to set and firm up as they cool on the baking sheet, resulting in that coveted soft-baked, irresistibly chewy consistency. Overbaking will lead to a drier cookie and a harder marshmallow.
Step 6: “Scoot” for Bakery-Style Roundness & Finishing Touches
It’s perfectly normal for cookies, especially those with gooey centers, to come out of the oven looking a little irregular or “wonky.” Don’t fret – this is where a baker’s secret technique comes in! Immediately upon removing them from the oven, take a round cookie cutter (one that is slightly larger than your cookies) or even a sturdy round glass or bowl. Place it around the outside of each hot cookie and gently swirl the cutter in a circular motion to “scoot” the cookie into a perfectly round shape. This clever trick not only makes them look professionally baked and aesthetically pleasing but also helps to push the edges inwards, contributing to a thicker, more substantial cookie profile. Right after this “scooting” process, while the chocolate is still beautifully melty, gently press a few extra chocolate chips or small chocolate pieces onto any bare spots on the top of the cookies. This enhances their visual appeal and makes them truly irresistible, just like they came from a high-end bakery.
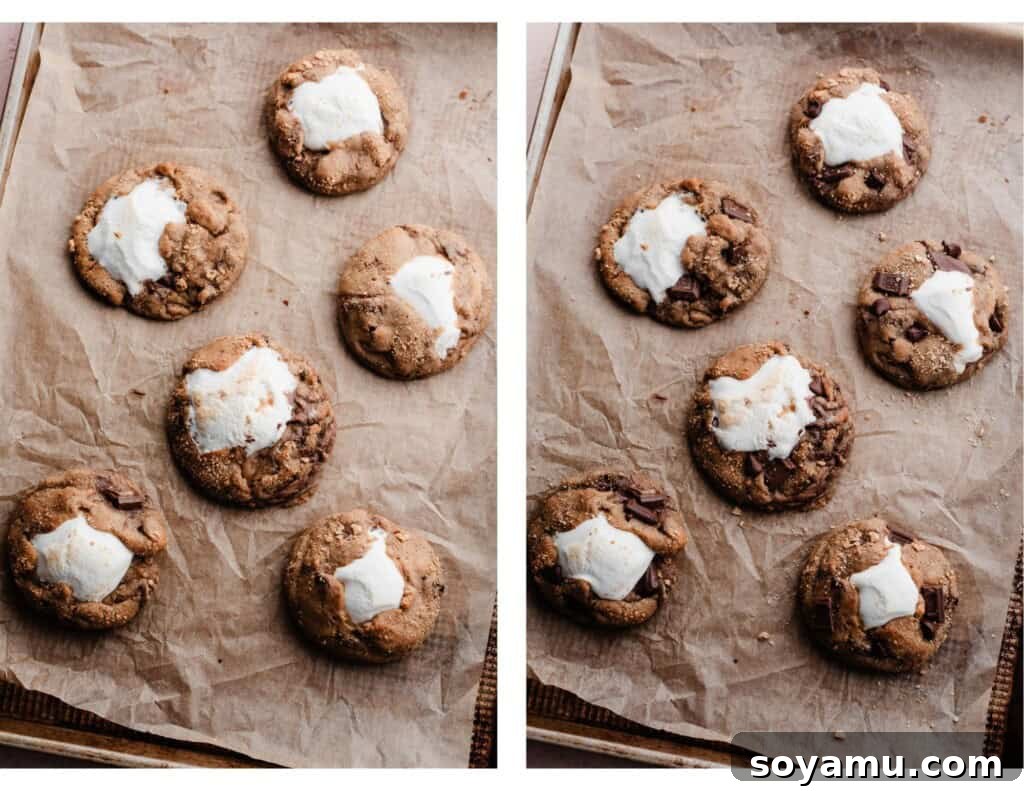
Serving Your S’mores Cookies & Essential Storage Tips
The anticipation is half the fun! Once your S’mores Cookies are out of the oven, resist the urge to devour them immediately. Allow them to cool on the baking sheet for at least 10-15 minutes before attempting to transfer them to a wire rack. This crucial cooling period allows the cookies to fully set up, preventing them from falling apart or being too delicate to handle, and ensures that perfect chewy texture with a glorious gooey marshmallow pull. They are absolutely divine and at their peak of gooey goodness when served warm, so don’t hesitate to enjoy them fresh!
To store any leftover cooled cookies, place them in an airtight container at room temperature. They will maintain their deliciousness and chewiness for 3-4 days. For longer storage, you can freeze baked and completely cooled cookies in an airtight freezer-safe container or bag for up to 2-3 months. To enjoy from frozen, simply thaw them at room temperature for an hour or so, or gently warm them in the microwave for a few seconds to revive that wonderfully gooey center, making them taste freshly baked again.
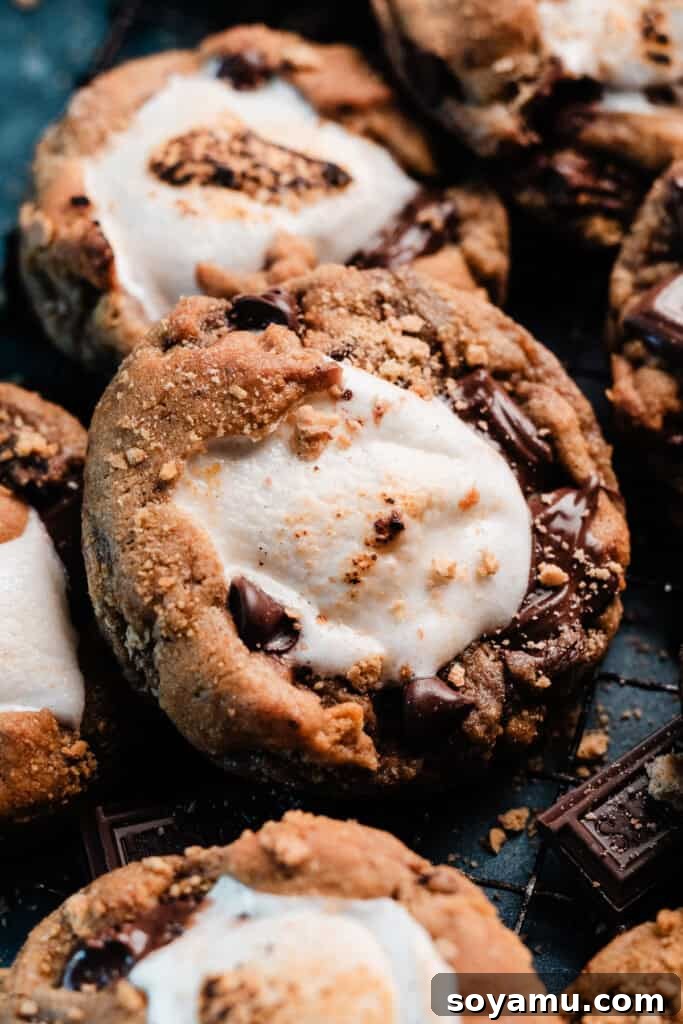
Unlock Your Inner Baker: Expert Tips for S’mores Cookie Success
Achieving bakery-quality cookies at home is entirely possible with a few insider tips and tricks. These expert insights will help you navigate common baking challenges and ensure your S’mores Cookies turn out spectacular every single time, from perfect texture to flawless appearance:
- Invest in an Oven Thermometer: This is arguably one of the most underrated yet crucial baking tools. An oven thermometer will tell you if your oven is actually running at the temperature you set it to. Many ovens, even new ones, can have significant temperature fluctuations, deviating by 25-50°F (15-30°C) from the set temperature. Accurate oven temperature is absolutely critical for consistent baking results, especially with delicate elements like marshmallows. Keep an oven thermometer in your oven at all times to monitor its calibration and adjust accordingly. Even a small discrepancy can dramatically impact your cookies’ spread, browning, and overall doneness.
- Embrace the Kitchen Scale for Unparalleled Accuracy: Measuring dry ingredients, particularly flour, by volume (cups) can be incredibly inconsistent due to variations in how it’s scooped and packed. A food scale is the gold standard for precision in baking. Weighing your flour (and other ingredients when weights are provided) ensures you’re using the exact amount specified in the recipe. This is the best way to prevent common cookie pitfalls like dry, dense cookies (from too much flour) or overly thin, spread-out ones (from too little flour). It eliminates guesswork and guarantees consistent, professional results batch after batch.
- Don’t Fear the “Wonky” Cookie – Embrace the “Scoot”: It’s common for s’mores cookies, especially with that melting marshmallow center, to spread a bit unevenly or look “wonky” right out of the oven. The dough sometimes struggles to fully adhere to the marshmallow as it bakes, leading to slight imperfections. This is completely normal and no cause for panic! As detailed in the “Scoot” step above, simply use a round cutter (or a glass/bowl) to gently reshape your hot cookies into perfect circles. This technique is a baker’s secret weapon, not only instantly improving their appearance but also helping to push the edges inwards, contributing to a thicker, more uniform cookie profile.
- Room Temperature Ingredients Truly Matter: For ingredients like butter and eggs, “room temperature” isn’t just a suggestion; it’s a critical step that impacts the final texture of your cookies. Room temperature butter creams beautifully with sugar, creating tiny air pockets that contribute to a light, tender crumb. Room temperature eggs emulsify much better into the butter mixture, resulting in a smooth, cohesive dough. Cold ingredients can lead to a lumpy batter, uneven mixing, and a less desirable cookie texture. Plan ahead and take them out of the fridge an hour or two before baking.
- Avoid Overmixing the Dough: Once you add the flour to your wet ingredients, mix only until no dry streaks of flour remain. Overmixing develops gluten, which can make your cookies tough, dense, and less tender. Gently folding in the chocolate and graham cracker pieces is also key to maintaining a soft, chewy texture. Stop mixing as soon as everything is just combined.
- Patience During Cooling is a Virtue: As tempting as it is to grab a cookie straight from the oven, allowing them to cool on the baking sheet for the recommended time (10-15 minutes) is incredibly important. This crucial cooling period allows the cookies to firm up and the marshmallow to slightly set, preventing a crumbly mess and giving you that perfect gooey pull and structural integrity.
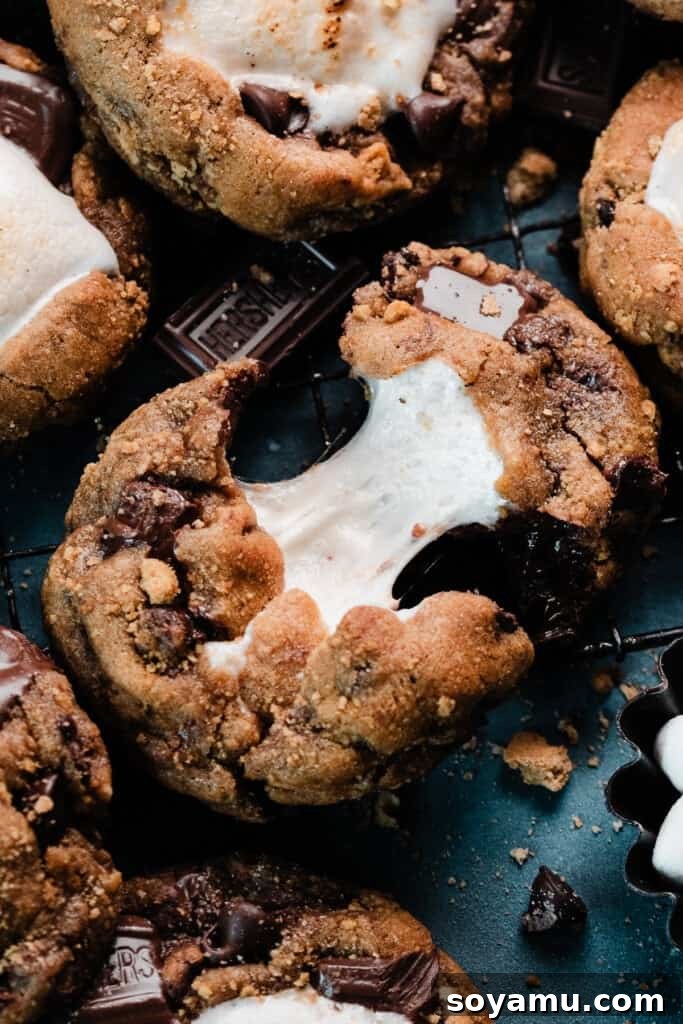
Frequently Asked Questions About S’mores Cookies
Here are answers to some common questions about making these delightful marshmallow-stuffed s’mores cookies, designed to help you bake with confidence:
Can I double or halve this recipe?
Absolutely, you can easily adjust the recipe to suit your needs! You can confidently double all the ingredients if you’re baking for a large crowd, preparing for a party, or simply want extra cookies for freezing. Just be prepared to use a sufficiently large mixing bowl and possibly bake in multiple batches. Conversely, if you only need a smaller batch to satisfy a craving or for a smaller household, halving the recipe works perfectly as well. The key is to ensure all measurements are scaled accurately (e.g., if halving eggs, use one large egg).
Can I make these cookies ahead of time?
For the very best results, I find that these S’mores Cookies are at their prime when baked shortly after the marshmallows have been stuffed into the dough. The dough tends to adhere best to the marshmallows when fresh, ensuring they hold together well during baking. However, if you need to prepare ahead, you have excellent options:
- Dough Balls (without marshmallows): You can prepare the cookie dough up to the point of mixing in the s’mores pieces (before stuffing marshmallows). Scoop the dough into balls and then either freeze them in an airtight freezer-safe container or bag for 1-2 months, or refrigerate for 1-2 days.
- Baking Frozen Dough: When you’re ready to bake, thaw the frozen dough balls overnight in the refrigerator. Once thawed, flatten each dough ball, insert a marshmallow, carefully wrap the dough around it, and then proceed with rolling in graham crumbs and baking as directed in the recipe, including the crucial freezing step after stuffing. This method helps ensure the marshmallow doesn’t dissolve prematurely.
Do I have to freeze the dough before baking?
Yes, absolutely! Freezing the dough balls (after stuffing the marshmallows) for at least 30 minutes is a crucial step that you shouldn’t skip. This chilling period helps significantly in preventing the marshmallows from melting away entirely into nothingness during the baking process. The cold dough forms a more robust barrier and sets around the marshmallow, allowing it to get perfectly gooey and stretchy without disappearing. It’s the secret to maintaining that incredible, molten, stretchy marshmallow center that makes these cookies so special. If the dough isn’t cold enough, the marshmallow will likely seep out or vanish.
How can I make the marshmallows more toasted like a campfire?
If you prefer a more golden-brown, slightly charred, and toasted marshmallow top, just like you’d get from a campfire, you have a couple of easy options to achieve this:
- Under the Broiler: After the cookies come out of the oven, while they are still hot, you can carefully place them under a preheated broiler for a very short period (30-60 seconds). Watch them *very* closely, as marshmallows burn quickly and can go from perfectly toasted to burnt in an instant.
- Using a Kitchen Torch: This method offers the most control for that perfect s’mores char. Use a reliable kitchen torch to lightly toast the exposed marshmallow centers until they achieve your desired golden-brown hue. This allows for precise browning without overcooking the cookie itself.
Recommended Tools for Baking Success
While you can certainly make these delicious cookies with standard kitchen equipment, a few special tools can elevate your baking experience and help you achieve truly professional-looking results. Investing in these items will make the process smoother and your final cookies even more impressive:
- Round Cutters: This is my absolute secret weapon for achieving perfectly circular, bakery-style cookies. Immediately after taking your cookies out of the oven, use a round cutter (one that is slightly larger than your baked cookies) to “scoot” the warm, pliable cookies into perfect circles. This simple yet incredibly effective step not only makes your cookies look professionally baked and aesthetically pleasing but also helps push the edges inward, contributing to a thicker, more uniform cookie profile. Don’t worry if you don’t have a dedicated cookie cutter; a sturdy round bowl or even a large glass that fits snugly around the cookie without touching the edges will work wonderfully. This step is a game-changer for presentation!
- Kitchen Torch: For those who love a perfectly toasted marshmallow (just like around a campfire!), a kitchen torch is a fantastic optional tool. While those small, handheld kitchen torches often disappoint and cease working after a few uses, I highly recommend investing in a more robust option. The Bernzomatic Trigger Start Torch paired with a few Propane Tanks is a much higher-quality, durable torch that has reliably lasted me for years. It gives you precise control to add that beautiful, slightly charred finish to the marshmallow centers right after the cookies come out of the oven, enhancing both flavor and visual appeal, bringing that true campfire experience indoors.
- Parchment Paper: Lining your baking sheets with parchment paper is an absolute essential for non-stick baking and incredibly easy cleanup. It prevents your cookies from sticking to the pan, promotes even baking, and helps with easy transfer of the warm cookies for the “scooting” step.
- Cookie Scoop: A good quality cookie scoop ensures uniform sizing of your dough balls, which is crucial for even baking. Consistent size means all your cookies will be perfectly done at the same time, avoiding some being overbaked while others are underbaked.
- Wire Cooling Rack: Allowing your cookies to cool properly on a wire rack promotes essential air circulation all around the cookies, preventing soggy bottoms and ensuring a perfectly crisp exterior with a beautifully chewy interior. It’s vital for setting the cookie’s structure.
- Kitchen Scale: As mentioned in the expert tips, a kitchen scale is invaluable for accurate ingredient measurement, especially flour. It ensures consistent results every time and takes the guesswork out of baking.
Note: The links above are affiliate links, meaning I may earn a small commission at no extra cost to you if you make a purchase. This helps support my work in bringing you delicious recipes!
Explore More S’mores Inspired Delights!
If you’re as obsessed with the classic flavors of s’mores as we are, you’ll love diving into these other fantastic recipes that capture that irresistible combination of graham cracker, chocolate, and marshmallow. From bars to pies, there’s a s’mores treat for every occasion!
- Gooey Caramel S’mores Bars: A decadent and sticky twist on classic s’mores, featuring a rich layer of caramel.
- No Bake S’mores Pie: All the s’mores flavor you love, perfect for warm weather or when you want a delightful treat without turning on the oven.
- Gooey S’mores Brownies: Fudgy, rich brownies topped with fluffy, toasted marshmallows and crunchy graham cracker pieces.
- S’mores Stuffed Skillet Cookie: An enormous, warm, and shareable cookie baked in a skillet, generously bursting with s’mores goodness.
- Skillet S’mores Dip: A warm, bubbly, and incredibly easy dip perfect for serving with graham crackers, fresh fruit, or pretzels.
- S’mores Tart: An elegant and impressive dessert showcasing the beloved s’mores flavors in a beautiful tart form, ideal for special occasions.
Made these incredible S’mores Cookies? We’d love to hear from you!
Please take a moment to leave a comment and a star rating. Your feedback is invaluable to us and truly helps our small business thrive, allowing us to continue bringing you delicious recipes!
S’mores Cookies (Marshmallow Stuffed!) Recipe Card
These thick & chewy bakery-style S’mores Cookies are loaded with graham cracker crumbs, rich chocolate pieces, and chocolate chips. Each cookie is stuffed with a marshmallow, rolled in graham crumbs, and baked to gooey perfection. Experience all the nostalgic joy of s’mores without the campfire!

Recipe Details:
- By: Stephanie Simmons
- Prep Time: 35 mins
- Cook Time: 9 mins
- Chill Time: 30 mins
- Yield: 24 cookies
Ingredients:
For the Cookies:
- 14 ½ tbsp salted butter, melted (206 grams)
- ¾ cup dark brown sugar, packed (163 grams)
- ¾ cup granulated sugar (156 grams)
- 2 large eggs, at room temperature
- 1 ½ tsp vanilla extract
- 2 ⅔ cups all-purpose flour, spooned & leveled or weighed (347 grams)
- 1 tsp baking powder
- 1 tsp baking soda
- ½ tsp salt
- 3 full-size Hershey’s chocolate bars, roughly chopped
- 1 ⅓ cups semi-sweet chocolate chips (230 grams)
- 8 whole graham crackers, crushed* (*Crush them in a bag with a rolling pin so that you have a mix of small chunks and fine crumbs.)
For Assembling:
- 24 full-size marshmallows
- 3 whole graham crackers, crushed into fine crumbs (*for rolling)
- Extra chocolate chips, for “touch-ups”
Instructions:
- Start the Cookie Dough: In a large mixing bowl, whisk together the melted butter and both sugars for 30-60 seconds until well combined. Add the room temperature eggs and vanilla extract, whisking until smooth and fully combined, about 30-45 seconds.
- Finish the Cookie Dough: Stir in the all-purpose flour, baking powder, baking soda, and salt until just combined. Be careful not to overmix. Then, gently fold in the chopped Hershey’s pieces, semi-sweet chocolate chips, and crushed graham cracker pieces until evenly distributed.
- Scoop & Stuff the Cookies: Place the finely crushed graham cracker crumbs for rolling onto a small plate. Scoop the cookie dough into balls, approximately 55 grams each. Flatten each dough ball into a disc, place one full-size marshmallow in the center, and carefully wrap the dough around it, pinching to seal and leaving a small portion of marshmallow exposed at the top. Roll the sides of each stuffed dough ball in the graham cracker crumbs to coat. Meanwhile, pre-heat your oven to 365℉ (185°C) and line several cookie sheets with parchment paper.
- Chill Cookies: This step is essential! Transfer the assembled cookie dough balls to the freezer for 30 minutes. The dough must be solid before baking. This crucial chill time prevents the marshmallows from dissolving in the oven and helps create that perfect gooey center.
- Bake: Place about 5 chilled cookies on a prepared baking sheet, ensuring ample space between them as they will spread. Bake for 8-10 minutes. The cookies are done when the edges are *just* set and the centers still look slightly soft. They will continue to set as they cool.
- Scoot & Finish: Immediately upon removing from the oven, use a round cookie cutter (or a large glass/bowl) placed around each cookie to gently “scoot” and reshape them into perfect circles. This also helps them appear thicker. While the chocolate is still melty, press a few extra chocolate chips onto any bare spots on top for a beautiful finish. If desired, use a kitchen torch to lightly toast the exposed marshmallow centers for a true campfire s’mores look.
- Serve & Store: Allow the cookies to cool on the baking sheet for 10-15 minutes before transferring to a wire rack. Enjoy them warm for the ultimate gooey experience! Store completely cooled cookies in an airtight container at room temperature for 3-4 days.
Nutrition Information:
(Approximate values per 1 cookie serving)
- Calories: 232 kcal
- Carbohydrates: 30 g
- Protein: 3 g
- Fat: 11 g
- Saturated Fat: 7 g
- Polyunsaturated Fat: 1 g
- Monounsaturated Fat: 3 g
- Trans Fat: 0.3 g
- Cholesterol: 34 mg
- Sodium: 179 mg
- Potassium: 90 mg
- Fiber: 1 g
- Sugar: 17 g
- Vitamin A: 239 IU
- Calcium: 29 mg
- Iron: 1 mg
Disclaimer: Nutrition information is automatically calculated and should only be used as an approximation.
Liked this recipe? We’d be thrilled if you left a comment and a star rating below!