
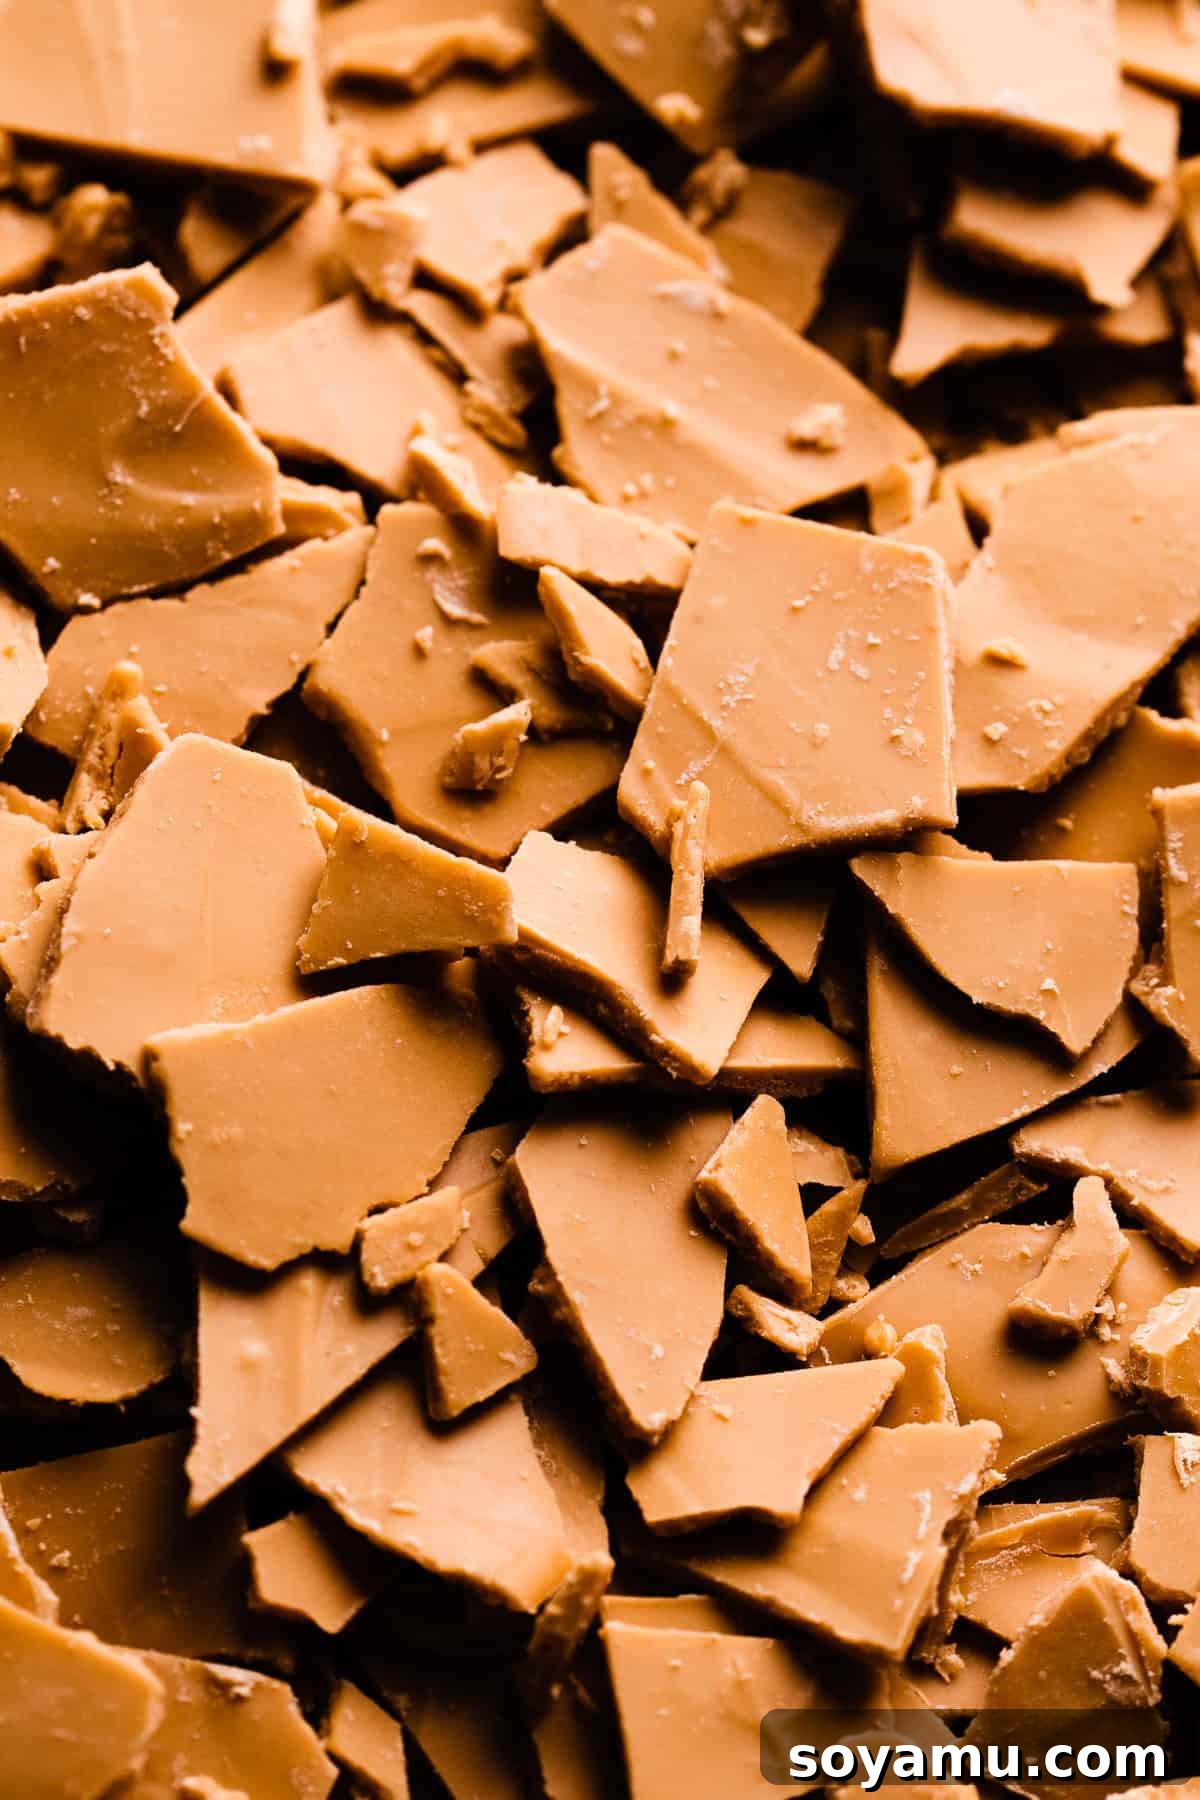
Caramelized white chocolate is a culinary marvel, an incredibly simple yet profoundly transformative way to elevate the flavor profile of virtually any dessert. By gently roasting white chocolate in the oven, you unlock a remarkable depth of flavor, introducing rich, nutty, and distinctly caramel notes that completely redefine its character. What begins as sweet, creamy white chocolate evolves into a sophisticated “blonde chocolate” with hints of butterscotch and dulce de leche. This remarkable transformation is achieved with just one ingredient and minimal effort—primarily stirring the chocolate every ten to twelve minutes as the oven works its magic. The resulting caramelized white chocolate is exceptionally versatile and utterly delicious, perfect for enriching cookies, brownies, hot chocolate, or forming the base of a luxurious ganache for cakes and cheesecakes. Prepare to impress with this easy gourmet ingredient!
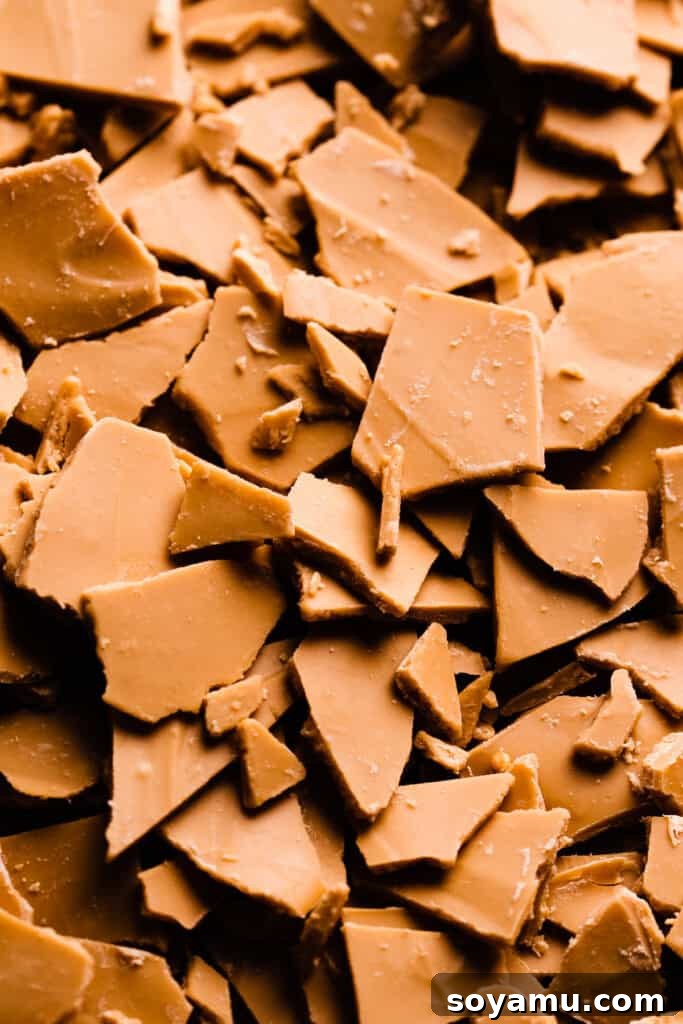
Why You’ll Fall in Love with Caramelized White Chocolate
Once you experience the rich, complex flavor of caramelized white chocolate, you’ll wonder how you ever lived without it. Here’s why this simple creation will become a staple in your kitchen:
- A Truly Impressive & Gourmet Treat: While incredibly easy to make, caramelized white chocolate feels distinctly luxurious and gourmet. It transforms your everyday desserts into something extraordinary. Imagine adding shards of this deep, nutty chocolate to your favorite cookie recipe, stirring it into a warm brownie batter, or folding it into a frosting. The subtle, yet pronounced, caramel and butterscotch notes will elevate any creation, making it seem like you spent hours on a complicated confection. It’s the ultimate secret weapon for home bakers looking to impress!
- Effortlessly Simple Recipe: Despite its sophisticated flavor, this recipe is remarkably straightforward. It requires minimal active preparation—just a bit of chopping and occasional stirring. The oven does most of the heavy lifting, slowly browning the chocolate through the Maillard reaction, developing those coveted complex flavors. This hands-off approach means you can achieve a high-end ingredient without breaking a sweat, making it perfect for both novice and experienced bakers alike.
- Single-Ingredient Magic: Yes, you read that right! This entire transformation hinges on just one key ingredient: quality white chocolate. There are no complicated syrups, extra sugars, or special flavorings needed. The magic happens purely through the precise application of heat, proving that sometimes, simplicity truly is the ultimate sophistication. It’s a testament to the incredible potential hidden within everyday ingredients.
Key Ingredient: Choosing the Right White Chocolate
For a recipe with just one ingredient, choosing the right one is absolutely crucial to your success. The quality of your white chocolate will directly impact the flavor, texture, and ease of caramelization.
- High-Quality White Chocolate Baking Bar: This is non-negotiable. For optimal results, select a premium white chocolate baking bar. Brands like Ghirardelli, Baker’s, or Lindt are excellent choices, often found in the baking aisle or alongside high-end candy bars at your local grocery store. What makes these superior? They contain a significantly higher percentage of cocoa butter, which is the fat component essential for smooth melting and achieving that beautiful, deep caramelization. Avoid anything labeled as “white candy coating,” “candy melts,” “chocolate melt,” or “almond bark,” as these are not true white chocolate and lack the necessary cocoa butter for proper caramelization.
- Why Avoid White Chocolate Chips? While convenient, white chocolate chips are typically engineered with stabilizers (like palm oil or other vegetable fats) to help them maintain their shape when baked into cookies. These stabilizers prevent them from melting and caramelizing smoothly in the oven, often resulting in a grainy or uneven texture. Stick to solid white chocolate bars for the best, most consistent results.
- Understanding True White Chocolate: Real white chocolate must contain a minimum of 20% cocoa butter, at least 14% total milk solids, and no more than 55% sugar. It should also be free of any non-milk fat. The higher cocoa butter content allows for better fat distribution and even browning as the sugars and milk solids undergo the Maillard reaction, creating those desirable complex flavors.
Ingredient Considerations & Substitutions
While this is a single-ingredient recipe, it’s worth noting a few common dietary questions:
- Gluten-Free: White chocolate is naturally gluten-free, making this a safe option for those with gluten sensitivities or celiac disease. Always double-check ingredient labels to ensure no cross-contamination or hidden gluten-containing additives, especially if using a less common brand.
- Dairy-Free: Unfortunately, I have not personally tested this recipe with dairy-free white chocolate alternatives. The caramelization process relies heavily on the milk solids present in traditional white chocolate (lactose sugars and milk proteins) to achieve its distinctive flavor and color change through the Maillard reaction. Dairy-free versions often use alternative fats and ingredients that may not react in the same way, so results could vary significantly or not work at all. Proceed with caution if experimenting with dairy-free options.
How to Make Delicious Caramelized White Chocolate (Oven Method)
The oven method is my preferred way to caramelize white chocolate due to its even heat distribution and relatively hands-off nature. For alternative methods like stovetop or microwave, please see the “Recipe Variations” section below.
Step 1: Prepare Your Chocolate and Baking Sheet
Begin by preheating your oven to a precise 255°F (124°C). This low, consistent temperature is key to a slow, even caramelization without burning. Next, roughly chop your high-quality white chocolate into small, even pieces. The smaller and more uniform the pieces, the more evenly and quickly they will melt and caramelize. Spread these chopped pieces in a single, even layer on a rimmed baking sheet. It is highly recommended to line your baking sheet with a silicone baking mat. A silicone mat provides a non-stick surface, ensures more even heat distribution, and makes scraping and stirring much easier. If you don’t have a silicone mat, a clean, unlined metal baking pan that is in good condition (not tarnished or rusty) can be used. Avoid parchment paper, as it tends to tear during the stirring process, especially with sticky chocolate.
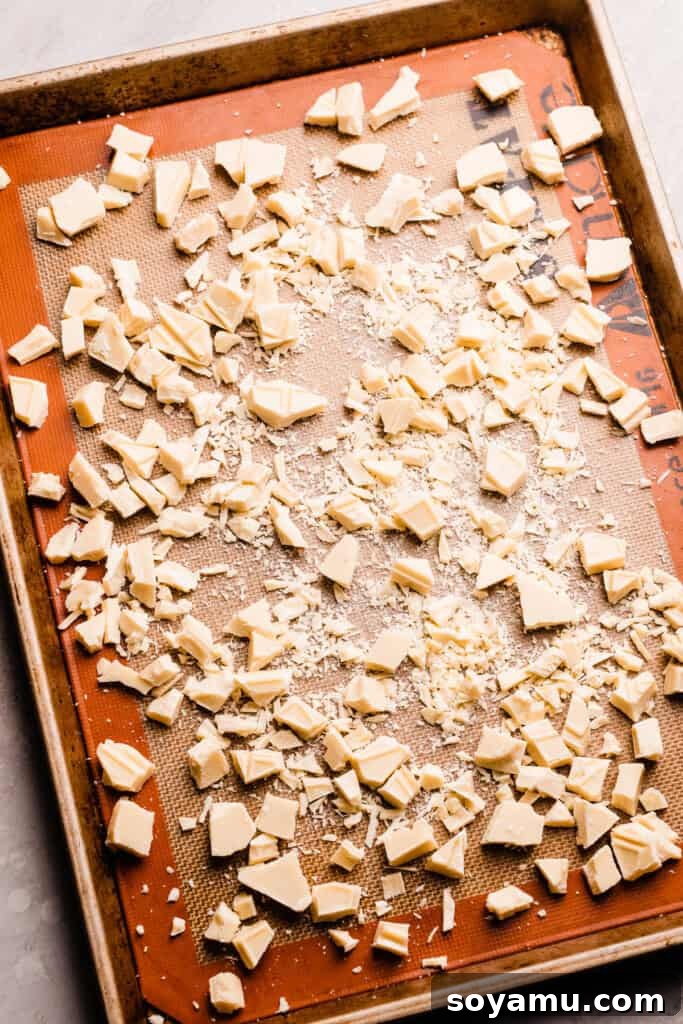
Step 2: Initial Melt in the Oven
Carefully place the baking sheet with the chopped white chocolate into your preheated 255°F oven. Let it bake for exactly 10 minutes. After this initial interval, remove the pan from the oven. The chocolate won’t be fully caramelized yet, but it should be softened and beginning to melt. Use an offset spatula or a sturdy rubber spatula to scrape and spread the chocolate around the pan until it’s mostly melted and smooth. This first stir helps to distribute the heat and begin the caramelization process evenly. Once melted, spread the chocolate back into an even, thin layer across the entire surface of the pan. Return the pan to the oven to continue caramelizing.
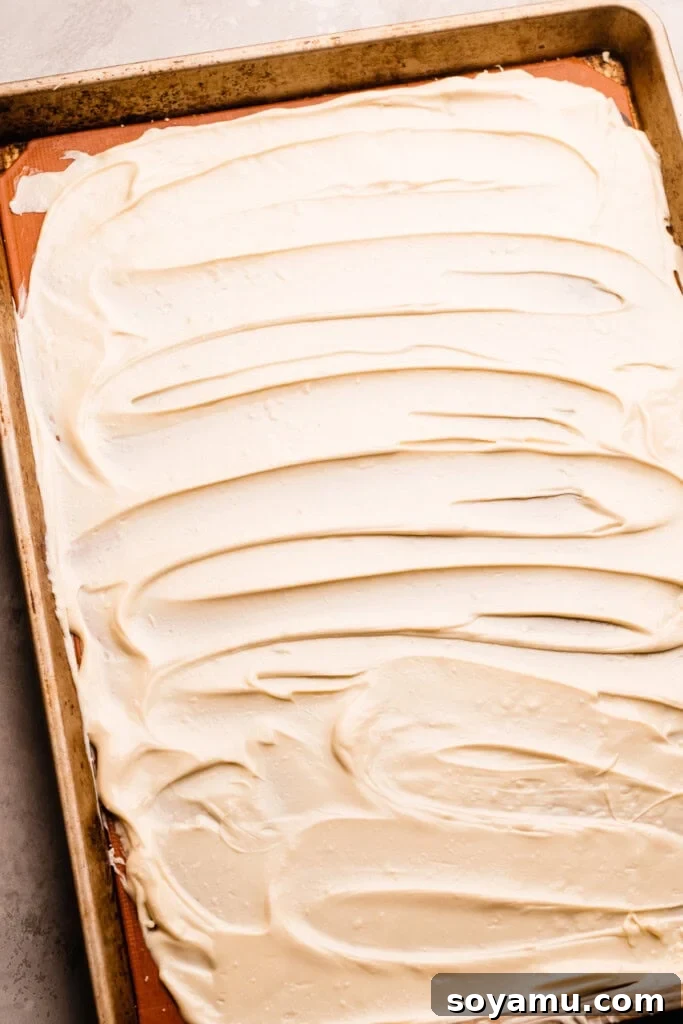
Step 3: Stir, Melt, & Caramelize in Intervals
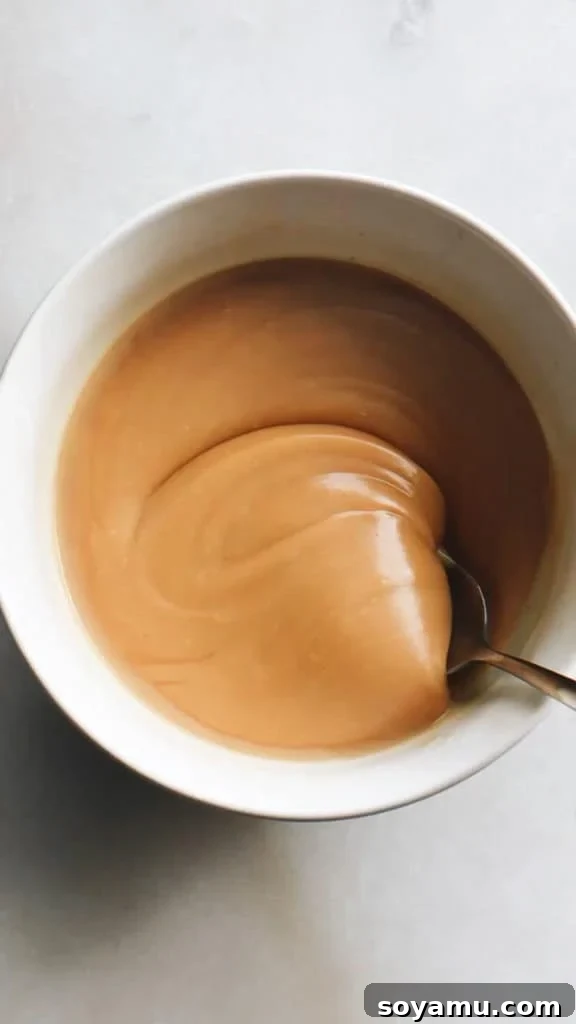
This is the most crucial stage. Continue to remove the chocolate from the oven every 10-12 minutes. Each time, use your spatula to thoroughly scrape the chocolate from the edges and bottom of the pan, folding it into the center, and stirring vigorously until it is smooth and evenly colored. Spread it back into a thin, even layer before returning it to the oven. Initially, the chocolate may appear a bit grainy, clumpy, or chalky after stirring—this is normal and a sign of the milk solids beginning to separate and react. Do not be alarmed; continue stirring and returning it to the oven. As the process continues (typically for a total of 50-70 minutes), the chocolate will gradually transition from white to off-white, then to a light beige, and finally to a beautiful deep caramel or golden-brown butterscotch color. The texture will also smooth out considerably. Continue until it reaches your desired deep golden hue and aromatic, nutty scent. Keep a close eye on it during the final stages to prevent burning.
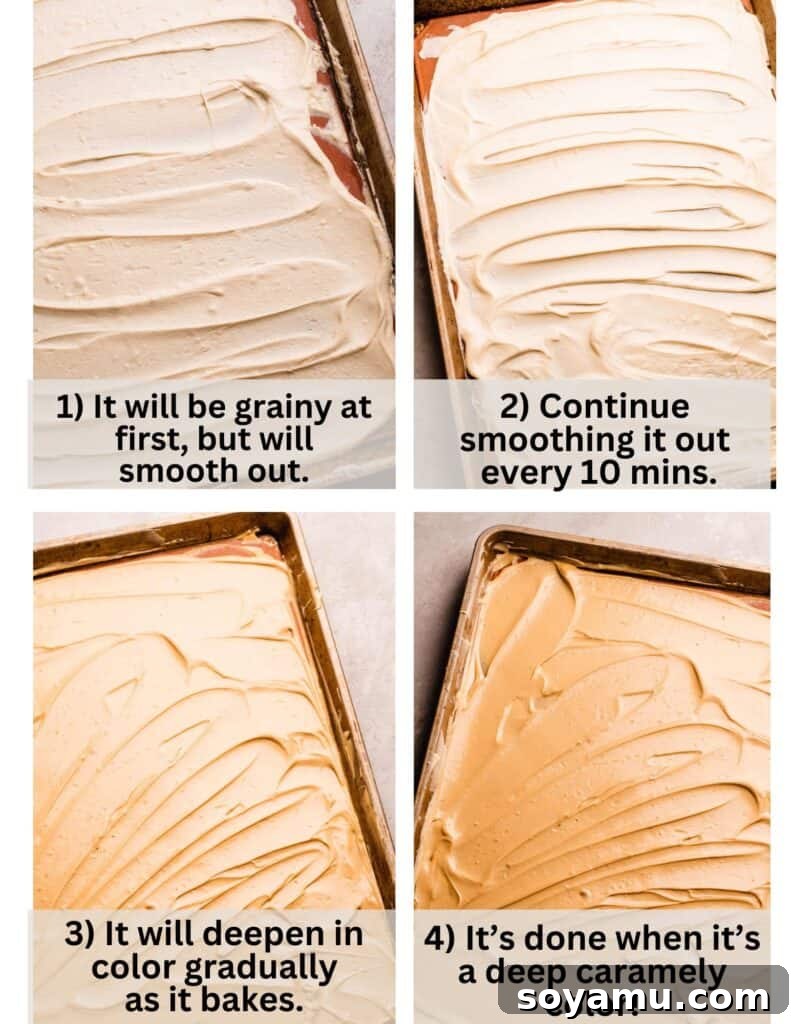
Step 4: Chill and Break into Chunks
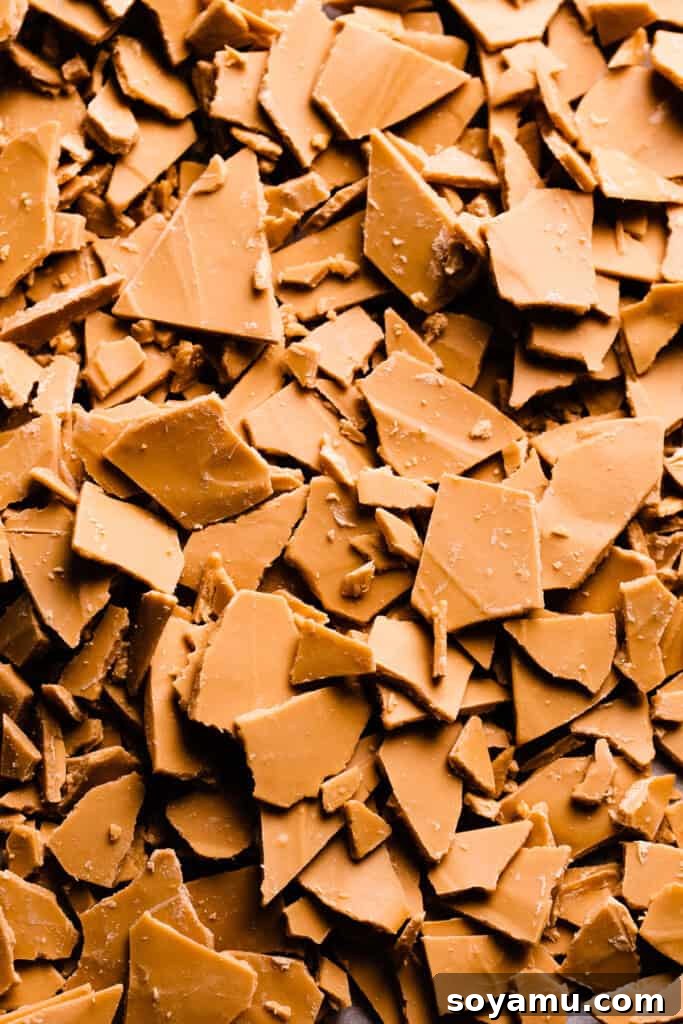
Once the white chocolate has reached a deep, rich caramel color and smells wonderfully nutty and toasted, it’s done. For the final spread, spread the warm, caramelized chocolate one last time into a slightly thicker layer on the baking sheet (aim for a thickness similar to a chocolate bar). If your baking sheet is piping hot, transfer the chocolate to a new, room-temperature baking sheet lined with a fresh silicone mat to prevent further cooking. Place the pan into the refrigerator or freezer until the chocolate is completely hardened and solid. This usually takes about 30-60 minutes in the fridge or 15-30 minutes in the freezer. Once firm, simply break the caramelized white chocolate into desired chunks or shards. It’s now ready to be used in your favorite recipes or enjoyed as a standalone treat!
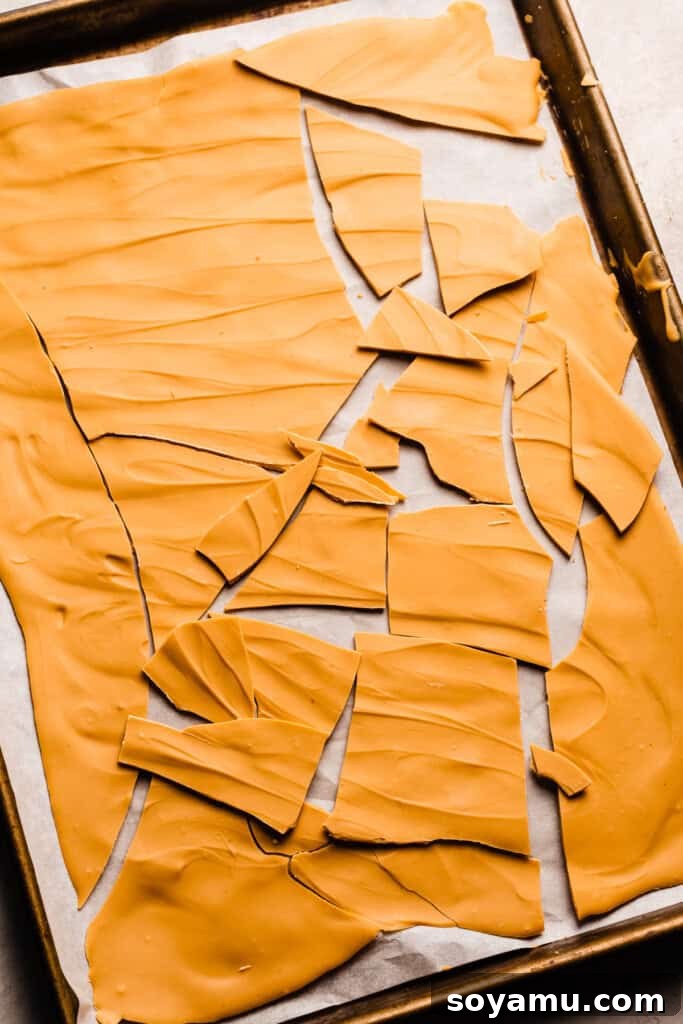
Serving & Storing Your Caramelized White Chocolate
Once you’ve created your batch of delicious caramelized white chocolate, proper storage ensures its longevity and maintains its delightful texture and flavor.
Store the finished caramelized white chocolate chunks or shards in an airtight container. Keep it in the refrigerator for up to several weeks or in the freezer for several months. Due to its milk fat content, caramelized white chocolate can become quite soft and prone to melting at room temperature, especially in warmer environments. Storing it chilled also helps preserve its unique flavor profile, preventing it from absorbing other odors. When you’re ready to use it, you can simply break off pieces directly from the fridge or freezer. If using in a recipe that requires melting, bring it to room temperature briefly before melting gently.
Exploring Alternative Caramelization Methods
While the oven method offers consistent and relatively hands-off results, caramelized white chocolate can also be achieved using other kitchen appliances. Each method has its own nuances, advantages, and challenges.
- Stovetop Method: For those who prefer to keep a closer eye on the process or don’t want to turn on the oven, the stovetop method is a viable alternative. Add your chopped white chocolate to a heavy-bottomed saucepan or a non-stick skillet. Melt it over very low heat, stirring continuously with a heat-proof spatula or wooden spoon. The key here is constant movement to prevent scorching. Continue cooking and stirring for approximately 20-30 minutes, or until the chocolate reaches the same deep butterscotch color and nutty aroma seen in the oven method photos. Be diligent about folding the chocolate from the bottom of the pan up and over to ensure even caramelization and prevent any part from burning or sticking. Once the desired color is achieved, immediately remove the chocolate from the hot pan to a cool surface (like a silicone mat on a baking sheet) to stop the cooking process, as residual heat in the pan can continue to caramelize or even burn the chocolate.
- Microwave Method: This is generally the fastest method, but also the one requiring the most vigilance, as it’s easiest to accidentally burn the chocolate. Start by microwaving the chopped white chocolate in a microwave-safe bowl in 20-second intervals, stirring thoroughly after each interval, until it is completely melted and smooth. Once melted, continue microwaving for longer intervals, about 45 seconds to 1 minute at a time, stirring exceptionally well between each burst. As soon as you notice the chocolate beginning to change color (even slightly), reduce your intervals to 25-30 seconds. Continue stirring and scraping the sides and bottom of the bowl diligently between each interval. This method typically takes 5-10 minutes total, but constant attention is crucial to avoid overheating and burning. The moment it reaches the desired golden-brown color and nutty scent, remove it and spread it out to cool.
Expert Tips for Perfect Caramelized White Chocolate
Achieving perfectly caramelized white chocolate is straightforward, but a few expert tips can ensure your success every time:
- Accurate Oven Temperature is Essential: A reliable oven thermometer is your best friend in baking, and especially critical for this recipe. Ovens can often run hotter or cooler than their set temperature. An oven thermometer will provide an accurate reading, allowing you to adjust your oven dial if necessary. Maintaining the precise 255°F (124°C) is vital for slow, even caramelization without scorching.
- Prevent Seized Chocolate: Water is the nemesis of melting chocolate. Even a tiny drop can cause your beautifully melting white chocolate to “seize”—becoming clumpy, stiff, and grainy, effectively ruining its smooth texture. Ensure all your utensils, bowls, spatulas, and especially your baking sheet or silicone mat are absolutely bone dry before you begin. A clean, dry environment is crucial for a silky-smooth caramelized white chocolate.
- Stir Diligently and Evenly: The consistent stirring every 10-12 minutes is not just to prevent sticking, but to ensure even caramelization. White chocolate browns from the outside edges inwards and from the top down. By scraping the bottom and sides and folding it into the center, you ensure all parts of the chocolate are exposed to the heat and undergo the Maillard reaction uniformly. Don’t skip or shorten these stirring intervals.
- Trust the Process & Visual Cues: It can be tempting to increase the oven temperature or shorten intervals, but patience is key. The process takes time, and the chocolate will go through various stages (melty, slightly grainy, smoother, then darker). Rely on both the visual color change (from white to a deep butterscotch) and the aromatic scent (nutty, caramel-like) as your guides, rather than just the clock.
- Cool Down Quickly for Best Texture: Once the chocolate reaches your desired color, it’s important to stop the cooking process immediately. Spreading it into a slightly thicker layer on a cool surface (or a fresh baking sheet) and chilling it quickly in the fridge or freezer will help it set into firm, snappy chunks that are easy to break and handle.
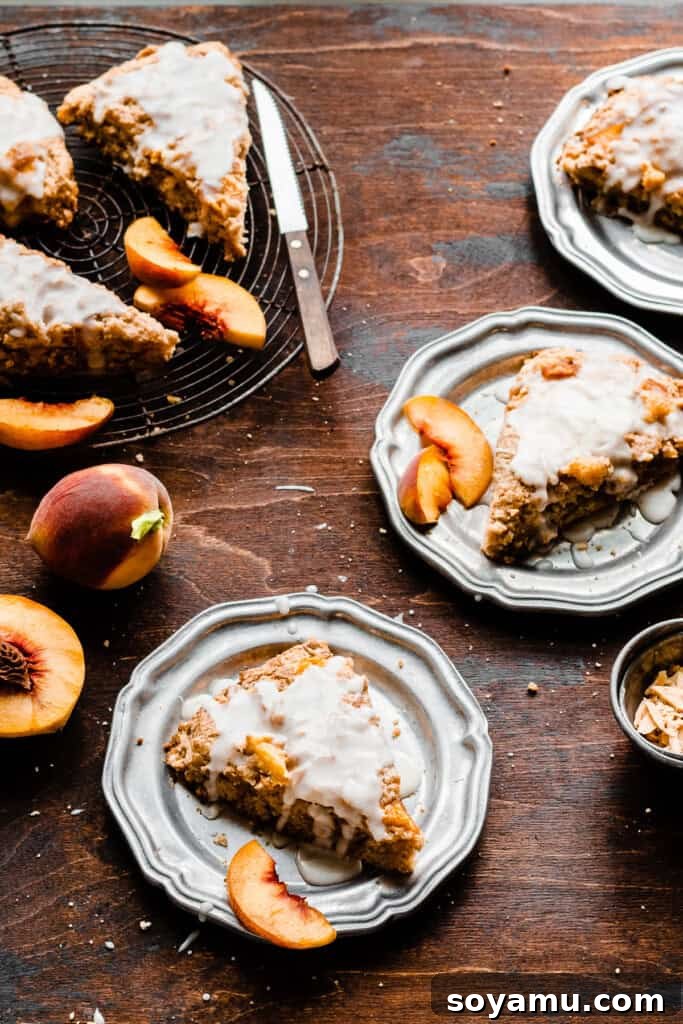
Pictured below are the luscious Caramelized White Chocolate & Peach Scones, a highlight recipe from my cookbook, “The One-Bowl Baker.” This showcases just one of the many delightful ways to incorporate this special ingredient.
Frequently Asked Questions About Caramelized White Chocolate
Absolutely! Caramelized white chocolate freezes exceptionally well. Once you’ve broken it into your desired size pieces, store them in an airtight container in the freezer. It will maintain its quality and flavor for several months, making it perfect for meal prep or having on hand for spontaneous baking. It also stores well in the refrigerator for a few weeks.
Yes, you can adjust the recipe, but with some considerations. If you double the recipe, you’ll likely need to spread the chocolate across two or even four separate baking sheets to maintain a thin, even layer. This ensures proper and even caramelization. Trying to pile too much chocolate onto one pan will result in uneven cooking and potentially a grainy texture. Halving the recipe is much simpler; you can comfortably place all the chocolate on a single, standard-sized baking pan.
This is where the magic truly happens! While plain white chocolate is often criticized for being overly sweet, once caramelized, its flavor undergoes a dramatic transformation. It develops rich notes of caramel, toasted nuts, and a delightful butterscotch-like sweetness. Some describe it as having hints of dulce de leche or even shortbread. It’s much deeper, more complex, and less cloyingly sweet than its original form, offering a truly incredible and addictive taste experience.
The esteemed French chocolate manufacturer, Valrhona, is widely credited with the invention and popularization of caramelized white chocolate, which they branded as “Dulcey” chocolate. Their innovative process brought this incredible flavor profile to the gourmet world, inspiring countless home bakers and professional chefs to explore its potential. We owe a big thank you to Valrhona for this delicious discovery!
Caramelizing milk chocolate or dark chocolate is not typically done in the same way as white chocolate. The caramelization process in white chocolate relies on the Maillard reaction between milk solids and sugars. Milk chocolate contains fewer milk solids and more cocoa mass, while dark chocolate contains even less or no milk solids and a high percentage of cocoa solids, which behave differently under heat. While some online resources suggest attempts with milk chocolate, the results are often not the same, potentially leading to burning before caramelization. It’s generally not recommended to try to caramelize milk or dark chocolate using this method.
Grainy caramelized white chocolate is a common issue, often indicating that it was either over-baked or cooked at too high a temperature, causing the milk solids and sugars to crystallize. David Lebovitz, a renowned pastry chef, suggests that if your chocolate is the color of “natural peanut butter” but grainy, you’ve likely over-baked it. He recommends pushing the still-warm chocolate through a fine-mesh sieve or chinois to remove the small lumps and achieve a smoother texture. Next time, try reducing the cooking time slightly or ensuring your oven temperature is accurate with an oven thermometer.
Recommended Special Tools for Success
While you can make caramelized white chocolate with basic kitchen items, a few special tools can make the process smoother, more efficient, and yield even better results:
- Rimmed Baking Sheet: A standard half-sheet size (cookie sheet) with rims is essential. The rims prevent the melting chocolate from flowing off the pan during stirring and when spreading it out.
- Silicone Baking Mat: While not strictly mandatory, a silicone baking mat (like a Silpat) is highly recommended. It provides a non-stick surface, ensures more even heat distribution than parchment paper, and makes scraping and stirring the sticky chocolate significantly easier without tearing or bunching up. It’s a versatile tool for many other baking tasks as well.
- Offset Spatula: An offset spatula is a baker’s secret weapon. Its angled blade makes spreading the melted and caramelizing chocolate into thin, even layers a breeze. It’s also incredibly useful for frosting cakes, spreading batters, and lifting delicate items. Its design allows you to keep your knuckles clear of the hot pan, adding a layer of comfort and safety.
- Oven Thermometer: As mentioned in the expert tips, an oven thermometer is invaluable. It ensures your oven is maintaining the precise low temperature required for controlled caramelization, preventing burning or under-caramelization.
Incorporate Caramelized White Chocolate into These Delicious Recipes
Once you’ve made a batch of this golden goodness, the possibilities are endless! Here are some fantastic ways to use your homemade caramelized white chocolate to elevate your baking:
- Strawberry & Cream Scones: Substitute the regular white chocolate in your favorite scone recipe, such as these Strawberry & Cream Scones, with caramelized white chocolate chunks for an unexpected depth of flavor. The nutty notes beautifully complement fresh fruit.
- Fudgy Red Velvet Oreo Brownies: Enhance the richness of Red Velvet Brownies by folding in 1/2 to 1 cup of caramelized white chocolate chunks. For an extra decadent twist, omit the Oreos and use 1 cup of caramelized white chocolate for pure chocolate bliss.
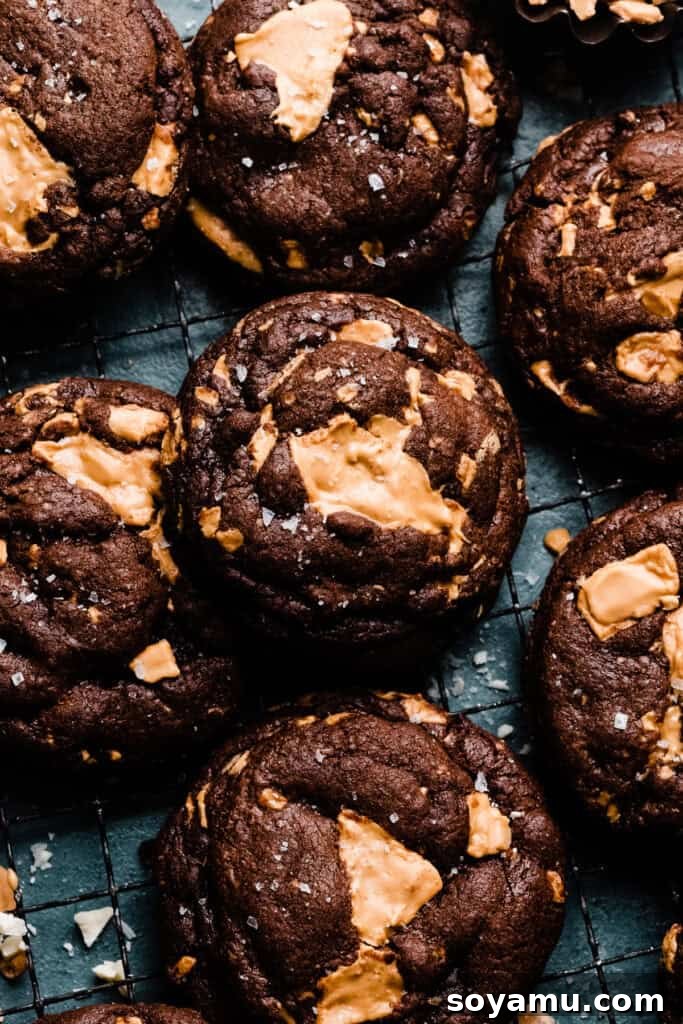
- Chocolate Caramelized White Chocolate Cookies: Directly swap out regular white chocolate chips for your homemade caramelized version in this Chocolate Caramelized White Chocolate Cookies recipe. The contrast of dark chocolate with the nutty blonde chocolate is truly divine.
- 5-Ingredient Brownies: Give a classic recipe a gourmet upgrade. Simply add 1 cup of caramelized white chocolate pieces to your 5-Ingredient Brownies for a fun, sophisticated twist.
- Triple Chocolate Skillet Brownie: Just like with the 5-ingredient brownies, folding in caramelized white chocolate to a Triple Chocolate Skillet Brownie recipe will add an incredible layer of flavor and texture that melts beautifully.
- Red Velvet Cookies: Replace the standard white chocolate chips in your Red Velvet Cookies with the caramelized white chocolate chunks for an elevated and more complex flavor experience.
- Caramelized White Chocolate Ganache: Create a truly luxurious ganache! Use the ganache recipe found in my White Chocolate Cake recipe, but substitute the regular white chocolate with your caramelized version. Combine it with heavy cream for a rich, pourable, or spreadable topping perfect for cakes, cupcakes, or tarts.
- Homemade Caramelized White Chocolate Bars: For a simple yet elegant treat, pour the still-melted caramelized white chocolate into fun silicone candy bar molds. Chill until firm, and you’ll have delightful homemade chocolate bars that make perfect gifts or personal indulgences.
Did you make this recipe? Leave a comment & star rating!
Your feedback is invaluable! Please click the little stars in the recipe card header below to leave a comment and star rating, letting me know how you enjoyed this recipe. Every rating helps my small business immensely!
★
★
★
★
Caramelized White Chocolate
Rate
Ingredients
- 12 ounces good-quality white chocolate*, *Use a good quality eating chocolate (Valrhona, Callebaut, or Lindt) or a good quality baking bar like Ghirardelli or Baker’s. Don’t use white chocolate chips – they have stabilizers that prevent them from melting in the oven.
Instructions
-
Prep: Preheat your oven to 255℉. Roughly chop your white chocolate into small pieces and place it on a completely dry silicone mat lined, rimmed cookie sheet in a single layer. If you don’t have a silicone baking mat, use a bare baking pan (with a rim!) that isn’t tarnished or rusty.
Note: Water is the enemy of white chocolate and will cause it to seize up! Make sure all utensils are clean & dry.
-
Melt the Chocolate: Pop the pan of chopped chocolate into the oven for 10 minutes, then remove the pan and spread & scrape the chocolate around with an offset spatula until melted. Spread it back into an even, thin layer and return to the oven to caramelize in 10 minute intervals.
-
Caramelize the White Chocolate: Remove the chocolate from the oven every 10-12 minutes to scrape and stir it around so it caramelizes evenly, repeating this process for 50 to 70 minutes total. Be sure to spread the chocolate back into an even thin layer each time you return it to the oven.
In the beginning, it may appear a bit grainy or chalky at times, but will smooth out as you continue roasting it. It will gradually turn from white, to off white, to a light beige, into a deep caramely butterscotch color. When it reaches that deep golden color, it’s done! (See photos in blog post above for reference.)
-
Finish: Spread the caramelized chocolate into a slightly thicker layer (think chocolate bar thickness) on a new pan (or let your pan cool down to room temp – don’t stick a piping hot pan in your fridge) and pop the pan in the fridge or freezer until the chocolate hardens. Then, break it into chunks. It’s now ready to use!
-
Serve & Store: Once you have your chocolate chunks or shards, store them in an airtight container in the fridge or freezer. It will become too soft at room temperature. Use in cookies, brownies, blondies, or scones. Use anywhere a recipe calls for chocolate chips, chocolate chunks, or white chocolate chips. In the blog post right above this recipe card, I’ve linked some recipes to use it in!
Nutrition
Nutrition information is automatically calculated, so should only be used as an approximation.