
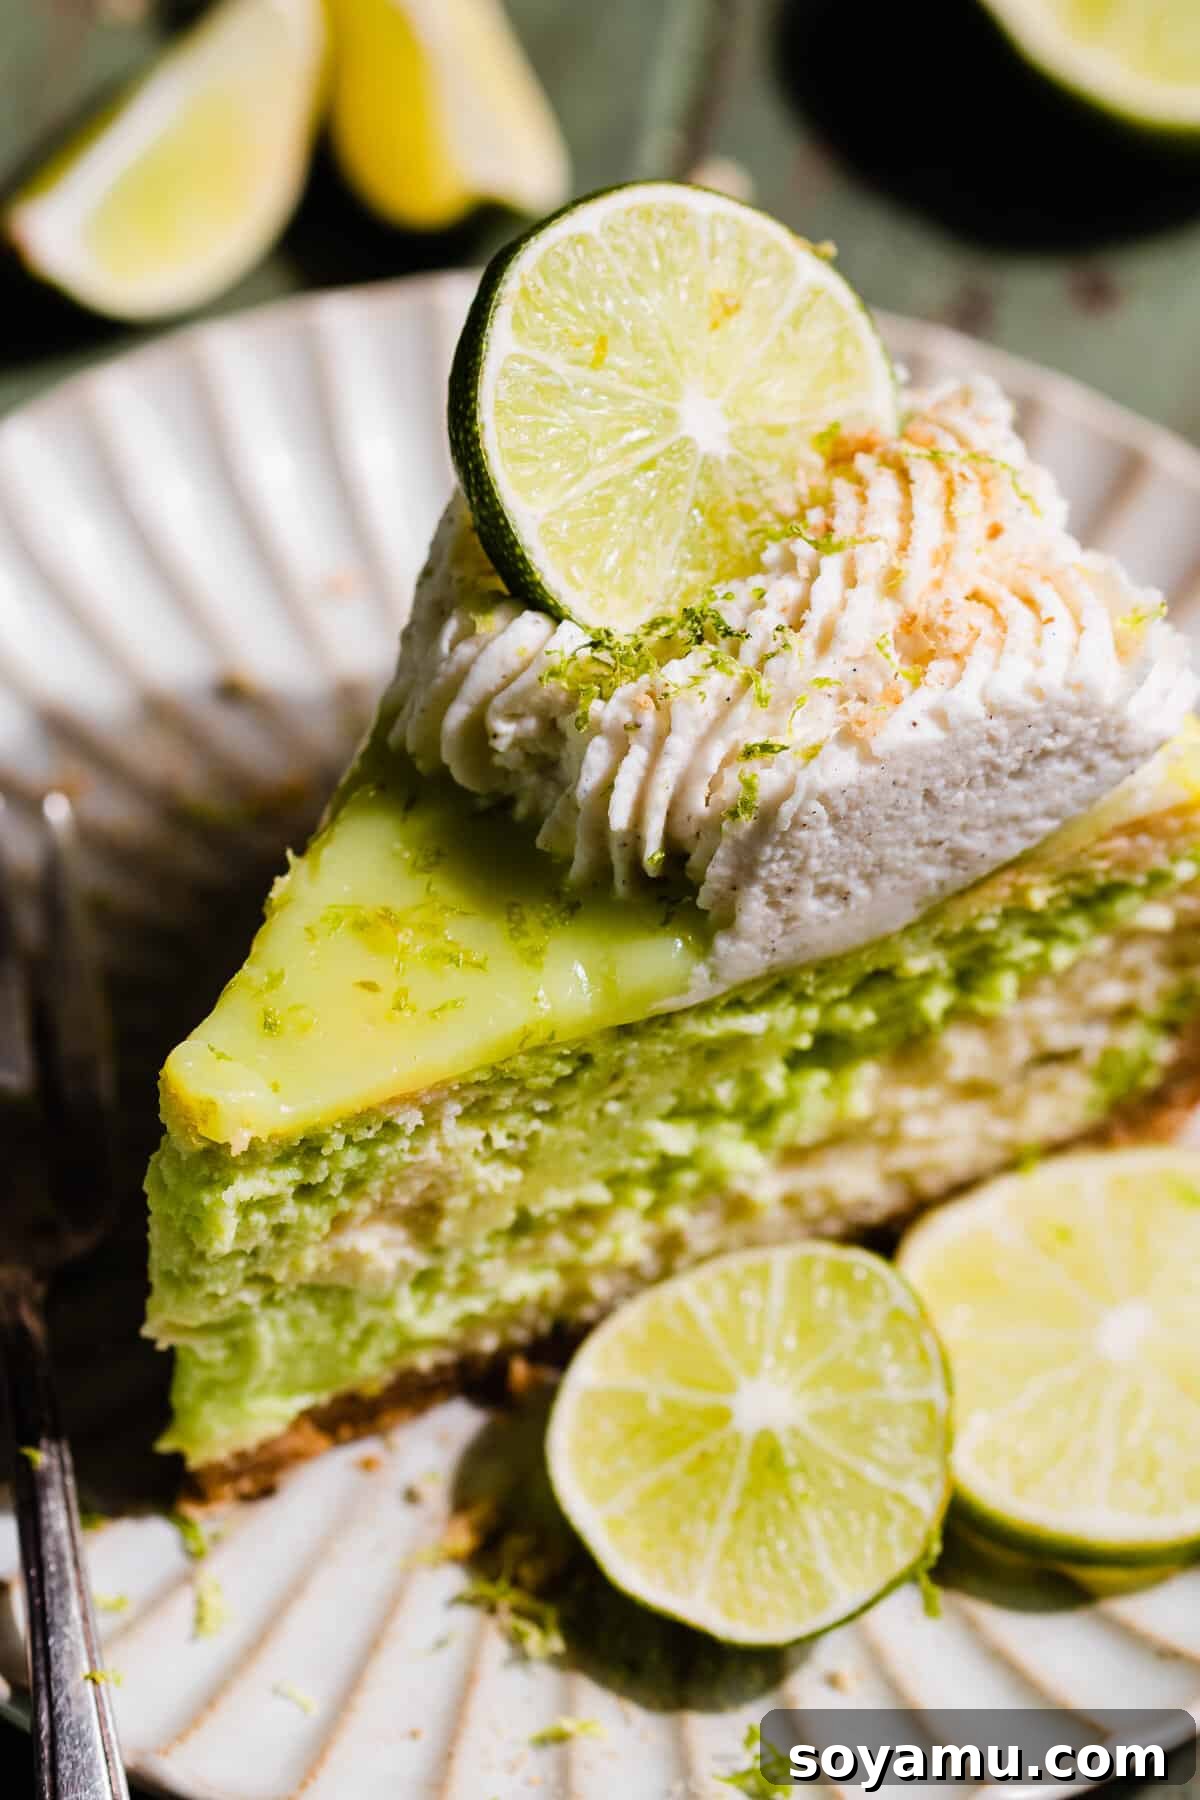
There’s nothing quite like the ethereal lightness and fresh flavor of homemade whipped cream. Forget the bland, overly sweet store-bought alternatives; creating your own fluffy topping is surprisingly simple and incredibly rewarding. In this comprehensive guide, we’ll walk you through every step to master homemade whipped cream, from selecting the right ingredients to advanced techniques like stabilizing for piping, exploring exciting flavor variations, and even troubleshooting common issues. Get ready to elevate your cheesecakes, pies, cakes, hot beverages, and countless other desserts with this perfectly refreshing, elegant finish.
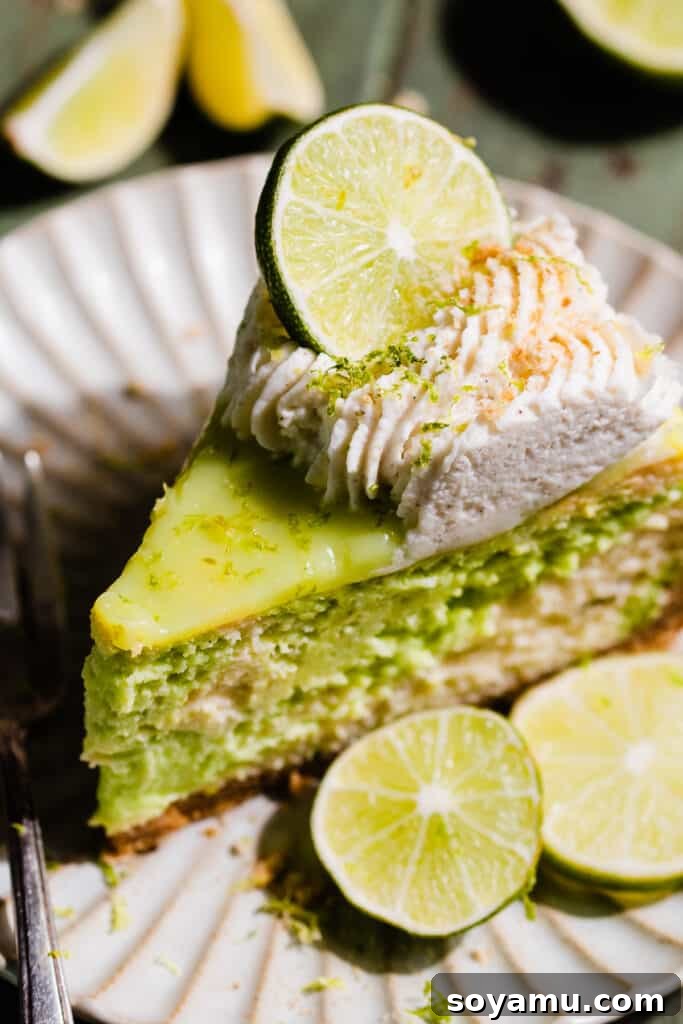
Why You’ll Adore Homemade Whipped Cream
Once you experience the superiority of homemade whipped cream, you’ll never look back. Here’s why this simple delight will become your go-to dessert topping:
- Effortlessly Easy to Make: Despite its gourmet appeal, whipped cream is one of the quickest and easiest treats to prepare. With just three core ingredients and a few minutes, you can transform liquid cream into a luscious cloud of sweetness. It requires minimal equipment and skill, making it perfect for even novice bakers.
- Unbeatable Fresh Flavor: The most compelling reason to make whipped cream from scratch is its exquisite taste. Unlike canned or frozen varieties, homemade whipped cream boasts a clean, delicate, and genuinely fresh dairy flavor that perfectly complements any dessert without overpowering it. You control the sweetness, allowing the rich taste of cream and subtle notes of vanilla to truly shine.
- Infinitely Customizable: Beyond its fundamental deliciousness, homemade whipped cream offers a world of possibilities for personalization. You can adjust its sweetness, incorporate a myriad of flavors, and achieve various textures—from soft, billowy dollops to firm, pipeable designs. This versatility allows you to tailor it perfectly to any dessert or occasion.
Essential Ingredients for Perfect Whipped Cream
Crafting perfect whipped cream begins with understanding the role of each ingredient. Quality and temperature are key!
- Heavy Cream: This is the star of our show. Always use very cold heavy whipping cream, typically labeled as “heavy cream” or “heavy whipping cream.” Both terms refer to cream with a high milkfat content (at least 36%), which is essential for it to whip up properly and hold its structure. The colder the cream, the faster and more efficiently the fat molecules will emulsify and trap air, leading to a stable, voluminous whipped cream. As a rule of thumb, heavy cream roughly doubles in volume when whipped, so 1 cup of liquid cream yields about 2 cups of whipped cream. This knowledge helps you gauge quantities without strictly adhering to a recipe every time.
- Vanilla Extract or Vanilla Bean Paste: Vanilla is a classic pairing that enhances the cream’s natural sweetness and aroma. While pure vanilla extract is excellent, for an extra touch of elegance and visual appeal, I highly recommend vanilla bean paste. It imparts tiny, beautiful flecks of vanilla bean into your pristine white whipped cream, making it look incredibly gourmet and adding a deeper, more complex vanilla flavor.
- Powdered Sugar (Confectioners’ Sugar): For the smoothest, most luxurious texture, powdered sugar is the only way to go. Its finely milled particles dissolve instantly into the cream, preventing any graininess that granulated sugar might leave behind. It also contains a small amount of cornstarch, which subtly aids in stabilization, contributing to a more resilient whipped cream. You can easily adjust the amount of powdered sugar to suit your preferred level of sweetness.
- Gelatin (for Stabilizing): While optional, plain powdered gelatin is a game-changer if you need your whipped cream to hold its shape for extended periods, especially for piping or topping desserts that will sit for a while. You’ll typically find it in the baking aisle near other gelling agents. It provides structure without affecting the taste or texture of the whipped cream, preventing it from “weeping” or deflating. We’ll delve into the stabilization process shortly.
Recipe Adaptations and Flavorful Variations
This basic whipped cream recipe is wonderfully adaptable, catering to various dietary needs and culinary desires.
- Naturally Gluten-Free: Good news for those with gluten sensitivities! This recipe is inherently gluten-free, using only dairy, sugar, and flavorings.
- Dairy-Free Whipped Cream: For a dairy-free alternative, select a high-quality, full-fat dairy-free heavy cream alternative. Brands like coconut cream (chilled, solid part only) or specific plant-based whipping creams can yield excellent results. It’s best to use a brand you’ve had success with for similar applications.
- Explore Flavored Whipped Cream: The possibilities for flavoring are endless! You can infuse your whipped cream with cocoa powder for a rich chocolate version, add finely ground freeze-dried fruit powder for a burst of fruity essence, or lighten it with a touch of fresh lemon or orange juice and zest. These variations allow you to perfectly complement specific desserts.
- Avoid Light Whipping Cream: I strongly advise against using light whipping cream. Its significantly lower fat content (around 30% or less) means it won’t achieve the same stable, voluminous peaks as heavy cream, often resulting in a runny, disappointing texture. Stick to heavy cream for guaranteed success.
- Infuse with Extracts: Beyond vanilla, other extracts can dramatically change the flavor profile. A hint of almond extract (start with 1/4 to 1/2 teaspoon and adjust to taste) adds a lovely nutty depth. Consider peppermint extract for holiday treats, orange blossom water for Middle Eastern-inspired desserts, or even a touch of rum or liqueur for an adult twist.
Crafting the Best Whipped Cream: A Step-by-Step Guide
Follow these simple steps to create perfectly whipped cream every time.
Step 1: The Critical Prep Work.
Begin by gathering all your ingredients. The most crucial factor for successful whipped cream is temperature. Your heavy cream must be very cold, pulled straight from the refrigerator just before you start whipping. Warm cream will not whip effectively, as the fat globules need to be firm to emulsify and trap air. For an extra boost, especially if you live in a warm climate or often struggle with whipping cream, consider chilling your mixing bowl and whisk attachment (or beaters) in the freezer for 15-20 minutes beforehand. A cold environment helps maintain the cream’s low temperature, ensuring quicker and more stable results.
Step 2: The Whipping Process.
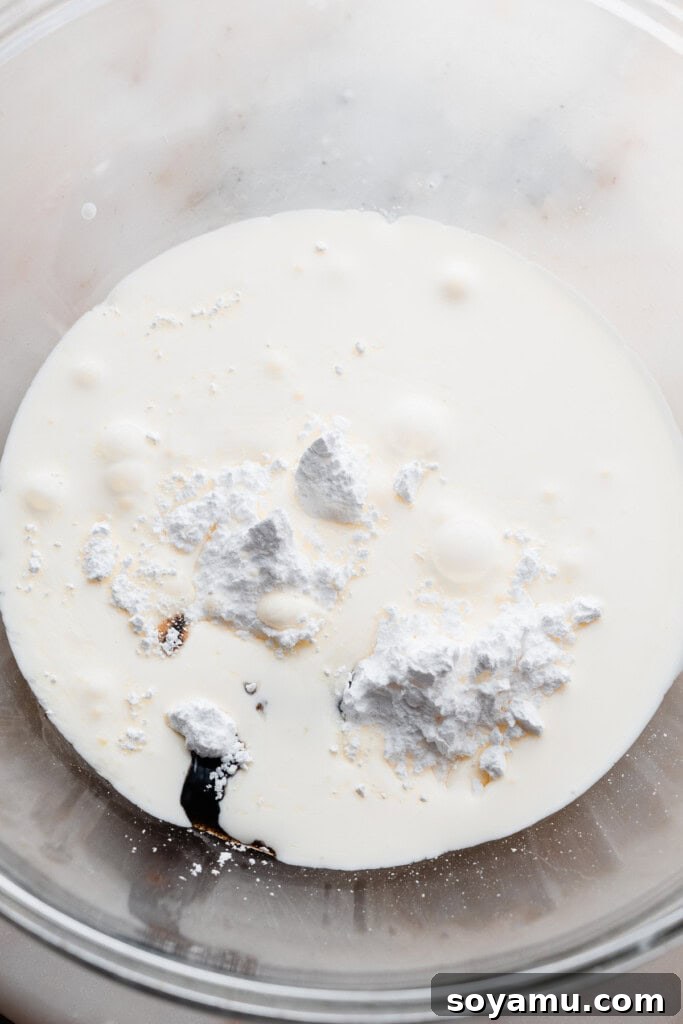
Combine your cold heavy cream, powdered sugar, and vanilla in your chilled mixing bowl. Start mixing on medium-high to high speed. Be prepared for some splattering in the initial stages before the mixture thickens; a kitchen towel draped loosely over the bowl and mixer can help contain the mess. As you continue to beat, the cream will progress through several stages:
- Foamy: Small bubbles appear.
- Soft Peaks: The cream begins to thicken, and when the whisk is lifted, soft, gentle peaks form but quickly droop. This consistency is perfect for soft dollops.
- Medium Peaks: The peaks hold their shape better but still have a slight curl at the tip.
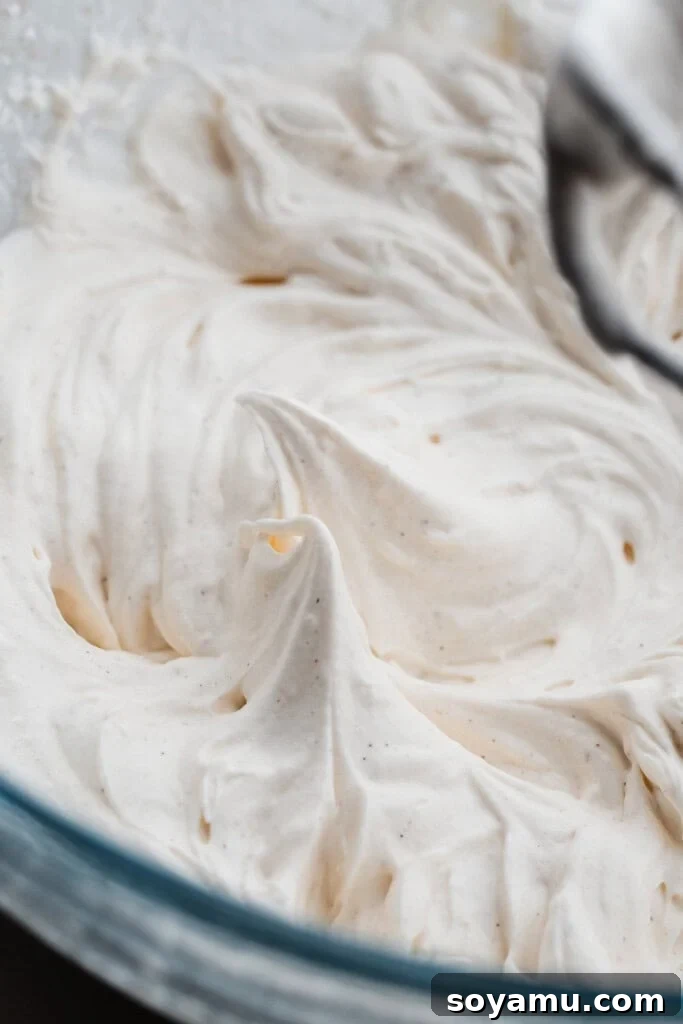
- Stiff Peaks: The cream is firm and holds its shape perfectly when the whisk is lifted, standing upright without drooping. This is ideal for piping and robust toppings.
It’s crucial to stop mixing once stiff peaks are achieved. Overmixing can cause the emulsion to break, leading to a curdled, grainy texture (essentially, you’re on your way to making butter!). Scrape down the sides of the bowl occasionally to ensure all the cream is evenly whipped.
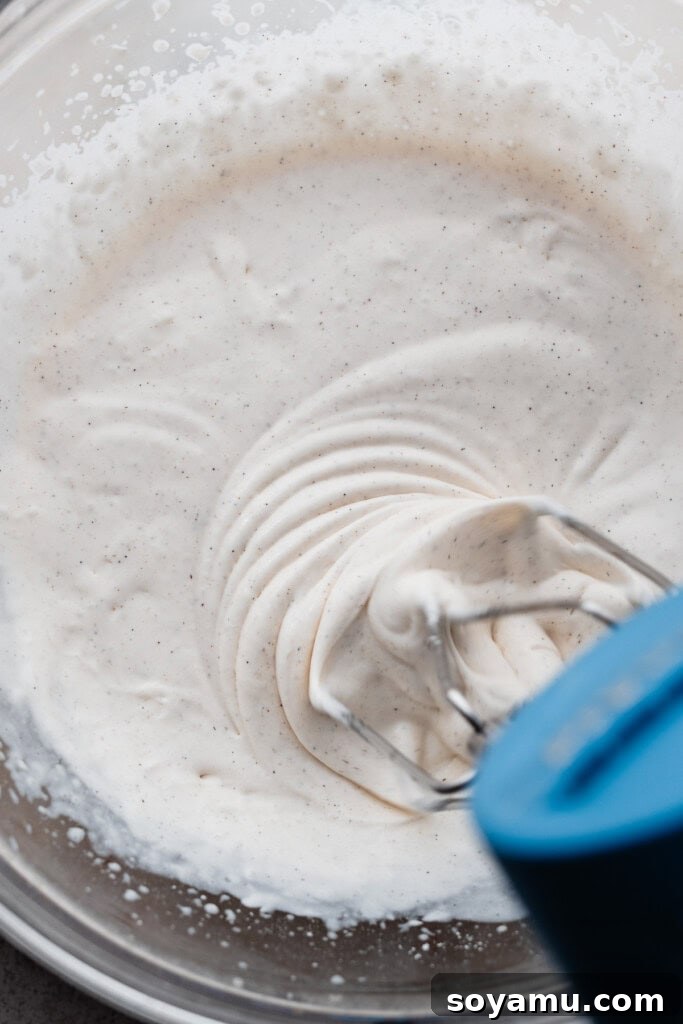
Step 3: Achieving Your Desired Consistency.
The final texture of your whipped cream depends on its intended use:
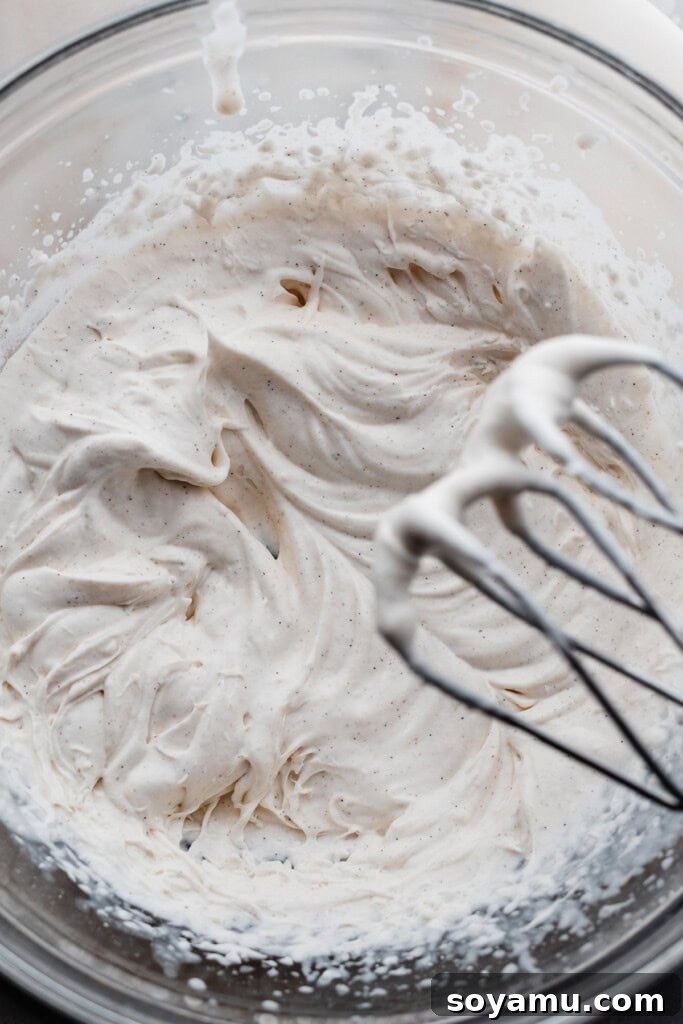
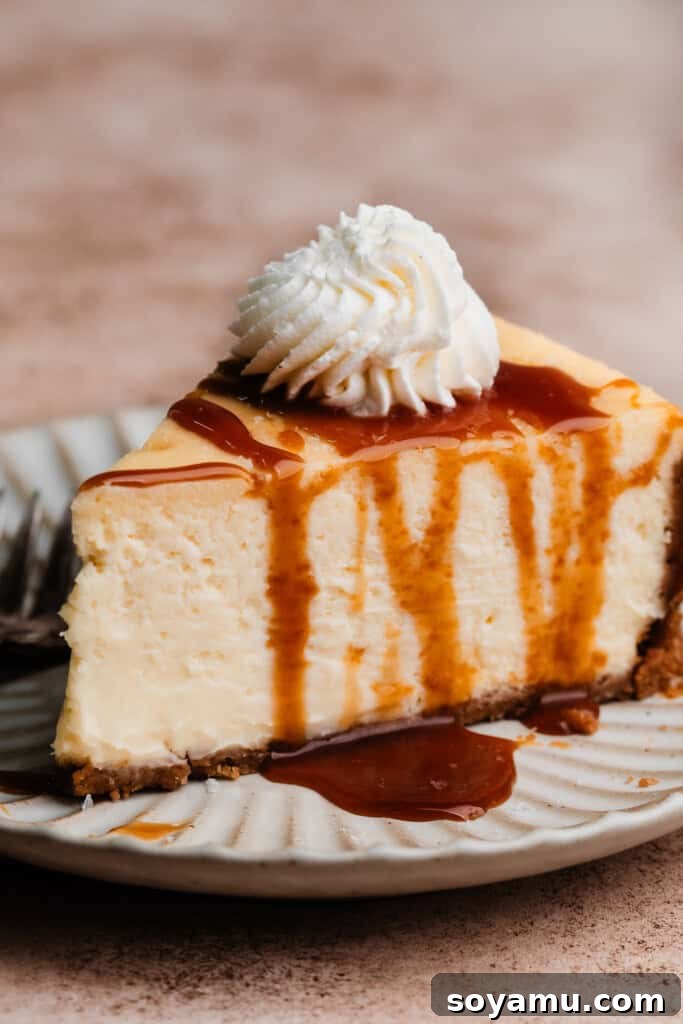
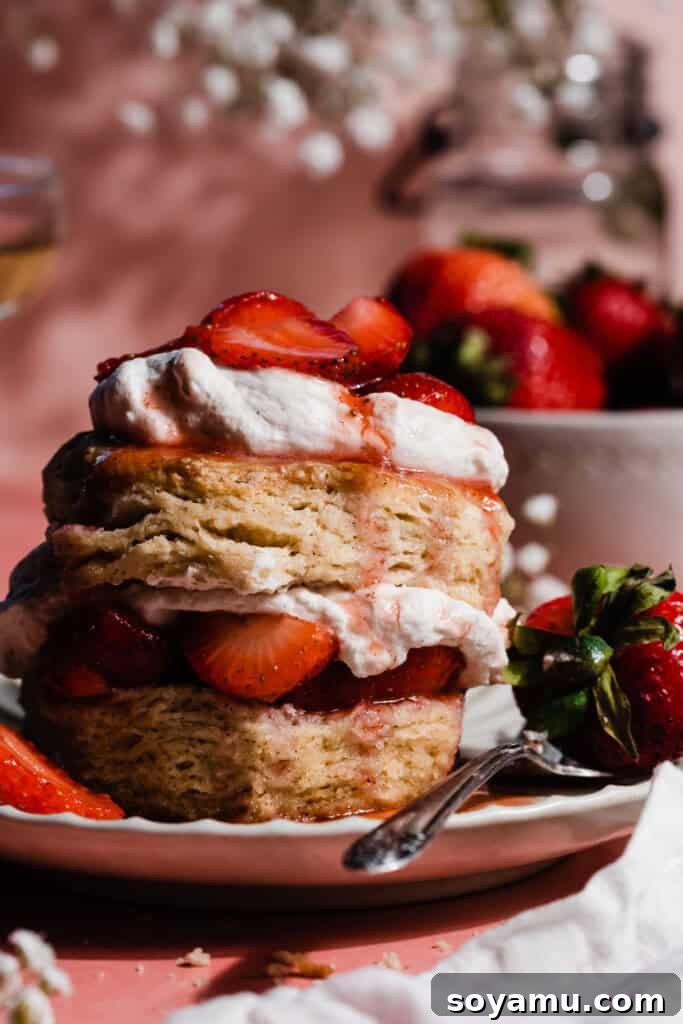
- Soft Peaks (Left Photo): The cream holds a gentle shape and is light and airy. This consistency is perfect for delicate dolloping onto individual slices of cake, fruit, or homemade Strawberry Shortcakes. It melts beautifully in your mouth.
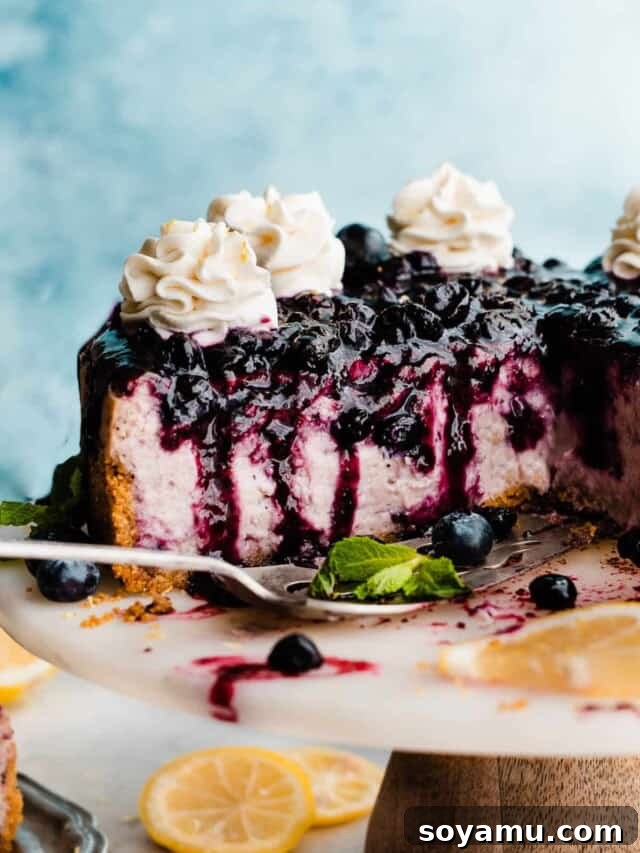
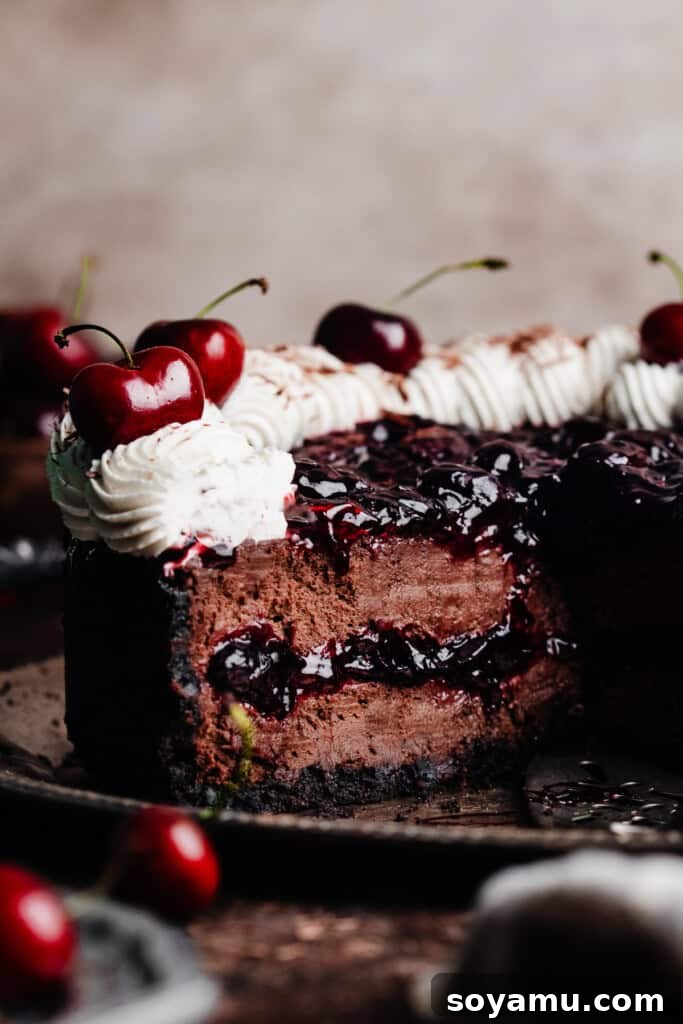
- Stiff Peaks (Right Photo): The cream is much firmer and holds its shape without collapsing. This is the ideal consistency if you want your whipped cream to be more stable, such as piling high on a pie (like a Black Forest Pie) or intricate piping. For maximum stability in these applications, you’ll also want to stabilize the cream as described in the next section.
The Secret to Stable Whipped Cream
Stabilizing whipped cream is a crucial technique for anyone looking to prepare desserts ahead of time, create decorative piped elements, or simply prevent their topping from deflating or “weeping” liquid. This is especially important for cakes, pies, or cheesecakes that need to hold their presentation for a party or over several days.
The most effective method involves a touch of gelatin, which provides an internal structure to the cream. This ensures your whipped cream stays sturdy, holds sharp piped edges, and remains soft and delicious without any gelatinous taste or texture. If gelatin isn’t an option, adding a small amount of cream cheese or mascarpone cheese can also lend significant stability and a lovely tang.
Gelatin Stabilization Method:
Step 1: Bloom the Gelatin.
In a small, heatproof bowl, sprinkle plain powdered gelatin evenly over cold water. The ratio is typically 1 part gelatin to 4 parts water (e.g., 3/4 tsp gelatin to 3 tsp water for 1 cup of heavy cream). Allow the mixture to stand undisturbed for 3 to 5 minutes. During this “blooming” phase, the gelatin granules absorb the water and swell, creating a thick, gummy paste.
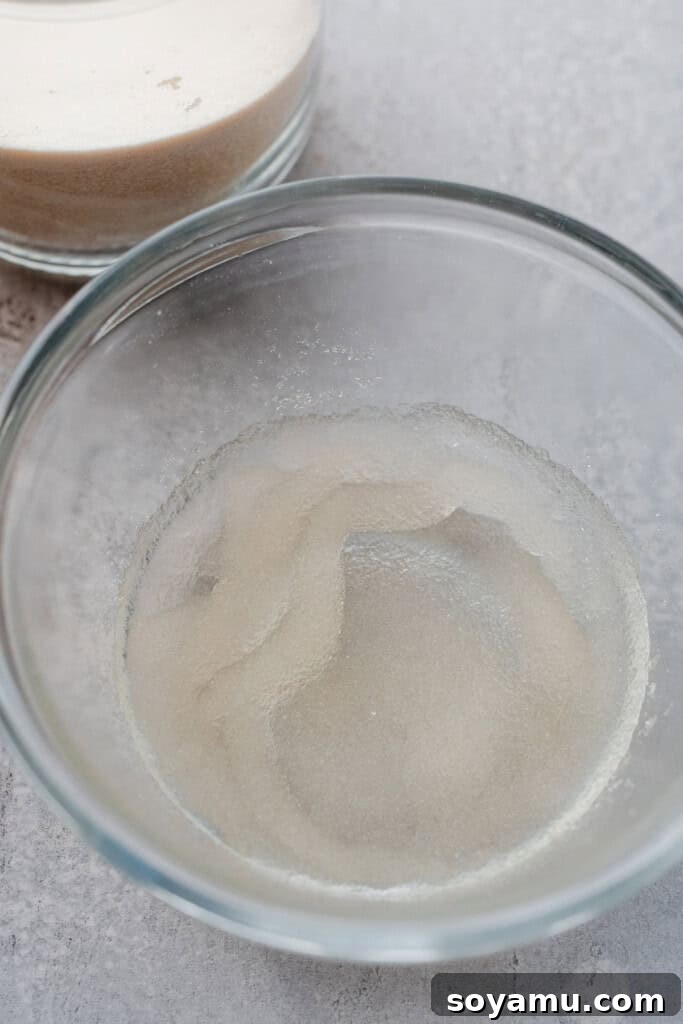
Step 2: Liquify the Gelatin.
Gently microwave the bloomed gelatin mixture for just a few seconds (typically 5-10 seconds, depending on your microwave’s power). Watch it carefully; you want it to liquify completely without boiling. It should be clear and smooth. If there are any undissolved granules, stir gently until fully incorporated. Set this liquid gelatin aside to cool slightly, ensuring it’s not hot when added to the cream.
Step 3: Incorporate into Whipped Cream.
Begin whipping your heavy cream with powdered sugar and vanilla as usual. Once the cream has just started to thicken and reaches soft peaks, slowly stream in the slightly cooled liquid gelatin mixture while continuing to mix on low speed. After the gelatin is fully incorporated, increase the mixer speed to medium-high and continue beating until stiff peaks form. That’s all there is to it! Your whipped cream is now stable and ready for intricate piping or longer-lasting dessert toppings.
Mastering Whipped Cream Piping
Piping whipped cream adds a professional and decorative touch to any dessert. Stabilized whipped cream is key for beautiful, defined shapes.
Step 1: Stabilize Your Cream.
Prepare your whipped cream and ensure it is stabilized using the gelatin method described above. This firmness is crucial for holding intricate piped designs. Aim for stiff peaks, but be careful not to overmix.
Step 2: Fill and Pipe.
Fit a piping bag with your desired decorative tip (star, round, ruffle, etc.). Carefully spoon the stabilized whipped cream into the piping bag, ensuring no large air pockets are trapped. Gently twist the top of the bag to seal it. Pipe the cream onto your chilled cheesecake, pie, cupcakes, or other desserts just before serving for the freshest appearance. You can also pipe individual servings as they are plated, offering flexibility for presentation.
Creating Elegant Whipped Cream Dollops
Even a simple dollop can look artful with a clever technique that adds texture and visual appeal.
Step 1: Create Waves.
Once your whipped cream is made (soft to medium peaks work best for dolloping), use the back of a spoon to gently create a few horizontal waves or swirls across the surface of the cream in the bowl. This creates natural undulations that catch the light beautifully.
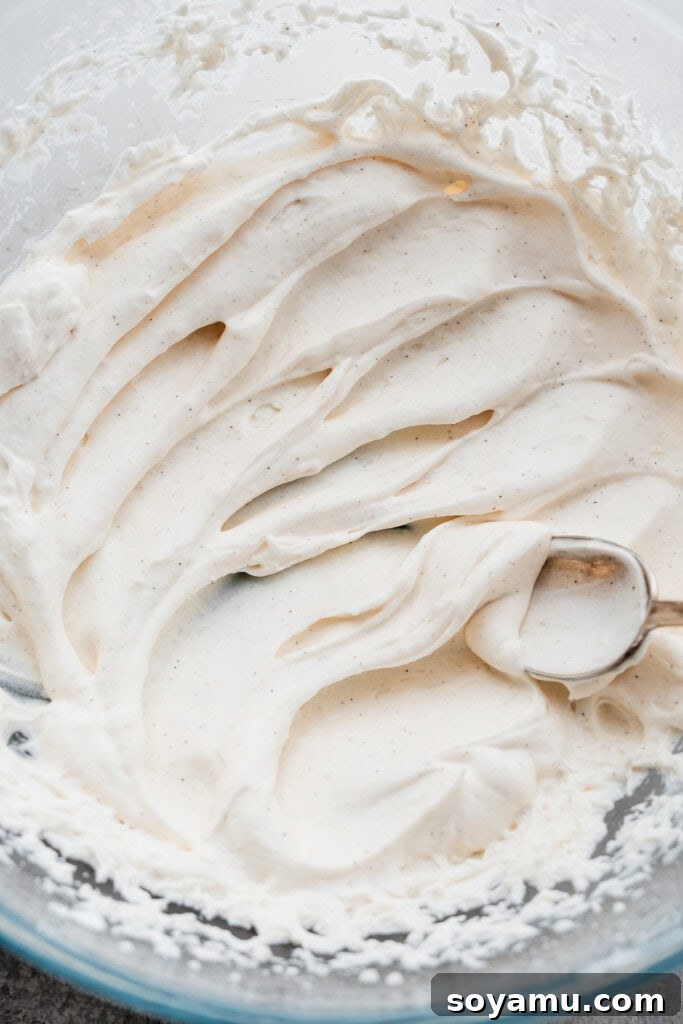
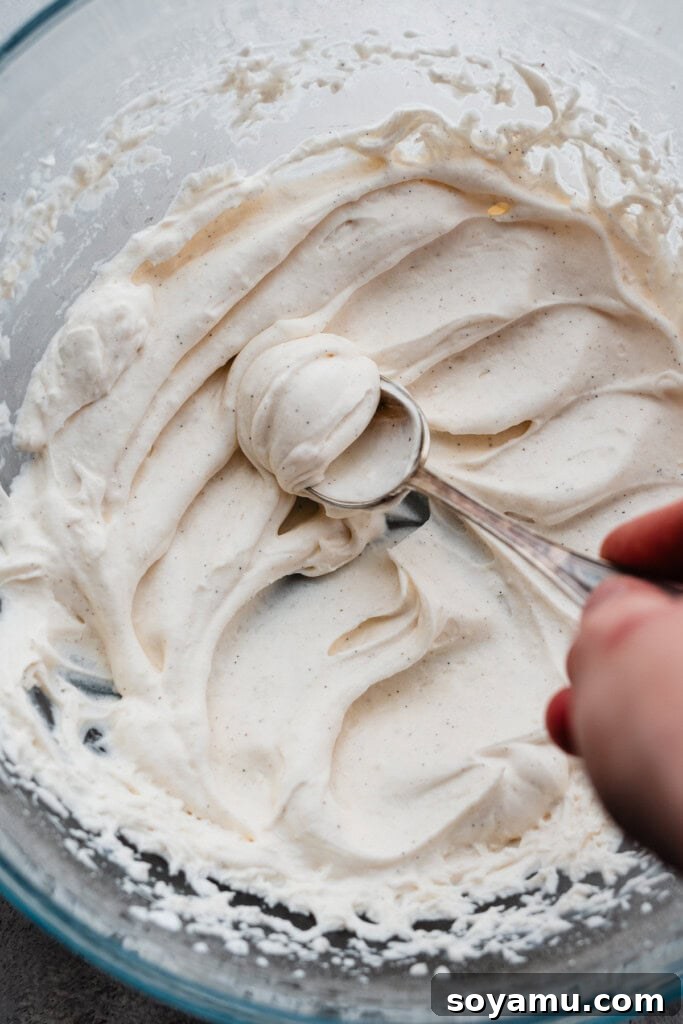
Step 2: Scoop and Nudge.
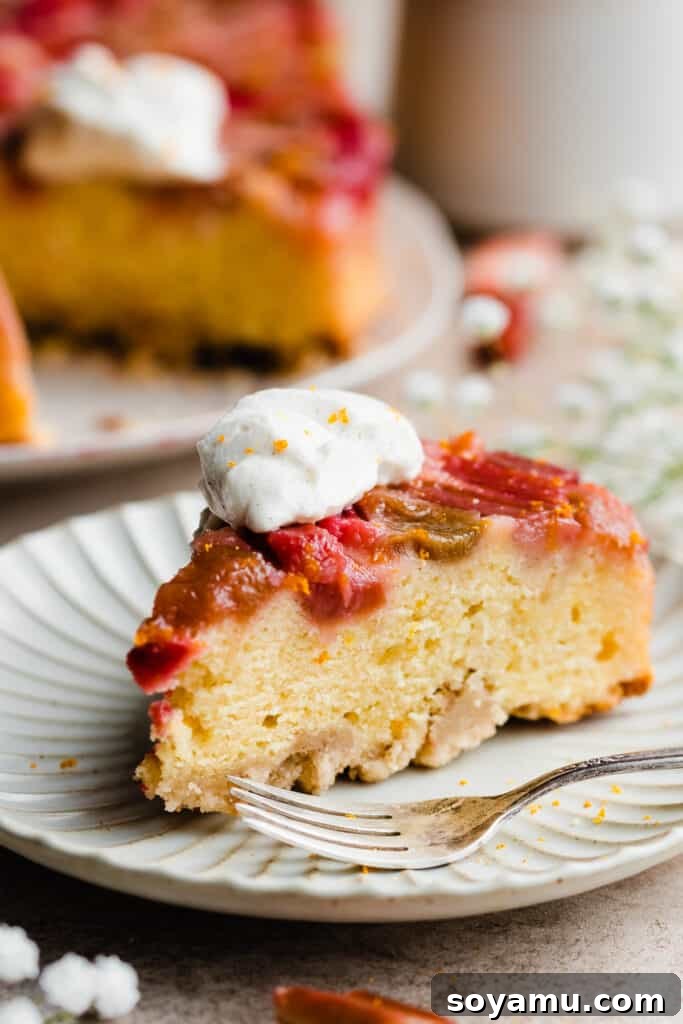
Now, use the spoon almost like a shovel, pushing it vertically through those horizontal waves. As you scoop, the waves will gather and form a gorgeous, textured dollop on your spoon. Gently nudge this elegant dollop off the spoon onto your slice of cake, cheesecake, pie, or fruit. This simple technique transforms a plain scoop into a sophisticated flourish.
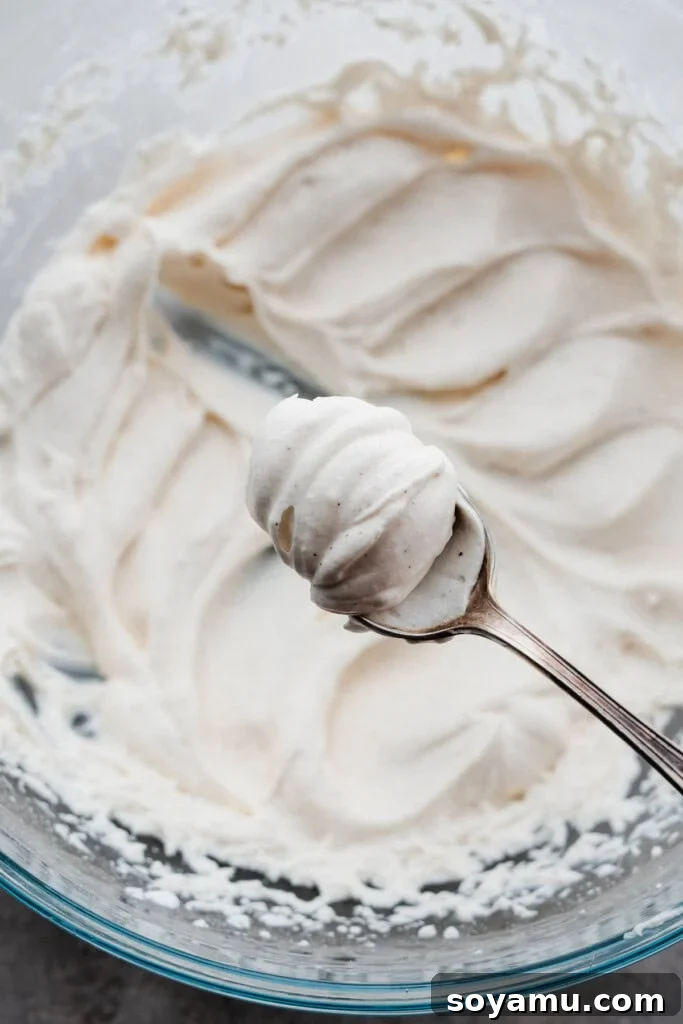
Exploring Alternate Whipping Methods
While an electric mixer is highly efficient, whipped cream can be made using various tools, each with its own advantages and quirks.
- Stand Mixer: The most effortless method. Use a stand mixer fitted with the whisk attachment on medium-high speed. It’s largely hands-free, allowing you to focus on other kitchen tasks. This method is also excellent for stabilizing whipped cream.
- Hand Whisk & Elbow Grease: The classic, artisanal approach. With a sturdy bowl and a good old-fashioned whisk, you can achieve beautiful results. This method takes longer and requires considerable arm strength, so don’t hesitate to share the whisking duty if you have helpers! It produces incredibly light and airy whipped cream and is suitable for stabilization.
- Blender: Surprisingly effective for quick whipped cream in smaller batches, and it often results in a naturally self-stabilizing texture due to the high speed. Add ingredients to a blender and pulse on medium-high for 1-2 minutes, pausing to check consistency. Be careful not to overmix, as it can go from perfect to butter very quickly.
- Food Processor: This can be a tricky method. While it can whip cream quickly, it’s also very easy to overmix, leading to curdled cream. If you choose this route, add ingredients and pulse 8-10 times, then run on low speed (if your processor has multiple settings) until thickened. Watch it like a hawk. Like the blender, it can create a somewhat self-stabilized cream.
- Immersion Blender: My experience with an immersion blender has yielded mixed results. While it produces delicious whipped cream, it often struggles to reach truly stiff peaks, resulting in a slightly runnier consistency. It’s a good option in a pinch if you don’t mind a softer whipped cream, but perhaps not for piping.
- Mason Jar: A fun, hands-on method, especially for kids or very small batches. Simply add your cold cream, sugar, and vanilla to a mason jar, seal tightly, and shake vigorously. It requires significant shaking but is a delightful way to involve everyone. This method is generally not recommended for stabilized whipped cream due to the difficulty of incorporating gelatin evenly.
Inspiring Flavor Variations for Whipped Cream
Beyond classic vanilla, you can easily transform your whipped cream into an exciting flavor experience to perfectly match your dessert.
- Bright Citrus Infusion: Add 1-2 tablespoons of fresh lemon, lime, or orange juice and a teaspoon of zest per cup of heavy cream. Incorporate these at the beginning of the mixing process with the other ingredients. The zest adds aromatic oils, enhancing the fruity notes.
- Fruity Freeze-Dried Powder: For intense fruit flavor, pulse 1/4 cup of freeze-dried fruit (such as strawberries, raspberries, or blueberries) into a fine powder in a food processor. Add this powder to 1 cup of heavy cream at the beginning of mixing.
- Rich Nutella Whipped Cream: Follow similar instructions to step 7 of a Nutella Cheesecake recipe. This type of flavored cream might be softer and harder to achieve firm, pipeable peaks, making it better suited for dolloping onto individual servings.
- Luxurious Mascarpone Whipped Cream: Incorporate mascarpone cheese for an incredibly rich, thick, and stable whipped cream. This variation, often seen in Tiramisu Cheesecake, is excellent for piping and adds a delightful subtle tang.
- Decadent Chocolate Whipped Cream: Add 2 tablespoons of unsweetened cocoa powder per 1 cup of heavy cream along with the powdered sugar and vanilla at the start of mixing. Sift the cocoa powder first to prevent lumps.
- Coffee or Espresso Whipped Cream: Dissolve 1-2 teaspoons of instant espresso powder or very strong cold coffee concentrate into a small amount of warm cream, then chill and add to your whipping cream mixture for a mocha-inspired topping.
- Spiced Whipped Cream: A pinch of cinnamon, nutmeg, ginger, or pumpkin pie spice can transform whipped cream into a cozy autumn or winter topping.
Serving and Storage Best Practices
The freshness of whipped cream is part of its charm, so timing is important.
For unstabilized whipped cream, it is always best to make it and serve it immediately. As it sits, even in the refrigerator, it will gradually begin to lose its structure and “weep” liquid, becoming less appealing in texture. Therefore, avoid making unstabilized whipped cream far in advance or planning for significant leftovers.
However, the story changes entirely with stabilized whipped cream. Once stabilized and piped onto a dessert, it can confidently hold its shape and fresh texture in the refrigerator for several days (typically 2-3 days). This means you can prepare a stunning cheesecake or pie with a beautiful whipped cream topping a day or two before serving without fear of it collapsing into a watery puddle. While the cream itself is best used immediately after whipping for optimal texture, its resilience when stabilized on a dessert offers fantastic convenience for entertaining.
Expert Tips for Whipped Cream Success
A few insider tips can make all the difference in achieving consistently perfect whipped cream.
- Maintain Extreme Coldness: This cannot be stressed enough. Cold cream is paramount. If your cream consistently fails to whip up, its temperature is the most likely culprit. Ensure it’s pulled directly from the coldest part of your refrigerator and start whipping immediately. For extra assurance, pre-chill your mixing bowl and whisk attachment in the freezer for at least 20 minutes before beginning. The colder everything is, the faster and more reliably the cream will whip to firm peaks.
- Whip and Serve Without Delay: Unstabilized whipped cream is a fleeting pleasure. It should be made right when you intend to use it. It’s not a make-ahead component for standalone servings. While a short grace period (15-30 minutes) is usually fine, prolonged waiting or refrigeration will lead to deflation and weeping.
- Taste and Adjust Sweetness: Everyone has a different preference for sweetness. The best time to taste and adjust your whipped cream is when it reaches the soft peaks stage. At this point, you can add a bit more powdered sugar if desired and continue whipping until your desired consistency. Adding sugar too late, when the cream is already at stiff peaks, increases the risk of overmixing.
- Avoid Overmixing: This is a common pitfall. Once the cream reaches stiff peaks, stop immediately! Continuing to beat will cause the fat and liquid to separate, resulting in a grainy, curdled texture (essentially, you’re making butter). It’s easier to under-whip and then whip a little more than to fix an over-whipped batch.
Frequently Asked Questions About Whipped Cream
If your whipped cream has passed the stiff peak stage and appears lumpy, grainy, or slightly curdled, don’t despair! You can often salvage it. Add a few extra tablespoons of cold heavy cream (1-2 tablespoons per cup of original cream whipped) and gently whisk or mix on low speed until the mixture smooths out. You may need to repeat this once or twice. While it might not return to its absolutely perfect texture, this trick often restores enough smoothness for it to be usable. If it’s completely separated into butter and buttermilk, it’s unfortunately beyond repair for whipped cream purposes, but you’ve just made homemade butter!
Flat or deflated whipped cream can occur for several reasons. If it initially reached stiff peaks and then deflated, it was likely left to sit too long before use, especially if unstabilized or left at room temperature. If it never thickened in the first place, the most common culprits are insufficient coldness of the cream (it must be very cold!), expired cream, or using a cream with too low a fat content (like light whipping cream). Ensure your cream is fresh, cold, and has at least 36% milkfat. You generally cannot re-whip deflated cream back to its original volume and texture, so it’s best to start fresh with very cold ingredients.
Absolutely! While a hand mixer is convenient, you have several excellent options. A stand mixer fitted with the whisk attachment is highly recommended for its efficiency and hands-free operation. For a more traditional and active approach, a sturdy bowl and a good old-fashioned hand whisk work beautifully, though it requires more time and effort. Other methods like using a blender or food processor are faster but require careful monitoring to prevent overmixing. Even a mason jar can be used for small batches, offering a fun, interactive way to make whipped cream. Refer to the “Alternate Mixing Methods” section above for a detailed breakdown of each technique.
Recommended Tools for Whipped Cream Perfection
While minimal equipment is needed, having the right tools can make the process even smoother:
- Mixing Tool of Choice: As discussed, a stand mixer with a whisk attachment or an electric hand mixer are the most efficient. A large, deep mixing bowl is essential to contain splatters. For hand whisking, a balloon whisk is ideal.
- Piping Bag and Tips (Optional): If you plan on piping your whipped cream, investing in a reusable piping bag and a few basic decorating tips (like a star tip or a round tip) will allow for beautiful presentations.
- Spatula: Useful for scraping down the sides of the bowl and folding in any additional ingredients.
Delicious Desserts to Pair with Homemade Whipped Cream
Homemade whipped cream is the ultimate companion for an endless array of sweet treats. Here are some ideas to get you started:
- Black Forest Cheesecake
- Peach Cobbler Cheesecake
- Key Lime Cheesecake
- Pineapple Upside Down Cheesecake
- Homemade Strawberry Shortcake
- Pumpkin Pie Cookies
- No-Bake Nutella Tart
- Berries & Cream Cake
- Black Forest Ice Cream (Did you know whipped cream is the foundation for classic no-churn ice cream bases?)
- Fresh Fruit Salads or Berries
- Hot Cocoa or Coffee
- Pancakes, Waffles, or French Toast
Did you make this recipe? Share your thoughts and leave a star rating!
Your feedback is invaluable and helps our small business grow. Thank you for trying our recipe!
Homemade Whipped Cream
Ingredients
For the Whipped Cream:
- 1 cup cold heavy cream (240 grams)
- 1/4 cup powdered sugar (or up to 1/2 cup, depending on your taste)
- 1 tablespoon vanilla extract (or vanilla bean paste for beautiful flecks)
For Stabilizing (Optional):
- 3/4 teaspoon plain gelatin
- 3 teaspoons water
Instructions
-
Prep Your Ingredients: Ensure your heavy cream is straight from the refrigerator and very cold. For best results, chill your mixing bowl and whisk attachment in the freezer for 15-20 minutes before you begin. This extra coldness helps the cream whip up more efficiently and stably.
-
Whip the Cream: In your chilled large mixing bowl, combine the cold heavy cream, powdered sugar, and vanilla extract (or paste). Begin mixing with an electric mixer on medium-high speed. The mixture will splatter a bit at first; you can use a kitchen towel to loosely cover the bowl and mixer to contain this. Continue beating on medium-high to high speed. The cream will gradually thicken, passing through soft peaks (where peaks gently droop) to stiff peaks (where peaks stand firm and upright). Stop mixing immediately once stiff peaks are achieved to prevent curdling. Scrape down the sides and bottom of the bowl to ensure all cream is evenly whipped.
(See the blog post above for detailed troubleshooting if your cream over-whips or deflates.) -
Stabilize Whipped Cream (Optional): If you plan to pipe the cream or need it to hold its shape longer (as shown in photos above), follow these steps: In a small bowl, sprinkle gelatin over water and let it bloom for 5 minutes until thick and gummy. Microwave the bloomed gelatin for 3-5 seconds, or just until it liquifies and becomes clear (do not boil). Let it cool slightly. While whipping your cream (once it has just started to thicken), slowly stream in the liquid gelatin mixture on low speed. Once fully incorporated, continue beating on medium-high speed until stiff peaks form. Your whipped cream is now stable and ready for piping!
-
Serve & Store: Once the desired consistency is reached, serve your whipped cream immediately with your chosen dessert. Unstabilized whipped cream is best enjoyed fresh and is not ideal for making ahead or saving leftovers, as it will quickly lose its structure and weep. However, if stabilized and piped onto a dessert, it will hold up beautifully in the refrigerator for a few additional days without collapsing.
-
Notes: Refer to the detailed sections in the blog post above for alternate mixing methods (stand mixer, whisk, blender, food processor, mason jar), in-depth guidance on stabilizing, piping, and dolloping, and a wide array of flavoring options for your whipped cream.
Nutrition
Nutrition information is automatically calculated and should be used as an approximation.