
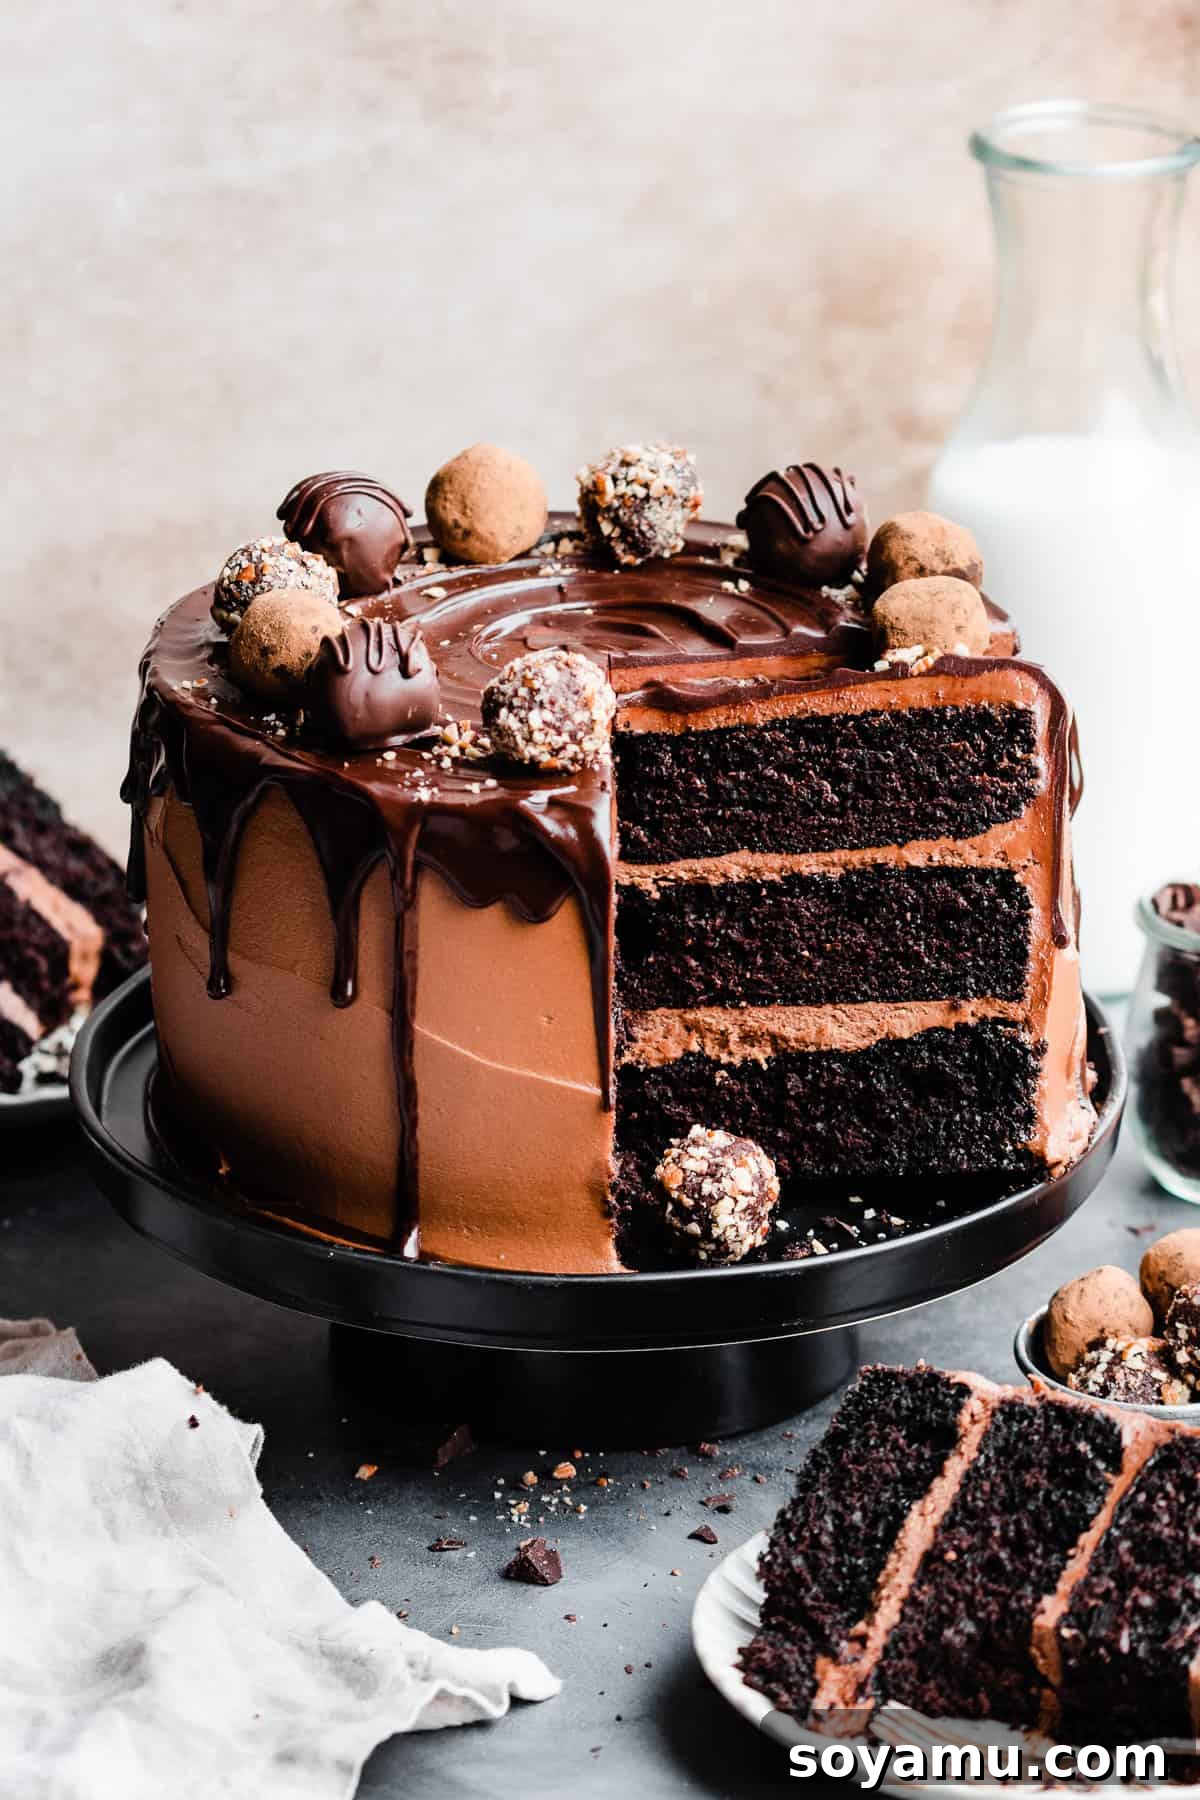
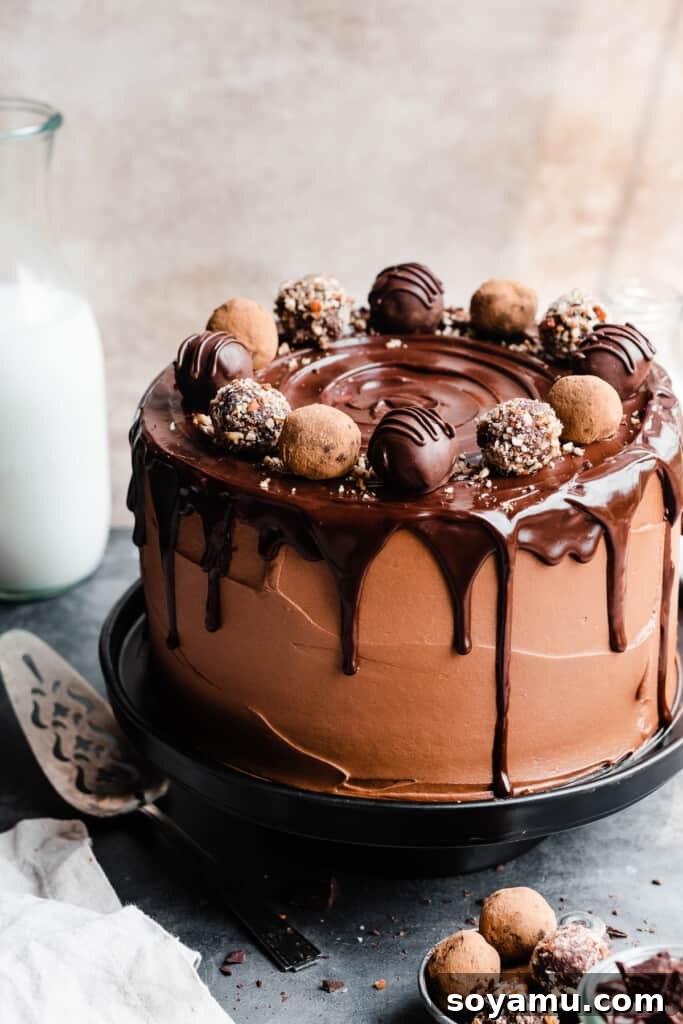
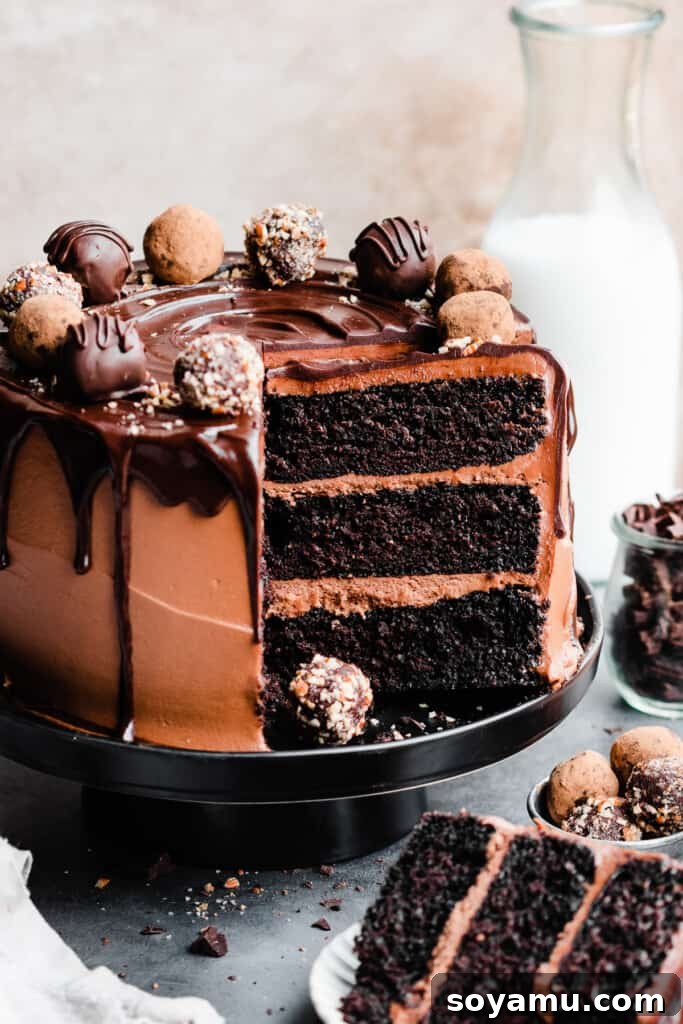
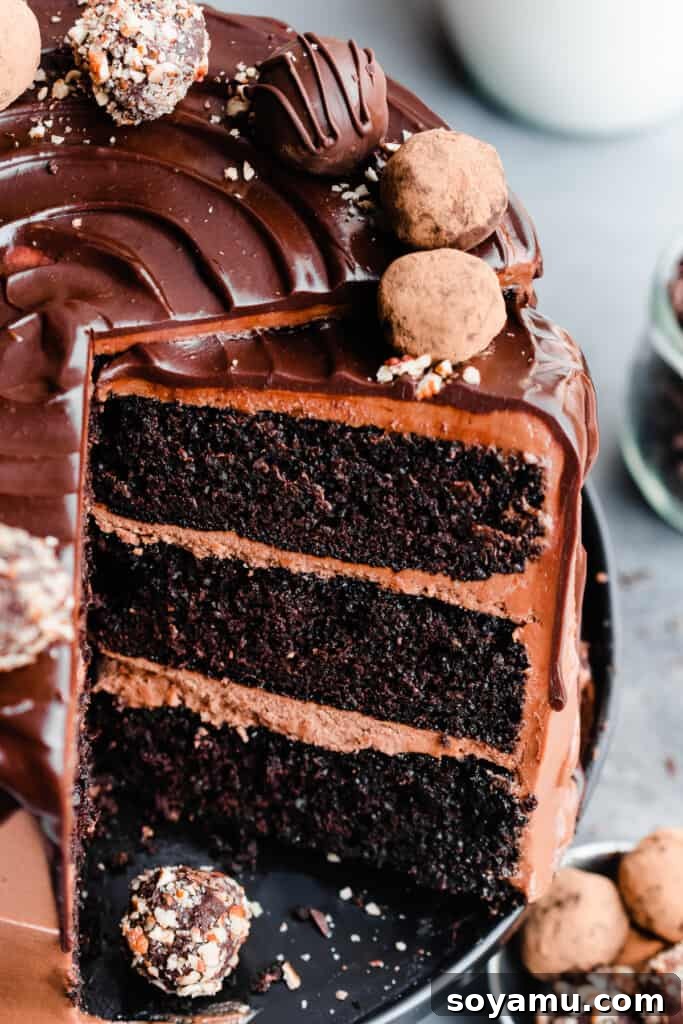
Chocolate Truffle Cake is more than just a dessert; it’s an unforgettable experience for chocolate lovers. Imagine layers of intensely moist, profoundly rich chocolate cake, generously slathered with a velvety milk chocolate buttercream. This masterpiece is then adorned with a glistening chocolate ganache drip and crowned with exquisite homemade chocolate truffles, taking its decadence truly over the top. This stunning creation is the perfect centerpiece for any celebration, promising pure bliss with every bite.
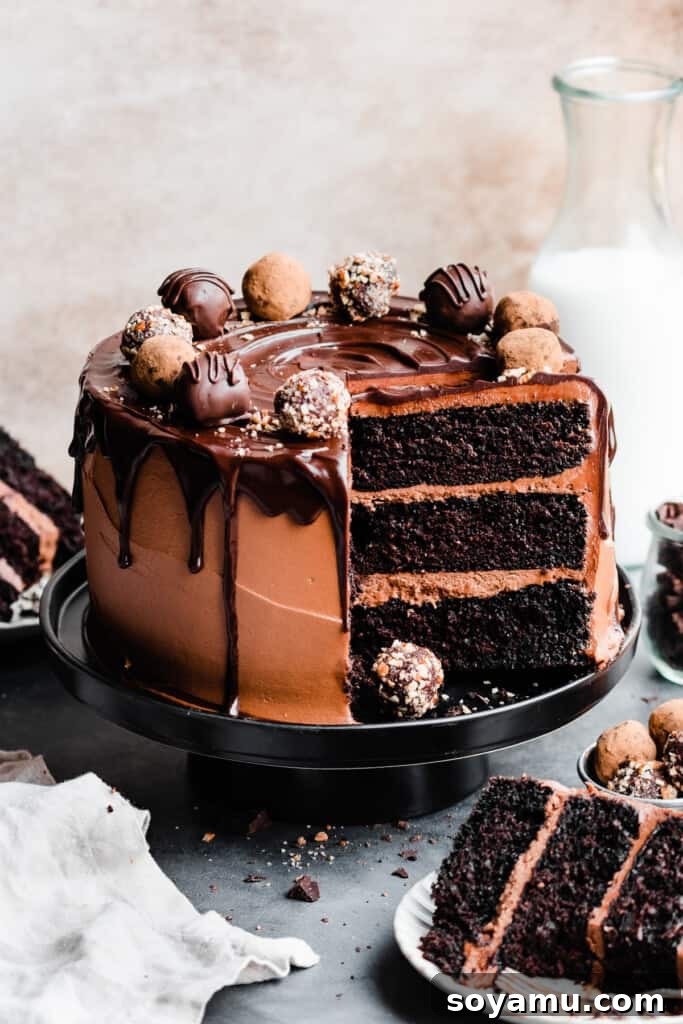
This cake is undeniably a showstopper, making it ideal for the most memorable moments in life. Whether you’re planning for the festive cheer of Christmas, the warmth of Thanksgiving, the romance of Valentine’s Day, or a joyous birthday party, this rich chocolate truffle cake will elevate your gathering. While it comprises several delightful components, there’s no need to feel daunted. This comprehensive guide will meticulously walk you through each step, providing abundant tips and step-by-step visuals to ensure your baking success. For those who find themselves pressed for time, be sure to explore the recipe variations at the bottom of this article for clever time-saving solutions. However, we promise that investing the time and effort into this magnificent creation is truly worthwhile. Let’s embark on this delightful baking journey!
Why You’ll Adore This Decadent Chocolate Truffle Cake
This isn’t just another chocolate cake; it’s a symphony of textures and flavors meticulously crafted for an unparalleled dessert experience. Here’s what makes this Chocolate Truffle Cake truly exceptional:
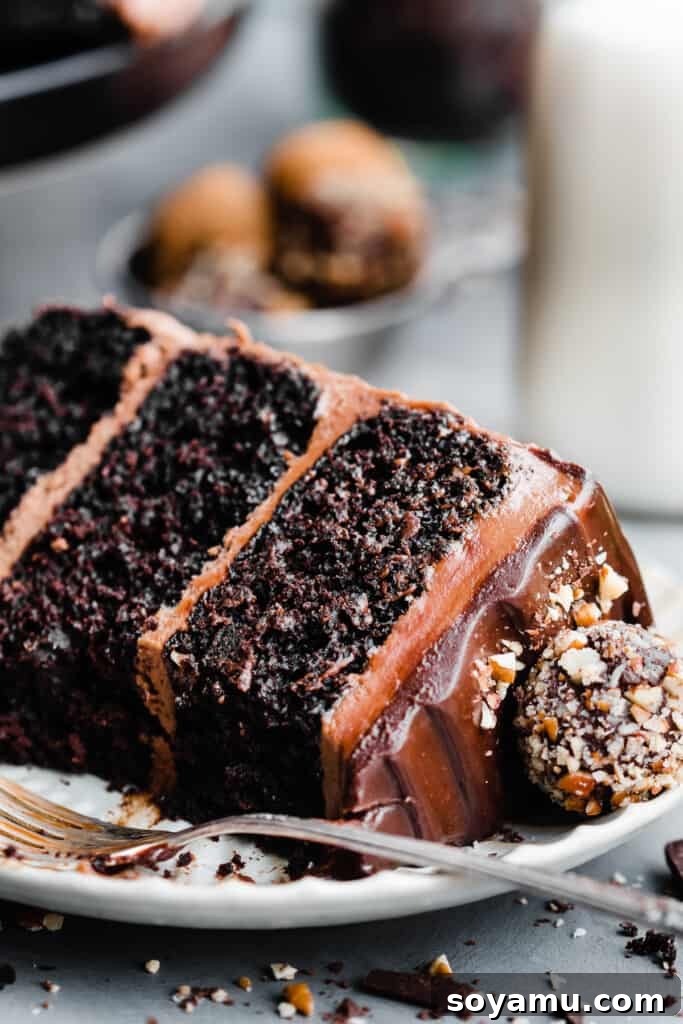
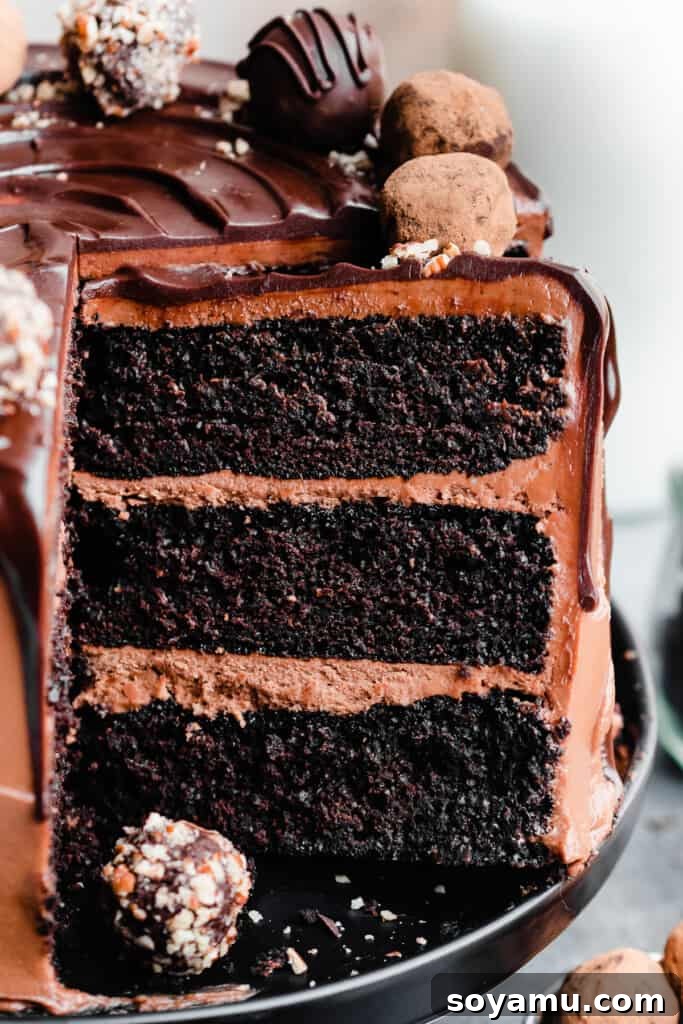
- Unbelievably Moist & Rich Chocolate Cake: Our signature one-bowl chocolate cake recipe is incredibly simple yet yields the most tender, moist, and intensely flavored chocolate layers you’ll ever bake. Its straightforward preparation makes it accessible for bakers of all skill levels, guaranteeing a perfect foundation for this luxurious dessert.
- Velvety Milk Chocolate Frosting: Prepare for a revelation in chocolate frosting. This silky smooth buttercream combines melted milk chocolate with softened butter, powdered sugar, a hint of cocoa, and the secret touch of cream cheese. The result is an impossibly creamy, deeply chocolatey frosting that melts in your mouth, reminiscent of the finest chocolate truffle filling itself.
- Elegant Chocolate Ganache Drip: To fully embody the “truffle” concept, a luscious chocolate ganache drip elegantly cascades down the sides of the cake. Not only does it add a beautiful, professional finish, but it also infuses another layer of rich chocolate flavor, creating a stunning visual and taste experience.
- Handmade Chocolate Truffles: What better way to crown a Chocolate Truffle Cake than with actual, melt-in-your-mouth homemade chocolate truffles? These delightful morsels are surprisingly easy to make with just two core ingredients. Customise them with coatings like cocoa powder, finely chopped nuts, or an extra dip in melted chocolate for a truly spectacular “wow factor.”
Essential Ingredient Overview for Your Truffle Cake:
The precise measurements and detailed instructions for this exquisite Chocolate Truffle Cake can be found in the comprehensive recipe card at the bottom of this post.
- Butter: We champion the use of salted butter in this recipe for its unparalleled flavor depth that beautifully complements the chocolate. However, if unsalted butter is your preference, feel free to use it and simply add a small pinch more salt to the cake batter. Butter, rather than vegetable oil, contributes significantly to the cake’s luxurious richness and tender crumb.
- Sour Cream: For optimal results, always use full-fat sour cream and ensure it’s brought to room temperature before incorporating it into the batter. This allows for better emulsification with other ingredients, leading to a consistently moist and tender cake texture.
- Cake Flour: This specialized flour is a game-changer for cakes, offering a lower protein content than all-purpose flour. This results in a remarkably tender, fine-crumbed cake that truly melts in your mouth. When measuring, always spoon and level your flour to avoid over-measuring, which can lead to a dry cake. A kitchen scale provides the most accurate measurement; typically, 1 cup of cake flour weighs about 110 grams, whereas 1 cup of all-purpose flour is around 130 grams.
- Cocoa Powder: For this recipe, natural cocoa powder is essential, as it reacts with the baking soda to create the perfect rise and texture. Avoid Dutch-processed cocoa, which is alkaline and would disrupt the chemical balance of the leavening agents.
- Milk: We typically use 2% milk for baking because it’s a staple in our kitchen. Any milk (whole, 1%) will generally work, but the fat content can subtly impact the final richness.
- Cream Cheese: Opt for full-fat, block-style cream cheese for the buttercream. Its high fat content is crucial for achieving that signature silky, tangy-sweet balance and rich texture that makes this frosting so irresistible.
- Heavy Whipping Cream: Also known simply as heavy cream, this ingredient is non-negotiable for both the chocolate truffles and the ganache drip. Its high-fat content is vital for creating the stable emulsion and decadent consistency required for these components, and there is no suitable substitute for achieving the desired results.
- Espresso Powder: While not listed in the initial overview, a touch of espresso powder in chocolate recipes doesn’t make the dessert taste like coffee. Instead, it brilliantly deepens and enhances the natural chocolate flavor, making the cake taste even more intensely chocolatey.
Handy Ingredient Substitutions & Customization Options:
Flexibility in baking can be incredibly useful! Here are some tried-and-true substitutions to help you adapt this Chocolate Truffle Cake recipe to various dietary needs or ingredient availability:
- Dairy-Free Adaptation: If you’re looking to make this recipe dairy-free, you can confidently substitute dairy ingredients with your preferred and trusted dairy-free alternatives. This includes dairy-free milk, sour cream, butter, and cream cheese. Always ensure your chosen products are suitable for baking and achieve similar consistencies.
- Gluten-Free Version: As of now, a gluten-free version of this cake has not been extensively tested. However, many bakers have success substituting regular flour with a high-quality 1:1 gluten-free baking flour blend that contains xanthan gum. If you venture into a gluten-free adaptation, we’d love to hear about your results and tips!
- Sour Cream Alternative: In a pinch, full-fat Greek yogurt can serve as an excellent substitute for sour cream. Like sour cream, ensure your Greek yogurt is at room temperature before mixing to prevent curdling and achieve a smooth batter. It will impart a similar tang and moisture to the cake.
- Homemade Cake Flour Substitute: No cake flour on hand? No problem! You can easily create a substitute using all-purpose flour and cornstarch. For every cup of cake flour required, spoon and level 1 cup of all-purpose flour into a measuring cup. Remove two tablespoons of this flour (scoop and level them off). Then, add two tablespoons of cornstarch to the remaining flour in the cup. Sift this mixture twice to ensure the cornstarch is thoroughly and evenly distributed, mimicking the light texture of commercial cake flour. This sifting step is crucial for achieving that desired tender crumb.
- Dark Chocolate Option: If milk chocolate isn’t your preference, you can easily swap it for semi-sweet or even dark chocolate in both the buttercream and ganache components. Adjust the powdered sugar in the buttercream to your taste if using darker chocolate.
Crafting Your Chocolate Truffle Cake: A Step-by-Step Guide
Creating this magnificent Chocolate Truffle Cake is a rewarding process. Follow these detailed steps to ensure every component comes together beautifully.
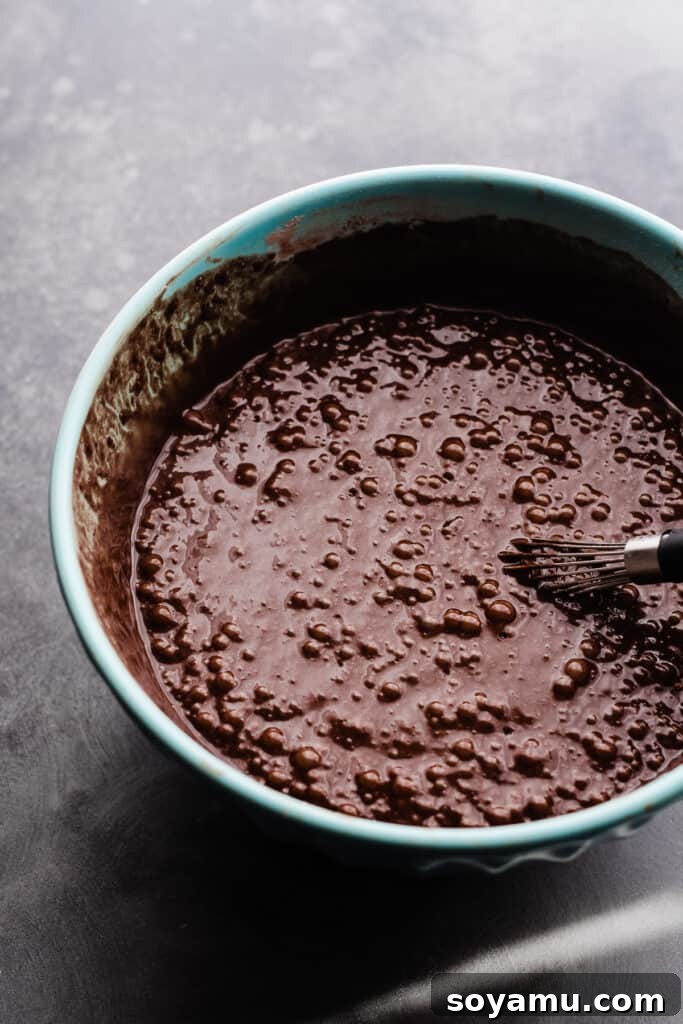
Step 1: Preparing the Ultra-Moist Chocolate Cake Batter. Begin by whisking together all the dry ingredients, including the sugars, cocoa, and leavening agents. Separately, ensure your wet ingredients are at room temperature for optimal mixing. Then, gently mix the wet ingredients into the dry until just combined. This one-bowl method is designed for ease and efficiency, making it the most straightforward and forgiving chocolate cake recipe you’ll ever encounter, delivering incredible flavor and moisture without fuss.
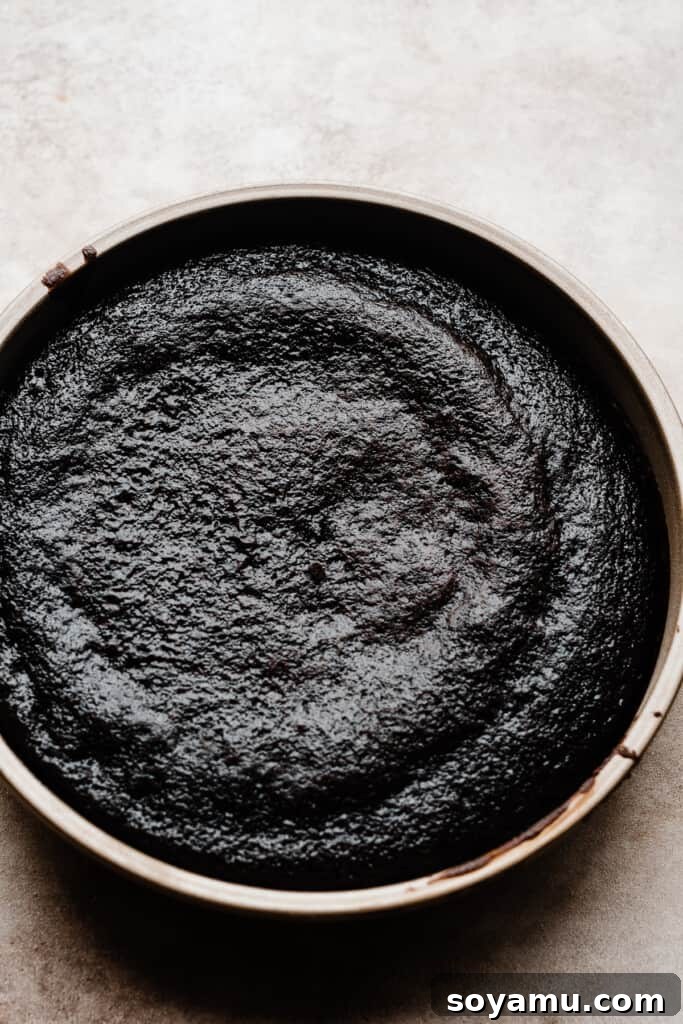
Step 2: Baking the Perfect Cake Layers. Carefully divide the prepared chocolate cake batter evenly among your greased and parchment paper-lined cake pans. For professional results and consistently even layers, we highly recommend using a kitchen scale to ensure each pan receives the exact same amount of batter. Bake the layers as specified in the full recipe card below. Once baked, allow the cakes to cool in their pans on wire racks for approximately 10 minutes before gently inverting them onto cooling racks to cool completely. Patience during this cooling process is key for easy handling and assembly.
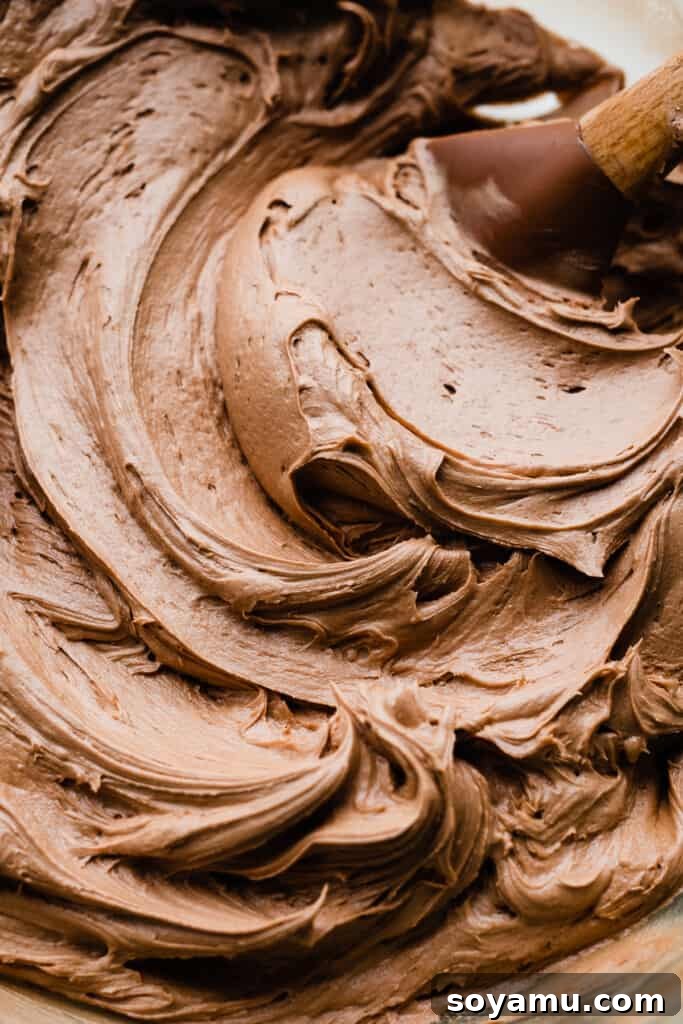
Step 3: Crafting the Silky Milk Chocolate Frosting. In a large mixing bowl, gently melt the milk chocolate until smooth. This forms the luxurious base for our buttercream. Next, beat the softened butter into the melted chocolate until thoroughly combined and creamy. Gradually incorporate the powdered sugar in two additions, mixing well after each to ensure a smooth consistency. Add a splash of milk, a hint of vanilla, and a pinch of salt to balance the flavors. Finally, beat in the softened cream cheese. This final addition is what transforms the frosting into an incredibly luscious, silky, and deeply satisfying buttercream, tasting remarkably like a true chocolate truffle filling.
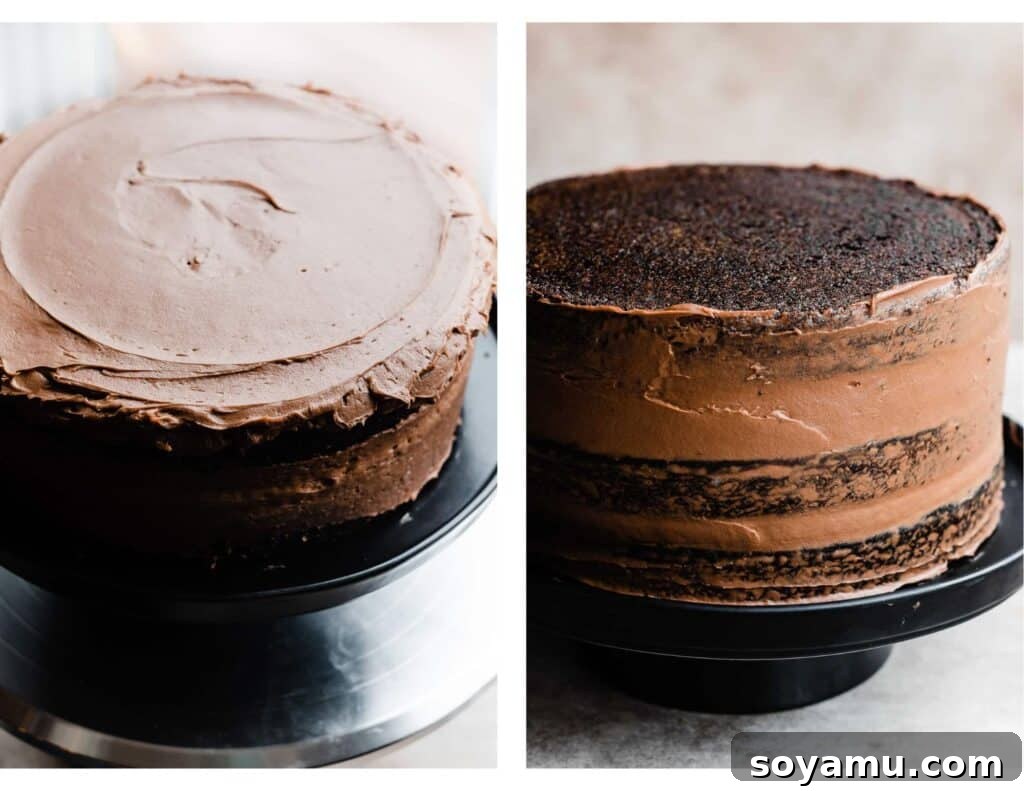
Step 4: Expertly Frosting Your Chocolate Truffle Cake. Position your first cooled cake layer onto a cake stand, ideally on a rotating turntable for ease. Spread a generous, even layer of the milk chocolate frosting over the entire surface, extending slightly beyond the edges. Carefully place the second cake layer on top. For added stability, pop the partially assembled cake into the fridge for about 10 minutes; this brief chill helps set the frosting, preventing layers from sliding during subsequent steps. Repeat the frosting process for the second layer. For a perfectly flat top, place the third cake layer upside down. Apply a thin, even layer of frosting over the entire cake – top and sides – creating what’s known as a “crumb coat.” This traps any loose crumbs, ensuring a pristine final finish. Chill the cake again in the fridge for at least 30 minutes, or even overnight, until the crumb coat is firm. Once firm, apply the remaining frosting to the top and sides, smoothing it out with an offset spatula or cake scraper to achieve a flawless finish. Chill once more to set the final frosting layer.
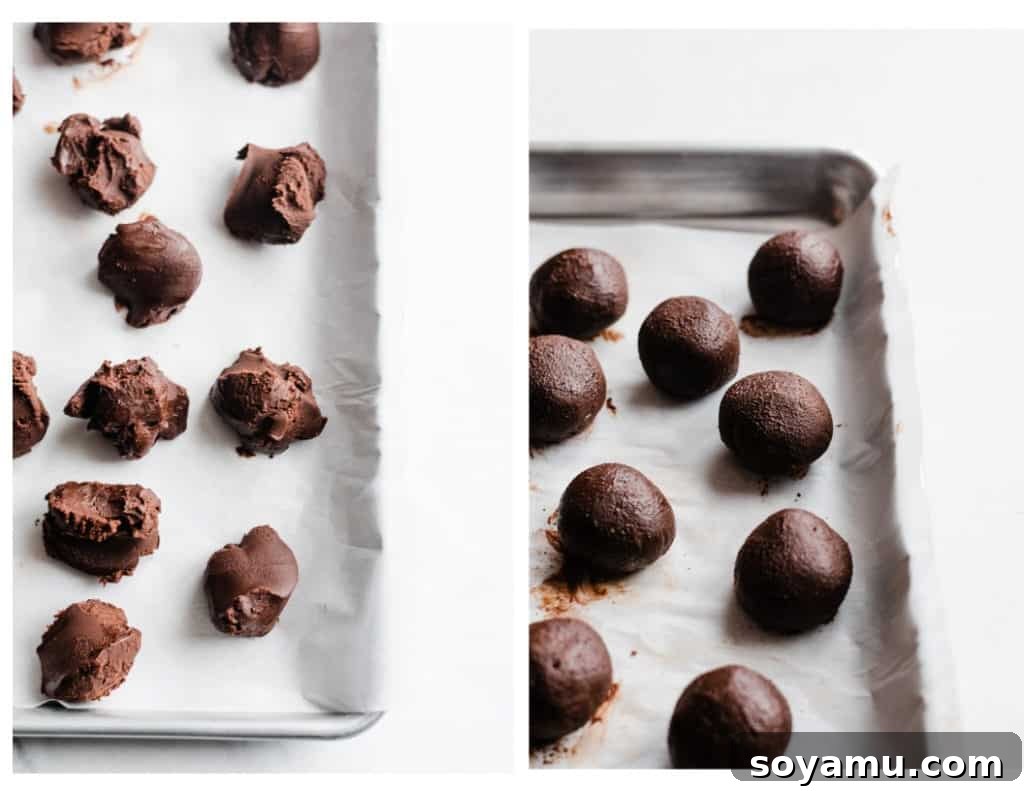
Step 5: Crafting Exquisite Homemade Chocolate Truffles. The foundation of these delightful truffles is remarkably simple, yet yields extraordinary results. Begin by placing finely chopped semi-sweet chocolate in a heatproof bowl. Bring heavy cream to a gentle simmer in a small saucepan, then pour the hot cream directly over the chopped chocolate. Allow the mixture to rest for a few minutes to soften the chocolate, then stir until it transforms into a perfectly smooth, glossy ganache. Chill this ganache in the refrigerator until it becomes solid and firm enough to scoop. Once firm, use a small scoop to form uniform balls, then chill them again briefly to ensure they hold their shape. Finally, roll your chilled truffles in a coating of your choice – be it rich cocoa powder, finely chopped nuts, or even a dip in more melted chocolate for extra indulgence. These elegant truffles can be prepared 2-3 days in advance, making your final assembly even smoother!
Step 6: The Grand Finale – Decorating Your Masterpiece. Once your beautifully frosted cake has had ample time to chill and the frosting is firm, it’s time for the signature chocolate drip. This elegant ganache is prepared in much the same way as the truffle base: simmering heavy cream poured over finely chopped chocolate, stirred until smooth. For detailed guidance on achieving a flawless chocolate drip, refer to our “Expert Success Tips” section below. With the ganache drip set, artfully arrange your homemade chocolate truffles on top of the cake. For an extra touch of sophistication, consider adding a sprinkle of chopped nuts or chocolate shavings. Your magnificent Chocolate Truffle Cake is now complete and ready to impress!
Serving & Storing Your Decadent Chocolate Truffle Cake:
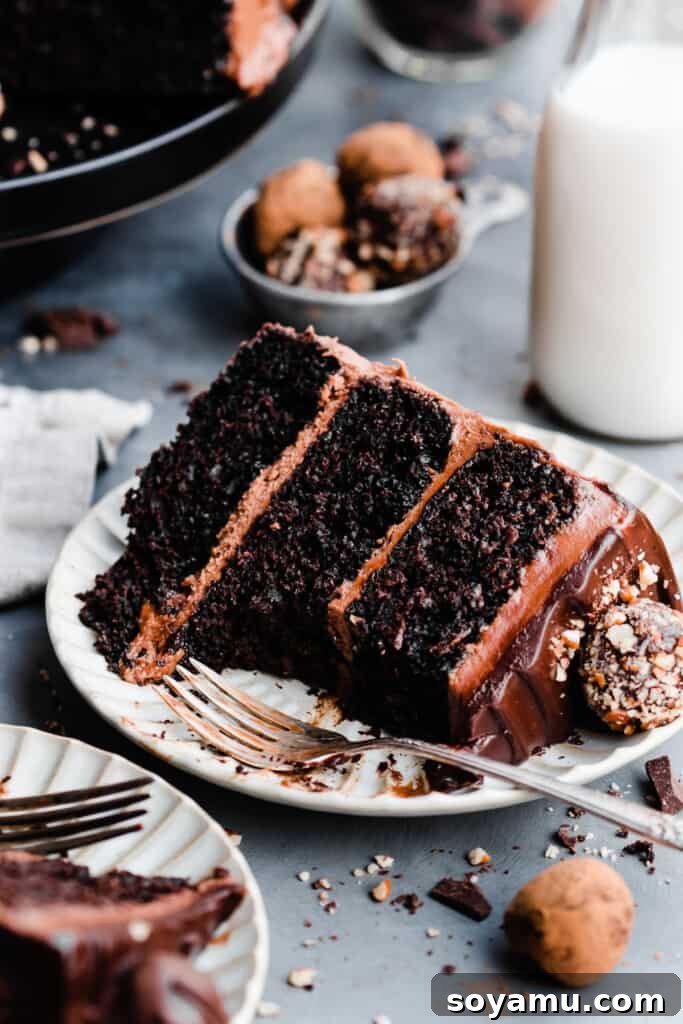
To enjoy your Chocolate Truffle Cake at its absolute best, allow it to stand at room temperature for 15-20 minutes before slicing. This slight warming will soften the buttercream and ganache, making it easier to cut and ensuring a perfectly tender texture with every forkful. For impeccably clean slices, use a sharp, thin-bladed knife, wiping it clean between each cut.
Should you miraculously have any leftovers (though we doubt it!), store them in an airtight container in the refrigerator for 3-4 days. This will keep the cake moist and the frosting fresh. For longer storage, individual slices or the entire cake (without truffles on top, if possible) can be wrapped tightly in plastic wrap and then aluminum foil, and frozen for up to 1-2 months. Thaw overnight in the refrigerator before bringing to room temperature to serve.
Expert Success Tips for a Flawless Chocolate Truffle Cake:
Achieving bakery-quality results at home is easier than you think with these expert tips:
- Invest in an Oven Thermometer: The accuracy of your oven’s temperature is paramount for consistent baking results. An inexpensive oven thermometer will reveal if your oven is running hot or cold. Keeping one inside at all times allows you to monitor its calibration and adjust accordingly for perfect bakes.
- Precision with a Kitchen Scale: For truly consistent and professional baking, a food scale is invaluable. Flour measurements, especially, can vary significantly depending on how it’s scooped. Weighing your ingredients ensures the correct proportions, preventing dry or dense cakes caused by too much flour.
- Mastering Chocolate Truffles: While we provide clear instructions here, for an even deeper dive into the art of making perfect chocolate truffles, explore our dedicated Black Forest Truffles post. It offers additional nuanced tips and tricks that apply to all truffle making.
- Mindful Powdered Sugar Incorporation: When adding powdered sugar to your buttercream, always do so on medium-low speed. This simple trick prevents a messy cloud of sugar from erupting in your kitchen, keeping your workspace clean and your frosting perfectly smooth.
- Room Temperature Ingredients Are Crucial: For the cake batter and buttercream, ensure all dairy products and eggs are at room temperature. This allows them to emulsify properly, creating a smoother batter, preventing curdling, and contributing to a lighter, more uniform cake texture and a creamier frosting.
- Don’t Overmix the Batter: After combining wet and dry ingredients for the cake, mix only until just combined. Overmixing develops gluten, which can lead to a tough, dry cake. A few small lumps are perfectly fine.
- Quality Chocolate Matters: Since chocolate is a star ingredient in this truffle cake, invest in good quality baking chocolate bars for melting. Chocolate chips often contain stabilizers that prevent them from melting as smoothly, which is crucial for silky buttercream and ganache.
- Patience with Chilling: Chilling steps for both the cake assembly and truffles are not optional; they are vital for success. Chilling helps firm up frosting, prevents layers from sliding, and ensures truffles can be rolled perfectly. Plan your baking schedule accordingly to allow for these essential chilling times.
Frequently Asked Questions About This Chocolate Truffle Cake:
Absolutely! This versatile recipe can be easily scaled down to suit your needs. You can halve the entire recipe to make two gorgeous 8-inch round cake layers, or one substantial 9×9 inch square layer. Alternatively, if you’re looking for an even smaller treat, scale the recipe down to one-third of a batch to yield a single 8 or 9-inch cake layer. Just remember to adjust baking times accordingly for smaller layers.
Yes, this chocolate cake batter is perfectly suited for cupcakes! The full quantity of cake batter in this recipe will generously yield approximately 48 standard-sized cupcakes. If you prefer a smaller batch, half of the recipe will produce around 24 cupcakes, and a quarter batch will give you about 12. Adjust baking time for cupcakes, typically 18-22 minutes, or until a toothpick inserted comes out clean.
Certainly! Strategic planning can make assembling this decadent cake much less stressful. The individual cake layers can be baked, fully cooled, and then stored tightly wrapped in plastic wrap on dinner plates at room temperature for up to 24 hours before you plan to assemble and frost the cake. The chocolate truffles are also excellent candidates for advance preparation; they can be made 2-3 days ahead of time and kept in an airtight container in the refrigerator. For the freshest and most vibrant flavor and texture, we recommend preparing the milk chocolate frosting on the day you plan to assemble and serve the cake.
Creative Recipe Variations to Inspire You:
Personalize your Chocolate Truffle Cake with these delightful twists:
- Alternative Chocolate Buttercream: If milk chocolate isn’t your preferred flavor profile, you can easily substitute it with semi-sweet or even dark chocolate in the buttercream. For a classic, rich dark chocolate frosting, consider adapting the frosting recipe from our Tuxedo Cake, adjusting to a full chocolate base.
- Time-Saving Shortcut: For those days when you need to shave a bit of time off the preparation, don’t hesitate to use your favorite high-quality store-bought chocolate truffles to adorn the top of your cake. They’ll still provide that impressive finish with minimal effort.
- Flavor Infusion: Add a teaspoon or two of your favorite liqueur to the ganache drip or truffle mixture for an adult twist. Think raspberry liqueur, orange liqueur, or a classic coffee liqueur to complement the chocolate beautifully.
- Nutty Crunch: Incorporate finely chopped toasted nuts (like pecans or hazelnuts) into the cake batter for an added layer of texture and flavor, or sprinkle them between the cake layers for a delightful surprise.
Recommended Special Tools for Effortless Cake Baking:
While not strictly necessary, these tools can significantly enhance your baking experience and help achieve professional-looking results:
- Quality Cake Pans: Investing in reliable cake pans makes a world of difference. Our absolute favorites are these 9-inch cake pans. We’ve used them for over six years for every cake recipe, and they consistently deliver even baking and remain in excellent condition.
- Offset Spatula: An offset spatula is a pastry chef’s best friend. Its angled blade makes spreading frosting, leveling cake batters, and assembling cake layers incredibly easy and precise, giving your cakes a smooth, professional finish.
- Cake Turntable: If you enjoy baking cakes even a few times a year, a cake turntable is a worthwhile addition to your kitchen. It rotates smoothly, allowing you to frost and decorate your cake with ease and achieve perfectly even coverage without constantly moving around the cake yourself.
- Kitchen Scale: As mentioned in our expert tips, a kitchen scale ensures precise ingredient measurements, which is fundamental for consistent and delicious baking, especially for flour and other dry ingredients.
More Decadent Cake Recipes to Explore:
If you’ve fallen in love with this Chocolate Truffle Cake, you’re sure to enjoy these other delightful cake creations from our collection:
- White Forest Cake: A beautiful twist on a classic, featuring white chocolate and cherries.
- Berries & Cream Cake: A lighter, fruity option perfect for summer gatherings.
- Ultimate Cookie Dough Cake: Indulge your inner child with layers of cake and edible cookie dough.
- German Chocolate Cake: A rich, classic chocolate cake with a unique coconut-pecan frosting.
- Tuxedo Cake with Whipped White Chocolate Ganache: A sophisticated blend of dark and white chocolate for an elegant dessert.
Did you create this recipe? We’d love to see it! Share a photo and leave a comment below!
Be sure to follow bluebowlrecipes on Instagram and tag #bluebowlrecipes with your photo! You can also post a picture of your culinary creation to the bluebowlrecipes Facebook page. We can’t wait to see what you make!
Chocolate Truffle Cake
Pin
Rate
Ingredients
Chocolate Cake
- 2 cups hot water, 472 mL
- 1 and 1/2 cups + 2 tbsp cocoa powder, 157 grams
- 3 cups cake flour, 330 grams
- 2 and 1/4 cups light brown sugar, packed, 488 grams
- 1 cup granulated sugar , 206 grams
- 3 tsp baking soda
- 1 and 1/2 tsp baking powder
- 3/4 tsp salt
- 2 tsp espresso powder
- 1 and 1/2 cups full fat sour cream, at room temperature, 360 grams
- 1/4 cup milk, 60 mL
- 4 large eggs, at room temperature
- 1/2 cup vegetable oil, 106 mL
- 1 and 1/2 tsp vanilla extract
For the Milk Chocolate Buttercream
- 12 ounces milk chocolate, use good-quality baking bars, not chocolate chips
- 1 and 1/2 cups salted butter, 3 sticks, 24 tbsp, or 339 grams
- 4 cups to 5 cups powdered sugar, 460 to 575 grams
- 3/4 cup + 1 tbsp cocoa powder
- 1 tbsp vanilla extract
- pinch of salt, to taste
- 12 ounces cream cheese, softened at room temperature, 340 grams
For the Chocolate Drip:
- 4 ounces semi-sweet chocolate, finely chopped, 113 grams
- 1/2 cup heavy cream, 4 ounces, 118 mL
- 1-2 tsp vegetable oil
For the Chocolate Truffles
- 12 ounces semi-sweet chocolate, finely chopped
- 8 ounces heavy cream
- chopped nuts, cocoa powder, or more melted chocolate, for dipping/rolling
Prevent your screen from going dark
Instructions
-
Prep: Preheat your oven to 350 ℉ (175 °C). Grease three 9-inch (23 cm) cake pans with shortening. Place a parchment paper circle in the bottom of each, then grease over that. Lightly dust the inside of each pan well with flour, gently tapping out any excess.
-
Make the Chocolate Cake Batter: Measure the hot water into a 4-cup glass measuring cup or a large bowl, then whisk in the cocoa powder until it is completely dissolved and no lumps remain. Set this aside to cool down to room temperature. In a separate large mixing bowl, whisk together all the dry ingredients (cake flour, both sugars, baking soda, baking powder, salt, and espresso powder). Next, add all the wet ingredients – including the room temperature cocoa and water mixture, sour cream, milk, eggs, vegetable oil, and vanilla extract – to the dry ingredients. Whisk until just combined. It’s normal to have a few small lumps, which is perfectly fine; avoid overmixing.
-
Bake Cake Layers: Divide the cake batter evenly between the three prepared cake pans. For precise distribution, use a kitchen scale to weigh the total amount of batter and then divide by three. Bake for 23 to 27 minutes, or until a wooden toothpick inserted into the center of a cake layer comes out with moist crumbs attached. Let the cakes cool in their pans on wire racks for 10 minutes before running a butter knife around the edge to loosen them, then invert the layers onto a cooling rack to cool completely.
Tip: To ensure an even bake across all layers, rotate your cake pans halfway through the baking time, as ovens often have hot spots.
-
Prepare the Milk Chocolate Frosting: In a large mixing bowl, melt the milk chocolate using a microwave (in 30-second intervals, stirring between each) or a double boiler until smooth. Allow it to cool slightly. Beat the softened butter into the cooled melted chocolate until well combined and creamy. Add the powdered sugar in two additions, mixing thoroughly after each. Start with 4 cups and taste; you can add up to 5 cups to achieve your desired sweetness and consistency.
Now, add all remaining ingredients for the frosting except the cream cheese (i.e., milk, vanilla extract, cocoa powder, and salt). Beat until combined. Finally, mix in the softened cream cheese very last, beating until the frosting is light, fluffy, and impeccably smooth. This creates the most luscious frosting!
-
Assemble and Frost the Cake: Place the first cooled cake layer onto a cake stand, preferably positioned on a turntable. Spread about 1 and 1/2 cups of frosting evenly over the layer, extending slightly past the edge. Place the second cake layer on top and gently press down. For stability, chill the cake in the fridge for 5-10 minutes to help set the frosting and prevent layers from sliding. Repeat the frosting process with the second layer. Add the final cake layer upside down to achieve a perfectly flat top surface. Apply a thin, even layer of frosting over the entire cake (top and sides) to create a “crumb coat.” Use a cake scraper or offset spatula to smooth it out and remove any excess. Don’t worry if it’s not perfect; its purpose is to trap crumbs. Pop the cake back into the fridge for 30 minutes, or until this crumb coat is firm. Then, apply the remaining frosting to the top and sides, smoothing meticulously with your cake scraper or offset spatula for a beautiful finish. Chill the entire frosted cake in the fridge for at least 30 minutes, or until fully set, before adding the chocolate drip.
Tip: If at any point your frosting becomes too soft to work with due to sitting out, simply return it to the fridge for a short period to firm up.
-
Create the Chocolate Drip: Place finely chopped semi-sweet chocolate into a small heatproof bowl. In a small saucepan, heat the heavy cream over medium heat until it just begins to simmer around the edges. Pour the hot cream over the chopped chocolate, let it sit undisturbed for 4 minutes to allow the chocolate to melt, then stir until the mixture is completely smooth and glossy. If needed, add 1-2 teaspoons of vegetable oil to achieve a pourable, slightly thinner consistency. Remove the chilled, frosted cake from the fridge and place it on a turntable. Pour the ganache into the center of the cake’s top. Slowly spin the cake while gently pushing the ganache towards the edges with an offset spatula, allowing it to drip naturally down the sides. Once the drip is complete, return the cake to the fridge for 20-30 minutes, or until the ganache drip is set.
-
Make the Chocolate Truffles: Finely chop the semi-sweet chocolate and place it into a microwave-safe bowl. In a small pot, heat the heavy cream over medium heat until it simmers. Pour the hot cream over the chopped chocolate and let it sit for 5 minutes without stirring. Then, stir the mixture gently until it becomes completely smooth and emulsified. If any small chocolate lumps remain, microwave the mixture for 15-second intervals, stirring well after each, until perfectly smooth. Pour the ganache into a shallow dish (such as a glass pie plate) to cool and set more quickly. Cover the surface directly with plastic wrap to prevent a skin from forming, and chill in the refrigerator for 1 and ½ to 2 hours, or up to 24 hours, until firm.
Once the ganache mixture is thoroughly chilled and firm, line two baking sheets with parchment paper. Using a small cookie scoop or a tablespoon, scoop out scant tablespoon-sized mounds of the cooled chocolate. Place these mounds onto the prepared pans. After all the chocolate has been scooped, go back and roll each mound into smooth, uniform balls between your palms. If the truffles become too soft to handle, place the pan (covered with a kitchen towel) back into the fridge for 10-20 minutes to firm up. Let the rolled chocolate truffles chill again for an additional 20-30 minutes before decorating. To finish, roll the chilled truffles in finely chopped walnuts or pecans, dust them generously with cocoa powder, or dip them in additional melted chocolate for a glossy finish. Store your homemade chocolate truffles in an airtight container in the fridge for up to a week.
-
Serve & Store: Once the cake is completely chilled and the ganache drip has set, artfully arrange your homemade chocolate truffles on top. For an extra touch, you can sprinkle with additional chopped nuts (optional). Slice and serve your magnificent Chocolate Truffle Cake! Any remaining slices should be stored in an airtight container in the fridge for 4-5 days to maintain freshness.
Nutrition
Nutrition information is automatically calculated, so should only be used as an approximation.
Love this recipe? Share your thoughts below!