
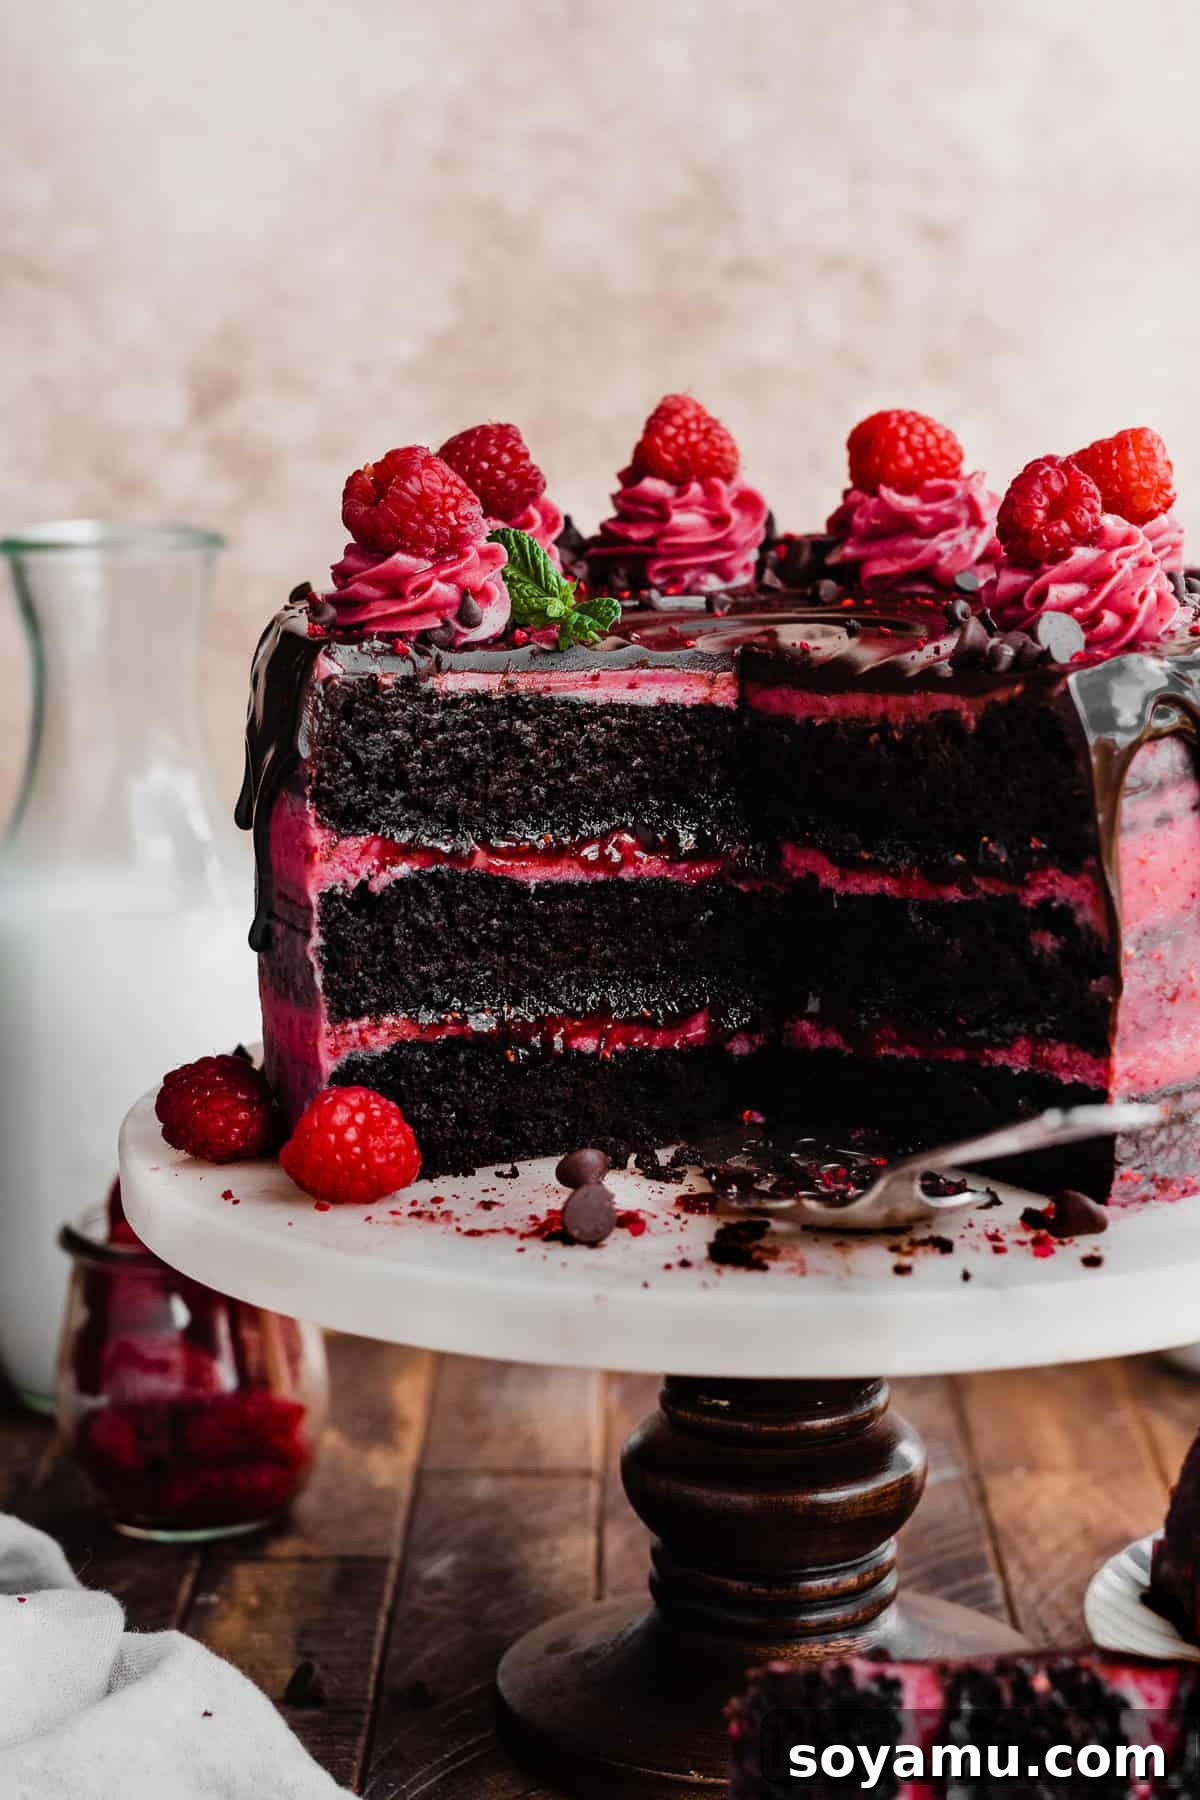
Chocolate Raspberry Cake: The Ultimate Celebration Dessert
Published: February 2020. Updated: August 2023.
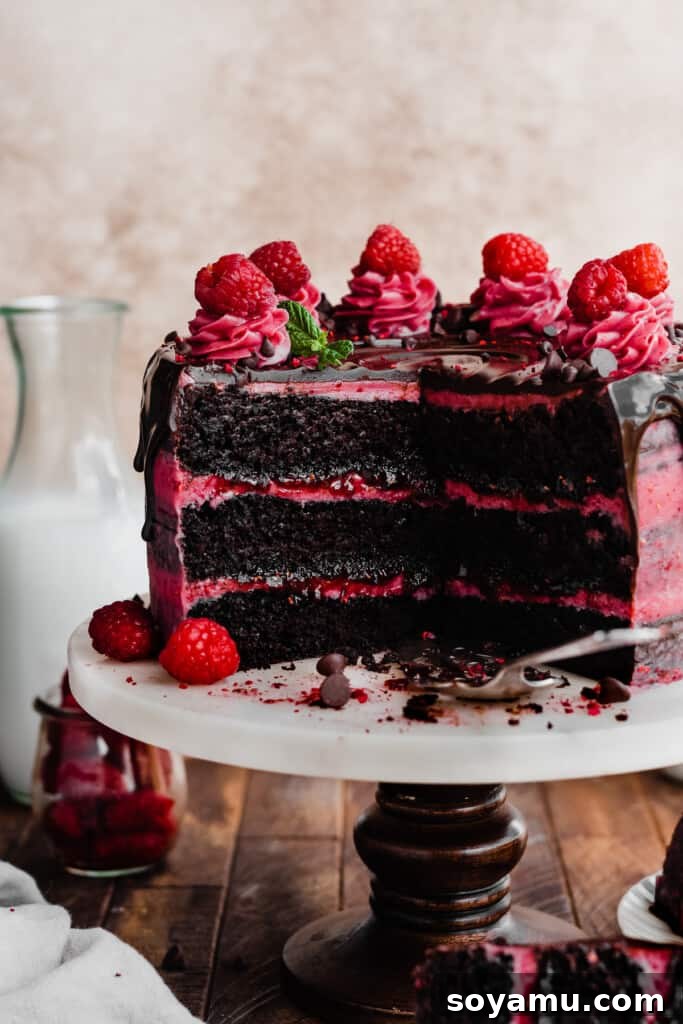
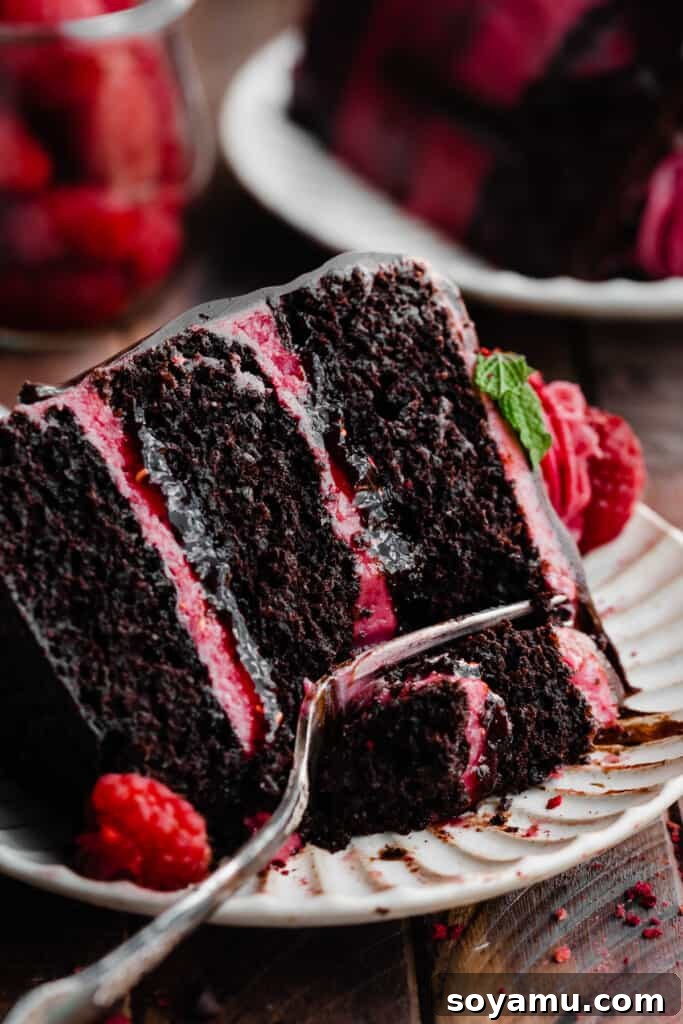
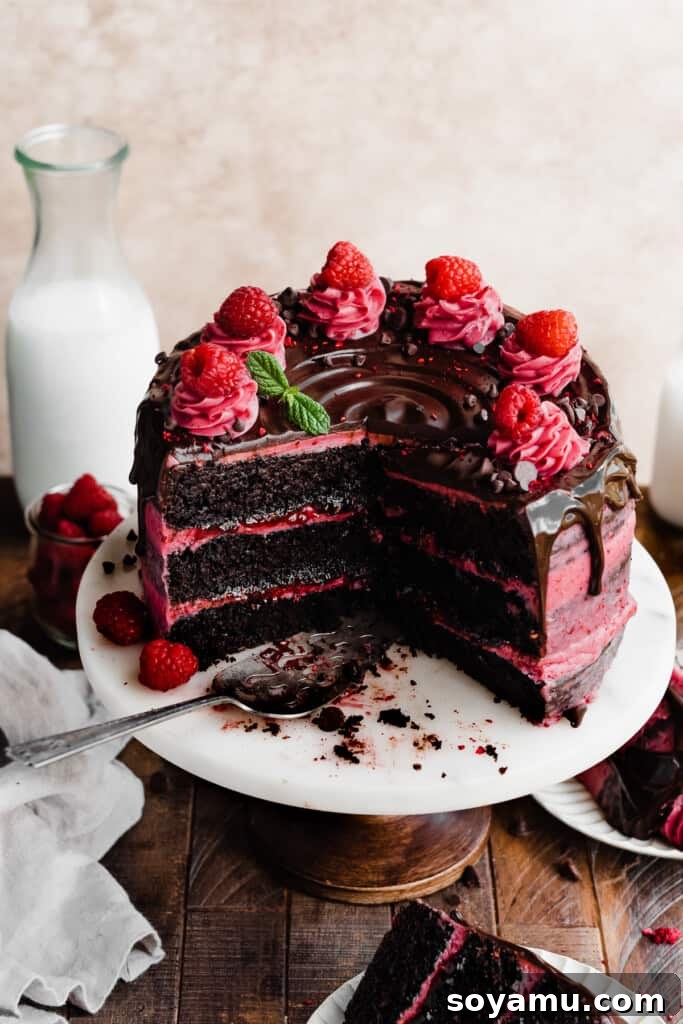
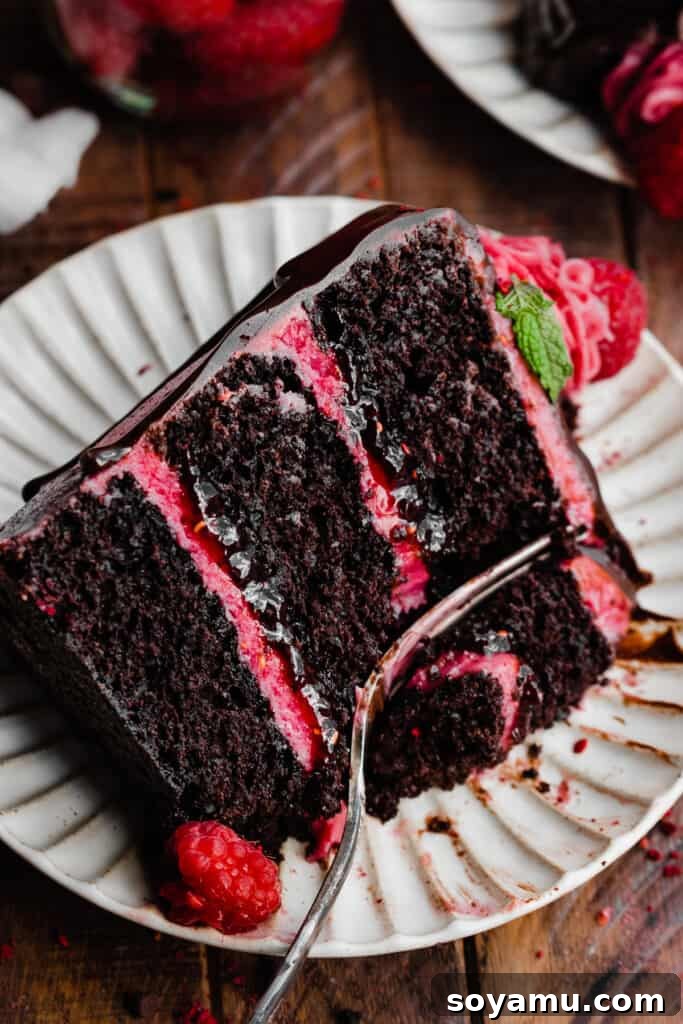
Prepare to be captivated by the sheer indulgence of this spectacular Chocolate Raspberry Cake. This recipe delivers an experience of rich, deeply flavored chocolate cake layers, generously frosted with a vibrant Raspberry Cream Cheese Frosting. Each slice is further enhanced by a luscious filling of sweet raspberry preserves and crowned with an elegant, glistening chocolate ganache drip. Designed for ease without compromising on gourmet taste, this cake promises an ultra-moist texture and an unforgettable fusion of bright raspberry and decadent chocolate flavors. Whether it’s a birthday, anniversary, holiday gathering, or simply a moment to treat yourself, this Chocolate Raspberry Cake is truly the perfect centerpiece for any celebration, guaranteed to impress every guest at your table.
Why This Raspberry Chocolate Cake Will Become Your New Favorite
This isn’t just another cake recipe; it’s a symphony of flavors and textures meticulously crafted for perfection. Here are the compelling reasons why you’ll fall head over heels for this exquisite Chocolate Raspberry Cake:
- Effortless, Rich Chocolate Cake: Forget complicated techniques! Our one-bowl chocolate cake recipe is remarkably simple to prepare, making it accessible for bakers of all skill levels. Despite its ease, it yields an incredibly rich, dark, and wonderfully moist crumb that forms the perfect foundation for this elegant dessert. Its deep chocolate notes are the ideal counterpart to the tangy raspberries.
- Luxuriously Creamy Raspberry Frosting: The secret to this cake’s irresistible charm lies in its frosting. A velvety smooth cream cheese frosting is infused with a powerful burst of natural raspberry flavor, creating a delightful contrast to the rich chocolate. This frosting isn’t just delicious; it’s beautifully colored and spreadable, making decoration a joy.
- Bursting with Raspberry Preserves: For an extra layer of bright, authentic fruitiness, we incorporate store-bought raspberry preserves as a luscious filling between the cake layers. This quick and easy addition ensures every bite is packed with the sweet and slightly tart essence of raspberries, beautifully complementing the chocolate and the frosting.
- Elegant Chocolate Ganache Drip: Elevate your cake from delicious to dazzling with a stunning chocolate ganache drip. This glossy, rich topping adds not only another dimension of chocolate flavor but also a professional, show-stopping finish that makes the cake look as incredible as it tastes. It’s surprisingly simple to achieve and transforms the cake into a true masterpiece.
Essential Ingredients for Your Chocolate Raspberry Cake:
Crafting this exquisite cake begins with selecting the right ingredients. Each component plays a vital role in achieving the perfect balance of flavor and texture. For precise measurements and step-by-step instructions, please refer to the detailed recipe card at the conclusion of this article.
- Raspberry Preserves: Opt for high-quality raspberry preserves over standard jam. Preserves typically contain more fruit pieces, offering a superior depth of flavor and a more desirable texture that truly shines in the filling.
- Freeze-Dried Raspberries: This is our secret weapon for intensely flavored, beautifully colored raspberry frosting without the risk of it becoming runny. Unlike fresh raspberries, which introduce excess moisture, freeze-dried raspberries provide concentrated fruit flavor and a lovely natural pink hue, ensuring your frosting remains perfectly stable.
- Butter: For the most robust flavor in both the cake and frosting, I consistently use salted butter. However, if you prefer, unsalted butter works perfectly well, just be sure to add a pinch more salt to taste in the frosting. Ensure your butter is softened to room temperature for optimal creaming.
- Sour Cream: Full-fat sour cream, brought to room temperature, is indispensable for an incredibly moist and tender chocolate cake. Its acidity tenderizes the cake crumb while adding a subtle tang that complements the richness of the chocolate. Greek yogurt can be a suitable substitute if needed.
- Cake Flour: To achieve that wonderfully delicate and tender cake crumb, cake flour is highly recommended. It has a lower protein content than all-purpose flour, resulting in a lighter texture. Remember to spoon and level your flour, or use a kitchen scale for precise measurement (1 cup of cake flour is approximately 110 grams) to avoid a dense, dry cake.
- Eggs: Always use large eggs and ensure they are at room temperature. Room temperature eggs emulsify better with other ingredients, creating a smoother, more uniform batter and contributing to a higher, more even rise in your cake.
- Unsweetened Cocoa Powder: For the characteristic deep chocolate flavor and color, natural unsweetened cocoa powder is essential. Do not substitute with Dutch-processed cocoa, as it reacts differently with the baking soda and baking powder, affecting the cake’s rise and texture.
- Milk: Any milk, such as 2% or whole milk, works beautifully in this recipe. Milk adds moisture and richness, contributing to the overall tender crumb of the chocolate cake layers.
- Cream Cheese: For the signature tang and creamy texture of our raspberry frosting, full-fat, block-style cream cheese is a must. Avoid the spreadable cream cheese in tubs, as it has a higher water content and will result in a runny frosting. Ensure it’s softened to room temperature for smooth incorporation.
Creative Recipe Substitutions & Variations:
While this Chocolate Raspberry Cake is perfect as written, don’t hesitate to customize it to suit dietary needs or flavor preferences. Here are some thoughtful substitutions and exciting variations to inspire your baking:
- Dairy-Free Adaptation: For those avoiding dairy, this recipe can be successfully converted. Replace traditional dairy products with your preferred, trusted dairy-free alternatives for butter, milk, sour cream (dairy-free yogurt), and cream cheese (dairy-free cream cheese blocks). For the chocolate ganache, use a high-quality dairy-free chocolate and heavy cream substitute, or consider a dairy-free chocolate hazelnut spread for an intriguing flavor twist.
- Gluten-Free Version: While I haven’t personally tested a gluten-free adaptation for this specific cake, many readers have found success with high-quality 1:1 gluten-free baking flour blends (ensure it contains xanthan gum). If you experiment with a gluten-free flour blend, please share your results! Small adjustments to liquid might be necessary.
- Sour Cream Alternatives: If sour cream isn’t readily available or you prefer an alternative, full-fat Greek yogurt at room temperature makes an excellent substitute. Its similar tang and creamy consistency will maintain the cake’s desirable moisture and flavor profile.
- Homemade Cake Flour: No cake flour on hand? No problem! You can easily create a homemade substitute. Measure 1 cup of all-purpose flour by spooning it into the measuring cup and leveling it off. Then, remove two tablespoons of flour (level these off as well). Add two tablespoons of cornstarch to the remaining flour. Sift this mixture twice to ensure the cornstarch is evenly distributed and the flour is light and airy, mimicking the texture of commercial cake flour. This step is crucial for achieving a tender crumb.
- Explore Other Freeze-Dried Fruits: Raspberry is a classic, but your imagination is the limit! Instead of freeze-dried raspberries and raspberry preserves, consider freeze-dried blueberries with blueberry preserves for a “Blueberry Chocolate Cake,” or switch to strawberries for a delightful “Strawberry Chocolate Cake.” You could even try a mix of berries for a vibrant “Mixed Berry Chocolate Cake.”
- Handcrafted Raspberry Sauce: For a truly homemade touch, consider preparing your own raspberry filling from scratch. My 10-minute Raspberry Coulis recipe offers a quick and easy way to make a vibrant, fresh-tasting sauce. Alternatively, a homemade raspberry jam works wonderfully, just ensure its consistency is thick enough to hold its shape as a cake filling, similar to store-bought preserves, to prevent it from seeping out.
Crafting Your Chocolate Raspberry Cake: A Step-by-Step Guide:
Embark on a delightful baking journey with this detailed guide to creating your own stunning Chocolate Raspberry Cake. Each step is designed to be clear and straightforward, ensuring a delicious result.
Step 1: Prepare the Cake Batter. Begin by preheating your oven to 350°F (175°C) and meticulously preparing your cake pans. Grease three 9-inch cake pans with shortening, line the bottoms with parchment paper circles, and then grease the parchment. Dust the interior of each pan generously with flour, tapping out any excess. In a large heatproof measuring cup or bowl, whisk together the hot water and unsweetened cocoa powder until the cocoa is completely dissolved and no lumps remain. Set this mixture aside to cool to room temperature. In a separate large mixing bowl, combine all the dry ingredients for the cake: cake flour, both granulated and brown sugars, baking soda, baking powder, salt, and espresso powder. Whisk them thoroughly to ensure even distribution. Next, gradually incorporate the wet ingredients: the cooled cocoa mixture, room temperature sour cream, milk, large eggs, vegetable oil, and vanilla extract. Mix until just combined, being careful not to overmix. A few small lumps are perfectly acceptable. This method creates an incredibly easy yet rich chocolate cake batter.
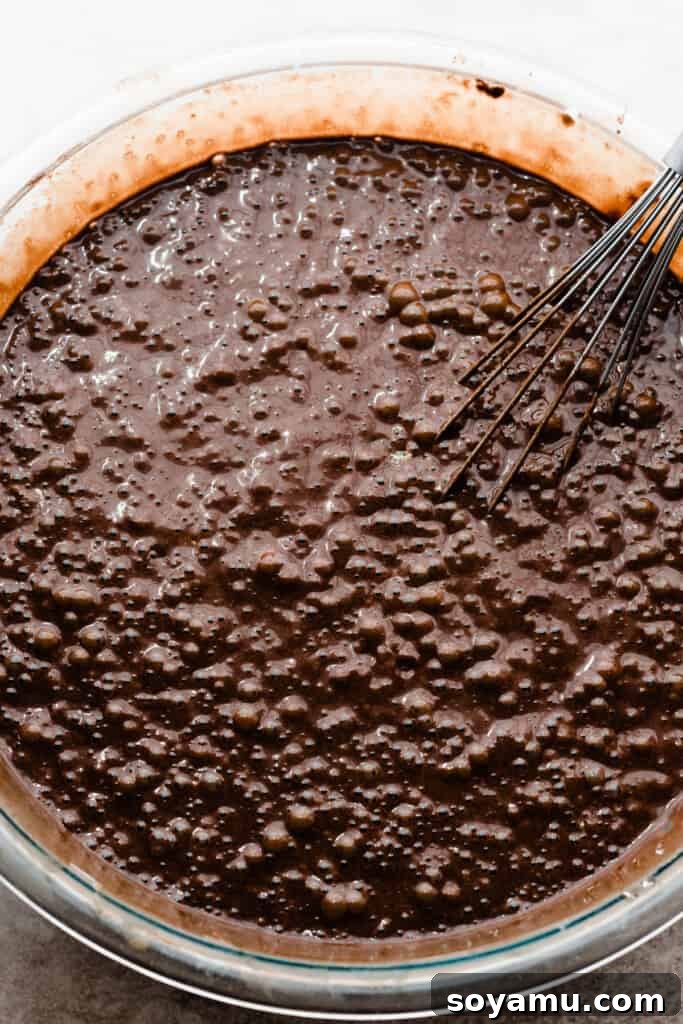
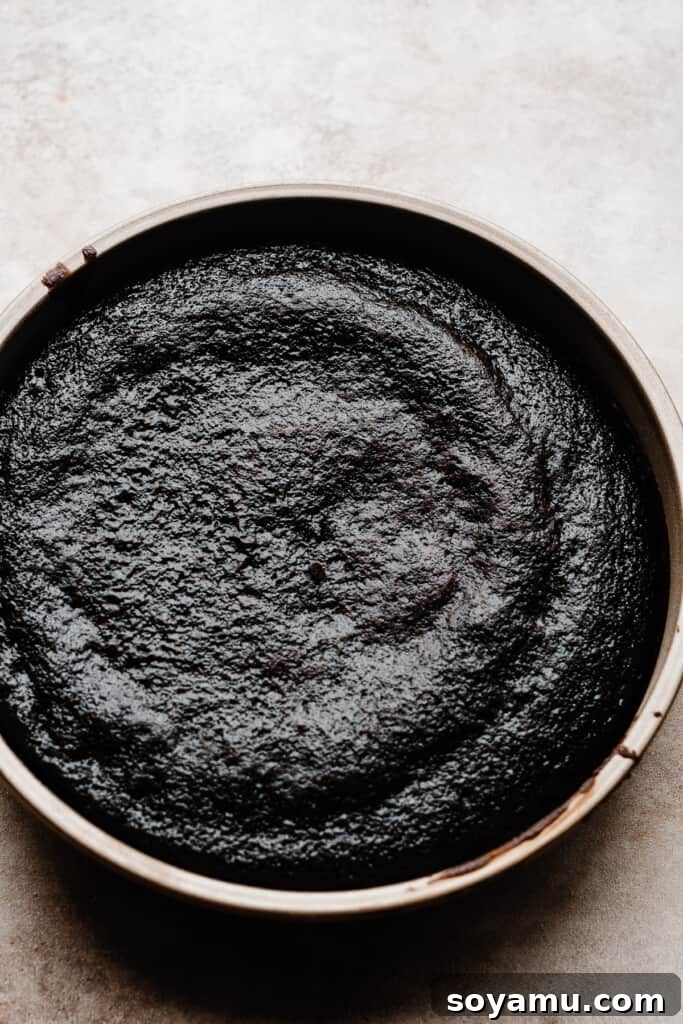
Step 2: Bake the Perfect Cake Layers. Divide the prepared cake batter evenly among your three 9-inch pans. For absolute precision and uniform layers, consider using a kitchen scale to weigh the total batter and then divide that weight by three for each pan. Bake in the preheated oven for approximately 23 to 27 minutes, or until a wooden skewer or toothpick inserted into the center of a cake layer comes out with moist crumbs attached (not wet batter). To ensure an even bake, it’s advisable to rotate the cake pans halfway through the baking time, as ovens often have hot spots. Once baked, allow the cake layers to cool in their pans on a wire rack for 10 minutes. This allows them to firm up slightly. Then, carefully run a butter knife around the edges of each pan before inverting the cakes onto a cooling rack to cool completely. Ensure each layer is thoroughly cooled before proceeding to frosting, as warm cake will melt the frosting.
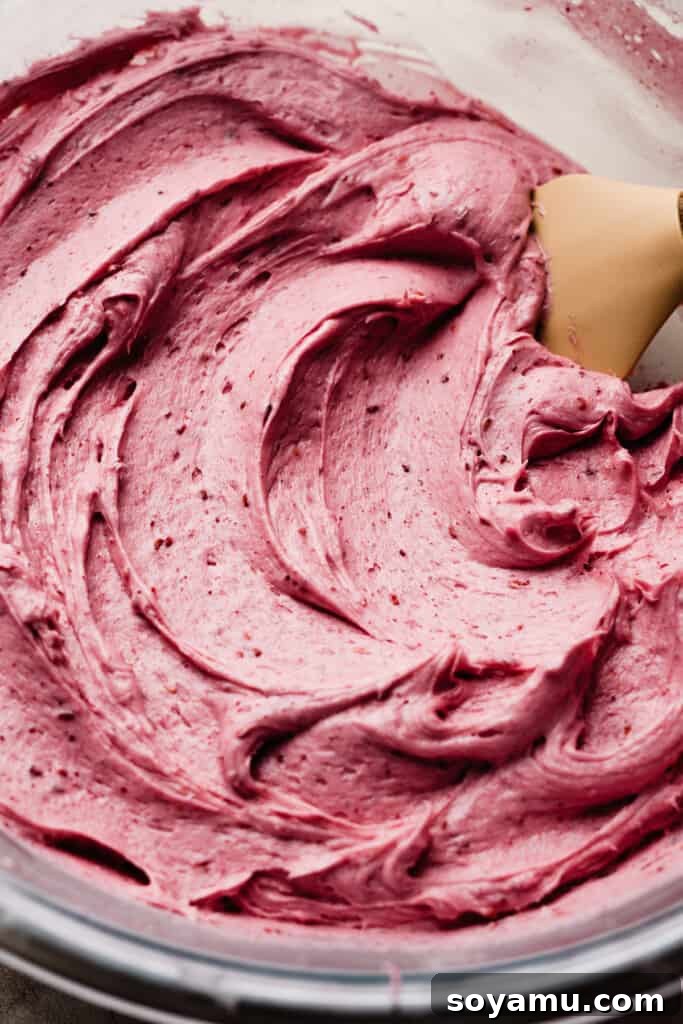
Step 3: Whip Up the Vibrant Raspberry Frosting. In a large mixing bowl, or the bowl of a stand mixer fitted with a paddle attachment, beat the softened salted butter on high speed until it becomes light and creamy, typically for about 30 to 60 seconds. Gradually add the powdered sugar, one cup at a time, mixing well between additions until fully incorporated. If the frosting appears too stiff, add a tablespoon of milk or heavy cream as needed to achieve a smooth, workable consistency. Next, beat in the vanilla extract and a pinch of salt. Incorporate the freeze-dried raspberry powder and the raspberry preserves, mixing until their vibrant color and flavor are evenly distributed throughout the frosting. Finally, add the softened full-fat cream cheese, beating just until it is fully combined and the frosting is smooth. Over-beating after adding cream cheese can lead to a runny consistency. If the frosting becomes too soft at any point, simply chill it in the refrigerator for 10-20 minutes to firm it up before continuing.
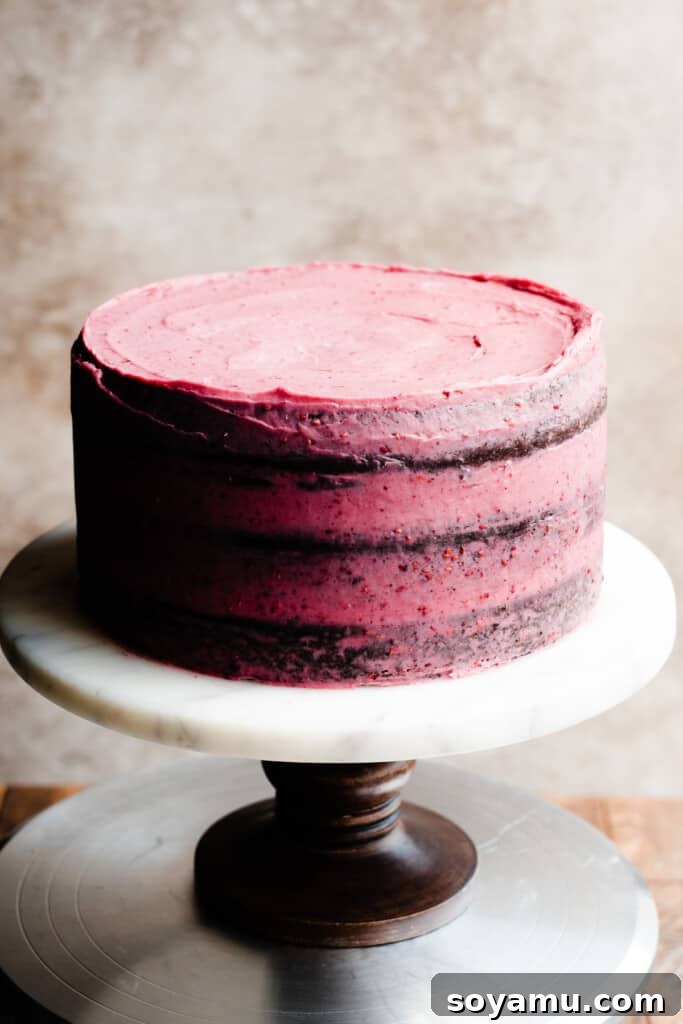
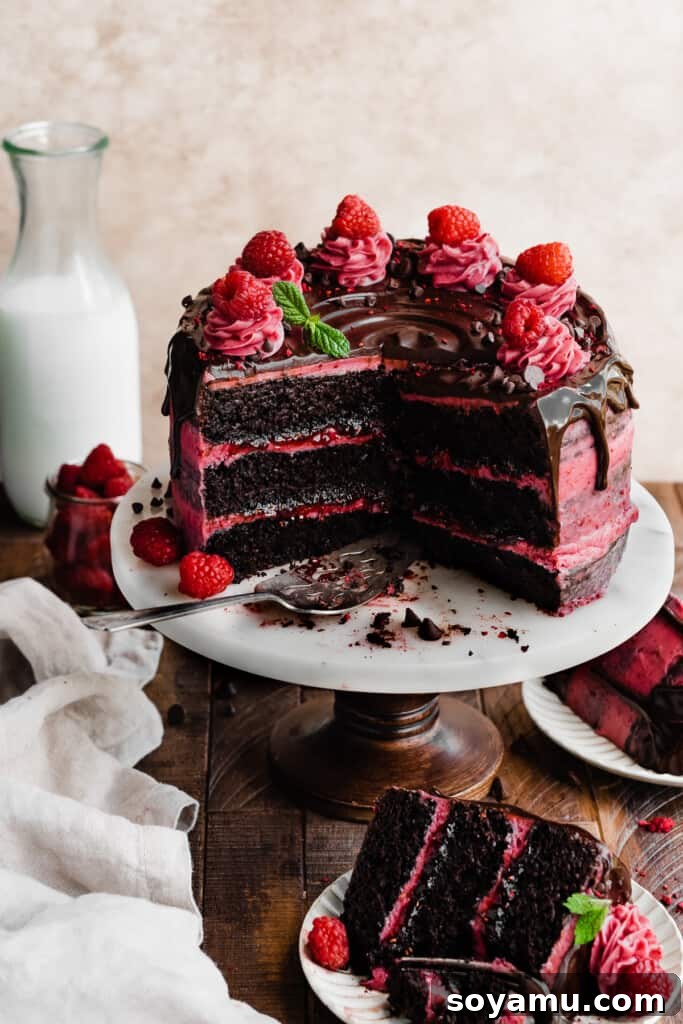
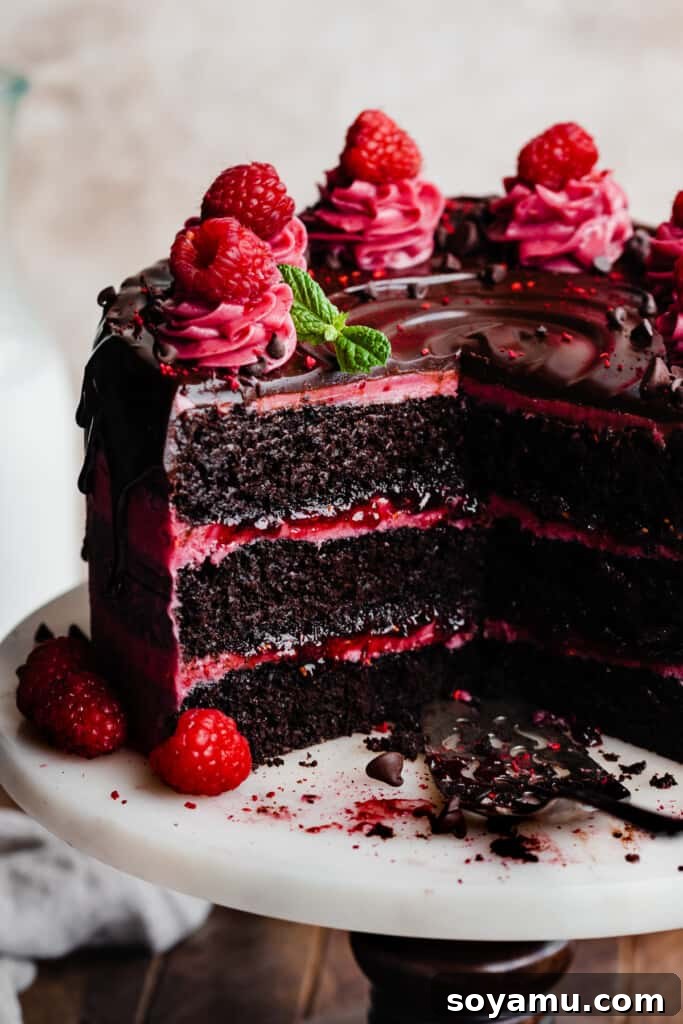
Step 4: Master the Art of Cake Assembly. Place your first cooled chocolate cake layer onto a cake stand, preferably positioned on a turntable for easier frosting. Spread a generous layer of about 1 and 1/4 cups of raspberry frosting over the cake, extending it slightly past the edge. Using a piping bag fitted with a round tip (like a Wilton 1A) or simply a small spoon, pipe a sturdy border of frosting around the outer edge of this layer. This creates a “dam” to hold the filling. Carefully pour about 1/3 cup of raspberry preserves into the center of the piped border and spread it evenly with a small offset spatula, ensuring it reaches the frosting dam. Gently place the second cake layer on top. Use your offset spatula to smooth any frosting “overhang” between the two layers, helping to seal them. Pop the cake into the fridge for 5-10 minutes to chill and set the layers, preventing any sliding as you continue. Repeat the frosting and preserve filling process with the second cake layer. Finally, add the third cake layer, placing it upside down to create a perfectly flat top. Apply a thin, even layer of frosting over the top and sides of the entire cake. This is your “crumb coat,” which traps any loose crumbs. Use a cake scraper or offset spatula to smooth it out. Don’t worry if it’s not perfect! Chill the crumb-coated cake in the refrigerator for at least 30 minutes, or even overnight, until the frosting is firm. Once set, apply the remaining frosting to the top and sides, smoothing it to your desired finish. For a trendy “semi-naked” look, scrape off a more generous amount of frosting to allow hints of the dark chocolate cake layers to peek through. Chill the entire cake again for at least 30 minutes before proceeding to the ganache drip.
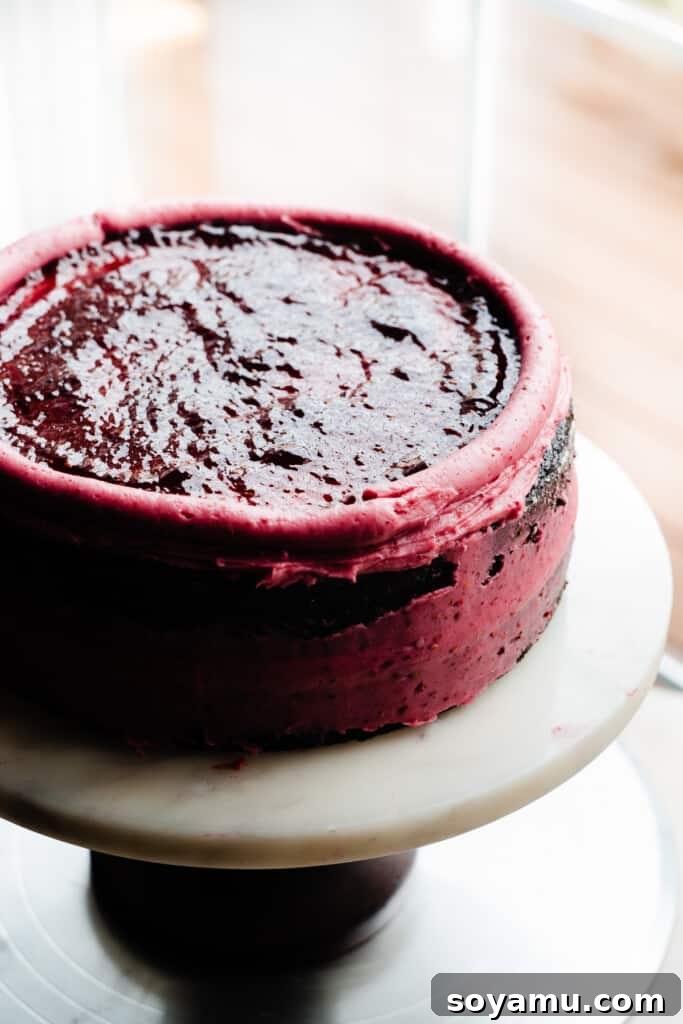
If you prefer a “naked” or “semi-naked” cake, simply apply less frosting on the exterior. The excess frosting can be reserved and used to pipe elegant swirls on top of the cake after the chocolate ganache drip has been applied, adding another layer of decorative charm.
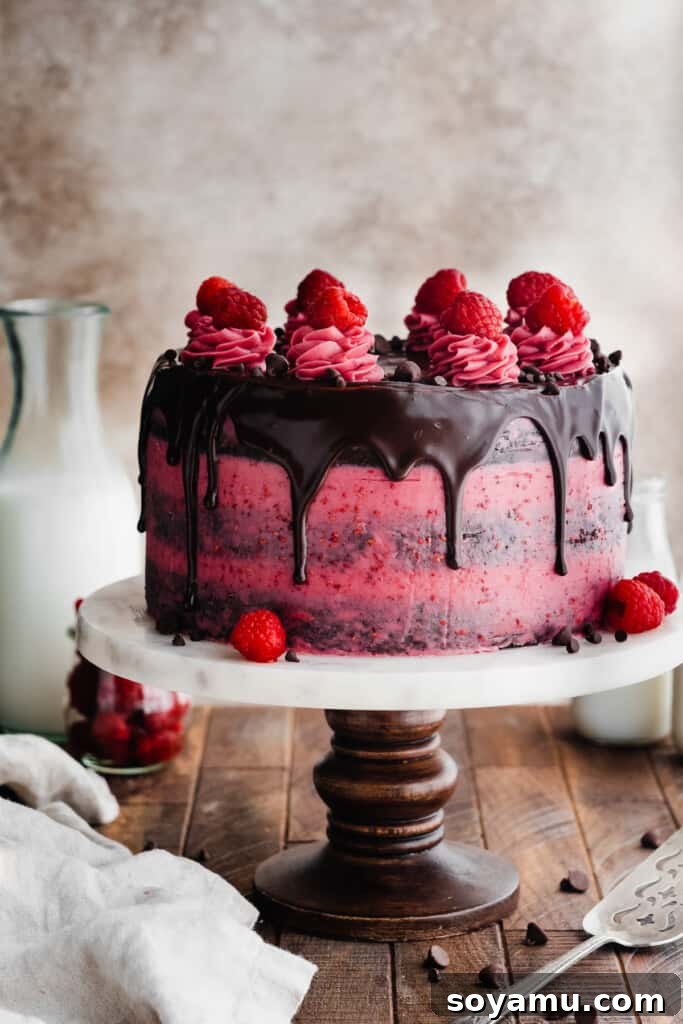
Step 5: Dazzle with a Chocolate Ganache Drip. For the grand finale, prepare the luxurious chocolate ganache drip. Begin by finely chopping your semi-sweet chocolate and placing it into a medium heatproof bowl. In a small saucepan, heat the heavy cream over medium heat until it just begins to simmer, showing small bubbles around the edges (do not boil). Immediately pour the hot cream over the chopped chocolate. Let it sit undisturbed for 4 minutes to allow the heat to melt the chocolate, then gently stir with a whisk or spatula from the center outwards until the ganache is completely smooth, glossy, and uniform. If desired, add 1-2 teaspoons of vegetable oil to achieve a thinner, more pourable consistency and an extra sheen. Place your chilled, assembled cake on a turntable. Carefully pour the ganache onto the center of the cake’s top. Using a small offset spatula, gently push the ganache towards the edges while slowly spinning the cake on the turntable. This controlled motion will create those beautiful, cascading waterfall drips down the sides. For a truly professional effect, let the ganache cool slightly before applying; if it’s too hot, the drips will be too thin and run too quickly. Once the drip is complete, return the cake to the refrigerator for 20-30 minutes to allow the ganache to set firmly. This technique can be applied to any layer cake, transforming it into a stunning dessert, much like our Chocolate Truffle Cake or Biscoff Cake!
Serving & Storing Your Chocolate Raspberry Masterpiece:
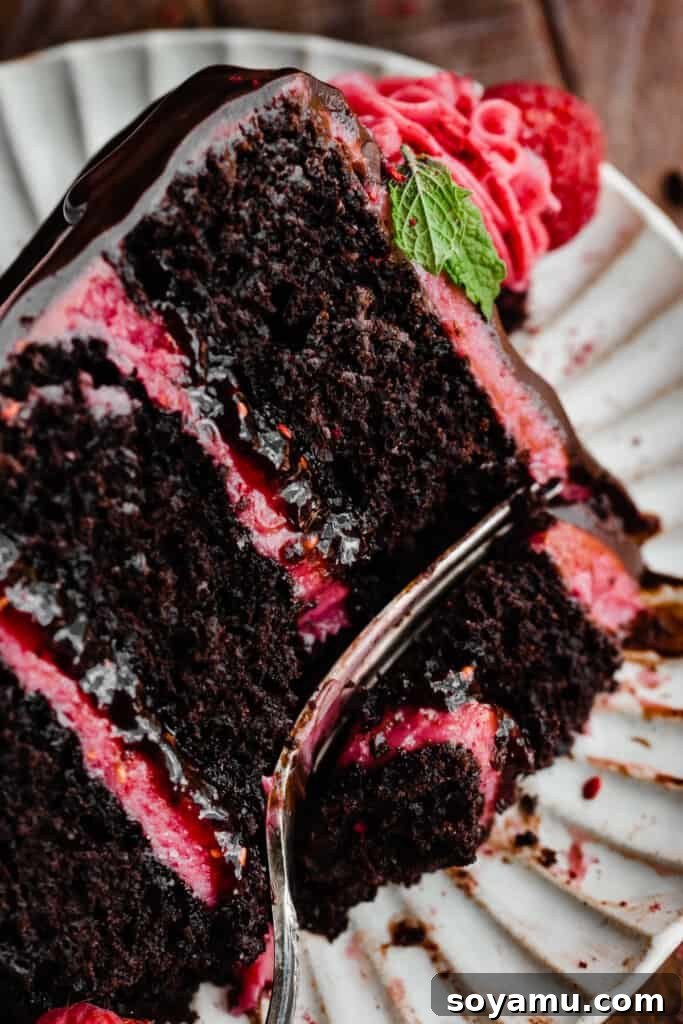
Once your exquisite Chocolate Raspberry Cake has been adorned with its chocolate ganache drip and allowed to set in the fridge for 20-30 minutes, it’s time for the final touches. Utilize any leftover raspberry frosting to pipe elegant swirls or decorative dollops on top of the cake. For a truly captivating presentation, garnish generously with fresh, vibrant raspberries and a sprinkling of mini chocolate chips or delicate chocolate shavings. The contrast of the deep red berries against the pink frosting and dark chocolate is simply stunning. Slice into generous portions and prepare to delight your guests! To preserve its incredible moisture and flavor, store any leftover cake in an airtight container in the refrigerator for 3-4 days. For an extra layer of protection against drying out, I often gently press a piece of plastic wrap directly onto the cut surfaces of the slices within the container. While this cake is remarkably resilient and holds its moisture well, this extra step ensures every bite remains as fresh and delectable as the first.
Expert Success Tips for Flawless Baking:
Achieving consistently perfect baking results often comes down to a few key insights and proper tools. These expert tips will help ensure your Chocolate Raspberry Cake turns out beautifully every time:
- The Indispensable Oven Thermometer: Your oven’s internal thermostat might not be as accurate as you think, often fluctuating by 25°F or even more. An oven thermometer is an inexpensive tool that provides real-time, accurate temperature readings. Consistent oven temperature is absolutely critical for the success of most baked goods, especially delicate cakes. Keep one inside your oven at all times to monitor its calibration and ensure your cakes bake evenly and to perfection.
- The Precision of a Kitchen Scale: Baking is often a science, and precise measurements are key to consistent results. Flour, in particular, can vary wildly in weight depending on how it’s scooped (packed vs. spooned). A food scale eliminates this variability, allowing you to measure ingredients by weight (grams or ounces) rather than volume. This ensures you’re using the exact amount specified in the recipe, preventing issues like a dry or dense cake caused by too much flour. It’s a game-changer for serious bakers.
Frequently Asked Questions About Chocolate Raspberry Cake:
Here are answers to some common questions that arise when baking this delicious Chocolate Raspberry Cake, designed to help you achieve baking success.
Absolutely! This versatile recipe can be easily scaled to fit your needs. To make a smaller, two-layer cake, simply cut the entire recipe in half and bake it in two 8-inch cake pans. For an even smaller, single-layer option, prepare one-third of the recipe and bake it in a single 9-inch cake pan. If you prefer a more casual sheet cake, the full recipe can be baked in a standard 9×13-inch pan. This recipe also adapts wonderfully for cupcakes; half a batch will yield approximately 24 delightful chocolate raspberry cupcakes, perfect for individual servings.
Runny or “weepy” frosting can be a common frustration, but there are usually a few key culprits. The most frequent reason is butter that’s too soft; it should be softened but still cool to the touch, not melted or greasy. Leaving the frosting at room temperature for an extended period, especially in a warm kitchen, can also cause it to lose its structure. A critical factor, particularly with cream cheese frosting, is when the cream cheese is added. For optimal stability, cream cheese should *always* be the last ingredient beaten into the frosting. Sugar tends to draw moisture out of cream cheese, so adding it earlier can cause the frosting to become watery. If your frosting starts to become too soft or runny at any stage, don’t panic! Simply pop the entire bowl of frosting (or even the assembled cake, if applicable) into the refrigerator or freezer. Chill it for 20 minutes to 2 hours, depending on its consistency, until it firms up again. Once chilled, give it a quick beat to restore its creamy texture before continuing.
Recommended Special Tools for Cake Baking:
While not strictly essential, these tools can significantly simplify the cake baking and decorating process, helping you achieve a professional finish with greater ease.
- Offset Spatula: An offset spatula is a baker’s best friend. Its angled blade allows for smooth, even spreading of frosting, batters, and fillings across cake layers without your knuckles dragging through the icing. It makes assembling and crumb coating a breeze, resulting in a much neater final product.
- Cake Turntable: If you enjoy baking layer cakes regularly, a cake turntable is a worthy investment. It allows you to rotate the cake smoothly as you apply frosting, pipes borders, or create that perfect ganache drip, ensuring an even and professional finish all around.
- Piping Bag & Piping Tips: For precise frosting borders and elegant decorative swirls, a reusable piping bag paired with specific tips is invaluable. A Wilton 1A tip is excellent for creating a smooth, round frosting border to contain fillings, while a Wilton 1M tip is perfect for creating beautiful rosette swirls or star patterns on top of your finished cake. These simple tools elevate your cake’s presentation significantly.
More Delightful Raspberry Recipes to Explore:
If you’ve fallen in love with the bright, tangy flavor of raspberries in this cake, you’ll adore these other fantastic raspberry-infused treats:
- 10-Minute Raspberry Coulis
- Raspberry Lemonade Cheesecake
- Raspberry Champagne Cupcakes
- One-Bowl Raspberry Lemon Bread
- Raspberry Cheesecake Cookies
Indulge in More Irresistible Chocolate Cake Recipes:
For the true chocolate aficionados, our collection extends beyond this raspberry pairing. Dive into these other decadent chocolate cake creations:
- Chocolate Truffle Cake
- Ultimate Nutella Chocolate Cake
- Tuxedo Cake with Whipped White Chocolate Ganache
- Ultimate Cookie Dough Cake
- German Chocolate Cake
Did you make this recipe? We’d love to hear from you!
Please consider leaving a comment and a star rating below in the recipe card. Your feedback helps our small business immensely and helps other bakers discover and enjoy this recipe. Thank you for your support!
Chocolate Raspberry Cake
Ingredients
For the Chocolate Cake
- 2 cups hot water, 472 mL
- 1 and 1/2 cups + 2 tbsp unsweetened natural cocoa powder, 157 grams *do not use dutch process
- 3 cups cake flour, spooned & leveled, 330 grams
- 2 and 1/4 cups light brown sugar packed, 488 grams
- 1 cup granulated sugar, 206 grams
- 3 tsp baking soda
- 1 and 1/2 tsp baking powder
- 3/4 tsp salt
- 2 tsp espresso powder
- 1 and 1/2 cups full fat sour cream, at room temperature, 360 grams
- 1/4 cup milk, 60 mL
- 4 large eggs, at room temperature
- 1/2 cup vegetable oil, 106 mL
- 1 and 1/2 tsp vanilla extract
For the Raspberry Frosting
- 1 and 3/4 cups salted butter, softened at room temperature, 3 and 1/2 sticks, 28 tbsp, or 396 grams
- 5 cups powdered sugar
- 1 tbsp milk
- 2 tsp vanilla extract
- salt
- 1 cup + 2 tbsp freeze dried raspberries, pulsed to a powder, but measured while whole, About one, 1.25 oz bag
- 2 tbsp raspberry preserves
- 6 ounces full fat cream cheese, use the block style
For Filling
- 2/3 cup raspberry preserves
For the Chocolate Ganache Drip
- 4 ounces semi sweet chocolate, finely chopped, *see note
- 1/2 cup heavy cream, 4 ounces
- 1-2 tsp vegetable oil
For Decorating
- fresh raspberries
- mini chocolate chips
Instructions
-
Prep: Preheat your oven to 350 ℉. Grease three 9-inch cake pans with shortening. Place a parchment circle in the bottom of each, then grease over that. Dust the inside of each pan well with flour, knocking out any excess.
-
Make the Cake Batter: Make the Chocolate Cake: Measure the hot water into a 4-cup glass measuring cup or large bowl, then whisk in the cocoa until completely dissolved. Set aside to let come down to room temp. In a large mixing bowl, whisk together all the dry ingredients (including the sugars). Next, add the wet ingredients, including the room temp (not steaming hot!) cocoa and water mixture, and whisk until combined. There may be a few small lumps – that’s fine.
-
Bake the Cakes: Divide the cake batter evenly between the three pans (use a kitchen scale to weigh the full amount of batter, then divide by 3 to get it perfect!). Bake for 23 to 27 minutes, or until a toothpick inserted into the center pulls out moist crumbs. Let cakes cool in the pans on wire racks for 10 minutes before running a butter knife around the edge and inverting onto a cooling rack. Let cool completely.Tip: I recommend rotating cake pans halfway through since every oven will have hot spots and this ensures an even bake.
-
Make the Raspberry Frosting: Beat butter in a large bowl until creamy, about 30 seconds. Mix in the powdered sugar in three additions, mixing between each until combined. Add the milk as needed to help things come together. Add the vanilla and salt and mix. Beat in the freeze dried raspberry powder & raspberry preserves. Beat in the cream cheese last, until well combined.
-
Assemble the Cake: Assemble Cake: Place the first cake layer on a cake stand on top of a turntable. Spread 1 and 1/4 cups of frosting over the layer, going past the edge a smidge. Pipe a border around the cake layer, and pour 1/3 cup of raspberry preserves into the center. Spread evenly with an offset spatula, going to the edges of the border. Place the second cake layer on top and Spread any frosting “overhang” between the two layers to seal them together. Chill for 5-10 minutes to set things so the layers don’t slide around. Repeat with the second layer. Add the final layer upside down for a flat top, and give the cake a thin layer of frosting on top and on the sides. Use a cake scraper to smooth out and remove excess. This is your crumb coat, so don’t fret if it isn’t perfect. Pop the cake in the fridge for 30 minutes or until the frosting is set. Then, frost the top and sides of the cake, smoothing things with the cake scraper or offset spatula. I left this cake semi-naked, which means I scraped off a more generous amount of frosting to let the cake peek through a bit. Chill the entire cake in the fridge for 30 minutes, or until set, before adding the chocolate drip.Tip: If your frosting is getting too soft at any point from sitting out, pop it back in the fridge for a bit to firm back up.
-
Make the Chocolate Drip: Add finely chopped chocolate to a small bowl. Heat heavy cream in a small saucepan over medium heat until simmering. Pour over the chocolate, let sit for 4 minutes, then stir until completely smooth. Add 1-2 tsp vegetable oil to get a pourable consistency. Set cake on a turntable. Pour ganache into the center of the top of the cake, then spin the cake slowly while pushing ganache to the edges with an offset spatula to create drips. Let chill 20-30 minutes, until ganache is set.
-
Serve + Store: Once ganache drip is set, pipe on swirls with remaining frosting and top with raspberries and chocolate chips. Slice and enjoy your life! Store leftovers in an airtight container in the fridge for 4-5 days.
-
Make Ahead Tips: Cake layers can be made a day ahead. Bake them, let cool completely at room temperature, and then store them on dinner plates covered tightly with plastic wrap or foil. Store at room temp overnight.
Raspberry frosting can be made a day ahead, covered tightly and stored in the fridge overnight. Beat it until creamy enough to spread before using.
Notes
Chocolate: Use a good-quality baking bar here rather than chocolate chips – something like Baker’s or Ghirardelli.
Nutrition
Calories: 1239kcal,
Carbohydrates: 177g,
Protein: 11g,
Fat: 58g,
Saturated Fat: 30g,
Polyunsaturated Fat: 8g,
Monounsaturated Fat: 15g,
Trans Fat: 1g,
Cholesterol: 177mg,
Sodium: 793mg,
Potassium: 697mg,
Fiber: 8g,
Sugar: 136g,
Vitamin A: 1448IU,
Vitamin C: 243mg,
Calcium: 173mg,
Iron: 8mg
Nutrition information is automatically calculated, so should only be used as an approximation.