
Ultimate Lemon Meringue Cheesecake Recipe: A Zesty Dessert Masterpiece
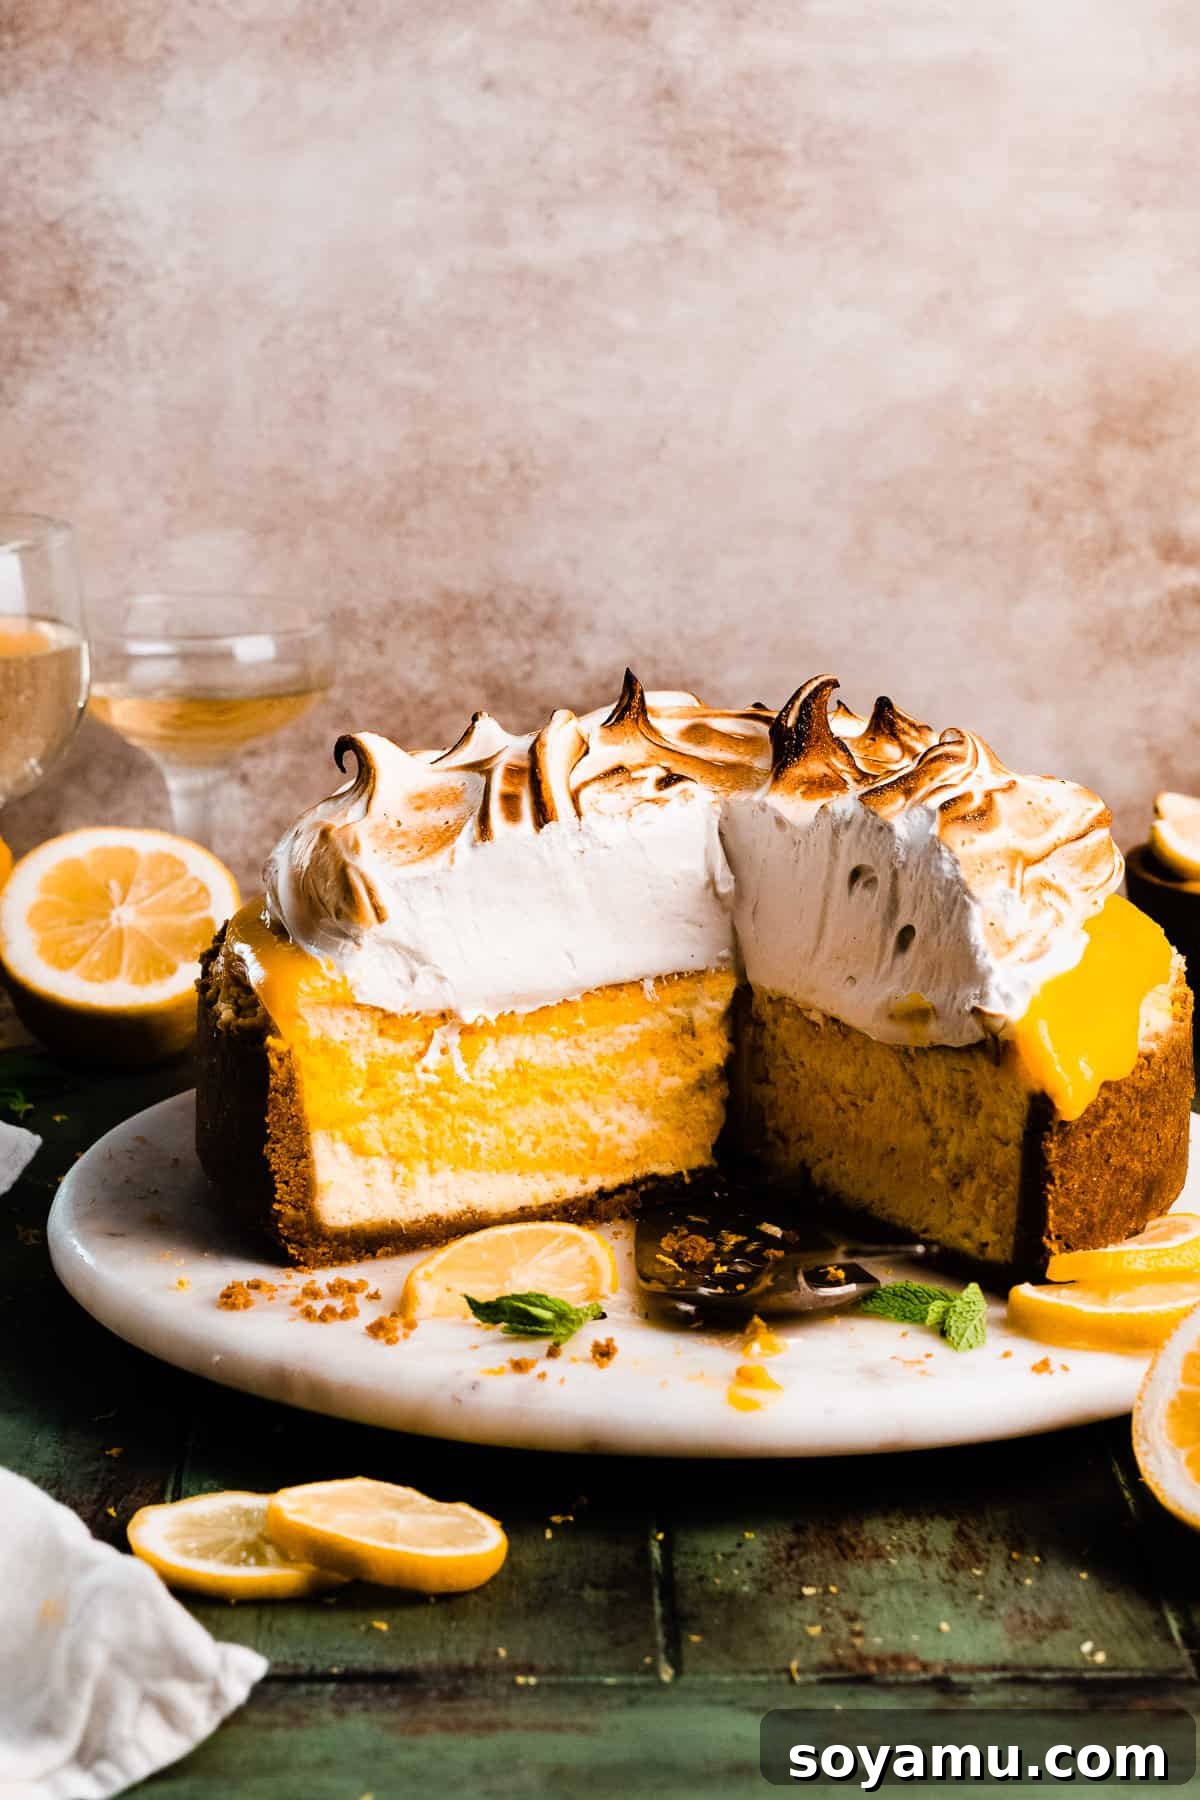
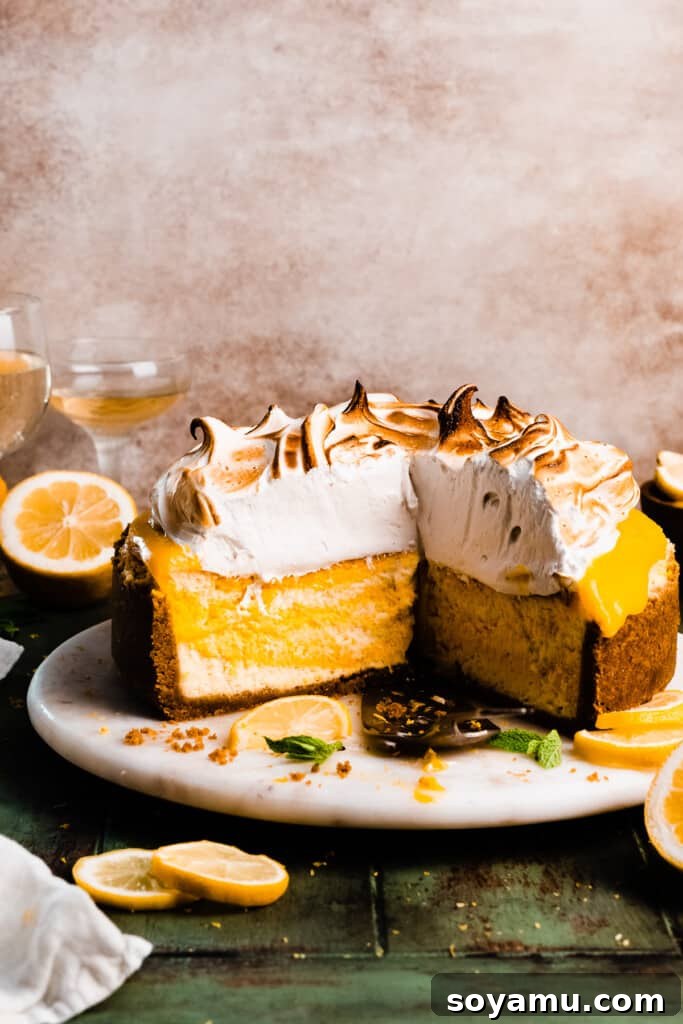
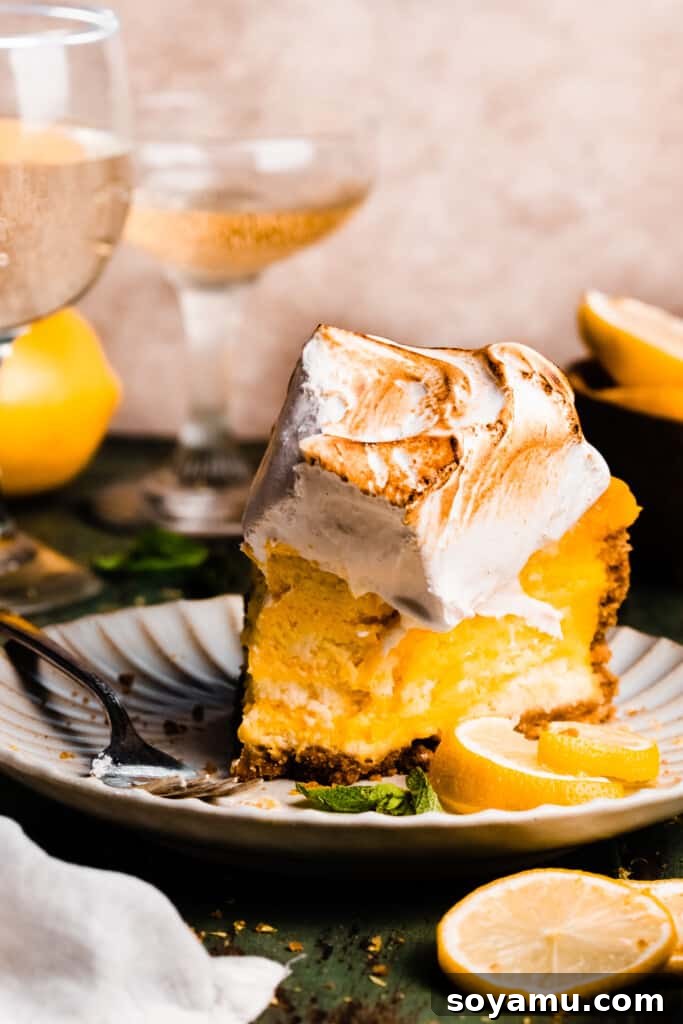
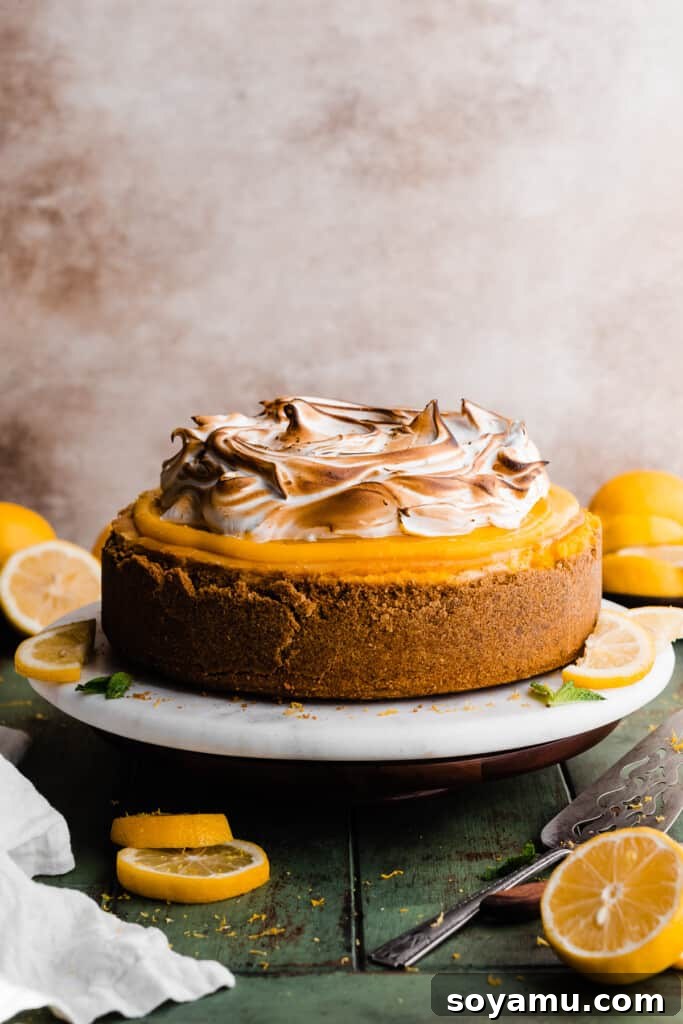
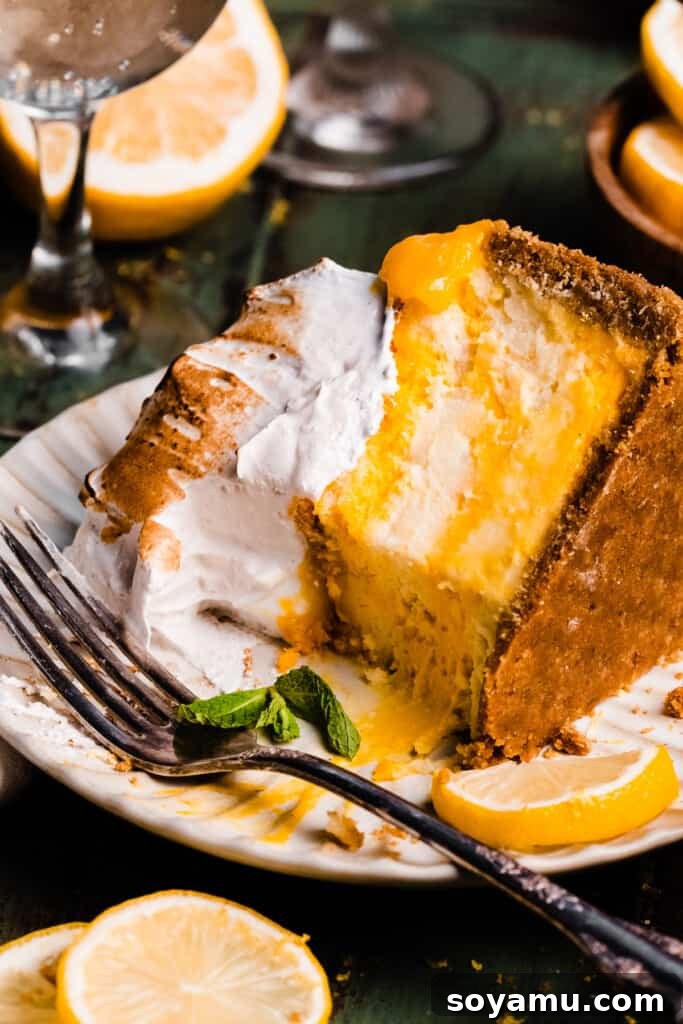
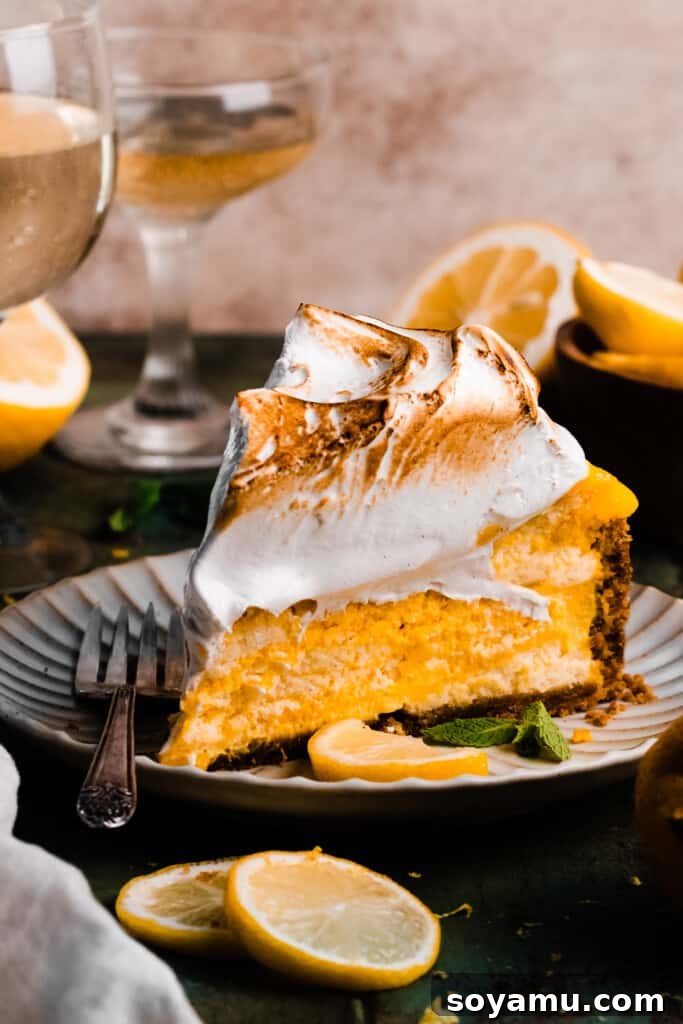
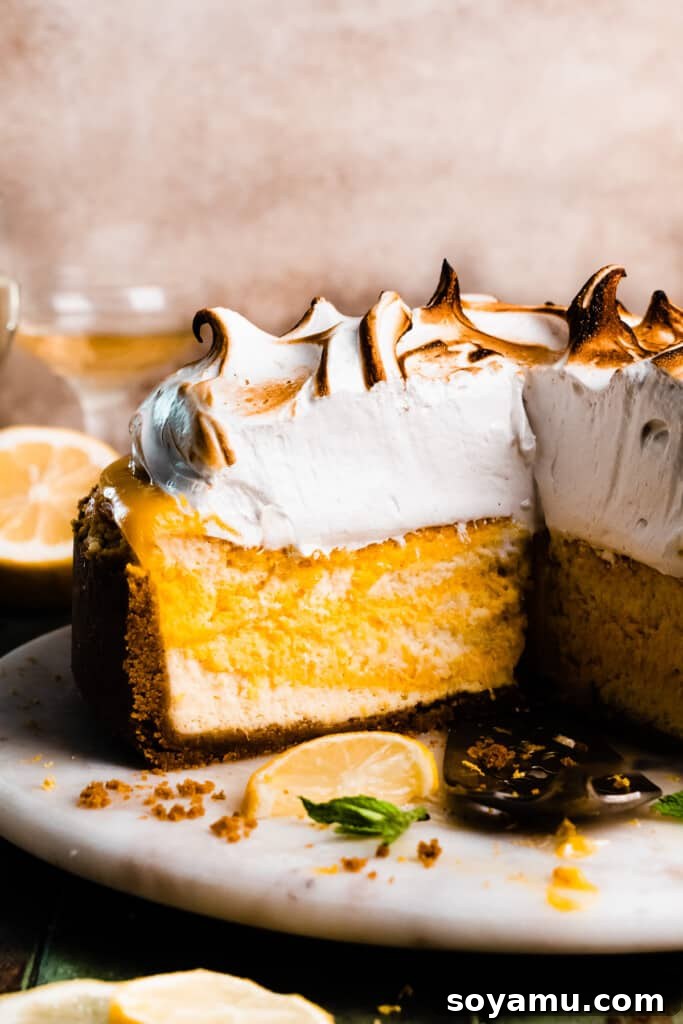
Prepare to embark on a culinary journey that marries two beloved desserts into one unforgettable creation: the Lemon Meringue Cheesecake. Imagine the bright, tangy zest of a classic lemon meringue pie harmoniously blended with the rich, velvety texture of a New York-style cheesecake. This impressive dessert features silky smooth lemon and luscious lemon curd cheesecake batters, gracefully swirled together over a perfectly crisp graham cracker crust. It’s then crowned with an extra layer of tart lemon curd and finished with a magnificent, mile-high pile of golden-toasted meringue. Each bite is a symphony of flavors and textures, promising to delight and impress even the most discerning palate.
Why This Lemon Meringue Cheesecake is a Must-Try
This Lemon Meringue Cheesecake isn’t just a dessert; it’s an experience. Here’s why it’s destined to become your new favorite:
- Unrivaled Creamy Lemon Cheesecake: We’ve perfected a cheesecake base that combines the richness of traditional vanilla lemon with an irresistible lemon curd swirl. Baked in a water bath to achieve ultimate creaminess, it’s smooth, dense, and bursting with fresh lemon flavor, providing the perfect canvas for its vibrant toppings.
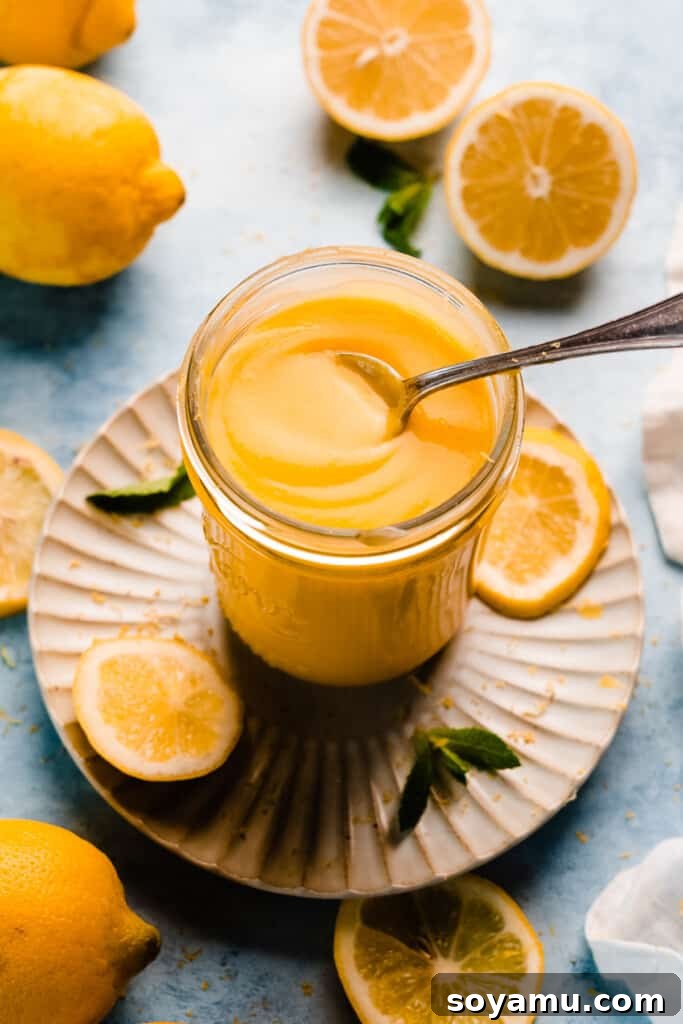
- Exquisite Homemade Lemon Curd: Forget store-bought! Our homemade lemon curd is the heart of this dessert, infusing it with an intense, tangy lemon flavor that’s both bright and refreshing. Its incredibly silky texture adds a luxurious dimension, both within the cheesecake batter and as a glistening topping.
- Dramatic Mile-High Meringue Topping: The show-stopping element is undoubtedly the towering Swiss meringue. This airy, sweet cloud provides a delightful contrast to the tart lemon, and we’ll guide you through every step to ensure your meringue is stable, never falls, and toasts beautifully to a golden perfection. It’s easier to master than you think!
- Perfect Blend of Classic Desserts: This recipe elegantly merges the best qualities of a classic lemon meringue pie – its zesty freshness and fluffy topping – with the decadent, melt-in-your-mouth richness of a cheesecake. It offers the best of both worlds in every single slice.
- Impressive Showstopper for Any Occasion: Whether it’s a holiday gathering, a special birthday, or simply a treat for yourself, this cheesecake is guaranteed to turn heads and gather compliments. Its stunning appearance and incredible flavor make it ideal for celebrations.
Essential Ingredients for a Perfect Lemon Meringue Cheesecake:
Creating this masterpiece starts with selecting the right ingredients. Quality makes all the difference in achieving that sublime texture and vibrant flavor. For precise measurements and detailed instructions, please refer to the comprehensive recipe card at the end of this post.
- Butter: Whether you choose salted or unsalted, butter is fundamental for both the crust and the lemon curd. I personally favor salted butter for its depth of flavor, but unsalted is perfectly fine if that’s your preference. Ensure it’s melted for the crust and cubed for easy incorporation into the curd.
- Graham Cracker Crumbs: The foundation of our cheesecake is a sturdy, flavorful crust. You can achieve this by pulsing whole graham crackers in a food processor until fine crumbs form, or for convenience, purchase pre-made graham cracker crumbs. Ensure they are finely ground for a cohesive crust.
- Full-Fat Cream Cheese: This is non-negotiable for a truly decadent cheesecake. Always opt for full-fat block cream cheese, and critically, allow it to come to room temperature. Cold cream cheese will result in a lumpy batter, impacting the final texture.
- Large Eggs: Eggs provide structure and richness to both the cheesecake and the lemon curd. Using large eggs at room temperature is crucial. Room temperature eggs emulsify better with the other ingredients, leading to a smoother, more uniform batter and meringue.
- Full-Fat Sour Cream: Added to the cheesecake batter, full-fat sour cream contributes to the signature creamy texture and a subtle tang that complements the lemon beautifully. Like cream cheese and eggs, it must be at room temperature for optimal blending.
- Fresh Lemons: The star of the show! Freshly zested and juiced lemons are paramount for that bright, authentic lemon flavor in both the curd and the cheesecake batter. Bottled lemon juice simply won’t yield the same vibrant taste. Stock up on ripe, fragrant lemons.
- Granulated Sugar: Essential for sweetness in all components – the curd, cheesecake, and meringue. It balances the tartness of the lemon and provides structure to the meringue.
- Vanilla Extract/Paste: A touch of vanilla enhances the overall flavor profile, adding warmth and depth to both the lemon curd and the cheesecake. Vanilla bean paste offers a more pronounced vanilla flavor and specks.
- Cream of Tartar: A vital ingredient for the meringue, cream of tartar acts as a stabilizer, helping the egg whites whip up into stiff, glossy peaks and preventing them from deflating.
- Salt: A small pinch of salt in each component (curd, crust, meringue) helps to enhance and balance the flavors, making them pop.
Creative Recipe Adaptations:
While the classic Lemon Meringue Cheesecake is perfection, don’t hesitate to personalize it with these delightful variations:
- Gluten-Free Option: Easily transform this recipe into a gluten-free delight by simply swapping out regular graham crackers for your favorite gluten-free graham cracker crumbs in the crust. The rest of the recipe naturally remains gluten-free.
- Time-Saving Shortcuts: If you’re short on time but still craving that lemon meringue magic, consider using a good quality store-bought lemon curd instead of making it from scratch. While homemade is always superior, a high-quality jarred version can still yield delicious results. Alternatively, for a completely different but equally delicious treat, try my Lemon Meringue Cookies.
- Whipped Cream Topping: Not a meringue fan, or perhaps intimidated by it? No problem! You can easily substitute the meringue with a decadent vanilla bean whipped cream. Prepare the whipped cream as described in my Key Lime Cheesecake recipe and pipe it elegantly over the chilled lemon curd layer, or serve it on the side, allowing guests to customize their slices.
- Explore Other Citrus Flavors: The versatility of this cheesecake allows for exciting citrus swaps! For a bright and sunny Orange Meringue Cheesecake, simply replace the lemon curd with my luscious orange curd, and use fresh orange zest and juice instead of lemon. If you’re a fan of tart lime, you absolutely must try my fabulous Key Lime Cheesecake recipe, which provides a tropical twist.
Step-by-Step Guide to Baking Your Lemon Meringue Cheesecake:
Creating this stunning dessert is a rewarding process. Follow these detailed steps to ensure a flawless Lemon Meringue Cheesecake.
Step 1: Master the Lemon Curd. The lemon curd is a cornerstone of this cheesecake, offering layers of bright, tangy flavor. Begin by gently rubbing lemon zest into granulated sugar in a non-metal saucepan – this technique helps release the essential oils from the zest, infusing the sugar with intense lemon aroma. Whisk in eggs, fresh lemon juice, and a pinch of salt. Cook this mixture over low heat, stirring constantly with a silicone whisk, until it visibly thickens and coats the back of a spoon, reaching a temperature of 175°F (79°C) on an instant-read thermometer. Immediately strain the hot curd through a fine-mesh sieve to remove any zest or tiny bits of cooked egg, ensuring a perfectly smooth consistency. Stir in vanilla extract and cubed butter until fully melted and combined. Press plastic wrap directly onto the surface of the curd to prevent a skin from forming and chill it thoroughly in the fridge for at least 3 hours, or up to 4 days, until it’s cold and firm. (Pro Tip: A tiny drop of golden yellow food coloring can enhance its vibrant lemon hue, as natural lemon curd can be paler than expected. This recipe yields about 2 cups of rich lemon curd.)
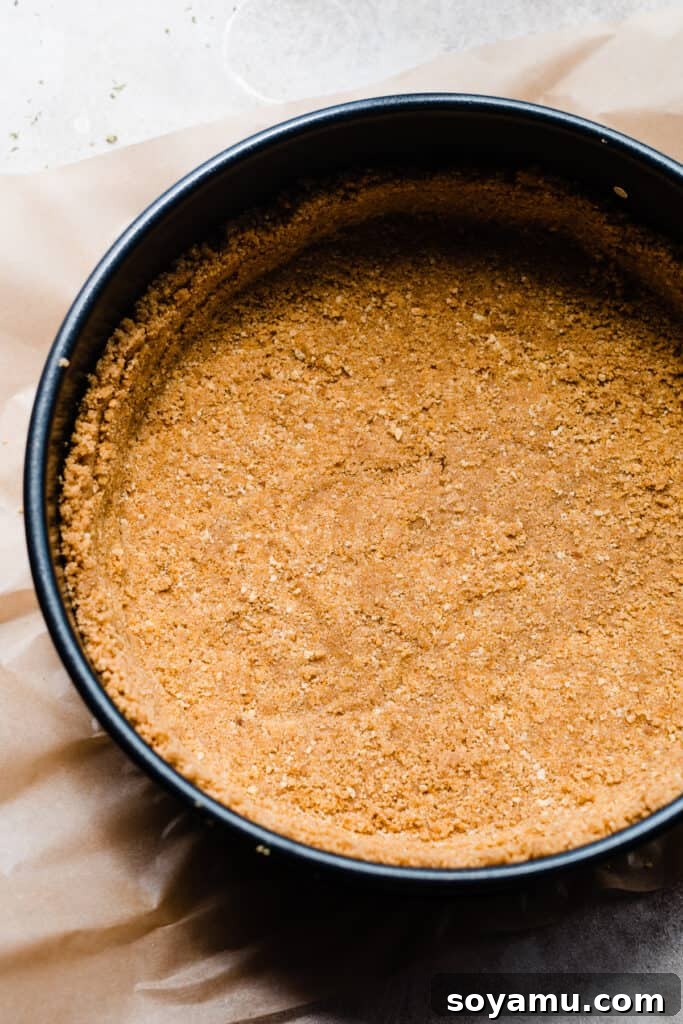
Step 2: Craft and Bake the Graham Cracker Crust. A sturdy and flavorful crust is essential. In a medium bowl, combine finely ground graham cracker crumbs, melted butter, and a pinch of sugar. Mix until the crumbs are evenly moistened and resemble wet sand. Press this mixture firmly and evenly into the bottom and slightly up the sides of a 9-inch springform pan that has been lightly sprayed with nonstick spray and has a securely fastened base. Baking the crust briefly for 10 minutes at 350°F (175°C) creates a perfectly crisp foundation that won’t become soggy when the cheesecake batter is added. After baking, let it cool completely before wrapping the bottom securely with aluminum foil – this is an initial barrier for the water bath. Keep your oven at 350°F and position your oven rack in the center, as it will be used shortly for the cheesecake. Begin boiling water in a large pot for the water bath.
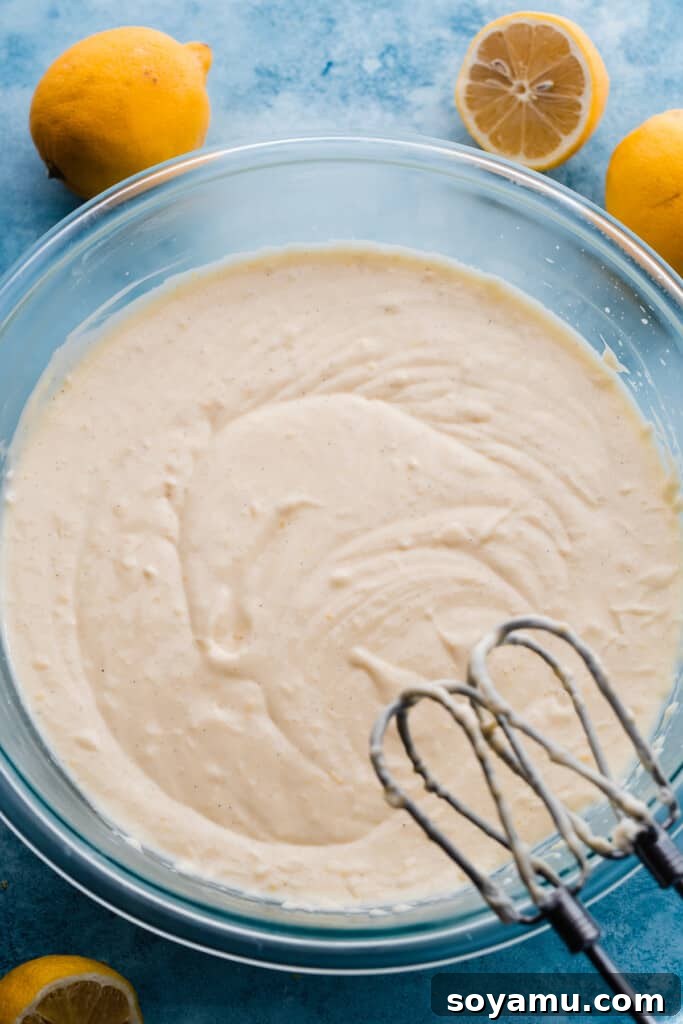
Step 3: Prepare the Silky Lemon Cheesecake Batter. For an ultra-smooth cheesecake, ensure all cold ingredients (cream cheese, eggs, sour cream) are at proper room temperature. Begin by gently rubbing the zest of two large lemons into the granulated sugar in a small bowl; this process maximizes lemon flavor. In a large mixing bowl, beat the softened full-fat cream cheese with an electric mixer until it’s incredibly smooth and creamy, about 1-2 minutes. Add the lemon-infused sugar and continue beating for another 1-2 minutes until thoroughly incorporated. Scrape down the sides and bottom of the bowl frequently to ensure no lumps remain. Incorporate the large eggs one at a time, mixing on medium speed just until each egg is combined. Avoid overmixing once the eggs are added, as this can introduce too much air, leading to cracks. Finally, mix in the vanilla extract, full-fat sour cream, and fresh lemon juice until just blended. You should have a silky, luscious batter with minimal lumps.
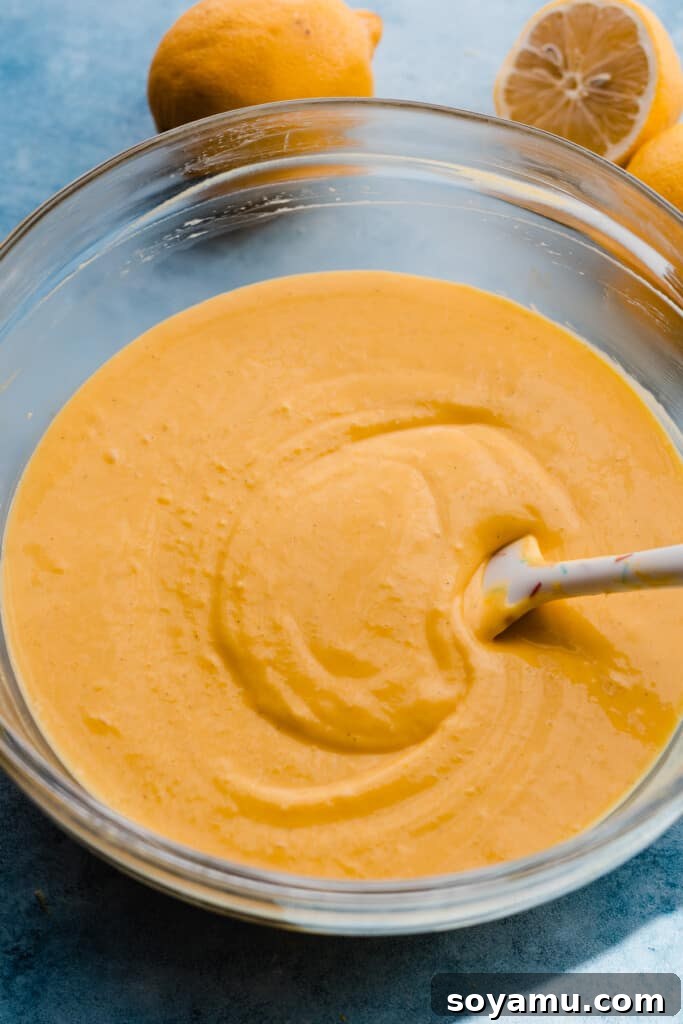
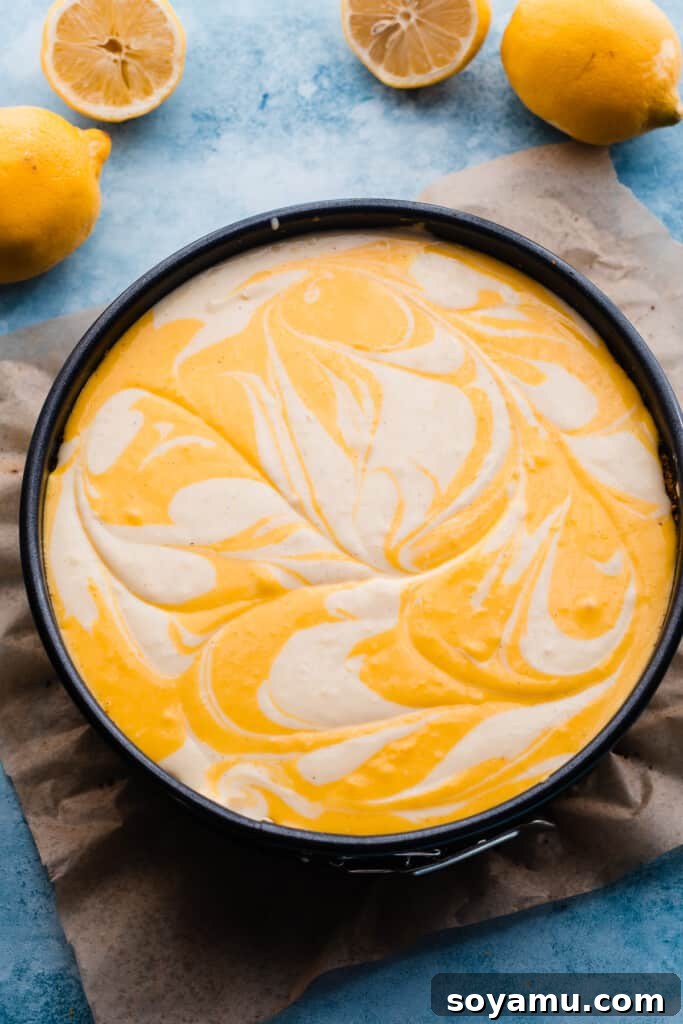
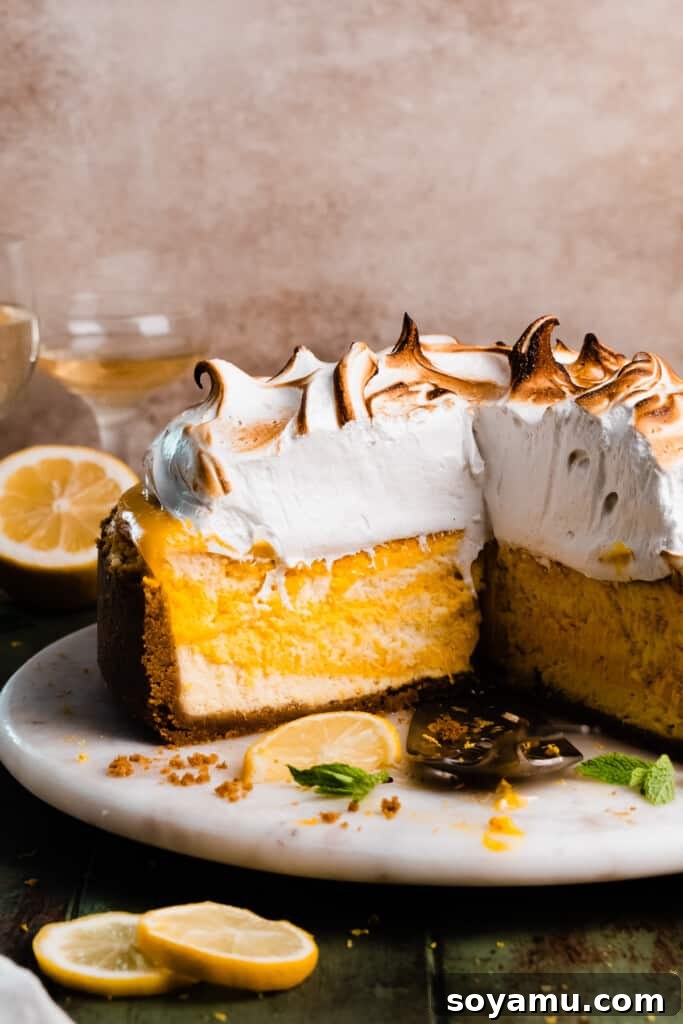
Step 4: Swirl the Batters and Prepare for Baking. To create a beautiful marbled effect and intensify the lemon flavor, divide your cheesecake batter. Remove 2½ cups (approximately 560 grams) of the prepared cheesecake batter and gently fold in 1 cup (290 grams) of your chilled homemade lemon curd. If desired, a touch more golden yellow food coloring can be added to this portion for a more vivid hue. Now, alternate dolloping spoonfuls of the plain lemon cheesecake batter and the lemon curd-infused batter into your cooled graham cracker crust. Continue until all the batter is used, creating random layers. Take a butter knife or a skewer and gently swirl the two batters together to create an elegant, marbling pattern on the surface. Be careful not to over-swirl, as you want distinct layers of flavor and color.
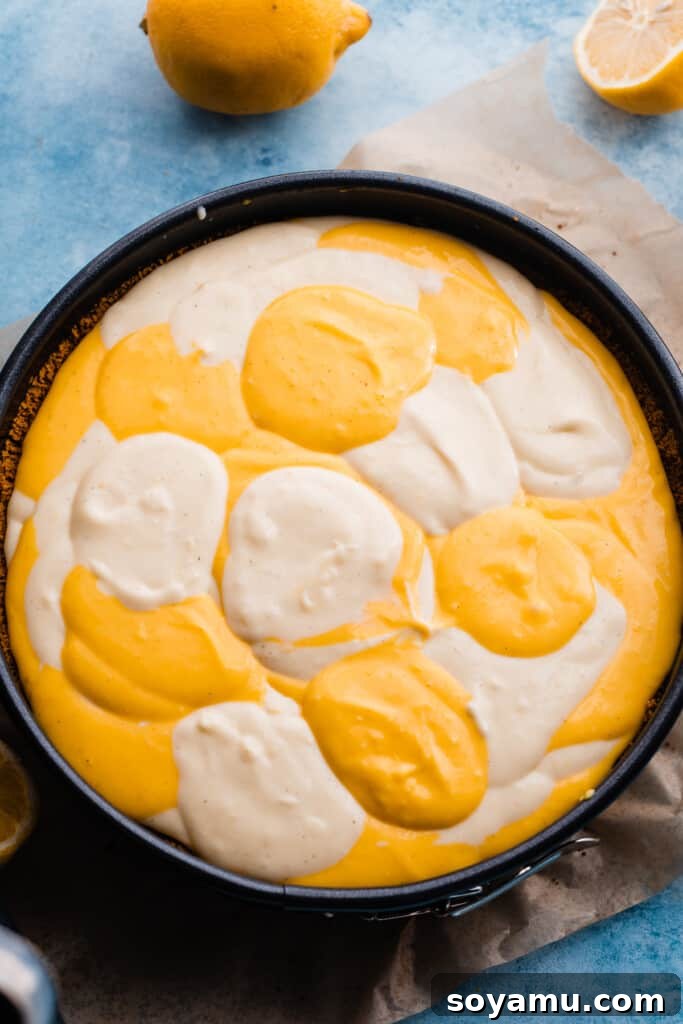
Use a butter knife to swirl the batters together, creating a beautiful marbled effect.
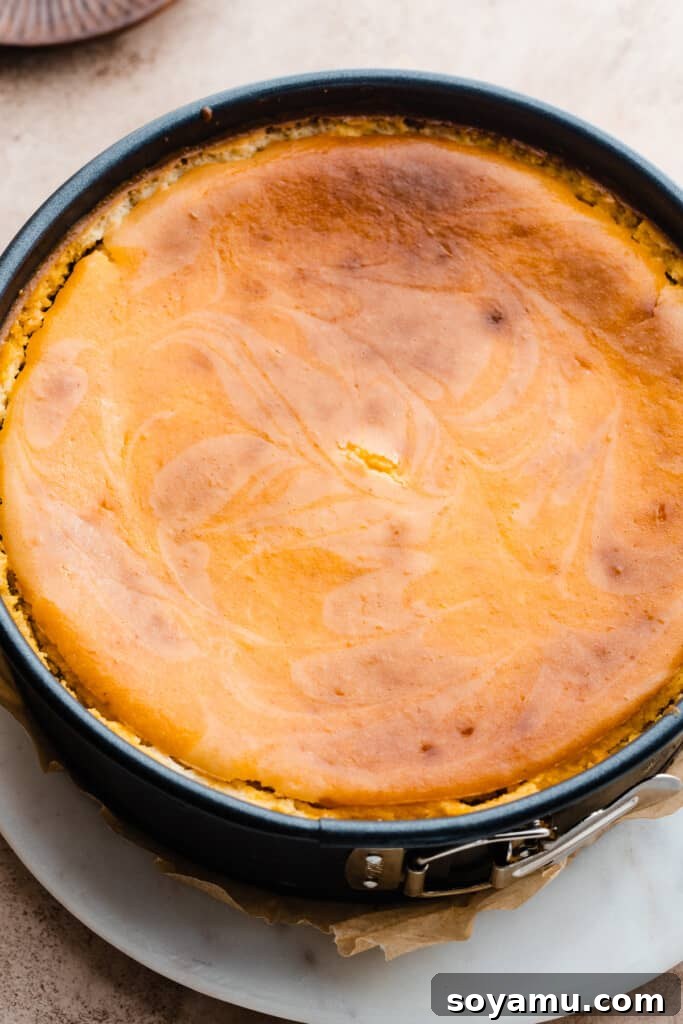
Step 5: Master the Water Bath and Bake to Perfection. The water bath (bain-marie) is the secret to a crack-free, incredibly creamy cheesecake. To ensure your cheesecake remains perfectly dry, wrap the sides of your 9-inch springform pan with a double layer of heavy-duty foil. Then, crucially, place this foil-wrapped springform pan *inside* a 10-inch cake pan. This acts as an impenetrable barrier. Next, place this nested setup into a larger roasting pan. Carefully transfer the roasting pan to your oven rack. Only once it’s in the oven, pour boiling water *into the roasting pan*, filling it about halfway up the sides of the 10-inch cake pan. Bake as directed in the recipe card, typically for 1 hour 40 minutes to 2 hours 12 minutes, or until the edges are set but the center has a slight wobble. This gentle, even heat prevents rapid temperature changes that cause cracking. Once baked, turn off the oven, crack the door slightly, and allow the cheesecake to cool slowly in the oven for 1 hour. This gradual cooling is essential. After an hour, remove it from the oven, unwrap the foil, let it cool completely to room temperature on a wire rack, then cover and chill in the refrigerator overnight. Overnight chilling is absolutely vital for the cheesecake to fully set and achieve its perfect dense, creamy texture.
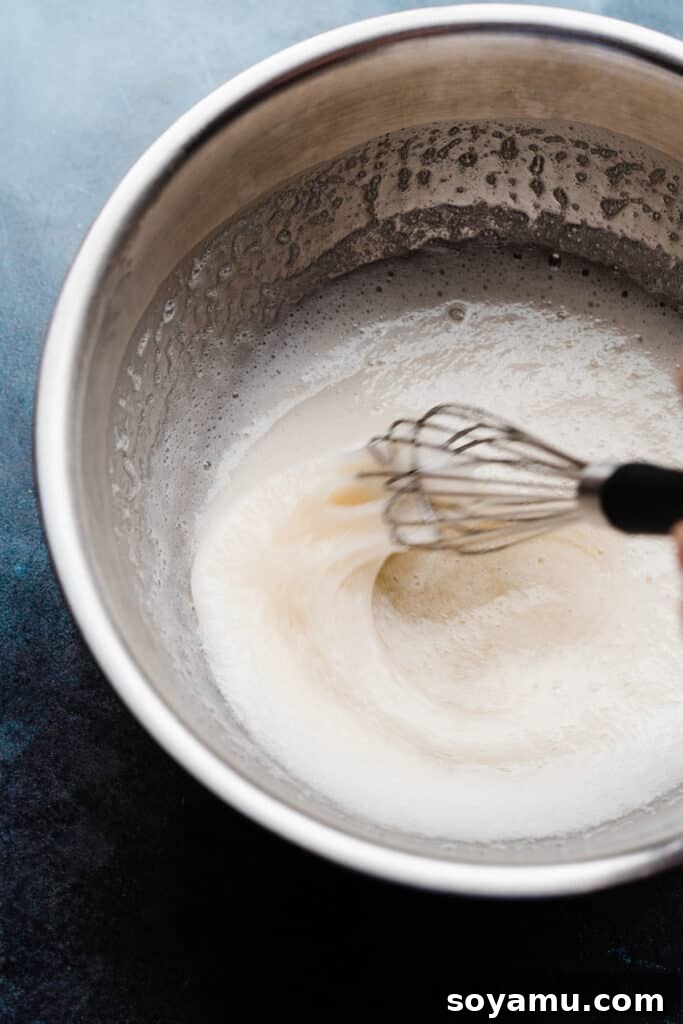
Step 6: Construct the Luxurious Meringue. Swiss meringue is renowned for its stability and glossy finish. Before you begin, thoroughly clean your metal mixing bowl and whisk attachment by wiping them with white vinegar and hot water; any trace of fat can prevent the meringue from whipping correctly. In a clean, heatproof metal bowl (preferably your stand mixer bowl), combine room temperature egg whites, granulated sugar, cream of tartar, and a pinch of salt. Place this bowl over a saucepan of simmering water (ensure the bowl’s bottom doesn’t touch the water). Whisk constantly until the mixture reaches a steady 175°F (79°C) on an instant-read thermometer. This cooking process stabilizes the egg whites. Immediately transfer the hot mixture to the bowl of a stand mixer fitted with a whisk attachment. Beat on high speed for 4-5 minutes, or until incredibly stiff, glossy peaks form. The meringue should hold its shape firmly when the whisk is lifted, with only the very tip gently curling. Stir in vanilla extract or vanilla bean paste at the end.
Step 7: The Grand Finale – Finish and Toast. Once your cheesecake is fully chilled and firm, carefully release it from the springform pan and transfer it to your serving platter. Spread a generous, even layer of the remaining chilled lemon curd over the top of the cheesecake. Then, using a spoon or an offset spatula, artfully pile the freshly made, glorious meringue on top of the lemon curd. Create beautiful swirls and peaks with the back of your spoon or spatula for a dramatic effect. Finally, and this is where the magic happens, use a kitchen blow torch to gently toast the meringue until it’s beautifully golden brown in spots. This adds a lovely caramelized flavor and a professional, visually stunning finish. Slice and serve immediately to enjoy the perfect harmony of creamy, tangy, and sweet!
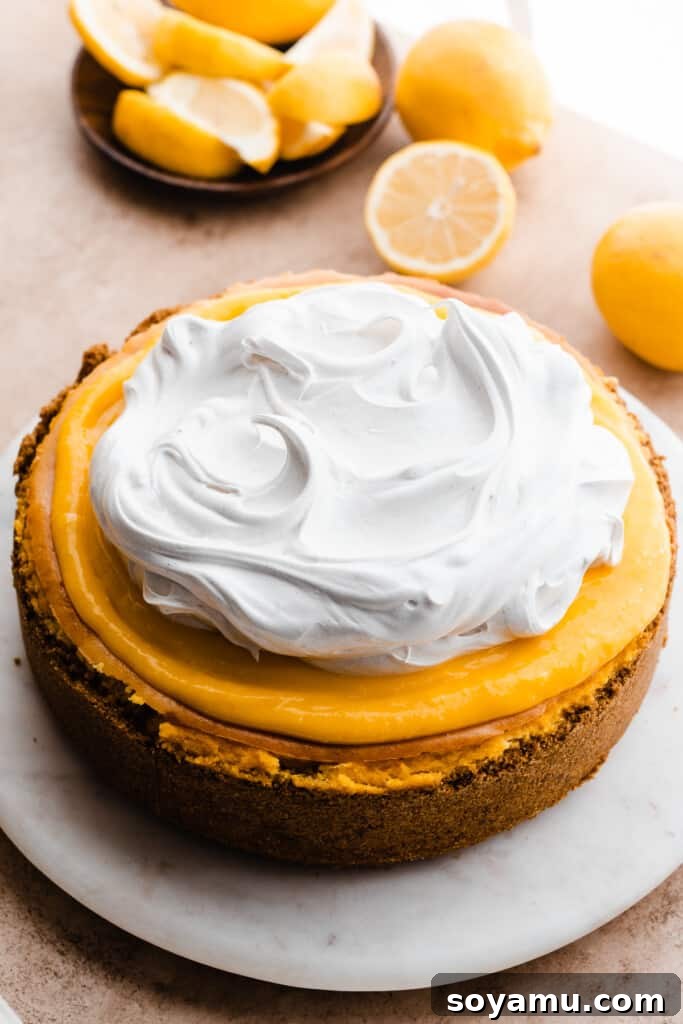
Serving and Storing Your Lemon Meringue Cheesecake:
The Lemon Meringue Cheesecake is at its absolute best when served immediately after the meringue has been toasted. The contrast between the warm, toasted meringue and the cold, creamy cheesecake is truly exquisite. For any glorious leftovers, store them carefully in an airtight cake carrier in the refrigerator. The meringue, especially Swiss meringue, is quite stable and should hold its beautiful shape without “weeping” (releasing liquid) for 3-4 days. This allows you to enjoy slices of this incredible dessert for several days!
Expert Tips for Flawless Swiss Meringue:
Meringue can seem daunting, but with these expert tips, you’ll achieve a perfect, stable, and visually stunning Swiss meringue every time.
- Understanding Swiss Meringue: Swiss meringue is celebrated for its stability, striking a perfect balance between the delicate French meringue and the more complex Italian meringue. Its magic lies in gently heating egg whites and sugar over a double boiler until the eggs reach 175°F (79°C). This crucial step pasteurizes and stabilizes the egg proteins. After heating, the mixture is vigorously beaten until it forms incredibly stiff, glossy peaks. This method results in a much more reliable meringue than French meringue (which uses no heat) and is less finicky than Italian meringue (which requires a hot sugar syrup).
- Why Meringue Fails (Weeping or Not Stiffening):
- **Humidity is the Enemy:** Meringue is highly sensitive to humidity. On very humid days, it can absorb moisture from the air, causing it to become “weepy” or fail to achieve stiff peaks. Try to make meringue on a dry day if possible.
- **Fat Contamination:** Even a minuscule amount of egg yolk in your egg whites, or fat residue on your mixing bowl or utensils, can prevent the egg whites from whipping up properly. Egg yolks contain fat, which interferes with the protein structure needed for stiff peaks.
- **Improperly Cleaned Equipment:** Always thoroughly clean your mixing bowl and whisk. Even after a dishwasher cycle, a barely perceptible film of fat (from butter, oils, etc.) can cling to surfaces. Wipe everything down with a paper towel dampened with white vinegar and hot water, then dry completely with a clean kitchen towel.
- **Material Matters:** Metal bowls and whisks are highly recommended over plastic or silicone for meringue. Fat adheres more stubbornly to plastic and silicone, making thorough cleaning more challenging.
- Can You Overmix Swiss Meringue? Yes, it is possible. While Swiss meringue is stable, overmixing can eventually cause it to deflate and become grainy. The key is to beat it until it’s very stiff and glossy, but stop once it reaches that point. If your meringue isn’t reaching the proper consistency after sufficient beating, it’s more likely due to one of the contamination issues mentioned above rather than under-mixing. Follow the cues in the recipe card closely, looking for those firm, unwavering peaks.
Expert Success Tips for Cheesecake Perfection:
Achieving a bakery-worthy Lemon Meringue Cheesecake relies on a few key techniques. Keep these expert tips in mind for consistently perfect results:
- Utilize an Oven Thermometer: Your oven’s internal thermostat might not be perfectly accurate. An oven thermometer is an inexpensive tool that provides real-time, accurate temperature readings, ensuring your oven is running precisely at the temperature you set. Consistent oven temperature is critical for cheesecake, so always keep an eye on its calibration.
- Room Temperature Ingredients are Non-Negotiable: This cannot be stressed enough for cheesecake! Cold cream cheese, eggs, and sour cream will not emulsify properly, leading to a lumpy, inconsistent batter. Allow all cold ingredients to sit out for at least 1-2 hours before beginning to ensure they reach true room temperature. This promotes a wonderfully smooth and uniform cheesecake texture.
- Avoid Overmixing the Batter: When adding the eggs to your cheesecake batter, mix only until just incorporated. Overmixing introduces too much air, which can cause the cheesecake to puff up excessively in the oven and then fall dramatically, often resulting in cracks or a “waist” in the middle. While it will still taste delicious, its appearance won’t be as pristine.
- Do Not Overbake: Overbaking is the most common cause of dry, crumbly cheesecake and unsightly cracks. Rely on the doneness cues provided in the recipe card: the edges should be set, but the very center should still have a slight wobble when gently nudged. The cheesecake will continue to set as it cools. A minor browning on the top is normal, especially with the volume of batter, and does not necessarily mean it’s overbaked.
- The Importance of Slow Cooling: After baking, turn off the oven and prop the door open slightly, allowing the cheesecake to cool slowly within the residual heat for an hour. This gradual temperature change prevents sudden shrinkage and cracking. Then, remove it to a wire rack to cool completely to room temperature before chilling overnight in the refrigerator. Patience here is key for the ideal texture.
FAQs: Frequently Asked Questions About Lemon Meringue Cheesecake
Absolutely! This recipe can be successfully halved. If you choose to do so, I recommend baking it in a 9×9 inch square pan. While a 6-inch springform pan might seem appropriate for a half batch, the volume of batter can still be a bit too much, potentially leading to a very tall cheesecake that takes longer to bake and cool. A square pan often works better for smaller portions.
Don’t panic! A slight browning on the top of your cheesecake is actually quite normal, especially with recipes that feature a generous volume of batter. The top surface of the cheesecake is closest to the oven’s heating element, making it more susceptible to browning. It’s crucial not to attempt to cover the cheesecake with foil if you notice it browning during baking, as the foil will likely stick to the surface and tear it when removed – a lesson many bakers learn the hard way! Rest assured, even with a little browning, the interior will remain wonderfully creamy and delicious. Using a water bath significantly helps to mitigate excessive browning and promotes even cooking.
Yes, chilling your cheesecake overnight is truly essential! This is a fundamental characteristic of almost all cheesecake recipes. After baking, allow the cheesecake to cool completely to room temperature. Then, transfer it to the refrigerator and let it chill for at least 6 hours, though overnight (10-12 hours) is ideal. This extended chilling period allows the cheesecake to fully set, firm up, and develop its signature dense, creamy texture. Rushing this step will result in a soft, potentially runny cheesecake that is difficult to slice and less enjoyable.
Certainly! While swirling the two batters creates a visually stunning marbled effect, it’s not strictly required for the taste. If you prefer a simpler approach, you can incorporate all of the lemon curd directly into the entire batch of cheesecake batter, without dividing it. Then, simply pour the combined batter into your crust and bake as directed. The cheesecake will still be incredibly delicious, just without the distinct two-toned swirl.
A water bath, or bain-marie, is a baker’s best friend for cheesecakes! It creates a moist, consistent cooking environment in your oven. The hot water produces steam that circulates around the cheesecake, preventing the top and edges from cooking too quickly and cracking. This gentle, even heat ensures the cheesecake cooks uniformly from edge to center, resulting in a beautifully smooth, creamy texture without the dreaded dry spots or cracks. Think of it as a protective, humid shield that lovingly bakes your delicate cheesecake.
Preventing a soggy crust from a leaky water bath is a common concern, but easily avoidable with the right technique. You have two highly effective options:
- The Double-Pan Method (Most Recommended): After wrapping the bottom of your springform pan with a double layer of heavy-duty aluminum foil, place the entire springform pan (with the cheesecake batter) inside a slightly larger, solid 10-inch cake pan. Then, place this nested setup into your roasting pan. Pour boiling water *only* into the roasting pan, ensuring it surrounds the 10-inch barrier pan. This method creates an almost foolproof seal against water leakage. Foil alone, even heavy-duty, is often not enough to prevent tiny leaks.
- Separate Rack Method: If you don’t have a 10-inch cake pan to use as a barrier, you can place your roasting pan (filled with boiling water) on the oven rack *below* your cheesecake pan. While this method is less effective at creating a truly humid environment directly around the cheesecake, it still adds some beneficial moisture to the oven and is far better than no water bath at all. Your cheesecake will still taste fabulous, but might have a slightly higher chance of minor cracking.
The double-pan method is highly recommended for the best results and peace of mind!
Special Tools for Lemon Curd and Cheesecake Success:
Having the right tools can make all the difference in achieving professional-level results and simplifying your baking process. Here are some recommended tools for this Lemon Meringue Cheesecake:
For the Lemon Curd:
- Silicone Whisk: To prevent any metallic taste from reacting with the acidic lemon juice, a silicone whisk is an excellent choice. It’s gentle on non-stick surfaces and ensures a pure lemon flavor.
- Ceramic Saucepan: Similarly, using a ceramic pan is highly recommended for cooking lemon curd. It reduces the chance of the lemon reacting with metal, which can impart an off-flavor.
- Fine Mesh Sieve: A fine sieve is indispensable for straining the cooked lemon curd. This essential step removes any bits of lemon zest or tiny cooked egg particles, ensuring your curd is exquisitely smooth and silky.
- Instant Read Thermometer: Precision is key when making curd. An instant-read thermometer will accurately tell you when your curd has reached the ideal temperature of 175°F (79°C), preventing overcooking or undercooking.
For the Lemon Cheesecake and Meringue:
- 9-inch Springform Pan: This 9-inch springform pan is specifically designed for cheesecakes, allowing for easy release of your delicate dessert without damaging its sides.
- 10-Inch Cake Pan: As detailed in the water bath instructions, a 10-inch cake pan serves as a crucial barrier between your springform pan and the boiling water in the roasting pan, ensuring absolutely no leakage.
- Large Roasting Pan: Essential for creating a water bath, a sturdy roasting pan provides the necessary space to hold your cheesecake setup and boiling water.
- Stand Mixer with Whisk Attachment: While a hand mixer can work, a stand mixer makes preparing the cheesecake batter and whipping the Swiss meringue much easier and more consistent, ensuring stiff, stable peaks.
- Kitchen Torch (Blow Torch): For that stunning golden-brown meringue topping, a Bernzomatic Trigger Start Torch paired with Propane Tanks is highly recommended. Avoid smaller, cheaper kitchen torches that tend to fail quickly; a quality torch will last for years and provide powerful, even toasting.
More Irresistible Cheesecake Recipes to Love:
If you’ve fallen in love with the art of cheesecake, explore these other fantastic recipes from our collection:
- Mini S’mores Cheesecakes with Toasted Marshmallow Meringue
- Key Lime Pie Cheesecake with Boozy Whipped Cream
- Perfect Classic Cheesecake with Homemade Strawberry Sauce
- Decadent Pecan Pie Cheesecake
- Ultimate Triple Biscoff Cheesecake
- Rich Triple Nutella Cheesecake with Nutella Ganache
- Lively Lemon Blueberry Cheesecake Bars with Homemade Topping
Did you make this recipe? We’d love to hear from you! Leave a comment & star rating!
Your feedback is invaluable to us. Please click the little stars in the recipe card header below to share your experience and leave a star rating. It helps our small business immensely and guides other bakers!
Lemon Meringue Pie Cheesecake
Stephanie Simmons
50 mins
2 hrs
10 mins
12 slices
Print Recipe
Ingredients
For the Lemon Curd
- Zest of 2 large lemons
- 3/4 cup + 2 tbsp granulated sugar
- 3/4 cup + 1 tbsp lemon juice, (About 4-5 medium lemons)
- 4 large eggs, at room temperature
- Pinch of salt
- 1/2 tsp vanilla extract
- 6 tbsp salted butter, cubed, (85 grams)
For the Crust:
- 3 cups graham cracker crumbs, (280 grams)
- 1/2 cup + 2 tbsp salted butter, melted
For the Cheesecake Batter:
- 32 ounces full fat cream cheese, softened at room temperature
- Zest of 2 large lemons
- 1 1/2 cups granulated sugar
- 4 large eggs, at room temperature
- 3/4 cup full fat sour cream, at room temperature
- 2 tsp vanilla extract
- 1/3 cup + 1 tbsp lemon juice
- 1 cup lemon curd, (290 grams, chilled)
For the Meringue
- 4 large egg whites, at room temperature
- 1 cup granulated sugar
- 1/2 tsp cream of tartar
- 1/8 tsp salt
- 2 tsp vanilla bean paste, (or vanilla extract)
Instructions
-
Make the Lemon Curd: Beat the eggs lightly in a small bowl and set aside. Place a strainer over a medium bowl. In a medium non-metal saucepan (ceramic preferred), combine lemon zest and granulated sugar, rubbing the zest into the sugar with clean fingers. Add the lemon juice, beaten eggs, and salt to the pan. Whisk constantly over low heat for 10-14 minutes, until the mixture thickens significantly and reaches 175°F (79°C) on an instant-read thermometer. It should coat the back of a spoon and hold a trail when a finger is drawn through. Immediately remove from heat and strain into the prepared bowl to remove any lumps. Whisk in vanilla and cubed butter until smooth. Press plastic wrap directly onto the surface of the curd and chill in the fridge for at least 3 hours, or up to 4 days, until fully cold and firm. (Yields approximately 2 cups/555 grams).
-
Make the Crust: Preheat oven to 350°F (175°C). Lightly spray a 9-inch springform pan with nonstick spray and ensure the bottom is securely fastened. Combine graham cracker crumbs and melted butter. Press firmly into the prepared pan and slightly up the sides. Bake for 10 minutes, then let cool completely. Once cool, wrap the bottom of the pan securely with aluminum foil. Keep oven on at 350°F (175°C), with the rack in the center. Begin boiling water in a large pot for the water bath.
-
Make the Cheesecake Filling: Ensure all cold ingredients are at room temperature. In a small bowl, rub lemon zest into granulated sugar with clean hands. In a large mixing bowl, beat softened cream cheese until creamy (1-2 minutes). Add lemon sugar and mix until well incorporated (1-2 minutes), scraping down the sides and bottom of the bowl thoroughly. Add eggs one at a time, mixing on medium speed just until incorporated after each, scraping the bowl after each addition. Mix in vanilla, sour cream, and lemon juice until just blended. Remove 2½ cups (560 grams) of batter to a medium bowl and fold in 1 cup (290 grams) of chilled lemon curd. Alternate dolloping the two batters into the cooled crust until all batter is used. Use a butter knife to gently swirl the batters together for a marbled effect.
-
Prepare the Water Bath + Bake: Bring your large pot of water to a boil. Place the foil-wrapped springform pan inside a 10-inch cake pan, then place this nested setup into your large roasting pan. Carefully transfer the roasting pan to the oven. Pour boiling water into the roasting pan only, filling it about halfway up the sides of the 10-inch cake pan. (The 10-inch cake pan acts as a barrier; foil alone is often insufficient to prevent leaks. If no 10-inch pan is available, place the roasting pan of water on the rack below the cheesecake – this is less effective but still helpful.)
-
Bake: Bake the cheesecake for 1 hour 40 minutes to 2 hours 12 minutes. The cheesecake is done when the edges are set but the center still has a slight wobble. A knife inserted near the edge should come out clean, and slightly gooey in the very center. Turn off the oven, crack the door open, and let the cheesecake cool in the oven for 1 hour.
-
Cheesecake Cooling: After 1 hour in the oven, remove the pan. It should be cool enough to handle. Remove the foil and place the springform pan on a wire rack to cool completely to room temperature. Once cool, cover with foil and refrigerate for at least overnight (preferably 10-12 hours) or up to 2 days before releasing from the pan and decorating.
-
Meringue Prep: Before starting, ensure all metal bowls and whisk attachments are meticulously clean. Wipe them down with white vinegar and hot water, then dry thoroughly with a clean towel to eliminate any traces of fat. Avoid making meringue on a very humid day. Place your chilled cheesecake on its serving plate. Spread a thin, even layer of the remaining lemon curd on top of the cheesecake.
-
Make the Meringue: Add about an inch of water to a small saucepan and bring to a simmer. In a heatproof metal bowl (or your stand mixer bowl), whisk together room temperature egg whites, granulated sugar, cream of tartar, and salt. Place the bowl over the simmering water (ensure the bowl does not touch the water). Whisk constantly until an instant-read thermometer holds steady at 175°F (79°C) – this typically takes about 8 minutes. Immediately remove the bowl from the heat and stir in the vanilla. Transfer to a stand mixer with a whisk attachment (or use a hand mixer). Beat on high speed (8-9 on a stand mixer) for 4-5 minutes until very stiff, glossy peaks form. The meringue should hold its shape firmly when the whisk is lifted. Immediately pile the meringue onto your cheesecake, create swirls with the back of a spoon, then use a kitchen blow torch to toast it to a golden brown.
-
Serve & Store: After toasting the meringue, slice and serve your Lemon Meringue Cheesecake immediately to best enjoy the textures. Store any leftovers in an airtight cake carrier in the refrigerator for 3-4 days. The meringue should remain stable during this time.
Notes
Egg Whites: Eggs separate more easily when cold. Separate your eggs while they’re cold, then allow the egg whites to come to room temperature before using them for the meringue.
Nutrition
Nutrition information is automatically calculated, so should only be used as an approximation.
Enjoyed this recipe? Leave a comment below!