
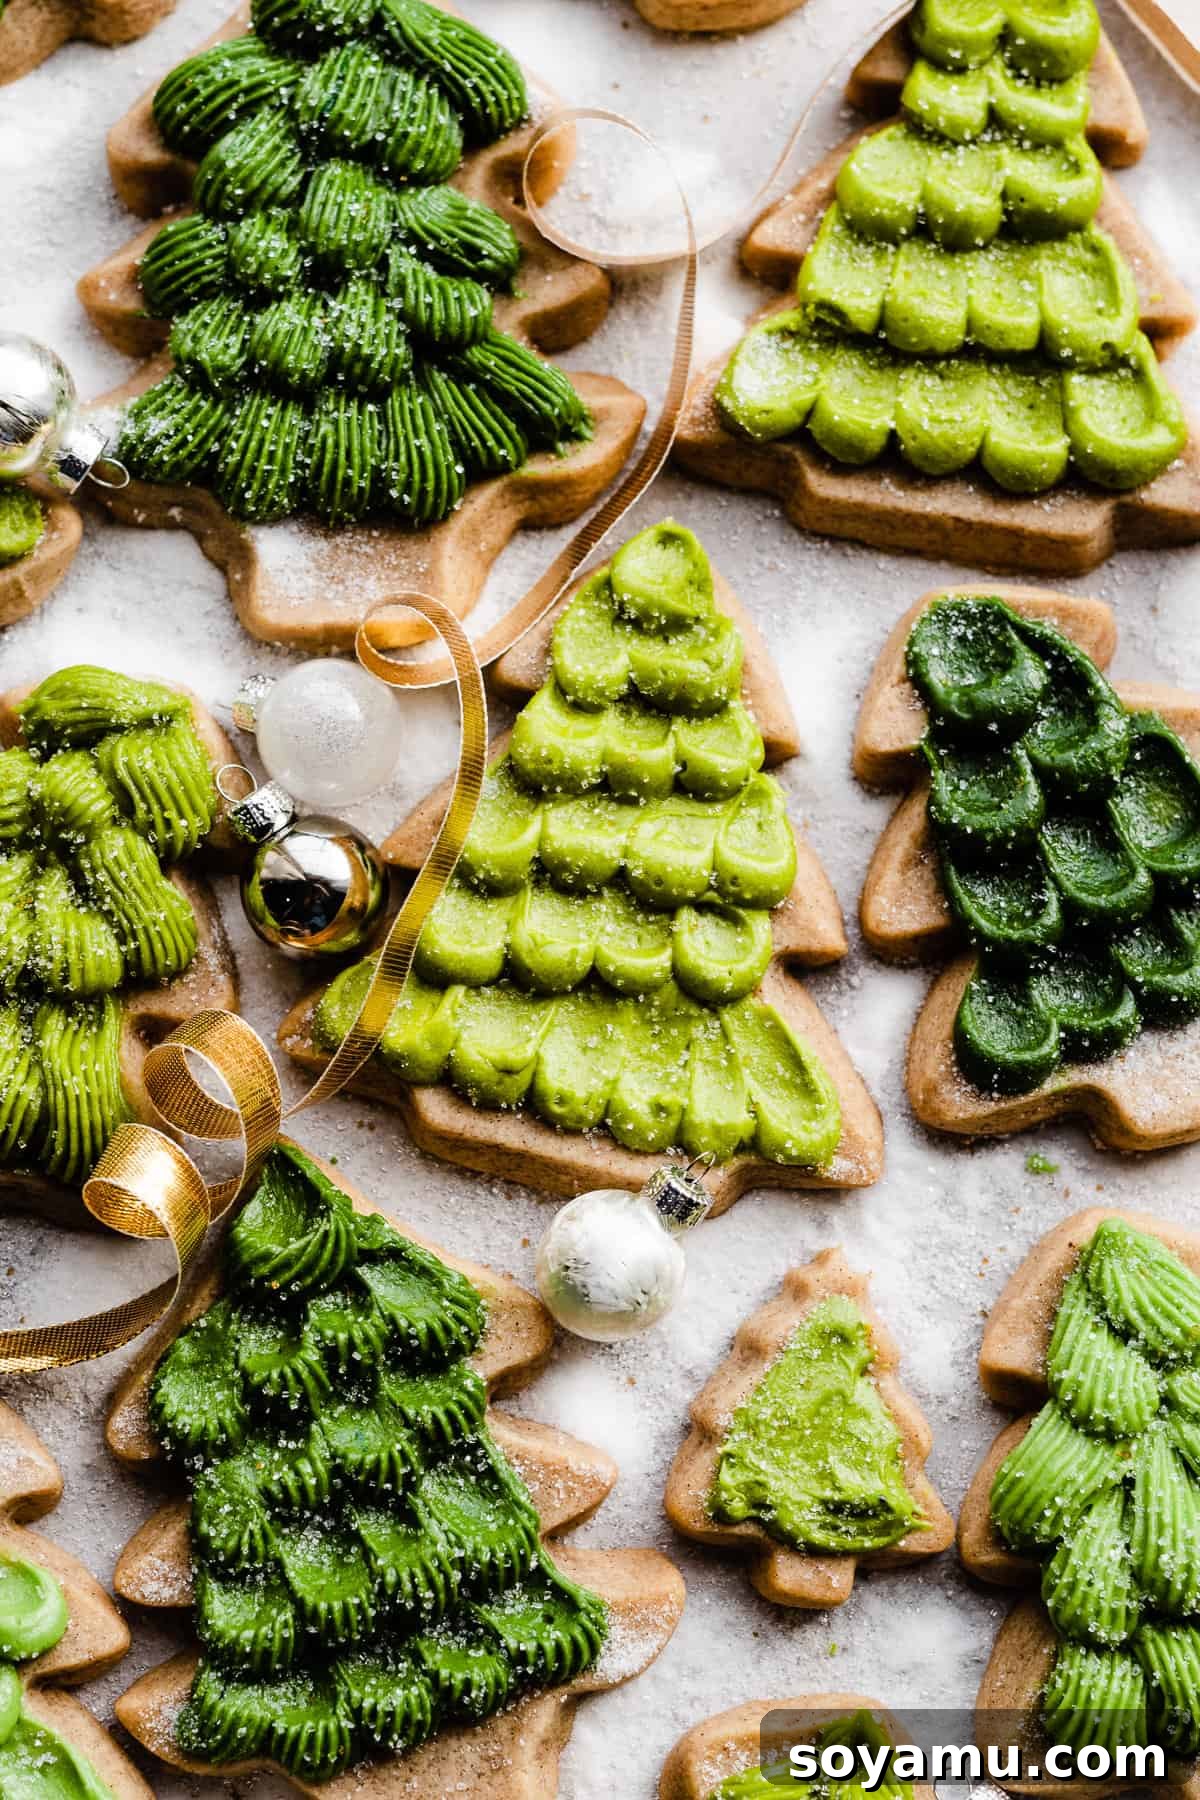
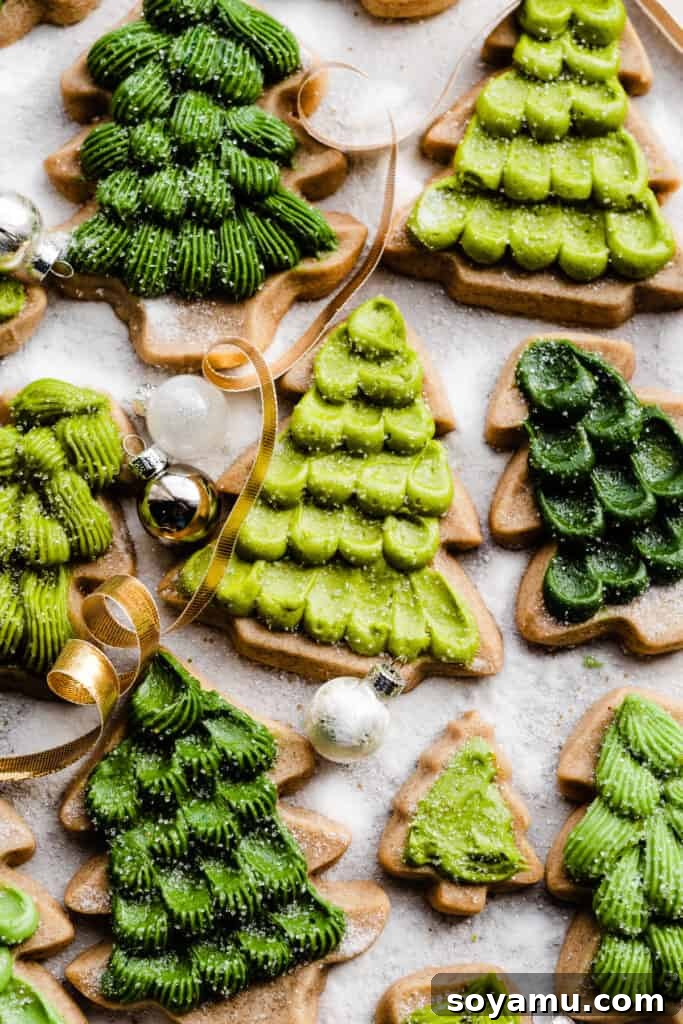
Delight in the sweet embrace of homemade goodness with these **Honey Cookies**, a true masterpiece of texture and flavor. These cookies are wonderfully soft and satisfyingly thick, offering a delightful chewiness that’s far from cakey. Each bite reveals a distinct, comforting honey flavor, perfectly balanced and elevated by a subtle hint of cinnamon. What truly sets these cookies apart is their ability to hold intricate shapes beautifully during baking, making them an ideal canvas for creative decoration, especially during festive seasons like Christmas. To top it all off, they’re crowned with a luscious, creamy honey cream cheese frosting that adds an irresistible tang and richness. In this comprehensive guide, you’ll discover everything from essential tips and tricks to recommended tools, ensuring your honey cookies are not only delicious but also visually stunning, just like the charming Christmas trees you see pictured!
Why You’ll Adore These Honey Cutout Cookies
Our Honey Cookies are more than just a treat; they’re an experience designed to bring joy and deliciousness to your kitchen. Here’s why these cookies will become your new favorite:
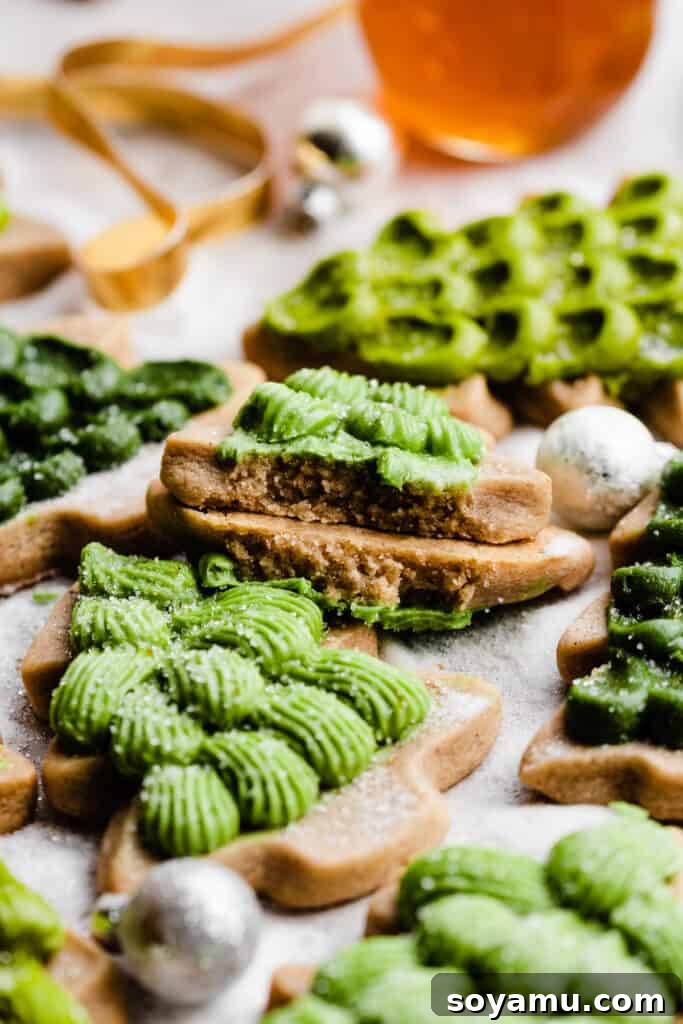
- Irresistibly Soft and Chewy Honey Cookies: Forget dry, crumbly cookies. These delectable honey cookies are renowned for their perfect balance of softness and chewiness. They’re thick and substantial, never cakey, and infused with the rich, natural sweetness of real honey. A delicate whisper of cinnamon perfectly complements the honey, creating a flavor profile that’s comforting and not overly sweet. This careful balance ensures every bite is a delightful burst of flavor, making them ideal for any occasion, from casual snacking to elegant dessert platters.
- Perfectly Shaped Cutout Cookies: If you love decorating, these are the cookies for you! Our honey cookie dough is engineered to hold its shape flawlessly during baking, ensuring your intricate cutout designs remain sharp and distinct. Whether you’re crafting festive Christmas trees, whimsical hearts for Valentine’s Day, or fun shapes for a birthday celebration, these cookies provide the perfect sturdy base for all your creative decorating endeavors. The joy of seeing your perfectly shaped cookies emerge from the oven is truly unmatched.
- Velvety Honey Cream Cheese Frosting: Elevate your cookie game with our signature honey cream cheese frosting. This isn’t just any frosting; it’s a creamy, dreamy concoction that strikes the perfect balance between the tangy richness of cream cheese and the delicate sweetness of honey. The honey subtly enhances the frosting’s depth, creating a truly unique and addictive flavor that complements the honey cookies beautifully. It’s smooth, easy to pipe, and provides a stunning finish to your masterpieces.
Essential Ingredient Overview for Honey Cookies
Crafting perfect honey cookies starts with understanding your ingredients. Below is a detailed look at the key components for both the cookies and the frosting:
- Salted Butter: For superior flavor depth in your cookies and frosting, we highly recommend using salted butter. Its subtle saltiness perfectly balances the sweetness of the honey and sugar, enhancing the overall taste profile. If unsalted butter is all you have on hand, simply add an extra pinch (about 1/8 teaspoon) of fine sea salt to your cookie dough and frosting recipes to achieve a similar flavor balance. Ensure your butter is softened to room temperature for optimal creaming.
- Pure Honey: The star of the show! Honey imparts a distinctive, warm, and natural sweetness that defines these cookies. We suggest using a lighter variety, such as clover honey or a raw clover honey, as these offer a classic, gentle honey flavor that won’t overpower the other ingredients. Avoid darker, more robust types like buckwheat or manuka honey, which can sometimes have too strong a flavor for delicate cookies.
- All-Purpose Flour: The foundation of our cookie structure. Accurate flour measurement is critical for achieving the desired soft and chewy texture. Always employ the “spoon and level” method: gently spoon flour into your measuring cup until it overflows, then level off the excess with a straight edge (like the back of a knife). Scooping directly from the bag can compact the flour, leading to too much in your dough and resulting in dry, dense cookies. For the most precise results, use a kitchen scale and measure 135 grams of all-purpose flour per cup.
- Light Brown Sugar: This provides additional moisture and a rich, molasses-like depth of flavor to the cookies, contributing to their chewy texture and golden hue. Make sure to pack it firmly when measuring.
- Ground Cinnamon and Nutmeg: These warm spices are the secret to enhancing the honey flavor and adding an inviting aroma to your cookies. They provide a subtle, comforting warmth that makes these cookies truly irresistible, especially during colder months or festive occasions.
- Baking Soda and Salt: Baking soda helps the cookies rise slightly and contributes to their tender crumb. Salt is crucial for balancing the sweetness and bringing out all the delicious flavors in the dough.
- Cream Cheese: For the frosting, use full-fat cream cheese, softened to room temperature. This is essential for a smooth, creamy texture and that signature tangy flavor.
- Powdered Sugar (Confectioners’ Sugar): This fine sugar is key to creating a silky-smooth, lump-free frosting that’s perfect for piping and decorating.
Recipe Substitutions & Creative Variations
These honey cookies are wonderfully versatile, allowing for various adaptations to suit dietary needs or creative whims. Don’t be afraid to experiment!
- Dairy-Free Alternative: For those with dairy sensitivities or preferences, these cookies can easily be made dairy-free. Simply substitute traditional butter with your favorite plant-based butter (ensure it’s suitable for baking) and use dairy-free cream cheese in the frosting. Brands like Miyoko’s Kitchen or Kite Hill often provide excellent results for both butter and cream cheese alternatives.
- Endless Decoration Possibilities: The beauty of cutout cookies lies in their decorative potential. While we focus on festive Christmas trees, you are truly limited only by your imagination!
- Shape It Up: Use cookie cutters for any holiday or theme: hearts for Valentine’s, shamrocks for St. Patrick’s, stars for patriotic holidays, or playful animal shapes for a child’s party.
- Simple & Sweet: For a quick and charming look, press sanding sugar or colorful sprinkles directly onto the cut-out dough before baking. This method creates a lovely sparkle and a slight crunch, reminiscent of classic homemade cookies.
- Frosting Fun: Beyond piping, consider spreading the honey cream cheese frosting smoothly with an offset spatula, then adding sprinkles, edible glitter, or small candies. You can even try marbling techniques with different colored frostings.
- Royal Icing vs. Cream Cheese: While this recipe features a cream cheese frosting, if you desire very intricate, hard-setting decorations, you could opt for royal icing. However, the honey cream cheese frosting offers unparalleled flavor and a delightful soft texture that complements these cookies wonderfully.
Crafting Your Honey Cookies: A Step-by-Step Guide
Follow these detailed steps to create perfectly soft, flavorful, and beautifully decorated honey cookies.
Step 1: Master the Cookie Dough. In a spacious mixing bowl, begin by creaming together your softened salted butter with an electric mixer (or a stand mixer fitted with the paddle attachment). Beat it on medium-high speed until it’s light and fluffy, about 1-2 minutes. Gradually add the light brown sugar, continuing to beat until the mixture is well-creamed, pale, and airy, for another minute or so. Incorporate the pure honey, mixing until it’s just combined. In a separate bowl, whisk together your all-purpose flour, cinnamon, nutmeg, baking soda, and salt. Gradually add these dry ingredients to your wet mixture, mixing on low to medium speed until a cohesive dough forms. Be careful not to overmix, as this can lead to tough cookies. The dough should come together smoothly; if it appears a tad crumbly, add 1-2 teaspoons of milk or cream to achieve a pliable consistency. To check, press a small piece of dough between your fingers – it should feel smooth and hold its shape.
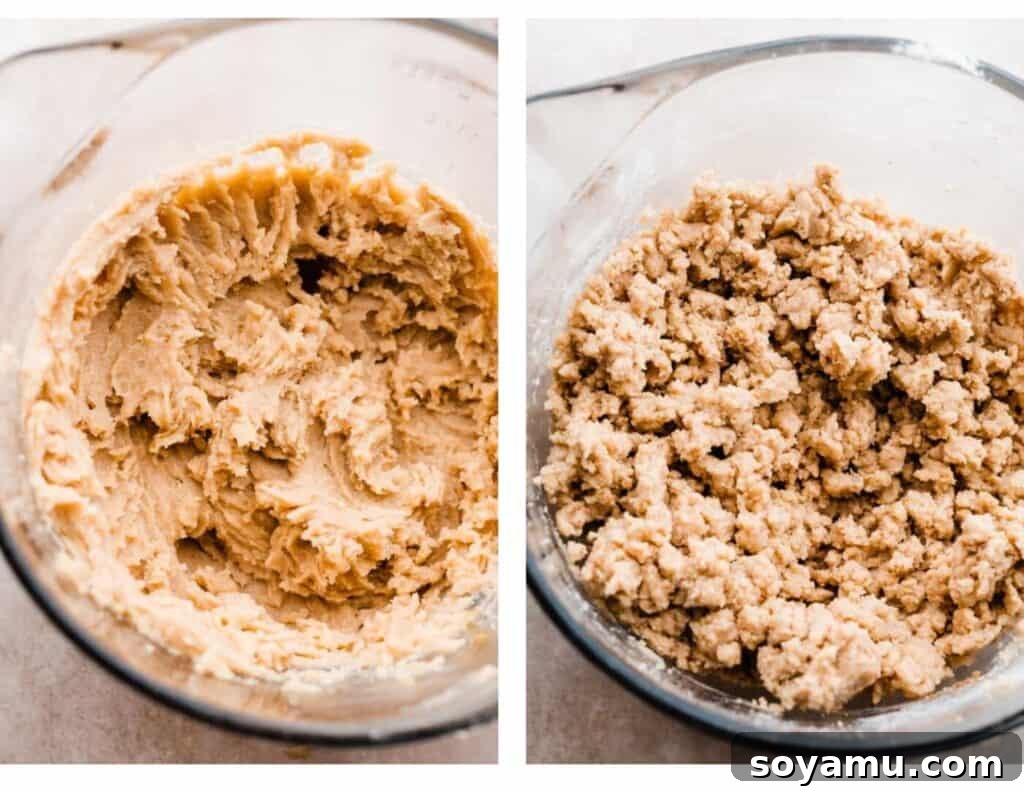
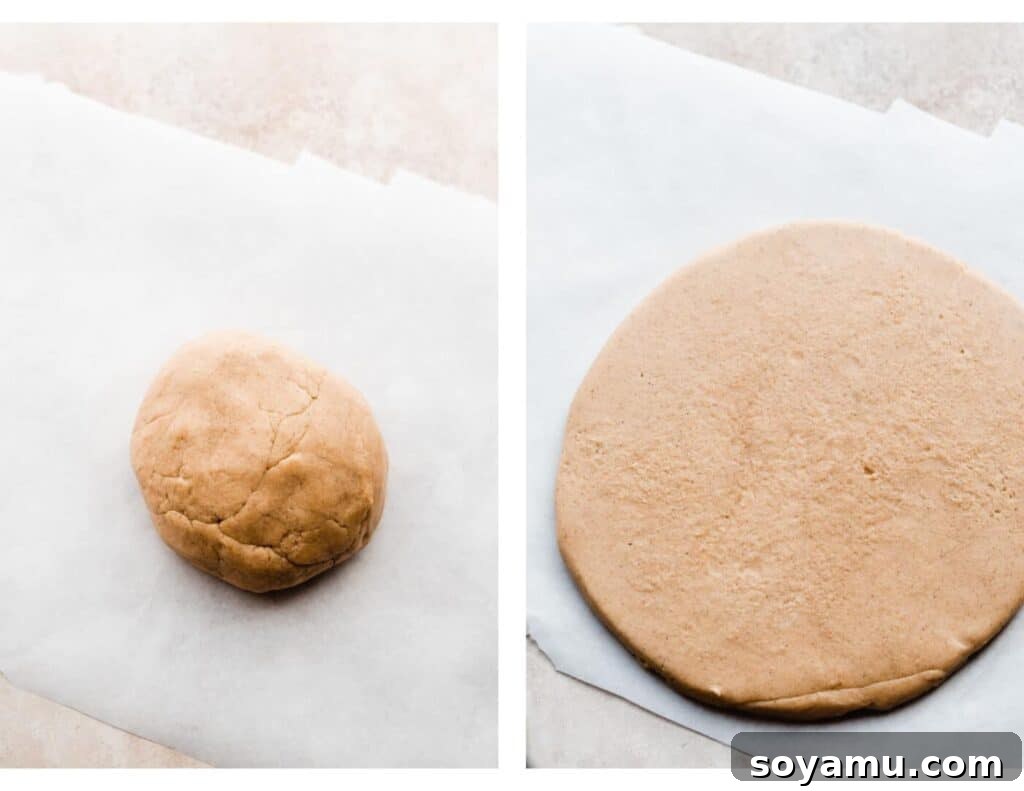
Step 2: Roll and Chill for Perfection. Divide your freshly made cookie dough into two equal halves. On a lightly floured surface or, preferably, between two sheets of parchment paper, roll out each half to a consistent thickness of 3/8 inch or 1/2 inch. Using a ruler can help ensure even thickness, which is crucial for uniform baking. The parchment paper method makes handling the dough much easier and prevents sticking. Once rolled, place the dough (still sandwiched in parchment) onto a baking sheet. Cover the baking sheet loosely with a clean kitchen towel or plastic wrap. Transfer it to the refrigerator and chill for a minimum of 2 hours, or for quicker results, place it in the freezer for about 1 hour. The dough must be firm and cold to the touch before you begin cutting to ensure your cookies maintain their beautiful shapes during baking.
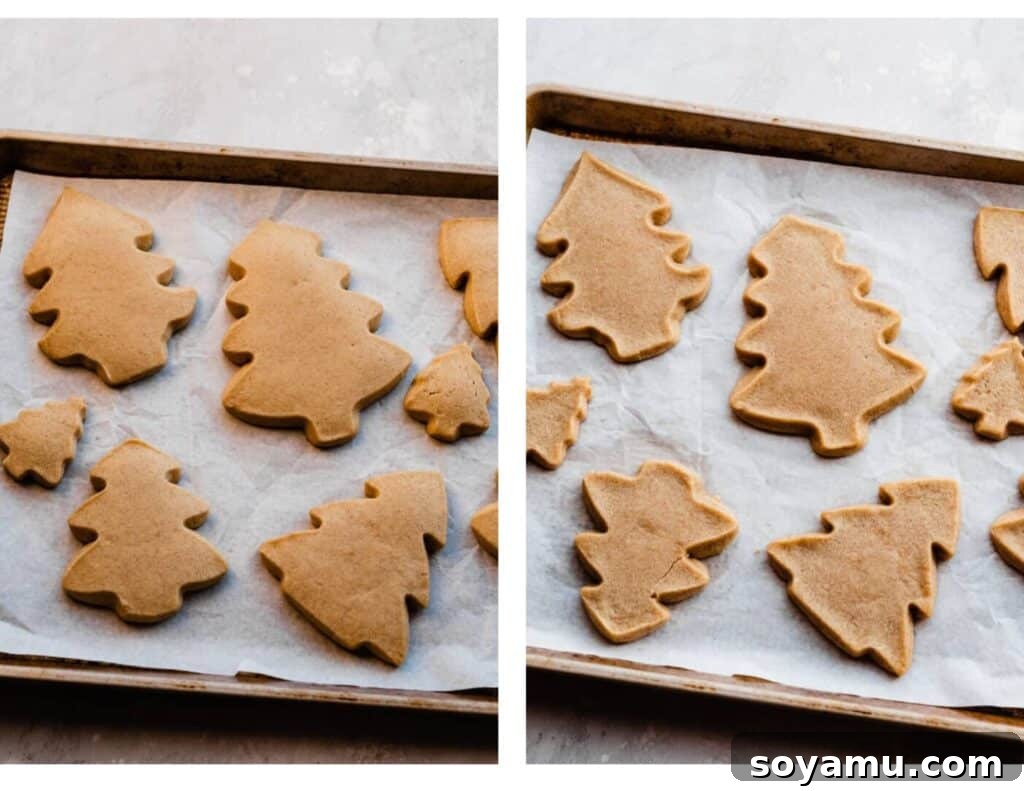
Step 3: Bake Your Masterpieces. Preheat your oven to 350°F (175°C). Line your baking sheets with parchment paper or silicone baking mats to prevent sticking and ensure even baking. Remove one chilled dough half from the refrigerator or freezer and use your desired cookie cutters to carefully cut out shapes. Place the cut-out cookies about 1-2 inches apart on your prepared baking sheet. If at any point the dough becomes too warm and soft from handling, simply pop the baking sheet with the cut cookies back into the fridge or freezer for 5-15 minutes to re-chill. This step is vital to prevent spreading during baking. Bake for 9-10 minutes, or until the edges are lightly golden and the centers appear just set and slightly puffy. Do not overbake, as this will lead to dry cookies. They will firm up as they cool. Let the cookies cool on the baking sheet for 5-10 minutes before carefully transferring them to a wire rack to cool completely to room temperature. While one batch bakes, gather your dough scraps, lightly knead them together, re-roll between parchment, and chill again before cutting more shapes. Repeat until all dough is used.
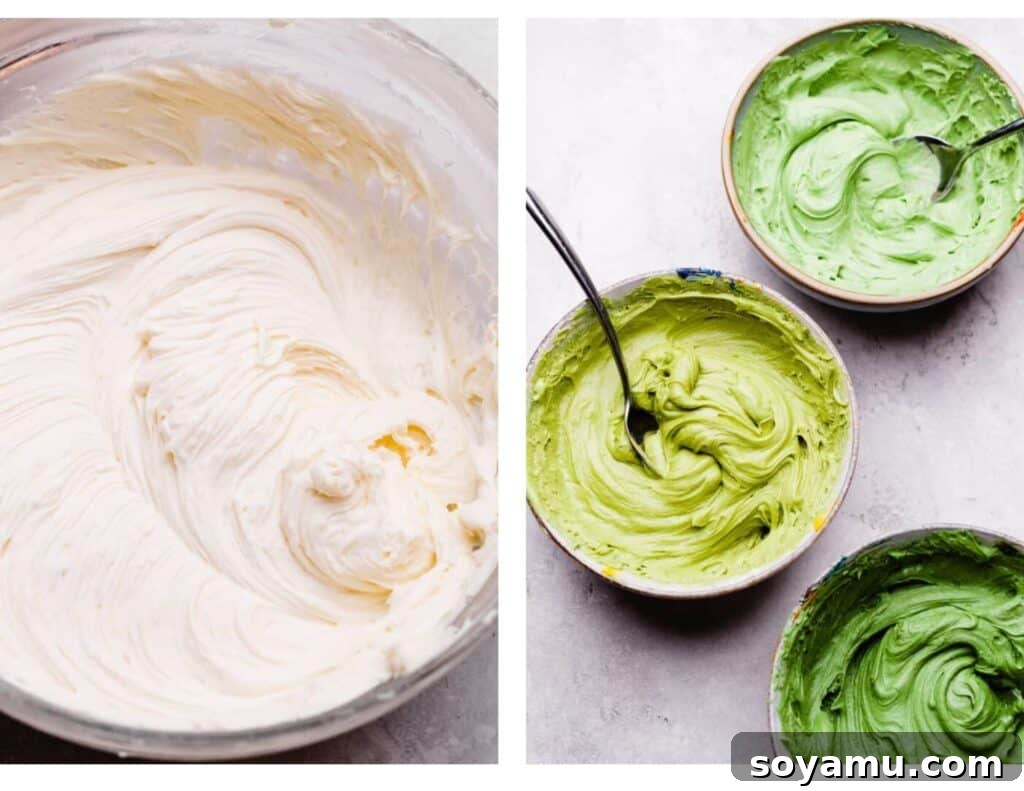
Step 4: Prepare the Decadent Frosting. In a large mixing bowl, combine your softened cream cheese and salted butter. Cream them together with an electric mixer on medium-high speed for about 2 minutes, until the mixture is light, fluffy, and completely smooth, with no lumps of cream cheese. Gradually add the powdered sugar, one-third at a time, mixing on low speed until each addition is fully incorporated before adding the next. This prevents a cloud of sugar in your kitchen! Once all the powdered sugar is mixed in, add the honey, a splash of vanilla extract (if using), and a pinch of salt. Beat on medium-high speed for another 1-2 minutes until the frosting is incredibly smooth, creamy, and holds soft peaks. If you plan to create multiple colors, divide the frosting into smaller bowls and use gel food coloring to achieve your desired vibrant shades. Remember to start with a tiny amount of gel color, as it is highly concentrated, and gradually add more until you reach the perfect hue.
Crafting the Perfect Green Frosting for Christmas Trees
Achieving that rich, forest green for your Christmas tree cookies is simple with gel food coloring. When working with any food coloring, especially gels, remember that a little goes a long way due to their high concentration. Always start with a very small amount, such as a toothpick dip, and gradually add more until you reach your desired shade.
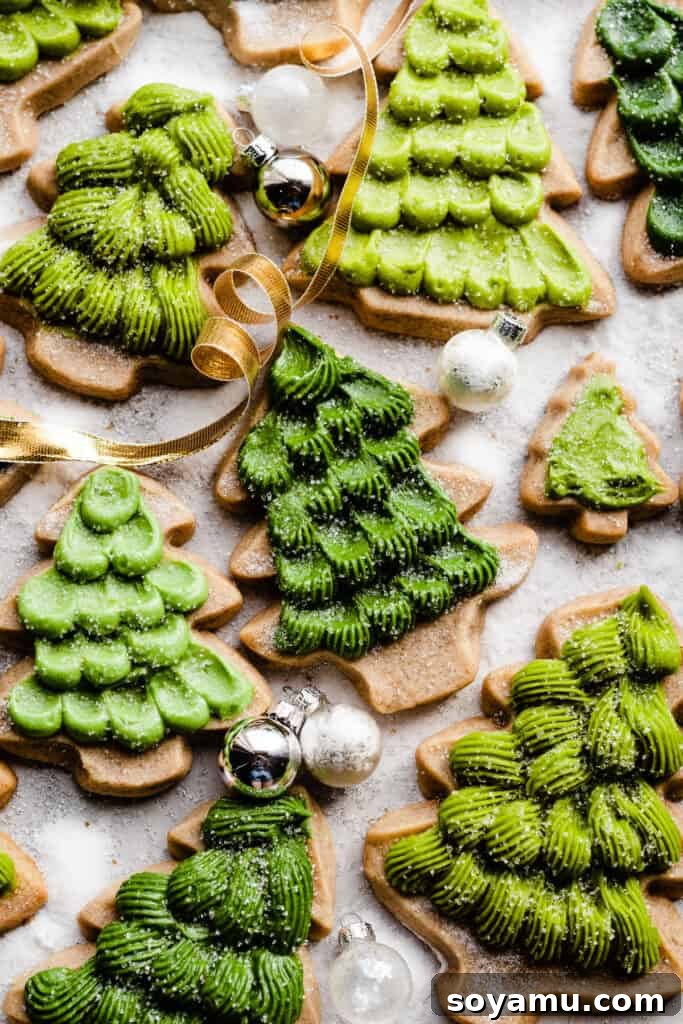
To create the beautiful varying shades of forest green like those pictured, you will need to combine golden yellow, blue, and black gel food coloring. Begin with your yellow, then add a touch of blue, mixing until you get a basic green. To deepen and enrich it to a forest green, slowly incorporate a tiny speck of black. Adjust the ratios to create different depths of green – more yellow for a brighter green, more blue for a cooler tone, and more black for a darker, richer forest shade.
Alternatively, many craft and baking supply stores now carry pre-mixed “forest green” or “evergreen” gel food colorings, which can save you time. Be mindful that “leaf green” or “kelly green” shades are often too vibrant and challenging to transform into a deep, natural forest green without significant additional coloring.
Decorating Your Honey Christmas Tree Cookies
Transforming your plain honey cookies into festive Christmas trees is a fun and creative process! For these designs, you’ll need a few essential tools and a steady hand.
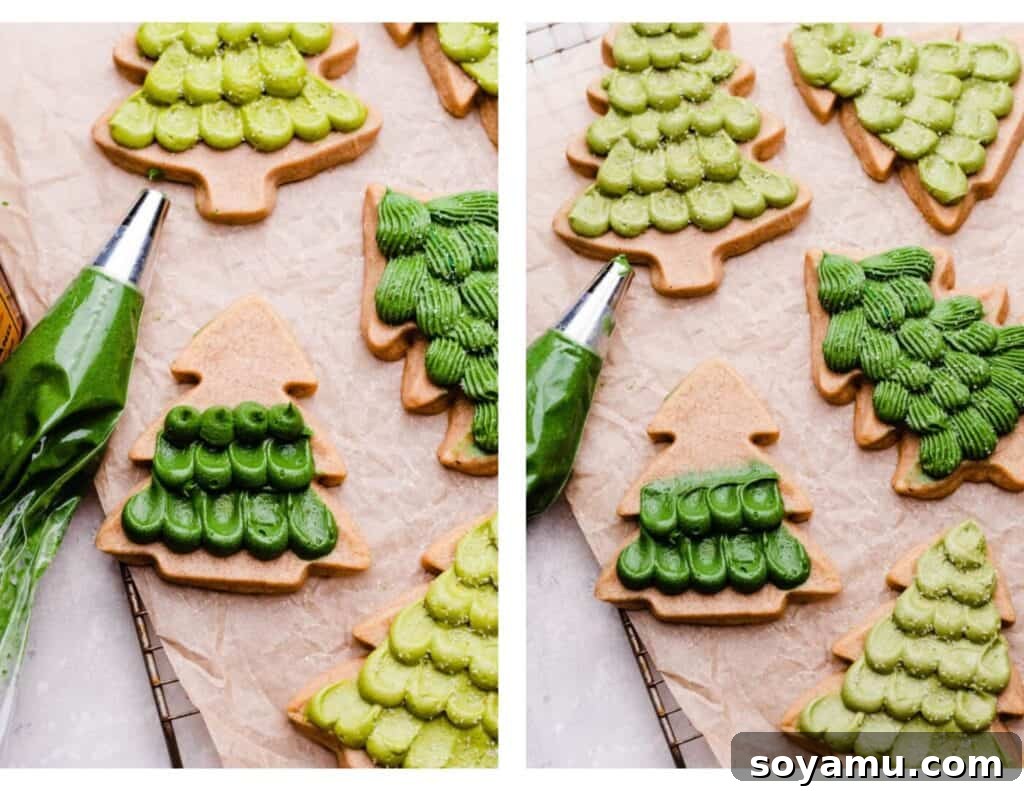
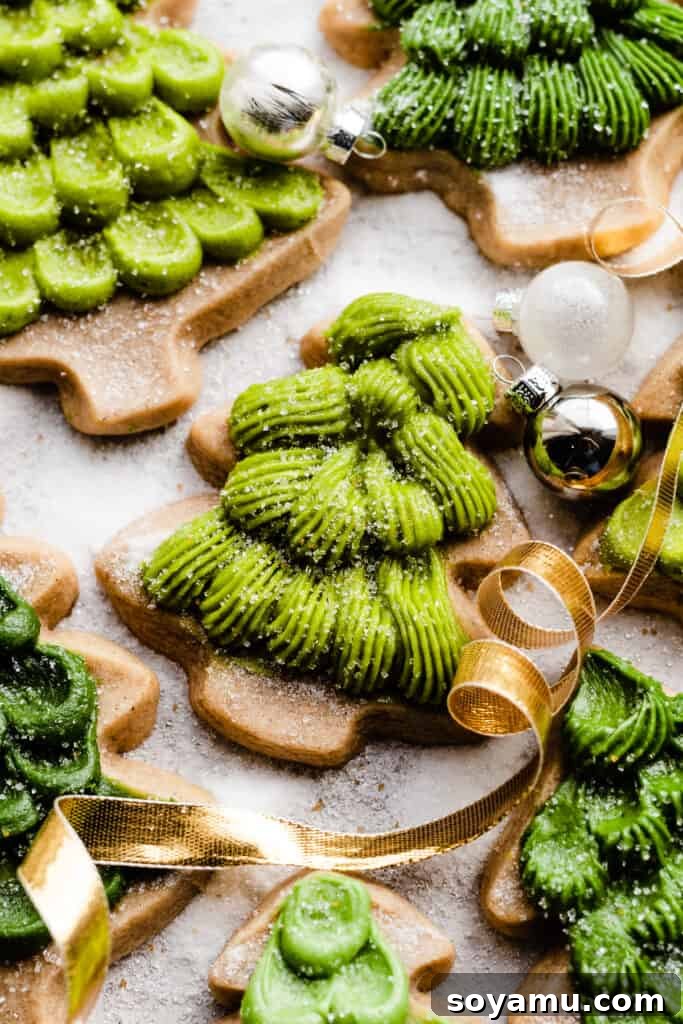
- Tools for Decoration: Gather several piping bags (reusable silicone bags or disposable plastic bags work well) and a couple of specific piping tips. For a classic, textured Christmas tree look, an open round piping tip, such as the Wilton 2A tip, is excellent. For a more traditional star-tip effect, an open star tip, like the Wilton 4B tip, is also highly effective. An offset spatula will be indispensable for spreading and shaping your frosting.
- Method 1: Swiped Dollops (Wilton 2A Tip):
- Fill a piping bag fitted with the Wilton 2A tip with your green honey cream cheese frosting.
- Starting at the very bottom edge of your tree-shaped cookie, pipe a row of small, even dollops of frosting.
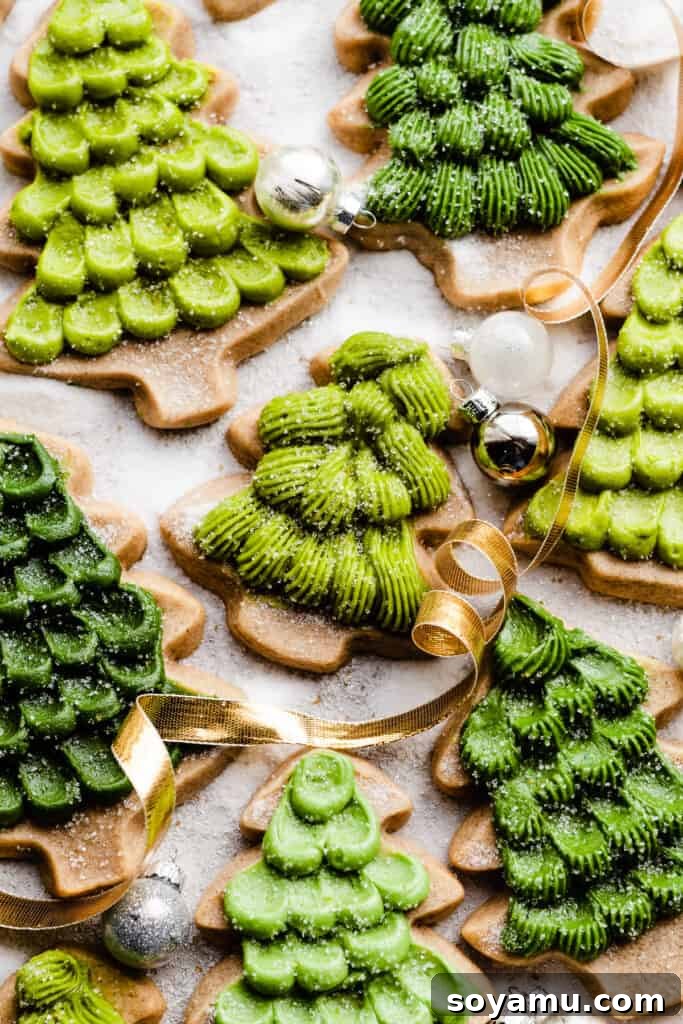
- Take your offset spatula and gently swipe each dollop upwards towards the center of the cookie, creating a soft, feathered effect that mimics pine needles.
- For the next row, pipe another line of dollops just above the previous row, slightly overlapping the top edge of the swiped frosting. Repeat the upward swipe motion.
- Continue this process, working your way up the cookie, decreasing the number of dollops per row as the tree narrows, until you reach the peak.
- Method 2: Overlapping Stars (Wilton 4B Tip):
- Fill a piping bag fitted with the Wilton 4B star tip with frosting.
- Starting at the bottom of your tree, pipe individual stars or small star-shaped dollops.
- For each subsequent row, pipe the stars so they slightly overlap the previous row. This creates a beautifully textured, dense tree canopy, as seen on the dark green tree in the accompanying photos.
- Continue layering the stars until the entire cookie is covered.
- Finishing Touches: Once your trees are frosted, you can add edible decorations like small sprinkles for “ornaments,” a yellow star sprinkle at the top, or a dusting of powdered sugar for a snowy effect. Let your creativity shine!
Expert Success Tips for Flawless Honey Cookies
Achieving bakery-quality honey cookies is within your reach with these essential tips:
- Completely Cool Cookies are Key: This is arguably the most crucial tip when frosting. Never, under any circumstances, apply frosting to a warm or even slightly warm cookie. The heat will immediately melt the butter and cream cheese in the frosting, turning your beautiful creation into a runny, sticky mess. Ensure your cookies are absolutely, thoroughly cooled to room temperature before you even think about reaching for that piping bag. This might mean letting them cool for several hours or even overnight.
- Working with Frosting Consistency: The perfect piping frosting should be firm enough to hold its shape but soft enough to flow smoothly.
- If your frosting is too soft: This often happens if your butter or cream cheese was too warm to begin with, or if your kitchen is very warm. Pop the frosting (either before or after coloring) into the refrigerator for 10-20 minutes, stirring it periodically, until it firms up to a pipeable consistency.
- If your frosting is too stiff: Sometimes, especially after refrigeration, frosting can become too firm. Add a tiny amount (1/2 teaspoon at a time) of milk or cream and beat on low speed until it reaches the desired consistency. Be careful not to add too much at once!
- Do Not Overmix the Dough: Once the flour is added to the wet ingredients, mix only until just combined. Overmixing develops the gluten in the flour, which can lead to tough, dense cookies instead of soft and chewy ones.
- Measure Flour Accurately: As mentioned in the ingredient overview, always spoon and level your flour or, even better, weigh it. Too much flour is the most common culprit for dry, crumbly dough and tough cookies.
- Chill the Dough Thoroughly: Don’t skip or rush the chilling step. Cold dough is stable dough. It prevents the cookies from spreading excessively in the oven, ensuring your cutout shapes remain sharp and distinct. If your kitchen is warm or you’re working slowly, chill the dough again between batches of cutting.
- Use Parchment Paper for Rolling and Baking: Rolling dough between parchment paper prevents sticking and makes transferring the rolled dough to the fridge a breeze. Lining baking sheets with parchment also ensures even baking, easy cleanup, and prevents cookies from sticking.
- Proper Oven Temperature: Ensure your oven is accurately preheated to the specified temperature. An oven thermometer can be a valuable tool, as many ovens can run hotter or colder than their display indicates.
- Know When Your Cookies Are Done: Honey cookies should appear set at the edges and slightly puffy in the center. They might not show much browning, so resist the urge to overbake. They will continue to set as they cool.
Frequently Asked Questions (FAQs) About Honey Cookies
Can I make these cookies ahead of time?
Absolutely! These honey cookies are excellent for making ahead, which is perfect for busy holiday preparations. You have a couple of options:
- Dough Preparation: You can prepare the cookie dough, roll it out between parchment paper, and store it tightly wrapped in plastic wrap in the refrigerator for 1-2 days before baking. Alternatively, you can cut out your shapes from the chilled dough and then freeze them in a single layer on a parchment-lined baking sheet. Once frozen solid, transfer the raw, frozen cutouts to airtight containers with parchment or wax paper between layers for up to 2-3 months. You can bake them directly from frozen; just add an extra minute or two to the baking time.
- Baked Cookies: Baked and completely cooled cookies can be stored undecorated in an airtight container at room temperature for 1-2 days before you plan to frost and serve them.
Do these cookies need to be stored in the refrigerator?
Yes, due to the presence of cream cheese in the frosting, these honey cookies must be stored in the refrigerator. The cream cheese is a dairy product that requires chilling to maintain freshness and prevent spoilage. Place frosted cookies in a single layer in an airtight container before refrigerating.
Can I double or halve the recipe?
Certainly! This recipe is quite flexible and scales well. Feel free to double the ingredients if you need a large batch for a party or holiday cookie exchange, or halve it if you’re making a smaller quantity for a family treat. Just ensure you use a sufficiently large mixing bowl for double batches and adjust chilling and baking times slightly as needed.
Can I bake these as regular drop cookies instead of cutout cookies?
While the dough is delicious, this particular recipe is formulated for cutout cookies that hold their shape. When tested as simple dough balls, they tend not to spread significantly, resulting in very thick and less appealing drop cookies. If you prefer to make them without cutting shapes, we recommend an alternative approach: divide the dough in half, roll each half into a log (about 1.5-2 inches in diameter), chill the logs thoroughly as directed, and then slice them into 1/2-inch thick rounds before baking. This will give you more evenly baked, traditional-looking round cookies compared to baking thick dough balls.
What type of honey should I use for the best flavor?
For these honey cookies, we highly recommend using a lighter, milder variety of honey. Clover honey or raw clover honey are ideal choices, as they offer a sweet, delicate flavor that complements the other ingredients without overpowering them. These are typically the lighter-colored honeys you find in most grocery stores. Varieties like buckwheat honey or manuka honey, which are darker and have much stronger, more robust, and sometimes medicinal flavors, are generally not suitable for this recipe as they can dramatically alter the cookie’s taste profile.
Serving and Storing Your Honey Cookies
Once decorated, these delightful honey cookies are ready to be enjoyed! For optimal freshness and safety, here’s how to properly serve and store them:
- Serving: Allow the frosting to set slightly before serving, especially if stacked. These cookies are perfect for dessert platters, holiday gatherings, or as a sweet treat with tea or coffee.
- Storing Frosted Cookies: Due to the cream cheese in the frosting, it is crucial to store these cookies in the refrigerator. Arrange frosted cookies in a single layer in an airtight container. If you need to stack them, place a sheet of parchment or wax paper between layers to prevent the frosting from sticking or smudging. Stored correctly, they will remain fresh and delicious in the fridge for 1-2 weeks.
- Storing Unfrosted Cookies: If you’ve baked the cookies but haven’t frosted them yet, you can store them in an airtight container at room temperature for up to 2-3 days, or freeze them for longer storage (up to 1 month). Thaw frozen cookies at room temperature before frosting.
Special Tools for Honey Cookie Success
While many baking tools are standard, a few specific items can make the process of creating and decorating these honey cookies much smoother and more enjoyable:
- Offset Spatula: An offset spatula is incredibly versatile and a must-have for any baker. Its angled blade allows you to easily spread frosting evenly across cookies, cakes, and brownies without your knuckles dragging through the frosting. It’s also perfect for creating the textured “swiped” look on your Christmas tree cookies.
- Piping Bags and Tips: Essential for precise and beautiful decorating. You can choose between reusable silicone piping bags, which are eco-friendly and durable, or disposable plastic bags for convenience. For the Christmas tree designs, an **open round piping tip** like the Wilton 2A and an **open star tip** like the Wilton 4B are recommended. Having a variety of tips allows for different decorative effects.
- Rolling Pin: A good quality rolling pin is fundamental for achieving even dough thickness. For cutout cookies, a rolling pin with adjustable guides can be particularly helpful, ensuring your dough is uniformly 3/8 or 1/2 inch thick across the entire sheet, which leads to consistent baking.
- Cookie Cutters: Of course, you’ll need cookie cutters in your desired shapes! For Christmas trees, look for sets with varying tree designs or sizes to add visual interest to your cookie platter. Sturdy metal cutters tend to give the cleanest edges.
- Parchment Paper or Silicone Baking Mats: These are invaluable for preventing dough from sticking during rolling and for ensuring easy release and even baking of your cookies without the need for additional grease.
More Festive Cookie Recipes to Explore
If you loved these Honey Cookies, you’ll surely enjoy these other delightful cookie recipes perfect for holidays or any special occasion:
- Best Soft Gingerbread Cookies
- Bakery-Style Monster Cookies
- Key Lime Slice & Bake Cookies
- Peppermint Hot Cocoa Cookies
- Peanut Butter & Jelly Thumbprint Cookies
- Cherry Pie Cookies
- Triple Chocolate Chunk Cookies
Did you enjoy making this recipe? We’d love to hear from you! Please leave a comment and a star rating below to share your experience!
Your feedback is invaluable and greatly supports our small business. Simply click the little stars in the recipe card header to leave your rating and thoughts. Thank you for baking with us!

Soft Honey Cutout Cookies
Ingredients
For the Honey Cookies
- 1 cup salted butter, softened at room temperature (226 grams)
- 1 cup light brown sugar, packed (220 grams)
- 1/2 cup honey (170 grams)
- 3 cups all-purpose flour, spooned & leveled (405 grams)
- 2 tsp cinnamon
- 1/4 tsp nutmeg
- 1/2 tsp salt
- 1/2 tsp baking soda
Honey Cream Cheese Frosting
- 3 ounces cream cheese, softened at room temperature (85 grams)
- 3/4 cup salted butter, softened at room temperature (170 grams)
- 2 and 1/4 cups powdered sugar (260 grams)
- 1-2 tbsp honey (21 to 42 grams)
- Pinch of salt
- Desired gel food coloring
Instructions
- Make the Cookie Dough: Beat butter in a large mixing bowl with an electric mixer on high speed until creamed. Add the brown sugar and mix until well creamed together, about 1 minute. Add the honey and mix until combined. In a separate bowl, whisk together all-purpose flour, cinnamon, nutmeg, baking soda, and salt. Add the dry ingredients to the wet ingredients and mix on medium speed until a dough forms. If your dough is slightly crumbly, add 1-2 tsp of milk; it should be smooth and cohesive when pressed together.
- Roll and Chill: Divide the dough into two halves. Roll each half to 3/8″ or 1/2″ thickness between sheets of parchment paper. Place the rolled dough, still in parchment, on a baking sheet and cover loosely. Chill for about 2 hours in the refrigerator or 1 hour in the freezer until firm.
- Cut out Cookies: Preheat your oven to 350° F (175°C). Line baking sheets with parchment paper or silicone baking mats. Cut shapes out of the chilled dough and place cookies a couple inches apart on your prepared baking sheet. If cookies soften, re-chill the pan for 5 to 15 minutes before baking. While the first batch bakes, combine dough scraps, re-roll, and cut more cookies, chilling as needed to keep the dough firm.
- Bake: Bake cookies for 9-10 minutes. The cookies should appear just set and slightly puffy. Do not overbake! Let them cool on the baking sheet for 5-10 minutes, then transfer to a wire rack to finish cooling completely.
- Make Frosting: In a large bowl, cream together cream cheese and butter for 2 minutes until smooth. Add the powdered sugar in 3 additions, mixing until combined after each. Add honey, and a pinch of salt, and mix until combined and fluffy. Divide into small bowls and tint with desired gel food coloring. To achieve forest green shades, mix golden yellow, blue, and black gel food coloring.
- Decorate Cookies: Use a Wilton 2A open tip for a “swiped” look or a Wilton 4B star tip for overlapping texture. For swiped trees, pipe dollops in rows from the bottom up, sweeping each dollop upwards with an offset spatula. For textured trees, pipe overlapping star dollops from the bottom up.
- Serve + Store: Enjoy cookies once decorated! Store frosted cookies in a single layer in an airtight container in the fridge for 1-2 weeks. Refrigeration is essential due to the cream cheese frosting. Refer to the “Expert Success Tips” for make-ahead options for both dough and unfrosted baked cookies.
Nutrition
Nutrition information is automatically calculated and should be used as an approximation only.
Like this? Leave a comment below!