
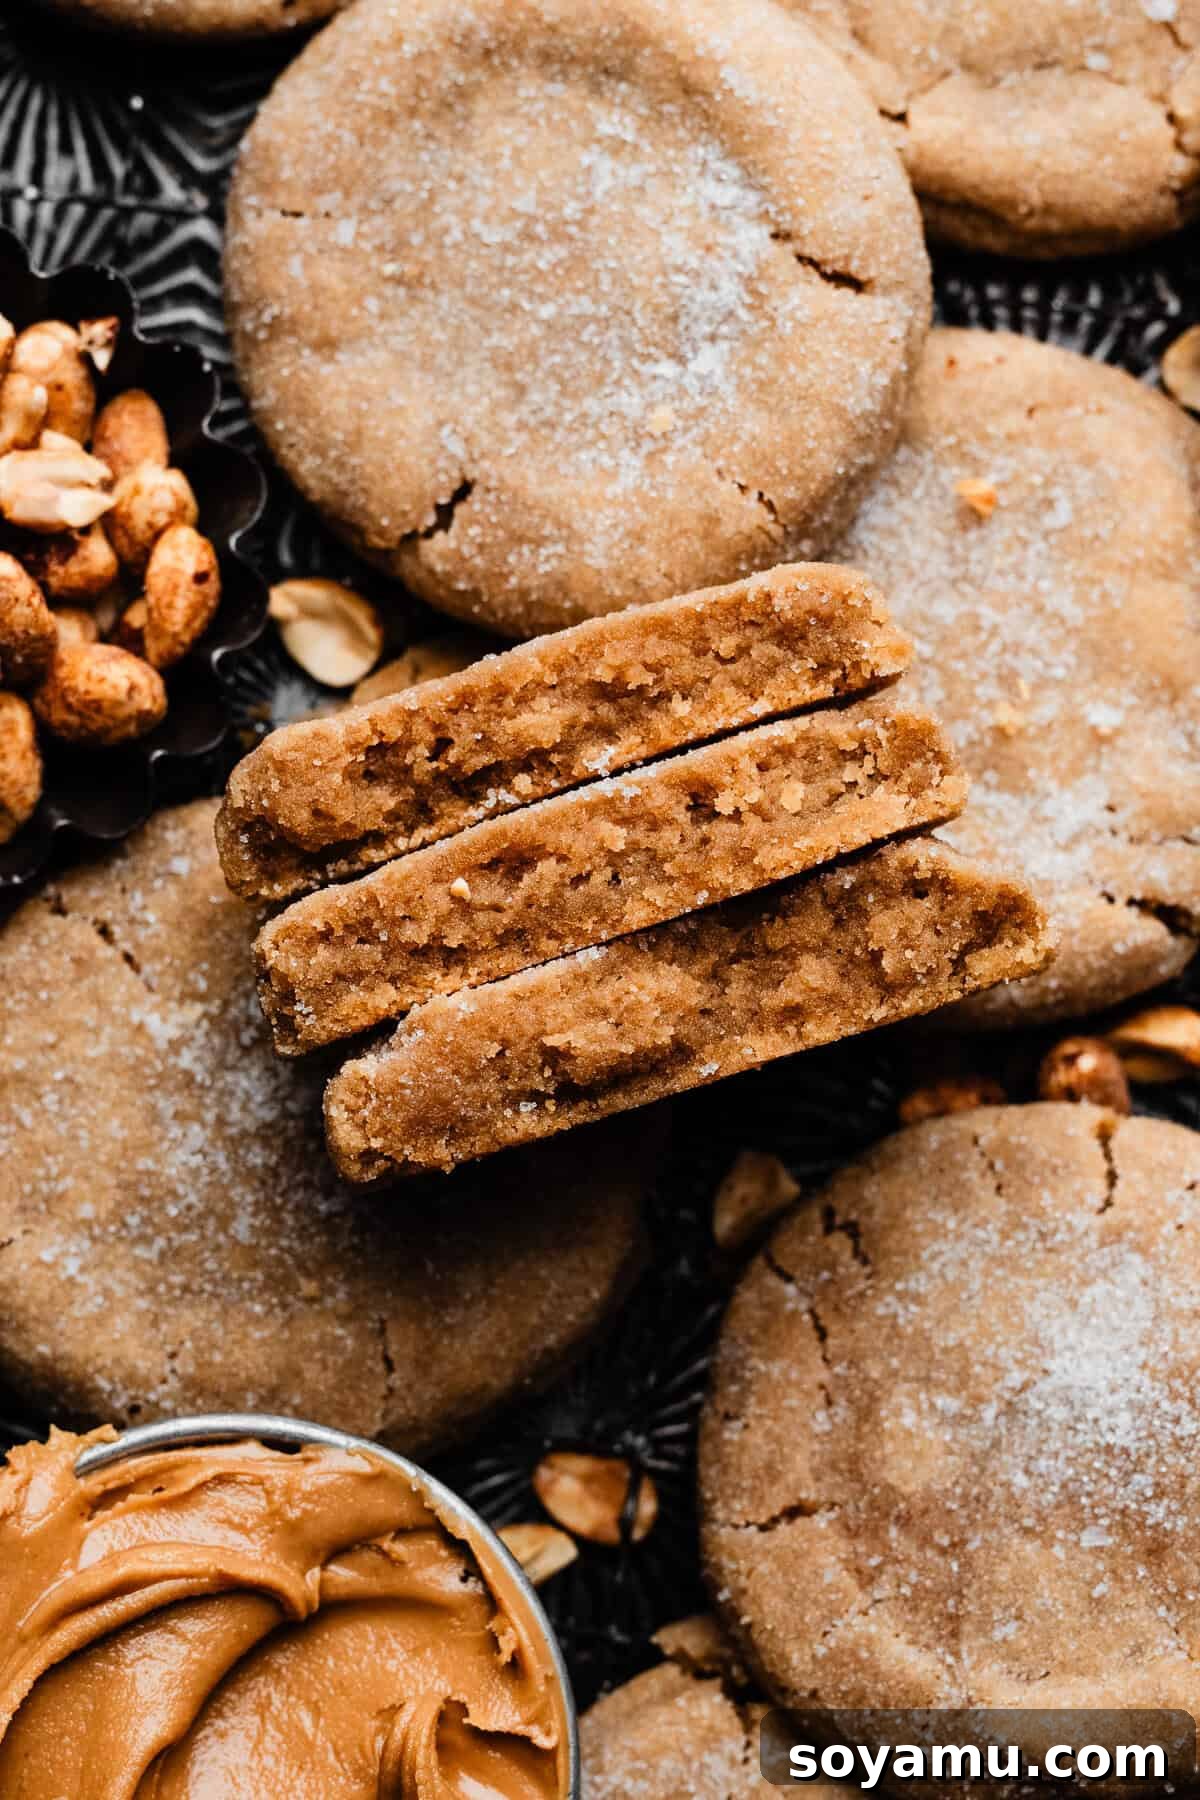
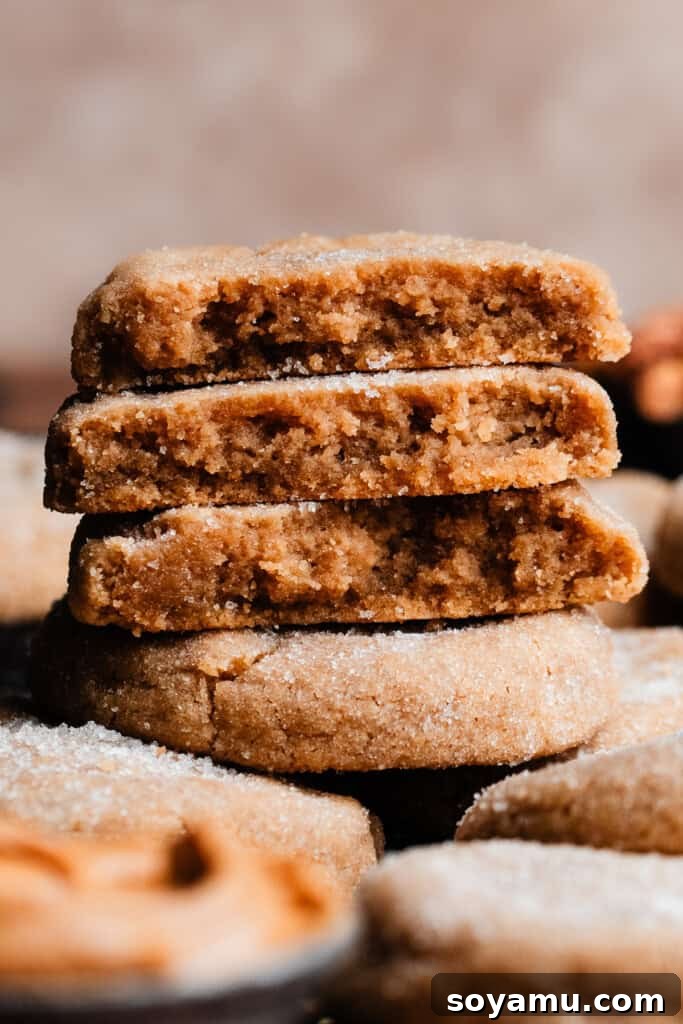
Prepare to fall in love with these extraordinary Peanut Butter Cookies! Boasting a perfectly thick, delightfully soft, and irresistibly chewy texture, each cookie also features wonderfully crisp edges. They are truly packed with an intense, rich peanut butter flavor that will satisfy every craving. What makes this recipe even better? These are no-chill cookies, meaning you can whip them up in a single bowl and have warm, freshly baked treats on your table in under an hour. Plus, for future convenience, the cookie dough freezes beautifully, allowing you to enjoy these delectable delights whenever the mood strikes!
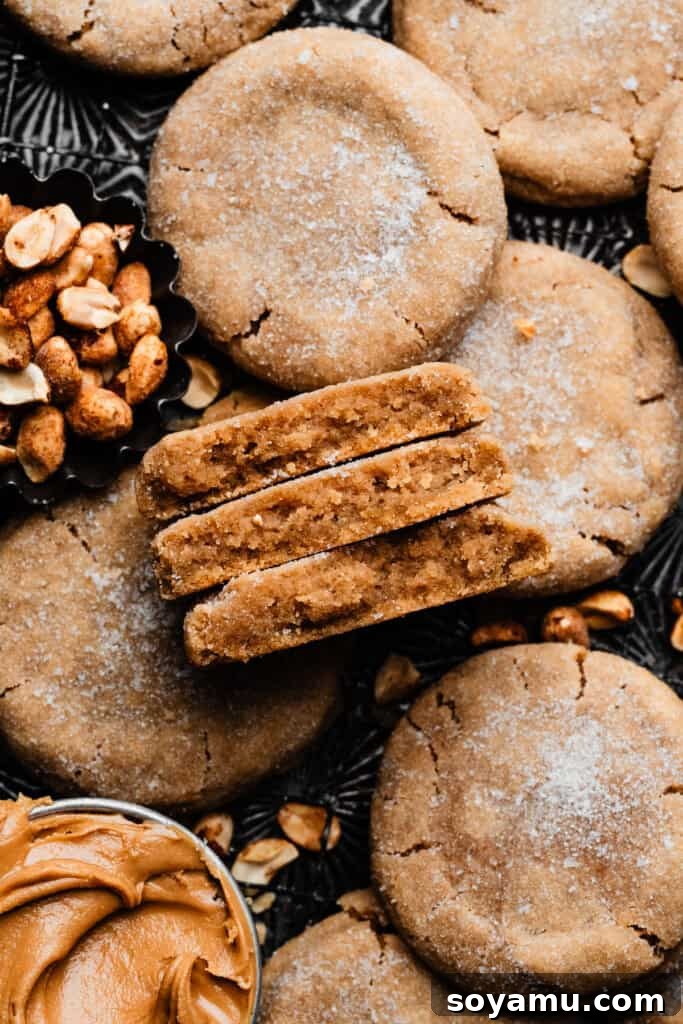
Why You’ll Absolutely Adore These Thick & Chewy Peanut Butter Cookies
There are countless reasons why this peanut butter cookie recipe will become your new go-to. From its incredible texture to its unmatched convenience, these cookies deliver on all fronts, making them a household favorite. Here’s a closer look at what makes them so special and why you’ll want to bake them again and again:
- Unbeatably Thick & Chewy – Forget dry, crumbly cookies! Our recipe guarantees peanut butter cookies that are wonderfully thick and lusciously chewy throughout. The secret lies in a carefully balanced ratio of ingredients and a unique baking technique that locks in moisture, ensuring every bite is moist and satisfying. The slightly melted butter combined with a blend of sugars contributes to that perfect chew, while maintaining a substantial, bakery-style cookie shape. You’ll be amazed at how such a simple recipe yields such rich, dense results.
- Effortlessly No-Chill – Say goodbye to waiting! This is truly a super easy cookie recipe that eliminates the dreaded chill time typically required for cookie dough. This means you can go from craving to warm, freshly baked cookie in less than an hour, making it perfect for spontaneous baking sessions, last-minute dessert needs, or when unexpected guests arrive. While no chilling is needed, the dough is incredibly forgiving and holds up beautifully if you do decide to refrigerate or freeze it before baking, offering ultimate flexibility for meal prep.
- Infinitely Customizable – These homemade peanut butter cookies are a fantastic canvas for your creativity! While outstanding on their own, they are also incredibly easy to customize with your favorite mix-ins. Elevate your batch by folding in colorful M&Ms, classic chocolate chips (milk, dark, or white!), or chopped peanut butter cups for an extra layer of peanut butter goodness. Get creative with pretzels for a salty-sweet crunch, a sprinkle of flaky sea salt on top before baking for a sophisticated touch, or even a dash of cinnamon for a warm, spicy note.
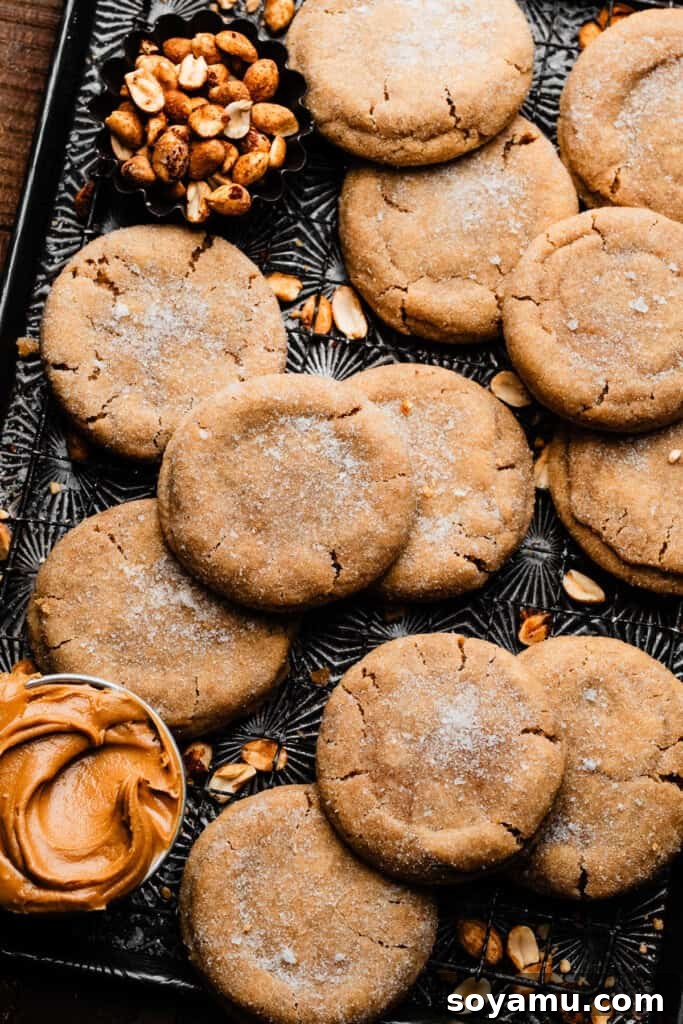
Essential Ingredient Overview for the Best Peanut Butter Cookies:
Crafting the perfect peanut butter cookie starts with understanding each ingredient’s role. Below is a detailed look at the key components for this simple yet incredibly delicious recipe. The full recipe with precise measurements and detailed directions can be found in the comprehensive recipe card at the bottom of this post.
- Peanut Butter – For optimal results and that classic chewy texture, we highly recommend using a smooth, processed peanut butter (like Jif or Skippy). These brands have a consistent texture and contain stabilizers that are ideal for baking. Natural peanut butter, which often separates and has a drier consistency, can alter the cookie’s texture, potentially making it crumbly or dry. If you enjoy a bit of crunch, a creamy crunchy peanut butter could also work beautifully, adding textural interest without compromising the moisture of these easy peanut butter cookies.
- Butter – We consistently use and recommend salted butter for its superior flavor, which beautifully balances the sweetness of the cookies and enhances the peanut butter. However, if you prefer or only have unsalted butter, you can certainly use it; just add an extra pinch of salt (about ¼ teaspoon) to the dry ingredients to compensate. This particular recipe ingeniously starts with melted butter, which helps create a dense, chewy texture, eliminating the need to wait for butter to soften.
- All-Purpose Flour – Accurate flour measurement is absolutely critical for cookie success. For best results, use a kitchen scale to measure your flour by weight (390 grams). If you don’t have a scale, spoon your flour lightly into the measuring cup, then level it off with a flat utensil (like the back of a knife). Scooping directly from the flour bag can compact the flour, leading to an excess amount, which consistently results in a dry, dense, or cake-like cookie.
- Eggs – Large eggs are specified for this recipe. Bringing your eggs to room temperature before mixing helps them incorporate more evenly into the batter, leading to a smoother dough and a more consistent, tender cookie texture. Simply take them out of the fridge about 30 minutes before you plan to bake.
- Granulated Sugar & Dark Brown Sugar – This recipe uses a blend of both granulated and dark brown sugar, each playing a vital role. Granulated sugar contributes to the crispness of the cookie edges and helps with proper spread. Dark brown sugar is crucial for achieving that deeply rich, molasses-like flavor and the incredibly soft, chewy interior. Its higher moisture content helps keep the cookies tender and prevents them from drying out, which is key for a truly thick and chewy peanut butter cookie.
- Vanilla Extract – Always opt for high-quality, pure vanilla extract. It plays a significant role in enhancing all the other flavors in the cookie, adding a warm, aromatic depth that artificial vanilla simply cannot replicate. A good vanilla extract elevates the overall taste profile significantly.
- Baking Soda & Baking Powder – This dynamic duo works together to give the cookies their perfect lift and texture. Baking soda reacts with the acidic brown sugar to provide spread and tenderness. Baking powder offers additional lift, ensuring your cookies are delightfully thick and puffy, not flat. This combination guarantees the ideal chewiness and structure.
- Salt – A touch of salt is essential for balancing the sweetness and enhancing the rich peanut butter flavor. It prevents the cookies from tasting overly sweet and brings out the depth of the other ingredients, creating a perfectly harmonious flavor profile.
Creative Recipe Substitutions & Flavorful Variations for Your Peanut Butter Cookies:
This versatile peanut butter cookie recipe is perfect for customization, allowing you to tailor it to dietary needs or explore new flavor combinations. Don’t be afraid to experiment and make these cookies uniquely yours!
- Gluten-Free Adaptation – While this recipe has not been officially tested with gluten-free flour, many readers have successfully adapted similar recipes. For best results, we recommend using a good quality 1:1 gluten-free baking flour blend that contains xanthan gum. Measure it by weight for accuracy (390 grams), and be aware that the dough consistency might vary slightly. You may need to add a tablespoon or two of milk if the dough appears too dry. If you give it a try, please share your results in the comments!
- Dairy-Free Option – You can easily make these cookies dairy-free by substituting the regular butter with your favorite trusted brand of non-dairy butter sticks (such as Miyoko’s Kitchen or Earth Balance baking sticks). Ensure the non-dairy butter has a similar fat content and behaves like real butter in baking to maintain the desired texture and spread. Avoid using soft tub margarines, as they can have too much water content and affect the cookie’s structure and spread.
- Add-Ins Galore – Elevate your cookies with a variety of delicious additions. Once the dough comes together in Step 2, consider gently folding in 1 to 1½ cups of your favorite mix-ins:
- Chocolate Chips: Classic semi-sweet, decadent milk chocolate, rich dark chocolate, or even sweet white chocolate chips will all pair beautifully with peanut butter.
- Chopped Candy: Miniature peanut butter cups, colorful M&Ms, or chopped Reese’s Pieces for an extra layer of peanut butter goodness and festive appeal.
- Nuts: Add extra texture with chopped peanuts (if not using crunchy peanut butter), crunchy pecans, or earthy walnuts.
- Pretzels: Crushed pretzels offer a delightful salty crunch, creating a perfect sweet and salty combination that is incredibly addictive.
- Spices: A pinch of cinnamon, nutmeg, or even a touch of pumpkin pie spice can add a warm, cozy dimension to the peanut butter flavor, especially during colder months.
Step-by-Step Guide: Crafting the Best One-Bowl Peanut Butter Cookies
Making these thick and chewy peanut butter cookies is a straightforward process, thanks to our no-chill, one-bowl method. Follow these simple steps for perfect results every time:
Step 1: Prepare Your Workspace and Begin the Dough. Start by preheating your oven to 350℉ (175°C). This ensures your oven is at the correct temperature for immediate baking. Line a few cookie sheets with parchment paper for easy cleanup and to prevent sticking. In a large mixing bowl, melt the butter completely. Once melted, add the creamy peanut butter and whisk thoroughly until the mixture is completely smooth and well-combined, with no lumps of peanut butter remaining. This initial whisking step is crucial for an even texture and consistent flavor throughout the dough.
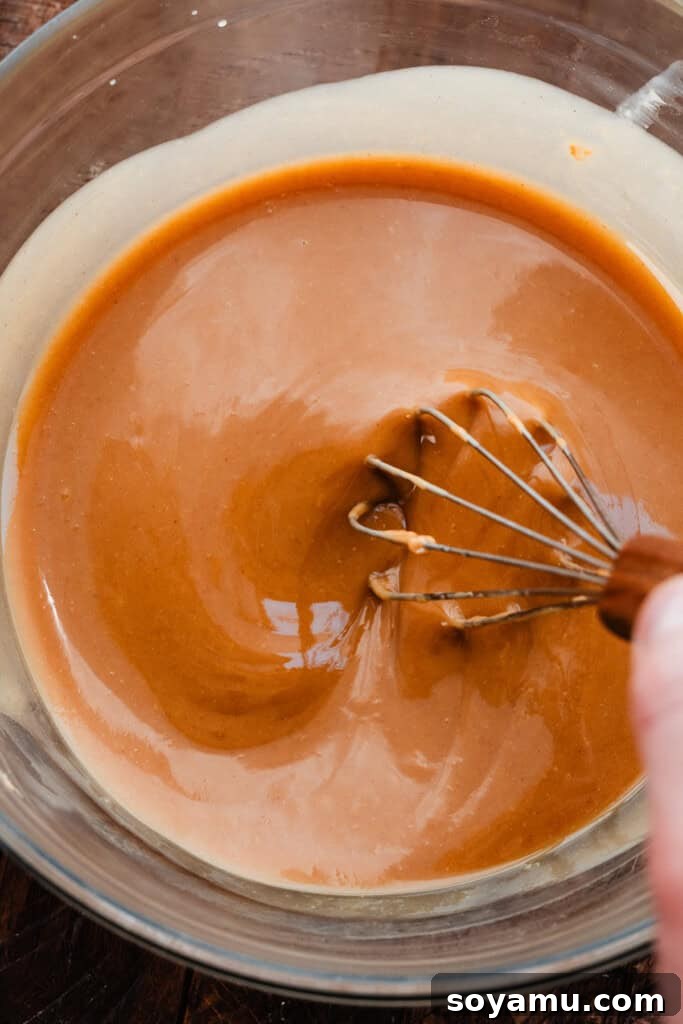
Step 2: Finish the Dough with Wet and Dry Ingredients. To the whisked peanut butter and butter mixture, add both the dark brown sugar and granulated sugar. Whisk vigorously for about 30 seconds to a minute until the sugars are fully incorporated and the mixture appears lighter and slightly creamy. Next, crack in the large, room-temperature eggs and pour in the vanilla extract. Whisk again until everything is smooth and thoroughly combined, creating a rich, uniform wet mixture. Finally, add all the dry ingredients – the all-purpose flour, baking soda, baking powder, and salt – into the bowl. Switch to a sturdy spoon or a rubber spatula and stir until a cohesive dough forms. This may require some “elbow grease” as the dough will be quite thick, but rest assured, it will come together beautifully. If you have a stand mixer, you can use it for this last step for added ease.
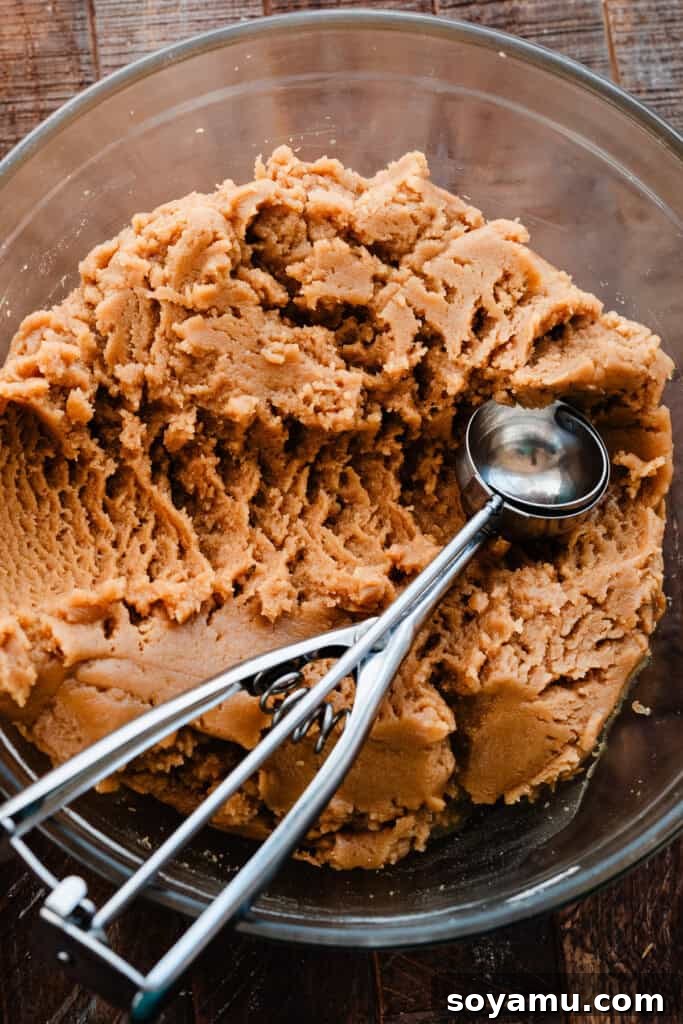
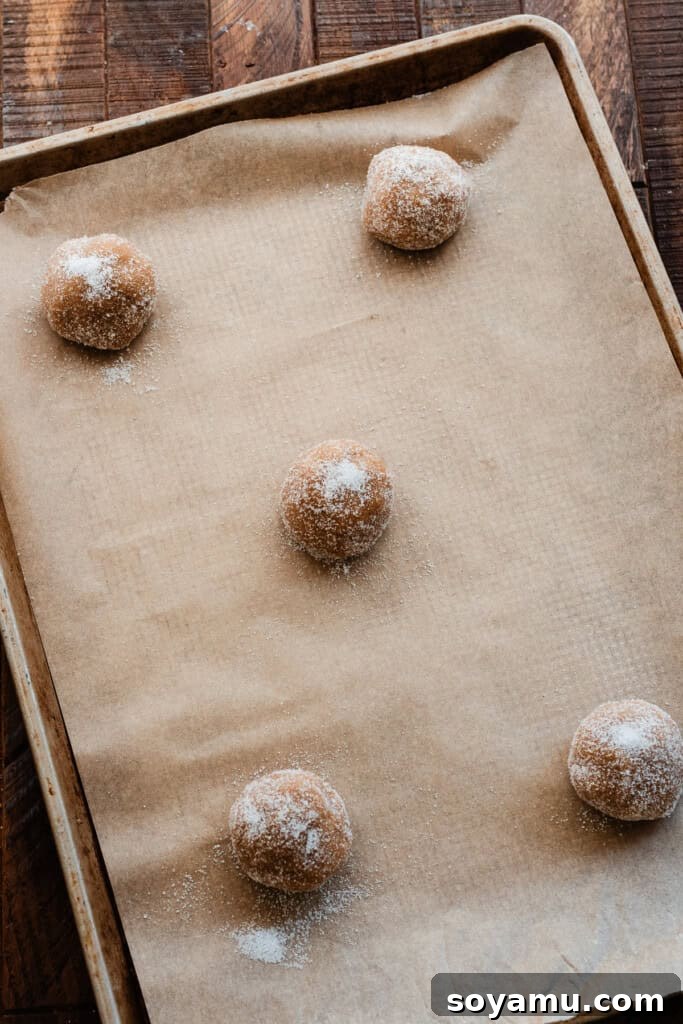
Step 3: Scoop and Prepare Dough Balls for Baking. Using a kitchen scale for precision, scoop dough balls that are approximately 60 grams each (this is roughly 2 generous tablespoons). Uniform sizing ensures even baking. For an extra touch of sweetness and a delightful crunch on the exterior, roll each dough ball thoroughly in granulated sugar. This sugary coating also adds a lovely sparkle. Place about 5-6 prepared cookie dough balls on each parchment-lined baking sheet, ensuring adequate space for slight spreading during baking. Remember, no chilling is required for this recipe, so they are ready to bake immediately – a true “no-chill” delight!
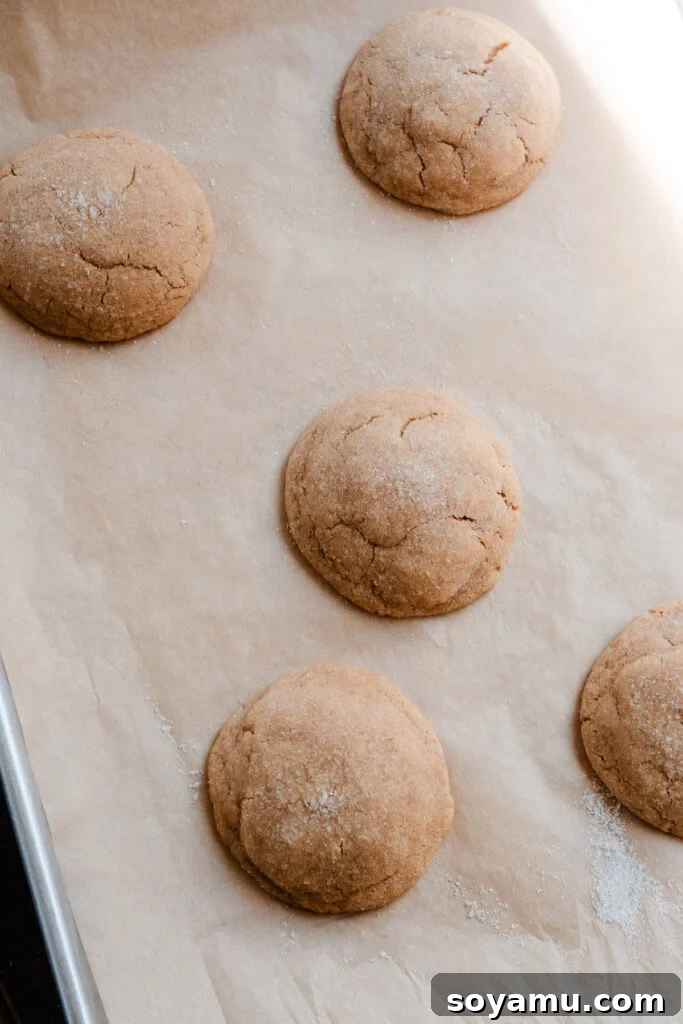
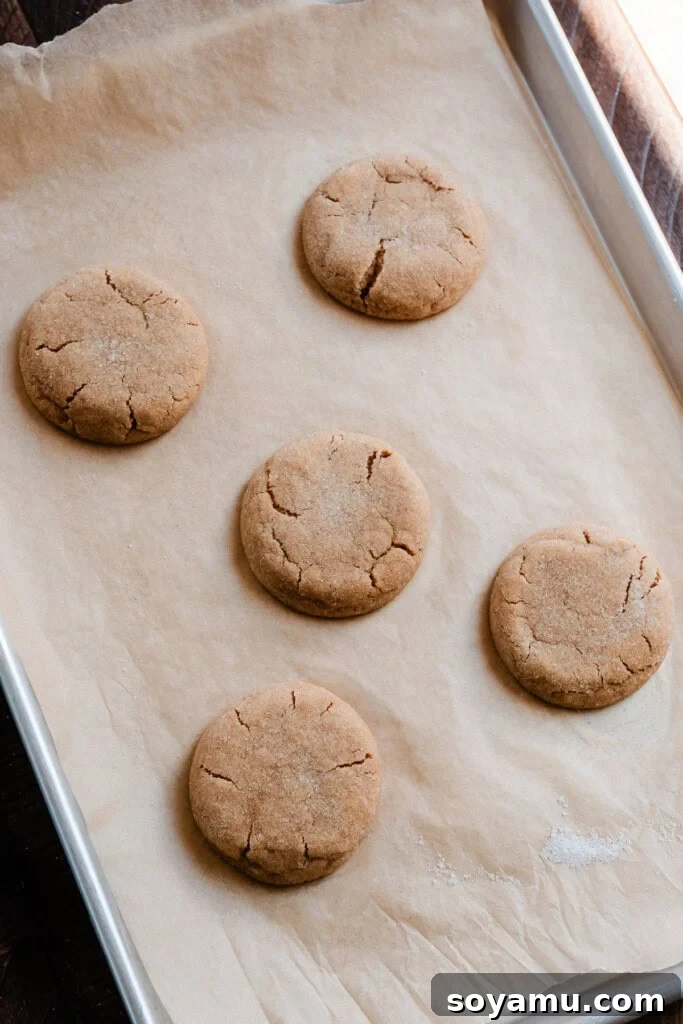
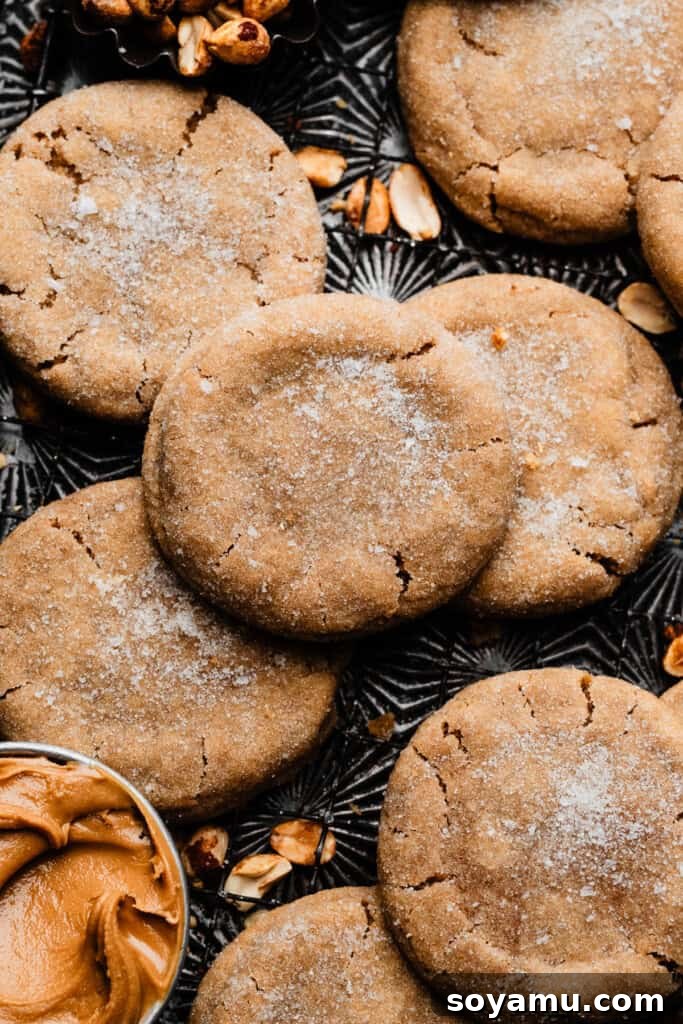
Step 4: Bake to Perfection and Achieve Optimal Texture. Bake the cookies for exactly 8 minutes. When they come out of the oven, the edges will appear just set and slightly golden, while the centers will look a little puffy and possibly still soft. This is crucial: resist the urge to bake them longer! Overbaking peanut butter cookies can quickly lead to a dry, crumbly texture, sacrificing their signature chewiness. The short bake time ensures they remain perfectly soft and chewy once cooled. Immediately after removing them from the oven, gently flatten the warm cookies slightly with the back of a measuring cup or a spoon. This technique helps to create that signature dense, chewy interior and contributes to their appealing crinkly edges that make these cookies so irresistible.
Serving Your Delicious Peanut Butter Cookies & Storage Tips:
Once baked, allow your best peanut butter cookies to cool on the baking sheet, placed on a wire cooling rack, for about 20-30 minutes. This crucial step allows them to set properly and further develop their chewy texture and firm up. While it’s incredibly tempting to devour them immediately, a little patience will be rewarded! Of course, if you can’t resist a warm, gooey cookie straight from the oven, we certainly won’t tell. For storing cooled cookies, transfer them to an airtight container. They will maintain their freshness and delightful chewiness at room temperature for 3-4 days. For longer storage, see our freezing tips below in the FAQ section, which covers freezing both baked cookies and raw dough for future enjoyment.
If you’re a true peanut butter enthusiast and simply can’t get enough, be sure to explore more of our irresistible recipes! Next, you might love my Bakery-Style Monster Cookies, which are loaded with peanut butter, oats, and candy, or try the classic, melt-in-your-mouth Peanut Butter Blossoms with a Hershey’s Kiss center!
Unlock Perfection: Expert Baking Tips for Your Ultimate Peanut Butter Cookies:
Achieving bakery-quality peanut butter cookies at home is easier than you think with a few simple expert tips. These insights will help you avoid common pitfalls and ensure every batch is a resounding success, giving you perfectly textured and flavored cookies every time:
- Invest in an Oven Thermometer – This inexpensive tool is a game-changer for any baker, especially when making precise recipes like cookies. An oven thermometer will accurately tell you if your oven is running at the temperature you set it to. Many home ovens fluctuate significantly or are improperly calibrated, which can drastically affect baking results (e.g., uneven browning, too much spread, or dry cookies). Consistent and accurate oven temperature is paramount for most baked goods, so keep an oven thermometer inside at all times to monitor its calibration and ensure even baking.
- Embrace the Kitchen Scale – For truly consistent and professional-level baking, a food scale is an indispensable tool. Measuring flour by weight (grams) is the most accurate method because volumetric measurements (cups) can vary widely depending on how the flour is scooped and packed. Too much flour can lead to dry, dense cookies, while too little can result in excessive spreading. Using a scale eliminates guesswork and ensures your ingredients are perfectly proportioned every time, guaranteeing the desired thickness and chewiness.
- The Criss-Cross Pattern – Our Secret Method – You might notice that our recipe deviates from the classic fork criss-cross pattern often seen on peanut butter cookies. While charming, we found that traditional pressing before baking often led to less attractive results and sometimes compromised the desired thick, chewy texture by flattening the cookie too much before it could bake properly. Our innovative approach involves gently pressing down on the cookies *after* they come out of the oven. This technique not only creates beautiful, slightly crinkled edges but, more importantly, enhances that wonderfully dense and chewy texture we’re aiming for, without drying out the cookie. Give it a try – you’ll be amazed by the difference in texture and appearance!
- Don’t Overbake! This is perhaps the most crucial tip for any cookie, especially peanut butter varieties which can dry out very quickly. Peanut butter cookies can dry out very quickly if left in the oven for too long. Bake them just until the edges are set and lightly golden, and the centers still look slightly soft or puffy. They will continue to cook and set as they cool on the baking sheet, transforming into perfectly soft-baked, chewy delights. An underbaked cookie is almost always better than an overbaked one in terms of moisture and chew.
Frequently Asked Questions About Baking Peanut Butter Cookies:
Here are answers to some common questions about making and storing these delicious peanut butter cookies, helping you troubleshoot and bake with confidence:
Absolutely! This recipe is incredibly adaptable. You can easily double all the ingredients to make a larger batch for parties, bake sales, or gifts, ensuring you have plenty to share. Alternatively, you can halve it if you’re only craving a small portion of freshly baked cookies for yourself or a smaller household. Just be sure to scale all ingredients proportionally for the best and most consistent results.
Yes, freezing the cookie dough is a fantastic make-ahead option! Scoop the dough into individual balls (approximately 60 grams each) and roll them in granulated sugar as directed. Place the sugared dough balls on a parchment-lined baking sheet and freeze until solid (typically 1-2 hours). Once frozen, transfer the solid dough balls to a freezer-safe bag or airtight container. They will keep well in the freezer for 1-2 months. When ready to bake, simply place them on a prepared baking sheet directly from frozen. You may need to reduce your oven temperature by 25 degrees Fahrenheit (about 15 degrees Celsius) to prevent over-browning on the outside before the inside cooks, and add an extra 1-2 minutes to the baking time.
The most common culprits for dry or crumbly peanut butter cookies are overbaking or too much flour. Ensure you measure your flour accurately, preferably by weight with a kitchen scale (390 grams). Also, stick precisely to the recommended baking time of 8 minutes, even if the centers still look slightly soft. The cookies continue to set as they cool, and even an extra minute in the oven can zap their moisture. Additionally, using a smooth, processed peanut butter contributes to a moister texture compared to many natural varieties.
For the chewiest, most consistently textured and flavorful cookies, we highly recommend using a smooth, processed peanut butter (such as Jif, Skippy, or Peter Pan). These commercial brands typically contain added oils and sugars that are specifically designed for baking, contributing to the cookie’s structure, moisture, and consistent spread. Natural peanut butter, while a healthy choice for eating, often has a different fat-to-solids ratio and can lead to a drier, more crumbly cookie due to its tendency to separate oils and lack of stabilizers.
For perfectly round, bakery-style cookies, uniformity is key. First, use a cookie scoop to ensure each dough ball is of equal size (60 grams). As soon as the cookies come out of the oven and are still hot and pliable on the baking sheet, use a large round cookie cutter or the rim of a glass that’s slightly larger than your cookie. Place it around the hot cookie and gently swirl it in a circular motion. This easy trick coaxes the warm edges back into a perfect circle, creating beautifully shaped cookies every time without altering their delicious texture.
More Irresistible Peanut Butter Recipes to Love:
If you’re a devoted fan of peanut butter, your culinary adventure doesn’t have to stop here! We have an array of other fantastic recipes that celebrate the rich, nutty flavor of peanut butter in various delightful forms. Expand your repertoire with these must-try treats that are sure to become new favorites:
- Peanut Butter and Jelly Thumbprint Cookies: A delightful twist on the classic sandwich, these soft peanut butter cookies feature a sweet jelly center nestled in a perfectly baked base.
- Decadent Peanut Butter Blondies: Indulge in rich, buttery blondies generously studded with peanut butter cups and topped with a luscious peanut butter frosting and a decadent chocolate ganache.
- Elegant Salted Peanut Butter Chocolate Tart: A sophisticated dessert featuring a creamy, dreamy peanut butter filling, a rich layer of chocolate ganache, and a hint of flaky sea salt all encased in a crisp, buttery crust.
- Amazing No-Bake Peanut Butter Pie: A heavenly, light, and fluffy peanut butter pie that requires absolutely no oven time, making it perfect for a quick yet impressive dessert any time of year.
Made these amazing Thick & Chewy Peanut Butter Cookies? We’d love to hear from you!
Your feedback is invaluable to us and helps our small business immensely. Please consider leaving a comment and a star rating below in the recipe card section, letting us know how much you enjoyed the recipe. Thank you for baking with us and sharing your creations!
Thick & Chewy No-Chill Peanut Butter Cookies
Rate This
Print Recipe
Ingredients
For the Cookie Dough:
- 1 cup salted butter, melted (226 grams)
- ¾ cup + 2 tbsp creamy peanut butter (218 grams)
- ¾ cup dark brown sugar, packed (163 grams)
- ¾ cup granulated sugar (156 grams)
- 2 large eggs, at room temperature
- 1 ½ tsp vanilla extract
- 3 cups all-purpose flour, spooned & leveled or weighed out (390 grams)
- 1 tsp baking soda
- 1 tsp baking powder
- ½ tsp salt
For Rolling Dough:
- ½ cup granulated sugar
Instructions
- Prep: Preheat your oven to 350℉ (175°C). Line a few cookie sheets with parchment paper for easy non-stick baking.
- Make Cookie Dough: In a large mixing bowl, melt the butter. Whisk in the peanut butter until completely smooth and combined. Add both the dark brown sugar and granulated sugar, whisking well until incorporated. Then, add the eggs and vanilla extract, whisking until the mixture is smooth and uniform, about 30-45 seconds. Finally, stir in the dry ingredients: all-purpose flour, baking soda, baking powder, and salt. You’ll need to use some effort here, as the dough will be quite thick, but it will come together. A stand mixer can be used for the dry ingredient incorporation if preferred.
- Form Dough Balls: Scoop dough into balls, each weighing approximately 60 grams (about 2 generous tablespoons). Roll each dough ball thoroughly in the additional granulated sugar for a sparkling finish and a delightful exterior crunch.
- Bake: Place 5-6 sugared dough balls on each prepared cookie sheet, leaving a little space between them for minimal spread. Bake for exactly 8 minutes. The edges will appear just set and lightly golden, while the centers will still look slightly puffy and soft. Do not overbake! This short baking time ensures perfectly soft and chewy cookies once cooled. Immediately after removing from the oven, gently flatten the cookies a bit with the back of a measuring cup or a spoon to achieve that signature dense, chewy texture.
- Serve & Store: Allow the cookies to cool completely on the baking sheet set on a wire rack before serving or storing. Store cooled cookies in an airtight container at room temperature for 4-5 days to maintain their freshness and chewiness.
- Make-Ahead Tip: Cookie dough balls can be prepared, rolled in sugar, and then frozen on a parchment-lined baking sheet until solid. Transfer the frozen dough balls to a freezer-safe bag or container and freeze for 1-2 months. To bake from frozen, reduce your oven temperature by 25 degrees Fahrenheit (15 degrees Celsius) to 325℉ (160°C) and bake for an additional 1-2 minutes, if needed, until the edges are set.
Nutrition
Calories: 311kcal
Carbohydrates: 39g
Protein: 5g
Fat: 16g
Saturated Fat: 7g
Polyunsaturated Fat: 2g
Monounsaturated Fat: 5g
Trans Fat: 0.4g
Cholesterol: 45mg
Sodium: 272mg
Potassium: 101mg
Fiber: 1g
Sugar: 23g
Vitamin A: 327IU
Calcium: 34mg
Iron: 1mg
Nutrition information is automatically calculated and should only be used as an approximation. Please consult a professional for precise dietary advice.