
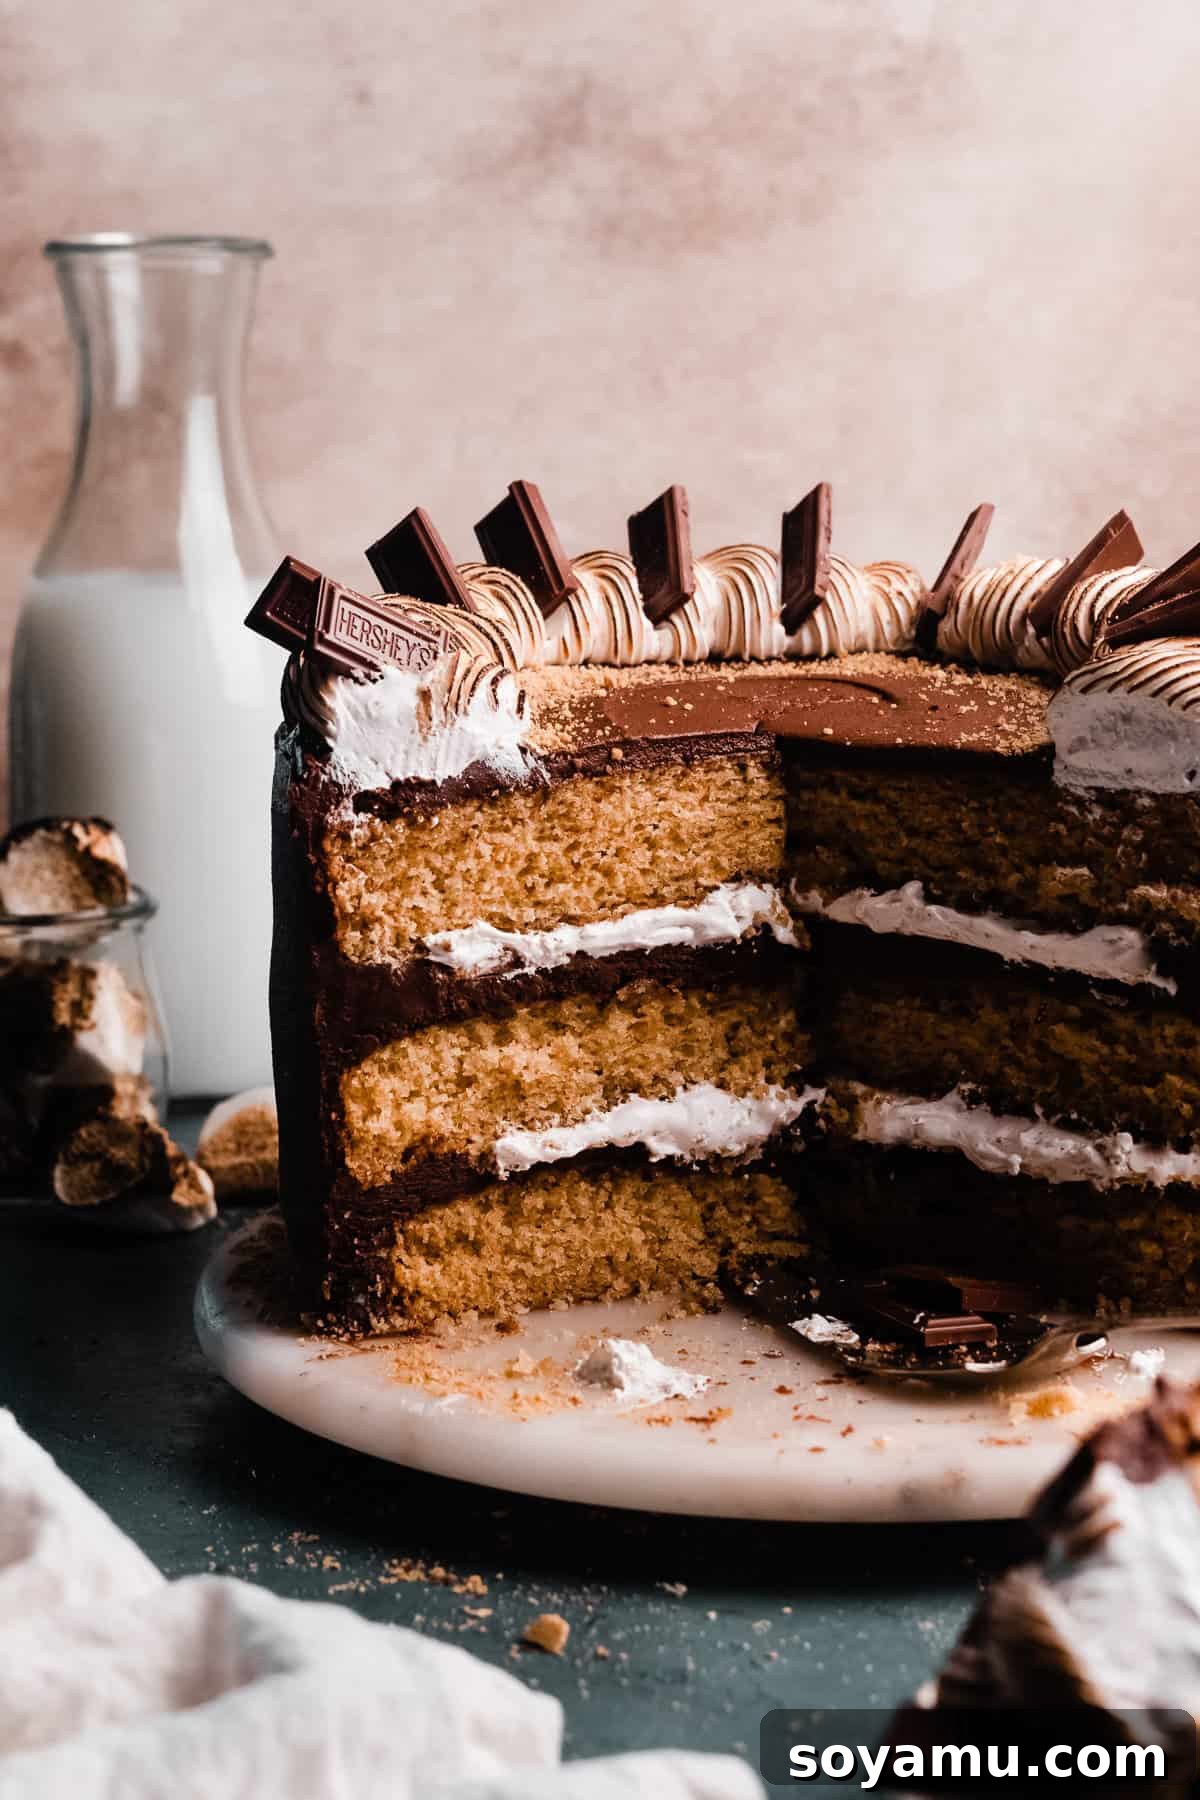
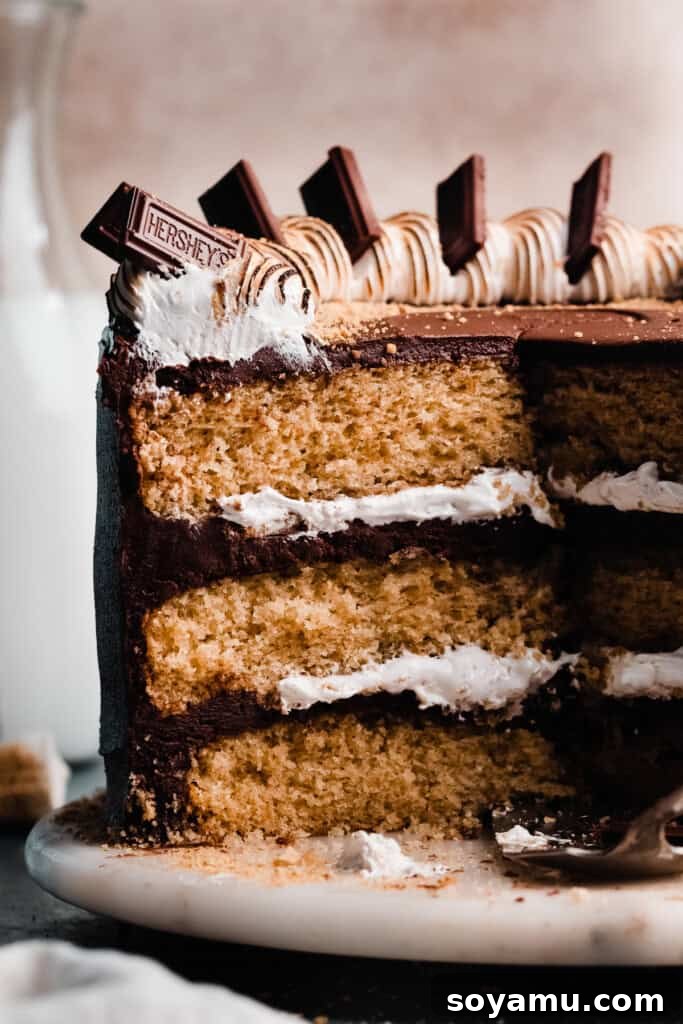
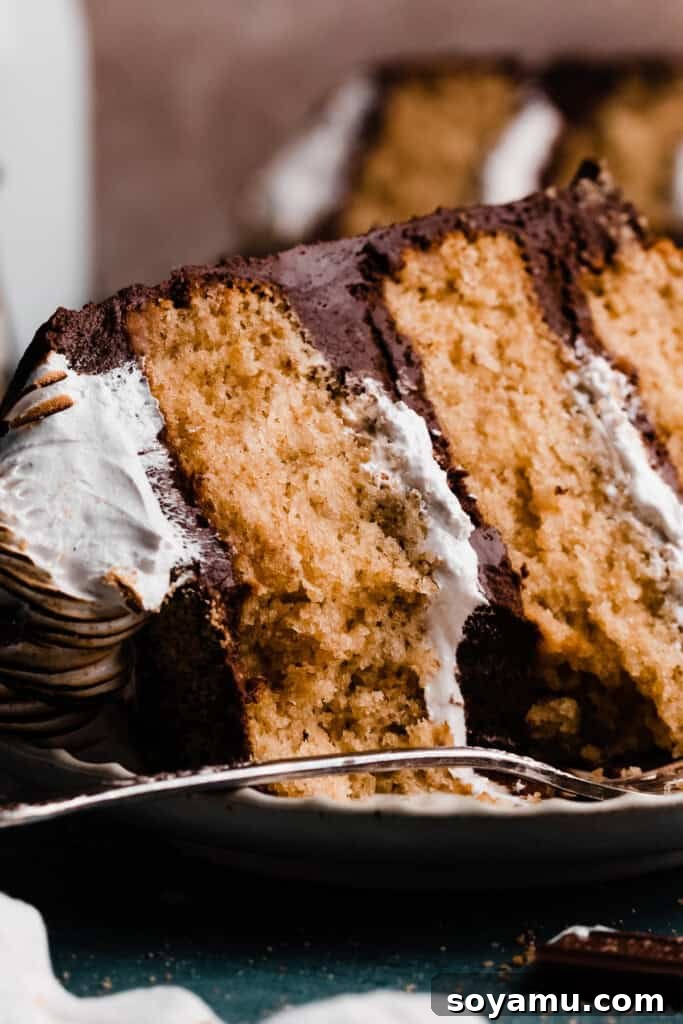
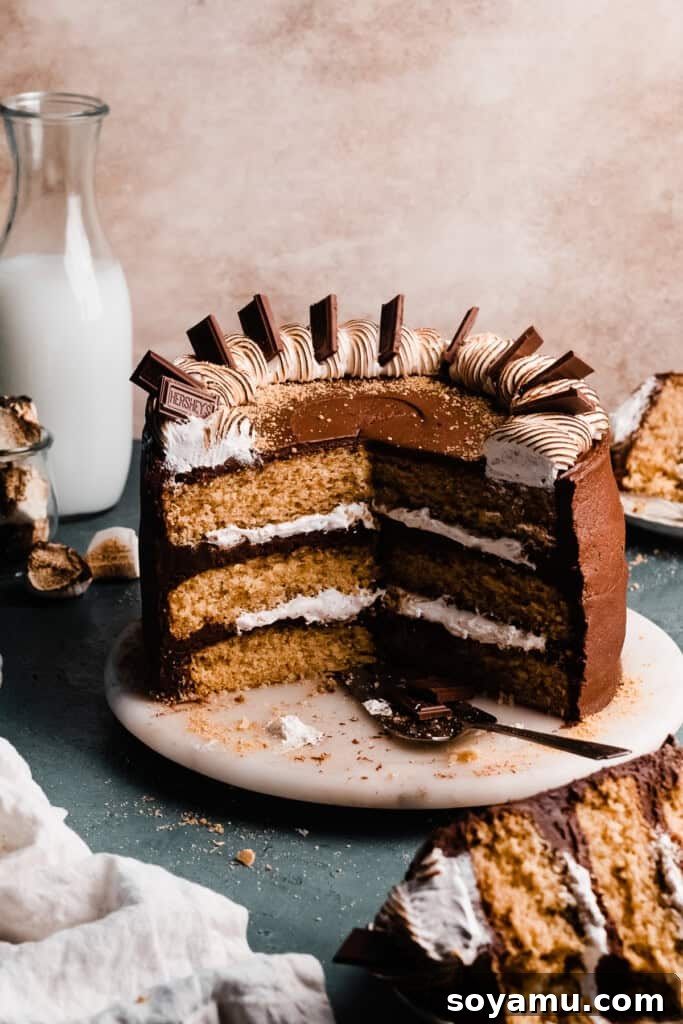
S’mores Cake is a decadent dessert that masterfully transforms the beloved campfire classic into an elegant, show-stopping treat. Imagine sinking your teeth into plush, incredibly moist cake layers, each infused with the unmistakable flavor of golden graham crackers. These delightful layers are generously filled with a luscious, homemade marshmallow fluff (or a luxurious Swiss meringue, if you’re feeling fancy!), and then enveloped in a rich, velvety milk chocolate frosting. To truly capture that authentic s’mores experience, artful swirls of marshmallow fluff are piped on top and gently toasted, creating a visually stunning finish and an irresistible aroma. This cake isn’t just a dessert; it’s an ultimate celebration of summer, offering a sophisticated yet wonderfully nostalgic twist on a timeless indulgence. Perfect for birthdays, special occasions, or simply bringing the joy of a campfire indoors, this S’mores Cake promises an unforgettable culinary adventure.
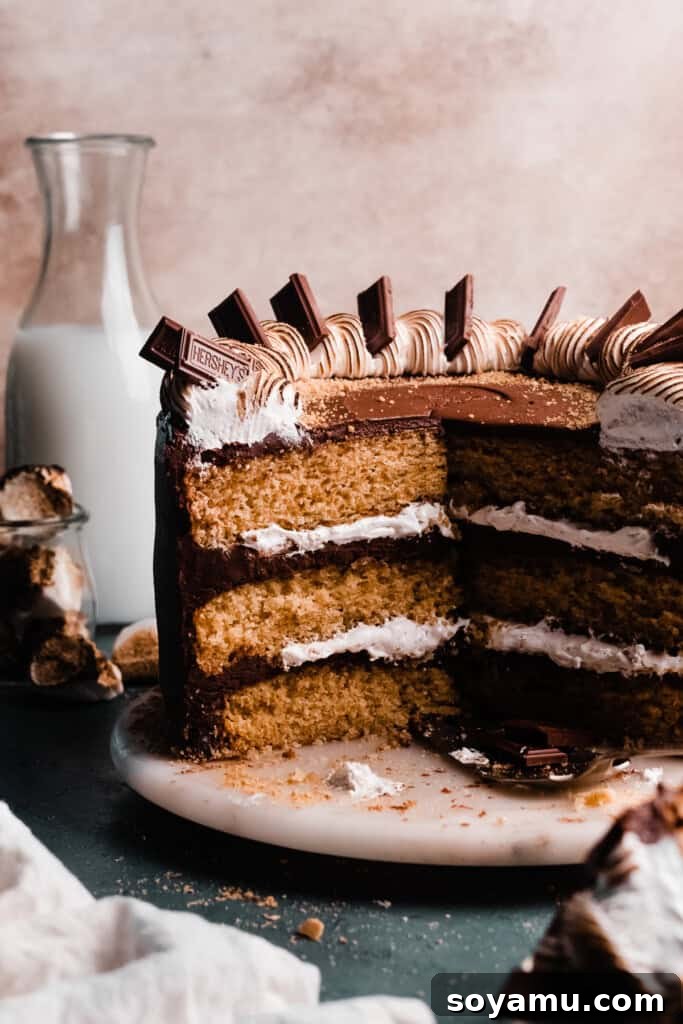
Why This S’mores Cake Will Become Your New Favorite:
This S’mores Cake is more than just a recipe; it’s an experience designed to delight your senses and bring smiles to every face. Here’s why this particular rendition stands out:
- Authentic Graham Cracker Cake Layers: Forget plain vanilla; our cake layers are the true stars, imbued with the warm, honey-kissed flavor of graham crackers. Finely crushed graham cracker crumbs are carefully folded into the batter, ensuring every bite carries that distinctive, beloved taste. A subtle hint of cinnamon is added to perfectly complement and enhance the graham cracker essence, echoing the comforting flavors of your favorite campfire snack. This unique cake base sets the stage for the entire s’mores experience, making it truly exceptional.
- Decadent Milk Chocolate Frosting: What’s a s’more without rich chocolate? Our frosting is a dream come true for chocolate lovers, crafted with real melted milk chocolate bars mixed into a silky-smooth, intensely flavorful base. This isn’t just any chocolate frosting; it’s specifically designed to evoke the creamy, melt-in-your-mouth goodness of a perfectly warmed chocolate bar from the campfire. Its luxurious texture and deep chocolate profile balance the sweet marshmallow and crisp graham cracker notes beautifully.
- Luxurious Homemade Marshmallow Meringue: Elevating this cake from delightful to extraordinary is the homemade Swiss Meringue, often lovingly referred to as marshmallow meringue due to its incredibly light, fluffy, and sticky texture. This meringue provides that iconic gooey, stretchy marshmallow pull that is synonymous with s’mores. While it might sound intimidating, the detailed instructions provided walk you through every step, making it achievable for bakers of all levels. For those short on time or seeking an easier path, store-bought marshmallow fluff can be used as a convenient alternative, though the homemade version offers unparalleled texture and taste.
- A Symphony of Textures and Flavors: Beyond individual components, this cake offers a magnificent interplay of textures and flavors. The soft, moist cake, the creamy frosting, the airy, toasted meringue, and the slight crunch of extra graham cracker crumbs create a dynamic and utterly satisfying bite every single time. It’s a dessert that’s both comforting and sophisticated.
- Visually Stunning Presentation: With its beautifully layered structure, billows of toasted meringue, and chocolate drizzles, this cake isn’t just delicious—it’s a feast for the eyes. It’s a guaranteed showstopper at any gathering, promising “oohs” and “aahs” before the first slice is even served.
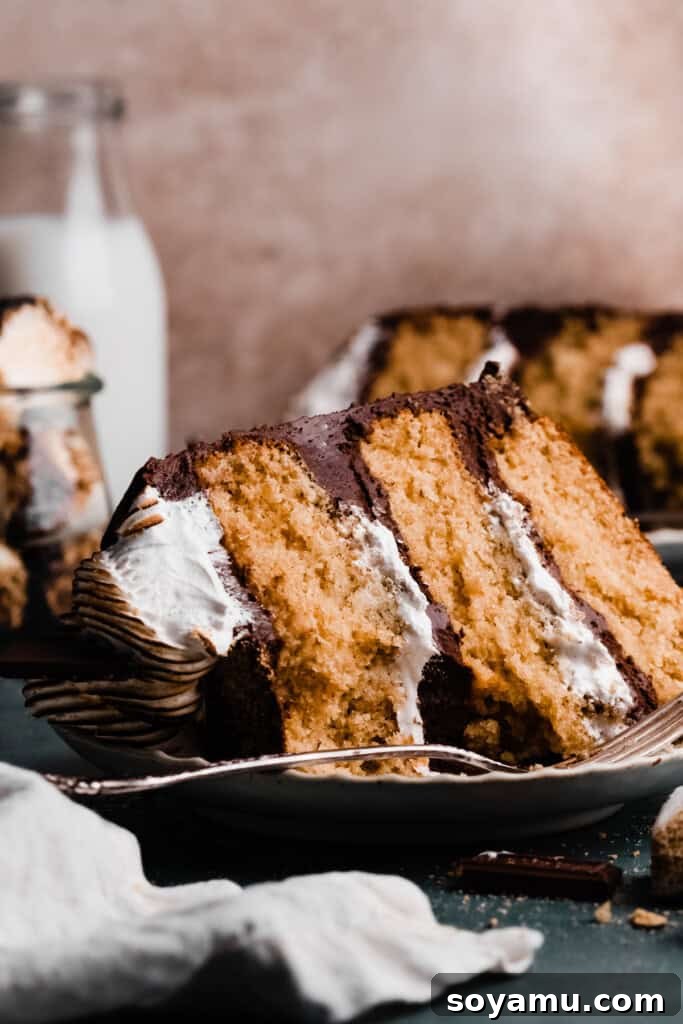
Ingredient Overview: Crafting Perfection
Success in baking often comes down to understanding your ingredients. Here’s a deeper look at the key components for this S’mores Cake, along with helpful tips. The full recipe with precise measurements and detailed directions can be found in the recipe card at the bottom of this post.
- Butter: For both the cake and frosting, butter provides rich flavor and tender texture. I typically use salted butter for a subtle contrast, but unsalted butter works perfectly if you prefer to control the salt content precisely. Ensure it’s softened to room temperature for optimal creaming in the cake batter and smooth incorporation into the frosting.
- Vegetable Oil: The secret to an exceptionally moist and tender crumb lies in using a combination of both butter and vegetable oil in the cake batter. While butter contributes unparalleled flavor, oil ensures the cake remains incredibly moist and prevents it from drying out, even after a few days.
- Eggs: Large eggs, brought to room temperature, are crucial for proper emulsification and a light, airy cake structure. This recipe uses whole eggs for richness and an additional egg white to boost the fluffy texture without adding excess fat, striking the perfect balance for a truly plush cake.
- Milk: I used 2% milk, but skim, whole, or even lactose-free milk are suitable substitutes. The milk adds moisture and helps activate the leavening agents, contributing to the cake’s tender crumb. Ensure it’s at room temperature for seamless blending with other ingredients.
- Sour Cream: Full-fat sour cream, also at room temperature, is a game-changer for cake texture. Its acidity reacts with the baking soda, creating a more tender and moist crumb, while its fat content adds richness. Plain full-fat yogurt can be used as a convenient substitute if needed.
- Cake Flour: For the ultimate light and delicate cake crumb, cake flour is highly recommended. It has a lower protein content than all-purpose flour, resulting in a softer, less dense cake. When measuring, always spoon and level your flour or use a digital scale (1 cup of cake flour weighs approximately 110 grams) to avoid over-measuring, which can lead to a dry, dense cake.
- Vanilla Extract: Given the simple yet profound flavors in this cake, using high-quality pure vanilla extract (rather than imitation) makes a significant difference. It enhances all the other ingredients, adding depth and warmth to both the cake and frosting.
- Graham Cracker Crumbs: The star flavor of our cake layers! Using finely crushed graham cracker crumbs directly in the batter ensures that authentic s’mores taste permeates every bite. For the best results, use a food processor to achieve very fine crumbs.
- Milk Chocolate (for Frosting): The quality of your chocolate directly impacts the richness of your frosting. While Hershey’s milk chocolate bars are quintessential for s’mores, high-quality milk chocolate chips or baking bars also work wonderfully. Avoid candy coating, as it will not melt and incorporate correctly for a creamy frosting.
- Powdered Sugar & Cocoa Powder (for Frosting): These form the base of our decadent milk chocolate frosting, providing sweetness and deep chocolate flavor. Sifting them can help prevent lumps, ensuring a super smooth finish.
- Cream Cheese (for Frosting): A unique addition to the milk chocolate frosting, cold cream cheese adds a delightful tang and helps stabilize the frosting, giving it a wonderfully creamy texture that’s less cloyingly sweet and easier to work with.
- Egg Whites & Granulated Sugar (for Meringue): These are the fundamental components of our Swiss meringue. Using room temperature egg whites is vital for achieving maximum volume when whisking, while granulated sugar adds sweetness and structure.
- Cream of Tartar (for Meringue): This acidic ingredient acts as a stabilizer for the egg whites, helping them whip up faster, achieve greater volume, and hold stiff peaks, ensuring a robust and stable meringue that won’t weep.
Recipe Substitutions & Variations: Get Creative!
While this S’mores Cake recipe is perfect as written, don’t hesitate to personalize it with these helpful substitutions and creative variations:
- Cake Flour Substitute: If cake flour isn’t readily available, you can easily make your own. For every cup of all-purpose flour, spoon and level it into a measuring cup, then remove two tablespoons. Replace these two tablespoons with two tablespoons of cornstarch. Sift this mixture thoroughly twice to ensure even distribution and a light texture comparable to commercial cake flour. This step is critical for achieving a tender cake.
- Marshmallow Fluff Alternatives:
- Store-Bought Marshmallow Fluff: For ultimate convenience, use pre-made marshmallow fluff between the cake layers. It provides that classic sticky sweetness. However, note that store-bought fluff lacks the structural integrity of homemade meringue, so it won’t hold piped shapes on top of the cake. Instead, dollop it generously and swirl it artistically over the frosting with the back of a spoon. You can still lightly torch it for that charred marshmallow aesthetic!
- Toasted Marshmallows: Elevate the s’mores experience by adding actual toasted marshmallows. You can place mini marshmallows on top of the cake, along with or in place of the fluff/meringue, and torch them directly. Alternatively, toast larger marshmallows on a baking sheet under your oven’s broiler for a minute or two (watch carefully!) before arranging them on the cake.
- Sour Cream Substitute: In a pinch, full-fat plain yogurt can be used as a direct substitute for sour cream. It provides a similar tang and moisture, contributing to a tender crumb.
- Gluten-Free Adaptation: I haven’t personally tested this cake recipe with gluten-free flour alternatives. However, many readers have success using a high-quality 1:1 gluten-free baking blend that contains xanthan gum in their favorite cake recipes. If you experiment with this, please share your results!
- Dairy-Free Adaptation: Similarly, I haven’t tested this specific cake with dairy-free ingredients. However, if you are accustomed to baking with dairy-free butter, milk, and sour cream alternatives, you can certainly try them here. Ensure they are products you trust for baking to maintain the cake’s delicate balance and texture.
- Spice Variations: For a different twist, consider adding a pinch of nutmeg or allspice along with the cinnamon to the graham cracker cake layers for a warmer, more complex spice profile.
- Chocolate Drizzle: For an extra layer of indulgence and visual appeal, melt some additional milk chocolate or dark chocolate and drizzle it decoratively over the finished, frosted, and meringue-topped cake.
- Mini S’mores Cakes: Instead of a large layer cake, bake the batter in cupcake liners for individual S’mores cupcakes. Adjust baking time accordingly. Top with mini marshmallows and torch them for adorable, personalized treats.
How to Make this Homemade S’mores Cake: A Step-by-Step Guide
Crafting this S’mores Cake is a rewarding process, bringing together distinct elements to create a harmonious masterpiece. Follow these detailed steps for a perfect bake:
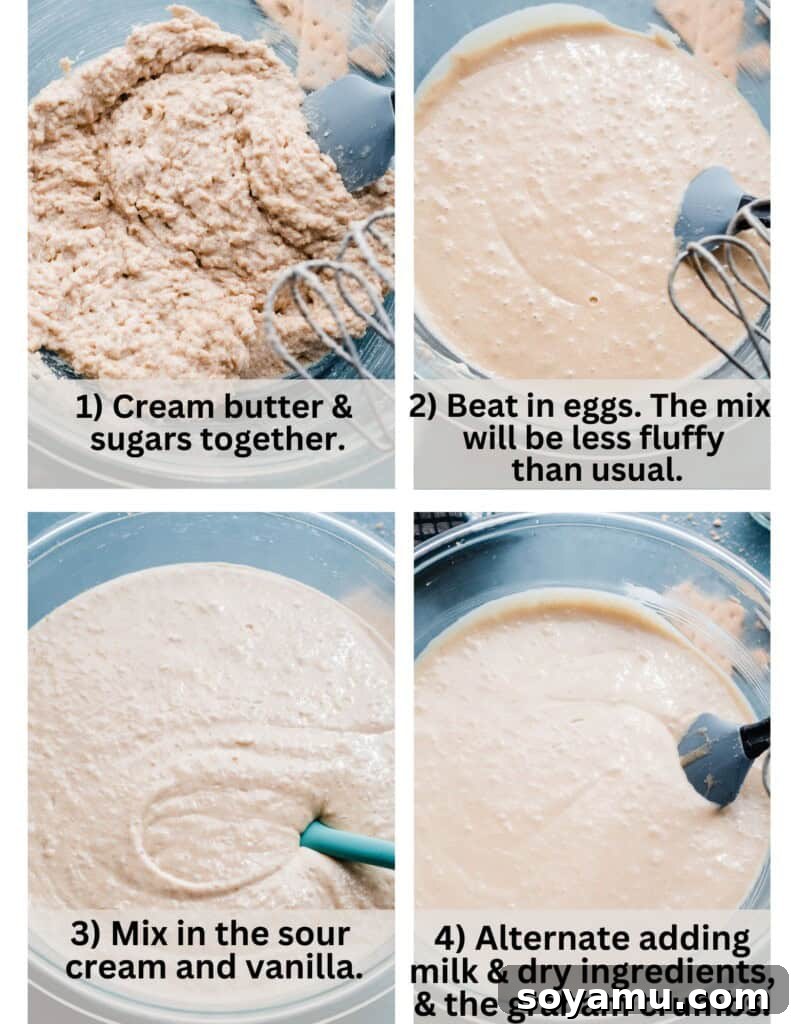
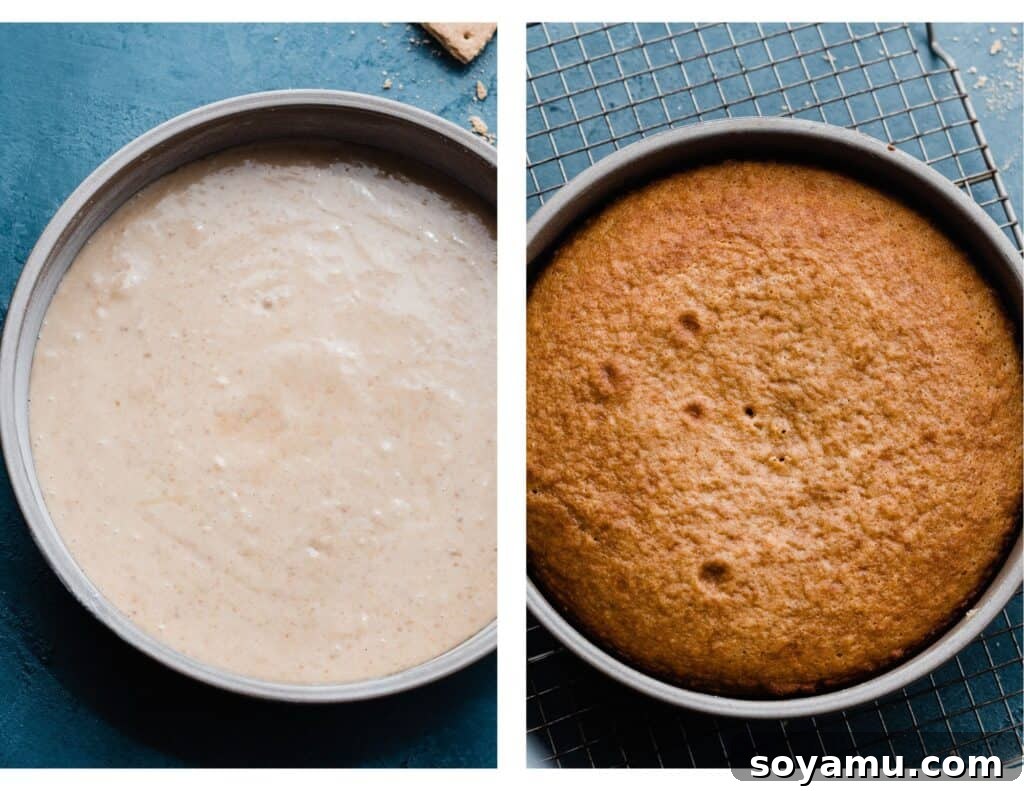
Step 1: Prepare Your Cake Batter for Success. Begin by creaming together the softened butter and vegetable oil in a large mixing bowl. An electric mixer, whether a handheld model or a stand mixer fitted with a paddle attachment, will ensure a smooth, uniform base. Beat this mixture until light and creamy, about 30 seconds. Next, gradually add the granulated and brown sugars, beating on high speed for a full two minutes. This crucial step incorporates air, making your cake lighter and fluffier. Scrape down the sides and bottom of the bowl frequently to ensure all ingredients are thoroughly combined. Introduce the eggs, two at a time, mixing on medium speed for 45 seconds after each addition until fully incorporated and the mixture is incredibly fluffy. Finally, gently fold in the room temperature sour cream and vanilla extract. In a separate bowl, whisk together all your dry ingredients (cake flour, baking powder, baking soda, cinnamon, and salt). Alternate adding the dry ingredients and milk to the wet mixture, starting and ending with the dry. Mix on low speed, and stop as soon as only a few streaks of flour remain. Do not overmix the batter; over-agitation can develop gluten too much, leading to a dense, tough cake. Lastly, gently fold in the graham cracker crumbs with a spatula until just combined. A few small lumps in the batter are perfectly acceptable and even desirable.
Step 2: Bake the Perfect Cake Layers. Divide your prepared cake batter evenly among three 9-inch prepared cake pans. For the most even bake, especially if your oven runs hot or cold, it’s recommended to bake two pans at a time, then the third. Bake for 23-26 minutes, rotating the pans halfway through to ensure uniform browning and doneness. A toothpick inserted into the center of each cake should come out with moist crumbs, indicating it’s perfectly baked. Allow the cakes to cool in their pans on a wire rack for 10 minutes before inverting them onto the racks, carefully peeling off the parchment rounds, and letting them cool completely. Patience is key here; frosting a warm cake will lead to a melty mess!
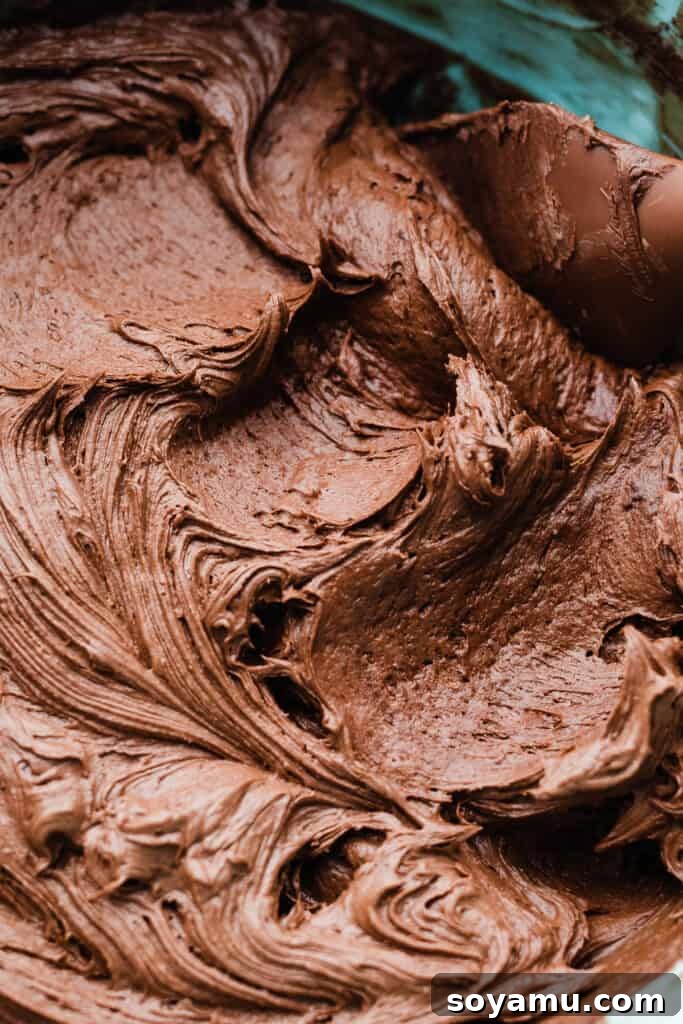
Step 3: Whip Up the Luxurious Milk Chocolate Frosting. While your cake layers are cooling, prepare the rich milk chocolate frosting. Start by gently melting the milk chocolate in a large mixing bowl, using 30-second intervals in the microwave and stirring well after each. Continue until mostly melted, then stir vigorously to smooth out any remaining lumps using the residual heat. Allow the melted chocolate to cool to room temperature. Once cooled, beat the softened butter into the melted chocolate until smooth. Gradually add the powdered sugar in two additions, mixing thoroughly after each. If the frosting seems too stiff, add a splash of heavy cream or milk until it reaches your desired consistency. Incorporate the vanilla extract, a pinch of salt, and the cocoa powder. Finally, and this is a crucial step, beat in the cold, block-style cream cheese until just combined. The cold cream cheese helps create an incredibly luscious, stable, and less-sweet frosting. Taste and adjust sweetness or chocolate intensity as desired with more powdered sugar or cocoa.
Tip: When adding powdered sugar and cocoa powder, start your mixer on the lowest speed to avoid a cloud of dust and a messy kitchen!
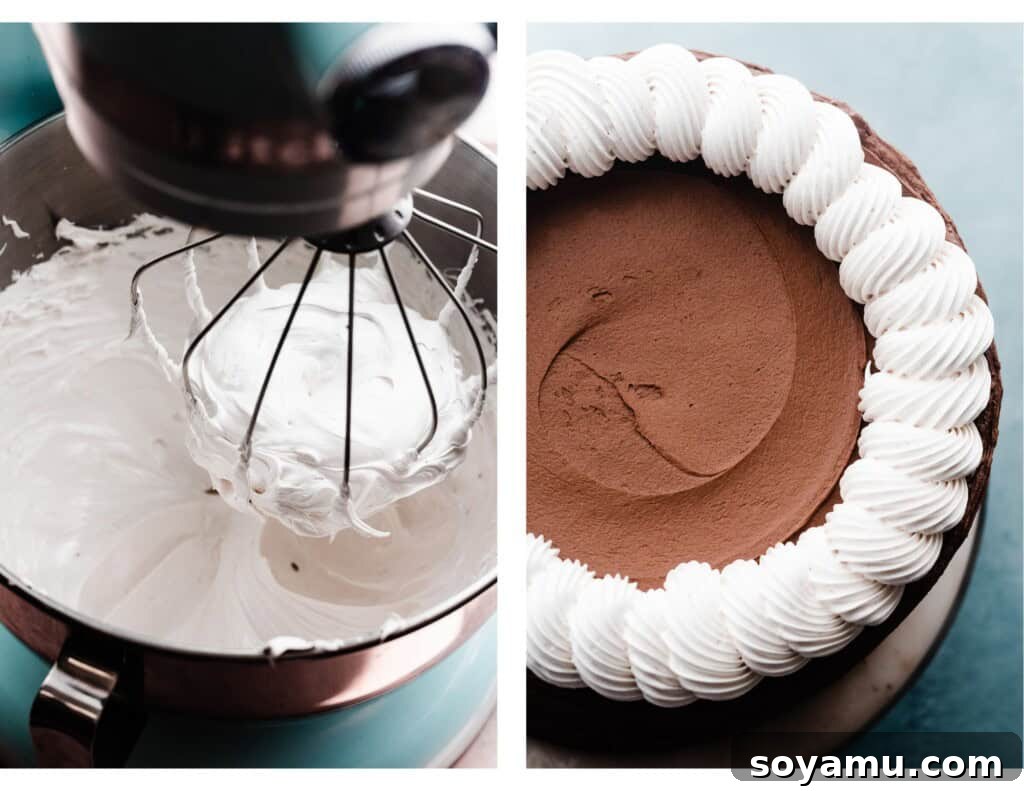
Step 4: Master the Homemade Swiss Meringue. This step creates the homemade marshmallow fluff that will elevate your S’mores Cake. It’s best to prepare this just before you are ready to assemble the cake, as fresh meringue is the most stable and workable. Begin by setting a metal bowl (preferably from your stand mixer, ensuring it’s impeccably clean and grease-free) over a pot of simmering water – making sure the bottom of the bowl does not touch the water. In this bowl, whisk together room temperature egg whites, granulated sugar, and cream of tartar. Continuously whisk this mixture over the simmering water until it reaches a steady temperature of 175°F (80°C) on an instant-read thermometer. This heating process dissolves the sugar and pasteurizes the egg whites, making them safe to eat. Once heated, immediately transfer the bowl to your stand mixer (or use a hand mixer). Beat the mixture on high speed with the whisk attachment until very stiff, glossy peaks form and hold their shape. The meringue will transform from a silky smooth texture to one that appears slightly chunky or “balled up” inside the whisk attachment – this is your indicator of maximum stability. When you lift the whisk, the peaks should stand upright with only the very tip curling over slightly.
For an even more in-depth tutorial and troubleshooting tips on mastering this delicate component, be sure to read a dedicated blog post all about Swiss Meringue.
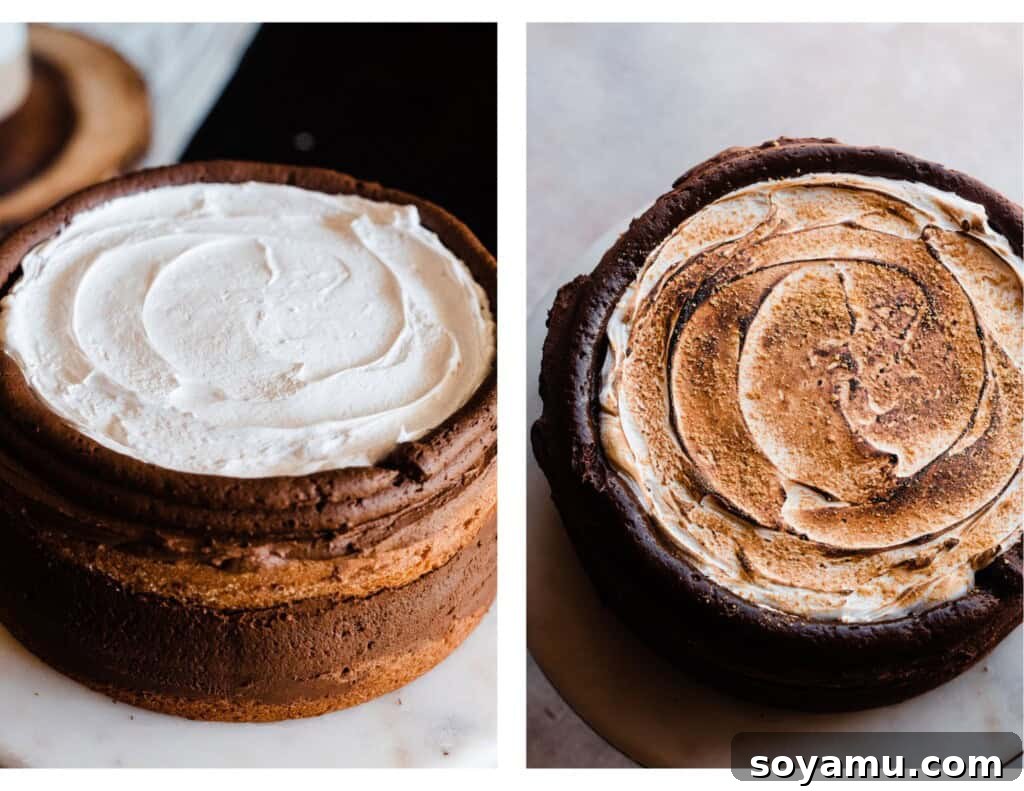
Step 5: Assemble Your Stunning S’mores Cake. The moment of truth! Place your first completely cooled cake layer on a cake stand or serving plate. Secure it in place with a small dollop of chocolate frosting underneath. Spread about 1.5 cups of your delicious milk chocolate frosting evenly over this layer using an offset spatula. Then, pipe a neat border of chocolate frosting around the perimeter of the cake layer; this acts as a dam to contain the luscious marshmallow meringue. Spoon about 1/4 of your freshly made Swiss meringue inside this frosting border. Using a kitchen torch, gently toast the meringue until it’s beautifully golden brown and slightly caramelized, mimicking that campfire char. Sprinkle a handful of crushed graham cracker crumbs over the toasted meringue. Carefully place the second cake layer on top. Use any excess frosting that might peek out from between the layers to start forming a very thin “crumb coat” around the sides of the cake. Place the cake in the refrigerator for 10-15 minutes to allow this layer to chill and set, which prevents sliding and locks in crumbs. Repeat the frosting, meringue, toasting, and graham cracker crumb steps for the second layer. For the top layer, place it upside down; this creates a perfectly flat top for a professional finish. Apply a very thin layer of frosting all over the entire cake (top and sides). This is your crumb coat – it doesn’t need to be perfect, its purpose is simply to trap any loose crumbs. Chill the cake in the fridge for another 20-30 minutes. Once chilled, apply the remaining milk chocolate frosting, smoothing it evenly over the top and sides with your offset spatula and cake scraper for a polished look. Return the cake to the fridge for 20 minutes for the final frosting layer to set. Just before serving, pipe the remaining marshmallow meringue decoratively on top of the cake and torch it immediately for that striking caramelized effect. For the final touch, break pieces of a Hershey’s bar and arrange them artistically on top, along with an extra sprinkle of graham cracker crumbs. This cake is a labor of love, and every step contributes to its magnificent layers of flavor and texture!
Serving & Storing Your S’mores Cake:
Once your S’mores Cake is fully assembled with its beautiful, toasted meringue, it’s ready to be enjoyed! For the best experience, slice and serve immediately. The warmth of the freshly toasted meringue and the vibrant textures are truly at their peak right away. If you’ve mastered the Swiss meringue and achieved a very stable consistency (like the one shown in the photos), your cake can be refrigerated for up to 24 hours before serving without significant loss of meringue integrity. However, if you are new to making meringue and are unsure of its stability, it is always best to serve the cake on the same day it’s assembled to ensure the meringue holds up perfectly. An improperly stabilized meringue may weep or deflate if left in the fridge for too long. For any leftover cake, store it in an airtight cake carrier in the refrigerator. To keep the cut portions from drying out, press a piece of plastic wrap directly against the exposed cake. Leftovers will remain delicious for 2-3 days, though the meringue’s texture will be best on the first day.
Expert Baking Tips for a Flawless S’mores Cake:
Achieving baking perfection often comes down to attention to detail and utilizing the right tools. Here are some expert tips to ensure your S’mores Cake turns out flawlessly:
- Read the Entire Recipe Thoroughly: This S’mores Cake recipe, while not overly difficult, involves several distinct stages and components. Before you even gather your ingredients, take the time to read through the entire recipe from start to finish. This will help you understand the flow of the process, anticipate upcoming steps, and ensure you have all necessary ingredients and equipment at hand. Being prepared is half the battle won!
- Invest in an Oven Thermometer: Many home ovens are not calibrated accurately, often running hotter or colder than the set temperature. An oven thermometer is an inexpensive yet invaluable tool that provides an accurate reading of your oven’s true temperature. Consistent and precise oven temperature is critical for even baking and prevents burnt edges or undercooked centers. Keeping an oven thermometer inside at all times allows you to monitor your oven’s calibration constantly.
- Utilize a Kitchen Scale for Accuracy: Measuring flour by volume (cups) can lead to significant inconsistencies, as the amount can vary widely depending on how it’s scooped and whether it’s sifted. A digital food scale is the most reliable way to measure dry ingredients, especially flour, ensuring you use the exact weight specified in the recipe. This precision is fundamental for achieving the correct cake texture – avoiding a dense cake from too much flour or a crumbly one from too little. For this recipe, 1 cup of cake flour should weigh approximately 110 grams.
- Room Temperature Ingredients are Key: For the cake batter, ensuring ingredients like butter, eggs, milk, and sour cream are at room temperature is vital. Room temperature ingredients emulsify more effectively, creating a smoother, more uniform batter that traps air better, resulting in a lighter and more tender cake crumb.
- Don’t Overmix the Batter: Once the dry ingredients are added to the wet, mix only until just combined, with a few streaks of flour still visible. Overmixing develops the gluten in the flour, leading to a tough, chewy, and dense cake rather than a tender, plush one.
- Cool Cakes Completely: Resist the urge to rush! Your cake layers must be completely cooled before you even think about frosting them. Attempting to frost warm cakes will cause the frosting to melt and slide, resulting in a messy, unstable cake.
- Clean Tools for Meringue: For Swiss meringue, ensure all your bowls and whisk attachments are impeccably clean and grease-free. Even a tiny bit of grease can prevent egg whites from whipping up properly, leading to a runny, unstable meringue. Wiping your equipment with a little vinegar or lemon juice beforehand can help ensure they are pristine.
- Patience with Assembly: Layer cakes require a bit of patience during assembly. The chilling steps for the crumb coat are not optional; they are essential for creating a stable, neat cake that is easy to frost smoothly.
Frequently Asked Questions (FAQs) About S’mores Cake:
Absolutely! Halving this recipe is straightforward. A half batch will perfectly yield two 8-inch round cake layers, or two 8-inch square cake layers. This is ideal if you’re making a smaller cake for a more intimate gathering or if you prefer a less towering dessert.
Yes, this recipe is highly versatile and can be easily adapted for cupcakes! A full batch of the cake batter will yield approximately 44-48 standard-sized cupcakes. If you’re looking for a more manageable quantity, you might want to halve the recipe to make about 22-24 cupcakes. The baking time for cupcakes will be significantly shorter, typically 18-22 minutes, so keep a close eye on them. For assembly, you can pipe the chocolate frosting, then pipe or dollop the marshmallow meringue on top and torch it for individual S’mores cupcake perfection.
Yes, absolutely! Cake layers can be baked 1-2 days in advance. Once completely cooled, wrap each layer tightly in plastic wrap, then again in aluminum foil, and store them at room temperature. For longer storage (up to a month), freeze the tightly wrapped layers. Thaw them at room temperature before frosting.
The milk chocolate cream cheese frosting can be made up to 3 days in advance. Store it in an airtight container in the refrigerator. Before use, let it come to room temperature for about an hour, then re-whip it with your electric mixer until it’s light and fluffy again, adding a tablespoon of milk or cream if needed to achieve the right consistency.
While Swiss meringue requires careful attention to temperature and clean equipment, it is very achievable for home bakers! The detailed steps in this recipe and a good instant-read thermometer will guide you to success. It’s often considered easier and more stable than French meringue.
If your meringue isn’t holding stiff peaks, it might be due to a few reasons: the egg whites or bowl might have had a trace of fat/grease, the egg whites weren’t cooked to the correct temperature, or they weren’t whipped long enough. Ensure your equipment is spotless, the temperature is accurate, and keep whipping until those stiff peaks form!
Essential Tools for Baking and Decorating Your Cake:
While some tools are optional, these can significantly streamline the cake-making and decorating process, making it more enjoyable and yielding professional results.
- Offset Spatula: An offset spatula is an absolute game-changer for frosting cakes and spreading batters evenly. Its angled blade keeps your knuckles clear of the cake surface, allowing for smooth, effortless application of frosting.
- Cake Turntable: If you plan on baking and decorating cakes regularly, a cake turntable is an invaluable investment. It allows you to rotate the cake smoothly as you apply frosting, ensuring even coverage and sharp edges with minimal effort.
- 9-inch Round Cake Pans (3): Essential for baking the multi-layered structure of this S’mores Cake. Using three pans ensures thinner, more even layers and quicker baking times.
- Parchment Paper Rounds: While you can cut your own, pre-cut parchment paper rounds save time and guarantee a perfect fit for your cake pans, making for easy release and clean edges.
- Large Mixing Bowls (2-3): Having multiple large bowls is helpful for separating wet and dry ingredients, and for preparing different components like the cake batter, frosting, and meringue.
- Electric Mixer (Stand or Handheld): Crucial for creaming butter and sugar, whipping eggs, and preparing both the frosting and the meringue. A stand mixer offers hands-free convenience, but a powerful handheld mixer will also get the job done.
Specialized Tools for Swiss Meringue Perfection:
Crafting a stable and beautiful Swiss meringue requires a few specific tools to ensure success.
- Piping Bag: For decorative swirls and precise application of the meringue, a reusable piping bag is an eco-friendly and practical choice.
- Piping Tip: I recommend using a Wilton 6B tip for piping the marshmallow meringue. Its open star shape creates beautiful, defined swirls that toast perfectly.
- Instant Read Thermometer: Absolutely essential for Swiss meringue! An instant-read thermometer ensures your egg whites and sugar mixture reaches the precise temperature of 175°F (80°C). This is critical for dissolving the sugar and pasteurizing the egg whites, leading to a stable and safe meringue.
- Kitchen Torch: To achieve that iconic toasted marshmallow effect, a kitchen torch is indispensable. Many small, handheld torches can be unreliable. For lasting quality and consistent performance, I highly recommend investing in a Bernzomatic Trigger Start Torch along with a few Propane Tanks. This professional-grade torch is significantly more powerful and durable, lasting for years of baking adventures.
- Metal Mixing Bowl: When making Swiss meringue, you need a heatproof bowl to sit over simmering water. A metal bowl (like your stand mixer bowl) is ideal for this double-boiler method.
More S’mores Recipes to Love:
If you’ve fallen in love with the classic combination of graham crackers, chocolate, and marshmallow, here are more delightful s’mores-inspired recipes to satisfy your cravings:
- Gooey Caramel S’mores Bars: A sticky, sweet, and utterly irresistible twist on the classic, perfect for a crowd.
- No-Bake S’mores Pie: Enjoy all the flavors of s’mores without turning on your oven. A quick and easy dessert for any occasion.
- Gooey S’mores Brownies: Fudgy brownies topped with toasted marshmallows and graham cracker crumbles – pure indulgence!
- S’mores Stuffed Skillet Cookie: A giant, warm chocolate chip cookie baked in a skillet, bursting with gooey s’mores goodness.
- Skillet S’mores Dip: The ultimate communal dessert! Melted chocolate and toasted marshmallows served warm with graham crackers for dipping.
- S’mores Tart: A sophisticated take featuring a crisp graham cracker crust, rich chocolate ganache, and a crown of toasted meringue.
Did you make this recipe? We’d love to hear from you!
Click the little stars in the header of the recipe card below to leave a comment and star rating, letting us know how you liked the recipe. Your feedback is invaluable and greatly supports our small business!
S’mores Cake with Marshmallow Meringue & Milk Chocolate Frosting
1 hour
30 minutes
33 minutes
12 to 20 slices
Rate
Ingredients
For the Graham Cracker Cake:
- 3 and 1/2 cups cake flour, spooned & leveled or weighed out, 385 grams
- 3/4 tsp baking soda, 4.5 grams
- 1 tbsp baking powder, 14 grams
- 3/4 tsp salt, 5 grams
- 1/4 tsp cinnamon
- 1/2 cup salted butter, softened at room temperature , 113 grams
- 1/2 cup + 1 tbsp vegetable oil, 131 grams
- 2 cups granulated sugar
- 2/3 cup brown sugar, packed, light or dark both work!
- 3 large eggs, at room temperature
- 1 large egg white, at room temperature
- 1 tbsp vanilla extract
- 3/4 cup full fat sour cream, at room temperature , 180 grams
- 1 and 1/2 cups milk, at room temperature , 360 mL
- 1 cup graham cracker crumbs
For the Milk Chocolate Frosting
- 14 ounces milk chocolate, You can use Hershey’s, milk chocolate chips, or any kind really! Just don’t use candy coating.
- 1 and 1/2 cups salted butter, softened at room temperature , 3 sticks, or 339 grams
- 5 and 3/4 cups powdered sugar , Plus more to taste
- 2 cups cocoa powder
- 1-2 tbsp heavy cream, or milk
- 1 tbsp vanilla extract
- pinch of salt, to taste
- 12 ounces full fat cream cheese, cold, Use the block style, straight from the fridge
For the Marshmallow Meringue (Swiss Meringue)
- 4 large egg whites, See note about separating eggs
- 1 cup granulated sugar
- 1/2 tsp cream of tartar
- 1/8 tsp salt
- 2 tsp vanilla extract, or vanilla bean paste – I love seeing the flecks of vanilla!
For Assembly
- 3 whole graham crackers, crushed into crumbs
- 1 full size Hershey’s bar
Instructions
-
Prep for Success: Ensure all cold ingredients have reached room temperature, which is vital for a smooth batter and stable meringue. Preheat your oven to 350°F (175°C). Prepare three 9-inch round cake pans by thoroughly greasing the insides with shortening using a paper towel, coating them evenly and completely. Cut rounds of parchment paper to fit perfectly in the bottom of each pan (tracing the pan bottom is the easiest method). Place the parchment rounds onto the greased bottoms, then grease over the parchment paper as well. Finally, add a handful of flour to each pan and tap it around to evenly coat the entire greased surface, tapping out any excess. This meticulous preparation prevents sticking and ensures easy release of your delicate cake layers.
-
Make the Graham Cracker Cake Batter: In a medium bowl, thoroughly whisk together all the dry ingredients: cake flour, baking powder, baking soda, cinnamon, and salt. Set aside. In a large mixing bowl, using an electric mixer (stand mixer with paddle attachment or a powerful hand mixer), cream the softened butter for about 30 seconds until it’s light and creamy. Add the vegetable oil and beat on medium-high speed for 1 minute until well combined. Gradually add the granulated sugar and brown sugar, then beat on high speed for 2 full minutes. The mixture should become very fluffy and pale. Throughout this process, stop and scrape down the sides and bottom of the bowl frequently to ensure everything is evenly incorporated. Add the large eggs, one at a time, beating on medium-high speed for 45 seconds after each addition until fully combined and the batter appears very fluffy. Mix in the sour cream and vanilla extract on medium speed until just combined. Now, with the mixer running on low speed, gradually add half of the dry ingredients until just barely combined. Then, add the milk, mixing until most of it is incorporated. Finally, add the remaining dry ingredients. Continue mixing on low speed, stopping as soon as only a few streaks of flour remain visible. Turn off the mixer and gently fold in the graham cracker crumbs with a spatula. Be careful not to overmix the batter at this stage, as over-developing the gluten will result in a dense cake; a few small lumps are perfectly fine.
-
Bake the Cake Layers: Divide the prepared cake batter evenly between your three prepared 9-inch cake pans. You can eyeball this or use a kitchen scale for precision. For the most even baking, especially in conventional ovens, bake two pans together on the same rack, and then bake the third pan separately once the first two are done. Bake the cakes for 23-26 minutes. Halfway through the baking time (around 12-13 minutes), carefully rotate the pans to encourage even baking. The cakes are done when a toothpick inserted into the center comes out with moist crumbs (not wet batter). Allow the baked cakes to cool in their pans on wire cooling racks for 10 minutes. After 10 minutes, carefully invert the cakes onto the cooling racks, gently peel off the parchment paper rounds, and let them cool completely to room temperature before frosting. This step is crucial for preventing crumbly cakes and melty frosting.
-
Prepare the Milk Chocolate Frosting: While the cake layers are cooling, prepare your decadent milk chocolate frosting. Start by melting the milk chocolate in a large mixing bowl. Heat in 30-second intervals in the microwave, stirring well after each interval. Once most of the chocolate is melted, stir vigorously to smooth out any remaining lumps using the residual heat. Let the melted chocolate cool completely to room temperature. Once cooled, beat the softened butter into the melted chocolate using an electric mixer until well combined and smooth. Gradually add the powdered sugar in two additions, mixing thoroughly between each. If the frosting seems too thick or stiff, add 1-2 tablespoons of heavy cream or milk until it reaches a spreadable consistency. Now, add all remaining ingredients except the cream cheese: vanilla extract, pinch of salt, and cocoa powder. Beat until combined and smooth. Finally, add the cold, full-fat block-style cream cheese (straight from the fridge) and beat until just combined and smooth. Do not overmix the cream cheese. Taste the frosting and add a bit more cocoa powder for a deeper chocolate flavor or powdered sugar for more sweetness, as desired.
-
Meringue Prep & Assembly Readiness: Before you start making the meringue, ensure all your utensils and bowls are impeccably clean and grease-free. Even a tiny trace of fat can prevent egg whites from whipping properly. Have everything else you need for cake assembly ready, including your completely cooled cake layers and the chocolate frosting. Place your first cooled cake layer on your chosen serving plate or cake stand, securing it with a small dollop of frosting to prevent it from sliding. If you have one, place the serving plate on a cake turntable for easier frosting. Fill a piping bag, fitted with a round tip (or simply with the end snipped off), with about 1/2 cup of your chocolate frosting. This will be used for the frosting border.
Important Note: I highly recommend making meringue in a stand mixer for the best results and stability, though a powerful hand mixer can also work if you’re confident in its abilities. Additionally, try to avoid making meringue on very humid days, as humidity can negatively affect its stability and ability to hold shape. -
Make the Marshmallow Meringue (Swiss Meringue): This component should be made just before you are fully ready to assemble the cake, as fresh meringue is the most stable. Add about an inch of water to a small or medium saucepan and bring it to a simmer. Ensure that your mixing bowl (ideally a metal bowl from a stand mixer) does not touch the simmering water when placed over the pot. In your selected heatproof bowl, whisk together the room temperature large egg whites, granulated sugar, cream of tartar, and salt. Place the bowl over the pot of simmering water. Continuously whisk this mixture (don’t stop!) until an instant-read thermometer inserted into the mixture (without touching the bottom of the bowl) consistently registers 175°F (80°C). This process typically takes about 8 minutes, but always go by temperature, not by time. This step dissolves the sugar and pasteurizes the egg whites. Immediately remove the bowl from the heat and stir in the vanilla extract.
Whipping the Meringue:
• Using a Hand Mixer: Beat the mixture on high speed for 4-5 minutes until it becomes thick, glossy, and holds stiff peaks.
• Using a Stand Mixer: Transfer the mixture to the bowl of a stand mixer and beat with the whisk attachment on high speed (usually between settings 8-9, not necessarily 10) for 4-5 minutes. The meringue will expand and climb up the sides of the bowl. It is ready when it appears to stop growing in volume and starts to “ball up” or clump slightly inside the whisk attachment (it will look somewhat clumpy rather than perfectly smooth and silky). When you lift the whisk attachment out and invert it, the meringue should stand stiffly upright, with only the slightest tip of the peak gently curling over. This indicates a strong, stable meringue. -
Assemble the Masterpiece: Spread 1 and 1/2 cups of the milk chocolate frosting evenly over the first cake layer using an offset spatula. Using your piping bag with frosting, pipe a generous border of chocolate frosting around the edge of this layer. This border will act as a dam to contain the marshmallow meringue. Spoon about 1/4 of your homemade marshmallow meringue inside the frosting border. Using your kitchen torch, lightly toast the meringue until it’s beautifully golden brown, mimicking that classic campfire char. Immediately sprinkle a handful of graham cracker crumbs over the toasted meringue. Carefully place the second cake layer on top. Any excess frosting peeking out from the sides can be gently smoothed onto the cake to begin forming your crumb coat around the first two layers. Chill the cake in the refrigerator for 10-15 minutes to allow the frosting to set, which helps stabilize the layers and prevents them from sliding during further assembly.
Repeat the frosting, meringue, toasting, and graham cracker crumb steps for the second layer. For the final (third) cake layer, place it upside down on top of the cake. This creates a perfectly flat and even surface for frosting. Apply a very thin layer of chocolate frosting over the entire cake (top and sides). This is your essential “crumb coat,” designed to trap any loose crumbs. Don’t worry if it’s not perfectly smooth. Return the cake to the fridge and chill for about 20 minutes to allow the crumb coat to set firm. Once chilled, apply the remaining milk chocolate frosting over the top and sides of the cake, using a cake scraper or offset spatula to smooth it for a polished finish. Chill the cake again for approximately 20 minutes until the final frosting is set. Finally, pipe the remaining marshmallow meringue decoratively on top of the cake. Using your kitchen torch, toast the meringue immediately until golden and slightly charred. For a beautiful presentation, break a full-size Hershey’s bar into pieces and arrange them on top of the cake, along with a final sprinkle of graham cracker crumbs.
Note for Time Management: If you are concerned you might not be able to work quickly enough to assemble and frost the cake before the homemade meringue loses its stability, you have options. You can use store-bought marshmallow fluff between the cake layers (which can also be lightly toasted). Then, you could make a half batch of the homemade meringue just for the top of the cake to pipe and toast right before serving, as store-bought fluff isn’t stable enough for piping. Alternatively, you can assemble and frost the cake with fluff between the layers, refrigerate it overnight, and then make a fresh half batch of homemade meringue to pipe and toast just before serving the next day. -
Serve & Store: Once the meringue has been piped and toasted, and assuming the chocolate frosting hasn’t become too soft from being out, your S’mores Cake is ready to be sliced and served! The cake can also chill for an additional 30-60 minutes in the refrigerator if needed before serving. If your homemade meringue achieved the proper level of stabilization (like the consistent meringue shown in the recipe photos), it should hold up beautifully for 4-6 hours before slicing and serving. For any leftover cake, store it in an airtight container in the refrigerator. To keep cut portions from drying out, gently press plastic wrap directly against the exposed cake. Leftovers will remain fresh and delicious for 2-3 days, though the texture of the meringue is always best on the first day.
Notes
Marshmallow Alternative: While homemade Swiss meringue offers the best texture and piping ability, you can certainly use store-bought marshmallow fluff as an alternative. Keep in mind that store-bought fluff is not as stable and will not hold piped shapes like homemade meringue. Instead, you can dollop swirls of it directly onto the chocolate frosting on top of the cake and lightly torch it for a similar visual and flavor effect. For an additional decorative touch, you can also toast mini or large marshmallows separately on a baking sheet using your kitchen torch or under your oven’s broiler (watch them very closely, as they toast quickly in 1-2 minutes!) and then arrange them on top of the cake.
Working Efficiently: It’s important to work with reasonable speed when frosting and assembling the cake, especially once the meringue is made, as it is best used fresh. However, if your meringue is properly stabilized as instructed, it will maintain its integrity throughout the assembly process. If you are less experienced with layer cakes or anticipate needing more time, there’s a helpful note about this within the assembly instructions (Step 5). Consider using store-bought fluff for the inner layers, or making half a batch of homemade meringue for the top. For convenience, you can assemble and frost the entire cake (using fluff between layers) and refrigerate it overnight. Then, just before serving the next day, quickly whip up the remaining half batch of homemade meringue, pipe it on top, and toast it fresh.
Nutrition
,
Calories: 1329kcal
,
Carbohydrates: 176g
,
Protein: 13g
,
Fat: 68g
,
Saturated Fat: 36g
,
Polyunsaturated Fat: 8g
,
Monounsaturated Fat: 18g
,
Trans Fat: 1g
,
Cholesterol: 170mg
,
Sodium: 792mg
,
Potassium: 340mg
,
Fiber: 3g
,
Sugar: 140g
,
Vitamin A: 1552IU
,
Vitamin C: 0.1mg
,
Calcium: 187mg
,
Iron: 2mg
Nutrition information is automatically calculated, so should only be used as an approximation.
Like this? Leave a comment below!