
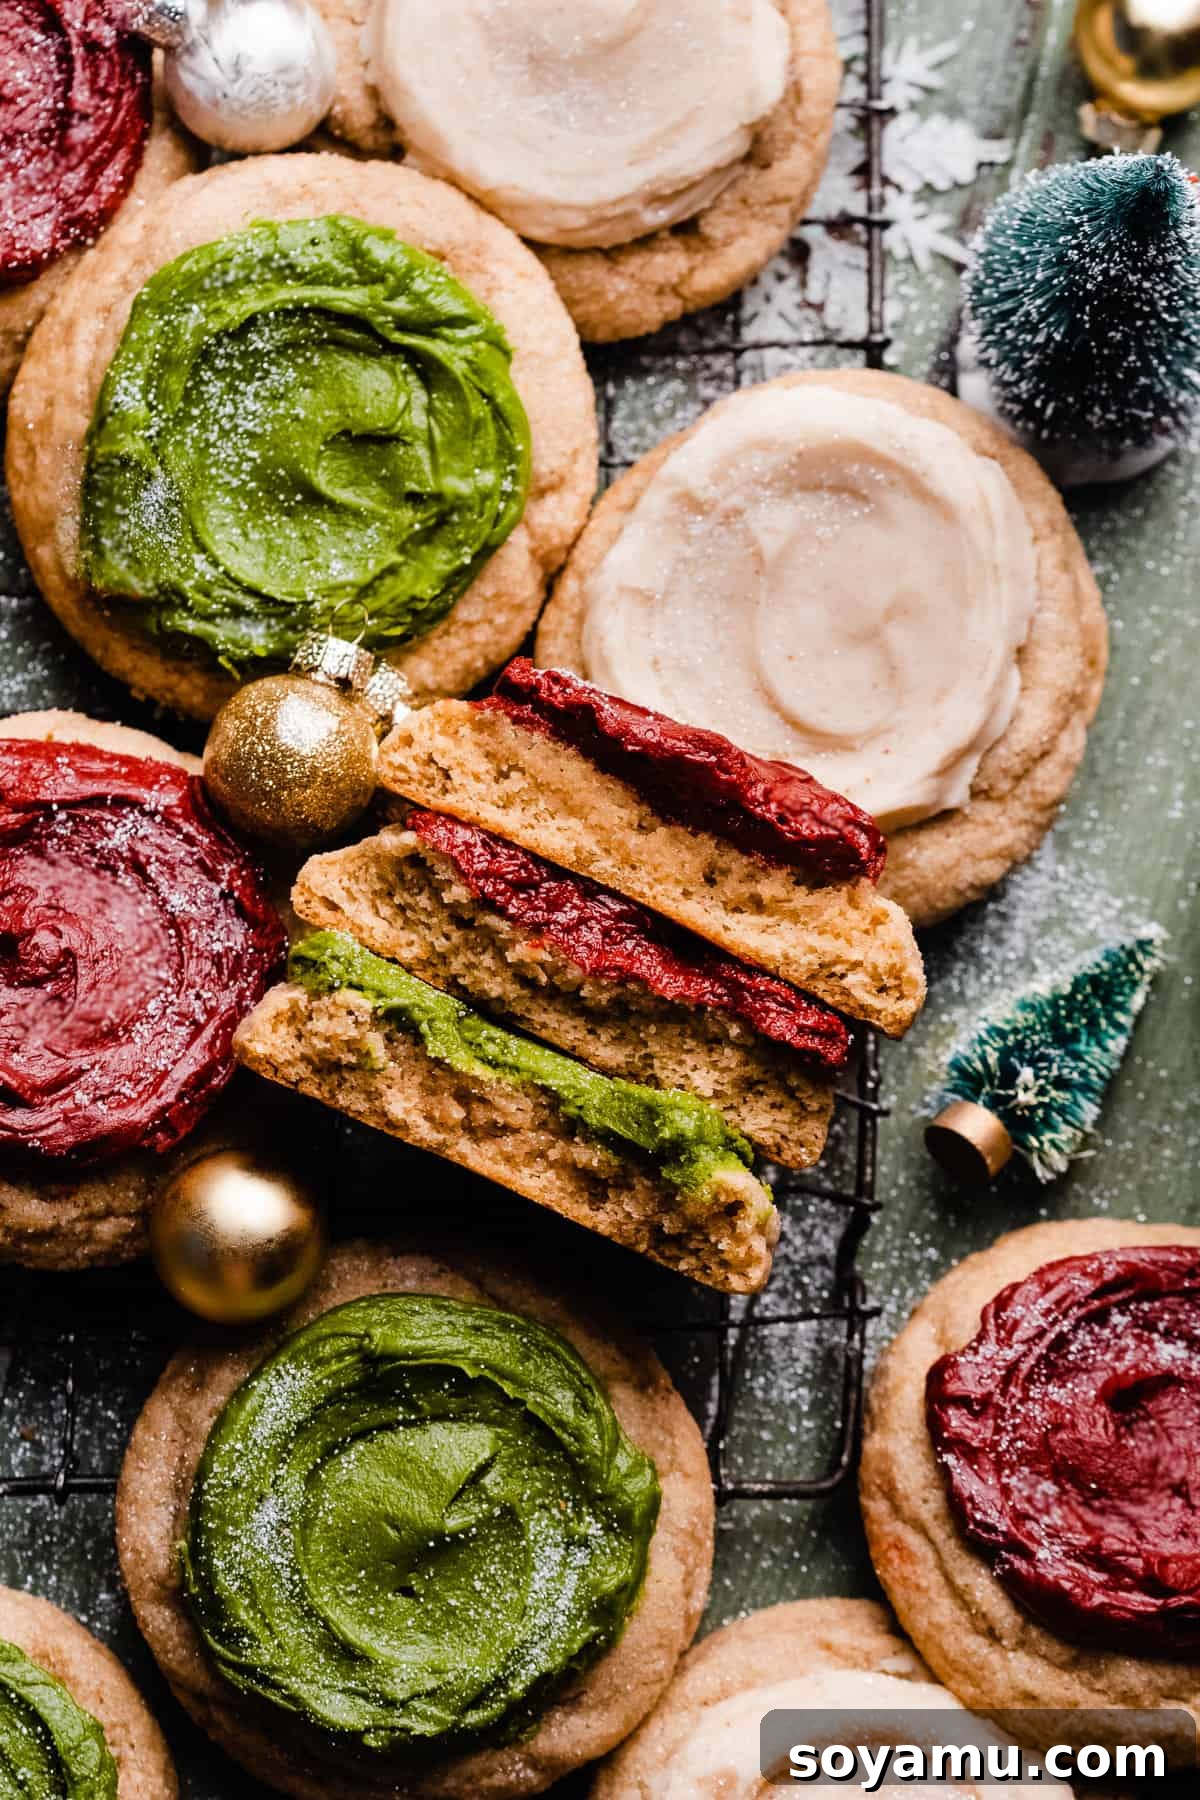
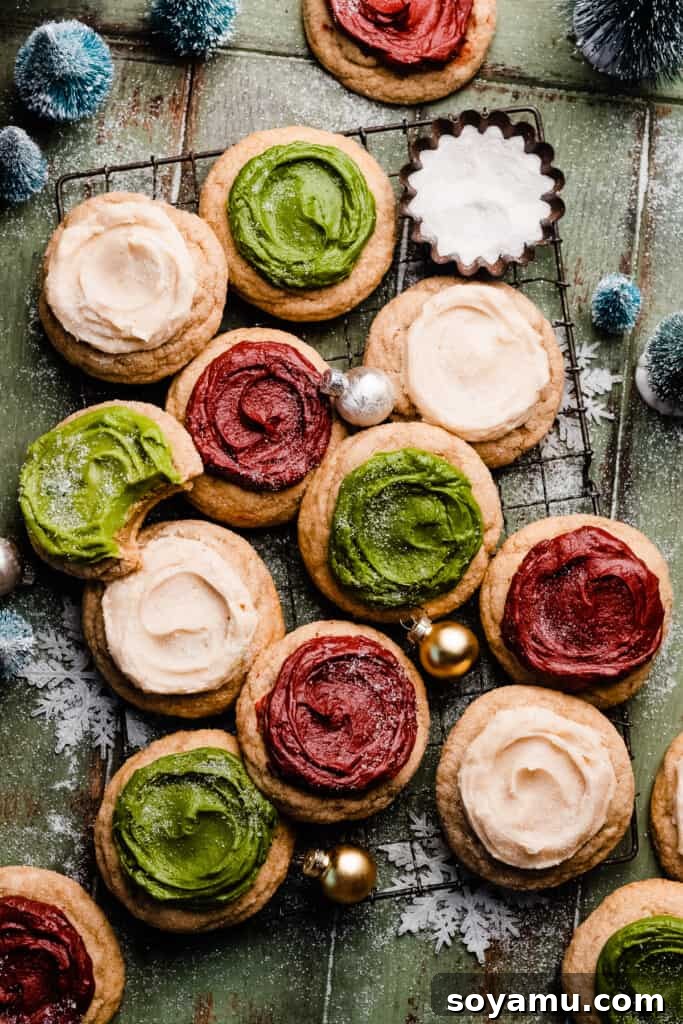
Sour Cream Cookies are a delightful classic, known for their irresistibly thick and chewy texture. This recipe elevates them further with a luxurious, creamy Brown Butter Cream Cheese Frosting that adds incredible depth of flavor. The beauty of these cookies lies in their simplicity: the dough comes together effortlessly in just one bowl, requiring no electric mixer, making it perfect for bakers of all skill levels. Both the cookie dough and the decadent frosting can be prepared in advance, saving you time and stress, especially during busy holiday seasons. The subtle tang from the sour cream perfectly balances the sweetness of the silky smooth frosting, creating a harmonious flavor profile that is both nostalgic and sophisticated. For a truly festive touch, decorate them in vibrant red, white, and green hues, transforming them into the most charming and delicious Christmas cookies your family and friends will adore.
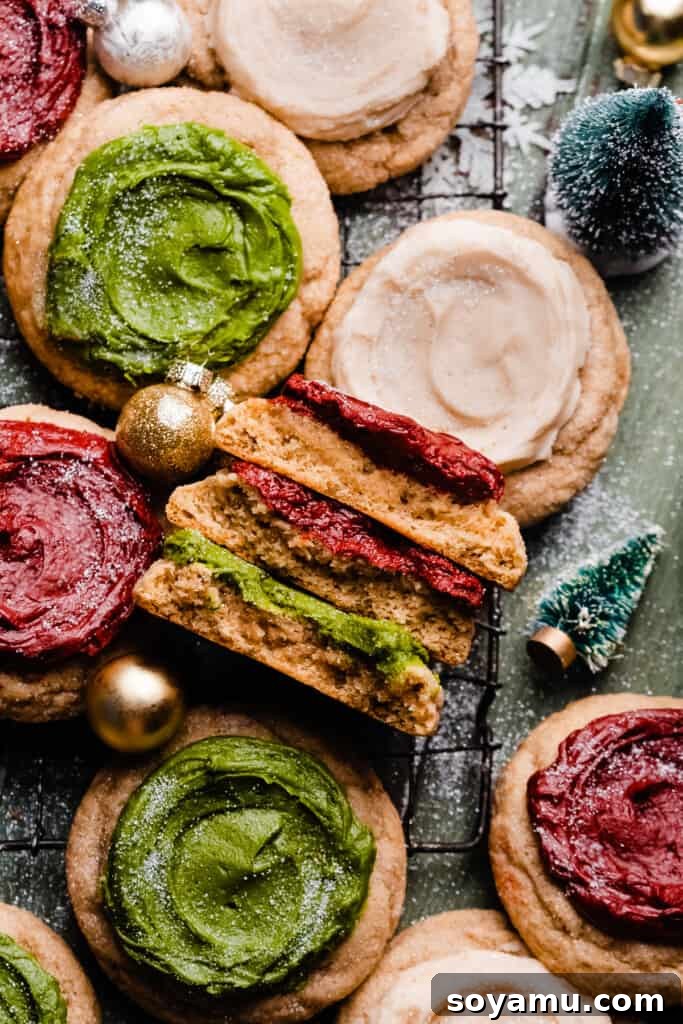
Why You’ll Fall in Love with These Frosted Sour Cream Cookies:
These aren’t just any cookies; they are a celebration of flavor and ease. Here’s why these Frosted Sour Cream Cookies are destined to become your new favorite:
- Effortless Baking Experience – No Mixer Needed! Forget lugging out your heavy stand mixer! This recipe features an incredibly simple, one-bowl cookie dough that comes together with just a whisk and a spatula. These are classic drop cookies, meaning there’s no fussy rolling pin or intricate cookie cutters involved, simplifying your baking process significantly.
- Authentic Old-Fashioned Charm – Infused with rich, full-fat sour cream, these sugar cookies capture the nostalgic essence of traditional, home-baked treats. The sour cream imparts a subtle yet distinct tang that beautifully cuts through the sweetness, reminiscent of grandma’s secret recipes. This unique flavor profile is what sets these cookies apart from standard sugar cookies, giving them a depth and character that truly delights.
- The Magic of Brown Butter Cream Cheese Frosting – While traditional buttercream is lovely, our brown butter cream cheese frosting elevates these cookies to an entirely new level. Browning the butter adds a complex, nutty, and slightly caramelized flavor that is simply irresistible and far more sophisticated than plain butter. This rich, tangy-sweet frosting is the perfect complement to the sour cream base, creating an unforgettable taste sensation.
- Perfectly Chewy Texture, Never Cakey – If you prefer your cookies dense and satisfyingly chewy rather than light and cake-like, this recipe is for you. We’ve meticulously crafted the dough to ensure a perfect chew with every bite, a hallmark of a truly great cookie.
- Make-Ahead Friendly – Life is busy, and your baking shouldn’t add to the stress. Both the cookie dough and the frosting can be prepared ahead of time, allowing you to tackle your baking in stages. This flexibility makes them ideal for holiday preparations or any time you need delicious cookies ready to go with minimal last-minute effort.
- Customizable & Festive – Whether you’re aiming for a vibrant holiday spread or a simple, elegant dessert, these cookies are incredibly versatile. Decorate them in cheerful red, white, and green for a classic Christmas look, or choose any colors to match your theme.
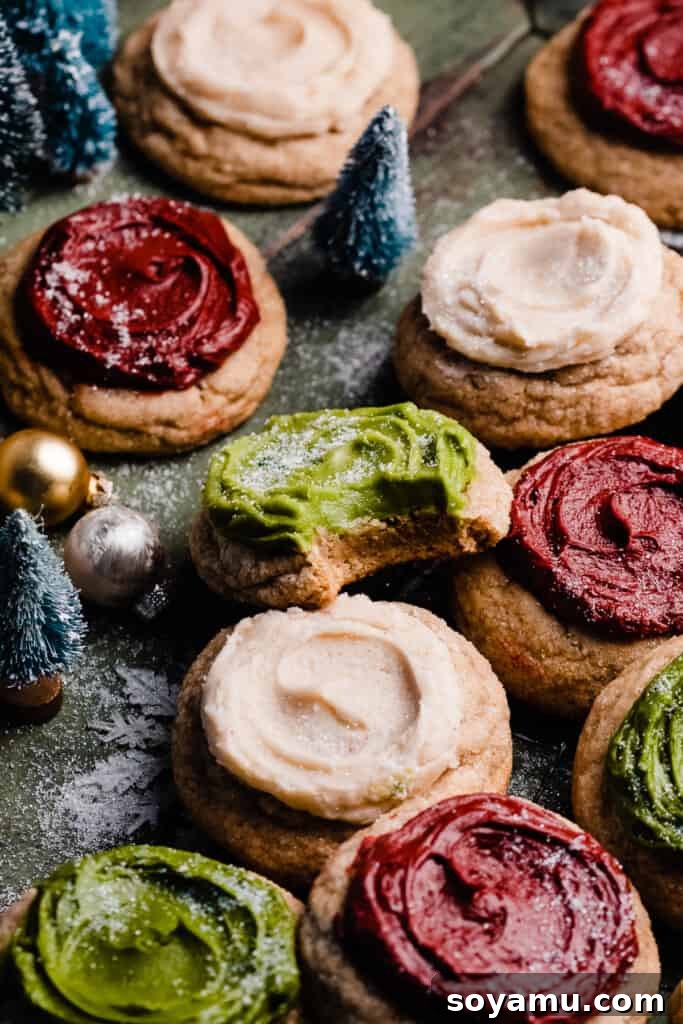
Essential Ingredient Overview:
Understanding each ingredient’s role is key to baking success. Below is a detailed look at what you’ll need to create these spectacular cookies. As always, the full recipe with precise measurements and detailed directions can be found in the recipe card at the bottom of this post.
- Butter (for cookies & frosting) – I consistently use high-quality salted butter in my recipes for its enhanced flavor, which truly shines in baked goods. However, if you prefer, unsalted butter works just as well; simply add an extra pinch of salt to the dough to compensate for the flavor difference. Ensure your butter for the cookies is melted and slightly cooled, and for the frosting, cubed and softened before browning.
- Sour Cream – This is the star ingredient that gives our cookies their distinctive tang and incredibly tender crumb. Always opt for full-fat sour cream at room temperature. Room temperature sour cream incorporates more smoothly into the batter, preventing lumps and ensuring a uniform texture. Do not substitute with low-fat varieties, as they can alter the cookie’s texture and richness.
- Eggs – Large eggs, also at room temperature, are crucial for this recipe. Like sour cream, room temperature eggs emulsify better with other ingredients, creating a more cohesive and evenly textured dough. They contribute to the cookies’ structure and moisture.
- All-Purpose Flour – Accurate flour measurement is vital for achieving the perfect chewy, non-cakey texture. The best method is to spoon your flour into the measuring cup lightly, then level it off with a flat utensil. Alternatively, for the most precise results, use a kitchen scale to weigh your flour. Scooping the measuring cup directly into a bag of flour can compact it, leading to too much flour and a potentially dry, crumbly cookie.
- Vanilla Extract – Always reach for real vanilla extract, not imitation. The pure, rich flavor of real vanilla significantly enhances the overall taste of both the cookies and the frosting, adding a warm, aromatic note.
- Granulated Sugar & Light Brown Sugar – The combination of these two sugars creates the ideal balance of sweetness and chewiness. Granulated sugar contributes to crisp edges, while brown sugar adds moisture, depth, and that coveted chewy texture.
- Baking Soda & Baking Powder – These leavening agents work together to give the cookies their perfect puffiness and slight crinkled tops without making them cakey.
- Salt – A touch of salt is essential to balance the sweetness and bring out the full spectrum of flavors in the cookies and the frosting.
- Cream Cheese (for frosting) – For a truly rich and stable frosting, use full-fat, block-style cream cheese. Cream cheese in a tub often contains more water and stabilizers, which can lead to a runny or less flavorful frosting. Ensure it’s softened at room temperature for optimal creaminess.
- Powdered Sugar (for frosting) – Also known as confectioners’ sugar, this fine sugar dissolves easily, creating a wonderfully smooth and lump-free frosting.
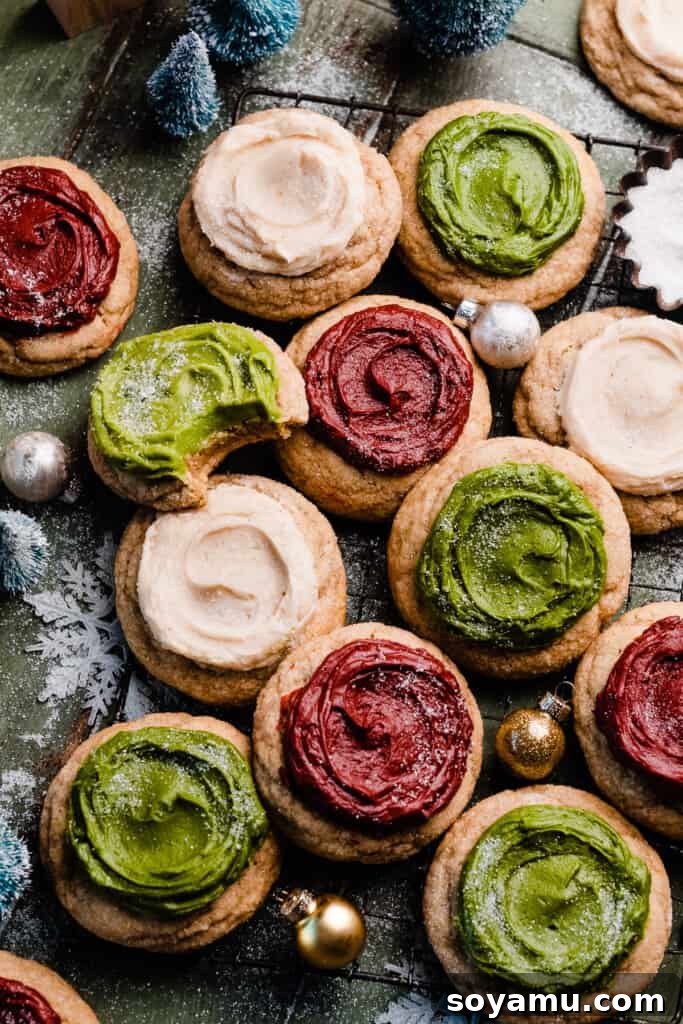
Creative Recipe Substitutions & Variations:
While this recipe is perfect as is, don’t hesitate to get creative and adapt it to your dietary needs or flavor preferences:
- Dairy-Free Adaptation – Making these cookies dairy-free is entirely possible! Simply swap out the butter, sour cream, and cream cheese for your favorite trusted dairy-free alternatives. Look for plant-based butters and cream cheeses designed for baking, and a thick dairy-free sour cream substitute.
- Gluten-Free Exploration – While I haven’t personally tested a gluten-free version of these cookies, many bakers have success substituting all-purpose flour with a high-quality cup-for-cup gluten-free flour blend. If trying this, I recommend using a blend that contains xanthan gum to help with structure and chewiness. Results may vary, but it’s worth experimenting!
- Simplified Frosting Options – The brown butter cream cheese frosting is truly outstanding, but if you’re pressed for time, you can certainly simplify. You could make a classic cream cheese frosting by skipping the browning step, or even use a simple vanilla buttercream or a store-bought frosting if convenience is your priority. Just be aware that the unique depth of flavor from brown butter will be missed.
- Aromatic Spice Additions – For an extra layer of cozy warmth, feel free to incorporate additional spices into your cookie dough. A half teaspoon of ground nutmeg, alongside the cinnamon, creates a truly comforting aroma and taste. Alternatively, experiment with a pinch of cardamom for an exotic twist, either in combination with or in place of the other spices. Ginger or allspice could also be delightful for a winter holiday theme.
- Citrus Zest Infusion – Brighten up your cookies by adding a teaspoon of finely grated lemon or orange zest to the cookie dough or even the frosting. The citrus notes will add a fresh counterpoint to the rich flavors.
- Different Extracts – Beyond vanilla, consider other extracts. Almond extract can add a classic bakery flavor, while peppermint extract would be wonderfully festive for Christmas. Start with a quarter teaspoon and add more to taste.
Mastering the Art of Sour Cream Cookies: A Step-by-Step Guide:
Creating these chewy delights is simpler than you might think. Follow these detailed steps to bake perfect Frosted Sour Cream Cookies every time:
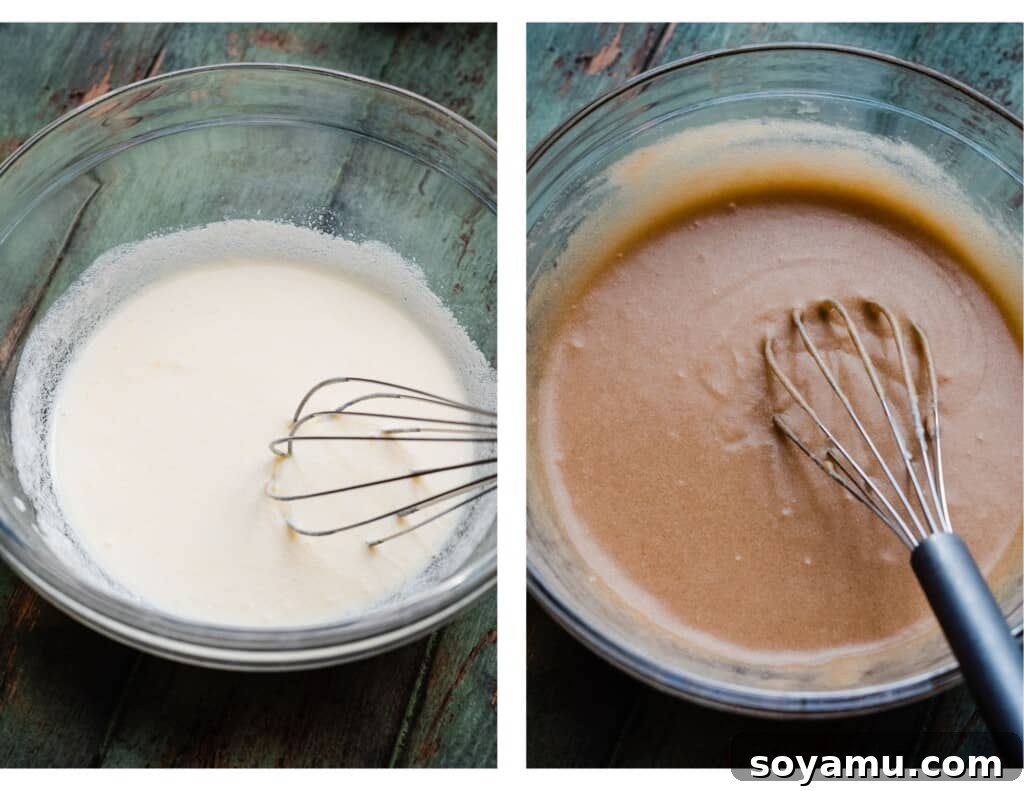
Step 1: Crafting the Perfect Cookie Dough. Begin by melting your butter in a large mixing bowl. Allow it to cool for a few minutes until it’s no longer hot, but still liquid. This prevents the eggs from cooking when added. Whisk in the room temperature full-fat sour cream until the mixture is smooth and fully incorporated. Next, gradually whisk in both the granulated and light brown sugars, ensuring they dissolve somewhat into the wet ingredients. Finally, whisk in the room temperature eggs and pure vanilla extract until the mixture is cohesive. In a separate bowl, combine your all-purpose flour (spooned and leveled or weighed), baking soda, baking powder, salt, and cinnamon. Gradually add these dry ingredients to your wet mixture. Using a sturdy spatula, fold the ingredients together until a thick, slightly sticky dough forms. Be careful not to overmix, as this can lead to tough cookies. Scrape down the sides and bottom of the bowl thoroughly to ensure all dry bits are fully incorporated into the dough.
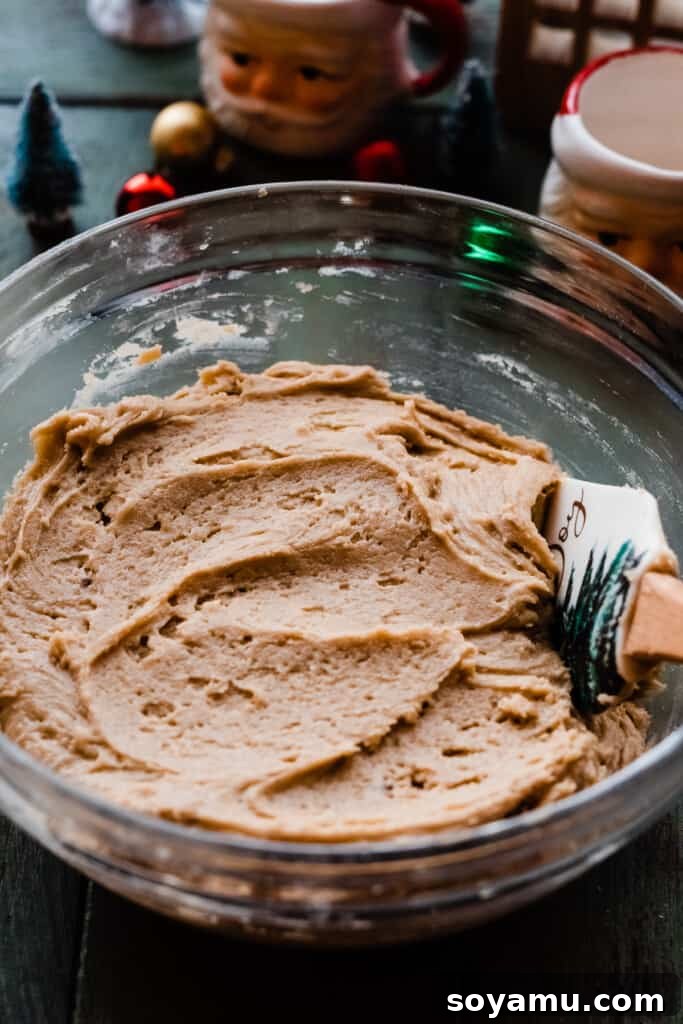
Stir the dry ingredients into the wet ingredients until a thick, slightly sticky dough forms. Ensure no streaks of flour remain, but avoid overmixing.
Step 2: Chill, Scoop & Form Dough Balls. Once your dough is mixed, cover the bowl with plastic wrap or a clean kitchen towel. Place it in the freezer for a quick initial chill of 20-30 minutes. This step is crucial as it firms up the dough, making it much easier to handle and roll. After the initial chill, scoop the cookie dough into uniform balls, each weighing approximately 60 grams for consistent size and baking. Once scooped, place these dough balls on a lined baking sheet, cover them with plastic wrap, and return them to the refrigerator for at least 2 hours, or for 45 minutes in the freezer. Proper chilling prevents the cookies from spreading too much during baking, ensuring they retain their thick, chewy texture.
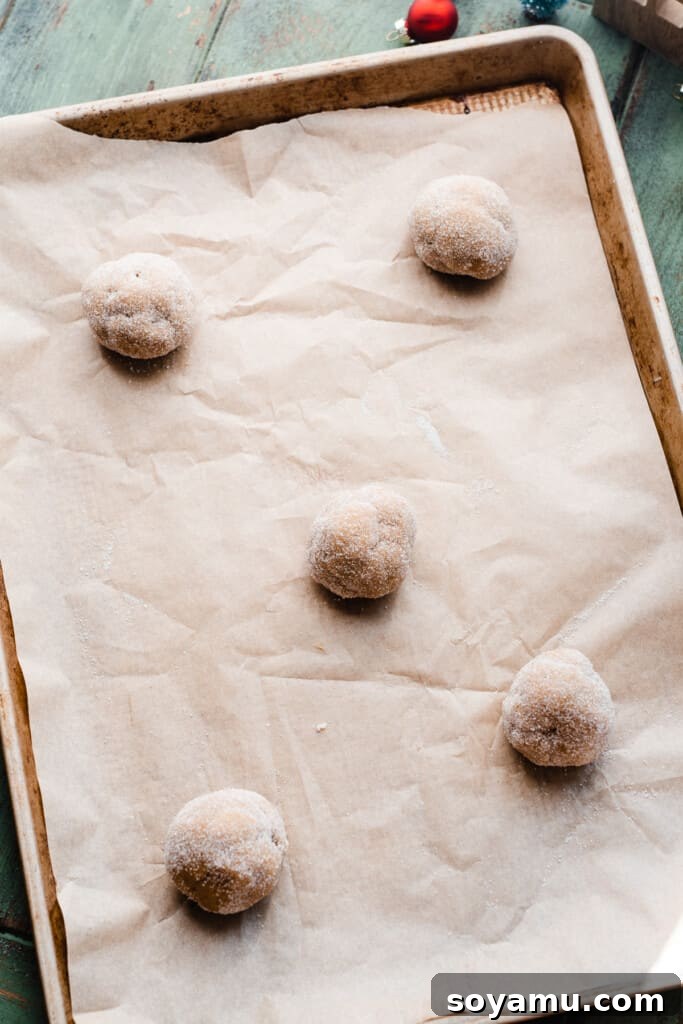
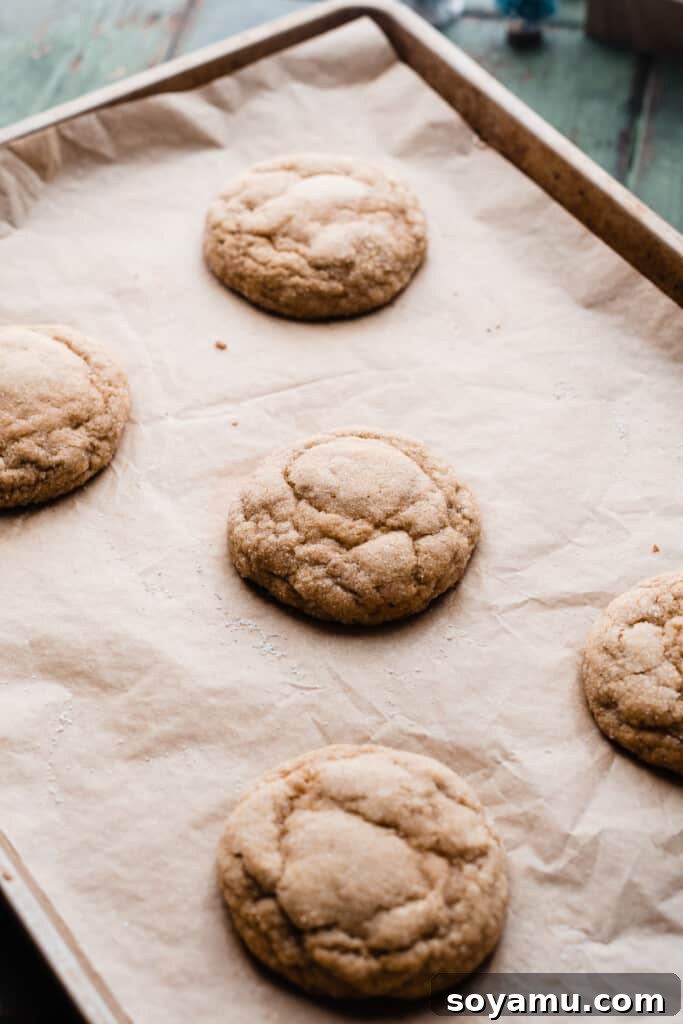
Step 3: Bake to Golden Perfection. Preheat your oven to 365°F (185°C). Line several cookie sheets with parchment paper to prevent sticking and ensure even baking. Take your thoroughly chilled cookie dough balls and roll each one generously in granulated sugar. This sugar coating not only adds a delightful sparkly crust but also helps achieve those characteristic crinkled tops. Place 5-6 cookies on each prepared sheet, leaving ample space between them for spreading. It’s important to keep any unbaked dough balls in the fridge while waiting their turn to bake to maintain their chill. Bake each pan for 11-13 minutes. The cookies are done when they appear puffy, slightly crinkled, and their edges are set and lightly golden. Avoid overbaking if you want to maintain their signature chewiness. Allow the cookies to cool on the baking sheet for 5-10 minutes on a wire rack before carefully transferring them to a separate cooling rack to cool completely. Frosting warm cookies will cause the frosting to melt into a messy puddle.
Step 4: Prepare the Indulgent Brown Butter Cream Cheese Frosting. The secret to this exceptional frosting is the brown butter. In a light-colored, non-stick pan over medium heat, melt the cubed salted butter. Continue cooking the butter, stirring constantly with a whisk. It will first become foamy, then bubbly. Keep stirring as it transitions to a light golden brown, and you’ll notice small brown bits forming at the bottom of the pan, accompanied by a rich, nutty, and caramelly aroma. This is the magical browning process! As soon as it reaches a deep golden color (be careful not to burn it), immediately remove the pan from the heat and pour the browned butter into a separate heat-safe bowl to stop the cooking. Chill this brown butter in the fridge or freezer until it returns to room temperature and is no longer warm. It doesn’t need to solidify, just cool. Once cooled, in a large bowl, combine the cooled brown butter with your softened full-fat cream cheese. Beat them together with an electric mixer (or vigorously with a whisk if you prefer) for about 1 minute until creamy and smooth. The mixture might look a little separated at first, but keep beating, and it will smooth out. Gradually add half of the powdered sugar and mix until fully incorporated. Add the remaining powdered sugar, pure vanilla extract, and a tiny pinch of salt. Continue beating until the frosting is wonderfully creamy, light, and fluffy. This frosting is incredibly versatile and can be made a day or two in advance and stored in the fridge.
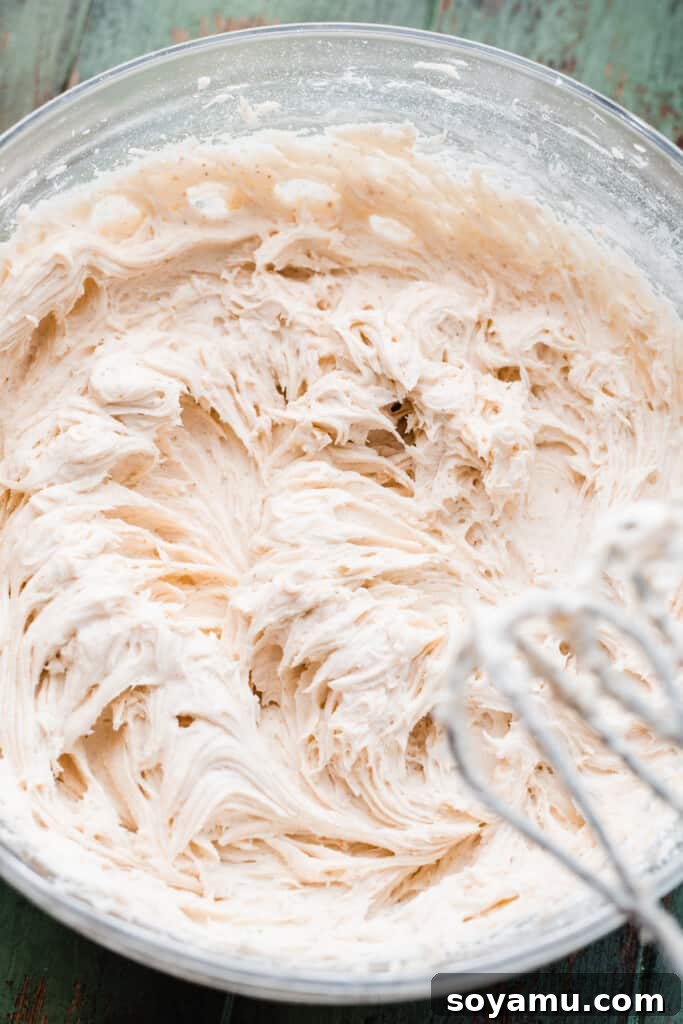
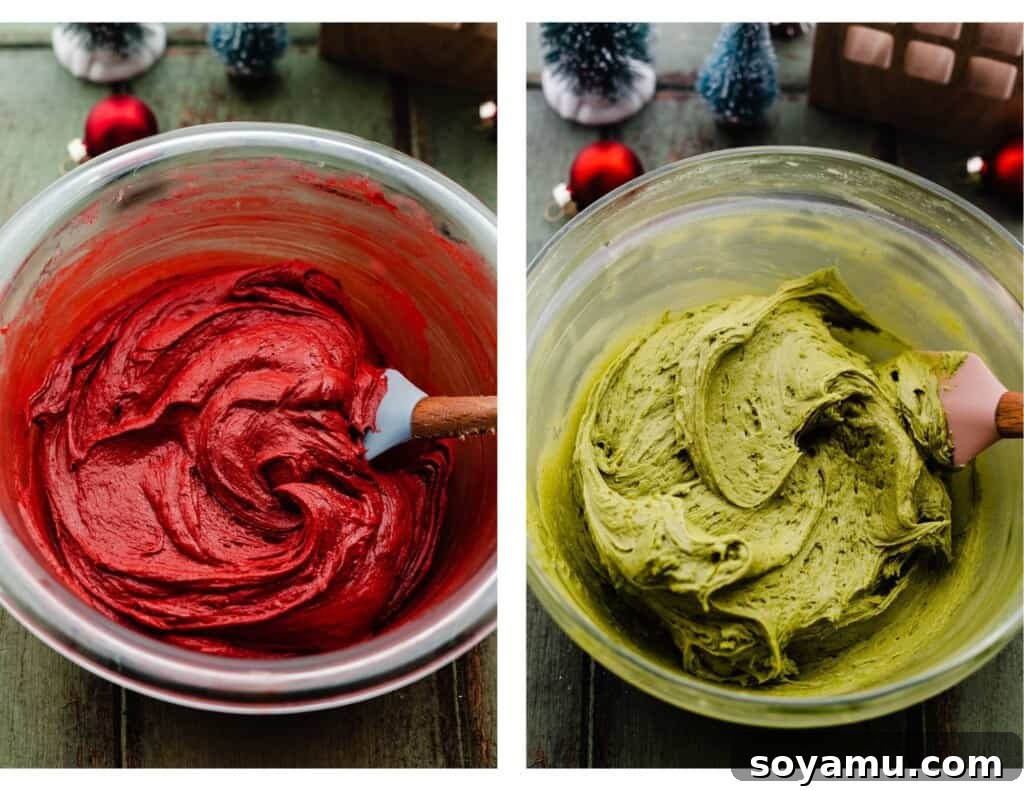
Divide the luscious frosting into thirds, creating one portion red, one green, and leaving the last bit pure white. Of course, you can choose any colors that inspire you! Refer to the detailed tips immediately below on how to achieve these vibrant shades.
Achieving Vibrant Frosting Colors: Expert Tips on Dyeing Your Frosting:
To achieve truly striking and vibrant colors for your frosting, gel food coloring is absolutely the best choice. Unlike traditional liquid food coloring found in grocery stores, gel food coloring is highly concentrated and won’t thin out your frosting, allowing for much richer, deeper hues. When using gel coloring, remember that a little goes a long way – it is very pigmented! Always start with a tiny amount, like a toothpick swipe, and gradually add more until you reach your desired shade. If you accidentally go too dark, you can lighten the color by mixing in a bit more plain white frosting. For best results, use gel food coloring brands like Wilton, Americolor, or Chefmaster.
- Crafting the Perfect Red Frosting – Achieving a true, deep red can be tricky as adding only red food coloring often results in a pinkish shade. To get that rich, classic red, you’ll need a combination: mix a vibrant red gel food coloring with a tiny touch of burgundy and an even tinier hint of black gel food coloring. These darker shades deepen the red and remove any pink undertones. I highly recommend a specific deep red gel food coloring designed for intense reds.
- Mixing the Ideal Green Frosting – For a beautiful, natural-looking green shade like the one pictured, I used a blend of juniper green gel food coloring mixed with a touch of golden yellow. The golden yellow brightens the green and gives it a warmer, more inviting tone. If juniper green isn’t available, an olive green or forest green gel coloring would also work well, especially when brightened with a hint of golden yellow.
- A Smart Tip for Holiday Colors: To conveniently get the black, burgundy, and various shades needed for red and green (and more!), I recommend investing in a set of 12 mini bottles of gel food coloring. This is often more cost-effective than purchasing individual full-size bottles and ensures you have a wide spectrum of colors at your fingertips for all your holiday baking needs.
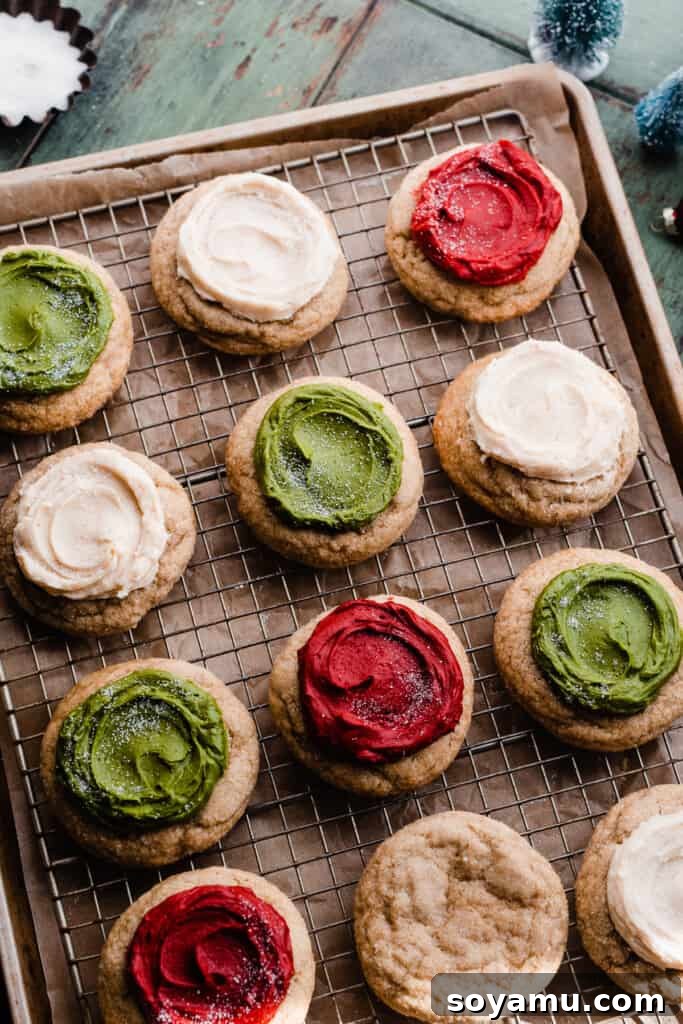
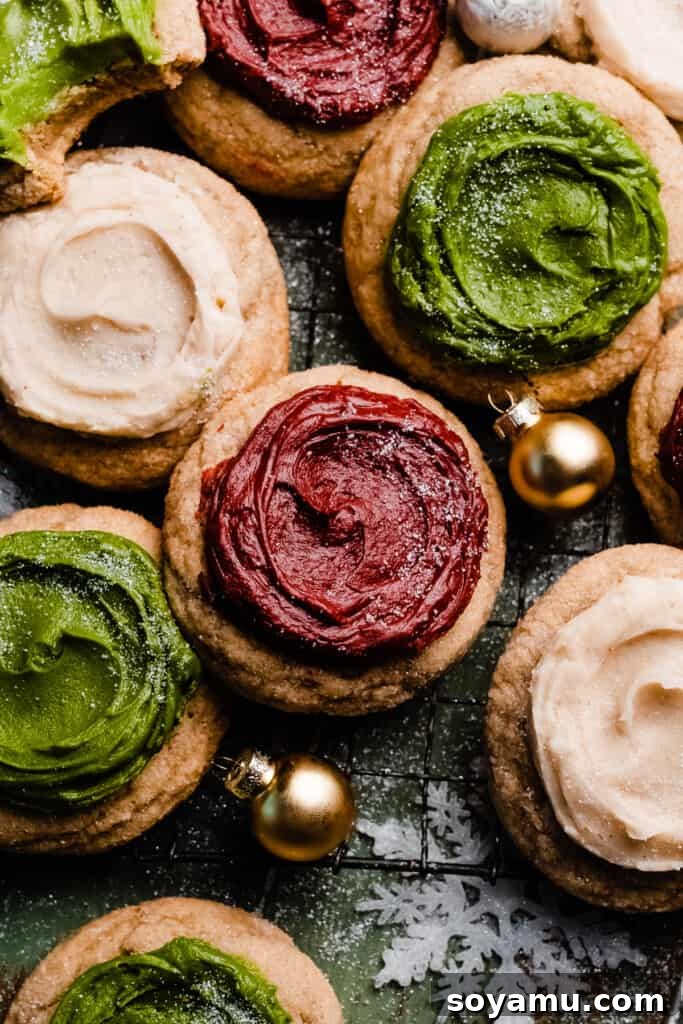
Step 5: The Art of Frosting and Finishing Touches. Once your cookies have completely cooled (this is critical!), it’s time for the fun part: frosting! A mini cookie scoop is an invaluable tool here, making it incredibly easy to portion out uniform dollops of frosting onto each cookie. For those beautiful, artistic swirls, an offset spatula is your best friend. Gently spread the frosting from the center outwards, creating elegant peaks and valleys. To add a final touch of sparkle and festive charm, finish each cookie with a delicate dusting of white sanding sugar. This adds a lovely texture and visual appeal, making your Frosted Sour Cream Cookies truly stand out.
Serving Suggestions & Smart Storage Solutions:
These Frosted Sour Cream Cookies are a joy to share and surprisingly easy to manage. Here’s how to best enjoy and store them:
Storage for Unfrosted Cookies: If you’re baking ahead, unfrosted sour cream cookies can be stored in an airtight container at room temperature for 1-2 days. This gives you flexibility if you want to frost them closer to serving time.
Storage for Frosted Cookies: Due to the cream cheese in the frosting, frosted cookies must be stored in an airtight container in the refrigerator. They will keep beautifully for 5-7 days. To prevent the frosting from getting smudged, consider placing a piece of parchment paper between layers of cookies.
Serving Temperature: These cookies are delicious both cold, straight from the fridge, and at room temperature. If you prefer a softer frosting and a slightly more tender cookie, simply let them sit out at room temperature for 10-15 minutes before serving. This allows the frosting to soften just enough for optimal enjoyment.
Pairing Ideas: Serve these delightful cookies with a warm cup of coffee, tea, or a glass of cold milk. They also make a fantastic addition to any holiday dessert platter, alongside other festive treats. If you love frosted or decorated cookies as much as we do, be sure to explore my recipes for Frosted Honey Cookies or my truly irresistible Iced Gingerbread Cookies for more delightful options!
Expert Success Tips for Flawless Baking:
Achieving bakery-quality cookies at home is within reach with these essential tips:
- The Unsung Hero: An Oven Thermometer – This simple tool can dramatically improve your baking accuracy. An oven thermometer will tell you the true temperature inside your oven, which often differs from the setting. An accurately calibrated oven is paramount for consistent baking results, so keep an oven thermometer inside at all times to monitor its performance.
- Precision Baking with a Kitchen Scale – For the most consistent and professional results, particularly with flour, a food scale is indispensable. Flour measurements can vary wildly depending on how you scoop and pack it into a measuring cup. Weighing your flour ensures you use the exact amount specified, preventing dry or overly dense cookies.
- The Golden Rule: Cool Cookies Completely – Patience is a virtue in baking, especially when it comes to frosting. Never, ever attempt to frost warm baked goods. The heat will melt the butter and cream cheese in your frosting, leading to a runny, messy disaster. Allow your cookies to cool completely to room temperature on a wire rack before applying any frosting.
- Room Temperature Ingredients are Key – As mentioned in the ingredient overview, ensuring your sour cream, eggs, and cream cheese are at room temperature is vital. This allows them to emulsify properly with other ingredients, creating a smoother, more uniform batter and a creamier frosting.
- Don’t Skip the Chill Time – The chilling periods for the cookie dough are not optional. Chilling helps the butter in the dough solidify, which prevents excessive spreading during baking and contributes to that desirable chewy texture. It also makes the dough easier to handle and roll.
- Bake in Batches – To ensure even baking and prevent crowding, bake your cookies in small batches of 5-6 per sheet. Keep any unbaked dough in the refrigerator or freezer while other batches bake.

Frequently Asked Questions (FAQs):
They offer a unique and delightful flavor profile! Imagine a rich, buttery, and satisfyingly chewy sugar cookie, but with a distinctive, subtle tang from the sour cream. This slight acidity brightens the cookie’s sweetness and adds a depth that’s truly reminiscent of classic, treasured recipes – in the most delicious way possible!
Absolutely not! If you’re not a fan of cookies with a dry, cake-like texture, you’re in for a treat. This recipe was specifically developed to yield cookies that are wonderfully thick, dense, and satisfyingly chewy, with a slightly crisp edge and a soft, tender interior. We guarantee a chewy, not cakey, experience!
A runny or weepy frosting can occur for a couple of reasons. Most commonly, your butter and/or cream cheese might have been too soft when you started, or the frosting became too warm and overmixed, especially if you were adjusting colors for an extended period. Don’t worry, this is an easy fix! Simply pop your bowl of frosting into the freezer for 10-15 minutes, or the fridge for 20-30 minutes, to help it firm back up. Once chilled, give it a quick beat with your mixer or whisk, and it should return to a perfectly spreadable consistency.
While it might seem like a healthier option, I strongly recommend sticking to full-fat sour cream and block-style cream cheese for this recipe. Low-fat versions contain more water and fewer milk fats, which can significantly alter the texture of both the cookies (making them less tender and chewy) and the frosting (making it thinner and less stable).
Excessive spreading usually indicates that your cookie dough wasn’t sufficiently chilled before baking, or your oven temperature might be too low. Ensure you adhere to the chilling times specified in the recipe. Also, double-check your oven temperature with an oven thermometer to ensure it’s accurately calibrated. If the issue persists, you can try chilling the dough balls for an extra 15-30 minutes, or slightly increasing the oven temperature by 5-10 degrees F in your next batch.
Recommended Special Baking Tools:
While not strictly necessary, these tools can make your baking experience more enjoyable and help you achieve professional-looking results:
- Offset Spatula – An offset spatula is a game-changer for frosting! Its angled blade allows for smooth, even spreading of frosting onto cakes and cookies, making the process much easier and cleaner than with a regular knife.
- White Sanding Sugar – For that extra special sparkle and a polished, festive finish, white sparkling sugar is ideal. It adds a lovely textural crunch and a beautiful glimmer that elevates the appearance of these cookies, especially for holidays.
- Mini Cookie Scoop – A small cookie scoop is perfect for portioning out uniform dollops of frosting onto each cookie. This ensures consistent coverage and makes the frosting process quick and efficient, giving all your cookies a professional look.
- Parchment Paper – Essential for lining your baking sheets. It prevents sticking, ensures even browning, and makes cleanup a breeze.
- Wire Cooling Racks – Crucial for allowing air circulation around your cookies as they cool, preventing them from becoming soggy on the bottom and ensuring they cool completely before frosting.
- Oven Thermometer & Kitchen Scale – As highlighted in our expert tips, these two tools are invaluable for precise and consistent baking results.
More Irresistible Christmas Cookies to Love:
If you’re in the mood for more festive baking, here are some other cherished holiday cookie recipes to add to your repertoire:
- Cinnamon Roll Brown Butter Snickerdoodles
- Best Soft Gingerbread Cookies
- Cinnamon Spiced Maple Cutout Cookies
- Cranberry White Chocolate Slice & Bake Cookies
- Chocolate Cherry Pie Cookies
Did you make this recipe? Leave a comment & star rating!
Click the little stars in the header of the recipe card below to leave a comment & star rating, letting me know how you liked the recipe. I take all feedback seriously, & leaving a rating helps my small business immensely!

Frosted Sour Cream Cookies
Stephanie Simmons
45 minutes
12 minutes
57 minutes
16
cookies
Pin
Rate
Ingredients
For the Cookies
- 10 tbsp salted butter, melted and cooled slightly, 141 grams
- 1/2 cup full fat sour cream, at room temperature , 120 grams
- 3/4 cup granulated sugar , 156 grams
- 3/4 cup light brown sugar, packed, 165 grams
- 2 large eggs, at room temperature
- 2 tsp vanilla extract
- 3 and 1/4 cups all-purpose flour, spooned & leveled or weighed out, 423 grams
- 1 tsp baking soda
- 1 tsp baking powder
- 1/2 tsp salt
- 1 tsp cinnamon
For Rolling:
- 1/3 cup granulated sugar , 70 grams
For the Frosting
- 3/4 cup salted butter, cubed, 170 grams
- 8 ounces full fat cream cheese, Softened at room temperature for about 5-10 minutes – 226 grams
- 4 cups powdered sugar , 460 grams
- 1 tbsp vanilla extract
- pinch of salt
- gel food colorings, see blog post above for details on how to create the exact shades I did
Instructions
-
Make the Cookie Dough: Melt the butter in a large mixing bowl and allow to cool for a few minutes so it’s not hot. Whisk in the room temperature sour cream until smooth. Whisk in the sugars, then the eggs and vanilla. Add the dry ingredients and fold in with a spatula (or use a mixer) until completely combined. Scrape the sides and bottom of the bowl to make sure all dry bits are incorporated.10 tbsp salted butter, melted and cooled slightly,
1/2 cup full fat sour cream, at room temperature,
3/4 cup granulated sugar,
3/4 cup light brown sugar, packed,
2 large eggs, at room temperature,
2 tsp vanilla extract,
3 and 1/4 cups all-purpose flour, spooned & leveled or weighed out,
1 tsp baking soda,
1 tsp baking powder,
1/2 tsp salt,
1 tsp cinnamon -
Chill & Roll Balls: Cover the bowl with plastic wrap or a clean kitchen towel and pop in the freezer for a quick initial chill for 20-30 minutes, so the dough is easier to handle & roll.
Roll dough into balls that are 60 grams in size. Continue chilling dough balls on a lined baking sheet covered with plastic wrap for at least 2 hours in the fridge or 45 minutes in the freezer.
1/3 cup granulated sugar -
Bake Cookies: Preheat your oven to 365℉ (185°C). Line a few cookie sheets with parchment paper. Roll chilled cookie dough balls in granulated sugar, and place 5-6 cookies on each sheet. (Keep extra cookies in the fridge while they wait their turn to bake.)
Bake each pan of cookies for 11-13 minutes. The cookies will be puffy and crinkly and the edges should look and appear set. Let cookies cool on the baking sheet on a wire rack for 5-10 minutes, then transfer to a cooling rack to finish cooling completely.
-
Brown Butter for the Frosting: In a nonstick pan over medium heat, melt the butter. Continue cooking the butter – stirring constantly. The butter will get foamy, then bubbly, then start to turn turn golden brown and develop a nutty/caramely aroma. Once it reaches a deep golden color, remove from the heat and pour into a bowl to chill in the fridge or freezer until it’s room temperature. It doesn’t have to come back to solid before using in the frosting, but it can’t be warm.3/4 cup salted butter, cubed,
8 ounces full fat cream cheese,
4 cups powdered sugar,
1 tbsp vanilla extract,
pinch of salt -
Make the Frosting: Beat together melted & cooled brown butter with cream cheese in a large bowl with an electric mixer for 1 minute or so, until creamy. It will look odd at first but will smooth out. Add half the powdered sugar and mix until incorporated. Add the remaining powdered sugar, vanilla, and a pinch of salt and mix until creamy.
-
Frost Cookies: Divide the frosting into three bowls, and color one portion green, one red, and leave one white. To make the shade green I have, use leaf green and bit of golden yellow gel food coloring. To make this shade of red, use deep red gel food coloring with a bit of burgundy and a hint of black.
Use a small cookie scoop to plop dollops of frosting onto each cookie, then spread it with an offset spatula. Top with white sanding sugar if desired, for a little sparkle.
gel food colorings -
Serve & Store: Store frosted cookies in an airtight container in the fridge for 5-7 days. Unfrosted cookies can be stored in a container at room temperature for 1-2 days before frosting them.
-
Make-Ahead Tips:
Cookie Dough: Cookie dough balls can be chilled in an airtight container in the fridge for up to 3 days before baking. Cookie dough balls can be frozen on a lined baking sheet, then transferred to an airtight container or freezer bag once solid. Freeze for 1-2 months, baking from frozen and adding 1-2 minutes as needed.
Frosting: Frosting can be made 1-2 days ahead, covered, and refrigerated. Let come back to room temperature for 20-30 minutes and beat with electric mixer to get it back to a spreadable consistency before using.
Nutrition
Serving:
1
cookie
,
Calories:
516
kcal
,
Carbohydrates:
74
g
,
Protein:
5
g
,
Fat:
23
g
,
Saturated Fat:
14
g
,
Polyunsaturated Fat:
1
g
,
Monounsaturated Fat:
6
g
,
Trans Fat:
1
g
,
Cholesterol:
83
mg
,
Sodium:
352
mg
,
Potassium:
85
mg
,
Fiber:
1
g
,
Sugar:
54
g
,
Vitamin A:
754
IU
,
Vitamin C:
0.1
mg
,
Calcium:
58
mg
,
Iron:
1
mg
Nutrition information is automatically calculated, so should only be used as an approximation.
Love this recipe? Share your thoughts!
Your feedback helps us grow and create more delicious content for you.