
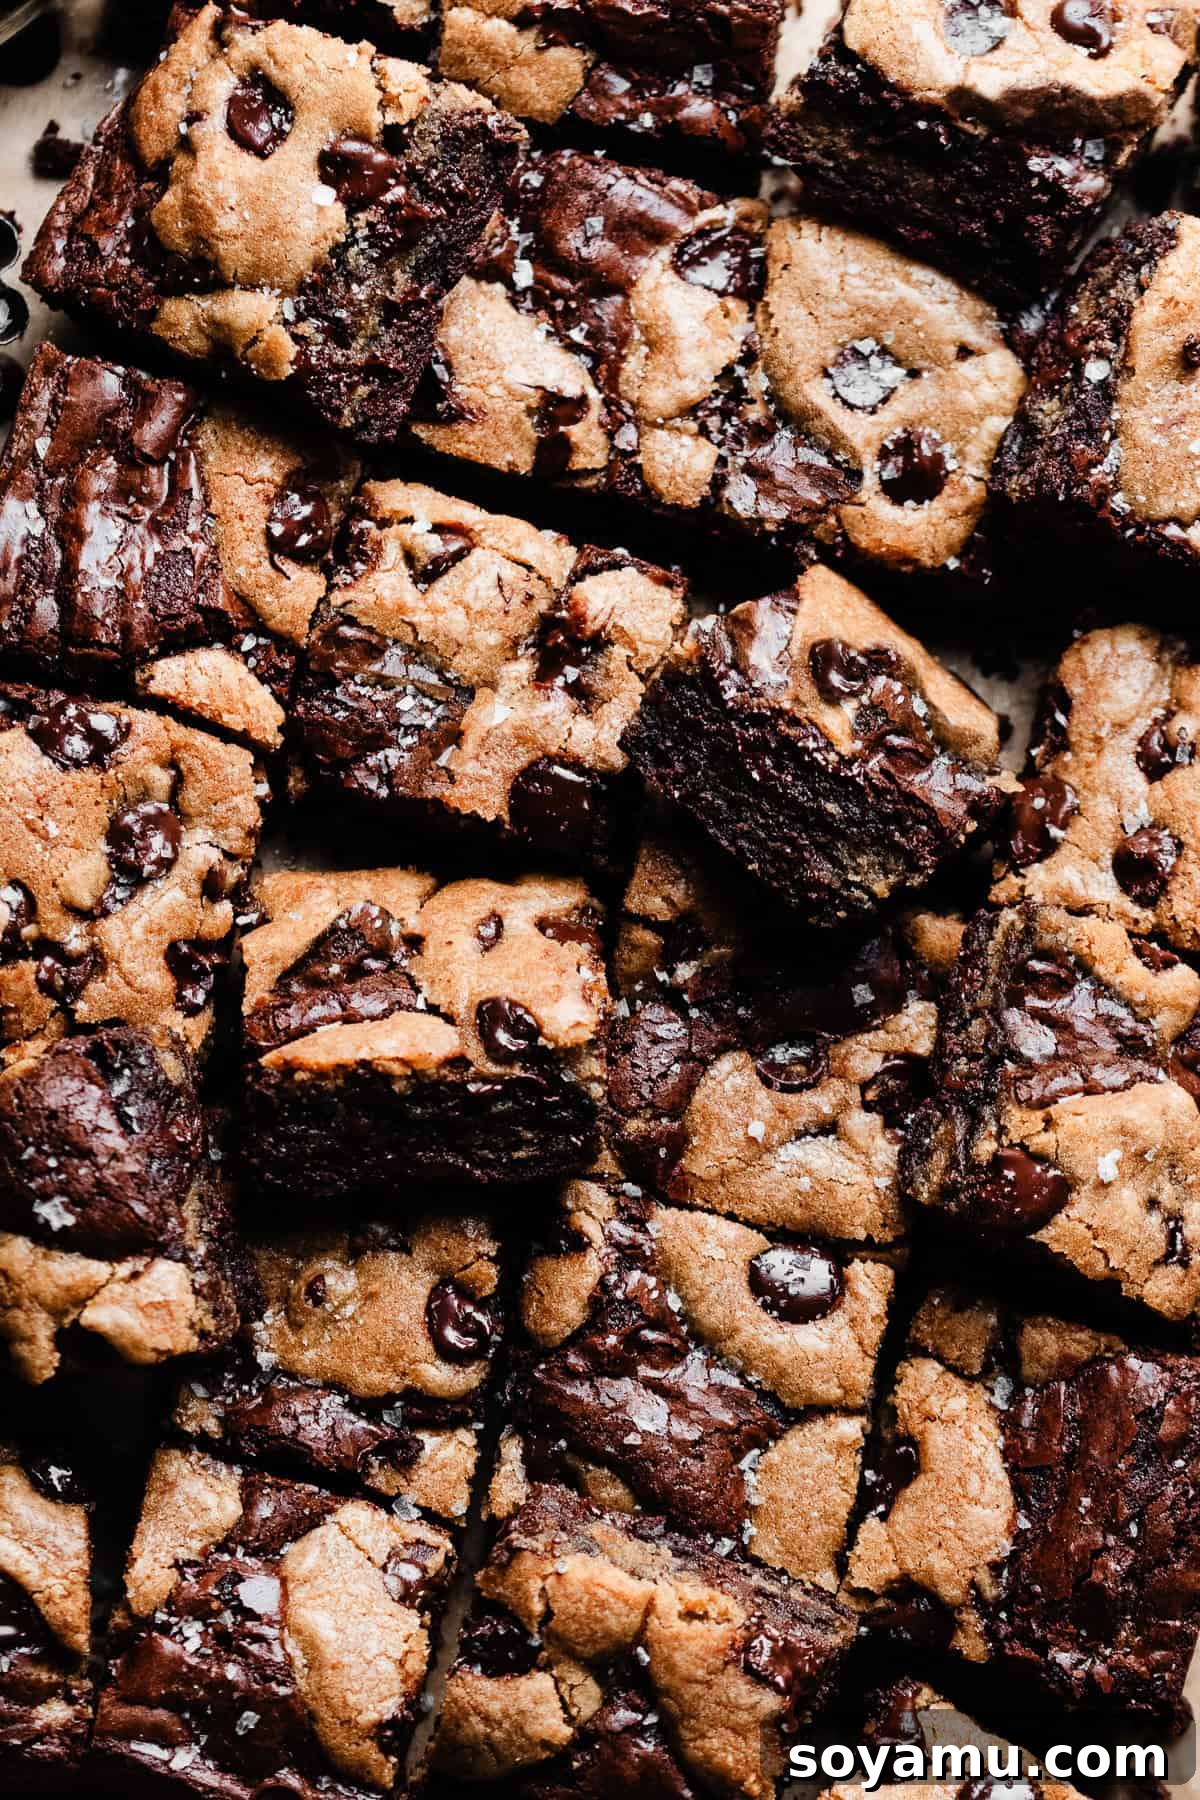
Brookies are the ultimate dessert mashup, brilliantly combining the best of two beloved treats: the deep, fudgy richness of brownies with the delightful chewiness of chocolate chip cookies. This particular recipe elevates the classic brookie by incorporating brown butter into the brownie layer, infusing it with an irresistible nutty depth that perfectly complements the sweet, familiar notes of a classic chocolate chip cookie. The secret to these magnificent bars lies in a specific layering technique that ensures both the brownie and cookie layers bake to their ideal textures, preventing any dryness or underbaking. Prepare yourself for an extraordinary dessert experience that’s easy to make and guaranteed to impress any crowd.
Why You’ll Fall in Love with These Brown Butter Brookies
These aren’t just any brookies; they are a meticulously crafted symphony of flavors and textures designed to deliver maximum indulgence with every bite. Here’s why this recipe will quickly become your go-to for a show-stopping dessert:
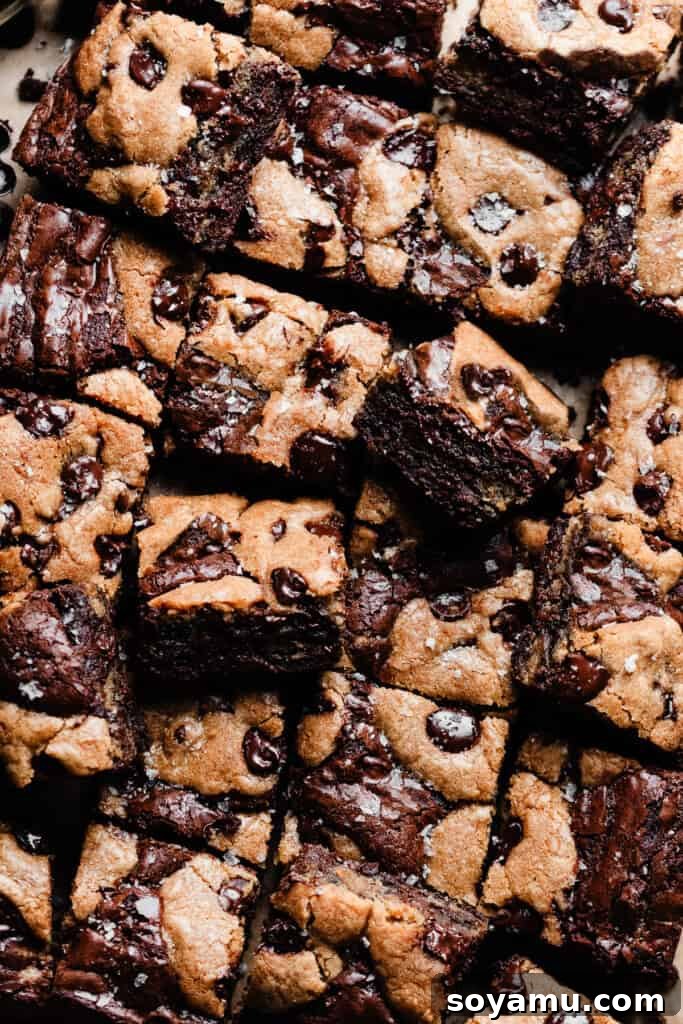
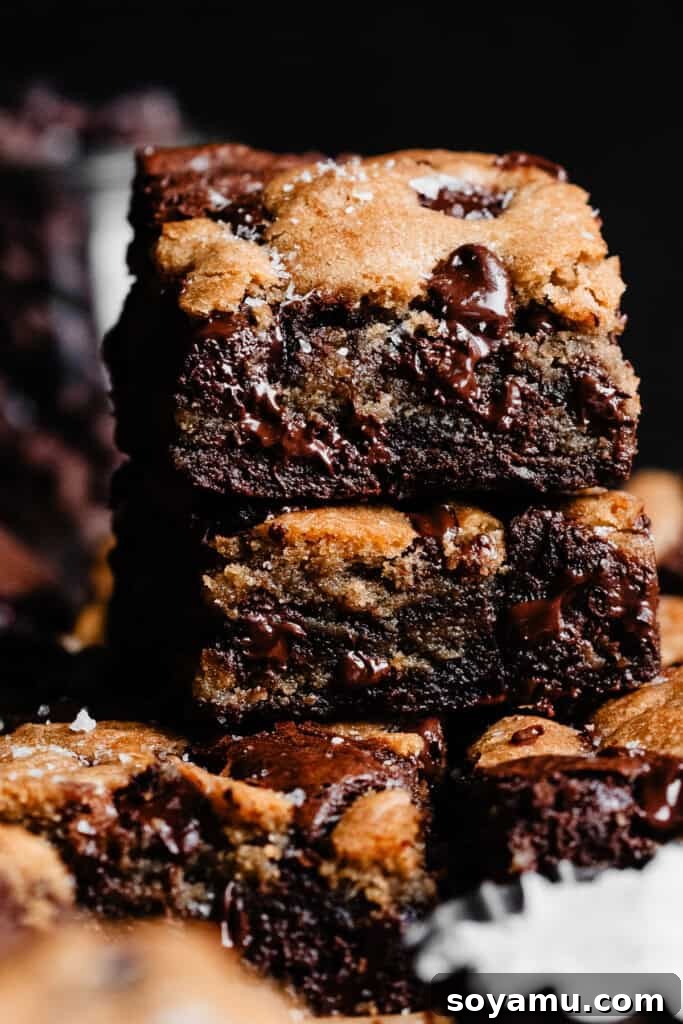
- Irresistibly Fudgy Brownie Layer: Our brownie base isn’t just chocolatey; it’s a deep, dark, and intensely fudgy experience, enhanced by the sublime complexity of brown butter. The nutty, caramelized notes of brown butter add an unparalleled richness that makes this brownie layer truly stand out. It’s a dense, moist, and utterly melt-in-your-mouth foundation.
- Perfectly Chewy Chocolate Chip Cookie Layer: Nestled between and atop the rich brownie batter is a classic, perfectly chewy chocolate chip cookie dough. Each bite offers that comforting, familiar taste and satisfying texture of a homemade chocolate chip cookie, studded with delightful pockets of melted chocolate. It’s the ideal contrast to the fudginess of the brownie.
- Feeds a Crowd with Ease: Planning a party, potluck, or family gathering? These robust brookie bars are your answer. They can be easily cut into generous or smaller, bite-sized portions, making them perfect for sharing. Their rich flavor means a little goes a long way, ensuring everyone gets a satisfying taste.
- Effortless Preparation: Despite their impressive appearance and complex flavor profile, these brookies are surprisingly straightforward to prepare. With clear, step-by-step instructions, even novice bakers can achieve spectacular results. The process is enjoyable, and the outcome is incredibly rewarding.
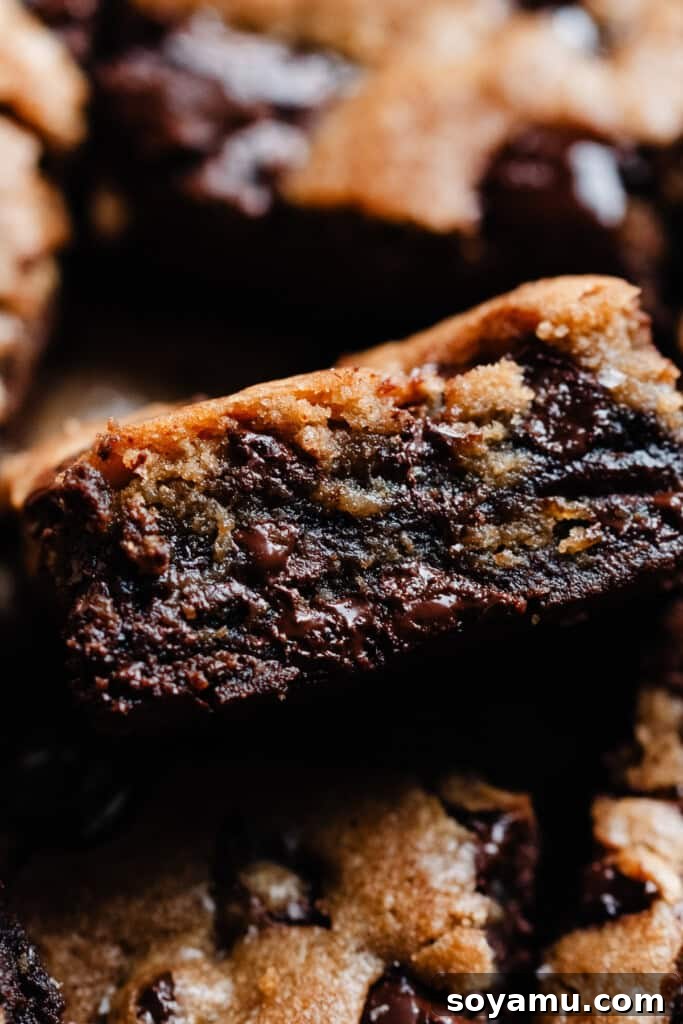
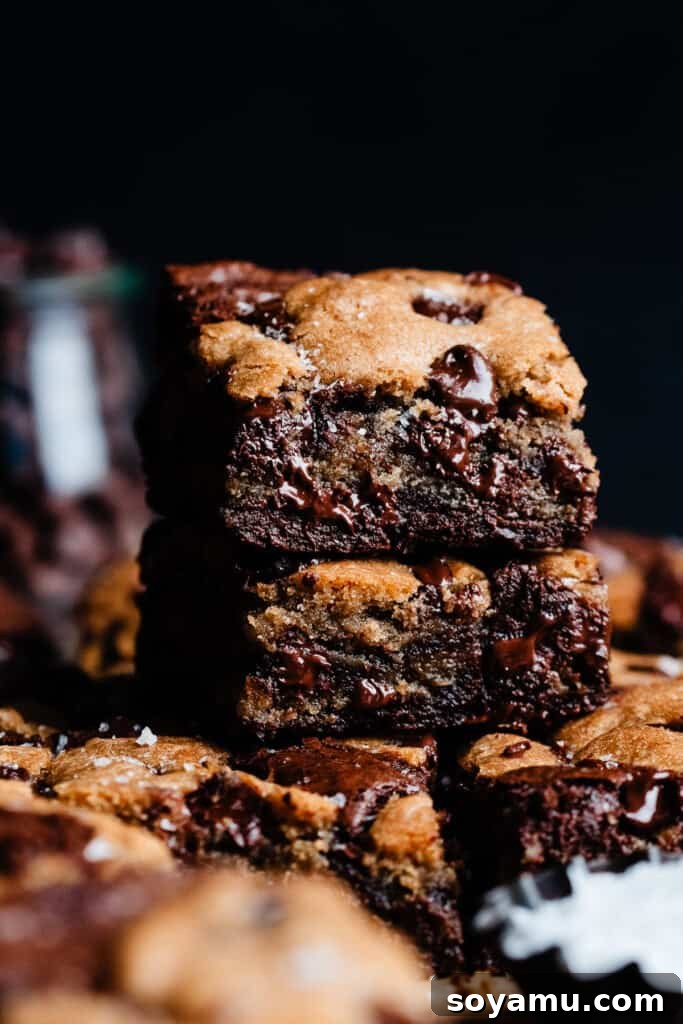
- Visual Appeal and Layered Perfection: The distinct layers of dark, rich brownie and golden-brown cookie dough create a visually stunning dessert that looks as good as it tastes. The careful layering technique ensures even baking and beautiful cross-sections that will surely garner compliments.
- Versatile for Any Occasion: From casual weeknight cravings to elegant holiday celebrations, these brown butter brookies fit seamlessly into any event. They are a delightful treat that appeals to all ages and chocolate lovers, making them incredibly versatile.
Essential Ingredients for Perfect Brookies: A Deep Dive
Crafting the perfect brookie starts with understanding the role of each ingredient. Below is a detailed overview, explaining why each component is crucial for achieving the ideal balance of flavor and texture in both the brownie and cookie layers. As always, precise measurements and full instructions are available in the comprehensive recipe card at the bottom of this article.
- Butter: For the cookie layer, we use salted butter to enhance the flavor profile and add a beautiful richness. While unsalted butter can be used, adding a pinch more salt to the recipe would be advisable to compensate. For the brownies, butter is browned, creating a depth of flavor that is truly transformative. Browning butter removes some water content, so be mindful of the precise weight mentioned in the recipe card if you opt to skip this step.
- Vegetable Oil: A crucial ingredient in our brownie recipe, vegetable oil is key to achieving an incredibly moist and tender crumb. Unlike butter, oil remains liquid at room temperature, which helps keep baked goods softer for longer. This substitution for a portion of the butter in the brownie batter ensures maximum moisture without sacrificing any of that rich, chocolatey flavor.
- Semi-Sweet Chocolate: We opt for semi-sweet chocolate in both layers to prevent the brookies from becoming overly sweet, allowing the complex flavors of brown butter and cocoa to shine through. Using high-quality chopped semi-sweet chocolate will yield the best melt and texture, creating delightful pockets of gooey chocolate.
- Cocoa Powder: To amplify the chocolate flavor in our brownies, we combine cocoa powder with melted chocolate. This layering of chocolate sources adds an incredible depth and intensity, creating a truly luxurious brownie experience. You can experiment with different types like natural, Dutch-processed, or even black cocoa for varying flavor nuances.
- Eggs: Large, room-temperature eggs are essential for optimal emulsification and structure in both batters. In the brownies, a combination of whole eggs and an extra egg yolk contributes to an exceptionally fudgy texture and a rich, shiny crust. Room temperature eggs blend more evenly, leading to a smoother, more consistent batter.
- Sugars: The strategic use of different sugars is vital for achieving specific textures. For the brownies, a blend of granulated sugar and powdered sugar is whisked thoroughly to dissolve the sugar crystals, which is the secret to that coveted, paper-thin, shiny crust. In the chocolate chip cookie dough, a combination of granulated sugar and dark brown sugar ensures a soft, chewy texture with a hint of molasses flavor.
- Vanilla Extract: Never underestimate the power of good vanilla. Using pure vanilla extract in both layers significantly enhances all the other flavors, adding a warm, aromatic depth that completes the dessert.
- Salt: A pinch of salt is a non-negotiable in both sweet and savory recipes. It acts as a flavor enhancer, balancing the sweetness and making all the other ingredients taste more vibrant. Especially with chocolate, salt helps to bring out its deeper notes.
- All-Purpose Flour: The foundation of our structure. Proper measurement is paramount. Always spoon your flour into the measuring cup and level it off with a straight edge, or, for the most accurate results, use a kitchen scale to weigh your flour. Scooping directly from the bag can compact the flour, leading to an excess amount and a dry, dense final product.
- Baking Soda & Baking Powder (for cookies): These leavening agents work together to give the cookie layer its perfect chewy texture and slight rise, ensuring it doesn’t become too dense.
- Espresso Powder (optional for brownies): A secret weapon for enhancing chocolate flavor! A small pinch of espresso powder (don’t worry, it won’t make your brownies taste like coffee) deepens the chocolate notes without adding any coffee flavor itself, making the brownies even more luxurious.
Creative Recipe Variations to Try
While these brown butter brookies are perfect as is, feel free to get creative and customize them to your taste. Here are a few ideas to inspire your baking adventures:
- Gluten-Free Adaptation: While this specific recipe hasn’t been tested with gluten-free flour, many successful brookie recipes exist using a 1:1 gluten-free baking flour blend. If attempting, ensure your blend contains xanthan gum for structure. Start with the same quantity by weight.
- Dairy-Free Option: Substitute your favorite high-quality dairy-free butter (stick form is usually best for baking) for both the brown butter and cookie butter. Ensure it has a similar fat content to regular butter for optimal results.
- Nutty Additions: Fold in a cup of chopped walnuts, pecans, or even macadamia nuts into either the brownie or cookie batter for an extra layer of crunch and flavor.
- Different Chocolate Chips: Experiment with milk chocolate, dark chocolate, white chocolate chips, or a mix of several for a different chocolate experience. Peanut butter chips or butterscotch chips could also offer an exciting twist.
- Flavor Extracts: Add a touch of almond extract to the cookie dough, or a hint of peppermint extract to the brownie batter (especially around the holidays!) for a unique flavor profile.
- Caramel Swirl: After assembling the layers, drizzle some homemade or store-bought caramel sauce over the top before baking for a gooey, dulce de leche-inspired treat.
Step-by-Step Guide: Crafting Your Perfect Brookies
Creating these delightful brookies involves a few key steps to ensure both layers are perfectly baked and harmoniously combined. Follow these instructions carefully for the best results:
Step 1: Prepare Your Pan and Oven. Begin by preheating your oven to 350°F (175°C). This ensures a consistent baking temperature from the moment your brookies enter the oven. Lightly spray a 9×13 inch metal baking pan with nonstick spray, then line it with parchment paper, leaving an overhang on the sides. This parchment “sling” will make lifting the cooled brookies out of the pan incredibly easy, allowing for clean, precise slicing.
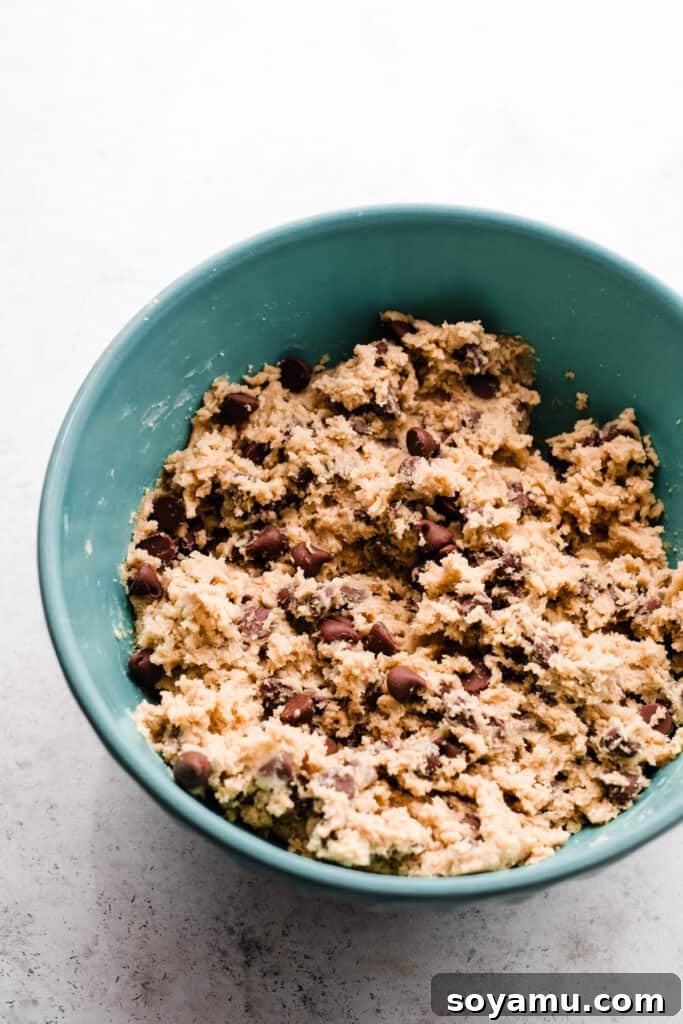
Step 2: Master the Chocolate Chip Cookie Dough. In a large mixing bowl, gently melt the salted butter. Once melted, whisk in both the dark brown sugar and granulated sugar until well combined. Next, add the room temperature eggs and vanilla extract, whisking for about 30-45 seconds until the mixture is smooth and fully emulsified. Gradually stir in your dry ingredients: the all-purpose flour (properly spooned and leveled or weighed), baking soda, baking powder, and salt. Mix until just combined, being careful not to overmix, which can lead to tough cookies. Finally, fold in the chocolate chips. Divide this delicious cookie dough into two equal halves (each should weigh approximately 640 grams for accuracy). Take one half and press it evenly into the prepared 9×13 inch pan. Lift this pressed cookie dough layer out of the pan using the parchment paper and set it aside. Line the pan with a fresh piece of parchment paper for the next step, leaving the other half of the cookie dough in its bowl for later use as the topping.
Step 3: Craft the Luxurious Brown Butter Brownies. This step begins with browning the butter, a simple technique that adds incredible depth. Place the cubed salted butter into a medium saucepan over medium heat. Melt the butter completely, stirring occasionally. Once melted, reduce the heat to medium-low and continue cooking, stirring frequently. The butter will foam, then turn a beautiful golden-amber color, and develop a distinct nutty, caramel-like aroma. This usually takes about 3-6 minutes after the butter has fully melted. Immediately remove from heat. Stir in your chopped semi-sweet chocolate until it’s completely melted and smooth, then whisk in the vegetable oil and cocoa powder. Set this mixture aside to cool slightly. In a separate large mixing bowl, combine the three large eggs, the extra egg yolk, and the granulated sugar. Whisk vigorously for 1-2 minutes until the sugar is fully dissolved and the mixture is light and fluffy. A great test is to rub a small amount between your fingers; if it’s smooth, you’re good to go. Next, whisk in the powdered sugar, vanilla extract, and salt. Check that the chocolate-butter mixture is warm, but not hot, then slowly whisk it into the egg and sugar mixture until fully incorporated. Finally, gently fold in the all-purpose flour and the optional pinch of espresso powder until just combined, followed by the remaining semi-sweet chocolate chips. Be careful not to overmix, as this can develop the gluten and lead to tougher brownies.
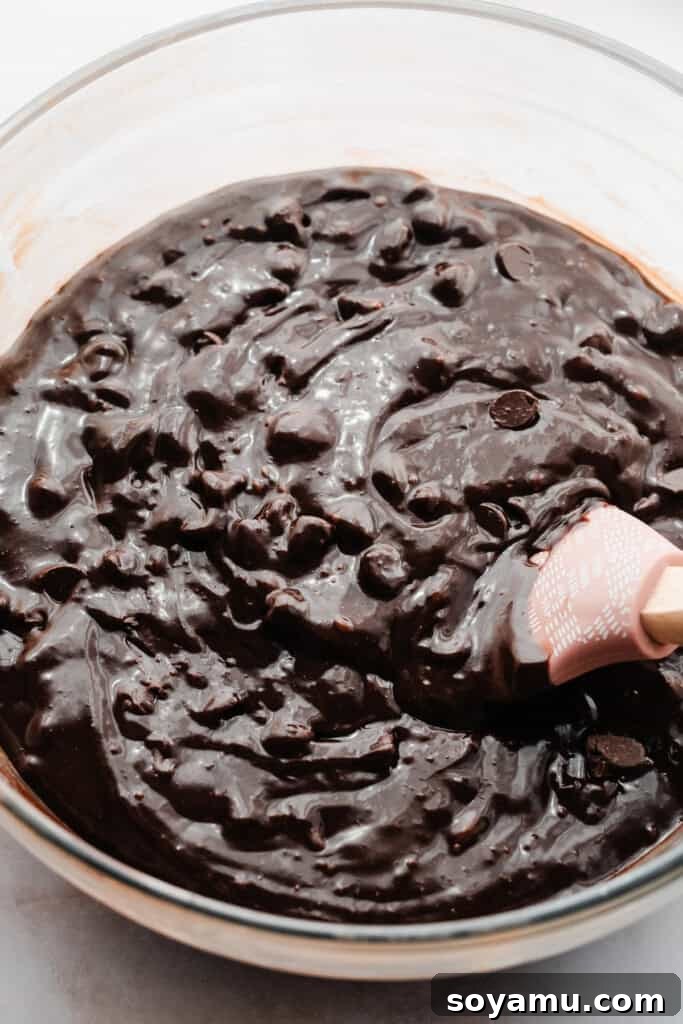
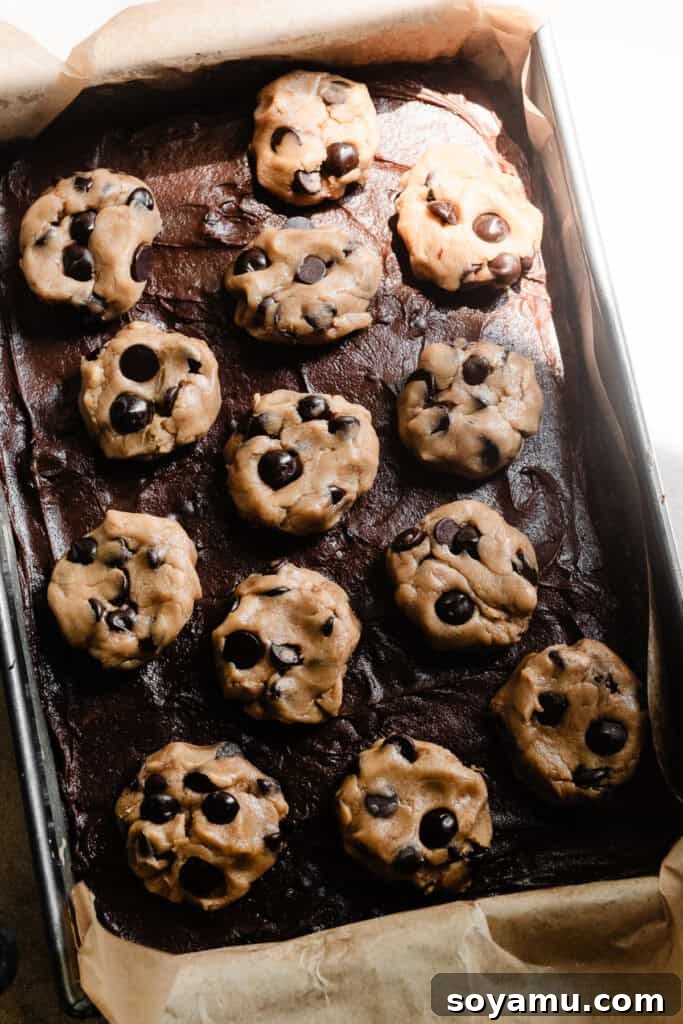
Step 4: Assemble Your Masterpiece. Now it’s time to bring the two incredible batters together. Spread slightly more than half of your rich brownie batter evenly across the bottom of the freshly parchment-lined 9×13 inch pan. Carefully lay the pre-pressed sheet of chocolate chip cookie dough directly on top of the brownie layer, ensuring it covers the brownie from edge to edge. Next, gently spread the remaining brownie batter over the cookie dough layer, covering it completely. For the final touch, take the remaining chocolate chip cookie dough from the bowl and form it into large, thick discs. Strategically place these cookie dough discs on top of the brownie batter layer. This creates those beautiful, distinct cookie pockets on the surface. If desired, press a few extra chocolate chips onto any visible brownie spots for an extra chocolate boost and aesthetic appeal.
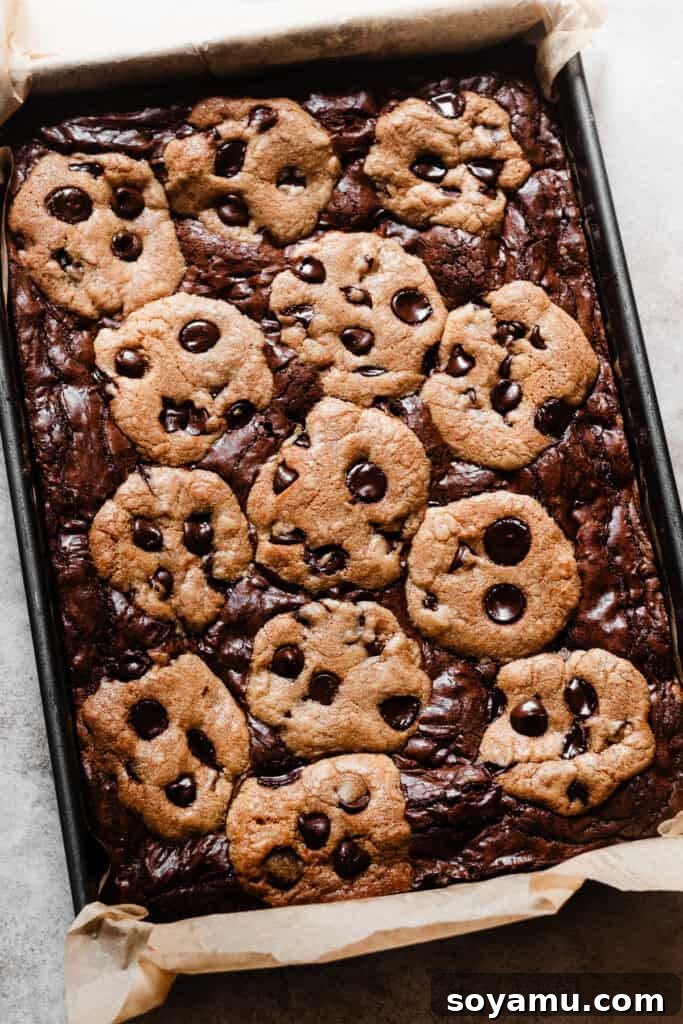
Step 5: The Bake. Place your assembled brookies into the preheated oven and bake for approximately 38 to 44 minutes. The key is not to overbake! You’ll know they’re ready when the cookie portions are beautifully golden brown and the brownie top has a slightly shiny, set crust. A toothpick inserted into a brownie section should come out with moist crumbs, but no wet batter. Overbaking will lead to dry brookies, so keep a close eye on them towards the end of the baking time. Rotate the pan halfway through baking for even cooking, if your oven tends to have hot spots.
Serving & Storing Your Delicious Brookies
Patience is a virtue, especially when it comes to these brookies! Proper cooling and storage are essential for the best experience.
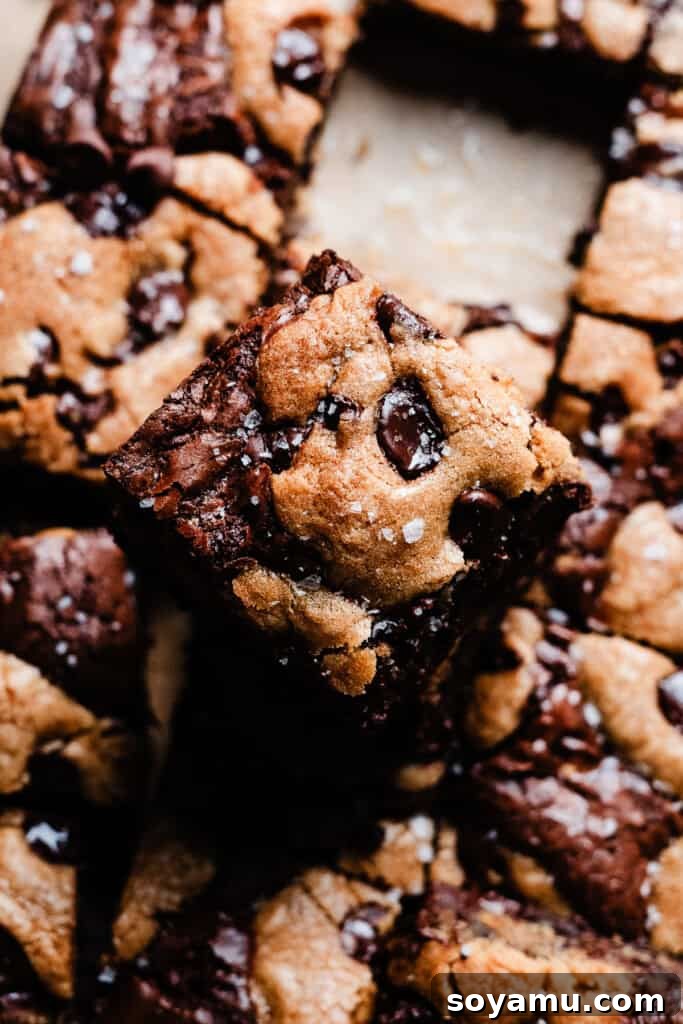
Allow the bars to cool completely in the pan on a wire rack for at least 1 to 2 hours before attempting to slice them. While it’s incredibly tempting to dig in when they’re warm and gooey (and absolutely delicious that way!), letting them cool will result in cleaner, more defined slices. If you cut them too soon, they might crumble or lose their structural integrity. For an extra touch of gourmet elegance, a sprinkle of flaky sea salt over the cooled brookies perfectly balances the sweetness and enhances the chocolate flavor.
Store any leftover cooled brookies in an airtight container at room temperature for 3-4 days to maintain their freshness and moisture. For an indulgent treat, briefly warm individual slices in the microwave before serving. This revives their gooey, fudgy texture and melted chocolate chips, making them taste as if they just came out of the oven.
Unlock Perfect Brookies: Essential Baking Tips
Achieving consistently amazing brookies requires attention to detail. These expert tips will help you bake like a pro:
- Invest in an Oven Thermometer: Many home ovens are not calibrated accurately, meaning the temperature you set might not be the actual temperature inside. An oven thermometer is an inexpensive tool that provides real-time, accurate temperature readings. This is crucial for all baking, especially for recipes like brookies where precise baking times prevent over or under-baking. Keeping one in your oven at all times ensures you’re always baking at the correct temperature.
- Embrace the Kitchen Scale for Accuracy: Flour measurements can vary wildly depending on how it’s scooped. Using a food scale to weigh your ingredients, especially flour, guarantees accuracy. This eliminates the common issue of adding too much flour, which can lead to dry, dense baked goods. While cup measurements are provided, gram measurements offer superior precision for professional-level results.
- Don’t Overmix Your Batters: Overmixing develops gluten in the flour, leading to tough brownies and chewy (in a bad way) cookies. Mix both batters only until the ingredients are just combined. A few streaks of flour are better than an overmixed batter.
- Room Temperature Ingredients are Key: Ensure your eggs and any other dairy are at room temperature. This allows them to emulsify better with other ingredients, creating a smoother, more uniform batter and a finer crumb in the finished product.
- Parchment Paper is Your Best Friend: Always line your pan with parchment paper, leaving an overhang on the sides. This not only prevents sticking but also creates a “sling” that allows you to easily lift the entire slab of brookies out of the pan for neat cooling and slicing.
- The Importance of Cooling: Resist the urge to cut into warm brookies. While delicious, they will be very gooey and hard to slice neatly. Cooling allows the brookies to set, firm up, and develop their final texture, making them much easier to cut into perfect squares or bars.
Frequently Asked Questions About Brookies
It is generally not recommended to double this recipe in a single batch. The sheer volume of batter would be too much for a standard home baking pan, and it would likely lead to uneven baking, with the center remaining raw while the edges overcook. For a larger quantity, it’s best to prepare two separate batches in two individual 9×13 inch pans.
Yes, you absolutely can! To make a smaller batch, simply halve all the ingredients in the recipe. Bake the halved recipe in a 9×9 inch metal pan. Keep a close eye on the baking time, as it might be slightly shorter for a smaller pan. A toothpick test (moist crumbs, no wet batter) is your best indicator of doneness.
While browning the butter adds a unique, nutty, and complex flavor that truly elevates these brookies, you can skip this step if you’re short on time. If you decide to omit browning, you’ll need to adjust the butter quantity. Browning butter causes some water to evaporate, resulting in less actual butterfat. Therefore, if skipping the browning, start with 140 grams of melted butter for the brownie layer, instead of the 170 grams required before browning. The brownies will still be delicious, but they will lack that signature brown butter nuance.
Brown butter is done when the milk solids at the bottom of the pan turn a golden-brown color and a distinct nutty aroma fills your kitchen. Be careful not to burn it; it can go from perfectly browned to burnt very quickly. Keep stirring and watch closely!
This combination is a secret weapon for ultimate brownie texture. Butter provides rich flavor, especially when browned. Vegetable oil, being a liquid at room temperature, contributes to an incredibly moist, fudgy, and tender brownie that stays soft for days, unlike all-butter brownies which can sometimes dry out faster.
Recommended Tools for Baking Success
Having the right tools can make all the difference in your baking experience. Here are a couple of essentials for making these brown butter brookies:
- 9×13 Inch Metal Baking Pan: A sturdy 9×13 inch metal pan is absolutely essential for this recipe. Metal conducts heat evenly, ensuring your brookies bake thoroughly without burnt edges or raw centers. Glass or ceramic pans can bake differently, often requiring adjustments to baking time and temperature.
- Parchment Paper: Crucial for easy removal and clean slicing. Always use it!
- Large Mixing Bowls: You’ll need at least two large mixing bowls for preparing the cookie dough and brownie batter separately.
- Whisks & Spatulas: Good quality whisks for combining wet ingredients and sturdy spatulas for folding in dry ingredients and chocolate chips are indispensable.
- Saucepan: A medium saucepan is needed for browning the butter.
More Irresistible Dessert Ideas
If you loved these brookies, you’re sure to enjoy these other easy and delicious dessert recipes from our kitchen:
- Triple Chocolate Chunk Cookies: For the ultimate chocolate lover, these cookies are packed with three kinds of chocolate.
- Chocolate Chip Cookie Cups: Individual portions of chewy cookie, perfect for filling with ice cream or frosting.
- Classic 15-Minute Puppy Chow: A quick, no-bake, and addictive snack mix that’s always a crowd-pleaser.
- Fudgy Brown Butter Brownies: If you adored the brownie layer, dive deeper into the world of rich, fudgy brownies with this standalone recipe.
- Brown Butter Chocolate Chip Cookies: Experience the magic of brown butter in a classic cookie format.
Did you whip up these incredible Brown Butter Brookies? We’d love to hear from you!
Your feedback helps our small business grow. Please take a moment to leave a comment and a star rating below, letting us know how much you enjoyed the recipe. Your honest review is invaluable!
Brown Butter Brookies
These ultimate dessert bars combine fudgy brown butter brownies with chewy chocolate chip cookies. The unique layering technique ensures perfect baking and an incredible blend of textures and flavors.
Ingredients
For the Chocolate Chip Cookies:
- 14.5 tbsp (206 grams) salted butter
- 3/4 cup (163 grams) dark brown sugar, packed
- 3/4 cup (156 grams) granulated sugar
- 2 large eggs, at room temperature
- 1 1/2 tsp vanilla extract
- 3 cups (390 grams) all-purpose flour, spooned & leveled or weighed out
- 1 tsp baking soda
- 1 tsp baking powder
- 1/2 tsp salt
- 1 1/2 cups chocolate chips
For the Brownies:
- 3/4 cup (170 grams before browning, 140 grams after) salted butter, cubed
- 4 ounces semi-sweet chocolate, chopped (chocolate chips work too)
- 1/4 cup (56 mL) vegetable oil
- 3/4 cup (63 grams) cocoa powder
- 3 large eggs, at room temperature
- 1 large egg yolk, at room temperature
- 3/4 cup (158 grams) granulated sugar
- 1 1/2 cups (174 grams) powdered sugar
- 2 tsp vanilla extract
- 1/4 tsp salt
- 1/2 cup (65 grams) all-purpose flour
- Pinch of espresso powder, optional
- 1 cup semi-sweet chocolate chips (optional, creates delightful melted pockets)
For Topping:
- Flaky sea salt, optional
Instructions
-
Prep: Preheat your oven to 350℉ (175°C). Spray a 9×13 inch metal pan with nonstick spray and line it with parchment paper, leaving an overhang on the sides for easy removal and slicing later.
-
Make the Chocolate Chip Cookie Dough: Melt the butter in a large mixing bowl. Whisk in the sugars (dark brown and granulated). Add the room temperature eggs and vanilla extract, and whisk until smooth and combined, about 30-45 seconds. Stir in the dry ingredients (flour, baking soda, baking powder, salt), mixing until just combined. Fold in the chocolate chips. Divide the dough into two equal halves (approx. 640 grams each). Press one half of the dough evenly into the prepared pan, then lift it out using the parchment paper and set aside. Line the pan with a fresh piece of parchment paper. The other half of the cookie dough will be used for topping later.
-
Brown the Butter: Add cubed salted butter to a medium saucepan over medium heat. Melt the butter, stirring occasionally. Once completely melted, reduce heat to medium-low and continue cooking, stirring frequently. The butter will foam, then turn a deep golden brown with a nutty, caramel-like aroma. This process typically takes 3-6 minutes after the butter has melted. Remove from heat immediately.
-
Make the Brownie Batter: Once the butter is browned, stir in the chopped semi-sweet chocolate until completely melted and smooth. Whisk in the vegetable oil and cocoa powder. Set aside to cool slightly. In a separate large mixing bowl, whisk together the large eggs, egg yolk, and granulated sugar for 1-2 minutes until the sugar is fully dissolved (test by rubbing a small amount between your fingers). Next, whisk in the powdered sugar, vanilla extract, and salt. Ensure the chocolate mixture is warm but not hot, then whisk it into the egg/sugar mixture until well combined. Gently fold in the all-purpose flour and optional espresso powder, followed by the semi-sweet chocolate chips, until just combined.
-
Assemble: Spread slightly more than half of the brownie batter evenly across the bottom of your freshly parchment-lined 9×13 inch pan. Carefully lay the pre-pressed sheet of cookie dough on top of this. Spread the remaining brownie batter evenly over the cookie dough layer. Take the remaining half of the chocolate chip cookie dough and form it into large, thick discs. Place these discs strategically on top of the brownie batter. For extra visual appeal, press additional chocolate chips into any bare spots on the cookie dough.
-
Bake: Bake the assembled brookies for 38 to 44 minutes. The cookie portions should be golden, and the brownie top should have a shiny, set crust. A toothpick inserted into a brownie section should come out with moist crumbs, not wet batter. Do not overbake to ensure maximum fudginess!
-
Serve & Store: Allow the brookies to cool completely in the pan on a wire rack for 1-2 hours before slicing and serving. This ensures clean, neat slices. Optionally, sprinkle with flaky sea salt before serving. Store any cooled leftover bars in an airtight container at room temperature for 3-4 days. For an ultimate treat, warm individual slices in the microwave before enjoying!
Notes
Brownie Notes:
Brown Butter in the Brownies: While highly recommended for flavor depth, you can skip browning the butter if you’re pressed for time. If skipping this step, ensure you start with exactly 140 grams of melted butter for the brownie portion, as browning causes water to evaporate, reducing the total butterfat.
Cocoa Powder: This brownie recipe doesn’t rely on baking powder/soda, so you have flexibility with cocoa powder. You can use natural, Dutch-processed, or even black cocoa powder (the kind used in Oreos, which gives a distinct darker color and flavor) interchangeably without affecting the leavening.
Nutrition Information
Serving: 1 bar
Calories: 667 kcal
Carbohydrates: 84 g
Protein: 6 g
Fat: 36 g
Saturated Fat: 20 g
Polyunsaturated Fat: 3 g
Monounsaturated Fat: 8 g
Trans Fat: 1 g
Cholesterol: 86 mg
Sodium: 297 mg
Potassium: 274 mg
Fiber: 4 g
Sugar: 56 g
Vitamin A: 641 IU
Calcium: 67 mg
Iron: 3 mg
Nutrition information is automatically calculated and should be used as an approximation.
Love this recipe? Share it with your friends and family!