
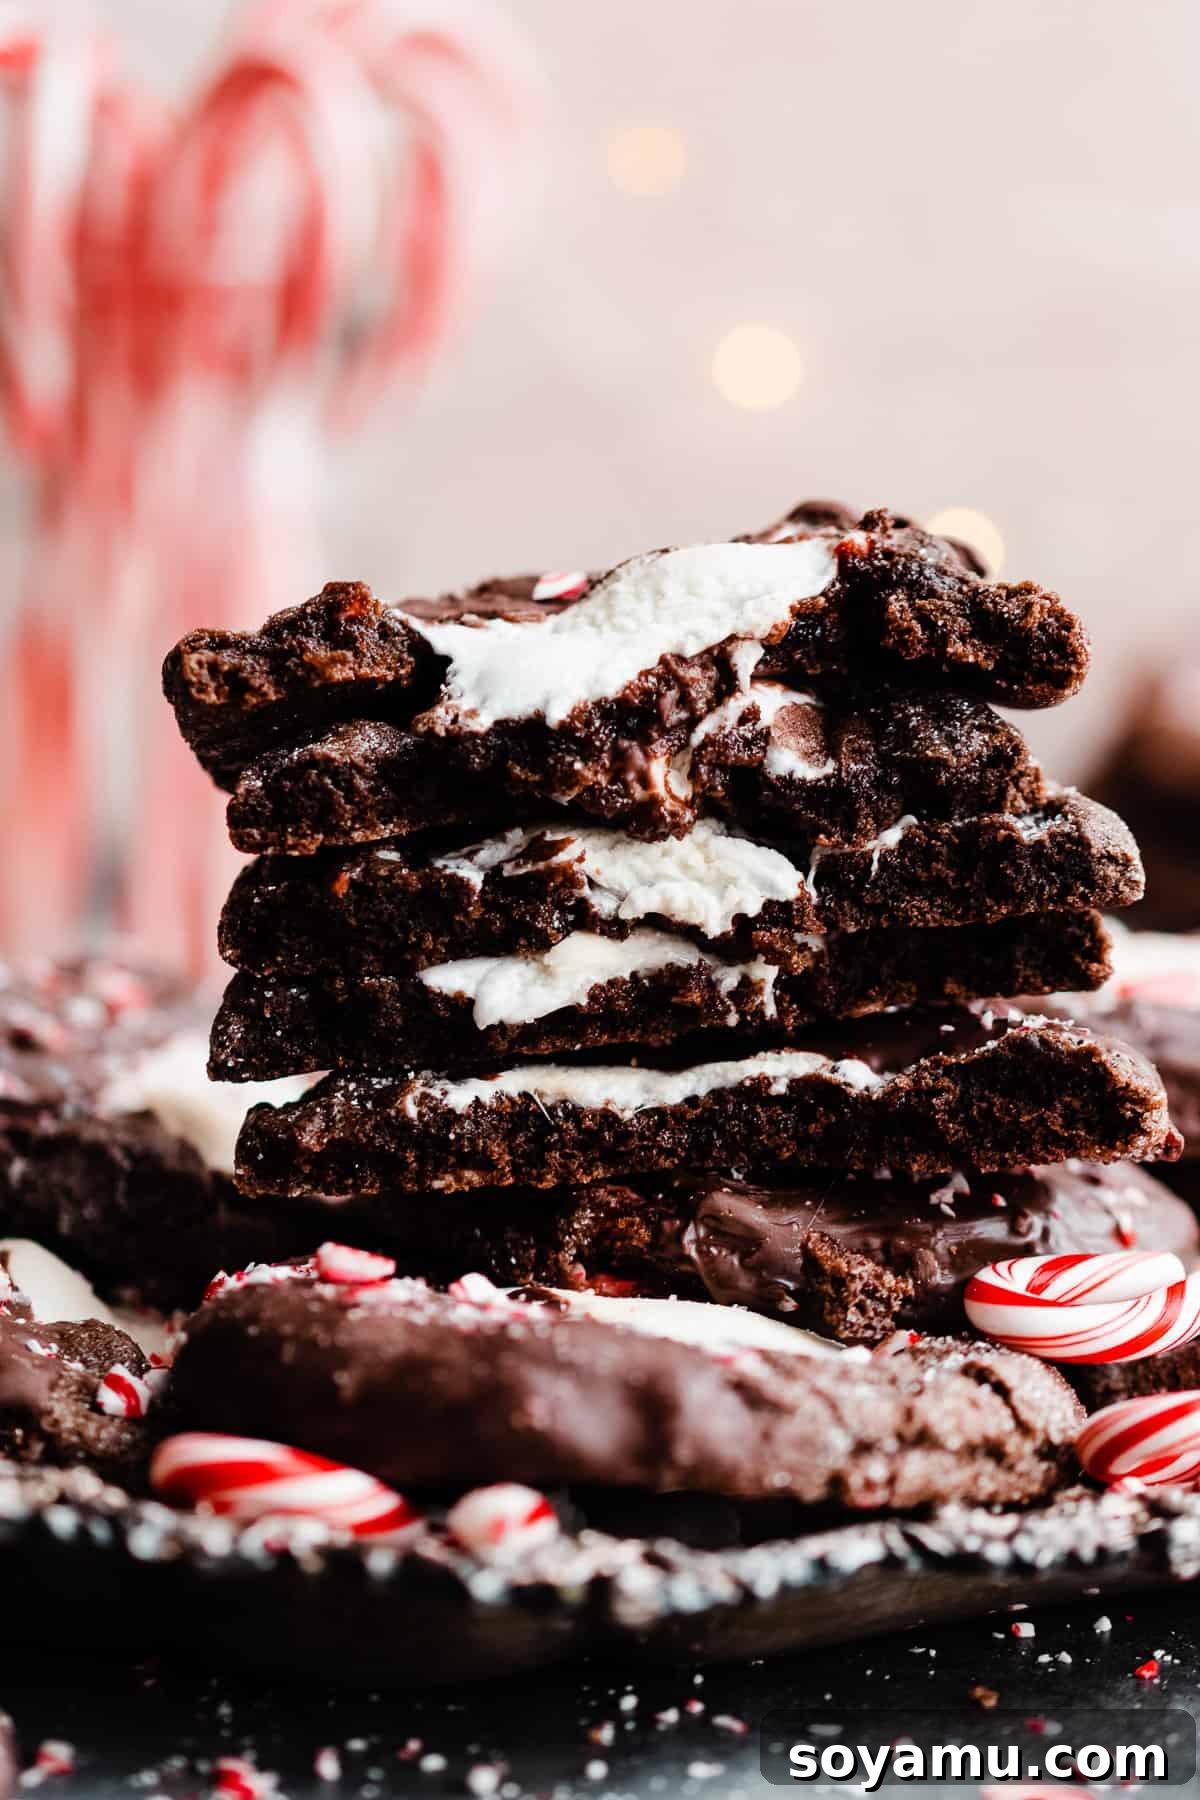
Ultimate Peppermint Hot Cocoa Cookies: Chewy, Fudgy, & Marshmallow-Stuffed Delights
Imagine your favorite mug of warm, comforting hot cocoa, complete with a melting marshmallow and a hint of refreshing peppermint, all transformed into a glorious cookie! Our Peppermint Hot Cocoa Cookies are precisely that – a dream come true for holiday dessert lovers. These aren’t just any cookies; they’re rich, deeply chocolatey, wonderfully chewy, and each one hides a secret, gooey marshmallow center. To truly elevate them, we dunk them in melted chocolate and shower them with a sprinkle of festive crushed peppermint, making them irresistible for any occasion, especially the holiday season.
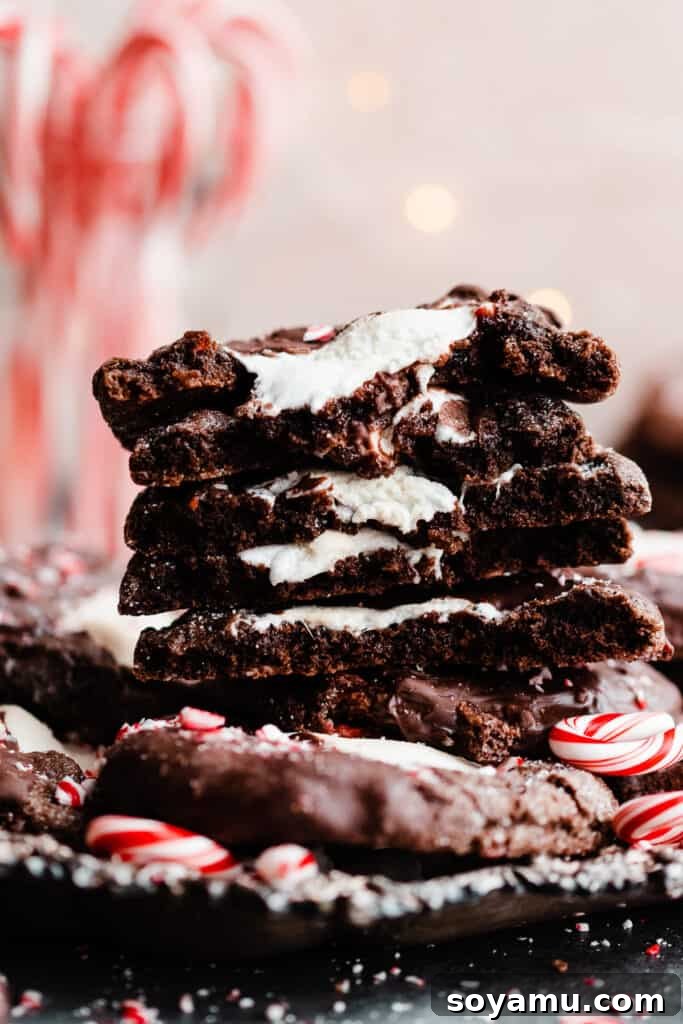
Whether you’re hosting a holiday gathering, looking for the perfect treat for a cookie exchange, or simply craving a festive sweet, these hot cocoa cookies deliver on all fronts. They’re surprisingly simple to make, yet impressive enough to wow any crowd. Get ready to bake a batch of pure joy!
Why These Peppermint Hot Cocoa Cookies Are a Must-Bake
These aren’t just another cookie recipe; they offer a unique combination of flavors and textures that make them truly stand out. Here’s why you’ll fall in love with them:
- Irresistibly Fudgy Double Chocolate Cookies: The base of these cookies is a masterpiece in itself. We use both cocoa powder and rich chocolate chips to create a profoundly deep chocolate flavor. The resulting texture is wonderfully chewy and fudgy, reminiscent of a brownie, making every bite a decadent experience.
- Perfectly Gooey Marshmallow Center: The hidden gem in each cookie is a whole marshmallow, which melts into a gloriously gooey, stretchy center as it bakes. This warm, soft marshmallow core perfectly mimics a fresh cup of hot cocoa, adding an unexpected and delightful textural contrast.
- Bursting with Peppermint Flavor: Infused with peppermint pieces directly into the dough and finished with a festive sprinkle on top, these cookies offer that signature cool, refreshing minty kick that pairs impeccably with the rich chocolate. It’s the quintessential flavor combination of the holiday season.
- Festive & Photo-Ready: With their beautiful chocolatey exterior, a hint of white marshmallow peeking through, and vibrant crushed candy cane topping, these cookies are as visually appealing as they are delicious. They’re perfect for holiday platters and Instagram-worthy moments.

Essential Ingredients for Your Peppermint Hot Cocoa Cookies
Creating these delightful cookies requires a few key ingredients. Here’s a detailed look at what you’ll need and some tips for each:
- Butter: For the most robust flavor profile, I consistently opt for salted butter in my baking. However, if unsalted butter is your preference or what you have on hand, feel free to use it; just remember to add an extra pinch of salt to balance the flavors. Ensure your butter is softened to room temperature for optimal creaming with the sugars.
- Milk: Any type of milk will work perfectly here. I typically use 2% milk, but whole milk, skim milk, or even a non-dairy alternative like almond or oat milk will integrate seamlessly into the dough, contributing to its moistness without altering the flavor significantly.
- Peppermint: The heart of the peppermint flavor comes from crushed candy canes. You can use mini or large candy canes – just crush them into small, manageable pieces. This not only adds a burst of minty flavor but also a lovely festive crunch and color. If you find yourself with an abundance of candy canes after making these, consider trying our Peppermint Mocha Cookies next for another delightful treat!
- Marshmallows: Regular-sized marshmallows are essential for that signature gooey center. They melt beautifully within the cookie, creating a warm, stretchy surprise. Avoid jumbo marshmallows as they might be too large for the cookie dough to fully encase.
- All-Purpose Flour: Achieving the perfect cookie texture relies on proper flour measurement. Always spoon and level your flour rather than scooping directly from the bag. Scooping can compact the flour, leading to an excess amount and a dry, crumbly cookie. For the most accurate results, use a kitchen scale and weigh 135 grams of all-purpose flour per cup.
- Semi-Sweet Chocolate Chips: These chips are crucial for enhancing the rich chocolate base without making the cookies overly sweet. Semi-sweet chocolate provides a balanced bitterness that complements the sweetness of the sugar and marshmallows. While you can experiment with milk chocolate chips, they might make the cookie too rich for some palates.
- Granulated & Brown Sugar: A blend of both sugars contributes to the cookies’ chewy texture and deep flavor. Granulated sugar provides crispness, while brown sugar adds moisture and a hint of caramel note.
- Cocoa Powder: Unsweetened cocoa powder is key for that intense hot cocoa flavor. Ensure it’s good quality for the best results.
- Eggs & Extracts: Large eggs bind the ingredients, while vanilla and peppermint extracts deepen the flavor profile, creating a truly irresistible aroma and taste.
Versatile Substitutions for Your Peppermint Hot Cocoa Cookies
Feel free to customize these cookies to suit your taste or dietary needs. Here are some excellent substitutions:
- Chocolate Chips: If semi-sweet isn’t your preference, feel free to substitute with milk chocolate chips for a sweeter profile, dark chocolate chunks for a more intense flavor, or even white chocolate chips for a creamy contrast. You can also omit them entirely if you prefer a simpler chocolate cookie base.
- Marshmallows: The large marshmallow center is a highlight, but you have options! Instead of one large marshmallow per cookie, you can mix in 1 cup of mini marshmallows or marshmallow bits directly into the dough. If marshmallows aren’t your thing, you can omit them completely. For those with dietary restrictions, vegan marshmallows work wonderfully as a substitute. Another creative option: press a Hershey’s Kiss into the top of each cookie immediately after they come out of the oven for a different kind of melty chocolate center.
- Dipping Chocolate: While semi-sweet chocolate is recommended for dipping, you can certainly use white chocolate or dark chocolate if that’s what you prefer or have on hand. The choice is yours to match your flavor preferences.
- Make Them Chocolate Chip Marshmallow Cookies: If the peppermint isn’t your favorite, simply omit the peppermint extract and crushed candy canes. You’ll still have incredibly delicious, fudgy chocolate cookies with a gooey marshmallow center – a classic combination everyone loves!
Baking Your Perfect Peppermint Hot Cocoa Cookies: A Step-by-Step Guide
Follow these detailed steps to create your batch of irresistible peppermint hot cocoa cookies. Precision and patience are key to achieving that perfect chewy texture and gooey center.
Step 1: Prepare the Cookie Dough
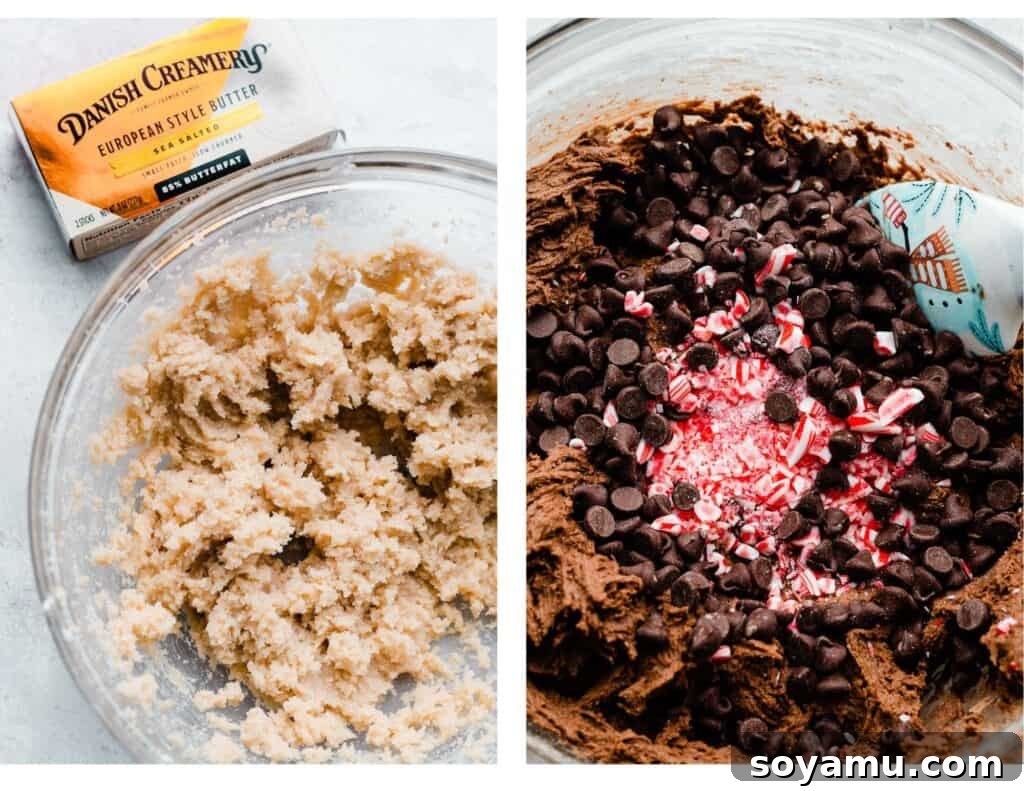
Begin by creaming the softened butter and both sugars (granulated and brown) together in a large mixing bowl. Use an electric mixer on high speed until the mixture is light, fluffy, and well combined – this usually takes about 1-2 minutes. Next, beat in the wet ingredients: the eggs one at a time, followed by the vanilla extract and peppermint extract. Mix until everything is just incorporated, scraping down the sides of the bowl as needed. Gradually add the milk and mix until it’s just blended into the wet ingredients. Finally, gently fold in the dry ingredients (flour, cocoa powder, baking soda, and salt) until a slightly wet, cohesive dough forms. Be careful not to overmix. On medium speed, mix in the semi-sweet chocolate chips and the crushed candy canes until they are evenly distributed throughout the dough. Once the dough is ready, cover the bowl and chill it in the refrigerator for at least 30 minutes. This chilling step is crucial as it prevents the cookies from spreading too much and makes them much easier to handle.
Step 2: Stuff the Cookie Dough Balls with Marshmallows
After the dough has chilled, it’s time to prepare the individual cookie portions. Using a cookie scoop (approximately 2-ounce size, or about 60-65 grams), portion out balls of dough. Take each dough ball and gently flatten it into a disk in the palm of your hand. Place one regular-sized marshmallow directly in the center of the flattened dough. Carefully fold the edges of the cookie dough up and around the marshmallow, sealing it completely. The goal is to fully enclose the marshmallow, ensuring it doesn’t leak out during baking. However, sometimes a little bit peeking out adds to the rustic charm. Repeat this process for all the dough balls. Once stuffed, you can place these dough balls in an airtight container and chill them for at least 2 hours or up to 48 hours, which further enhances their flavor and texture.

Step 3: Bake to Chewy Perfection
Preheat your oven to 350°F (175°C). Line several baking sheets with parchment paper or silicone baking mats to prevent sticking and ensure even baking. Pour some granulated sugar into a small bowl. Gently roll each marshmallow-stuffed cookie dough ball in the granulated sugar, coating it evenly. This sugar coating adds a lovely sparkle and a slight crispness to the exterior. Place 6 cookies on each prepared baking sheet, ensuring enough space between them for spreading. Bake for 10-11 minutes, one sheet at a time, for the most consistent results. The cookies are done when the edges appear just set, and the centers still look a bit soft and slightly underdone. Don’t worry, they will continue to set as they cool. When they first come out of the oven, they might look a little misshapen due to the melting marshmallow – this is completely normal and easily fixed!

Expert Tip for Perfectly Round Cookies: Immediately after removing the baking sheet from the oven, use a round cookie cutter (slightly larger than your cookies) or the rim of a glass. Place it around each hot cookie and gently swirl it to nudge the edges inward, shaping them into a perfectly round form. This quick trick works wonders for achieving bakery-style perfection!

Step 4: Decorate Your Festive Treats
Allow the freshly baked cookies to cool on the baking sheet for about 5-10 minutes. This crucial step allows them to firm up slightly, making them less fragile for transfer. After this initial cooling, carefully transfer them to a wire rack to cool completely. Once cooled, it’s time for the final festive touch! Melt your semi-sweet chocolate in a microwave-safe bowl in 30-second intervals, stirring until smooth, or use a double boiler method. Dip half of each cookie into the melted chocolate, letting any excess drip off. Immediately sprinkle crushed candy cane pieces onto the melted chocolate before it sets. The vibrant red and white bits add both visual appeal and an extra burst of peppermint flavor. Let the chocolate set completely before serving or storing. If you’re skipping the chocolate dip, you can certainly enjoy these warm and fresh from the oven!

Serving & Storing Your Peppermint Hot Cocoa Cookies
To fully appreciate the magic of these cookies, you absolutely MUST enjoy them warm! The soft, gooey marshmallow center and warm, fudgy chocolate are truly at their best when slightly heated. Pair them with a steaming cup of hot cocoa or coffee for an unparalleled cozy experience, especially during chilly evenings or holiday celebrations.
For storing, place cooled cookies in an airtight container at room temperature for 3-4 days to maintain their freshness and chewiness. If you want to extend their shelf life, store them in the refrigerator for up to a week. To reheat and bring back that delightful gooey center, simply pop them in the microwave for 10-15 seconds, or warm them in a low oven for a few minutes.
These beautiful and delicious cookies are also the perfect addition to any holiday cookie exchange. They’re unique, festive, and guaranteed to be a crowd-pleaser. For more delicious cookie ideas, consider making my Almond Crescent Cookies, which yield a generous batch perfect for sharing!

Expert Tips for Cookie Baking Success
Achieve bakery-quality results every time with these valuable baking tips:
- Proper Butter Softening: Room temperature butter is essential for a smooth, well-creamed dough. However, “room temperature” doesn’t mean melted or greasy. Your butter should be cool to the touch, and when you gently press it with your finger, it should leave a slight indent without your finger sinking in easily. This texture allows it to cream properly with sugar, creating air pockets that lead to tender cookies.
- Patient Cooling for Baked Cookies: These cookies are delicate when they first emerge from the oven, especially with that molten marshmallow center. Resist the urge to move them immediately! Allow them to cool on the baking sheet for at least 5-10 minutes. This brief resting period helps them firm up and prevents them from breaking when transferred to a wire rack. Of course, if you can’t resist a warm, fresh cookie straight from the pan, go for it – it’s highly encouraged!
- Invest in an Oven Thermometer: Many ovens, even new ones, don’t maintain accurate temperatures. An oven thermometer is an inexpensive tool that will show you the true temperature inside your oven. Consistent and accurate oven temperature is paramount for successful baking, especially for cookies. I recommend keeping one in your oven at all times to monitor its calibration.
- Utilize a Digital Kitchen Scale: For truly precise baking, particularly with flour, a food scale is a game-changer. Flour can be notoriously difficult to measure consistently with measuring cups, as amounts vary widely depending on how you scoop and pack it. Weighing your flour (135 grams per cup for all-purpose flour) ensures you’re always using the correct amount, leading to perfectly textured cookies every time.
- Don’t Skip Chilling the Dough: Chilling the dough is not just about easier handling; it allows the flavors to meld and prevents excessive spreading, resulting in a thicker, chewier cookie with a more intense flavor.
Frequently Asked Questions About Peppermint Hot Cocoa Cookies
Can I Make the Dough Ahead?
Absolutely! This is a fantastic make-ahead recipe. I recommend preparing the dough balls, but do not add the marshmallow yet. You can either refrigerate them in an airtight container for 1-2 days, or freeze them for 1-2 months. If frozen, thaw the dough balls in the refrigerator overnight before proceeding. When ready to bake, flatten each dough ball, add the marshmallow, and continue with the recipe instructions for baking.
Can I Make These Hot Cocoa Cookies Smaller?
I do not recommend making these cookies significantly smaller. The recipe is designed to perfectly encase a regular-sized marshmallow. If you reduce the size of the cookie dough ball, there won’t be enough dough to properly support and seal around the marshmallow center, which could lead to it melting out and making a mess on your baking sheet.
Can I Halve or Double the Recipe?
Yes, this recipe is quite flexible! Feel free to halve all the ingredients if you’re looking for a smaller batch, or double them if you need to feed a crowd or want plenty for holiday gifting and cookie exchanges.
Can I Use Hot Cocoa Mix Instead of Cocoa Powder?
While both contain cocoa, hot chocolate mix and unsweetened cocoa powder are not interchangeable on a 1:1 basis. Hot chocolate mix typically contains added sugar, powdered milk, and other flavorings, whereas cocoa powder is pure unsweetened chocolate. Substituting directly would throw off the sugar balance and potentially the texture of the cookies. You might be able to replace 1-2 tablespoons of cocoa powder with hot cocoa mix, but beyond that, the results would be unpredictable without thorough testing.

Recommended Special Tools for Baking Perfection
While not strictly necessary, these tools can greatly enhance your cookie-baking experience and results:
- Large Cookie Scoop: To ensure all your cookies are uniform in size and bake evenly, a large cookie scoop (often labeled as an ice cream scoop) is invaluable. It helps you portion out consistent amounts of dough, leading to beautifully shaped, bakery-style cookies.
- Quality Baking Sheets: Good quality baking sheets are a baker’s best friend. Look for heavy-gauge aluminum sheets that conduct heat evenly, preventing burnt bottoms and undercooked centers. Using parchment paper or silicone baking mats with them further aids in even baking and easy cleanup.

More Irresistible Cookie Recipes to Explore
If you’ve enjoyed these Peppermint Hot Cocoa Cookies, you’ll surely love these other delightful cookie creations from our kitchen:
- Jumbo Bakery-Style Monster Cookies
- Salted Caramel Chocolate Chip Cookies
- Bakery-Style Peanut Butter Chip Chocolate Cookies
- Key Lime Slice & Bake Cookies
- Blueberry Lemon Cookies
- Peanut Butter & Jelly Thumbprint Cookies
- Funfetti Cake Batter Cookies
- Cherry Pie Cookies
- Triple Chocolate Chunk Cookies
Did you make this festive recipe? We’d love to see it!
Snap a photo and share your creations! Be sure to follow bluebowlrecipes on Instagram and tag #bluebowlrecipes with your photo. You can also post a photo of your recipe to the bluebowlrecipes Facebook page. Your baking inspires us all!
Peppermint Chocolate Marshmallow Cookies
By Stephanie Simmons
These Peppermint Chocolate Marshmallow Cookies are like a mug of cocoa in cookie form! Rich, chewy hot chocolate cookies are flavored with peppermint & stuffed with a marshmallow. Dunk them in melted chocolate and add a sprinkle of crushed peppermint to take these perfect cookies right over the top!

Cook Time: 12 mins
Yields: 16 cookies
Rating: 5 out of 5 stars (based on 4 votes)
Ingredients
For the Cookie Dough:
- 1 cup (226 grams) salted butter, softened at room temperature
- 1 cup (210 grams) granulated sugar
- 1/2 cup (107 grams) packed brown sugar
- 2 large eggs
- 1 ½ tsp vanilla extract
- 1 tsp peppermint extract paste (or 1 ⅛ tsp liquid peppermint extract)
- 3 tbsp milk
- 2 ½ cups (325 grams) all-purpose flour, spooned & leveled
- ½ cup + 2 tbsp (60 grams) unsweetened cocoa powder
- 1 tsp baking soda
- ¼ tsp salt
- 1 cup (196 grams) semi-sweet chocolate chips
- ½ cup crushed candy canes (about 7 large candy canes)
For Stuffing & Decorating the Cookies:
- 20 regular-sized marshmallows
- 4 ounces (113 grams) semi-sweet chocolate, melted, for dipping
- 2-3 large candy canes, crushed, for topping
- Additional granulated sugar for rolling
Instructions
- Make the Cookie Dough: In a large mixing bowl, cream together the softened butter and both granulated and brown sugars with an electric mixer on high speed for about 1 minute until light and fluffy. Beat in the eggs one at a time, followed by the vanilla extract and peppermint extract until just combined. Mix in the milk until fully incorporated. Gradually add the dry ingredients (flour, cocoa powder, baking soda, and salt) and mix on low speed until a slightly wet dough forms, being careful not to overmix. Finally, stir in the semi-sweet chocolate chips and crushed candy canes until evenly distributed.
- Chill the Dough: Cover the bowl with plastic wrap and chill the cookie dough in the refrigerator for at least 30 minutes. This step is crucial for preventing excessive spreading during baking and making the dough easier to handle. Once chilled, scoop the dough into uniform balls, each weighing approximately 60-65 grams. Place these scooped dough balls into an airtight container and chill for a minimum of 2 hours, or up to 48 hours, for enhanced flavor and texture.
- Fill & Bake the Cookies: Preheat your oven to 350°F (175°C). Line a few baking sheets with parchment paper or silicone baking mats. Pour some granulated sugar into a small, shallow bowl. Take a chilled dough ball and flatten it into a disk in the palm of your hand. Place one regular-sized marshmallow in the center, then carefully fold the edges of the dough around the marshmallow, sealing it completely. Roll the stuffed dough ball in the granulated sugar to coat it evenly. Place 6 cookies on each prepared baking sheet, ensuring adequate spacing. Bake one sheet at a time for 10-11 minutes. The cookies are ready when the edges are just set, and the centers appear slightly soft. They will continue to firm up as they cool.
- Cool & Decorate: As soon as the cookies come out of the oven, use a round cookie cutter or the rim of a glass (slightly larger than the cookies) to gently shape any misshapen cookies into perfect rounds by scooting their edges inward. Let the cookies cool on the baking sheet for 5-10 minutes before carefully transferring them to a wire rack to cool completely. Once cooled, melt the extra semi-sweet chocolate. Dip half of each cookie into the melted chocolate, allowing excess to drip off. Immediately sprinkle with additional crushed candy canes. Let the chocolate set before serving.
- Serve & Store: These cookies are best enjoyed warm to experience the full gooey marshmallow effect! Store cooled cookies in an airtight container at room temperature for 3-4 days. For longer storage, they can be kept in the refrigerator for up to a week. Reheat gently in the microwave or a low oven for that fresh-baked warmth.

Nutrition Information
Per serving (1 cookie):
- Calories: 376 kcal
- Carbohydrates: 47g
- Protein: 5g
- Fat: 20g
- Saturated Fat: 12g
- Polyunsaturated Fat: 1g
- Monounsaturated Fat: 5g
- Trans Fat: 0.5g
- Cholesterol: 55mg
- Sodium: 212mg
- Potassium: 192mg
- Fiber: 3g
- Sugar: 27g
- Vitamin A: 402 IU
- Calcium: 34mg
- Iron: 3mg
Nutrition information is automatically calculated and should be used as an approximation.
Enjoy your homemade Peppermint Hot Cocoa Cookies!