
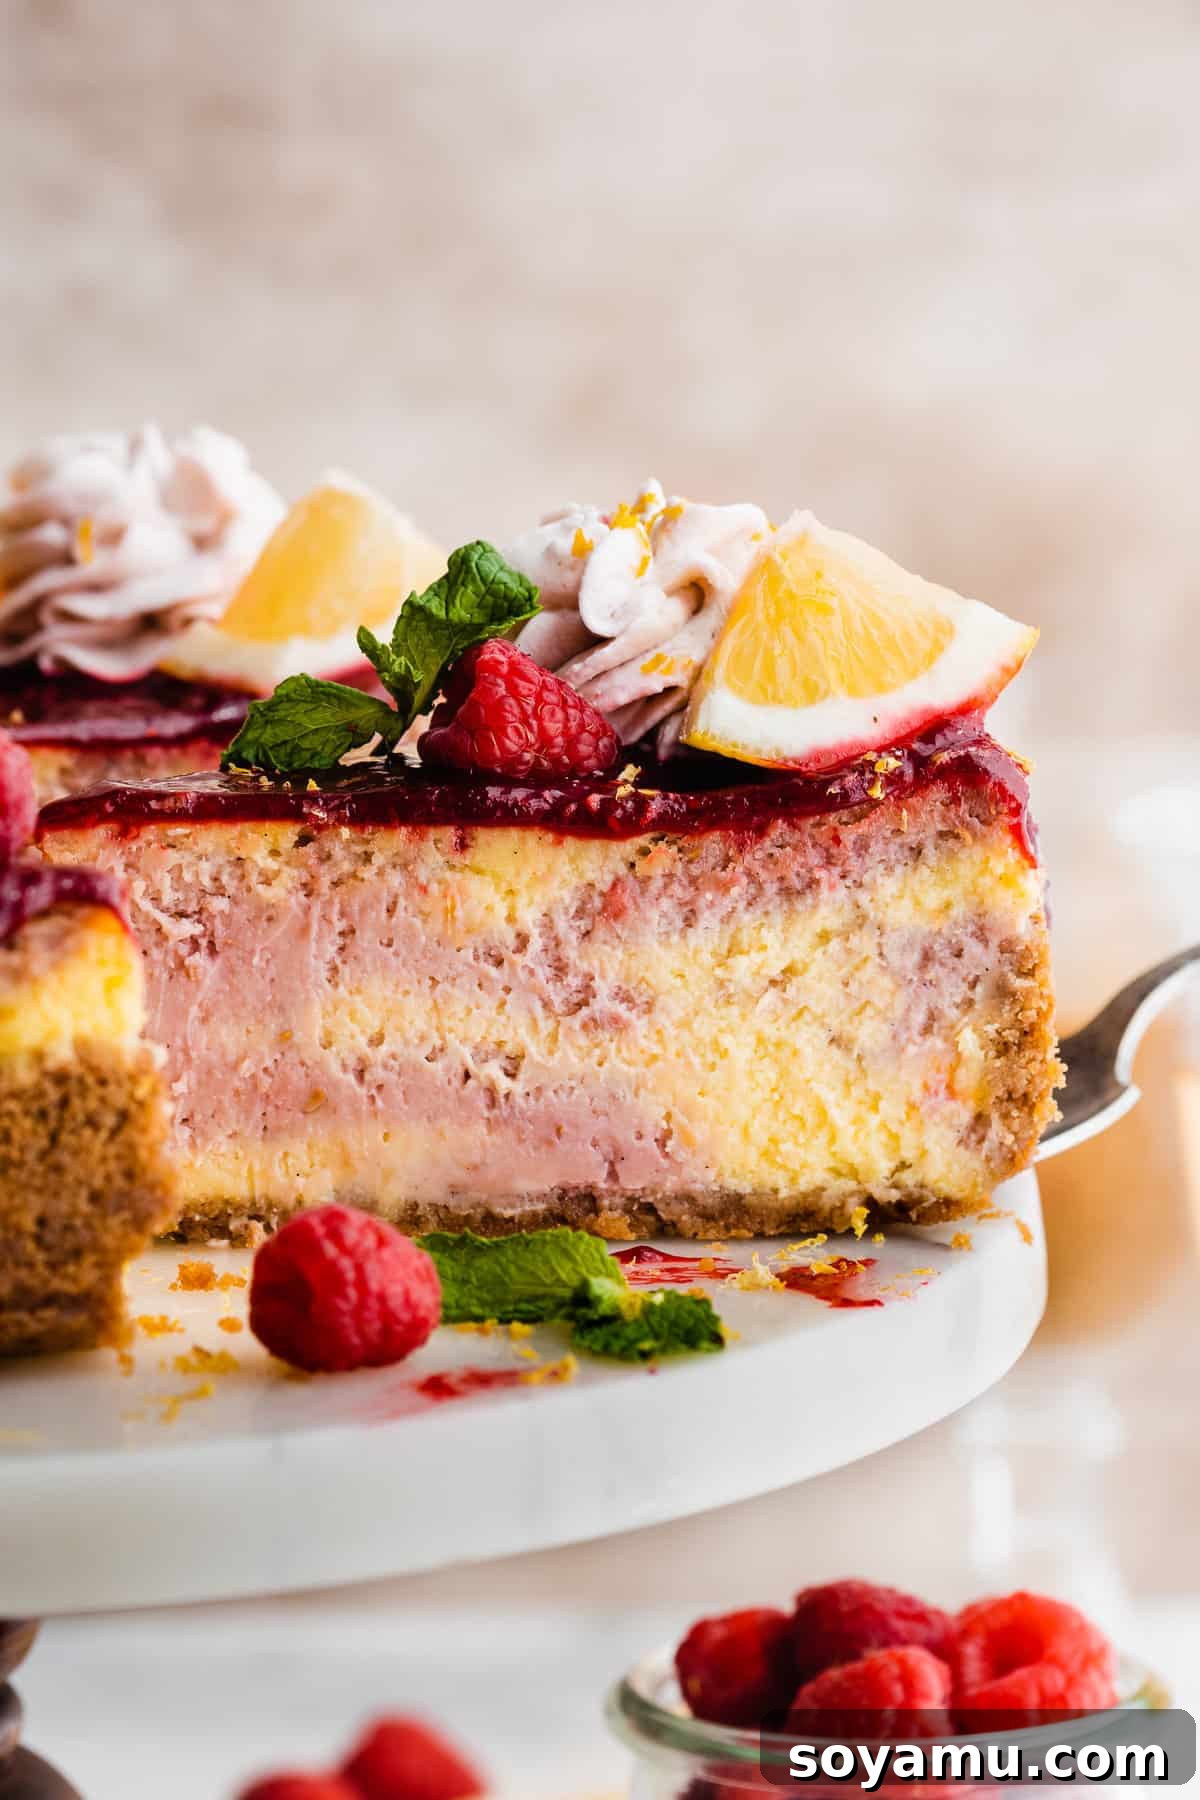
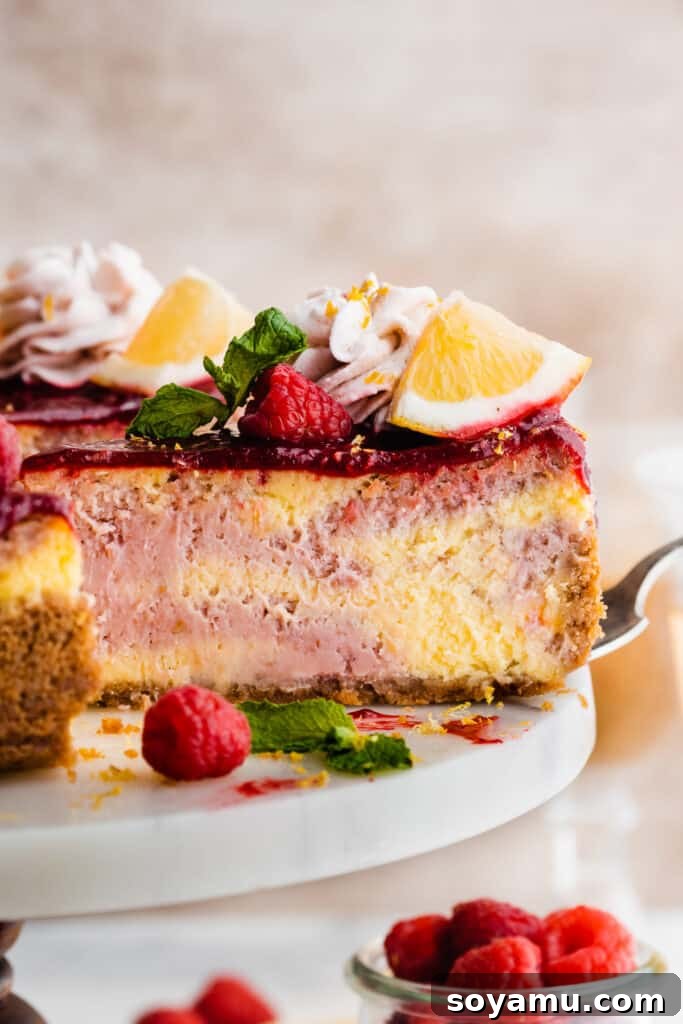
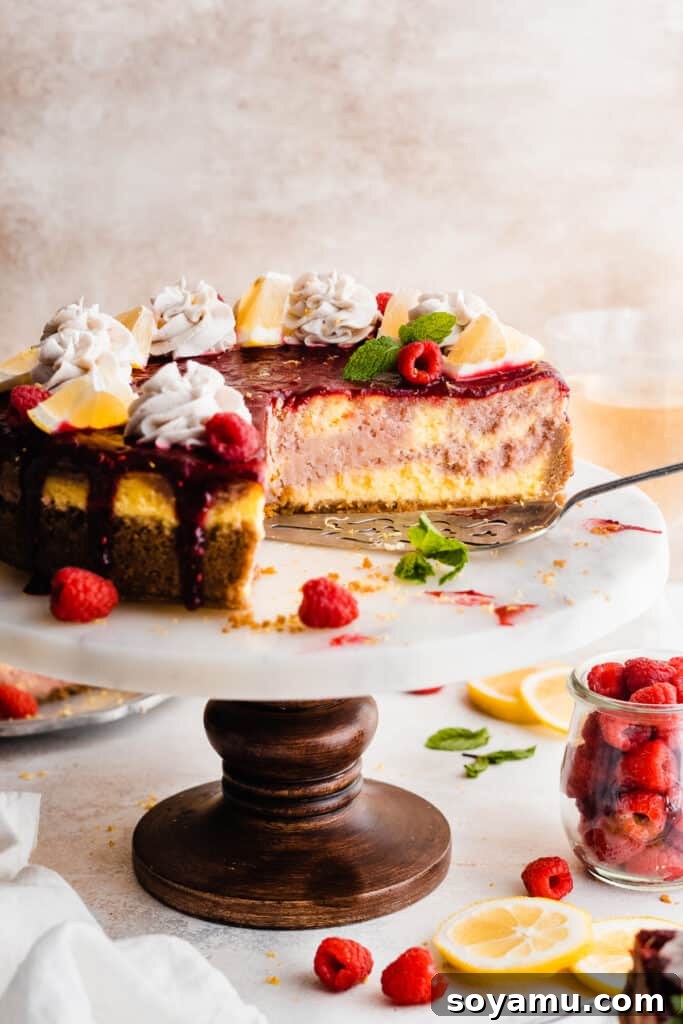
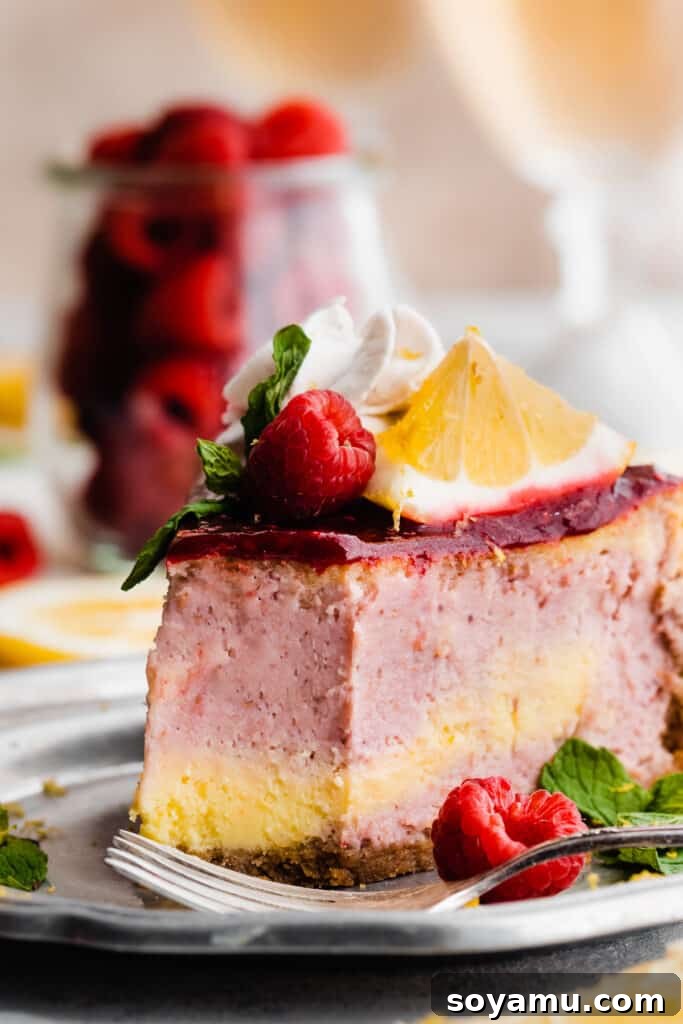
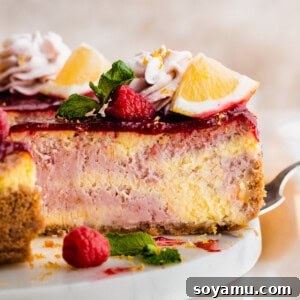
Prepare to be enchanted by a dessert that perfectly captures the vibrant essence of summer: our Raspberry Lemonade Cheesecake. This culinary masterpiece boasts a delightful crisp graham cracker crust, forming the ideal foundation for its star attraction – a lusciously creamy cheesecake filling. What makes it truly special is the elegant swirl of bright, tangy lemon cheesecake harmoniously intertwined with sweet, refreshing raspberry cheesecake. To elevate this extraordinary dessert further, it’s generously topped with a homemade raspberry sauce and a cloud of fluffy raspberry whipped cream. Every single bite is a burst of flavor, reminiscent of a refreshing glass of raspberry lemonade, making it an unforgettable treat for any occasion.
Why You’ll Adore This Raspberry Lemonade Cheesecake
This isn’t just any cheesecake; it’s an experience. From its stunning appearance to its complex yet balanced flavor profile, here are the compelling reasons why this Raspberry Lemonade Cheesecake will become your new favorite dessert:
- An Unforgettable Raspberry Lemonade Flavor Profile: Imagine your favorite summertime drink, transformed into a decadent dessert. Each forkful delivers a refreshing symphony of flavors, where the tartness of fresh lemon perfectly balances the sweet and slightly tangy notes of ripe raspberries. It’s light, vibrant, and surprisingly refreshing, offering a sophisticated twist on classic cheesecake that will delight your palate. This unique blend makes it stand out from traditional fruit cheesecakes. (If you’re a true lemon aficionado, you might also love our Lemon Meringue Cheesecake!)
- Achieve Unrivaled Creamy Perfection: Forget dry or crumbly cheesecakes. This recipe is meticulously crafted to ensure the most incredibly creamy, smooth, and luscious texture imaginable. We guide you through every step to prevent common cheesecake pitfalls, promising a melt-in-your-mouth experience that is truly foolproof. The rich, velvety consistency is a hallmark of a perfectly baked cheesecake, and this recipe delivers it every time.
- An Approachable Recipe for Every Baker: Don’t let the elegant appearance fool you. While this cheesecake features several distinct components – the crust, two flavored batters, raspberry sauce, and whipped cream – each step is straightforward and designed to be completely manageable for bakers of all skill levels. With clear instructions and helpful tips, you’ll feel confident creating a show-stopping dessert that looks and tastes like it came from a professional patisserie. Enjoy the rewarding process of baking a homemade masterpiece!
Ingredient Spotlight: What You’ll Need for Success
Crafting the perfect Raspberry Lemonade Cheesecake begins with understanding the role of each ingredient. Below is a detailed overview of the key components. Remember, for precise measurements and comprehensive directions, always refer to the full recipe card at the conclusion of this article.
- Cream Cheese: The backbone of any great cheesecake! Always opt for full-fat, block-style cream cheese. Avoid spreadable tub varieties, as they contain added water that can compromise the texture. Crucially, ensure your cream cheese is at room temperature before mixing. This allows it to cream smoothly with sugar, preventing lumps and ensuring a velvety, uniform batter.
- Eggs: Large eggs, also at room temperature, are essential. Room temperature eggs emulsify more effectively with the cream cheese and sugar, creating a cohesive and stable batter. This helps prevent cracks and ensures a consistently smooth cheesecake.
- Sour Cream: Full-fat sour cream, brought to room temperature, adds a delicate tang and a remarkable richness to the cheesecake batter. It contributes to the signature creamy texture and helps tenderize the cheesecake, preventing it from becoming rubbery.
- Vanilla Extract: Use a high-quality, pure vanilla extract. Its warm, aromatic notes beautifully complement the bright fruit flavors, adding depth and complexity to the overall taste profile.
- Butter: For the graham cracker crust, we recommend using salted butter for an enhanced flavor depth that contrasts wonderfully with the sweet filling. However, if you prefer to control the salt content, unsalted butter is a perfectly acceptable alternative. Ensure it’s melted for easy incorporation into the crumbs.
- Raspberries: Both fresh or frozen raspberries work perfectly for the homemade raspberry sauce. If you’re using frozen berries, there’s no need to thaw them beforehand; they can go directly into the saucepan, making this recipe even more convenient. Fresh raspberries are also ideal for garnishing.
- Lemons: You’ll need fresh lemons for both their zest and juice. The zest provides aromatic oils that infuse a bright, concentrated lemon flavor, while the juice delivers the essential tangy acidity that defines the “lemonade” aspect of this cheesecake.
- Granulated Sugar: Essential for sweetness in both the cheesecake filling and the raspberry sauce.
- Graham Cracker Crumbs: The foundation of our crisp crust. You can either pulse whole graham crackers in a food processor until finely ground or purchase pre-crushed graham cracker crumbs for convenience.
- Corn Starch: A small amount of corn starch is used in the raspberry sauce to help thicken it to the perfect drizzling consistency.
- Powdered Sugar & Heavy Cream: These form the base for our light and airy raspberry whipped cream, providing a delicate sweetness and rich texture.
Recipe Variations and Adaptations
While this Raspberry Lemonade Cheesecake recipe is perfect as is, it’s also incredibly versatile. Feel free to explore these delightful variations to suit different dietary needs or taste preferences:
- Gluten-Free Option: Making this cheesecake gluten-free is incredibly simple! Just substitute traditional graham crackers with your favorite brand of gluten-free graham crackers for the crust. The rest of the recipe remains naturally gluten-free.
- Convenient Raspberry Preserves: If time is of the essence or you prefer a shortcut, you can easily use store-bought raspberry preserves instead of making the homemade raspberry sauce. For the best flavor and texture, we recommend choosing a high-quality preserve over standard jam, as preserves typically have a richer fruit flavor and more desirable consistency. If you prefer a smoother sauce, strain the preserves to remove any seeds.
- Pure Raspberry Indulgence: For those who simply can’t get enough raspberry, you can easily transform this into an all-raspberry cheesecake. Instead of dividing the batter, keep it as one and incorporate an additional 1/2 cup of raspberry preserves into the entire cheesecake mixture. You can also increase the amount of freeze-dried raspberry powder for an intensified berry flavor.
- Add a White Chocolate Swirl: For an extra layer of decadence, melt 4 ounces of good quality white chocolate and swirl a portion into the plain cheesecake batter before adding the raspberry sauce, or incorporate it into the lemon batter for a subtle sweetness.
- Citrus Twist: Experiment with other citrus flavors! A lime or orange twist can offer a different dimension. Replace lemon juice and zest with fresh lime or orange juice and zest for a delightful change.
How to Make This Divine Raspberry Lemonade Cheesecake:
Creating this stunning cheesecake is a journey of simple, yet precise steps. Follow along to craft your own masterpiece:
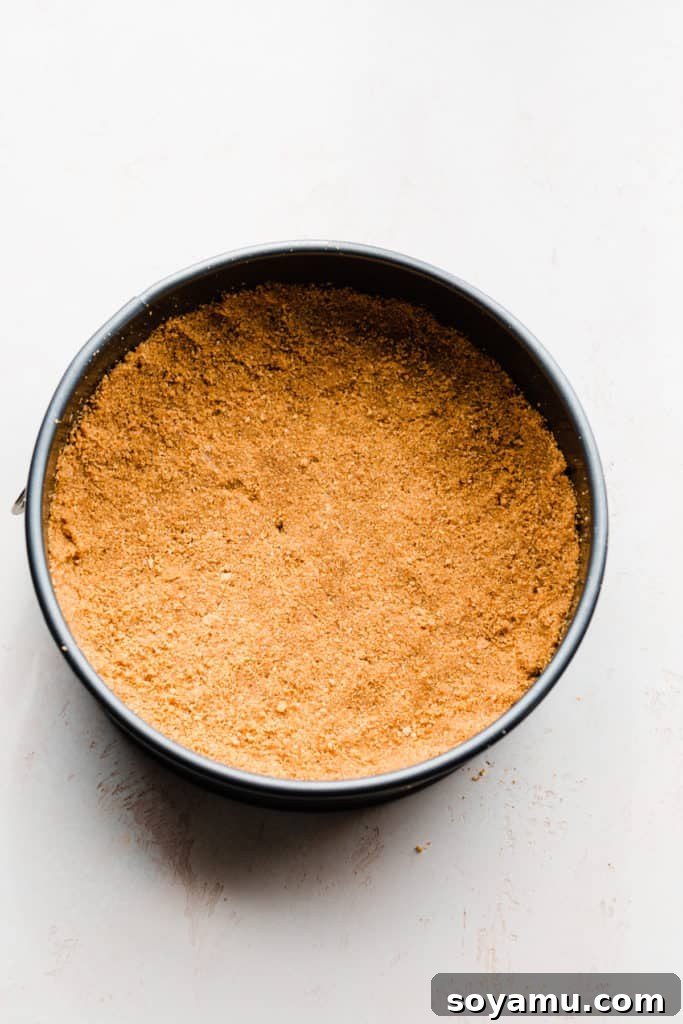
Step 1: Prepare and Bake the Golden Graham Cracker Crust. Begin by combining finely crushed graham cracker crumbs with melted butter and a touch of sugar. The key to a perfect crust is ensuring the mixture resembles wet sand – it should hold together when pressed. Press this mixture firmly and evenly into the bottom and slightly up the sides of a greased 9-inch springform pan. This firm pressing is crucial to prevent the crust from crumbling after baking. Bake the crust for approximately 8-10 minutes until lightly golden and fragrant. This pre-baking step helps to set the crust, making it deliciously crisp and preventing it from becoming soggy once the cheesecake filling is added. Once baked, set it aside to cool completely while you prepare the filling. Tip: For perfectly fine crumbs, pulse whole graham crackers in a food processor. Alternatively, many stores offer pre-crushed graham cracker crumbs for added convenience.
Step 2: Craft the Silky Smooth Cheesecake Batter. In a large mixing bowl, using an electric mixer fitted with the paddle attachment (or a stand mixer), beat the softened, full-fat cream cheese on high speed for 1-2 minutes until it becomes incredibly smooth and creamy, with no lumps remaining. This initial creaming is vital for a lump-free cheesecake. Next, gradually add the granulated sugar, mixing until it’s thoroughly incorporated and the mixture is light and fluffy. Then, add the large, room-temperature eggs one at a time, mixing on medium speed just until each egg is combined. Be careful not to overmix at this stage, as too much air can cause cracks later. Scrape down the sides and bottom of the bowl frequently to ensure everything is evenly mixed. Finally, gently mix in the room-temperature sour cream and pure vanilla extract until just combined, creating a luxurious, silky-smooth batter. A few tiny lumps at this stage are perfectly fine.
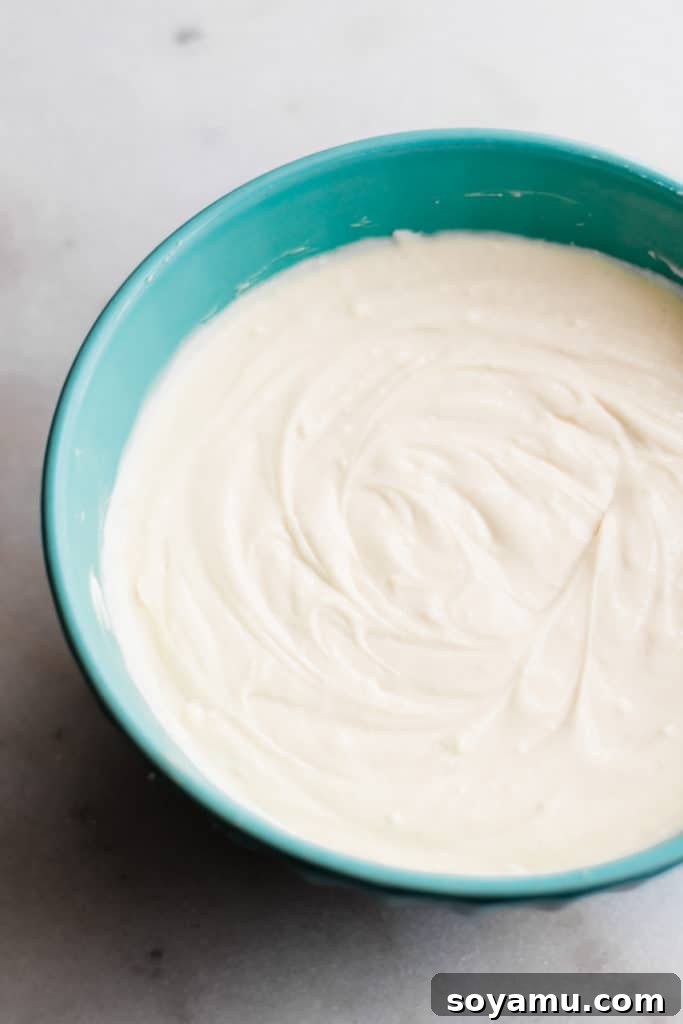
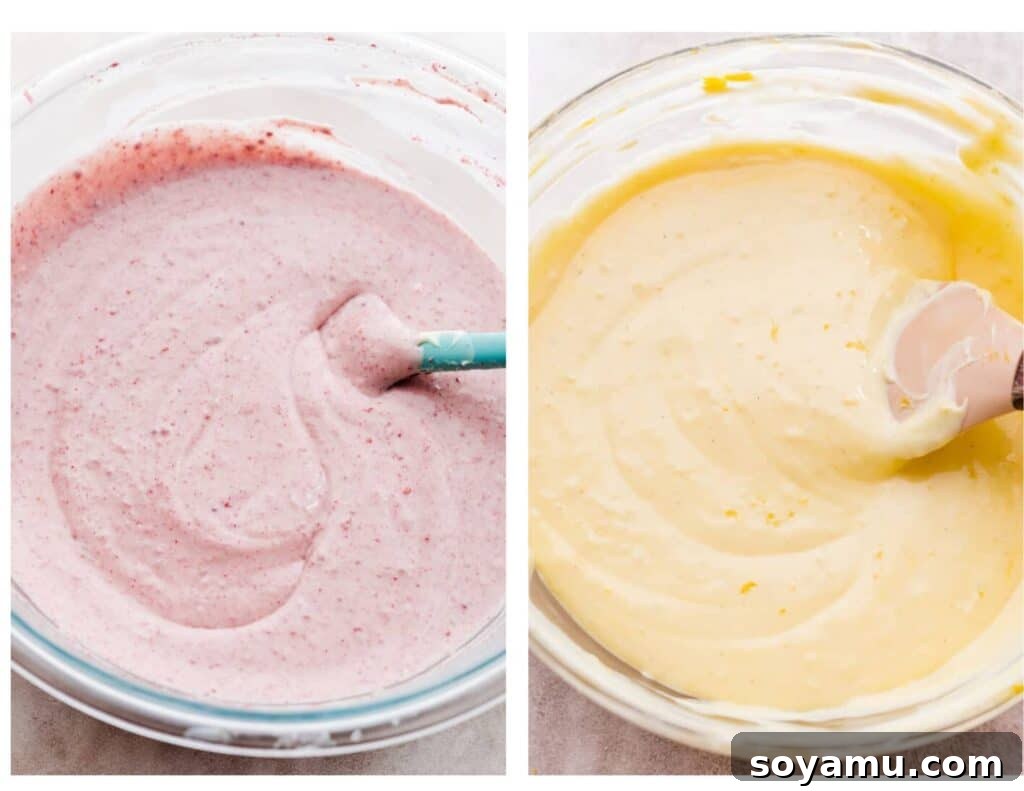
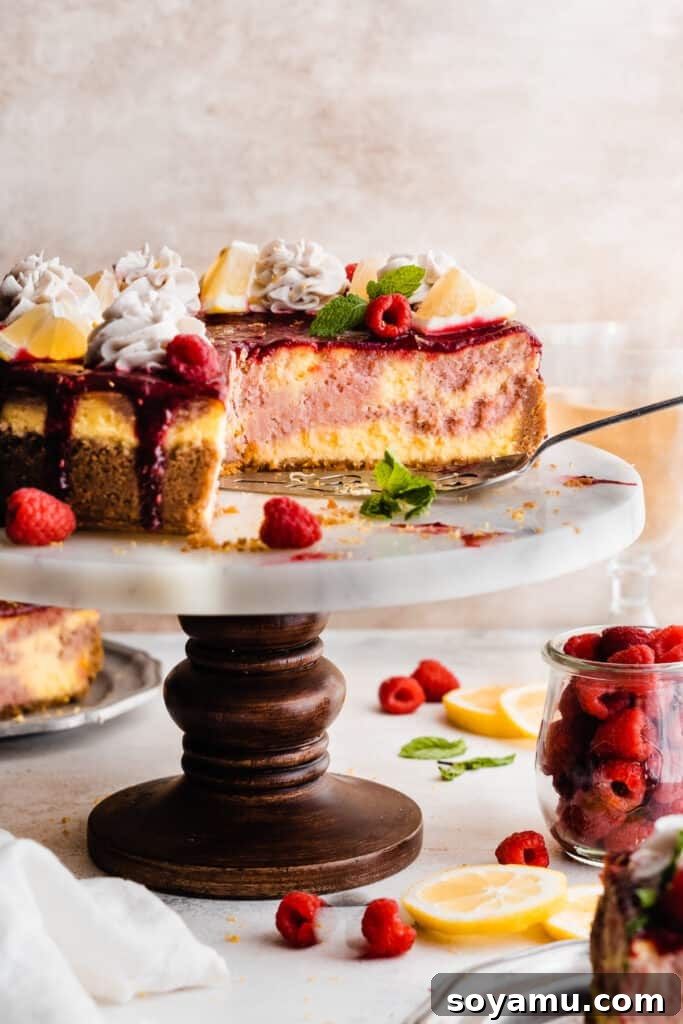
Step 3: Divide and Infuse with Raspberry and Lemon Flavors. Carefully divide the prepared cheesecake batter. Portion about 2.5 cups of the batter into a separate medium bowl. To this portion, add the fresh lemon juice and lemon zest, stirring gently with a silicone spatula until thoroughly combined. For an even more vibrant appearance, you can add a tiny drop of yellow food coloring (this step is entirely optional). To the larger portion of remaining batter, fold in the homemade raspberry sauce (or strained raspberry preserves) and the freeze-dried raspberry powder. The freeze-dried raspberries intensify the natural berry flavor and add a beautiful depth of color. Stir until the raspberry sauce is evenly distributed, creating a gorgeous pink hue.
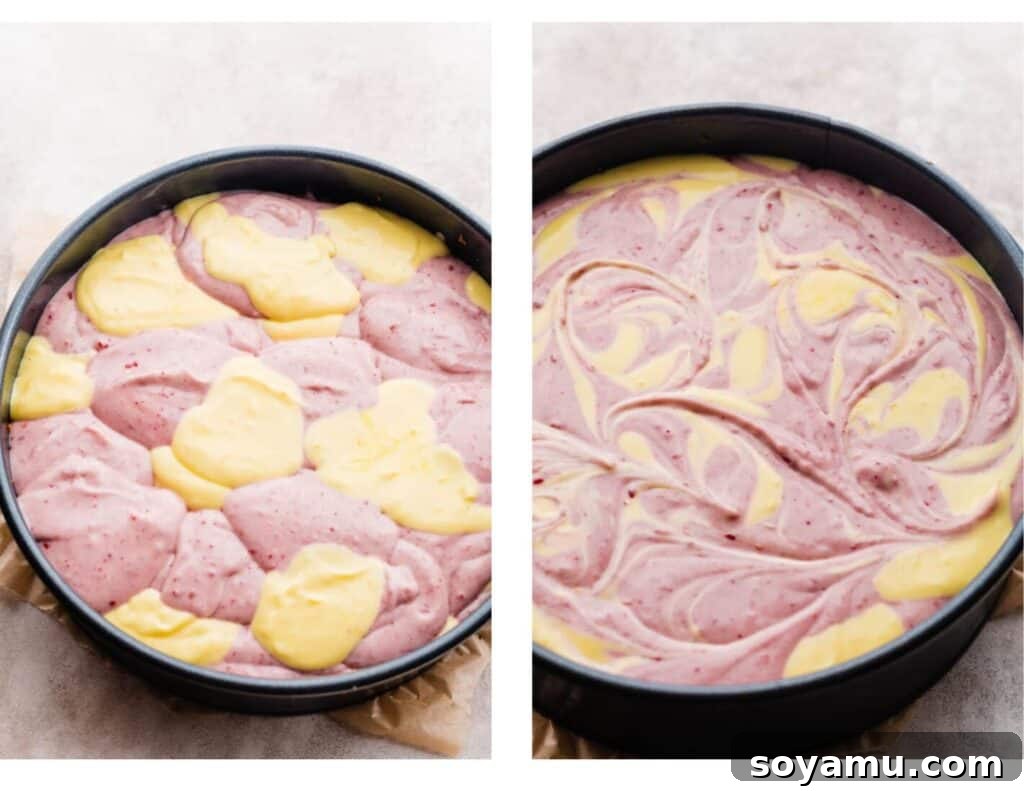
Step 4: Master the Art of Swirling for a Beautiful Design. Now comes the fun part! Begin layering the two distinct batters into your cooled graham cracker crust. Drop alternating dollops of the raspberry batter and the lemon batter evenly across the pan until all the batter has been used. Don’t worry about perfection at this stage. Once all the batter is in the pan, take a butter knife or a skewer and gently swirl the batters together. Move the knife through the batter in an ‘S’ shape or figure-eight pattern, ensuring you create beautiful, defined swirls without overmixing the colors. The goal is an artistic marble effect that showcases both the raspberry and lemon hues, making each slice a visual delight.
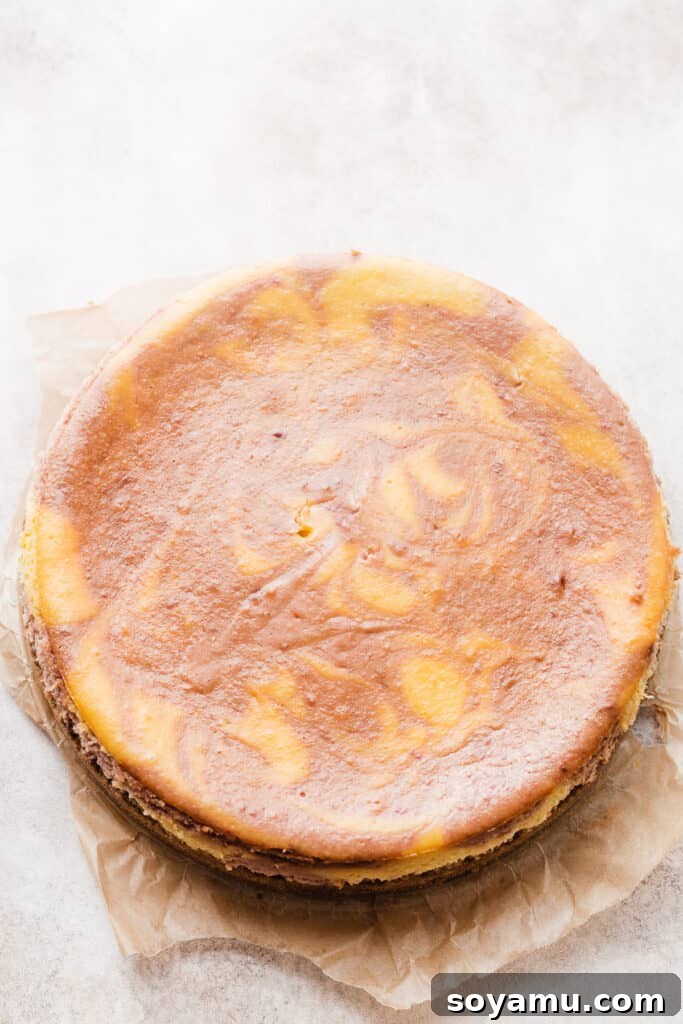
Step 5: Bake and Cool for the Perfect Set. Prepare your water bath (see expert tips and notes below for instructions on this crucial step). Place your springform pan carefully into the water bath. Bake the cheesecake as directed in the recipe card below, typically for 1 hour 40 minutes to 1 hour 51 minutes. During baking, the top surface of the cheesecake may dull slightly in color, but rest assured, the vibrant swirls will remain stunning on the inside. The cheesecake is ready when the edges are set and a knife inserted near the edge comes out clean, while the very center still has a slight, delicate wobble. This indicates it’s perfectly cooked. Once baked, turn off the oven and crack the oven door open, allowing the cheesecake to gradually cool inside the oven for 1 hour. This slow cooling prevents drastic temperature changes that can lead to cracks. After this hour, remove it from the oven and the water bath, and cool completely on a wire rack at room temperature. Then, cover it with foil and refrigerate for a minimum of 6 hours, or ideally overnight, to allow it to fully set and for the flavors to meld beautifully. This chilling period is non-negotiable for a perfect cheesecake texture.
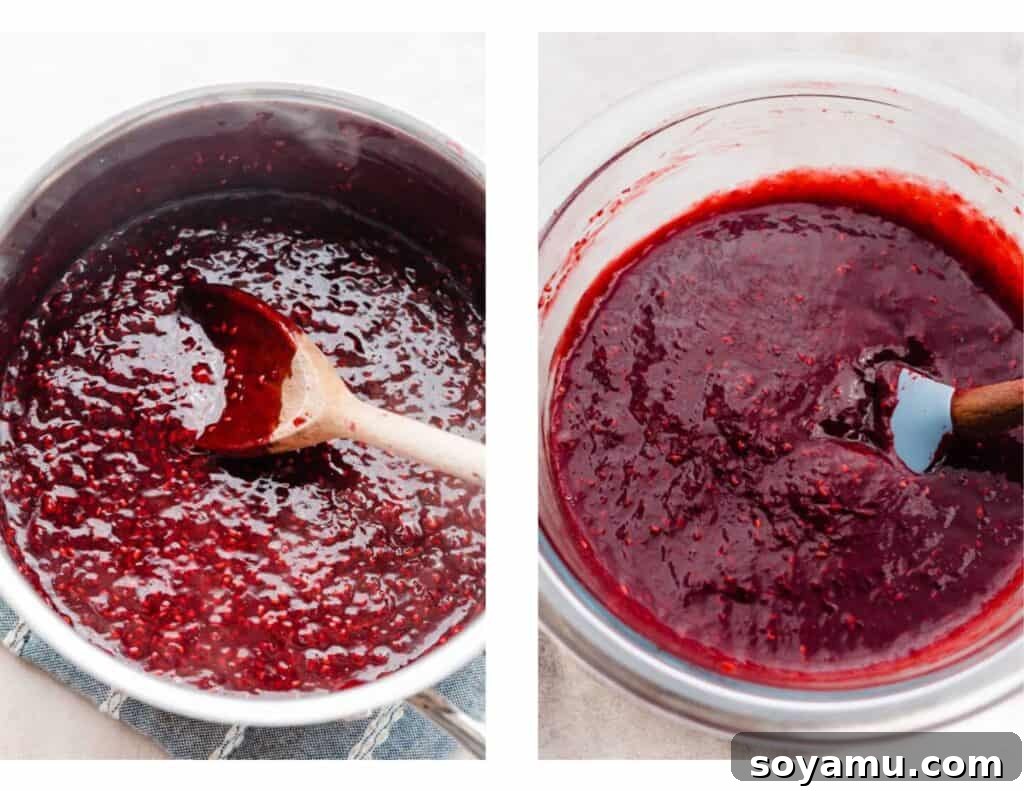
Step 6: Prepare the Luscious Raspberry Sauce. While your cheesecake bakes and chills, you can prepare the exquisite raspberry sauce that crowns this dessert. In a saucepan, combine fresh or frozen raspberries with a small amount of sugar, water, and corn starch. Cook this mixture over medium heat, stirring occasionally and gently mashing the berries to release their juices. Bring it to a gentle boil and continue to cook for about 3 minutes, allowing the sauce to thicken beautifully but not become overly gloppy. Remove the sauce from the heat and stir in a touch of vanilla extract and lemon juice for added brightness. For a perfectly smooth sauce, strain it through a fine-mesh sieve to remove most of the seeds. Transfer the strained sauce to a shallow bowl and chill it in the refrigerator until it’s ready to be poured over the cheesecake. This sauce can be made up to 3 days in advance.
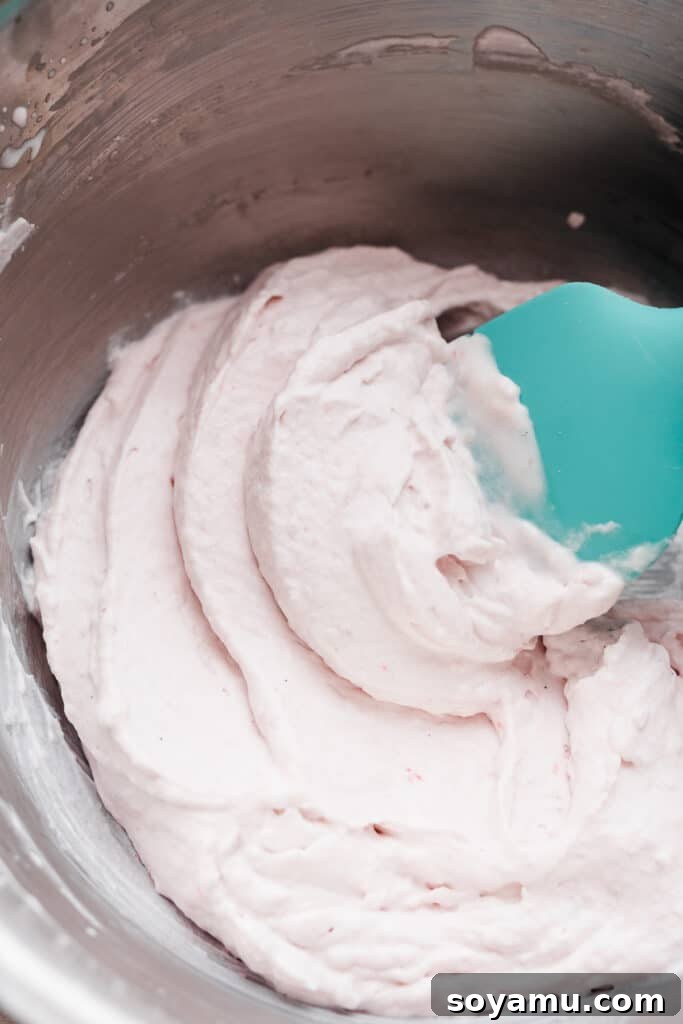
Step 7: Whip Up the Fluffy Raspberry Whipped Cream (Optional, but Recommended!). To complete your decadent dessert, prepare a batch of homemade raspberry whipped cream. In a medium bowl, combine cold heavy cream, powdered sugar, a splash of vanilla extract, and a small amount of your prepared raspberry sauce. Using an electric mixer, beat the ingredients on high speed until stiff peaks form. The raspberry sauce will infuse the cream with a delicate pink hue and a lovely fruity flavor. This whipped cream is perfect for piping decoratively onto the cheesecake or serving alongside individual slices. If you plan to pipe intricate designs and need extra stability, refer to the “Stabilizing Whipped Cream” note in the recipe card for a simple gelatin trick.
Serving and Storing Your Masterpiece
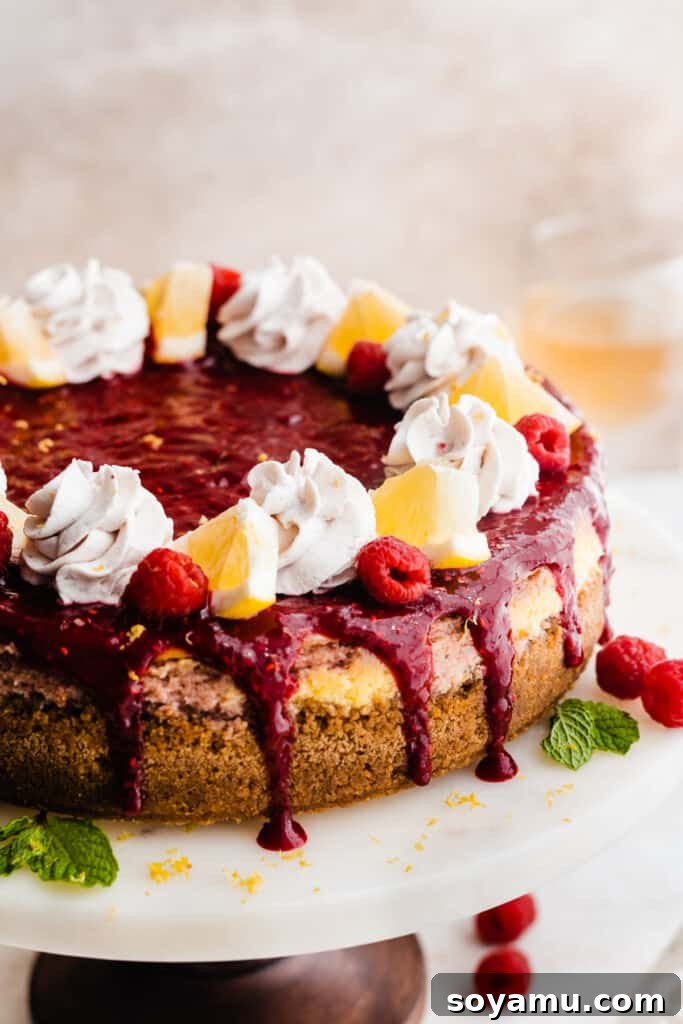
Once your Raspberry Lemonade Cheesecake is perfectly chilled and set, it’s time for the grand reveal! Carefully release the cheesecake from the springform pan. For a stunning presentation, gently pour the vibrant raspberry sauce over the top of the entire cooled cheesecake, allowing it to artfully cascade down the sides. Then, pipe generous dollops of the raspberry whipped cream around the edges or directly onto the sauced surface. Garnish with a scattering of fresh raspberries and thin lemon slices for an extra pop of color and freshness. Slice and serve immediately to enjoy its peak freshness and texture!
Storing Leftovers: Any leftover cheesecake should be stored in an airtight container in the refrigerator. It will maintain its exquisite flavor and creamy texture for 3-4 days. For longer storage, you can freeze individual slices (without the sauce and whipped cream) tightly wrapped in plastic wrap and then foil, for up to 1 month. Thaw in the refrigerator before serving. While freezing can slightly alter the crust’s crispness, it remains a viable option for enjoying this delicious treat later.
Expert Success Tips for a Flawless Cheesecake
Achieving cheesecake perfection isn’t difficult when you know a few key secrets. These expert tips will help you bake a beautiful, crack-free, and incredibly creamy Raspberry Lemonade Cheesecake every time:
- Room Temperature Ingredients are Non-Negotiable: This is arguably the most critical tip for any cheesecake! Ensure your cream cheese, eggs, and sour cream are at proper room temperature (about 68-70°F or 20-21°C). Cold ingredients will not emulsify properly, leading to a lumpy batter and a cheesecake with an inconsistent, potentially grainy texture. Plan ahead and take them out of the refrigerator at least 1-2 hours before you begin baking.
- Avoid Overmixing the Batter: When adding ingredients, especially after the eggs, mix only until just combined. Overmixing incorporates too much air into the batter. This air expands rapidly during baking, causing the cheesecake to puff up, then collapse and potentially crack as it cools. A gentle hand will yield a denser, smoother, and crack-free cheesecake.
- Do Not Overbake Your Cheesecake: Overbaking is a common culprit for dry, rubbery cheesecakes and visible cracks. Look for specific doneness cues: the edges should appear set, while the very center (about a 2-inch diameter) should still have a slight, gentle wobble. A knife inserted near the edge should come out clean. Remember, cheesecake continues to set as it cools. Follow the baking and cooling instructions in the recipe card precisely. A slight browning on top is normal and does not necessarily mean it’s overbaked inside.
- Embrace the Water Bath: A water bath (bain-marie) is your best friend for cheesecake baking. It creates a moist, even heat environment in the oven, which prevents the cheesecake from drying out, overcooking, and most importantly, cracking. It also contributes to that signature silky-smooth texture. While it might seem like an extra step, it makes all the difference in achieving a professional-looking result.
- Invest in an Oven Thermometer: Oven temperatures can be notoriously inaccurate, sometimes varying by as much as 50 degrees Fahrenheit. An inexpensive oven thermometer will provide you with the true temperature of your oven, ensuring consistent and predictable baking results for all your recipes.
- Use a Kitchen Scale for Accuracy: Especially when baking, exact measurements can significantly impact the outcome. A food scale is the most precise way to measure dry ingredients like flour or graham cracker crumbs, as cup measurements can vary widely based on how ingredients are scooped and packed. This ensures your crust and batter have the correct ratios for optimal texture.
- Patient Cooling is Key: After baking, resisting the urge to immediately remove the cheesecake from the oven is crucial. The gradual cooling in the oven, followed by cooling at room temperature and then thorough chilling in the refrigerator, allows the cheesecake to set properly and prevents cracking.
FAQs: Your Cheesecake Questions Answered
Here are some common questions about making and enjoying this Raspberry Lemonade Cheesecake:
Absolutely! This recipe can be easily halved. We recommend baking it in an 8×8 or 9×9 inch square pan to create delicious Raspberry Lemonade Cheesecake Bars. Adjust the baking time to approximately 30-42 minutes, and check for doneness using the same method (set edges, slight wobble in the center).
Yes, chilling is absolutely essential for cheesecake! It’s an integral part of the setting process. After it’s baked and cooled to room temperature, you must transfer it to the fridge to chill for at least 6 hours, or ideally, up to 1 full day before serving. This chilling time allows the cheesecake to firm up, develop its rich flavor, and achieve its signature dense, creamy texture.
You can indeed freeze this cheesecake, but with a few considerations. It’s best to freeze it without the raspberry sauce and whipped cream toppings. Wrap individual slices or the whole cheesecake (if untoppped) tightly in plastic wrap, then an additional layer of aluminum foil, to prevent freezer burn. While the flavor will largely be preserved, you might notice a slight loss of crispness in the crust upon thawing. For the freshest taste and best texture, serving it freshly baked and chilled is always recommended, so freeze only if you’re in a pinch or need to extend its shelf life.
Cheesecake cracks are often caused by overbaking, overmixing the batter (which incorporates too much air), or drastic temperature changes during cooling. Ensuring ingredients are at room temperature, not overmixing, using a water bath, and allowing the cheesecake to cool gradually in the oven before refrigerating are the best ways to prevent cracks.
Yes, the homemade raspberry sauce is perfect for making in advance! You can prepare it up to 3 days before assembling and serving your cheesecake. Store it in an airtight container in the refrigerator. This can help streamline your baking process on the day of serving.
Essential Tools for Cheesecake Baking
Having the right equipment can make all the difference in your cheesecake baking experience. While some tools are optional, these are highly recommended for achieving the best results:
- 9-inch Springform Pan: This recipe specifically calls for a 9-inch springform pan. Its removable sides are indispensable for easy unmolding of the delicate cheesecake without damaging its beautiful structure.
- Electric Mixer (Handheld or Stand Mixer): Essential for thoroughly creaming the cream cheese and incorporating ingredients smoothly. A stand mixer with a paddle attachment makes the process effortless.
- Food Processor: Ideal for quickly crushing graham crackers into fine, even crumbs for the crust.
- Fine-Mesh Sieve: Perfect for straining the raspberry sauce to achieve a smooth, seedless consistency.
- Lemon Zester/Grater: For effortlessly zesting fresh lemons, which releases their fragrant oils into the batter.
- Roasting Pan (for Water Bath): A large roasting pan or any oven-safe baking dish that can comfortably fit your springform pan is needed for the crucial water bath.
- Oven Thermometer: As mentioned in our tips, an oven thermometer ensures your oven’s temperature is accurate, preventing common baking mishaps.
- Kitchen Scale: For precise measurement of dry ingredients like graham cracker crumbs, ensuring consistent results.
More Irresistible Cheesecake Recipes to Love
If you’ve fallen in love with this Raspberry Lemonade Cheesecake, you’ll be thrilled to discover more delightful cheesecake creations:
- Mini S’mores Cheesecakes with Toasted Marshmallow Meringue
- Perfect Classic Cheesecake with Homemade Strawberry Sauce
- Nutella Cheesecake with Nutella Ganache
- Chocolate Cherry Cheesecake
- Bailey’s Chocolate Cheesecake
- Biscoff Cheesecake
- Boozy Key Lime Rum Cheesecakes
Did you craft this delightful recipe? We’d love to hear from you!
Your feedback is invaluable to our small business. Please take a moment to leave a comment and a star rating below, sharing your experience and how much you enjoyed the recipe. Your ratings truly help us grow!
Raspberry Lemonade Cheesecake
Stephanie Simmons
45
1
45
12 to 16 slices
Ingredients
For the Raspberry Sauce
- 3 and 1/2 cups raspberries, fresh or frozen (do not thaw if frozen)
- 1 tbsp water
- 2 tsp corn starch
- 1/3 cup granulated sugar
- 1 tsp lemon juice
- 1/2 tsp vanilla extract
- 1/2 tsp lemon zest
For the Crust
- 3 cups graham cracker crumbs (280 grams)
- 1/2 cup salted butter, melted (more as needed to reach a wet sand consistency)
For the Cheesecake
- 32 ounces full-fat cream cheese, room temperature (use block style)
- 1 large lemon, zested
- 1 and 1/2 cups granulated sugar
- 4 large eggs, at room temperature
- 1 cup sour cream, at room temperature
- 2 tsp vanilla extract
- 2 tbsp lemon juice
- 1/2 cup raspberry sauce (use homemade or strained store-bought raspberry preserves)
- 3/4 cup freeze-dried raspberries, pulsed to a powder in a food processor (measure while whole)
For the Raspberry Whipped Cream (Optional)
- 1/2 cup heavy cream, cold
- 2 tbsp powdered sugar
- 1 tsp vanilla extract
- 2 tsp raspberry sauce or preserves
- fresh raspberries, for topping – optional
- lemon slices, for topping – optional
Instructions
-
Make Raspberry Sauce: In a small bowl, stir together cornstarch and 1 tbsp water until the cornstarch is fully dissolved, creating a slurry. Add this cornstarch slurry, 3 1/2 cups raspberries, 1/3 cup granulated sugar, 1/2 tsp vanilla extract, and 1/2 tsp lemon zest (all ingredients for the sauce except the remaining vanilla and lemon juice) to a medium pot over medium heat. Cook for 2 minutes, stirring with a wooden spoon and lightly mashing the berries to help them release their juices. Bring to a gentle boil over medium heat and continue to cook at a low boil for 3 minutes. The sauce should visibly thicken during this time, but it should not become overly globby. Remove from heat and stir in the remaining vanilla and lemon juice. Pour the sauce into a shallow bowl and place it in the fridge to cool quickly. Taste the sauce and, if it’s too tart for your preference, stir in an additional 1-3 tablespoons of sugar. Make Ahead: This raspberry sauce can be prepared up to 3 days in advance and stored in the refrigerator. The yield is approximately 1 and 1/3 cup before straining, with a slight reduction of 2-3 tablespoons after straining.
Note: For a quicker option, you can skip making homemade sauce and use a jar of good quality raspberry preserves, if desired. If seeds bother you, strain the preserves once to remove most of them.
-
Make the Crust: Preheat your oven to 350° F (175°C). Lightly spray a 9-inch springform pan with nonstick cooking spray, ensuring the bottom is securely fastened. In a medium bowl, stir together the graham cracker crumbs and melted salted butter until well combined and the mixture resembles wet sand. Press this mixture firmly and evenly into the bottom of the prepared springform pan and slightly up the sides (refer to process photos above for visual guidance). Bake the crust for 10 minutes until lightly set and fragrant. Remove the crust from the oven and set it aside to cool completely. Keep your oven on at 350° F (175°C). While the crust cools, prepare for the water bath: fill a large pot with water and place it on your stove to bring to a boil; also get out a large roasting pan – these will be used for your water bath in a later step.
-
Make the Cheesecake Filling: It is crucial that your cold ingredients (cream cheese, eggs, sour cream) have come to room temperature before you begin this step. In a large mixing bowl, using an electric mixer, cream the softened full-fat cream cheese on high speed for 1-2 minutes until it is beautifully smooth and creamy, with no lumps. In a separate small bowl, rub the lemon zest into the granulated sugar with your fingers until the sugar is fragrant and has a wet sand consistency; this helps to release the lemon’s essential oils and infuse the sugar with flavor. Add the lemon-infused sugar to the cream cheese mixture and mix on medium speed until well incorporated, making sure to scrape down the bowl frequently to ensure even mixing. Add the large, room-temperature eggs one at a time, mixing on medium speed after each addition only until just incorporated. Avoid overmixing once the eggs are added. Scrape the bottom and sides of the bowl thoroughly to ensure no chunks of unmixed batter are hiding.
Finally, add the vanilla extract and room-temperature sour cream, mixing on low speed just until they are fully incorporated into the batter. Do not overmix. Now, divide the batter: remove 2 and 1/2 cups of batter (approximately 560 grams) and transfer it to a medium bowl. To this smaller portion, gently fold in 2 tablespoons of fresh lemon juice and the remaining lemon zest with a silicone spatula. To the larger bowl containing the remaining plain batter, fold in the 1/2 cup of prepared raspberry sauce (or strained raspberry preserves) and the 3/4 cup of freeze-dried raspberry powder until fully combined and the batter takes on a lovely pink hue.
-
Swirl the Batters & Prepare the Water Bath: Layer the two distinct batters into your baked and cooled graham cracker crust. Drop alternating dollops of the raspberry batter and the lemon batter, distributing them evenly across the pan until all the batter has been used. Take a butter knife or a thin skewer and gently swirl the batters together in an ‘S’ pattern or figure-eight motion. Do this carefully to create beautiful, distinct marbled swirls without completely blending the colors.
Prepare the Water Bath + Bake: Ensure your large pot of water is boiling. To set up the water bath for leak prevention, you have two options: either wrap the base of your springform pan tightly in several layers of heavy-duty aluminum foil (covering the bottom and extending up the sides), and then place it directly into the roasting pan. Or, for extra security, place the foil-wrapped springform pan inside a slightly larger (e.g., 10-inch) cake pan, and then place this entire assembly into the roasting pan. Position a rack in the center of your oven. Place the roasting pan (with the cheesecake pan inside) onto this center rack. Carefully pour the boiling water into the roasting pan, ensuring it comes halfway up the sides of the cheesecake pan (or the larger cake pan if using). This creates a moist, even baking environment.Bake for 1 hour 40 minutes to 1 hour 51 minutes. The cheesecake is done when the edges are set and firm, but the center (about a 2-inch diameter) still has a slight, delicate wobble. A knife inserted into the edge will come out clean, but a knife inserted into the very center will have a bit of thick batter clinging to it. Once baked, turn off the oven and crack the oven door open slightly. Allow the cheesecake to cool gradually in the oven for 1 hour before removing it. This slow cooling prevents cracking.
-
Cheesecake Cooling & Chilling: After the hour of cooling in the oven is complete, carefully remove the entire roasting pan from the oven. The springform pan should be cool enough to handle. Remove the foil wrapping from the springform pan and gently lift the cheesecake out of the water bath. Place the springform pan onto a wire rack to cool completely at room temperature. This can take several hours. Once the cheesecake has reached room temperature, cover it loosely with aluminum foil and transfer it to the refrigerator. It must chill for at least 6 hours, or ideally overnight (up to 1 day), before you attempt to remove it from the pan and slice. This prolonged chilling period is crucial for the cheesecake to firm up, set properly, and for its flavors to fully develop.
-
Make the Raspberry Whipped Cream: In a medium bowl, combine the cold heavy cream, powdered sugar, vanilla extract, and the 2 teaspoons of raspberry sauce (or preserves). Using an electric mixer (handheld or stand mixer with whisk attachment), beat on high speed until stiff peaks form. The whipped cream should be light, airy, and hold its shape. If you intend to pipe this whipped cream for decoration, you may wish to stabilize it – please refer to the “Stabilizing Whipped Cream” note in the recipe notes section below for instructions.
-
Serve & Store: Once the cheesecake is thoroughly chilled and ready to serve, carefully remove it from the springform pan. Gently pour the prepared, chilled raspberry sauce generously over the top of the cheesecake. Then, pipe the raspberry whipped cream decoratively around the edges or in dollops across the surface. For an extra touch of elegance and freshness, garnish with fresh raspberries and thin lemon slices, if desired. Slice with a sharp knife (wiping the knife clean between each slice for neat cuts) and enjoy your magnificent Raspberry Lemonade Cheesecake! Store any leftovers in an airtight container in the refrigerator for 3-4 days.
Notes
Stabilizing Whipped Cream for Piping: If you wish to pipe your raspberry whipped cream and need it to hold its shape for an extended period, you can stabilize it with gelatin. To do this, combine 1/2 teaspoon of unflavored gelatin powder (found in the baking aisle) with 2 teaspoons of cold water in a small, microwave-safe bowl. Let it sit for 5 minutes to bloom (dissolve). Meanwhile, begin beating your heavy cream, powdered sugar, vanilla, and raspberry sauce as usual. Once the mixture just starts to thicken and before soft peaks begin to form, stop your mixer. Microwave the bloomed gelatin for 5-10 seconds until it becomes completely liquid (do not let it boil). With your mixer on low speed, slowly stream the liquified gelatin into the whipped cream mixture. Once added, increase the mixer speed to medium-high and continue beating until stiff peaks form. Now, your stabilized whipped cream is ready for elegant piping!
Nutrition
Serving: 1slice
,
Calories: 672kcal
,
Carbohydrates: 65g
,
Protein: 8g
,
Fat: 43g
,
Saturated Fat: 24g
,
Polyunsaturated Fat: 2g
,
Monounsaturated Fat: 11g
,
Trans Fat: 0.3g
,
Cholesterol: 178mg
,
Sodium: 395mg
,
Potassium: 387mg
,
Fiber: 2g
,
Sugar: 49g
,
Vitamin A: 1577IU
,
Vitamin C: 184mg
,
Calcium: 124mg
,
Iron: 4mg
Nutrition information is automatically calculated, so should only be used as an approximation.
Enjoyed this recipe? Leave a comment below!