
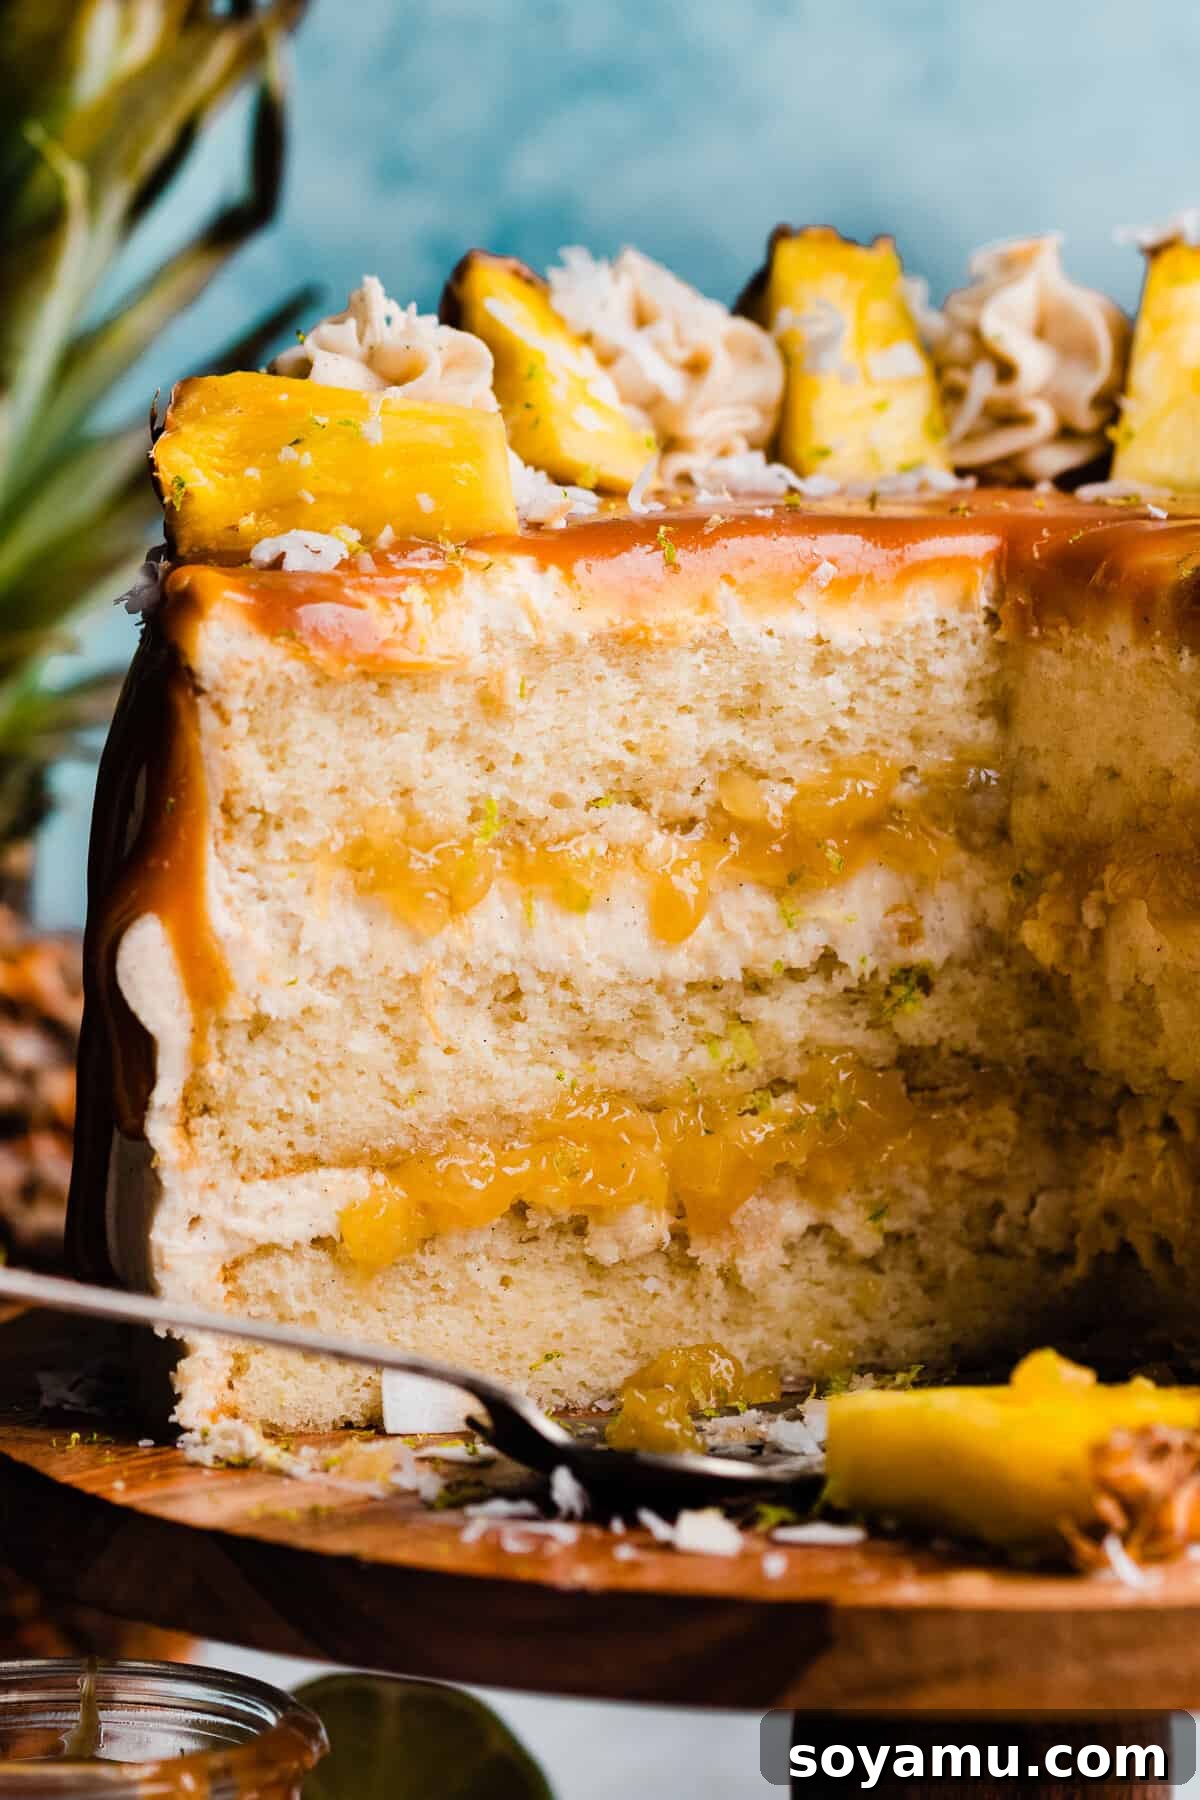
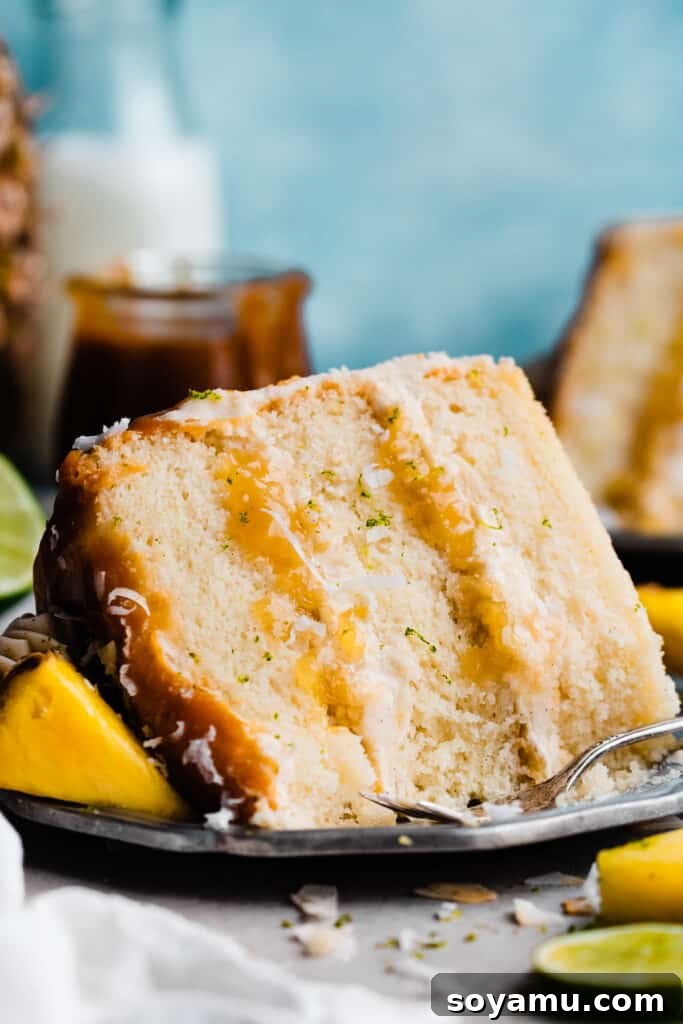
Prepare to be transported to a tropical paradise with every decadent bite of this spectacular Piña Colada Cake. Imagine layers of incredibly moist, rum-infused cake, generously filled with a luscious, sweet pineapple compote, and enrobed in a velvety smooth coconut rum frosting. To elevate this already stunning dessert to legendary status, we’ll crown it with a glistening pineapple caramel sauce. This isn’t just a cake; it’s a celebration of vibrant flavors and luxurious textures, promising to be the most unforgettable dessert you’ll ever create and share.
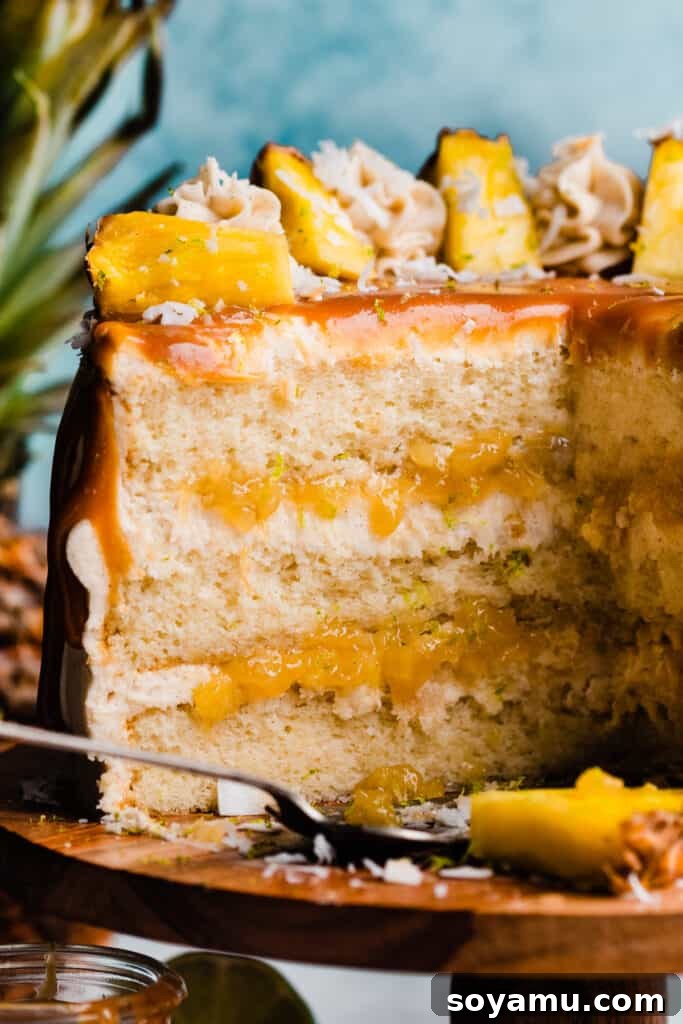
Why You’ll Adore This Tropical Piña Colada Cake:
- Exquisitely Fluffy Cake Layers – At the heart of this masterpiece are cake layers that are impossibly fluffy and moist, boasting a delicate vanilla flavor enhanced with the unmistakable notes of coconut rum. Each bite is tender, airy, and melts in your mouth, setting the perfect foundation for the tropical symphony of flavors.
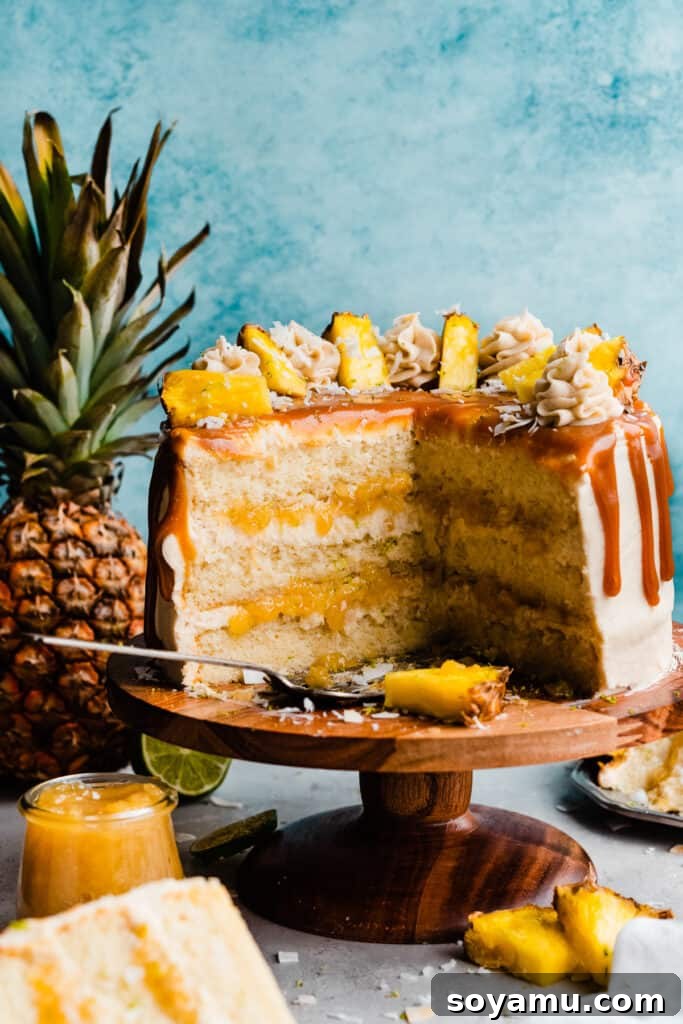
- Bursting with Pineapple Flavor – Nestled between these delightful cake layers is a homemade, sweet, and tangy pineapple filling. Crafted from crushed pineapple, it delivers an authentic, bright, and juicy burst of tropical goodness that perfectly complements the rich cake and creamy frosting, creating a harmonious balance.
- A Show-Stopping Celebration Cake – This Piña Colada Cake isn’t just delicious; it’s a visual spectacle. Its impressive height, beautiful layers, and elegant presentation make it the ideal centerpiece for any special occasion. Whether it’s a birthday, anniversary, holiday gathering, or just a treat to brighten your day, this unique cake is guaranteed to impress your guests and be the talk of the party.
- Silky Smooth Coconut Rum Frosting – The cake is generously covered in a luscious frosting that combines the richness of cream cheese with the classic tropical essence of coconut rum. This frosting is not overly sweet, offering a perfect counterpoint to the cake layers and pineapple filling, creating a truly irresistible experience.
- Unforgettable Pineapple Caramel Drizzle – To crown this majestic dessert, a warm, homemade pineapple caramel sauce cascades over the top, adding another layer of complex sweetness and a hint of fruity tang. This optional but highly recommended addition truly seals the deal, making every slice an extraordinary indulgence.
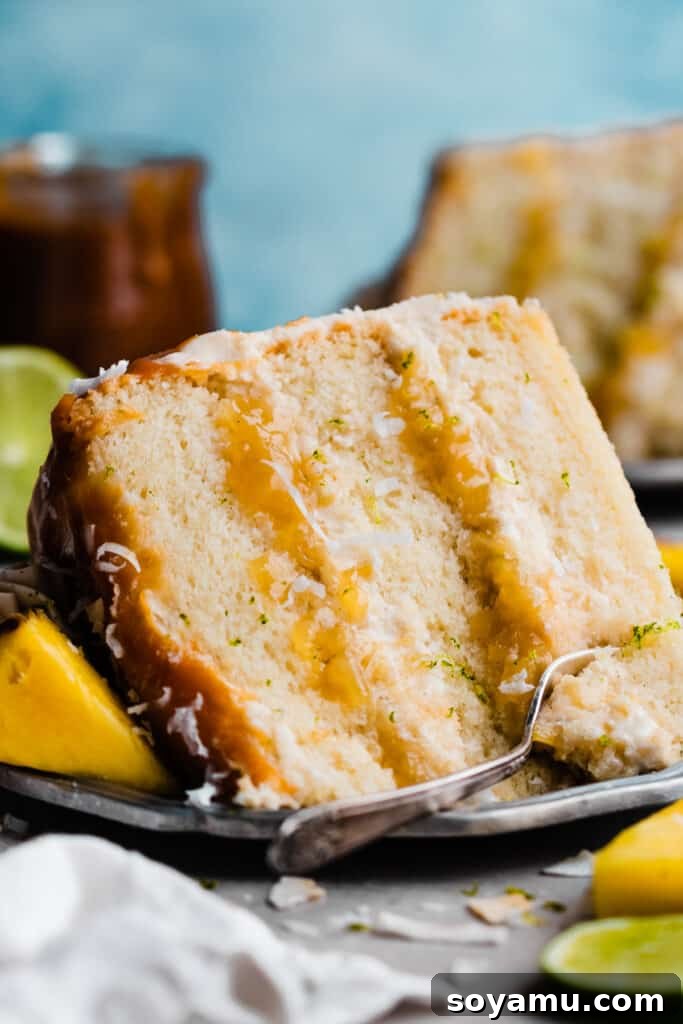
Piña Colada Cake Ingredient Overview:
Crafting this incredible Piña Colada Cake begins with selecting the right ingredients. Each component plays a vital role in achieving the perfect balance of flavor and texture, mirroring the refreshing tropical cocktail. Below, you’ll find a detailed look at the key ingredients and why they are essential for this recipe. For precise measurements and comprehensive directions, please refer to the complete recipe card located at the bottom of this post.
- Butter – We highly recommend using high-quality salted butter for this recipe, as it adds a subtle depth and richness that enhances the overall flavor profile of the cake layers and frosting. If unsalted butter is your preference or what you have on hand, simply add a small pinch of fine sea salt to balance the sweetness. Ensure your butter is softened to room temperature for optimal creaming, which is crucial for a light and airy cake batter.
- Egg Whites – Utilizing only large egg whites, rather than whole eggs, is a key technique for achieving the exceptionally light, airy, and tender crumb that defines this cake. The absence of egg yolks prevents the cake from becoming too dense or rich, allowing the delicate tropical flavors to shine through. Always use large eggs and bring the whites to room temperature for better volume and incorporation into the batter.
- Milk – We used 2% milk in this recipe, but whole milk would also work beautifully to add moisture and a touch of richness to the cake batter. The fat content in the milk contributes to the cake’s tender texture and helps to carry the flavors throughout. Ensure your milk is at room temperature to prevent it from seizing the butter mixture.
- Sour Cream – Full-fat sour cream is a secret weapon for creating an incredibly moist and tender cake. Its acidity reacts with the baking soda, promoting a superior rise, while its fat content contributes to a rich, velvety texture. Using full-fat sour cream at room temperature is essential for smooth incorporation into the batter without curdling. Greek yogurt can be a suitable substitute if needed.
- Cake Flour – For that signature light and delicate crumb, cake flour is indispensable. Its lower protein content compared to all-purpose flour results in a softer, more tender cake. Accurate measurement is crucial: always spoon and level your cake flour into the measuring cup, or for the most precise results, use a kitchen scale. One cup of cake flour typically weighs around 110 grams, significantly less than all-purpose flour (approximately 130 grams per cup), so exact measurement is vital to avoid a dense cake.
- Vanilla Extract – Since this cake celebrates simple yet robust flavors, the quality of your vanilla extract truly matters. Opt for pure vanilla extract over imitation vanilla to infuse the cake with a warm, complex, and aromatic base that perfectly complements the tropical notes of pineapple and coconut rum.
- Vegetable Oil – Incorporating vegetable oil alongside butter provides the best of both worlds. While butter delivers rich flavor, vegetable oil ensures an exceptionally moist and tender cake that stays fresh for longer. The combination results in a cake with a fine crumb that remains soft and delicate, even days after baking.
- Rum – The iconic Piña Colada flavor comes alive with the addition of rum. We specifically used Malibu coconut rum for its distinct tropical notes that enhance both the cake and frosting. However, any good quality light rum or white rum, such as Blue Chair Bay, would also be excellent. The alcohol content bakes out, leaving behind a delightful, aromatic essence.
Ingredient Substitutions:
While the original recipe for this Piña Colada Cake is meticulously crafted for optimal flavor and texture, we understand that sometimes substitutions are necessary. Here are some thoughtful alternatives that will help you achieve a delicious result without compromising too much on the cake’s integrity.
- Sour Cream – If sour cream isn’t available, full-fat Greek yogurt is an excellent alternative. It offers a similar tanginess and richness that contributes to the cake’s moisture and tender crumb. Ensure it’s at room temperature before incorporating it into the batter for best results and to prevent any textural issues.
- Flavor Alternatives – This cake serves as a fantastic base for various flavor combinations. While our focus is tropical, you could explore other avenues. Consider adding fruit preserves (such as mango or passion fruit) for an extra layer of fruity flavor, swirling them into the pineapple filling or even the cake batter. You could also transform this into a fun sprinkle cake by folding colorful sprinkles into the batter and frosting, or a sophisticated almond-flavored wedding cake by replacing some of the vanilla extract with almond extract and adding finely ground almonds to the dry ingredients.
- Cake Flour Substitute – If you don’t have cake flour, you can easily create a suitable substitute using all-purpose flour and cornstarch. To make your own cake flour, spoon and level 1 cup of all-purpose flour into a measuring cup, then remove two tablespoons. Replace those two tablespoons with two tablespoons of cornstarch. Crucially, sift this mixture together at least twice. Sifting ensures that the cornstarch is evenly distributed and helps to create the finer, lighter texture that cake flour provides, mimicking its low-protein characteristics.
- Rum – For a non-alcoholic version of this delightful cake, simply substitute the coconut rum with an equal quantity of milk (dairy or non-dairy). The cake will still retain its wonderful coconut and pineapple essence, offering a family-friendly dessert. No other substitutions are required, making this an easy adjustment.
- Coconut – If you or your guests are not fond of coconut, you can easily omit the shredded coconut from the recipe. For the rum, simply use a plain light rum instead of coconut rum to remove that flavor component entirely, allowing the pineapple to take center stage.
How to Make this Piña Colada Cake Step-by-Step:
Creating this stunning Piña Colada Cake is a rewarding baking journey. Follow these detailed steps to ensure a flawless and delicious result, worthy of any special occasion.
Make the Cake.
Step 1: Prepare the Cake Batter. Begin by ensuring your butter and vegetable oil are at the ideal room temperature. In a large mixing bowl, using an electric mixer or a stand mixer fitted with the paddle attachment, cream together the softened butter and vegetable oil until the mixture is light, pale, and fluffy, typically for about 30 seconds to a minute. Next, gradually add the granulated sugar to this mixture, beating on high speed for a full two minutes. This crucial step incorporates air, making the batter incredibly light and contributing to the cake’s tender crumb. Remember to scrape down the sides and bottom of the bowl frequently to ensure all ingredients are thoroughly combined. Introduce the egg whites, adding them one at a time, and beating well for about 45 seconds after each addition. The mixture will become even fluffier and emulsified. Finally, gently mix in the room-temperature sour cream and pure vanilla extract until just combined, being careful not to overmix at this stage.
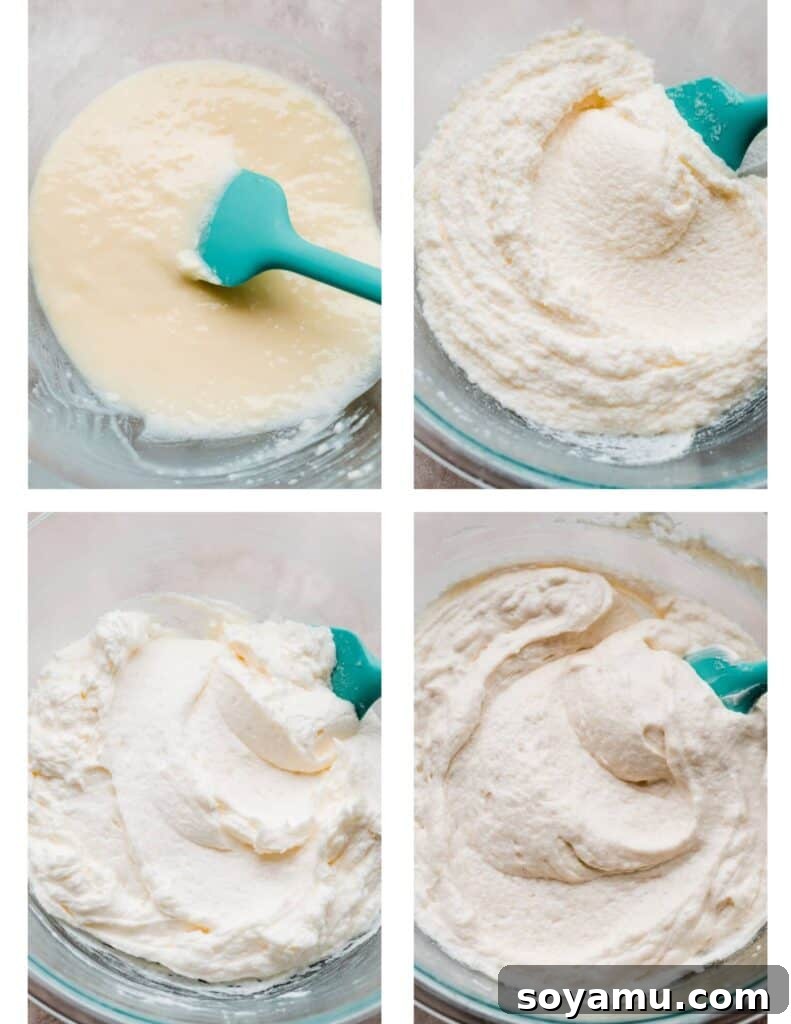
Step 2: Incorporate the Dry Ingredients and Liquids. With your mixer running on the lowest speed, slowly add half of the whisked dry ingredient mixture (cake flour, baking powder, baking soda, and salt) to the wet batter. Mix until just barely combined, with a few streaks of flour still visible. Then, gradually pour in the milk and coconut rum, allowing them to almost fully incorporate. Once the liquids are nearly mixed in, add the remaining dry ingredients. Continue mixing on low speed only until just a few streaks of flour remain. At this point, turn off the mixer and use a rubber spatula to gently fold the batter a few times, ensuring everything is fully combined without overmixing. Overmixing can develop the gluten in the flour, leading to a tough cake, so a light hand is best here.
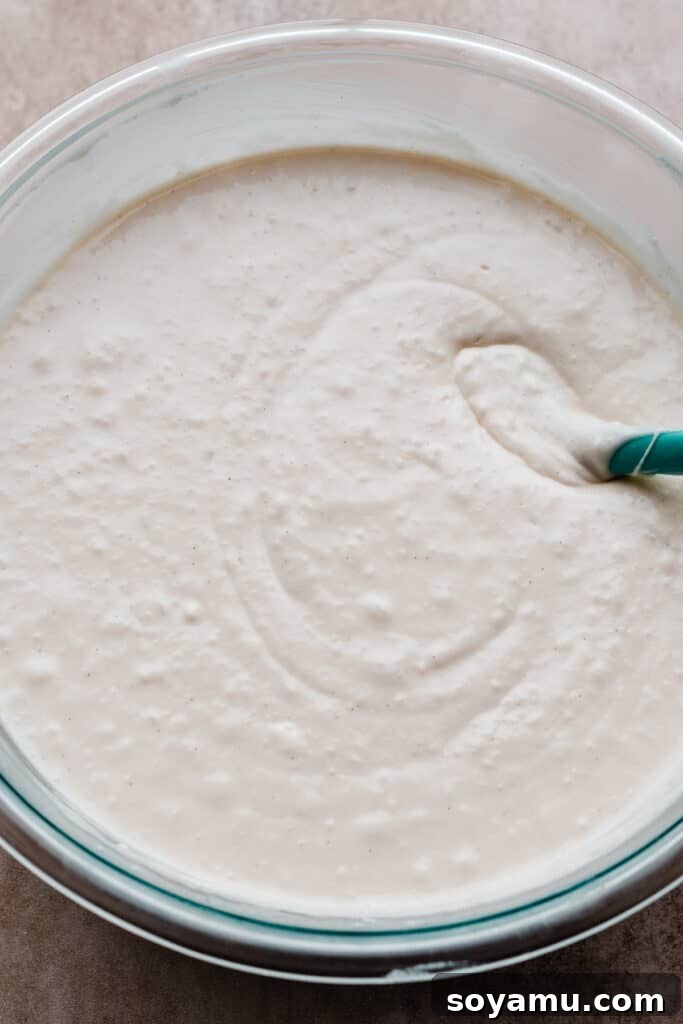
Step 3: Bake the Cake Layers. Carefully divide the prepared cake batter evenly among your three greased and floured 9-inch cake pans. For precision, a kitchen scale can be incredibly helpful to ensure each pan receives the exact same amount of batter, promoting even baking. Bake the first two pans simultaneously, then bake the third pan once the first two are done. This method helps prevent overcrowding the oven and ensures a more consistent bake for each layer. Bake the cakes for approximately 22-26 minutes at 350°F (175°C), rotating the pans halfway through if your oven tends to have hot spots. The cakes are ready when a toothpick inserted into the center comes out with moist crumbs, not wet batter. Allow the freshly baked cakes to cool in their pans on a wire rack for 10 minutes before carefully inverting them onto the wire racks to cool completely. It’s crucial that the cake layers are entirely cool before frosting to prevent the frosting from melting.
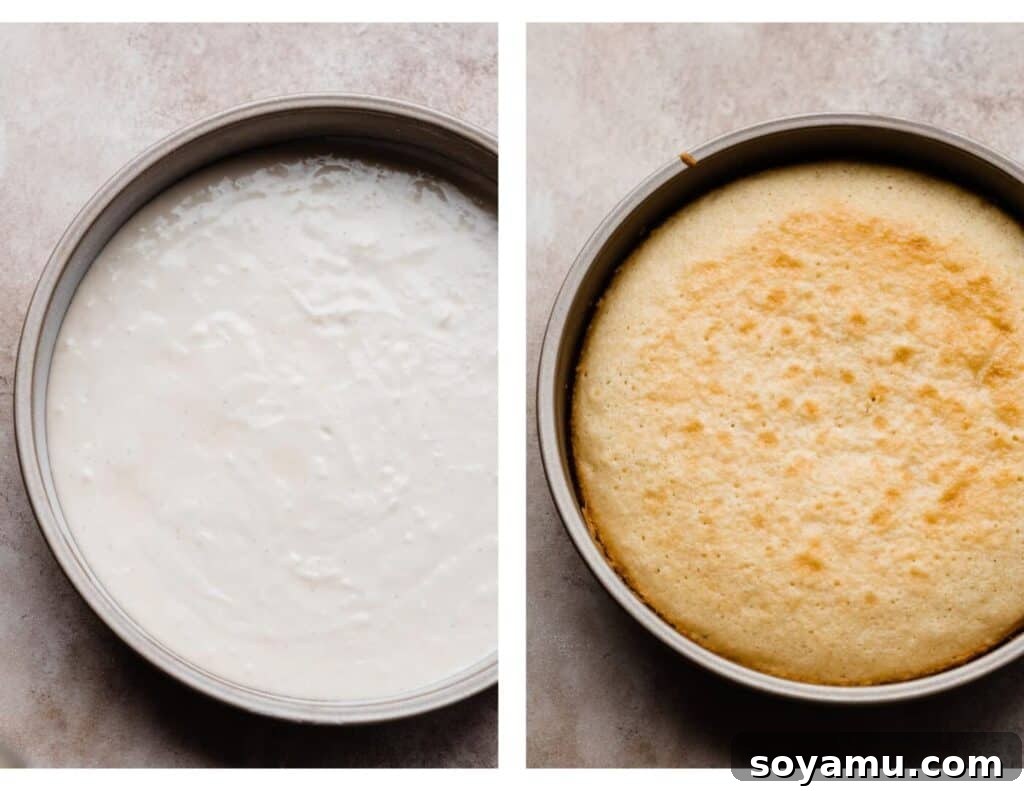
Make the Pineapple Filling.
Step 1: Cook the Filling. In a medium-sized pot, combine the crushed pineapple (do not drain the juices), light brown sugar, granulated sugar, coconut rum, cornstarch, and a pinch of cinnamon. Place the pot over medium-high heat and bring the mixture to a high simmer or a gentle boil. Once it reaches this point, reduce the heat slightly to maintain a steady simmer. Cook the filling for approximately 2-5 minutes, stirring frequently, until it visibly thickens. The desired consistency should be rich and syrupy, not overly thick like jam, but definitely not watery. As it cools, the filling will continue to thicken, creating that perfect spreadable texture for your cake layers. Once thickened, remove from heat and let it cool completely before using. Chilling it in the refrigerator will help it firm up further.
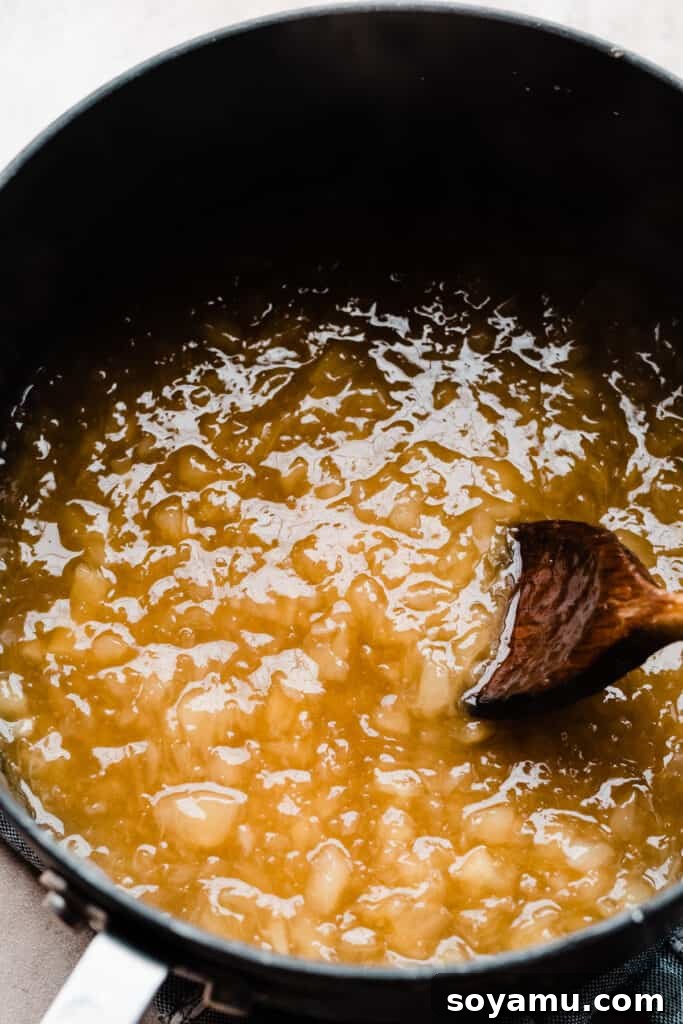
Make the Coconut Rum Frosting
Step 1: Prepare the Frosting. In a large mixing bowl, beat the softened salted butter on high speed for about 30 seconds to a minute until it becomes incredibly creamy and pale. Gradually add the powdered sugar, about two cups at a time, beating thoroughly after each addition until fully incorporated and smooth. If the frosting seems too stiff, you can add 1-2 tablespoons of coconut rum between additions to help achieve a smoother consistency. Once all the powdered sugar is added, mix in the vanilla extract and a pinch of salt. Finally, add the cubed, room-temperature full-fat cream cheese. Beat this in last and just until combined and smooth. This technique is crucial for preventing the cream cheese from breaking down and giving the frosting a “weepy” or runny texture. Taste the frosting and adjust sweetness by adding more powdered sugar if desired, or thin it slightly with a touch more rum or milk if it’s too thick. The result should be a silky, pipeable frosting bursting with tropical flavor.
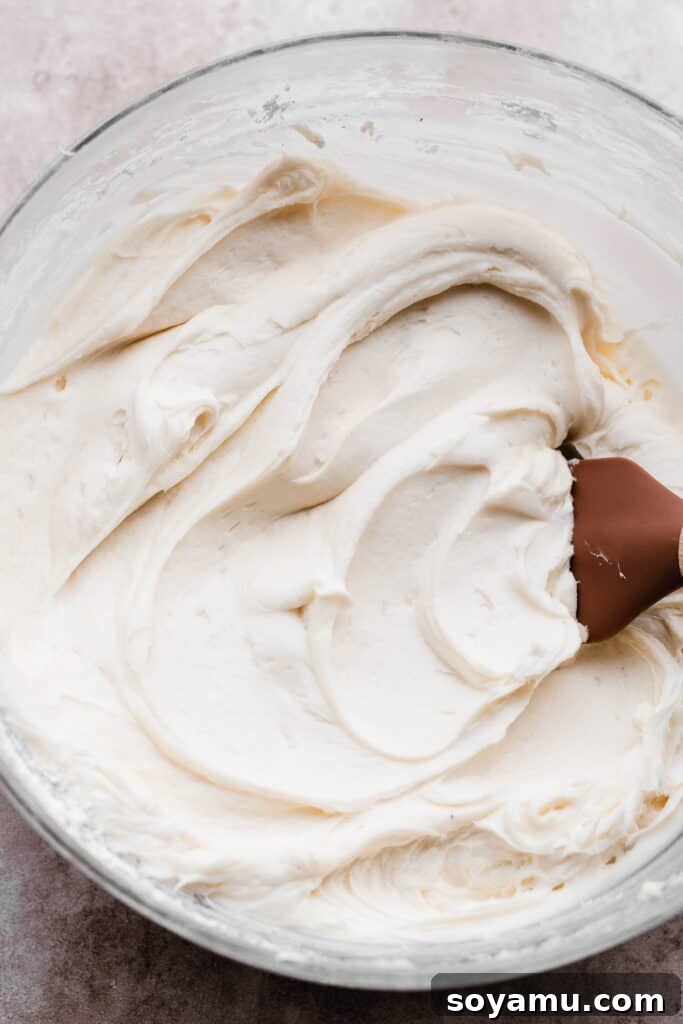
Make the Pineapple Caramel
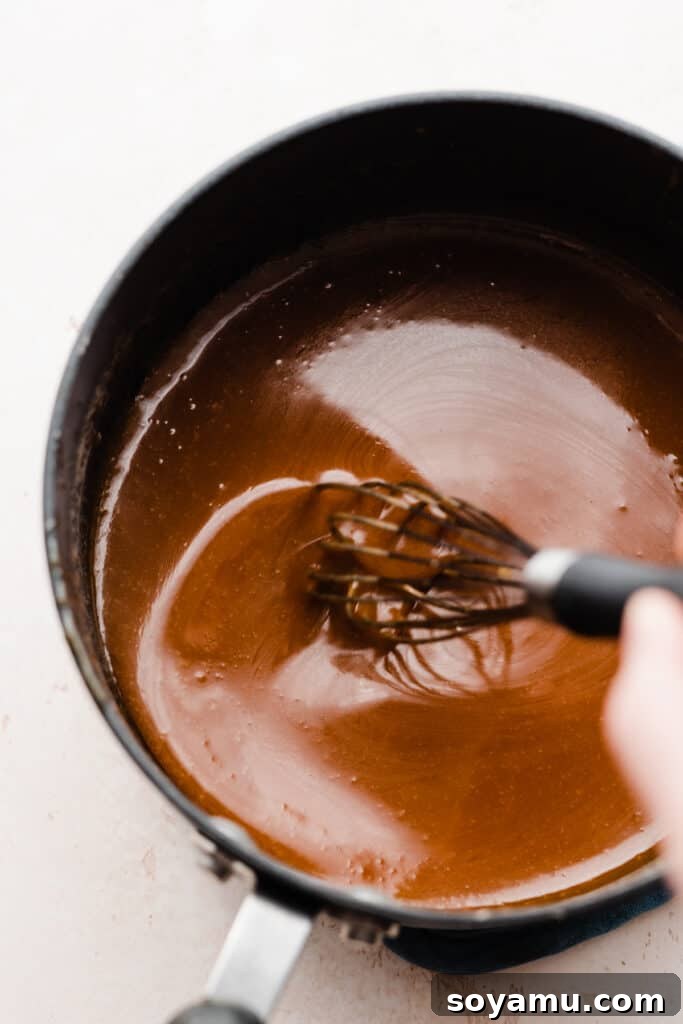
Step 1: To create this exquisite Pineapple Caramel, begin by following your favorite salted caramel sauce recipe as directed. For a flawless homemade caramel, we highly recommend referring to our Simplest Homemade Salted Caramel Sauce recipe. Once your caramel base is ready and the heavy cream has been whisked in, introduce two tablespoons of fresh or canned pineapple juice to the mixture. Return the pot to the stove and gently cook for an additional 2-3 minutes, allowing it to simmer and bubble softly. This extra cooking time ensures the pineapple juice fully integrates and helps the caramel thicken to a beautiful, pourable consistency. The result is a vibrant, fruity caramel that adds a spectacular tropical dimension to your Piña Colada Cake. Pour the finished pineapple caramel into a heatproof jar and allow it to cool completely at room temperature or in the refrigerator before using. It will thicken further as it cools.
Assemble the Cake:
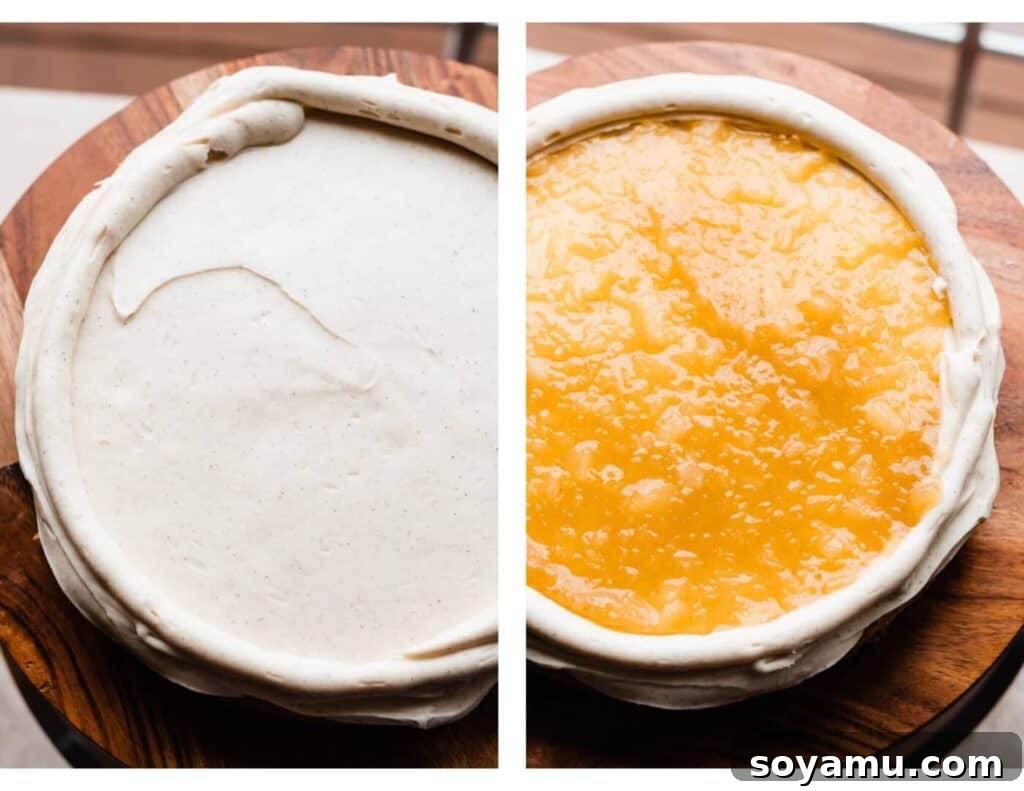
Step 1: Layering and Crumb Coating. Begin the assembly process by placing your first cooled cake layer onto a cake stand, ideally positioned on a cake turntable for ease of frosting. Take about ½ cup of your prepared coconut rum frosting and transfer it into a piping bag fitted with a round tip. Pipe a neat border of frosting around the perimeter of the first cake layer. This border acts as a dam, preventing the pineapple filling from oozing out. Inside this border, spread about 1 ½ cups of the remaining frosting evenly across the cake layer using an offset spatula. Next, spoon ½ cup of your chilled pineapple filling over the frosting, spreading it gently within the piped border. For an extra touch of tropical flair, sprinkle ¼ cup of shredded coconut (optional) over the pineapple filling. Carefully place the second cake layer on top. Any excess frosting that peeks out from the sides should be smoothed around the first two layers, starting to form a thin crumb coat. Chill the cake in the refrigerator for 10-15 minutes to allow this initial layer to set, which prevents the layers from sliding during the remaining assembly.
Repeat the frosting and filling process with the second cake layer. For the final layer, place it upside down on top of the cake. This technique ensures a perfectly flat top for a beautifully finished cake. Apply a very thin, even layer of frosting over the entire cake – top and sides. This is your crumb coat, which traps any loose crumbs, ensuring a clean and smooth final finish. Don’t worry if it’s not perfect at this stage. Use a cake scraper to smooth the sides and top, removing any excess frosting. Return the cake to the fridge for at least 30 minutes to allow the crumb coat to firm up completely.
Once the crumb coat is set, apply the remaining coconut rum frosting generously over the entire cake. Use your offset spatula and cake scraper to achieve a smooth and professional finish on both the top and sides. Once frosted to your liking, chill the cake in the refrigerator for at least another 30 minutes, or until the frosting is fully set and firm.
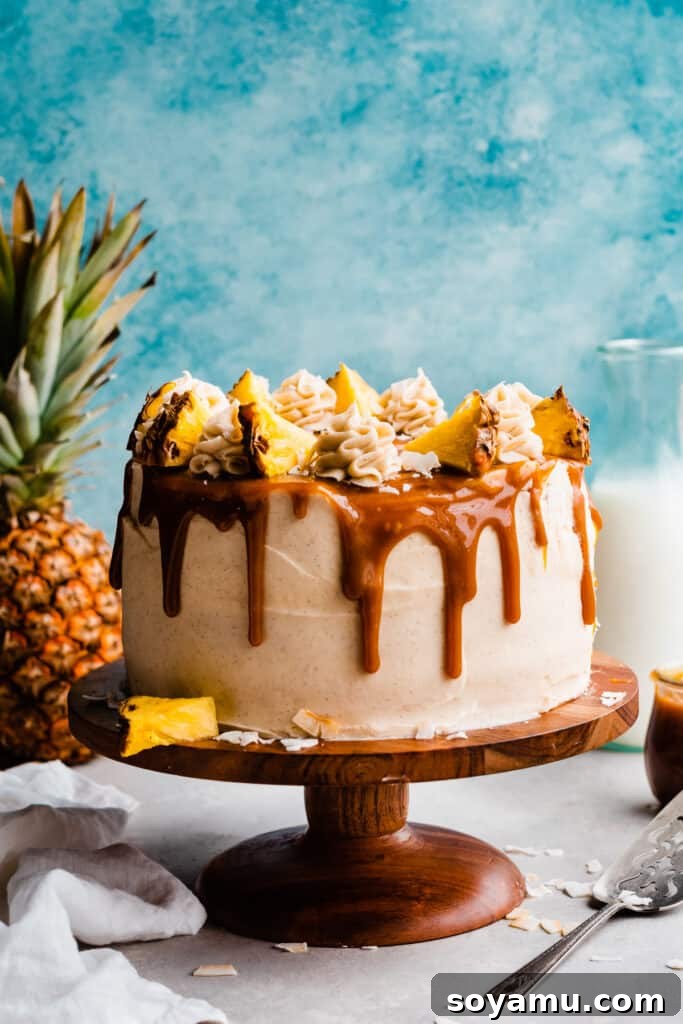
Step 2: Drizzle and Decorate. Now for the breathtaking finishing touches! Gently warm your pineapple caramel sauce in the microwave for about 30 seconds (if it solidified while cooling) until it’s pourable but not overly runny. Create an elegant drip effect around the edge of the cake by slowly pouring the caramel sauce along the perimeter while rotating your cake turntable. Allow the caramel to naturally cascade down the sides. For a truly impressive presentation, pipe additional swirls of coconut rum frosting on top of the cake using your piping bag. Garnish with fresh pineapple slices or wedges and a final sprinkle of shredded coconut. It’s highly recommended to chill the entire assembled cake in the refrigerator for a minimum of 2 hours, or even overnight, before slicing and serving. This chilling time allows the flavors to meld beautifully and ensures the cake holds its shape perfectly for clean slices.
Quick Tip for Storage: If covering with plastic wrap, position toothpicks around the top and sides of the cake to prevent the plastic wrap from sticking to the caramel drizzle or frosting. Alternatively, use a cake plate with a dome lid if you have one large enough.
Serving & Storing Your Piña Colada Cake:
Once your magnificent Piña Colada Cake has had ample time to chill and for its flavors to fully develop, it’s ready to be unveiled and enjoyed! The cold temperature helps firm up the frosting and makes for perfectly clean slices, enhancing both its presentation and taste. Serve this tropical delight as the grand finale to any meal, or as a decadent treat with your favorite coffee or tea.
To store any delectable leftovers, first ensure the cake is placed in an airtight container. If you have already cut into the cake, it’s crucial to press a piece of plastic wrap directly against the exposed cut surface. This prevents the cake from drying out and helps maintain its incredible moisture and flavor. Stored properly in the refrigerator, your Piña Colada Cake will remain fresh and delicious for 4-5 days. While it’s best enjoyed within the first few days, the flavors often deepen beautifully overnight.
If you find yourself utterly captivated by the vibrant taste of pineapple, we highly recommend exploring some of our other fantastic recipes. Next, why not dive into the irresistible Pineapple Upside Down Cheesecake for a creamy, fruity indulgence, or whip up a batch of refreshing Frozen Piña Coladas (the beverage!) to complete your tropical experience?
Expert Success Tips for a Flawless Piña Colada Cake:
Achieving baking perfection, especially with a layered cake like this Piña Colada masterpiece, often comes down to a few key techniques and tools. Incorporating these expert tips will significantly enhance your baking success and ensure a consistently delicious result every time.
- Utilize an Oven Thermometer – An oven thermometeris an absolute game-changer in any baker’s kitchen. It provides an accurate reading of your oven’s true internal temperature, which can often differ significantly from what your oven’s dial indicates. Even a slight temperature variation can drastically impact baking times and the final texture of your cake. By leaving an oven thermometer in place at all times, you can constantly monitor and adjust your oven’s calibration, ensuring consistent and precise baking for all your delicate bakes.
- Employ a Food Scale – For truly consistent and professional baking results, a kitchen scale is your best friend. Measuring dry ingredients, especially flour, by volume (cups) can lead to wide discrepancies due to variations in scooping and packing. A scale allows you to measure ingredients by weight, which is far more accurate and ensures your flour-to-liquid ratio is perfect every time. This precision is essential for achieving the light, tender crumb we’re aiming for in this Piña Colada Cake.
- Room Temperature Ingredients – This is a golden rule in baking, particularly for cakes and frostings. Ensure all your cold ingredients, such as butter, eggs, milk, and sour cream, are brought to room temperature before you begin mixing. Room temperature ingredients emulsify more effectively, creating a smoother, more cohesive batter. This results in a cake with a finer, more even crumb and a frosting that is wonderfully creamy and lump-free. Plan ahead and take them out of the fridge at least 30 minutes to an hour before you start baking.
- Scrape the Bowl Thoroughly – Throughout the mixing process, especially when creaming butter and sugar, and when incorporating wet and dry ingredients, make it a habit to frequently scrape down the sides and bottom of your mixing bowl with a rubber spatula. This ensures that all ingredients are fully incorporated into the batter, preventing pockets of unmixed flour or butter that could lead to an uneven texture or streaks in your finished cake.
Frequently Asked Questions About Piña Colada Cake:
Absolutely! This recipe can be successfully halved to make a smaller cake. If you choose to do so, you can bake it in a single 9×9 inch square pan (for best results, use a ceramic or metal pan, as glass pans may bake unevenly) or two 8-inch round cake pans. Remember to also halve the amounts for the pineapple filling and the coconut rum frosting to maintain the perfect balance of flavors and proportions for your smaller cake.
Yes, you can certainly get a head start on this recipe! The cake layers can be baked, allowed to cool completely, then wrapped securely in plastic wrap and stored at room temperature for up to 24 hours before you plan to assemble the cake. Both the pineapple filling and the pineapple caramel sauce can be made 2-3 days in advance; simply store them in separate airtight jars or containers in the refrigerator until you’re ready to use them. This makes the final assembly process much quicker and less stressful.
A classic piña colada cocktail, known for its iconic tropical taste, traditionally features a delightful blend of pineapple juice, rich cream of coconut (not just coconut milk, but the sweetened, thicker cream), and, of course, a generous splash of rum. Some variations also include a hint of fresh lime juice to add a bright, zesty counterpoint. Our Piña Colada Cake thoughtfully incorporates all of these essential flavor elements, transforming the beloved drink into a delectable dessert experience!
Incorporating cream cheese into frosting recipes is one of our signature techniques, and for good reason! We find that the subtle tang and richness of cream cheese brilliantly cuts through the intense sweetness often found in traditional buttercream recipes. This results in a frosting that is incredibly smooth, creamy, and wonderfully balanced, preventing that overly sweet, tooth-aching sensation. It provides a more sophisticated flavor profile that truly elevates the entire dessert experience.
Yes, this versatile cake recipe can absolutely be transformed into delicious cupcakes! A full batch of the cake batter will yield approximately 36-40 standard-sized cupcakes. If you halve the recipe, you can expect to make about 18-20 cupcakes. When baking, remember to fill your cupcake liners only two-thirds full to allow for proper rising. Bake them for a shorter duration, typically between 12-18 minutes, or until a toothpick inserted into the center comes out with moist crumbs. For a full batch of cupcakes, use the entire quantity of both the pineapple filling and the coconut rum frosting. If making a half batch of cupcakes, halve these components as well. Don’t forget to add a delightful drizzle of pineapple caramel sauce on top for that extra special touch!
Piña Colada Cake Recipe Variations to Explore:
While the classic Piña Colada Cake is a triumph of tropical flavors, its versatile base allows for exciting variations that can cater to different preferences or inspire new culinary adventures. Feel free to experiment and make this recipe truly your own!
- Add a Zesty Hint of Lime – For those who appreciate a brighter, more zesty kick reminiscent of a true cocktail, consider incorporating fresh lime. Add 2 tablespoons of finely grated lime zest directly into the cake batter for an aromatic lift. You can also include a small splash of fresh lime juice (about 1-2 teaspoons) to the coconut rum frosting; this brightens the flavor and beautifully balances the sweetness and richness.
- Time-Saving Cake Mix Option – If you’re short on time but still crave the incredible flavors of this cake, a high-quality box of your favorite vanilla or white cake mix can be a fantastic shortcut. Prepare the cake mix according to the package directions, then seamlessly incorporate our delectable homemade pineapple filling, creamy coconut rum frosting, and signature pineapple caramel sauce. This way, you get all the delightful tropical taste with significantly less prep time for the cake base.
- Toasted Coconut Finish – For an extra layer of texture and intensified coconut flavor, lightly toast some shredded coconut until golden brown. Sprinkle this over the top of the cake, especially around the edges, for a beautiful garnish and a delightful crunch.
- Mango Tango Twist – Introduce another tropical fruit by replacing half of the pineapple filling with a homemade mango compote, or by finely dicing fresh mango and folding it into the pineapple filling. The sweet, floral notes of mango would beautifully complement the existing flavors.
- Spiced Rum Kick – If you prefer a bolder, spicier rum note, consider using a high-quality spiced rum in place of light or coconut rum in both the cake batter and the frosting. This would add warm undertones of vanilla, cinnamon, and nutmeg, offering a more complex flavor profile.
Special Tools to Master Your Piña Colada Cake:
While passion and good ingredients are paramount, having the right tools can make a significant difference in the ease and professionalism of your baking projects. For assembling this show-stopping Piña Colada Cake, these specialized tools are highly recommended to simplify the process and achieve a polished finish.
- Offset Spatula – An offset spatula is an indispensable tool for any cake decorator. Its angled blade keeps your knuckles from dragging through the frosting, making it incredibly easy to spread cake batter evenly in pans and to apply and smooth frosting across cake layers with precision. It allows for a much cleaner and more professional finish than a straight spatula or knife.
- Cake Turntable – If you enjoy baking and decorating cakes more than just occasionally, a cake turntable is a worthwhile investment. This rotating stand allows you to easily spin the cake as you frost it, enabling you to apply smooth, even layers of frosting to the sides and top with minimal effort. It transforms the often-fussy process of cake decorating into an enjoyable and efficient task, giving your cakes a truly professional look.
- Piping Bag & Piping Tip – For creating that neat frosting border to contain your pineapple filling, a reusable piping bag paired with a sturdy Wilton 1A or 2A round piping tip is ideal. These tips create beautiful, consistent lines and can also be used for decorative swirls on top of the finished cake. In a pinch, a sturdy plastic freezer bag with one corner snipped off can serve as a makeshift piping bag, though a dedicated piping bag offers better control and comfort.
- Kitchen Scale – As mentioned in our expert tips, a kitchen scale is invaluable for precise ingredient measurement, especially for flour, ensuring consistent and perfect cake texture every time.
- Oven Thermometer – Another essential tool to ensure your oven is baking at the accurate temperature you set, preventing under or over-baked cakes.
More Cake Recipes to Love:
- Salted Butterscotch Crunch Cake
- White Forest Cake
- Peach Cobbler Cake
- German Chocolate Cake
- Raspberry Chocolate Ganache Cake
- Best Yellow Birthday Cake
- Mojito Cake
- Perfect White Birthday Cake
Did you make this recipe? We’d love to hear your thoughts!
Please click the little stars in the header of the recipe card below to leave a comment and a star rating. Your feedback helps our small business immensely and assists other bakers in our community!
Piña Colada Cake
Pin
Rate
Ingredients
For Greasing Cake Pans
- shortening, for greasing pans
- flour, for greasing pans
For the Cake Layers
- 3 and 1/2 cups cake flour, spooned & leveled , 385 grams
- 1 tbsp baking powder, 14 grams
- 3/4 tsp baking soda, 5 grams
- 3/4 tsp salt, 5 grams
- 1/2 cup + 2 and 1/2 tbsp salted butter, softened at room temperature, 148 grams
- 1/2 cup vegetable oil, 116 mL
- 2 and 2/3 cup granulated sugar , 543 grams
- 7 large egg whites, at room temperature , 266 grams
- 1 and 1/2 tbsp vanilla extract , 20 grams
- 3/4 cup full fat sour cream, at room temperature , 180 grams
- 1 cup milk, 240 mL
- 1/2 cup + 1 tbsp coconut rum, 136 mL
For the Pineapple Filling
- one, 20 ounce can crushed pineapple, don’t drain
- 1/3 cup light brown sugar, packed, 73 grams
- 1/3 cup granulated sugar , 70 grams
- 1 tbsp coconut rum
- 1 tbsp + 2 tsp corn starch, 13 grams
- pinch cinnamon
For the Pineapple Caramel
- 1 cup granulated sugar , 210 grams
- 6 tbsp salted butter, cubed, 85 grams
- 1/2 cup + 1 tbsp heavy cream, 135 grams
- 2 tbsp pineapple juice
For the Coconut Rum Frosting
- 1 and 1/2 cups + 2 tbsp salted butter, softened at room temperature , 367 grams
- 7 cups to 7 and 2/3 cups powdered sugar , 840 – 920 grams
- 3-4 tbsp coconut rum
- pinch of salt
- 1 tbsp vanilla extract
- 16 ounces full fat cream cheese, softened at room temperature , use the block style – 454 grams
For the Cake Assembly
- 3/4 cup shredded coconut, optional
- pineapple slices for decorating
Instructions
-
Preparation is Key: Begin by ensuring all cold ingredients, such as butter, eggs, milk, and sour cream, have been brought to room temperature before you start. Preheat your oven precisely to 350° F (175°C). Prepare three 9-inch round cake pans for baking. Using a paper towel, thoroughly rub shortening all over the inside surface of each pan, ensuring an even and complete coating. Cut a round of parchment paper to fit perfectly inside the bottom of each pan (tracing the pan bottom is the easiest method). Place this parchment round onto the greased pan bottom, then grease over the parchment paper as well. Add a generous handful of flour to each pan, and gently tap and rotate the pan to evenly coat the entire greased interior with flour, then tap out any excess. This meticulous preparation prevents sticking and ensures your cake layers release beautifully.shortening, for greasing pans, flour, for greasing pans
-
Prepare the Dry Ingredients: In a medium-sized mixing bowl, thoroughly whisk together all of the dry ingredients: cake flour (ensuring it is spooned and leveled for accuracy), baking powder, baking soda, and salt. Whisking them together ensures they are evenly distributed, which is vital for the cake’s consistent rise and texture. Set this mixture aside.3 and 1/2 cups cake flour, spooned & leveled, 1 tbsp baking powder, 3/4 tsp baking soda, 3/4 tsp salt
-
Craft the Cake Batter: In a large mixing bowl, using an electric mixer or stand mixer, begin by creaming the softened salted butter for about 30 seconds until it becomes visibly creamy and pale. Next, add the vegetable oil and continue to beat the mixture for a full minute, ensuring it is well combined. Incorporate the granulated sugar and beat on high speed for at least 2 full minutes; this step is crucial for aerating the mixture and creating a light, fluffy texture. Throughout this process, make sure to frequently scrape down the sides and bottom of the bowl to ensure uniform mixing. Add the large egg whites, two at a time, then the last one on its own, beating on medium speed for about 45 seconds after each addition until the mixture is very light and fluffy. Finally, add the sour cream and vanilla extract, mixing on medium-low speed only until they are just combined to prevent overmixing.
Now, it’s time to incorporate the dry ingredients and liquids in an alternating fashion. With the mixer running on low speed, gradually add half of the whisked dry ingredients to the wet batter. Mix until just a few streaks of flour remain visible. Then, slowly pour in the milk and coconut rum. Continue mixing on low speed until these liquids are nearly fully incorporated. Once they are almost mixed in, add the remaining dry ingredients. Continue mixing on low speed only until just a few streaks of flour are still visible. Turn off the mixer and use a rubber spatula to gently fold the batter a few times, ensuring all ingredients are thoroughly combined without overmixing, which can lead to a tough cake.
1/2 cup + 2 and 1/2 tbsp salted butter, softened at room temperature, 1/2 cup vegetable oil, 2 and 2/3 cup granulated sugar, 7 large egg whites, at room temperature, 1 and 1/2 tbsp vanilla extract, 3/4 cup full fat sour cream, at room temperature, 1 cup milk, 1/2 cup + 1 tbsp coconut rum -
Bake the Cake Layers: Evenly divide the prepared cake batter among your three greased and floured 9-inch cake pans. Using a kitchen scale at this stage can help ensure perfectly even layers. Bake the first two pans together on the middle rack, and then bake the third pan on its own after the first two are done. This method prevents overcrowding and ensures the most even bake for each layer. Bake the cakes for approximately 22-26 minutes, or until a toothpick inserted into the center pulls out with moist crumbs (not wet batter). If your oven has hot spots, be sure to rotate the pans halfway through baking for uniform results. Once baked, let the cakes cool in their pans on cooling racks for 10 minutes. After this initial cooling, carefully invert them onto the wire racks to cool completely. Ensure the cake layers are thoroughly cooled before you begin frosting them to prevent any melting of the frosting.
-
Prepare the Pineapple Filling: To make the luscious pineapple filling, combine all the filling ingredients—crushed pineapple (including its juices, do not drain), light brown sugar, granulated sugar, coconut rum, cornstarch, and a pinch of cinnamon—into a medium-sized pot. Place the pot over medium-high heat and bring the mixture to a high simmer or a low boil. Once it starts to bubble, reduce the heat slightly to maintain a consistent simmer. Cook for approximately 2-5 minutes, stirring continuously. The filling should visibly thicken as it cooks; you’re looking for a consistency that is syrupy and thick enough to hold its shape between cake layers, but not overly stiff. It will continue to thicken further as it cools. Remove the pot from the heat and allow the filling to cool completely before using. You can chill it in the refrigerator to speed up this process.one, 20 ounce can crushed pineapple, don’t drain, 1/3 cup light brown sugar, packed, 1/3 cup granulated sugar, 1 tbsp coconut rum, 1 tbsp + 2 tsp corn starch, pinch cinnamon
-
Create the Pineapple Caramel: Begin by making your salted caramel sauce according to your preferred recipe. If you don’t have one, our Salted Caramel Sauce post provides clear instructions for a simple and delicious homemade version. Once the heavy cream is whisked into your caramel base, introduce 2 tablespoons of pineapple juice. Return the caramel to the heat and gently simmer for an additional 2-3 minutes, allowing it to bubble softly. This extra cooking time helps the pineapple juice to fully incorporate and ensures the caramel thickens to the perfect pourable consistency. Transfer the finished pineapple caramel sauce into a clean jar and let it cool down to room temperature. It will thicken further as it cools. If made ahead, store it in the fridge; you may need to gently warm it before use.1 cup granulated sugar, 6 tbsp salted butter, cubed, 1/2 cup + 1 tbsp heavy cream, 3/4 cup shredded coconut, optional
-
Prepare the Coconut Rum Frosting: In a large mixing bowl, beat the softened salted butter on high speed for 30 seconds to 1 minute, until it is light, creamy, and pale. Gradually add the powdered sugar, about 2 cups at a time, beating well after each addition until fully incorporated and smooth. If the frosting seems too thick or stiff during this process, add 1-2 tablespoons of coconut rum to help achieve a smoother, more workable consistency. Once all the powdered sugar is incorporated, mix in the vanilla extract and a pinch of salt. The final crucial step is to add the cubed, room-temperature full-fat cream cheese. Beat the cream cheese in last, mixing only until it is just combined and smooth. This specific order prevents the frosting from developing a “weepy” or runny texture. Taste the frosting and adjust the sweetness by adding more powdered sugar if desired, or a tiny splash more rum/milk if you prefer a slightly thinner consistency.1 and 1/2 cups + 2 tbsp salted butter, softened at room temperature, 7 cups to 7 and 2/3 cups powdered sugar, 3-4 tbsp coconut rum, pinch of salt, 1 tbsp vanilla extract, 16 ounces full fat cream cheese, softened at room temperature
-
Assemble the Cake Layers: Place your first completely cooled cake layer onto a cake stand, ideally situated on a cake turntable to facilitate easy frosting. Fill a piping bag, fitted with a simple round piping tip, with approximately 1/2 cup of the prepared coconut rum frosting. Pipe a sturdy border of frosting around the very edge of the cake layer. This “dam” will hold your filling in place. Inside this piped border, spread about 1 and 1/2 cups of frosting evenly across the cake layer using an offset spatula. Next, carefully spoon 1/2 cup of the chilled pineapple filling over the frosting, spreading it gently within the piped border. If desired, sprinkle on 1/4 cup of shredded coconut for added texture and flavor.
Carefully place the second cake layer on top. Gently press down to secure it. Any excess frosting that subtly peeks out from between the layers can be lightly smoothed around the sides to begin forming a very thin crumb coat. Chill the cake in the refrigerator for 10-15 minutes; this brief chill will help set the layers and prevent any shifting or sliding during subsequent steps. Repeat the frosting and filling process with the second cake layer. For the final (third) layer, place it upside down on top of the cake. This clever trick provides a perfectly flat surface for a professional-looking finish. Apply a very thin, even amount of frosting over the entire cake – both the top and sides. This is your initial crumb coat, designed to trap any loose crumbs and create a smooth canvas for your final frosting layer. Don’t worry if it’s not perfect at this stage; a cake scraper can be used to gently smooth the sides and remove any excess. Place the cake back into the fridge for 30 minutes to allow the crumb coat to firm up completely. Then, retrieve your cake and apply the remaining coconut rum frosting generously over the entire cake, using your offset spatula and cake scraper to achieve a beautiful, smooth top and sides. Once frosted, allow the cake to chill in the fridge for at least 30 minutes, or until the frosting is fully set.
Final Drizzle and Decoration: Now for the show-stopping finale! If your pineapple caramel sauce has solidified in the fridge, gently microwave it for 30 seconds or so, until it’s pourable but not overly runny. Create an elegant drip effect by slowly pouring the caramel along the outer edge of the cake while rotating the turntable, allowing it to gracefully cascade down the sides. For extra flair, pipe additional swirls of frosting on top of the cake. Finally, decorate with fresh pineapple slices or wedges and a sprinkle of shredded coconut for that ultimate tropical appeal. For best flavor and structure, chill the entire assembled cake in the refrigerator for at least 2 hours or, ideally, overnight (up to 24 hours) before slicing and serving. This allows all the incredible flavors to meld beautifully and the cake to firm up perfectly for clean, impressive slices.
Tip for Covering: When covering the cake with plastic wrap, use toothpicks inserted around the top and sides to prevent the plastic from touching and sticking to the delicate caramel drizzle or frosting. Alternatively, if you have a cake plate with a clear dome lid large enough, that is an ideal solution for storage.
pineapple slices for decorating -
Serve & Store for Freshness: Once the cake is thoroughly chilled and set, it’s ready to be sliced and served! Use a sharp knife for clean cuts through the layers. Store any remaining cake in an airtight container in the refrigerator. To maintain optimal moisture and freshness, especially for cut portions, gently press a piece of plastic wrap directly over the exposed cake surface before sealing the container. Properly stored, your delightful Piña Colada Cake will remain fresh and delicious for 3-4 days.
Nutrition
Nutrition information is automatically calculated, so should only be used as an approximation.
Love this recipe? Share your experience below!