
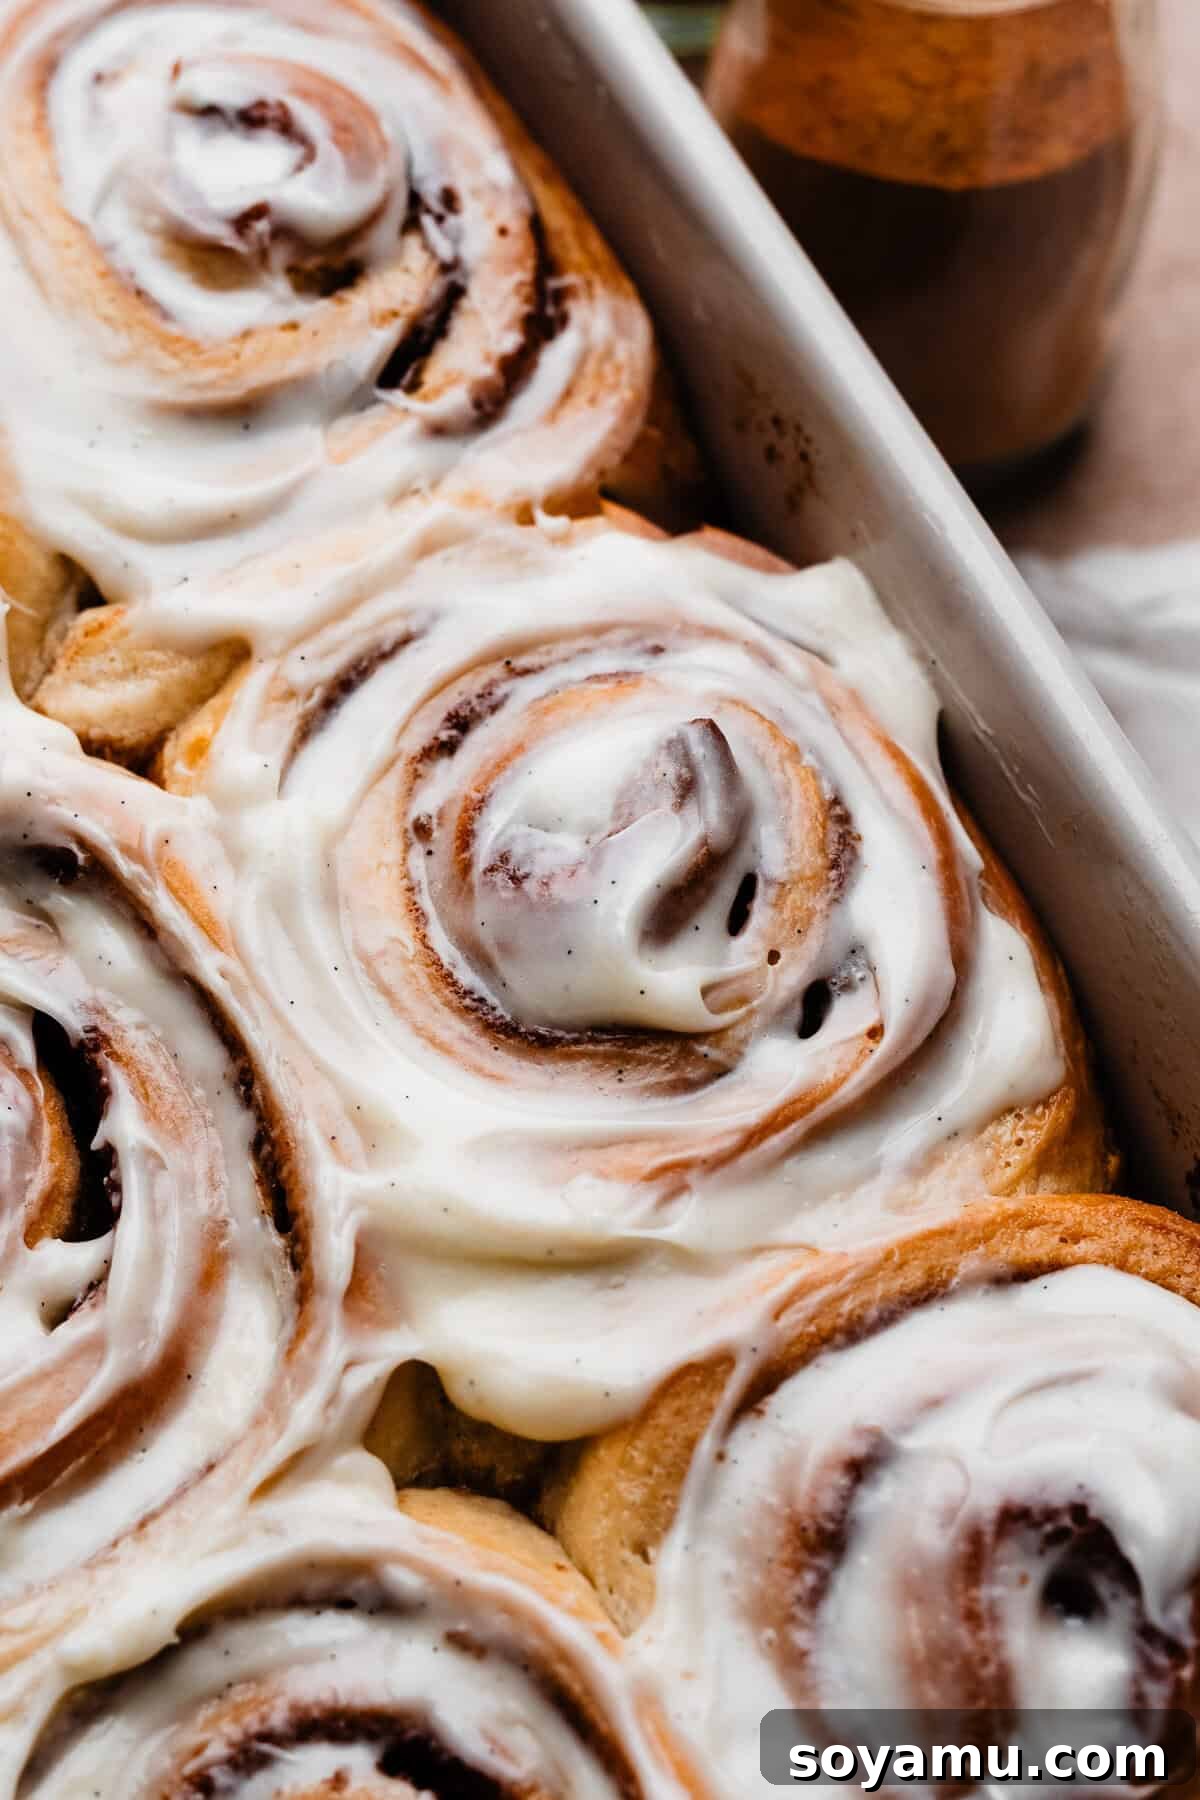
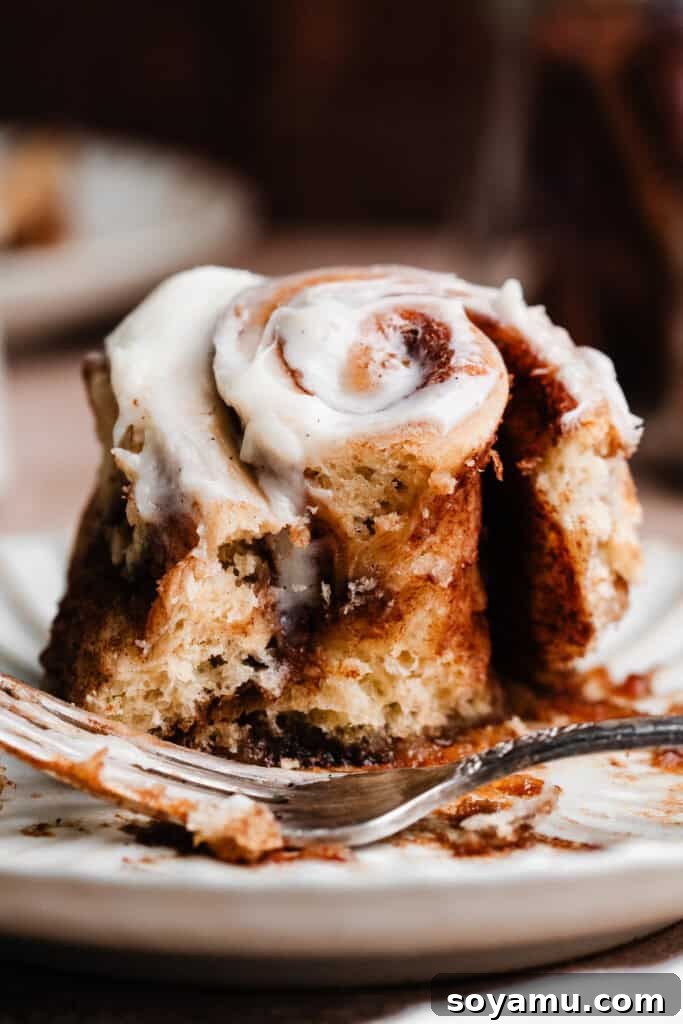
These are truly no ordinary Cinnamon Rolls! Prepare to experience a level of indulgence you didn’t know was possible. This isn’t just about that one perfect center bite; every single part of these rolls is pillowy soft, oozing with cinnamon sugar, and wonderfully gooey. Our secret lies in a slightly lower baking temperature, ensuring consistent tenderness throughout, without any crunchy edges. Plus, we bake them with an extra layer of filling at the bottom of the pan, creating irresistible puddles of caramelized goodness beneath each roll. Get ready to bake the best homemade cinnamon rolls you’ve ever tasted!
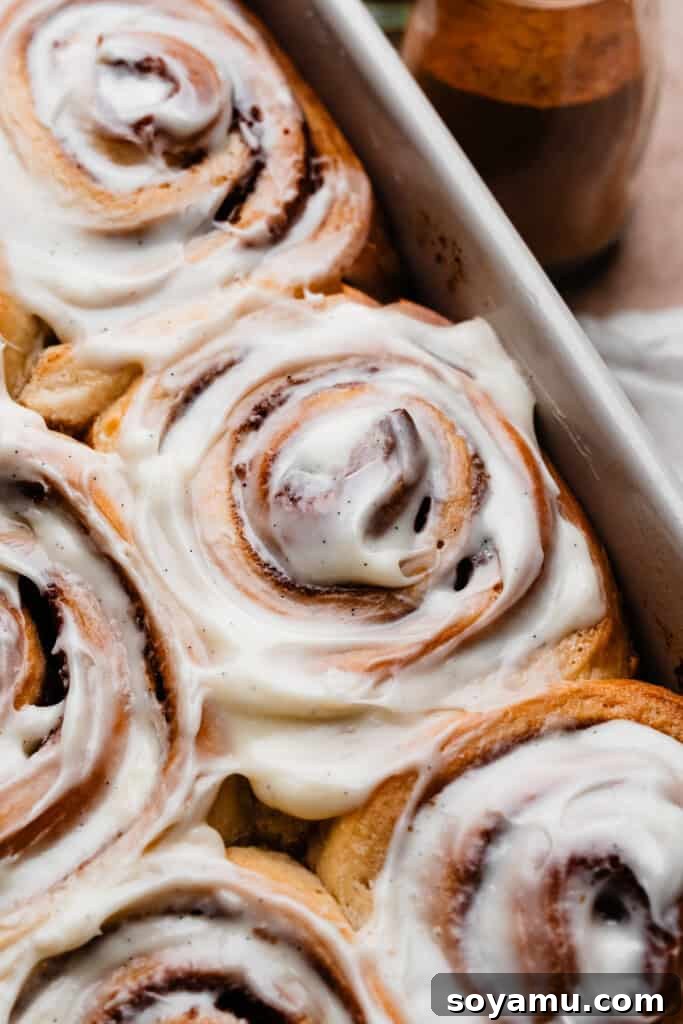
Why You’ll Fall in Love with These Incredible Gooey Cinnamon Rolls
Forget everything you thought you knew about cinnamon rolls. This recipe elevates a classic to new heights, promising a bakery-quality treat right in your own kitchen. Here’s why these homemade cinnamon rolls will become your new favorite:
-
Pillowy Soft & Gooey Perfection
The magic starts with an enriched dough – a special blend of flour, yeast, eggs, sugar, and butter that results in an incredibly tender, melt-in-your-mouth texture. Unlike drier rolls, these maintain their pillowy softness from edge to center, making every bite a delight. This dough is a simplified, yet equally delicious, version of the rich brioche dough found in our beloved Maple Brioche Cinnamon Rolls, guaranteeing a truly decadent experience.
-
Irresistible Gooey Caramel Bottoms
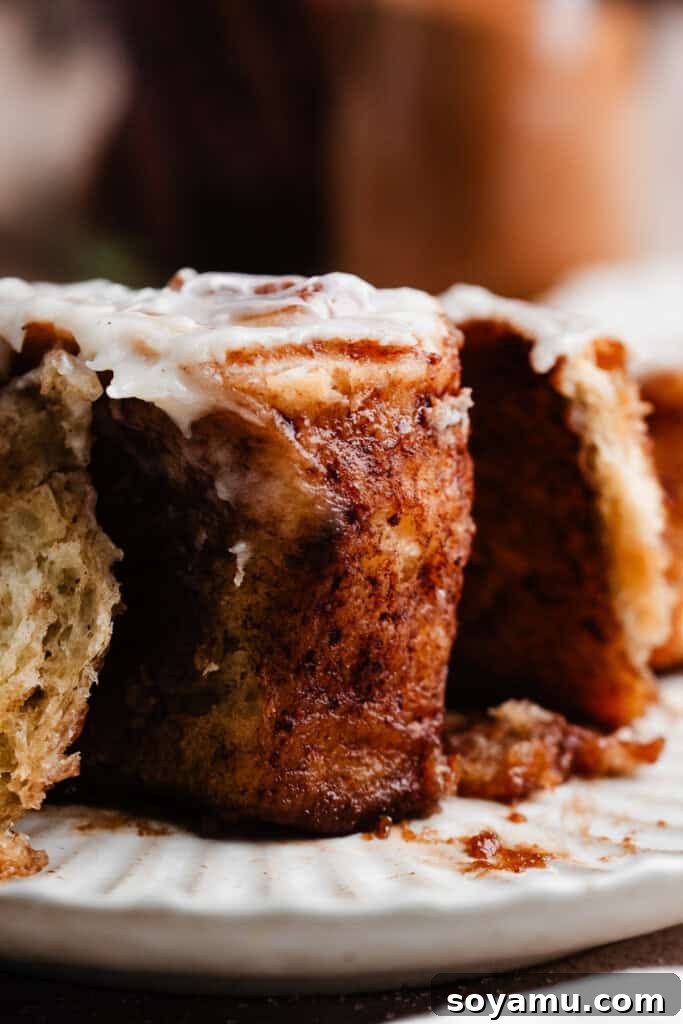
Our unique approach involves crafting an extra batch of the rich cinnamon roll filling, then blending it with a touch of heavy cream. This luscious mixture is spread generously across the bottom of the baking pan before the rolls are placed in. As they bake, this “secret sauce” transforms into decadent puddles of caramelized deliciousness, perfectly coating the bottom of each roll with a sticky, sweet, and unbelievably gooey layer. It’s a game-changer!
-
Decadent Cream Cheese Frosting
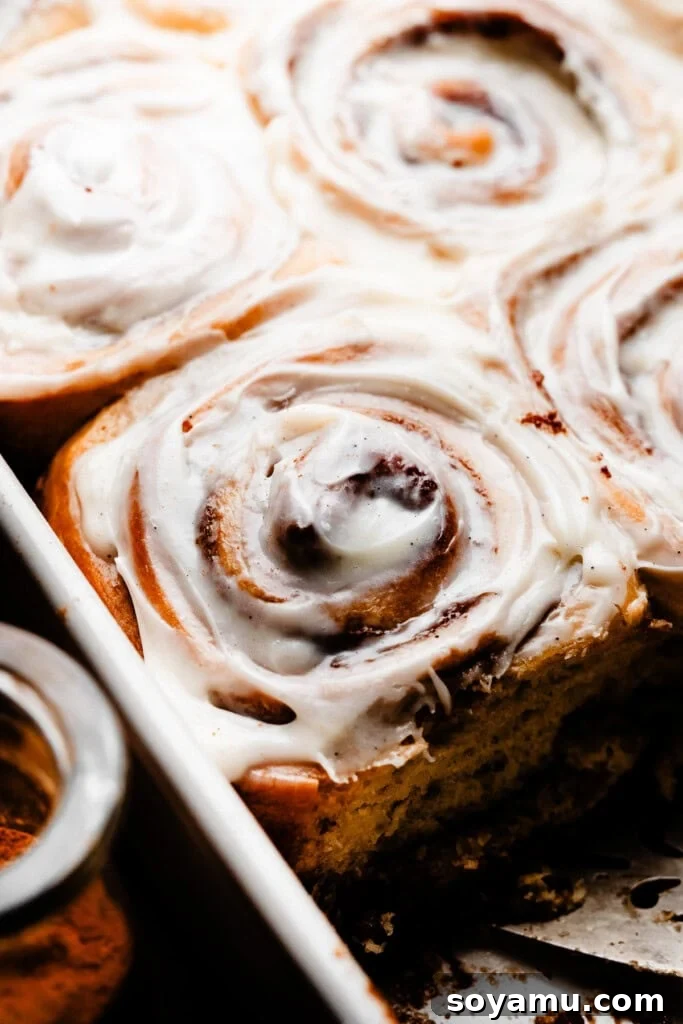
No cinnamon roll is complete without the perfect frosting, and ours is truly special. We whip up a generous batch of velvety cream cheese frosting that’s wonderfully tangy and sweet. Swirls of this luscious frosting melt into the warm, fresh-from-the-oven rolls, creating a beautiful glaze that seeps into every crevice, adding another layer of irresistible flavor and moisture. It’s the ideal counterpoint to the rich cinnamon and caramel, making each bite balanced and utterly divine.
Essential Ingredients for Your Perfect Cinnamon Rolls
Crafting these incredible gooey cinnamon rolls begins with understanding the role of each ingredient. Below is an overview of the key components you’ll need. For precise measurements and step-by-step instructions, please refer to the detailed recipe card at the bottom of this post. You can also use the table of contents at the top to navigate through the recipe sections.
-
Yeast: The Dough’s Leavening Agent
For this recipe, we’re utilizing instant yeast (also known as rapid yeast or quick-rise yeast). The beauty of instant yeast is that it doesn’t require “blooming” in warm liquid beforehand, unlike active dry yeast. You can simply mix it directly with your other dry dough ingredients, which streamlines the preparation process and saves you a valuable step in the kitchen.
-
All-Purpose Flour: The Foundation of Your Dough
Accurate flour measurement is crucial for the perfect dough consistency. For best results, spoon your all-purpose flour into the measuring cup lightly, then level it off with a straight edge or the back of a knife. Avoid scooping directly from the bag, as this can compact the flour, leading to an excess amount and potentially dry, tough rolls. Using a kitchen scale for precise measurement (528 grams for 4 cups + 1 tbsp) is highly recommended. There’s no need for specialty flours like bread flour; standard all-purpose works beautifully here.
-
Milk: For Tenderness and Flavor
Milk is an indispensable ingredient for our enriched dough, contributing to its incredible softness and rich flavor. While we typically use 2% milk, you have the flexibility to use any type of milk you prefer, from whole milk for an even richer texture to a dairy-free alternative if you are experimenting with variations. Ensure it’s warmed to the specified temperature to activate the yeast effectively.
-
Eggs: For Richness and Structure
Large eggs are essential for adding richness, color, and structure to our dough. They contribute to the “enriched” quality, making the rolls tender and moist. Always use eggs at room temperature; this helps them incorporate more easily and evenly into the dough, leading to a smoother mixture and a better rise.
-
Butter: Flavor and Fluffiness
Butter is key for both the dough and the luxurious fillings. We consistently opt for salted butter in our recipes because, from our experience, it imparts the best depth of flavor and balances the sweetness. However, if unsalted butter is your preference or what you have on hand, feel free to use it – just be mindful of adjusting the pinch of salt in the recipe to taste.
-
Cream Cheese: The Frosting’s Star
For the luscious cream cheese frosting, we recommend block-style cream cheese. Its firmer texture is ideal for achieving a thick, stable, and spreadable frosting that holds up well on warm rolls. While you might get away with using cream cheese from a tub for a frosting (unlike a delicate cheesecake), the block variety generally yields superior results for consistency and richness.
Customizing Your Cinnamon Rolls: Substitutions & Variations
While this recipe is designed to deliver optimal results, we understand the desire for customization. Please note, however, that we have not yet developed or tested specific gluten-free or dairy-free versions of this recipe. Adapting yeasted dough recipes for these dietary needs often requires precise adjustments and specialized ingredients that can significantly alter the texture and rise. For the best outcome, we recommend following the recipe as written. If you do choose to experiment, be aware that results may vary.
Step-by-Step Guide to Baking Incredible Gooey Cinnamon Rolls
Creating these perfect cinnamon rolls involves a few key stages, each crucial for achieving that signature pillowy softness and gooey texture. Follow these steps carefully, and you’ll be rewarded with a truly unforgettable treat.
Step 1: Preparing the Enriched Dough & First Rise
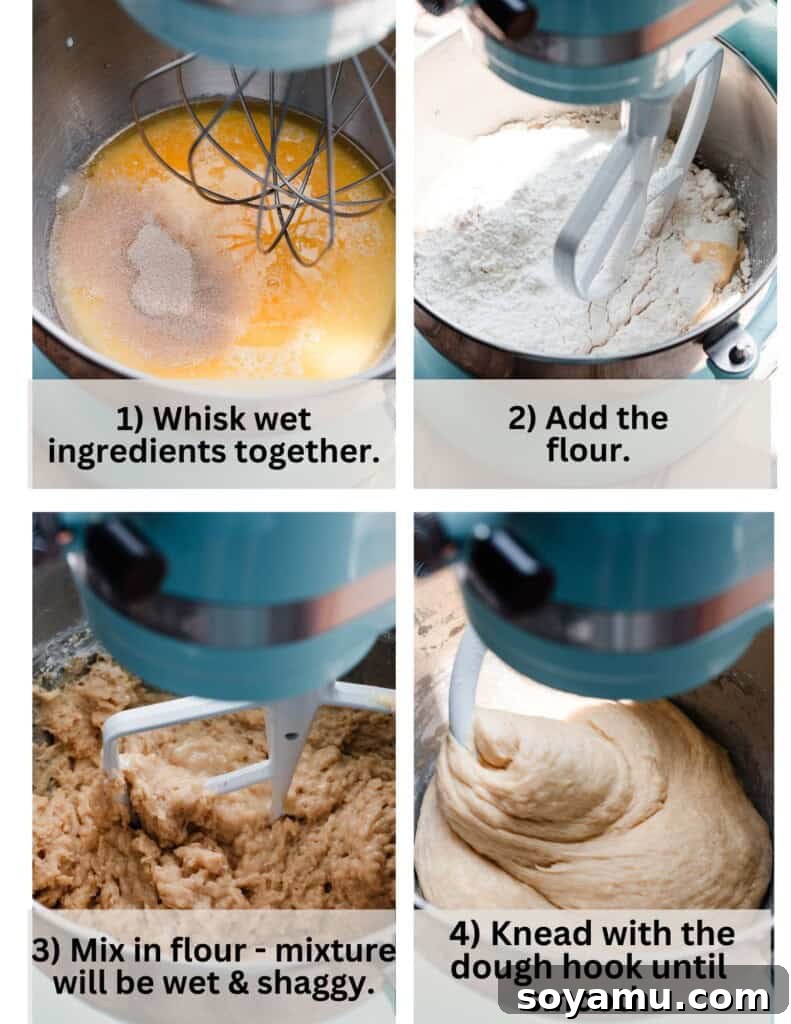
Begin by combining the melted butter, warm milk, lightly beaten room temperature eggs, granulated sugar, instant yeast, and salt in the bowl of your stand mixer. Whisk these wet ingredients together thoroughly. Next, attach the paddle attachment and gradually incorporate the all-purpose flour, mixing on a low speed (settings 2-3) until the flour is just combined and no dry streaks remain. The dough will appear shaggy and wet at this stage. Allow the dough to rest for 5 minutes; this brief pause helps the flour fully hydrate.
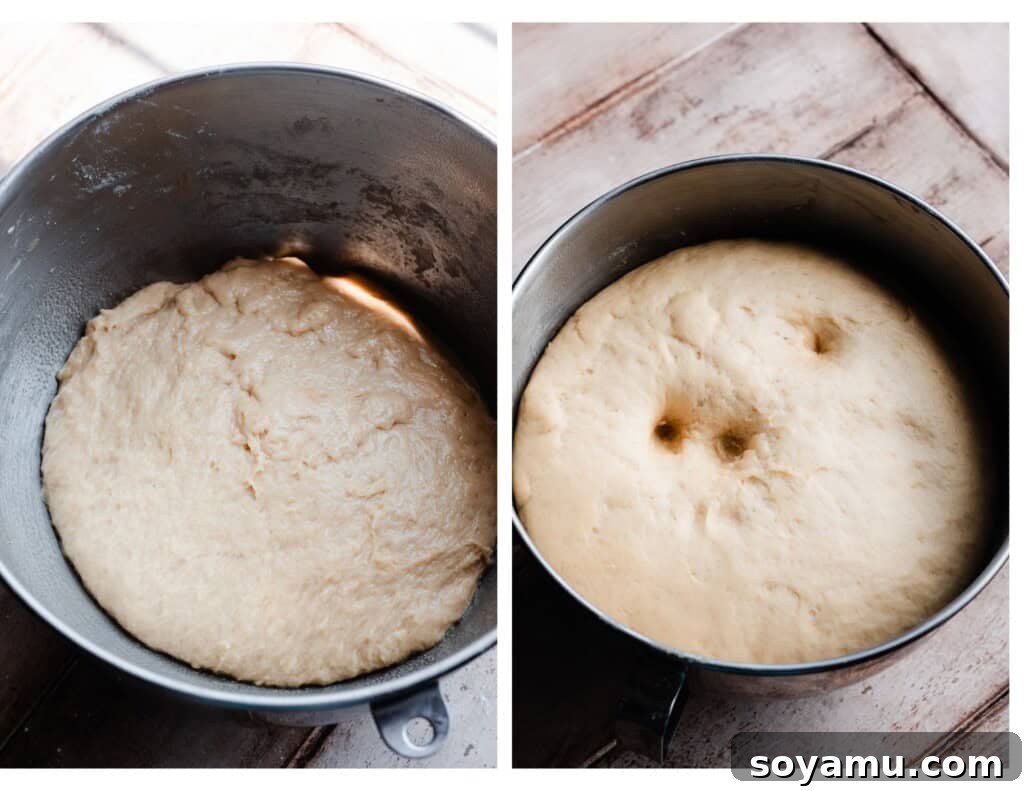
After resting, switch to the dough hook attachment. Knead the dough on a low speed (settings 1-2, never higher) for 5-7 minutes. You’ll notice the dough slowly begin to pull away from the sides of the bowl, becoming smoother and more elastic. It will still be quite soft and pliable, which is exactly what we want for pillowy rolls. Once kneading is complete, gently transfer the dough onto a clean countertop. Lightly spray your stand mixer bowl with nonstick spray (no need to wash it!), then return the dough to the bowl. Cover it loosely with a clean kitchen towel or plastic wrap and let it rise in a warm spot for approximately 1 hour, or until it has visibly doubled in size. To confirm it’s ready, gently poke the dough with your fingertip; if the indent remains, it’s perfectly risen. While the dough rises, proceed to prepare your fillings!
Step 2: Crafting the Luscious Caramel Sauce
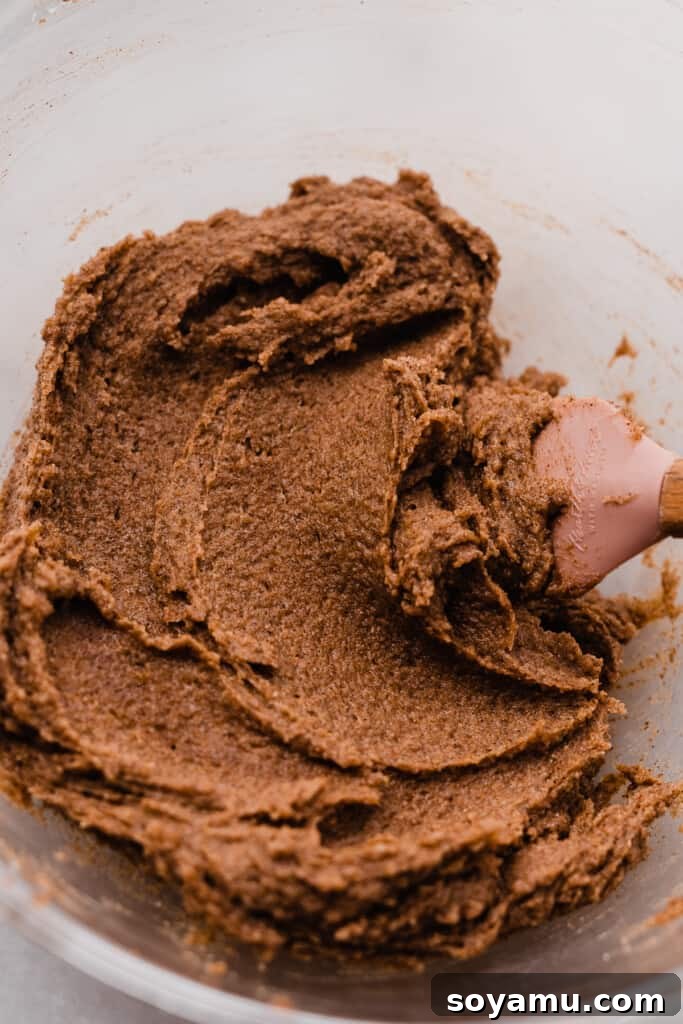
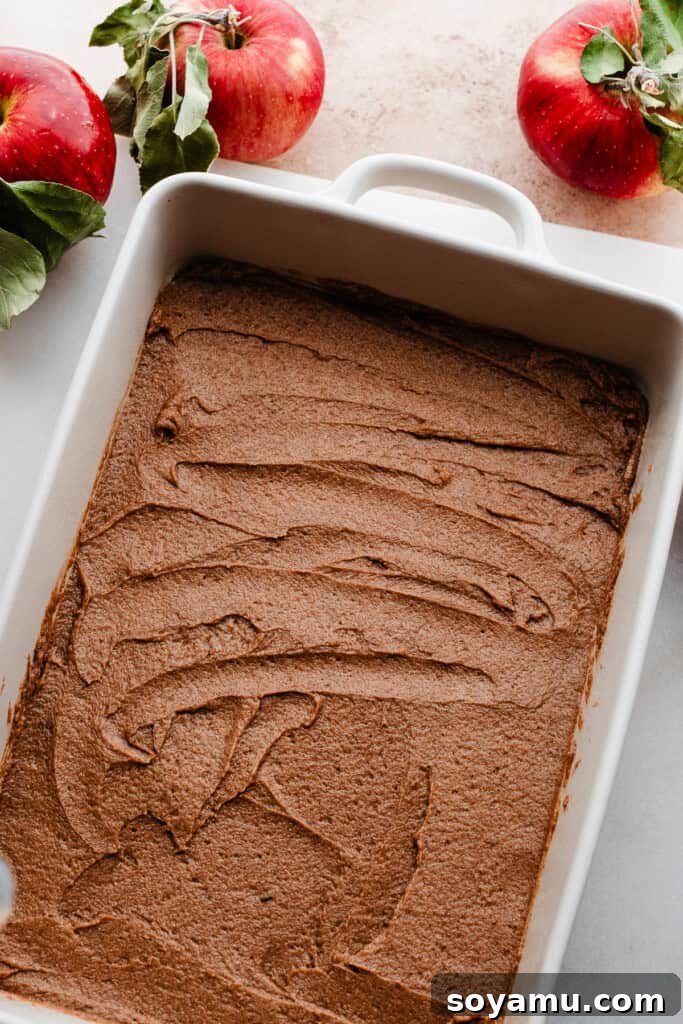
This is where the magic of the gooey bottoms begins! In a medium bowl, combine the very softened salted butter, packed dark brown sugar (light brown sugar works too), cinnamon, a pinch of salt, and vanilla extract, along with the heavy cream. Beat these ingredients together until they are thoroughly combined and creamy. Lightly spray a 9×13-inch ceramic or metal baking pan with nonstick spray, then evenly spread this thick, luscious mixture across the bottom. This will create those incredible caramelized puddles as your rolls bake.
Step 3: Preparing the Flavorful Cinnamon Filling
In a separate medium bowl (or use the same bowl you just used for the caramel sauce – no need to clean it!), beat together the softened salted butter, packed light brown sugar, cinnamon, nutmeg, a pinch of salt, and vanilla extract. Mix on medium-high speed until all ingredients are well combined and you have a thick, fragrant, and creamy cinnamon filling. Set this aside, ready for assembling the rolls.
Step 4: Assembling Your Perfect Cinnamon Rolls
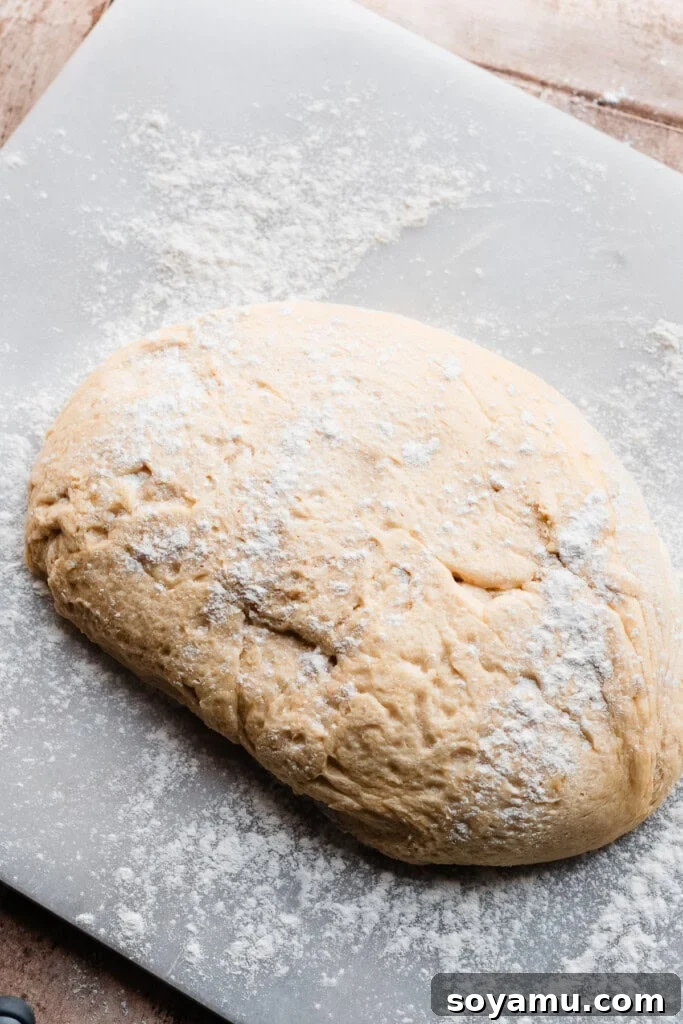
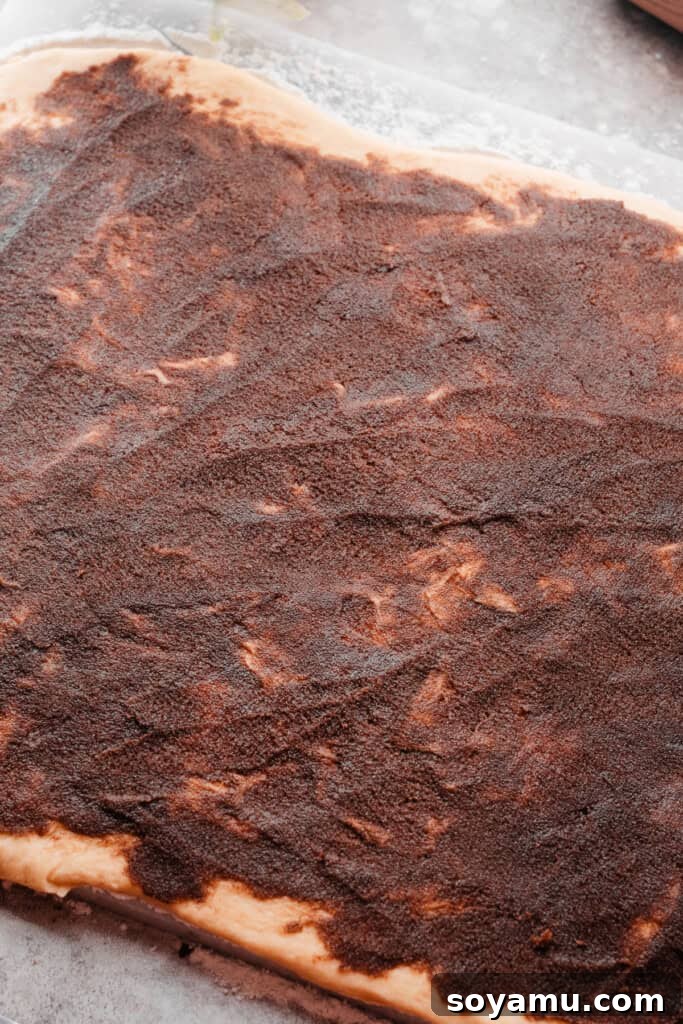
Once your dough has completed its first rise (approximately 1 hour), generously flour your countertop. Ensure you have ample space to roll the dough out to a rectangle measuring about 14 inches by 22 or even 24 inches. Gently turn the risen dough out onto your floured surface. Using a rolling pin, carefully roll the dough into the desired rectangular shape. Precision here ensures even rolls, so don’t hesitate to use a ruler! Once rolled, dot the entire surface of the dough evenly with the prepared cinnamon filling. Use an offset spatula to gently spread the filling from edge to edge, getting as close to the perimeter as possible for maximum flavor in every roll.
Step 5: Slicing, Rolling & Final Rise
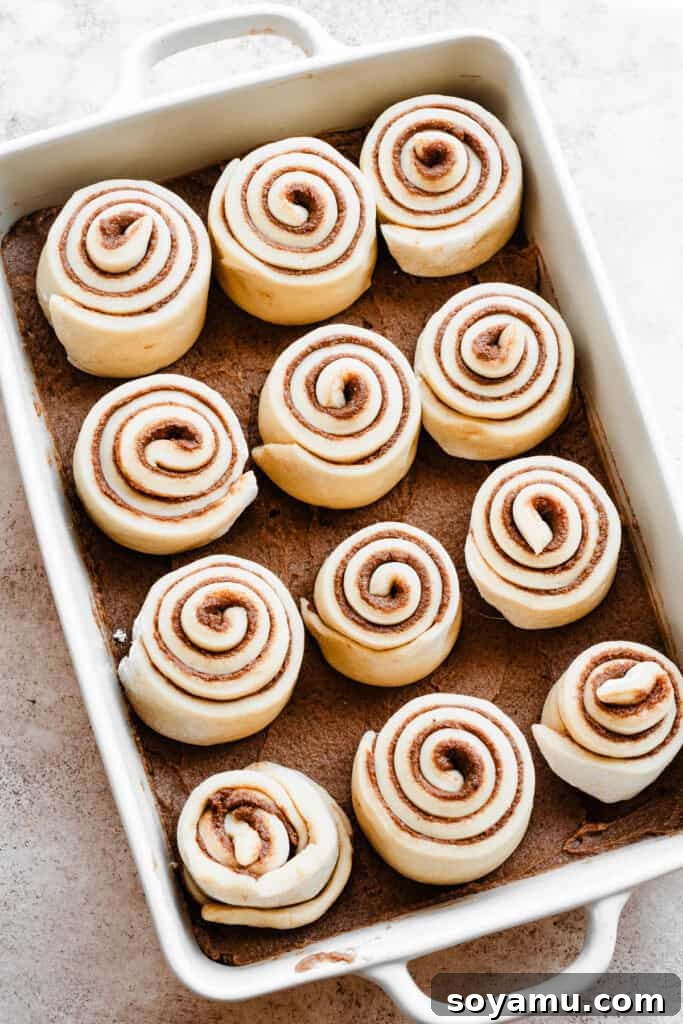
Now it’s time to shape your rolls! Instead of rolling the entire dough into a log and then slicing (which can be messy), we’re going to slice the dough into individual strips first. Using a sharp knife or a bench scraper, cut strips from the long side of the dough, each approximately 1 and 3/4 inches wide. Then, carefully roll up each strip into a classic cinnamon roll spiral. This method often results in more uniform rolls and is generally easier to manage. If you have smaller pieces from the ends of the rectangle, you can combine them by rolling one strip into a roll, then wrapping the other smaller strip around it.
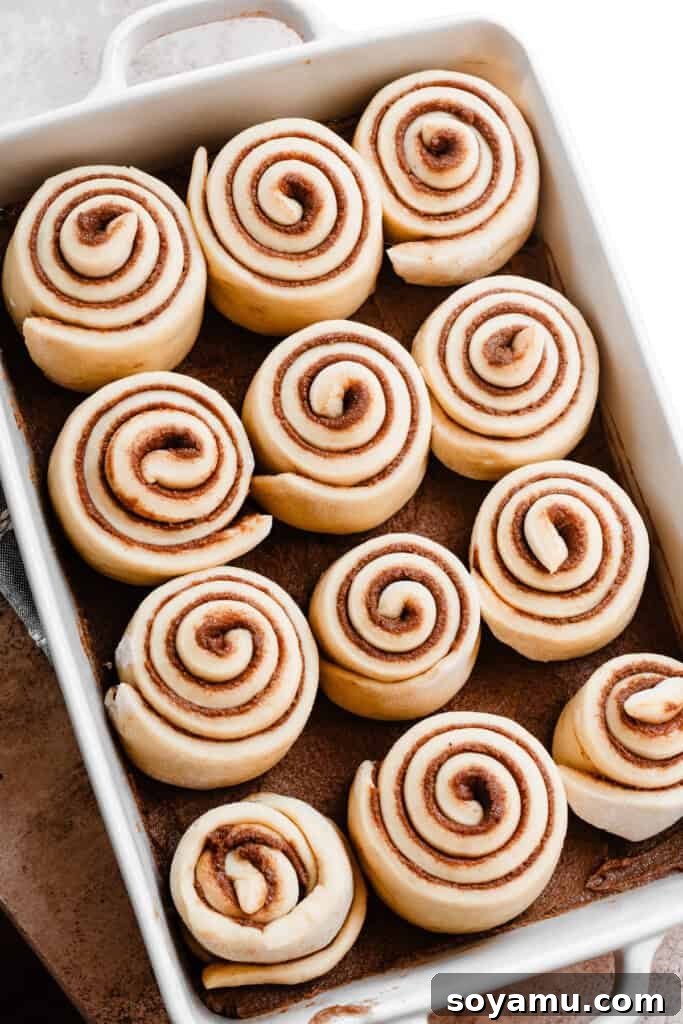
Carefully place your assembled rolls into the prepared 9×13-inch pan, arranging them snugly on top of the caramel sauce. For even baking, try to position any slightly smaller rolls in the center, as these areas typically bake a little slower. Cover the pan loosely with a clean kitchen towel and let the rolls undergo their final rise for about 30-40 minutes. The warmth of your kitchen will influence the rise time; a warmer room will expedite the process. To check for readiness, perform the indent test again: gently poke the side of a roll with your finger; if the indent holds and doesn’t spring back, they’re ready to bake. While they rise, preheat your oven to 325°F (160°C). We often place the rolls near the warming oven to encourage their final proofing.
Step 6: Baking to Golden Perfection
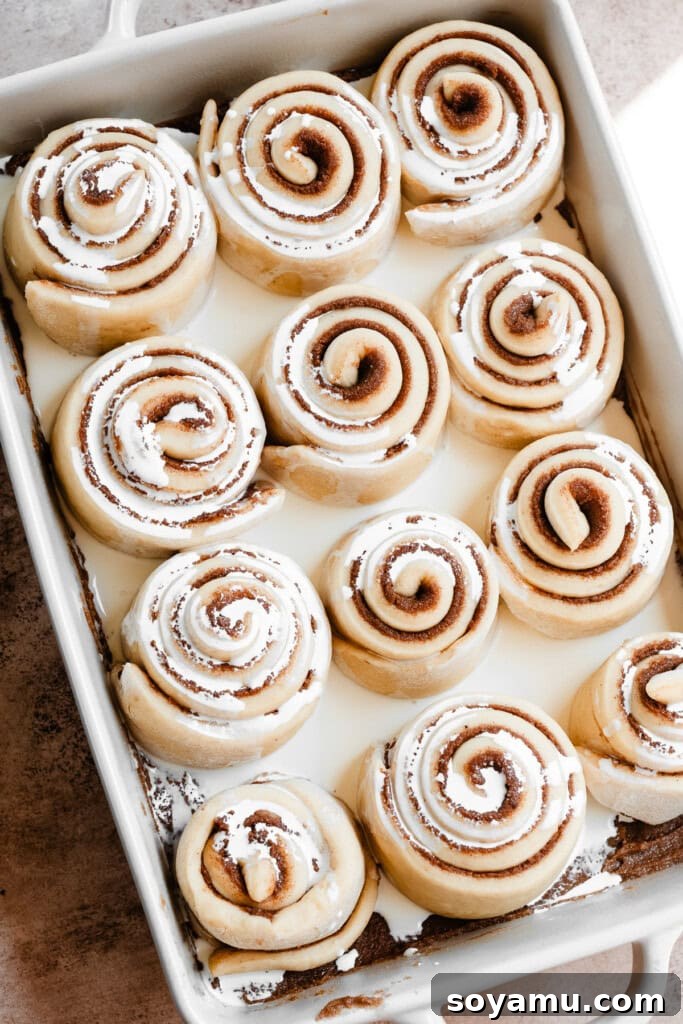
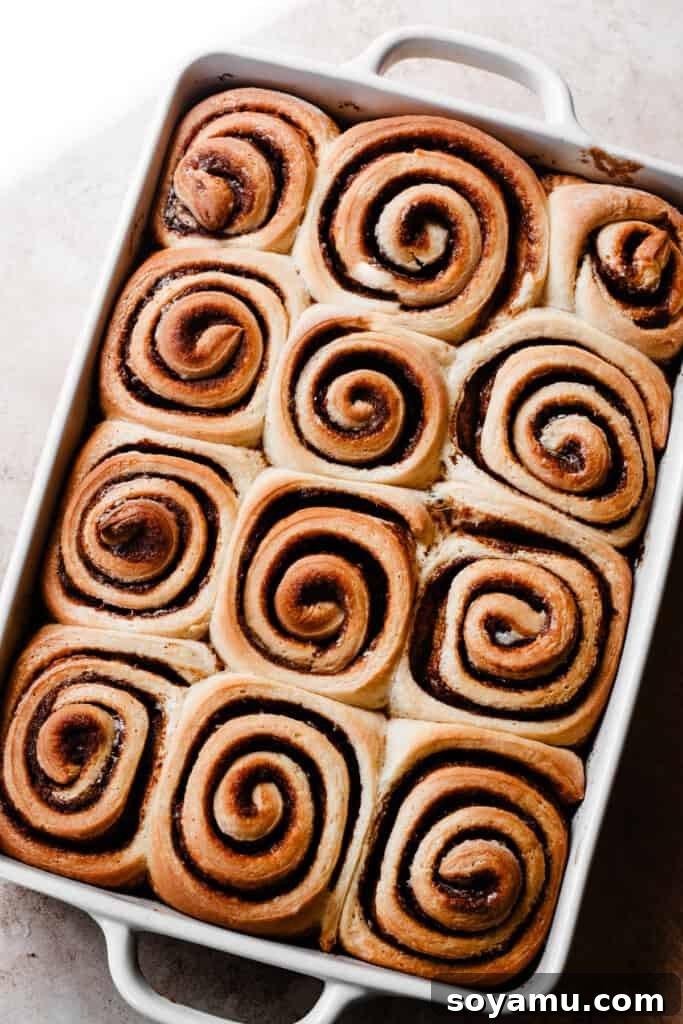
Once your cinnamon rolls are perfectly risen, gently pour room temperature heavy cream over the top and between each roll. This step is crucial for ensuring the rolls remain incredibly moist and contribute to the gooey caramelized bottom. Bake the rolls in your preheated 325°F (160°C) oven for 38 to 44 minutes. They are done when they achieve a beautiful light golden brown color on top and appear set in the centers. For absolute precision, insert an instant-read thermometer into the center of one of the middle rolls; it should register between 205-210°F (96-99°C). Also, check the tip of the thermometer for any raw dough clinging to it. If necessary, add a few more minutes to the baking time until thoroughly cooked. While your rolls are baking, it’s the perfect time to prepare your frosting!
Step 7: Whipping Up the Cream Cheese Frosting
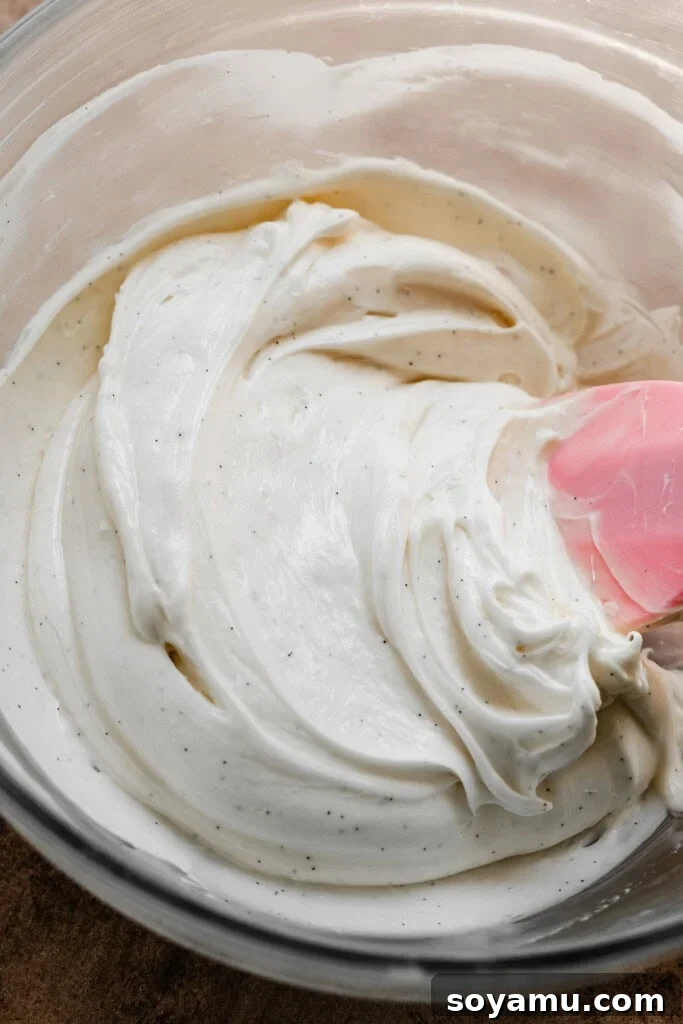
For the ultimate finish, prepare the luscious cream cheese frosting. In a medium mixing bowl, combine the softened cream cheese, softened butter, powdered sugar, vanilla extract, a pinch of salt, and a dash of cinnamon (start with 1/8 tsp and adjust to your preference, up to 1/2 tsp for more spice). Beat these ingredients together on medium-high speed until everything is smoothly combined and beautifully creamy. If you prefer a thinner consistency, gradually add 2-3 tablespoons of milk or heavy cream, mixing until desired consistency is achieved. Remember, cream cheese frosting tends to become runnier the longer it’s mixed, so stop as soon as it reaches your preferred texture.
Step 8: Frosting and Serving Your Masterpiece
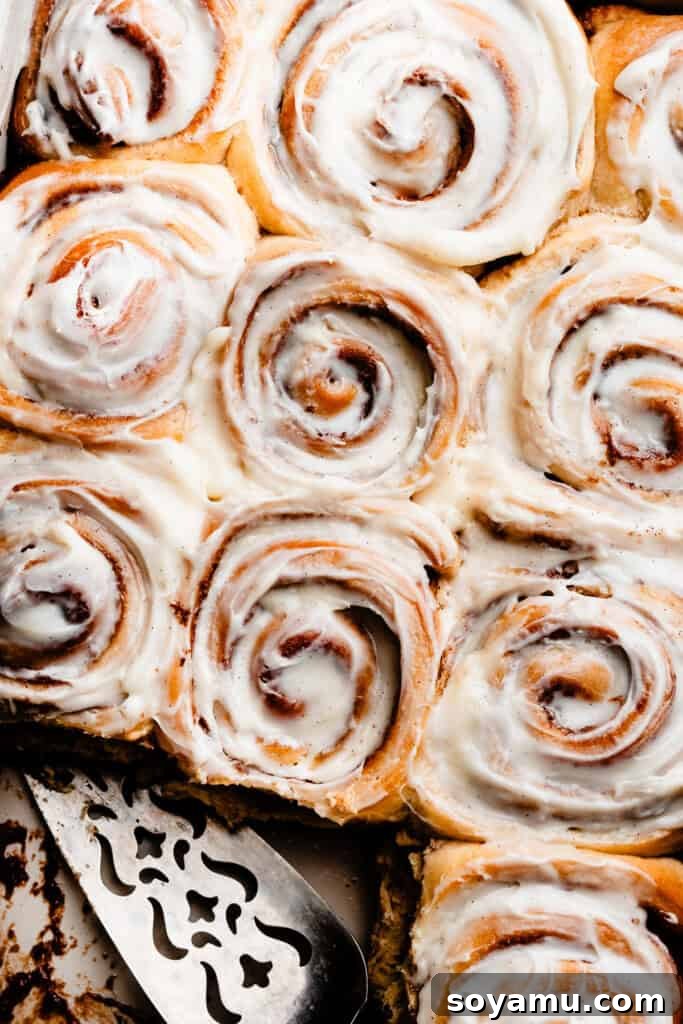
The moment you’ve been waiting for! As soon as the baked cinnamon rolls come out of the oven, immediately spread the prepared cream cheese frosting generously over the warm rolls. The heat from the rolls will slightly melt the frosting, allowing it to seep into all the nooks and crannies, creating an even more decadent experience. Serve and enjoy your incredible homemade gooey cinnamon rolls while they are still warm! They are truly at their best fresh from the oven, with the frosting melting into a glorious glaze. This is a treat that will disappear quickly!
Serving and Storing Your Homemade Cinnamon Rolls
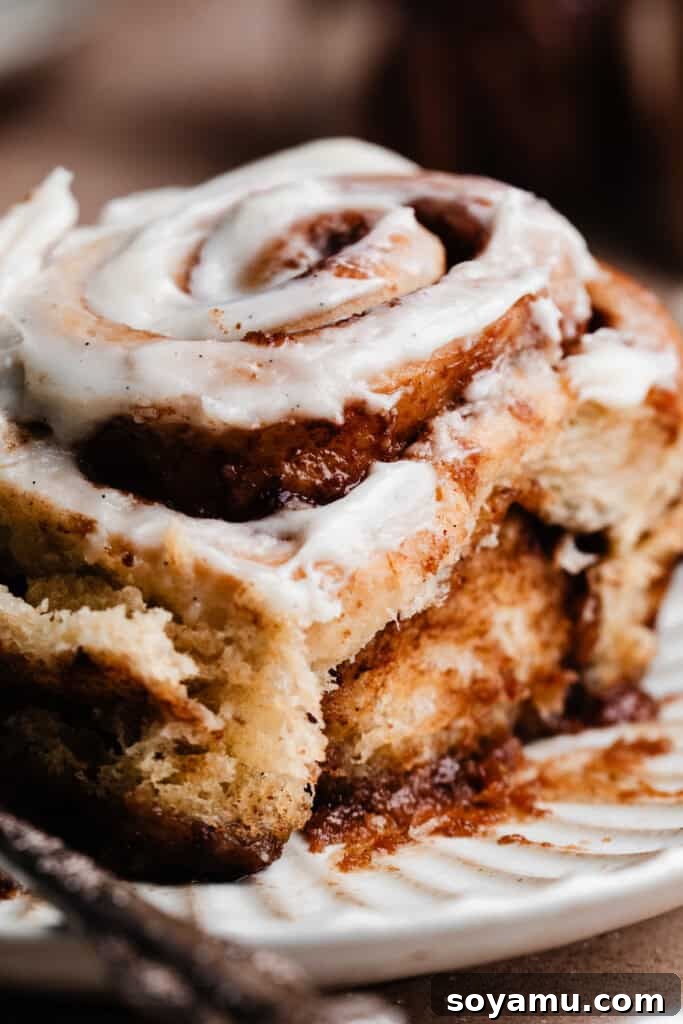
These incredible gooey cinnamon rolls are an absolute delight when served warm, ideally fresh from the oven. The soft texture and melting frosting create an unparalleled experience. However, any leftovers can be stored in an airtight container in the refrigerator for 2-3 days. For the best enjoyment of reheated rolls, gently warm them in the microwave or a low oven until soft and fragrant again – because let’s be honest, a cold cinnamon roll simply doesn’t do justice to its gooey potential!
If you’ve fallen in love with these classic cinnamon rolls, be sure to explore our other delightful variations. You’ll swoon over our Blueberry Cinnamon Rolls for a fruity twist, and our Apple Pie Cinnamon Rolls for a comforting, seasonal treat!
Pro Tips for Cinnamon Roll Success
Achieving bakery-perfect cinnamon rolls consistently requires attention to detail. Here are some expert baking tips to help you master this recipe and ensure every batch is as incredible as the last:
-
Utilize an Oven Thermometer for Accuracy
An oven thermometer is one of the most underrated tools in a baker’s arsenal. It provides a real-time reading of your oven’s internal temperature, which can often differ significantly from the setting on your dial. Accurate oven temperature is absolutely critical for yeasted doughs; an oven that runs too hot can dry out your rolls, while one that’s too cool can result in underbaked or dense rolls. Keep an oven thermometer inside at all times to monitor calibration and ensure consistent, perfect baking results.
-
Invest in a Kitchen Scale for Precision
For truly consistent and professional-level baking, a food scale is a game-changer. Measuring flour by volume (cups) can lead to wide variations depending on how it’s scooped and packed, potentially resulting in too much flour and a dry, heavy dough. A kitchen scale ensures you’re adding the exact amount of flour by weight, guaranteeing the proper hydration and texture for your dough every single time. It’s the best way to achieve light, airy, and consistently perfect cinnamon rolls.
-
Ensure Room Temperature Ingredients
While mentioned for eggs, this tip applies broadly. Butter, milk, and cream cheese for frosting also benefit from being at room temperature. Room temperature ingredients emulsify more easily, creating smoother batters, doughs, and frostings. This results in a more uniform product and contributes to the overall pillowy texture of your rolls.
Frequently Asked Questions (FAQs) About Cinnamon Rolls
Can I double or halve this recipe?
While you can certainly adjust the recipe, we generally do not recommend doubling the dough itself. Working with such a large quantity of enriched dough can significantly impact rise times and kneading consistency, making it harder to achieve the desired pillowy texture. Instead, if you need a larger batch, consider making two separate batches of dough. You can, however, easily double the other elements like the cinnamon filling, caramel sauce, and frosting, storing half of each for your second batch. Alternatively, if you wish to make fewer rolls, you can halve the entire recipe and bake it snugly in a smaller pan, such as an 8×8-inch pan, which will comfortably fit 6 rolls.
Can I make these ahead?
While the dough hasn’t been extensively tested for specific overnight proofing times in our kitchen, some elements of this recipe are definitely make-ahead friendly. The cinnamon filling, the caramel “sauce,” and the cream cheese frosting can all be prepared 1-2 days in advance. Store each component in its own airtight container in the refrigerator until ready to use. For the rolls themselves, a strong possibility exists to assemble them the night before (with the caramel sauce already in the pan), cover tightly with plastic wrap, and refrigerate overnight. The next morning, allow them to come to room temperature on the counter for 1-2 hours, or until they have visibly risen to the size shown in the photos, before adding the heavy cream and baking. This method allows you to enjoy fresh, warm cinnamon rolls with less morning fuss.
Recommended Tools for Baking Cinnamon Rolls
While many baking tasks can be accomplished with basic kitchen equipment, certain tools can significantly streamline the process and help you achieve superior results for these homemade cinnamon rolls:
-
Stand Mixer: Your Dough-Making Ally
While it is possible to make these cinnamon rolls by hand, incorporating and kneading the enriched dough can be quite a workout. A stand mixer equipped with a dough hook attachment makes the process remarkably easier and more efficient, ensuring the dough is perfectly kneaded to develop the necessary gluten for that pillowy texture without tiring your arms.
-
Ruler: For Precision and Uniformity
This might sound unconventional for baking, but a ruler or a mini tape measure is incredibly handy in our baking drawer! It’s invaluable for accurately measuring the dough when rolling it out into a perfect rectangle and for ensuring that each cinnamon roll strip is cut to a uniform width. Precision in these steps leads to evenly sized rolls that bake consistently and look professionally made.
-
Rolling Pin: The Essential Dough Flattener
A good quality rolling pin is a fundamental tool for this recipe. It’s essential for rolling out your dough to the correct thickness and dimensions, creating the perfect canvas for your cinnamon filling. Whether you prefer a classic French-style pin or a more traditional one with handles, make sure it’s comfortable to use for an even roll.
Explore More Delicious Yeasted Dough Recipes
If you enjoyed the process of making these cinnamon rolls and are looking to expand your baking repertoire with more delightful yeasted dough creations, we have several other recipes that are sure to inspire you. From fruity variations of cinnamon rolls to classic pastries and unique desserts, there’s something for every baker:
- Peach Cobbler Cinnamon Rolls
- Maple Brioche Cinnamon Rolls
- Homemade Apple Fritters
- Homemade Soft Pretzels (3 Ways!)
- Caramel Apple Dessert Pizza
Did you make this recipe? Leave a comment & review!
We value your feedback immensely! Your comments and reviews help our small business grow and allow us to continue sharing delicious recipes. Thank you for baking with us!
Rated 5 out of 5 stars (1 vote)
Incredible Gooey Cinnamon Rolls
By Stephanie Simmons
These are no ordinary Cinnamon Rolls! They’re pillowy soft and gooey all the way through – it’s not just the middle bite that has the best texture. Baking at a slightly lower temperature ensures the rolls are soft all the way through – and not crunchy on the outside! They’re baked with extra filling in the bottom of the pan, which creates puddles of caramelized goodness below each roll!
Prep: 30 mins
Cook: 40 mins
Dough Rising: 1 hr 30 mins
Total: 2 hrs 40 mins
Servings: 12 rolls
Ingredients
For the Cinnamon Roll Dough:
- 1/2 cup salted butter, melted, 115℉ (113 grams)
- 1 cup warm milk, 115℉ (See Note below!, 240 mL)
- 2 large eggs, lightly beaten and at room temperature
- 1/3 cup granulated sugar (70 grams)
- 2 and 1/2 tsp instant yeast (9 grams)
- 3/4 tsp salt
- 4 cups + 1 tbsp all-purpose flour, spooned & leveled or weighed out (528 grams)
For the Cinnamon Caramel Sauce:
- 1/2 cup salted butter, very softened (113 grams – feel free to microwave this to quickly soften it – if it’s a *tad* melty, that’s fine.)
- 3/4 cup dark brown sugar, packed (Light is fine too. 165 grams)
- 2 tsp cinnamon
- pinch of salt
- 1 tsp vanilla extract
- 1/4 cup heavy cream (60 grams)
For the Cinnamon Filling:
- 1/2 cup salted butter, softened (113 grams)
- 3/4 cup light brown sugar, packed (165 grams)
- 2 tbsp cinnamon
- 1/4 tsp nutmeg
- pinch of salt
- 1/2 tsp vanilla extract
- 1/3 cup heavy cream, for pouring over the rolls – don’t mix into the filling (Gently warm this in the microwave. 80 grams)
For the Frosting:
- 6 ounces cream cheese, softened (170 grams)
- 1 cup powdered sugar (115 grams)
- 1 tsp vanilla extract
- pinch of salt
- 1/8 tsp cinnamon (I usually add more, about 1/4 to 1/2 tsp in total. Start small and/adjust to taste!)
- 2-3 tbsp milk or heavy cream (30-45 grams)
Instructions
-
Make the Dough & First Rise: In the bowl of your stand mixer, add the melted butter, warm milk, beaten eggs, sugar, yeast, and salt. Whisk together. Then, add the paddle attachment and add the flour. Mix on low speed (setting 2-3) just until the flour disappears into the dough. It will be shaggy and wet. Let this rest for 5 minutes before proceeding.
Scrape the dough off the paddle attachment and add the dough hook. Knead the dough on setting 1-2 (no higher!) for 5-7 minutes. The dough will begin to pull away from the sides of the bowl towards the 5 minute mark and will look smoother and elastic, however it will still seem a bit slack.
Gently pour the dough onto a clean countertop and spray the stand mixer bowl with nonstick spray (no need to wipe it out!), then place the dough back in to rise. Let the dough rise for 1 hour. It should have doubled in size, and an indent should hold when you poke your fingertip into it. Make the cinnamon caramel sauce and cinnamon filling while the dough rises – see next two steps.
Tip: This time will be longer when it’s cold out, and about 1 hour in the summer – when I did this, it was 72-73℉ in my home. Go by the look of the dough doubling & the indent holding shape rather than the time. - Make the Cinnamon Caramel Sauce: Beat together all sauce ingredients in a medium bowl until well combined. Spray a ceramic or metal 9×13 pan with nonstick spray, then evenly spread this thick mixture in the bottom.
- Make the Cinnamon Filling: Beat together all filling ingredients in a medium bowl on medium high speed until well combined. (You can use the same bowl as you used in the step above – no need to clean it!) You’ll have a thick creamy mixture.
- Assemble the Rolls: After the dough has risen for about 1 hour, generously flour your counter. Make sure you have room to roll the dough to 14 inches by 22 or 24 inches. Gently dump the risen dough onto your floured counter and roll to 14×22 (or up to 15×24). Dot the cinnamon filling all over, and use an offset spatula to gently spread it as evenly as you can, getting close to the edges.
-
Assemble Cinnamon Rolls: Slice strips from the long side of the dough that are about 1 and 3/4 inches thick.* Roll each one up into a roll, then place in the prepared pan, on top of the caramel sauce. Use the slightly smaller pieces from each far end of the rectangle to roll into one cinnamon roll (roll one up like normal, then roll the other strip around it).
Try to place any smaller rolls in the center as the center ones always take a tad longer to bake, and this will help even things out.
Place the pieces in the prepared dish and cover loosely with a kitchen towel. Let rise for about 30 to 40 minutes (the warmer the room, the faster they’ll rise). To check if they’ve risen enough, poke the side of a roll with your finger. If the indent stays and doesn’t spring back, they’re ready.
Preheat your oven to 325℉ while the rolls rise. I place my rolls next to the oven on the counter.
*Note: I find this method easier than rolling the dough into a log and slicing them that way! However, you can do that as well. -
Bake: Once the cinnamon rolls have risen, pour the room temperature heavy cream over and between them. Bake at 325℉ for 38 to 44 minutes. The rolls will be golden brown and appear set in the centers, and an instant read thermometer inserted into the center of one of the middle rolls should read 205 to 210 ℉. Check the tip of the thermometer for raw dough clinging to it as well – add a few more minutes if needed.
Prepare frosting while the rolls bake. - Make the Frosting: Beat together all ingredients in a medium mixing bowl. Mix on medium high until everything is combined and creamy. Thin the icing out a bit with milk or heavy cream as desired. Don’t beat it for as long if you want it to remain thicker. (Cream cheese will become runnier the longer you mix it.)
- Serve + Store: Immediately frost the warm rolls. Enjoy! Store leftovers, in an airtight container in the fridge for 2-3 days, reheating gently as desired. These are best fresh from the oven, naturally, but do re-heat nicely over the next day or two!
Notes
For more tips, FAQs, and step-by-step photos be sure to read the blog post above! Use the table of contents below the first image to jump to various sections.
Nutrition
, Calories: 649kcal
, Carbohydrates: 79g
, Protein: 9g
, Fat: 34g
, Saturated Fat: 21g
, Polyunsaturated Fat: 2g
, Monounsaturated Fat: 9g
, Trans Fat: 1g
, Cholesterol: 122mg
, Sodium: 406mg
, Potassium: 196mg
, Fiber: 3g
, Sugar: 44g
, Vitamin A: 1157IU
, Vitamin C: 0.1mg
, Calcium: 108mg
, Iron: 3mg
Nutrition information is automatically calculated, so should only be used as an approximation.