
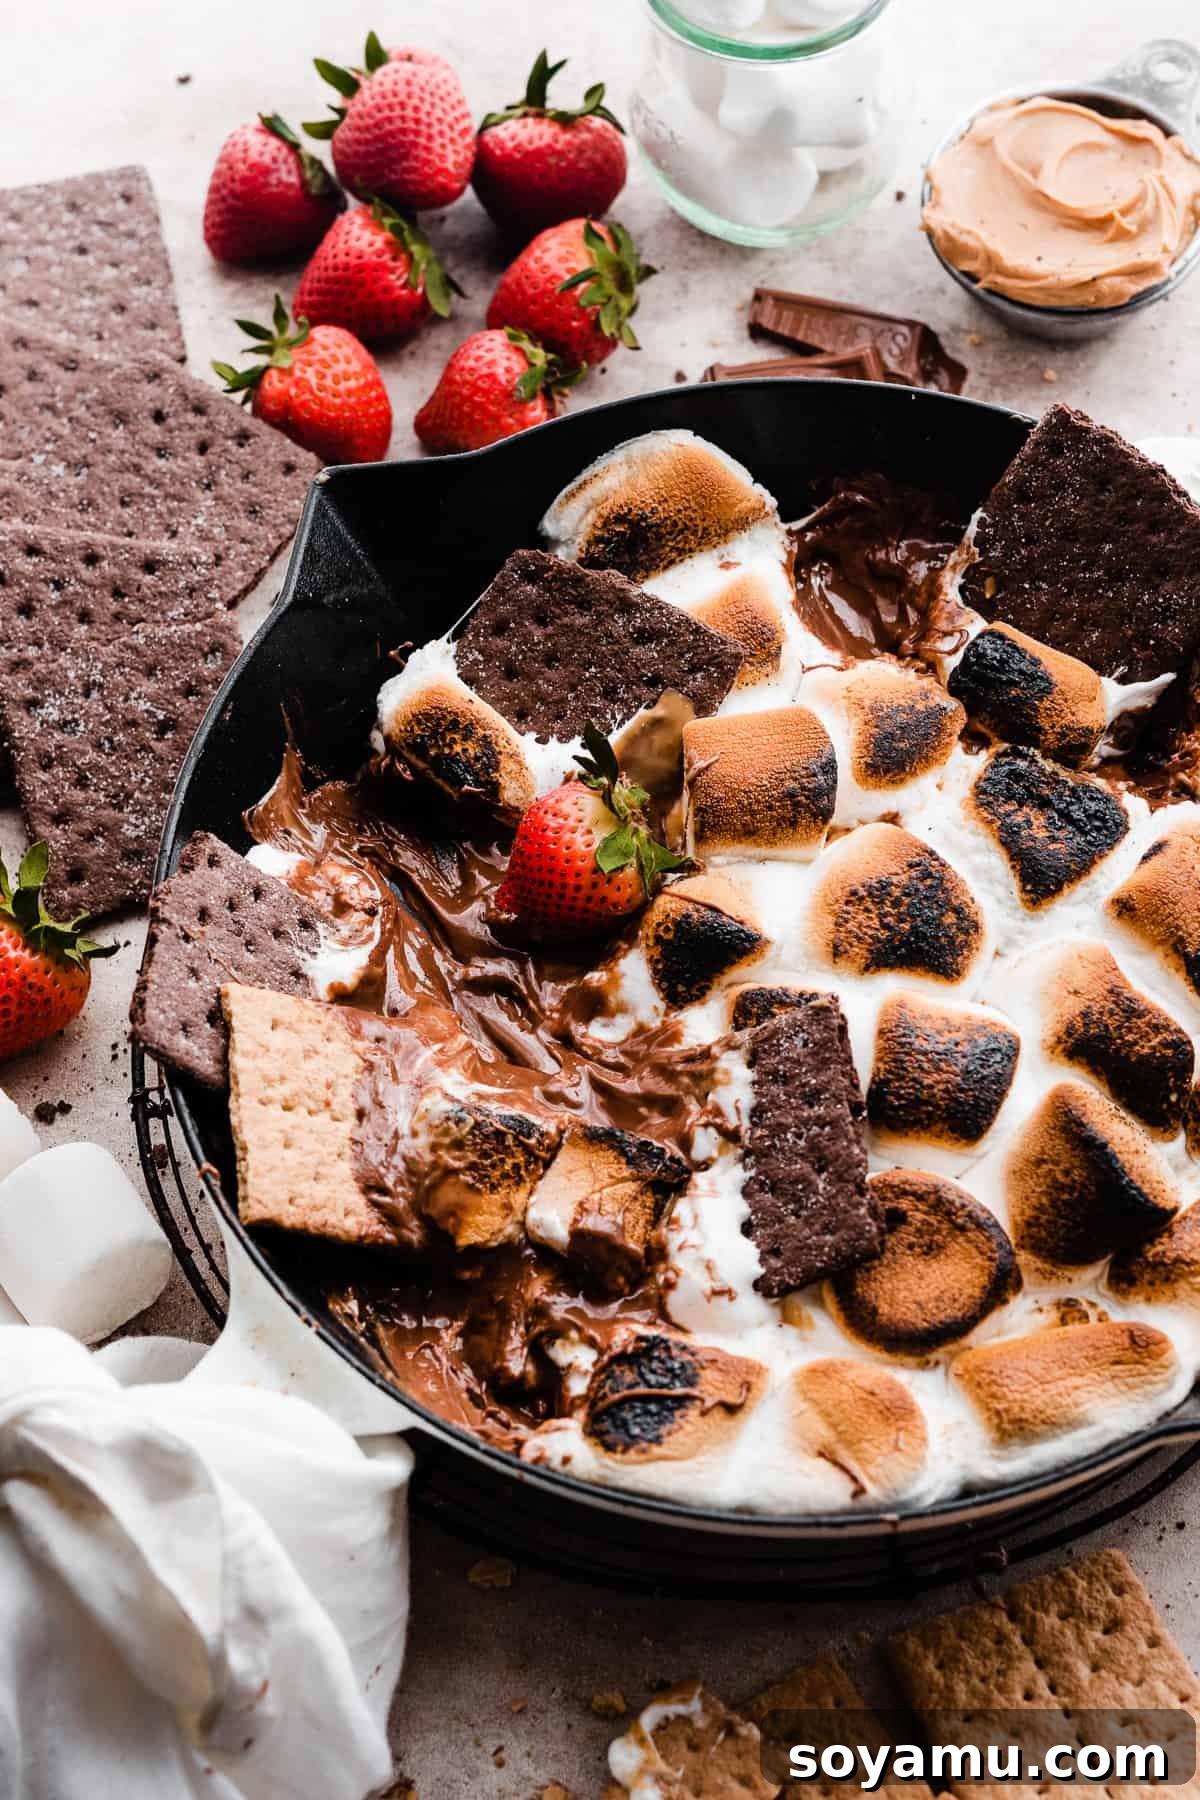
Easy Skillet S’mores Dip: Your Ultimate No-Campfire Dessert
Craving the classic, comforting taste of s’mores but without the hassle of building a campfire? Our **Easy Skillet S’mores Dip** is the perfect solution, bringing all the beloved flavors and wonderfully gooey textures right to your kitchen table. This incredibly simple, yet utterly crowd-pleasing dessert requires minimal effort and delivers maximum satisfaction. Imagine decadent layers of rich, melted chocolate, delightful pockets of creamy peanut butter (if you choose to add them!), and a generous topping of perfectly toasted marshmallows, all baked together in one convenient oven-safe skillet. It’s an irresistible treat that embodies the warmth and nostalgic charm of a traditional s’more, reimagined for modern indulgence. Gather your favorite dippers – from crisp graham crackers and refreshing fresh fruit to an array of sweet and savory cookies – and prepare to dive into a warm, molten, and unforgettable dessert experience that will delight everyone, every time.
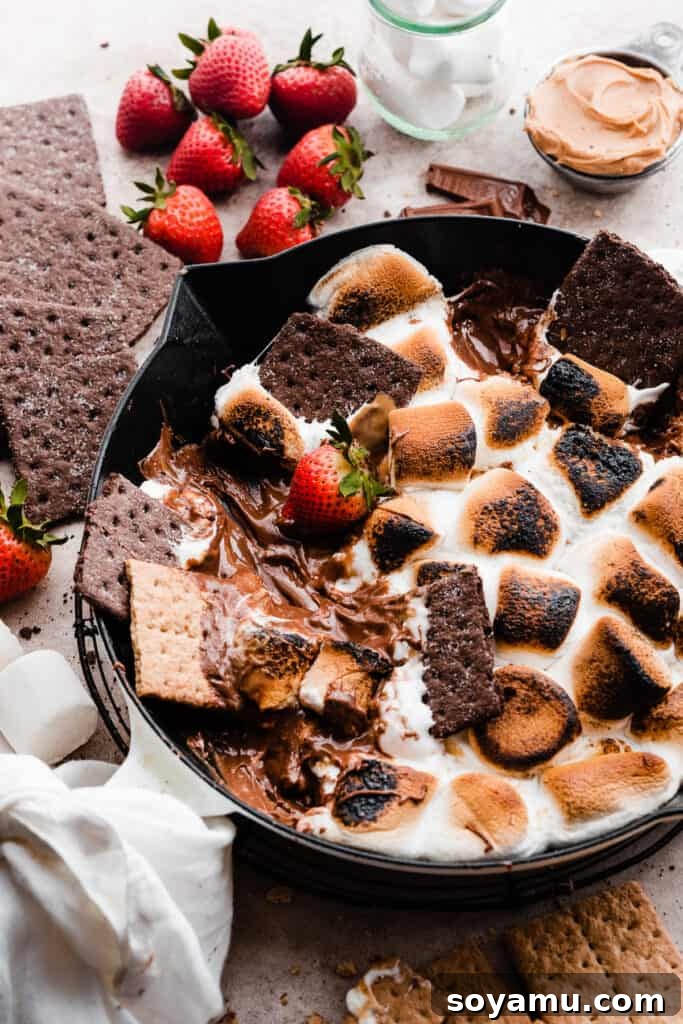
Why You’ll Fall in Love with This Easy Skillet S’mores Dip
This isn’t just another dessert recipe; it’s an experience that combines ultimate convenience with pure, unadulterated indulgence. Here’s why this Skillet S’mores Dip will quickly become a cherished favorite in your recipe collection:
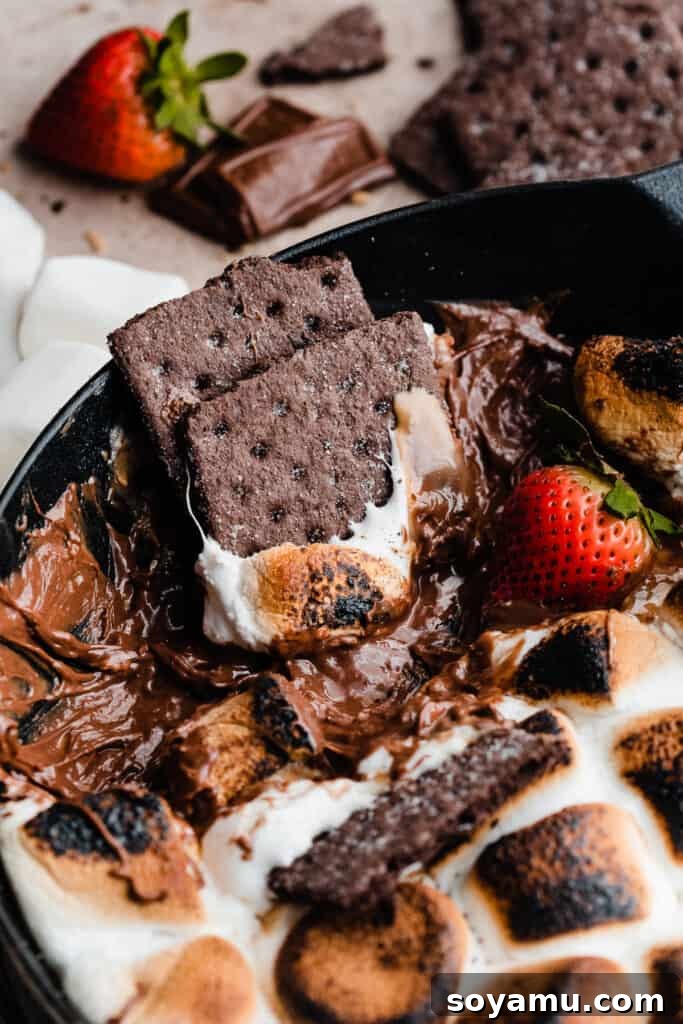
- Irresistible Layers of Melted Chocolate & Creamy Peanut Butter: Each decadent scoop promises a delightful fusion of rich, warm chocolate and velvety peanut butter. The chocolate melts into a luxuriously smooth, molten base, while strategically placed dollops of peanut butter create gooey pockets of salty-sweet goodness. This perfect pairing of flavors complements the sweetness of the marshmallows, ensuring every single bite is a decadent surprise. It’s a harmonious blend that is truly unmatched and incredibly satisfying.
- Effortless & Beginner-Friendly Recipe: Forget complicated baking techniques, obscure ingredients, or lengthy preparation times. This recipe is specifically designed for ease, making it the ideal dessert for novice bakers, busy parents, and seasoned pros alike. With just three primary ingredients and a few simple, straightforward steps, you can assemble this impressive treat in mere minutes. It’s absolutely perfect for those moments when you crave a show-stopping dessert without any of the stress, proving that delicious doesn’t have to mean difficult.
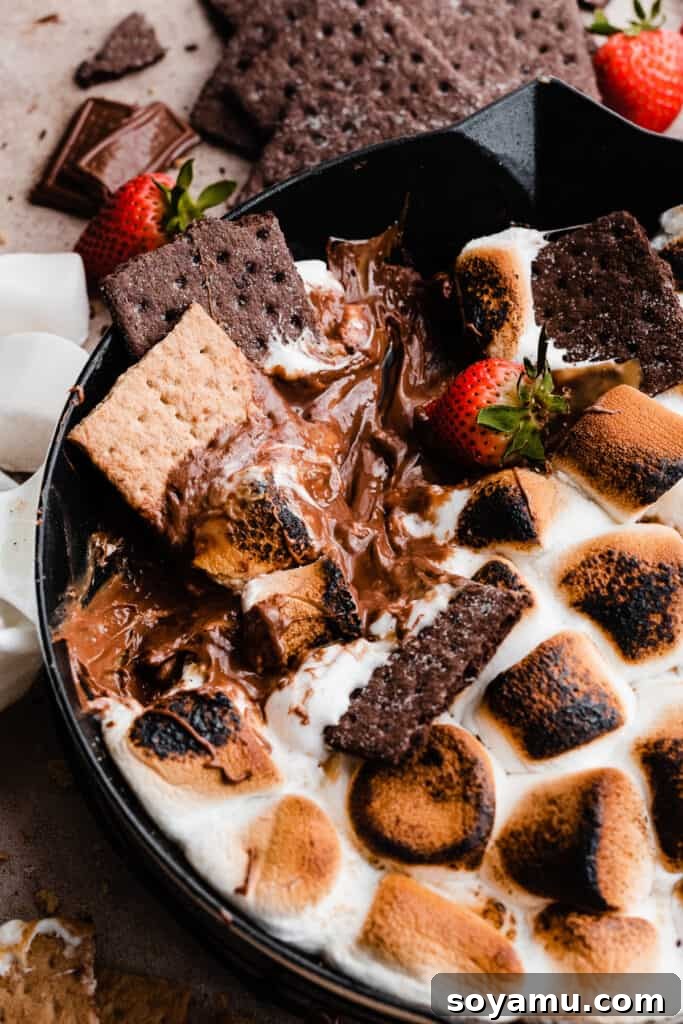
- Perfectly Toasted & Gooey Marshmallows: The crowning glory of this magnificent dip is undoubtedly its beautiful, golden-brown, and lightly charred layer of marshmallows. Baked to perfection in the oven, they achieve that coveted campfire-toasted exterior – slightly crisp and caramelized – and an irresistibly fluffy, gooey interior. This provides an authentic s’mores experience, complete with that satisfying pull and sweet, melt-in-your-mouth texture that everyone, regardless of age, adores.
- Year-Round S’mores Indulgence: The beauty of this skillet dip lies in its ability to bring the joy of s’mores to you anytime, anywhere. No campfire? No problem! Whether it’s a sweltering summer evening when building an outdoor fire is simply too hot, or a cozy winter night when you’re craving comfort food, this dip delivers. It’s the ultimate treat for movie nights, casual family gatherings, backyard BBQs, holiday parties, or simply a spontaneous weeknight dessert. It offers all the nostalgic charm of s’mores without any of the smoke, ash, or outdoor setup required.
Essential Ingredients for Your S’mores Dip
Crafting the perfect S’mores Dip begins with selecting a few simple, yet high-quality ingredients. While the full recipe with precise measurements and detailed directions can be found in the recipe card at the bottom of this post, here’s a comprehensive overview to guide your preparation:
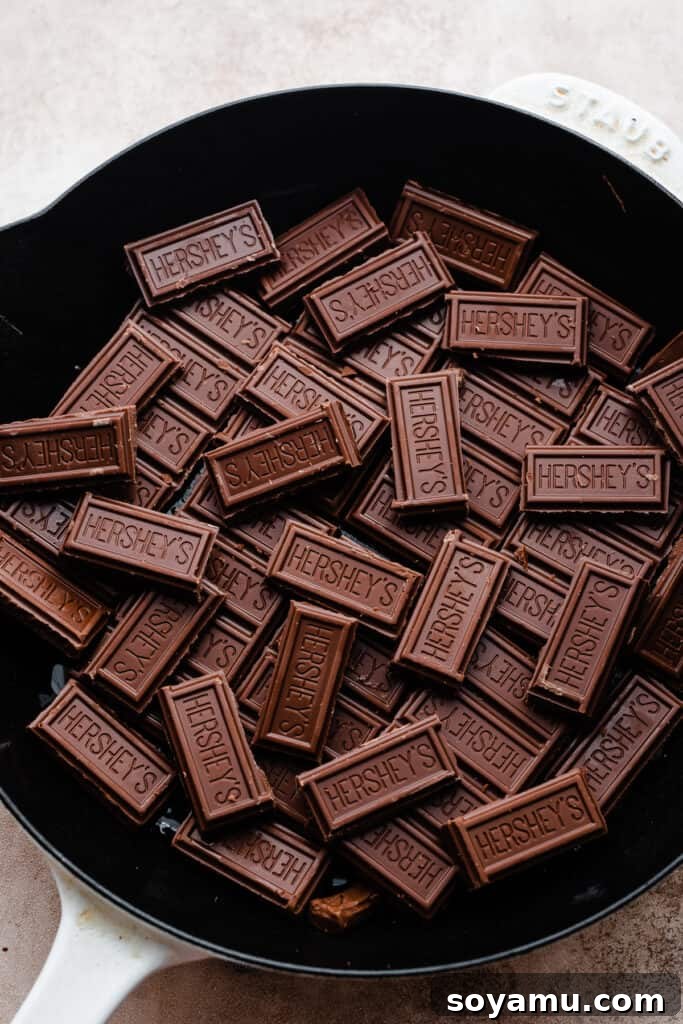
- Chocolate: For an authentic and incredibly delicious s’mores base, Hershey’s milk chocolate bars are the undisputed classic choice. Their familiar taste and excellent melting properties make them ideal for this dip. We highly recommend using their XL size bars to ensure a generous, rich chocolate layer that truly shines. However, the beauty of this recipe is its flexibility; feel free to experiment with your favorite chocolate varieties, as detailed in our substitutions section. The key is to have enough chocolate to create a substantial, molten foundation that beautifully supports the gooey marshmallows.
- Peanut Butter (Optional, but Highly Recommended!): A generous swirl of creamy peanut butter adds a fantastic nutty depth, a hint of saltiness, and an extra layer of pure indulgence that takes this dip to the next level. We find that a classic, processed peanut butter (such as Jif or Skippy) works best here. Its smoother texture and stable oil content help it melt beautifully without separating, creating delightful, gooey pockets throughout the dip. While natural peanut butter can be used, it may become slightly oilier during baking. If you’re a fan of the iconic chocolate-peanut butter combination, this addition is an absolute must-try!
- Marshmallows: These are the quintessential topping for any s’mores creation! Large marshmallows are generally ideal for this dip, as they create big, puffy, golden-brown clouds on top that achieve that perfect toasted exterior and wonderfully gooey interior in the oven. Their size ensures they don’t disappear too quickly and provide a satisfying chew. Mini marshmallows can also be used for a slightly denser and more uniform top layer, but be sure to keep a close eye on them during baking, as they tend to brown much faster due to their smaller size.
- Dippers: This is where you can unleash your creativity and truly customize the experience! The options for dipping into your warm, gooey S’mores Dip are virtually endless. Classic honey graham crackers and chocolate graham crackers are, of course, essential for that authentic s’mores flavor and satisfying crunch. But don’t hesitate to think outside the box! Consider fresh fruits like vibrant strawberries, sweet banana slices, or crisp apple wedges for a refreshing contrast. For an even more decadent and playful experience, try animal crackers, delicate vanilla wafers, salty Ritz crackers (for an amazing salty-sweet kick!), crumbly Nutter Butters, or classic chocolate Oreos. Feel free to get creative and choose a variety of dippers that perfectly complement your sweet tooth and excite your guests!
Ingredient Flexibility and S’mores Dip Substitutions
One of the most appealing aspects of this Skillet S’mores Dip recipe is its incredible adaptability. You can effortlessly tweak it to accommodate various dietary needs or simply to explore new and exciting flavor profiles. Don’t be afraid to experiment!
- Dairy-Free Delight: To transform this beloved dessert into a dairy-free treat, simply swap out traditional milk chocolate for your favorite brand of dairy-free chocolate chips or chocolate bars. The market now offers many excellent dairy-free varieties that melt beautifully and deliver a rich, satisfying chocolate flavor.
- Gluten-Free Goodness: Making this S’mores Dip gluten-free is remarkably easy. The core components of chocolate, peanut butter, and marshmallows are typically naturally gluten-free. The only adjustment needed is to ensure you select gluten-free graham crackers or other gluten-free dippers to enjoy with your dip.
- Nut-Free Alternative: If you or your guests have a nut allergy, rest assured this dip can still be enjoyed! You can simply omit the peanut butter entirely; the dip will remain incredibly delicious with just the chocolate and marshmallows. Alternatively, consider using a sunflower seed butter (often marketed as SunButter) for a similar creamy texture and rich flavor without any nuts.
- Creative Chocolate Variations: While Hershey’s milk chocolate is traditional and highly recommended, feel completely free to mix things up! A combination of milk chocolate chips and semi-sweet chocolate chips can provide a wonderfully balanced sweetness and a deeper, more complex flavor profile. For dark chocolate enthusiasts, using dark chocolate bars or chips will create a more intense, less sweet, and sophisticated dip. You could even swirl in some white chocolate chips for an added layer of creamy sweetness and visual appeal, or even a handful of butterscotch chips for a unique twist.
- Marshmallow Alternatives: If you find yourself in a pinch without traditional marshmallows, marshmallow fluff can be a quick and convenient substitute. However, it’s crucial to be aware that the baking time will be significantly shorter – usually just 2-5 minutes – as fluff browns very rapidly. Keep a very close eye on it to prevent any burning and achieve that perfect golden toast.
How to Make Your Skillet S’mores Dip: A Simple Step-by-Step Guide
Creating this irresistible Skillet S’mores Dip is incredibly straightforward and requires minimal culinary expertise. Just follow these simple steps for a perfect, gooey treat every single time. For precise measurements and any additional specific details, refer to the comprehensive recipe card located further down this page.
Step 1: Prepare Your Pan and Create the Chocolate Base. Begin by preheating your oven to a robust 450°F (230°C). This high heat is essential for achieving perfectly toasted marshmallows quickly. Next, lightly grease a 9 or 10-inch oven-safe skillet or cast iron pan with a non-stick cooking spray. This crucial preparation step prevents the melted chocolate from stubbornly sticking to the pan and makes cleanup significantly easier. Once your pan is prepped, break your Hershey’s chocolate bars into smaller, manageable pieces and arrange them in a relatively even layer across the bottom of the skillet. Don’t stress about creating a perfectly flat or precise arrangement; a bit of overlap is absolutely fine, as the chocolate will melt together into a unified, luscious base during baking.
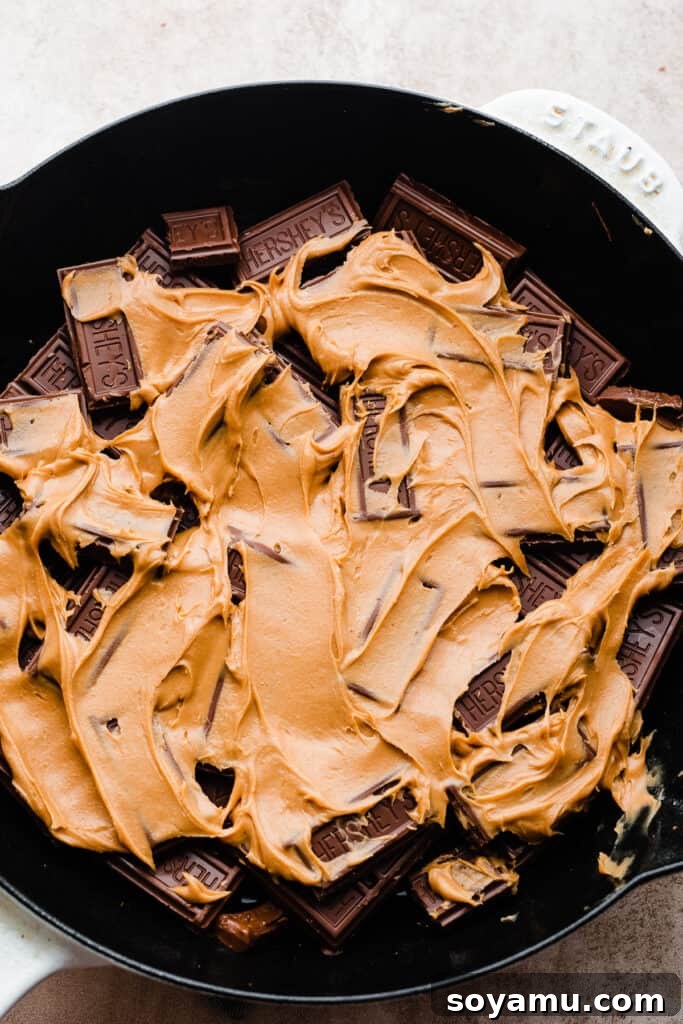
Step 2: Incorporate the Creamy Peanut Butter (Optional, but Recommended). If you’ve opted to include peanut butter in your dip (and we enthusiastically recommend it for that extra layer of nutty flavor and creaminess!), spoon generous dollops of it over the chocolate layer. There’s no need to meticulously spread it perfectly or evenly across the entire surface; simple, scattered dollops will create delightful pockets of creamy peanut butter that will melt and swirl beautifully with the chocolate during baking. This creates an exciting textural and flavor contrast with every decadent bite, elevating the entire experience.
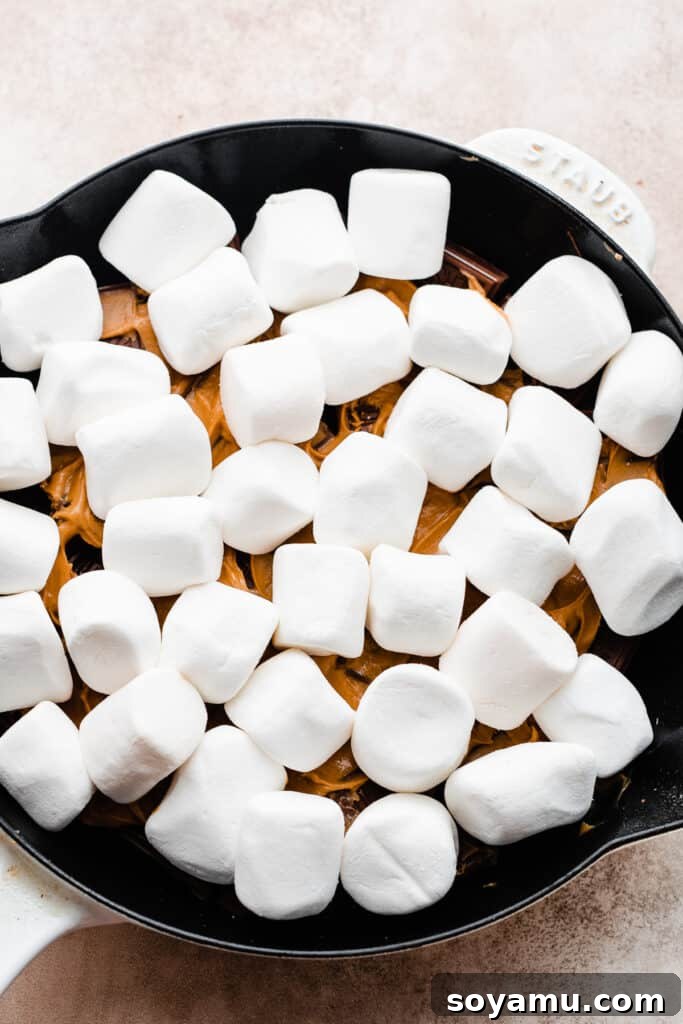
Step 3: Crown with a Blanket of Marshmallows. The final, crucial layer before baking is, of course, the marshmallows! Arrange a single layer of large marshmallows closely together on top of the chocolate and peanut butter base. It’s perfectly acceptable if they touch and slightly overlap; in fact, this helps them melt and puff up into a cohesive, wonderfully gooey blanket that forms the signature golden-brown topping. If you’re using mini marshmallows, sprinkle them generously and evenly to cover the base completely, ensuring a consistent toast.
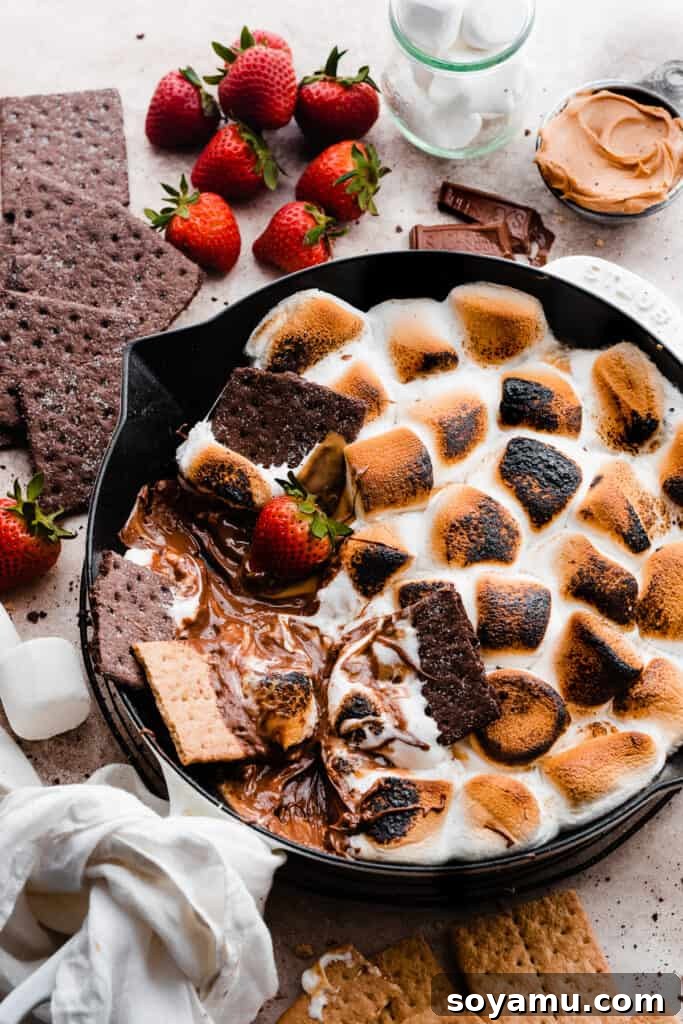
Step 4: Bake to Golden Perfection & Serve Immediately! Carefully place your assembled skillet into the preheated 450°F (230°C) oven. Bake for approximately 5-10 minutes. The exact baking time can vary slightly depending on your specific oven and the type and size of marshmallows used, so it’s essential to keep a close watch. You’ll know your S’mores Dip is perfectly ready when the chocolate base is fully melted and bubbling gently around the edges, and the marshmallows themselves are beautifully puffed up, golden brown, and lightly caramelized on top. For an extra authentic campfire char and a delicious smoky flavor, you can carefully use a kitchen torch to toast the marshmallows further for a few seconds once the skillet is removed from the oven. This adds a lovely visual appeal and a crispier exterior.
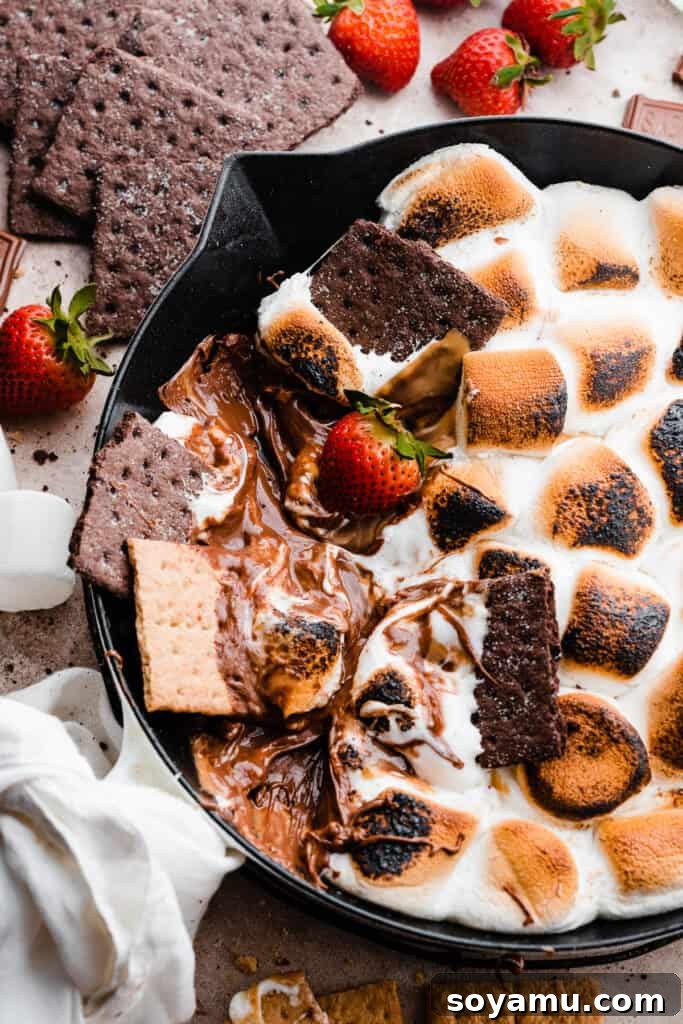
Once baked to perfection, remove the skillet from the oven and, crucially, allow it to cool for 5-10 minutes before attempting to serve. This brief resting period is vital to prevent burning your mouth on the molten hot chocolate and marshmallow. Then, gather your fantastic array of dippers – crisp honey graham crackers, rich chocolate graham crackers, refreshing fresh strawberries, sweet banana slices, crunchy Oreos, creamy Nutter Butters, or even salty pretzels for a delightful contrast – and dig in! This dip is an absolute dream when enjoyed warm and gooey, directly from the skillet.
Serving and Storing Your S’mores Dip
Proper serving and careful storage ensure you get the absolute most enjoyment out of your delicious S’mores Dip, whether you’re sharing it with a large crowd or savoring it for a lingering indulgence.
Serving Guidelines: The golden rule for serving this magnificent dip is patience! While the aroma and bubbling appearance make it incredibly tempting to dive straight into the hot skillet, allow it to cool for at least 5-10 minutes after removing it from the oven. This brief, but crucial, cooling time allows the molten chocolate and marshmallow to set slightly and cool down to a safe temperature, significantly reducing the risk of a burned mouth while still keeping it wonderfully warm, gooey, and easy to scoop. Always serve it directly in the skillet it was baked in, surrounded by an inviting array of dippers. This communal serving style adds to the fun and interactive experience, making it a memorable treat for everyone.
Storing Leftovers: Should you be fortunate enough to have any leftovers – which is a rare occurrence with this popular treat! – they can be easily stored. Once the dip has cooled completely to room temperature, cover the skillet tightly with aluminum foil or plastic wrap. Store it at room temperature for up to 2-3 days. We strongly advise against attempting to transfer the cooled, sticky dip to an airtight container, as its gooey nature will make it an incredibly messy and challenging task. Keeping it in the cast-iron skillet (or whichever oven-safe pan you used) is by far the most practical and efficient storage method.
Reheating Instructions: To reheat any cooled leftovers, simply place the covered skillet back into a preheated oven at a moderate temperature, around 300°F (150°C), for 10-15 minutes, or until the chocolate is melty and the marshmallows are soft and gooey again. Keep a watchful eye on the marshmallows during reheating to prevent them from over-browning. While perfectly delicious when reheated, nothing quite compares to the sublime experience of digging into a fresh, warm, and perfectly toasted S’mores Dip straight from the oven!
If you find yourself utterly captivated by the magic of s’mores, don’t stop here! Explore more delightful s’mores-inspired creations on our site, like our rich S’mores Cake or the elegantly crafted S’mores Tart!
Expert Success Tips for the Best S’mores Dip
While this recipe is incredibly straightforward and forgiving, a few insider tips can elevate your Skillet S’mores Dip from simply great to absolutely unforgettable. Pay attention to these details for a truly perfect dessert:
- Embrace the Crucial Resting Period: This tip cannot be stressed enough! As tempting as it is to immediately dig into your freshly baked S’mores Dip, resist the urge for a solid 5-10 minutes. The molten chocolate and marshmallow retain significant, blistering heat directly out of the oven, posing a real risk of painful burns to your mouth. Allowing it to rest not only lets the heat distribute slightly for safer consumption but also allows the dip to firm up just enough for cleaner, more enjoyable scoops. Trust us on this – a little patience goes a very long way for a much more pleasant experience!
- Generously Grease Your Skillet: A meticulously well-greased oven-safe skillet is your absolute best friend for both effortless serving and easy cleanup. Even if you’re using a non-stick pan, a light, even spray of cooking oil ensures that the rich, melted chocolate base doesn’t stick stubbornly to the bottom. This allows for smooth, satisfying scoops every time, making sure you get every last bit of deliciousness.
- Avoid Overcrowding the Marshmallows: While a generous marshmallow topping is absolutely desired for that classic s’mores look and taste, it’s important to avoid piling them too high. A single, relatively even layer allows the marshmallows to toast uniformly and melt into a beautiful, cohesive, gooey blanket. Too many marshmallows can lead to uneven cooking, with some browning too quickly while others remain undercooked or raw underneath.
- Closely Monitor Your Oven: Ovens can vary quite significantly in temperature and heat distribution. Therefore, it’s crucial to keep a close eye on your S’mores Dip, especially during the last few minutes of baking. Marshmallows can transition from perfectly golden to burnt in a matter of seconds. If your marshmallows are browning faster than the chocolate is melting, you can loosely tent the skillet with aluminum foil for the remainder of the bake time. If your oven has a broiler setting, you can use it for a very short 30-60 seconds at the very end to achieve a more intense char, but never leave it unattended even for a moment.
- Utilize a Kitchen Torch for Perfect Char: For that authentic, deep-brown char and delicious smoky flavor so reminiscent of a genuine campfire s’more, a robust kitchen torch (or even a larger blow torch with an adapter for propane gas) is your secret weapon. A quick, controlled pass over the baked marshmallows once the skillet is out of the oven creates a professional-looking finish, enhances the texture, and significantly boosts the overall s’mores experience.
Frequently Asked Questions About S’mores Dip
Absolutely! This S’mores Dip recipe is incredibly flexible and scales beautifully. You can easily adjust the quantities to fit any size oven-safe baking dish or skillet, whether you’re making a small, intimate treat for two or a large batch to feed a celebratory party. The fundamental principle remains consistent: create a base layer of chocolate, add peanut butter (if desired), and then generously top it with marshmallows. Just ensure your chosen pan is oven-safe and be prepared to adjust the baking time slightly; a smaller pan might cook a bit faster, and a larger one may require a few extra minutes.
Yes, you can certainly reheat any cooled leftovers of your S’mores Dip, though it’s always best served fresh. The most effective way to reheat it is to place the covered skillet back into a preheated oven at a moderate temperature, such as 300°F (150°C), for approximately 10-15 minutes, or until the chocolate base becomes warm and gooey again. Be sure to keep a close eye on the marshmallows during reheating to prevent them from becoming overly browned or burnt.
A 9-inch or 10-inch cast iron skillet is unequivocally ideal for making S’mores Dip. Cast iron skillets are exceptional at distributing and retaining heat evenly, which ensures a consistent melting of the chocolate and perfect toasting of the marshmallows. However, any other oven-safe skillet or baking dish of a similar size made from ceramic, glass, or oven-safe stainless steel will also work perfectly. The most important factor is simply ensuring your chosen pan can safely withstand the high oven temperatures required for this recipe.
Marshmallows are notorious for browning (and burning) very quickly under high heat. To prevent them from burning, it’s crucial to keep a vigilant eye on your dip, especially after the 5-minute mark in the oven. If the marshmallows are browning too rapidly but you feel the chocolate underneath hasn’t fully melted yet, you can loosely tent the skillet with aluminum foil for the remaining bake time. If you prefer a lighter golden color, simply remove the dip from the oven as soon as they reach your desired toast. Utilizing a kitchen torch offers even more precise control for achieving a beautiful, even char without extended oven time.
While the dip is undeniably best when served immediately after baking for maximum gooeyness, you can assemble the chocolate and peanut butter layers in the skillet a few hours in advance. Cover it tightly and store at room temperature. Add the marshmallows just before baking, as they can absorb moisture and become sticky if left out too long. Baking it fresh ensures the best texture and taste experience.
Delicious Recipe Variations to Try
Feel free to unleash your culinary creativity with your Skillet S’mores Dip! These fantastic variations can add exciting twists and new dimensions to the beloved classic, making each serving a unique delight:
- Alternative Nut Butters: Why stop at peanut butter? Nutella offers an incredibly decadent chocolate-hazelnut twist that’s rich and irresistible. Almond butter or cashew butter can provide a slightly different, sophisticated nutty profile. For those with nut allergies, sunflower seed butter (often referred to as SunButter) is a fantastic and safe option that still delivers wonderful creaminess and a unique flavor. Any creamy nut or seed butter you love will likely be delicious here, especially if it complements chocolate well.
- Diverse Chocolate Blends: Don’t limit yourself to just milk chocolate! A thoughtful combination of semi-sweet chocolate chips and milk chocolate chips can provide a richer, more complex, and perfectly balanced sweetness. For an intensely sophisticated and less sweet dip, go all in with dark chocolate bars or chips. White chocolate chips can be swirled in for an added layer of creamy sweetness and visual contrast, or even a handful of butterscotch chips for a distinct, buttery flavor profile. Consider using high-quality gourmet chocolate bars, roughly chopped, for an extra special and luxurious touch.
- Cookie Crumbles or Candy Bar Mix-ins: For an ultimate indulgence, before adding the marshmallow layer, sprinkle a generous amount of crushed cookies (like Oreos, Biscoff, or even chocolate chip cookies) or chopped candy bars (such as Reese’s Peanut Butter Cups, Snickers, Kit Kat, or even peppermint patties during the holiday season) over the chocolate and peanut butter base. These delicious additions will melt slightly into the dip, creating delightful pockets of flavor, texture, and surprise.
- Spiced S’mores Adventure: For an unexpected and wonderfully warm twist, add a tiny pinch of ground cinnamon, a dash of chili powder (for a delightful Mexican hot chocolate inspired feel), or even a touch of pumpkin pie spice to your chocolate layer. These spices will infuse the dip with a cozy, aromatic warmth that is truly inviting.
- Fruity S’mores Twist: While fresh fruit is already a fantastic dipper, you can also incorporate a thin layer of your favorite fruit preserve, such as raspberry jam, cherry pie filling, or even a dollop of apple butter, over the chocolate layer before adding the marshmallows. This creates a delightful fruity dimension to your s’mores experience.
- Salty-Sweet Perfection: For those who adore the irresistible combination of salty and sweet, consider adding a thin layer of crushed pretzels or a sprinkle of flaky sea salt over the chocolate and peanut butter before adding the marshmallows. This will cut through the sweetness and add a delightful crunch.
Special Tools for the Ultimate S’mores Dip
While this recipe is designed to be effortlessly straightforward and requires minimal specialized equipment, a couple of key tools can significantly enhance your S’mores Dip experience and consistently yield even better results. (Please note: The following are affiliate links, meaning we may earn a small commission if you make a purchase through them, at no extra cost to you.)
- High-Quality Oven-Safe Skillet: A durable, oven-safe skillet is absolutely essential for this recipe. While a luxurious 10-inch Staub Cast Iron Skillet represents a fantastic investment for its exceptional heat distribution and superior heat retention, any similar-sized cast iron skillet will perform beautifully. We particularly recommend the affordable, robust, and reliable Lodge skillet for its excellent performance, durability, and outstanding value. Ensure your skillet is well-seasoned for optimal non-stick properties, which aids both cooking and cleanup.
- Professional Blow Torch (Optional, but Highly Recommended for the Perfect Char): To achieve that perfect, deeply charred, and caramelized marshmallow top that truly mimics a genuine campfire s’more, a robust blow torch is undeniably superior to smaller, less powerful kitchen torches. We use and highly recommend a blow torch that connects to a small tank of propane gas (which is typically sold separately). This type of torch provides a powerful, consistent, and broad flame that quickly caramelizes and chars marshmallows with precision, without excessively melting the entire dip beneath. Smaller, crème brûlée-style kitchen torches often lack the necessary power and consistent flame to effectively or quickly char marshmallows, and can frequently break down with repeated use.
More S’mores Recipes to Satisfy Your Cravings
If you’re utterly captivated by the magical combination of chocolate, marshmallow, and graham cracker, and can’t get enough of that classic s’mores flavor, you’ll love exploring these other creative and incredibly delicious recipes from our collection:
- Campfire S’mores Stuffed Skillet Cookie
- Gooey S’mores Brownies
- S’mores Tart
- S’mores Donuts
- Stuffed S’mores Cookies
- Mini S’mores Cheesecakes
Did you make this delicious Skillet S’mores Dip? We’d absolutely love to hear from you!
Please consider leaving a comment and a star rating below to share your experience and let us know how you liked the recipe. Your valuable feedback not only helps us grow our small business immensely but also inspires other home cooks to try this fantastic treat!

Rating: 5 out of 5 stars (Based on 1 review)
15-Minute Skillet S’mores Dip
Stephanie Simmons
5 mins
10 mins
8 to 12 servings
Pin
Ingredients
Main Dip
- 3 XL Hershey’s bars (4.4 oz each)
- 1/2 cup creamy peanut butter (optional, but highly recommended!)
- 1 bag large marshmallows (approx. 10 oz)
For Dipping
- Graham crackers (a mix of honey & chocolate is delicious)
- Fresh fruit, such as strawberries, banana slices, or apple wedges
- Cookies like Oreos, Nutter Butters, vanilla wafers, or animal crackers
- Pretzels (for a salty-sweet contrast)
Instructions
-
1. Preheat & Prepare: Preheat your oven to 450°F (230°C). Lightly spray a 9 or 10-inch oven-safe skillet (preferably cast iron) with nonstick cooking spray to prevent sticking and ensure easy cleanup.
-
2. Assemble the Chocolate Base: Break the chocolate bars into smaller pieces and arrange them in the bottom of the prepared skillet. It’s perfectly fine if they overlap slightly, as the chocolate will melt and spread evenly.
-
3. Add Peanut Butter (If Using): If incorporating peanut butter, spoon generous dollops of it over the chocolate layer. You don’t need to spread it perfectly; the heat will help it melt and swirl beautifully with the chocolate.
-
4. Top with Marshmallows: Carefully place a single, even layer of marshmallows on top of the chocolate and peanut butter. Ensure they cover the base as much as possible, as they will puff up and expand gloriously while baking.
-
5. Bake Until Golden: Bake for 5-10 minutes, or until the chocolate is fully melted and bubbling gently beneath, and the marshmallows are beautifully puffed and golden brown on top. For an extra authentic char, you can use a kitchen torch once out of the oven for a few seconds.
-
6. Rest & Serve: Remove the skillet from the oven and allow it to rest for a crucial 5-10 minutes before serving. This prevents burns from the molten hot dip. Serve warm with your desired dippers – graham crackers, various cookies, and fresh fruit are excellent choices.
Notes
Storage & Reheating: Store cooled leftovers, covered tightly, directly in the skillet at room temperature for up to 3 days. To reheat, place the covered skillet in a 300°F (150°C) oven for 10-15 minutes, or until warmed through and gooey. Watch carefully to prevent over-browning of marshmallows.
Nutrition Information
Serving: 1 serving,
Calories: 368kcal,
Carbohydrates: 44g,
Protein: 6g,
Fat: 23g,
Saturated Fat: 10g,
Polyunsaturated Fat: 2g,
Monounsaturated Fat: 9g,
Sodium: 90mg,
Potassium: 215mg,
Fiber: 3g,
Sugar: 34g,
Calcium: 19mg,
Iron: 1mg
Nutrition information is automatically calculated and should be used as an approximation. It can vary significantly based on specific ingredients, portion sizes, and preparation methods.
Like this recipe? We’d love your feedback! Please leave a comment and a star rating below to let us know how you enjoyed it. Your insights are invaluable!