
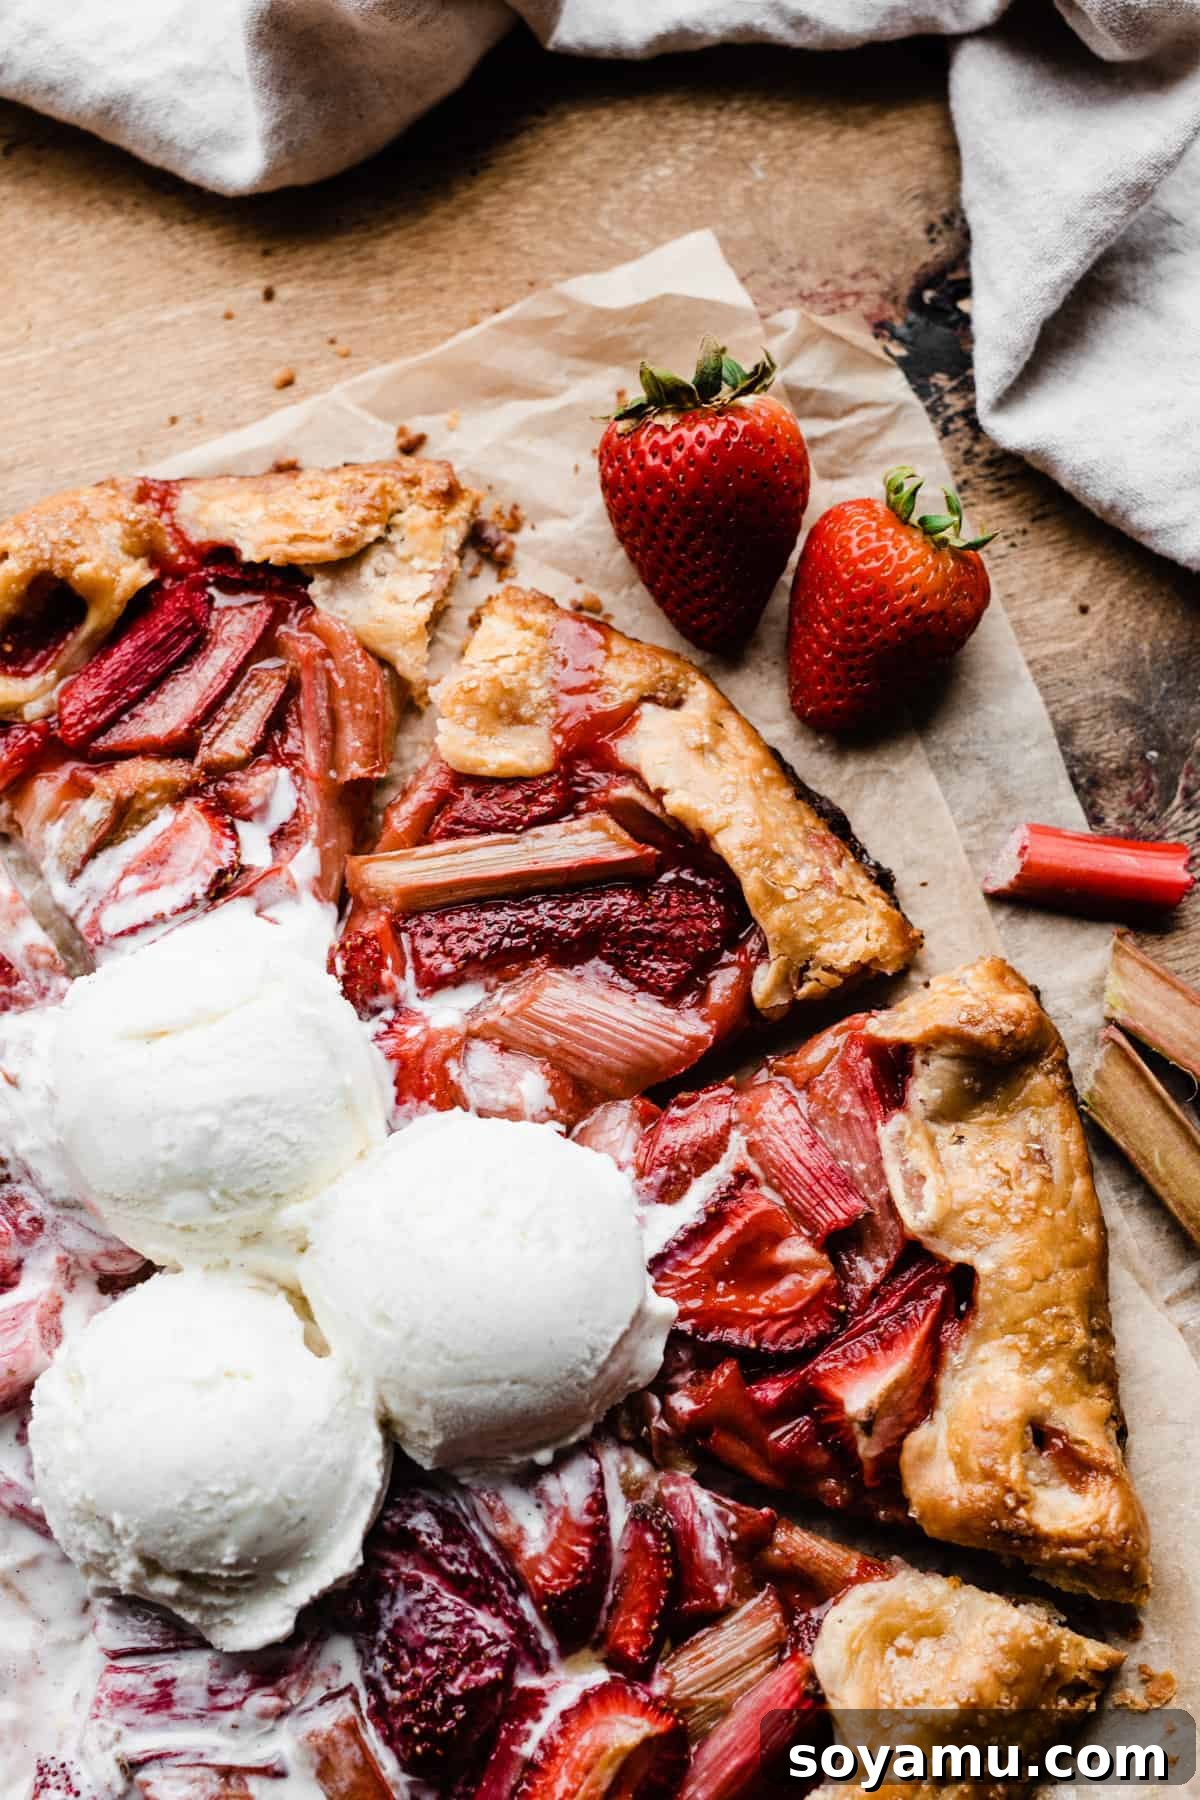
Embrace the vibrant flavors of summer with this spectacular **Strawberry Rhubarb Galette**! This rustic, free-form pie bursts with the natural sweetness of ripe strawberries harmoniously blended with the delightful tartness of juicy rhubarb. Effortlessly prepared, its luscious, jammy filling bakes to perfection within a golden, buttery, and irresistibly flaky pastry crust. Whether you’re planning a casual backyard picnic, a lively cookout, or simply craving a dessert that showcases the freshest farmer’s market finds, this galette is the ultimate seasonal treat. It’s a true celebration of spring and early summer produce, promising a mouthful of sunshine in every single bite.
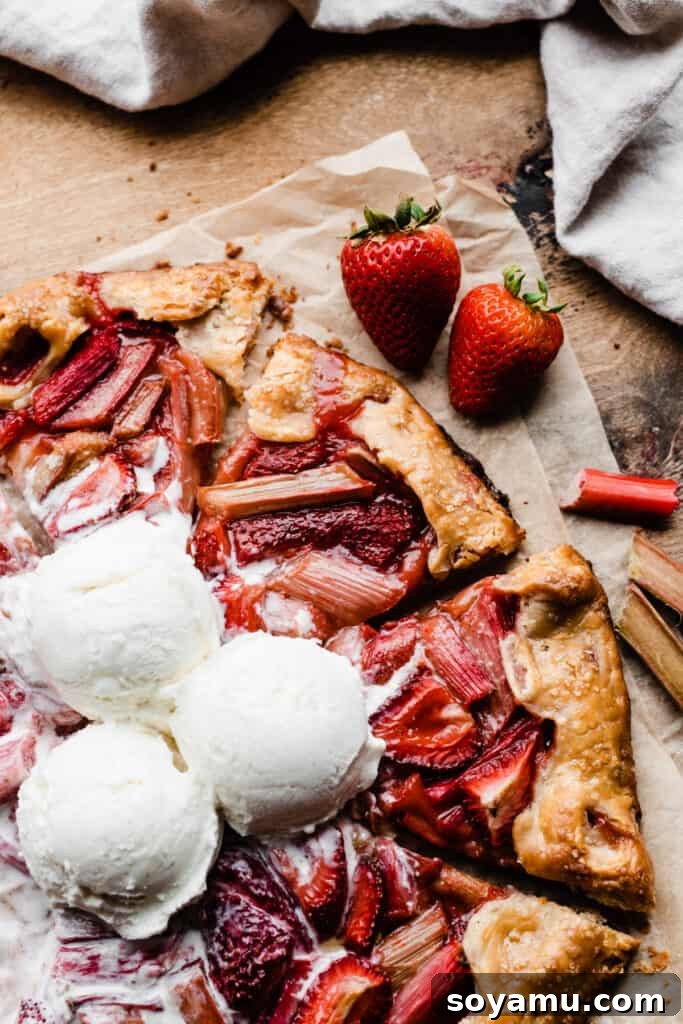
This classic recipe was originally shared in May of 2021 and has since been updated with additional expert tips, tricks, and detailed insights to ensure your baking success. The core recipe, however, remains timeless and utterly delicious.
Why This Strawberry Rhubarb Galette Will Become Your New Favorite Dessert
There’s a special kind of magic that happens when strawberries and rhubarb come together, especially during their peak season. This galette captures that magic in a dessert that is as easy to make as it is delightful to eat. Here’s why you’ll fall in love with this recipe:
- **Effortlessly Simple & Quick:** Forget the complexities of traditional double-crust pies! A galette, often described as a free-form tart, uses just one simple pastry crust. You simply roll it out, pile the vibrant fruit filling in the center, and fold the edges casually over the fruit. This rustic approach not only saves time but also eliminates the need for intricate crimping or lattice work, making it a fantastic entry point into pie-making for beginners, or a quick go-to for seasoned bakers.
- **A True Taste of Summer:** Rhubarb, with its distinct tartness, is a quintessential spring and early summer ingredient. When paired with the natural sweetness of ripe strawberries, it creates an unparalleled flavor profile that is both refreshing and deeply satisfying. This galette perfectly encapsulates the essence of the season, bringing bright, sunny flavors to your table. It’s a delightful way to celebrate the abundance of fresh produce.
- **Exquisite Sweet-Tart Balance:** The natural acidity of rhubarb is beautifully mellowed by the sweetness of the strawberries and a touch of granulated sugar. This creates a harmonious sweet-tart symphony that tantalizes the taste buds without being overly sugary. If you’re someone who appreciates a dessert with nuanced flavors, rather than just pure sweetness, this combination is truly a revelation. It’s a sophisticated yet comforting treat that appeals to almost everyone.
- **Perfectly Versatile & Rustic Charm:** The beauty of a galette lies in its rustic, imperfect appearance. There’s no pressure for a flawless finish; in fact, its homemade charm is part of its appeal. This versatility extends to serving – it’s equally at home at a casual BBQ as it is at a more formal brunch. Plus, it pairs wonderfully with a variety of accompaniments, from a simple dusting of powdered sugar to a decadent scoop of ice cream.
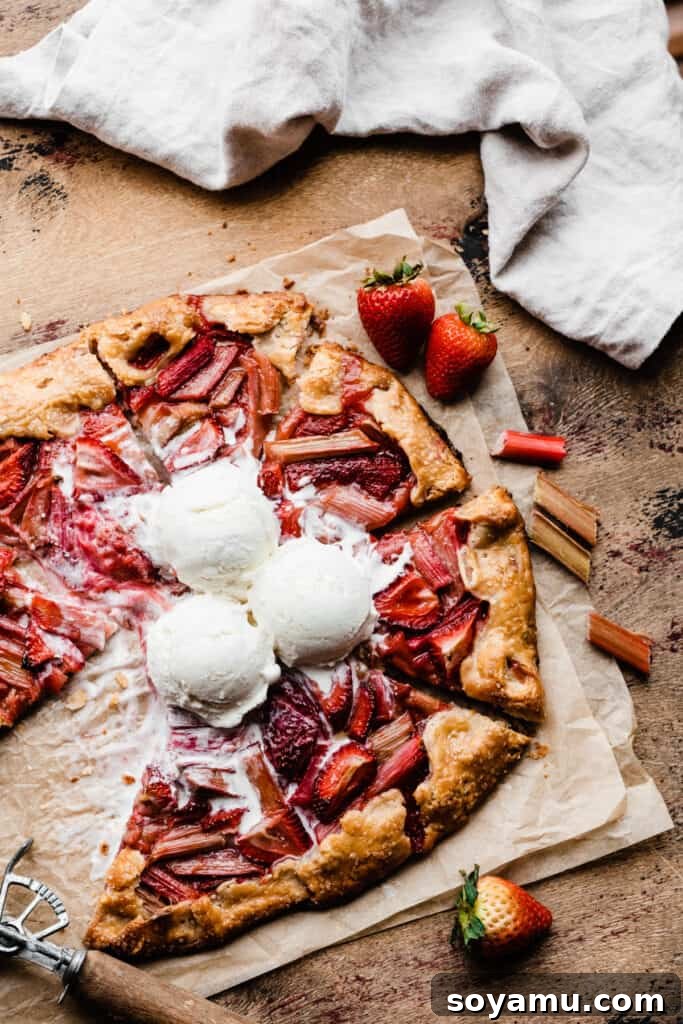
Key Ingredients for Your Delicious Galette
Creating this irresistible galette starts with a few simple, high-quality ingredients. Here’s a closer look at what you’ll need and why each component is vital for that perfect taste and texture:
- **Fresh Strawberries:** When making this galette during spring or summer, opt for fresh, ripe strawberries for the best flavor and aroma. If fresh berries are out of season, frozen strawberries are an excellent alternative. Remember, do **not** thaw frozen strawberries before using them; simply halve them and toss them directly into the filling mixture.
- **Fresh Rhubarb:** Just like strawberries, fresh rhubarb is ideal during its season. Look for crisp, firm stalks with a vibrant red or pink hue. If fresh rhubarb isn’t available, check your grocery store’s freezer section or local food co-ops for frozen options. **Critical Safety Note:** The leaves of rhubarb are poisonous and should never be consumed. Only use the stalks (the red or green-red part) for your culinary creations. Always discard the leaves safely.
- **Granulated Sugar:** This is essential for balancing the natural tartness of the rhubarb, creating a perfectly sweet and tangy filling that isn’t overpowering.
- **Vanilla Extract:** A splash of real vanilla extract adds a wonderful depth and warmth to the fruit filling, enhancing the overall flavor profile. Don’t underestimate the subtle complexity it brings.
- **Cornstarch:** This is your secret weapon for a perfectly set, jammy filling. Cornstarch acts as a thickener, preventing your galette from becoming a watery, soupy mess. It ensures a luscious, spoonable consistency that holds its shape beautifully once baked.
- **Lemon Zest & Juice:** Just a pinch of fresh lemon zest and a touch of lemon juice brightens the entire galette, adding a lively “zip” that complements both the strawberries and rhubarb without making the dessert taste overtly lemony. It awakens the other flavors and adds a hint of refreshing citrus.
- **For the Flaky Crust:** Our pie dough recipe relies on classic ingredients for that signature buttery, flaky texture. You’ll need all-purpose flour, salt, a pinch of granulated sugar, and crucially, **cold salted butter**, cut into cubes. **Ice cold water** and **cold full-fat sour cream** are also key for achieving the perfect dough consistency and tenderness. The coldness of these ingredients is paramount for preventing the butter from melting too quickly, ensuring a truly flaky crust.
- **For Finishing:** A large egg (for an egg wash) and a sprinkle of raw sugar (like turbinado or demerara) will give your galette a beautiful golden-brown crust with a delightful crunch and sparkle.
Exploring Ingredient Substitutions and Dietary Considerations
While the original recipe provides the best results, here are some common substitutions and notes on adapting the galette for different dietary needs:
- **Frozen Fruit (Strawberries & Rhubarb):** As mentioned, frozen fruit works wonderfully when fresh is unavailable. The most important rule is to **never thaw** the fruit beforehand. Using it directly from frozen helps maintain its structure and prevents an excessively watery filling, which could lead to a soggy crust.
- **Dairy-Free Options:** Achieving a truly flaky, dairy-free pie crust can be challenging, as the fat content and composition of dairy-free butters vary widely. If you have a trusted brand of dairy-free butter that you’ve successfully used for pie crusts before, feel free to experiment. For the sour cream, your best bet would be a high-quality, trusted vegan sour cream alternative that you are already familiar with and enjoy the texture of.
- **Gluten-Free Crust:** This recipe was developed using traditional all-purpose flour. Crafting a successful gluten-free pie crust requires specific gluten-free flour blends and techniques to achieve the desired texture and flakiness. We have not tested this particular recipe with gluten-free flour, so we cannot guarantee the results. If you are experienced with gluten-free baking, you might adapt a proven gluten-free pie crust recipe to this galette.
- **Other Fruit Combinations:** The beauty of a galette is its adaptability! While strawberry and rhubarb are a classic pairing, you can certainly experiment with other fruits. Consider combinations like Blueberry and Cherry, or even a Salted Caramel Apple Galette for a different seasonal twist.
How to Craft Your Perfect Strawberry Rhubarb Galette: A Detailed Guide
Making a galette is an incredibly satisfying baking project, resulting in a show-stopping dessert that tastes as good as it looks. Follow these steps for a beautifully rustic and delicious strawberry rhubarb galette:
Step 1: Prepare Your Flaky Pie Dough
A truly exceptional galette begins with a superior crust. Our recipe yields a buttery, tender, and flaky dough that is surprisingly easy to make. For in-depth troubleshooting and advanced tips on achieving the perfect pastry, you might find valuable insights in a dedicated pie crust guide. To start, combine all-purpose flour, salt, and a pinch of granulated sugar in a medium mixing bowl. Cut very cold, cubed salted butter into the dry ingredients using a pastry cutter or your fingertips. Work quickly until the mixture resembles coarse meal with some pea-sized and blueberry-sized pieces of butter still visible – these pockets of butter are what create flakiness. Drizzle in ice-cold water and cold full-fat sour cream, mixing with a fork until the dough just comes together. Gently gather the dough into a ball, flatten it into a 1-inch thick disc, and wrap it tightly in plastic wrap. Chilling the dough in the fridge for at least 2 hours (or preferably overnight, up to 48 hours) is crucial. This allows the flour to fully hydrate and the butter to firm up, preventing a tough crust. You can even freeze the dough for up to 2 months after an initial fridge rest.
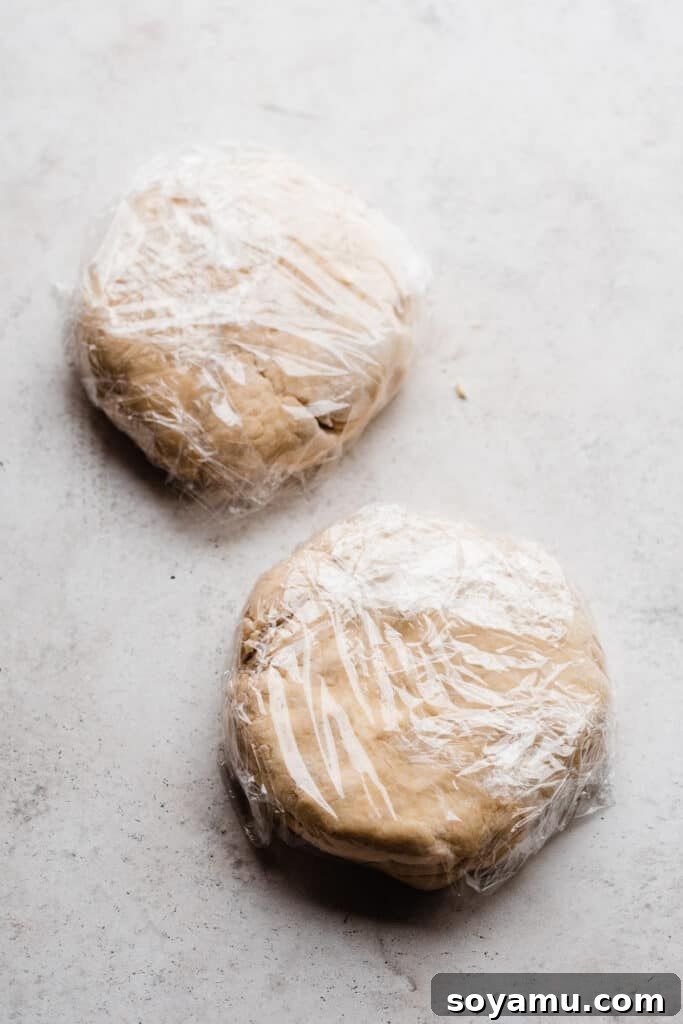
Step 2: Roll Out the Dough and Prepare for Filling
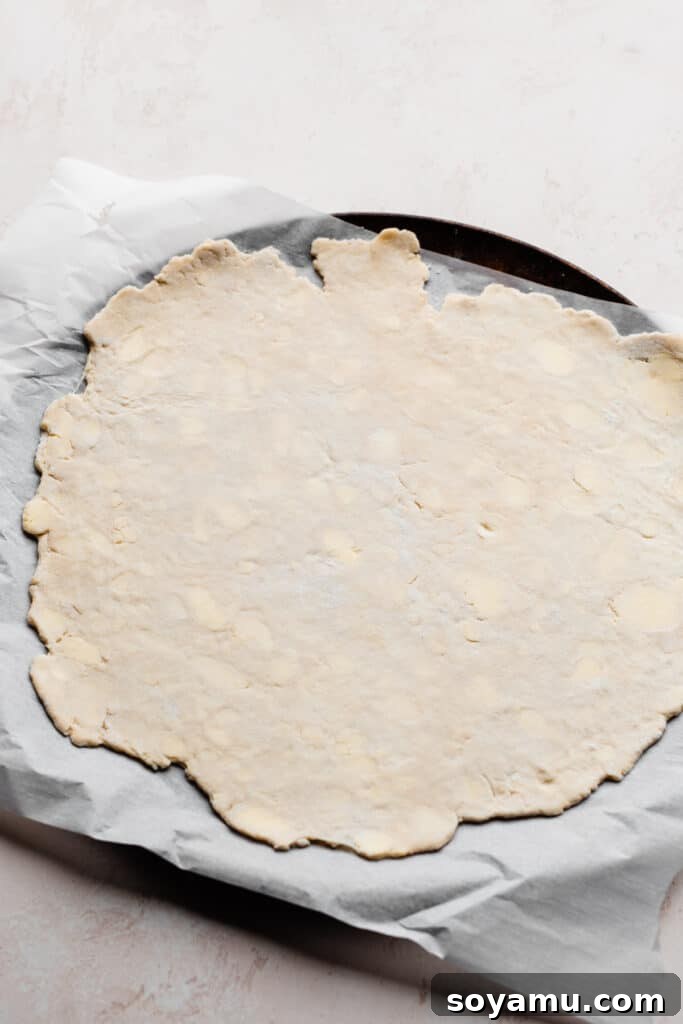
Preheat your oven to 400°F (200°C). Line a large baking sheet with parchment paper or a silicone baking mat to prevent sticking. Lightly flour your clean countertop and your rolling pin. Unwrap your chilled dough disc and dust it lightly with flour. Begin rolling the dough gently from the center outwards, rotating it frequently to prevent it from sticking and to ensure an even thickness. If the dough cracks slightly, don’t worry – simply flip it and work on the other side, or gently press the cracks together. Patience is key here; avoid stretching the dough too quickly. Aim for a circular shape, approximately 12 to 14 inches (30-35 cm) in diameter and about ⅛ inch (3 mm) thick. Once rolled, carefully transfer the dough onto your prepared baking sheet by gently rolling it around your rolling pin. Cover the dough with a kitchen towel and place the entire baking sheet back into the refrigerator to keep the dough cold while you prepare the fruit filling.
Step 3: Craft the Irresistible Strawberry Rhubarb Filling
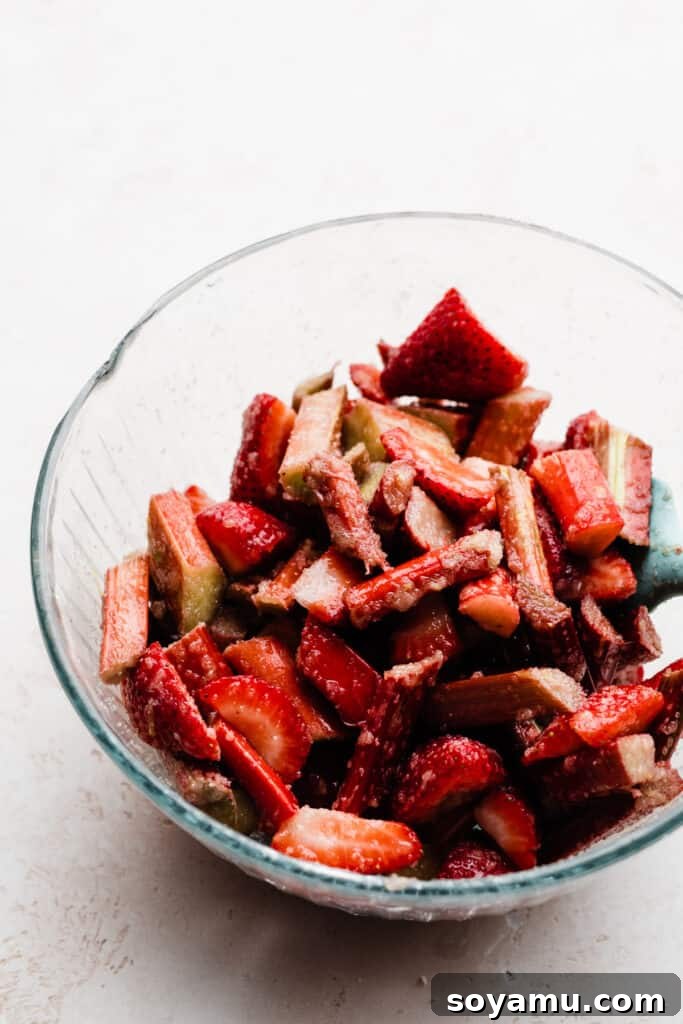
Rinse and thoroughly dry your fresh strawberries and rhubarb. Hull the strawberries (remove the green tops) and halve them; if they are particularly large, quarter them for more even distribution. Chop the rhubarb stalks into roughly 1-inch (2.5 cm) pieces. In a large bowl, combine the prepped strawberries and rhubarb with granulated sugar, vanilla extract, cornstarch, a pinch of lemon zest, and a ¼ teaspoon of lemon juice. Gently toss all the ingredients together until the fruit is evenly coated. The cornstarch is crucial here, as it will thicken the fruit juices during baking, preventing a soggy bottom crust. Avoid letting the fruit mixture sit for too long, as it will start to release its juices; if it does, leave any excess liquid behind in the bowl when you spoon the fruit onto the dough.
Step 4: Assemble Your Rustic Galette
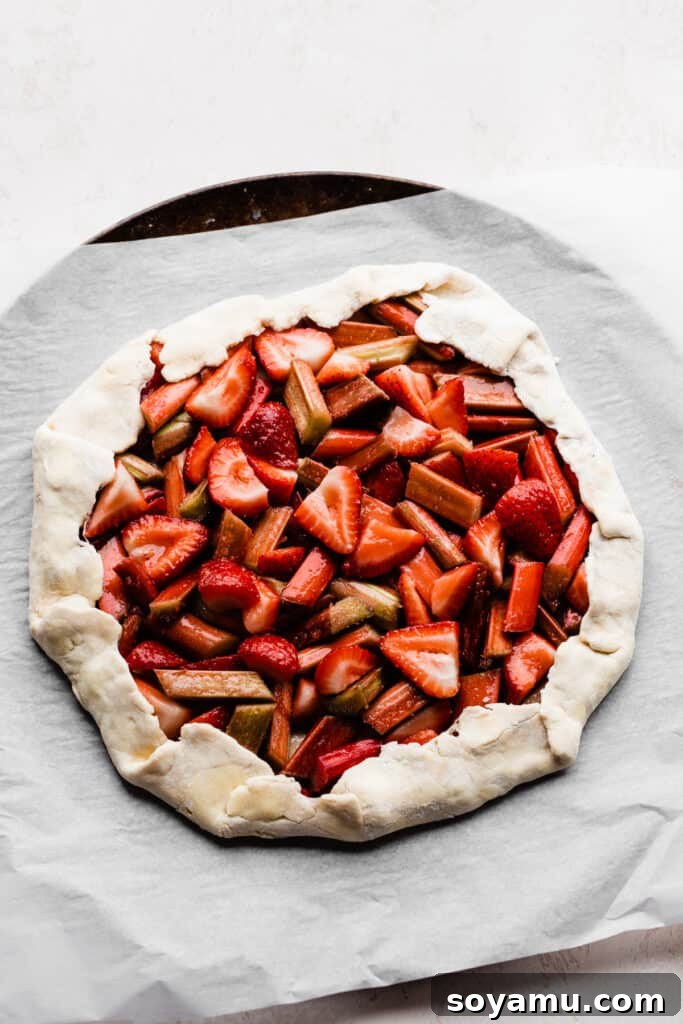
Retrieve your chilled dough from the refrigerator. Spoon the fruit filling evenly over the center of the dough, leaving a generous 2 to 3-inch (5-7.5 cm) border around the edges. Distribute the fruit relatively flat, though it doesn’t need to be a single thin layer. Begin folding the exposed edges of the dough up and over the fruit filling, working in small sections at a time. Don’t worry about making it look perfect; the charm of a galette lies in its rustic, free-form nature. The folds should be organic and naturally imperfect. If there’s any small amount of liquid in the bottom of your filling bowl, you can drizzle a spoonful or two over the fruit for extra moisture and flavor.
Step 5: Prepare for Baking with an Egg Wash and Sugar
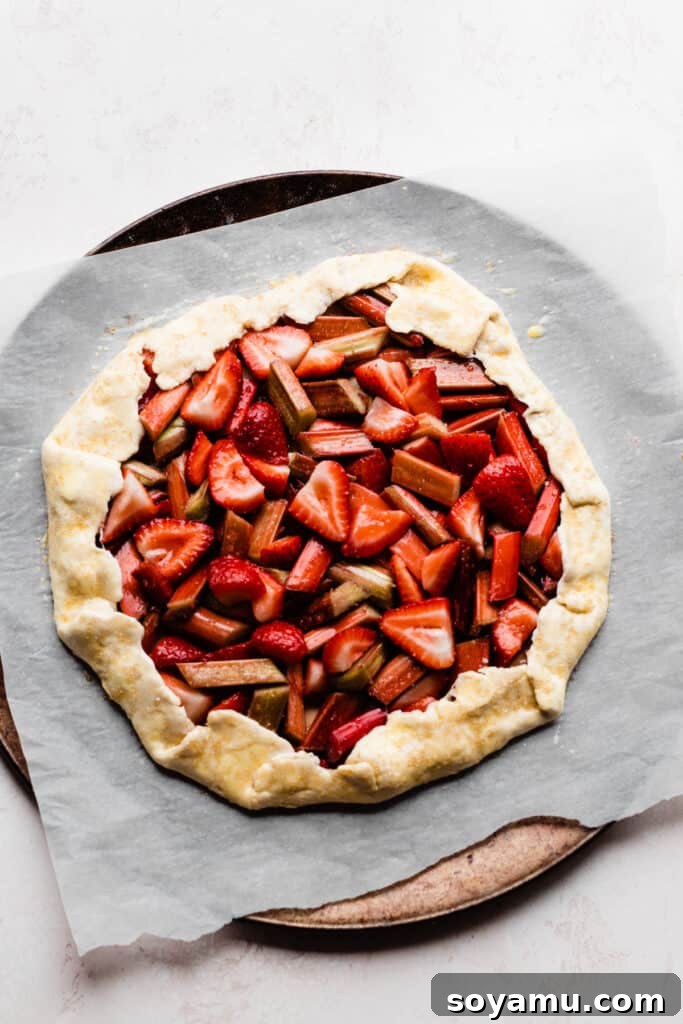
Once assembled, chill the galette, uncovered, in the refrigerator for at least 8 minutes. This step is vital: working with the dough warms it up, and chilling it again ensures the butter remains firm, preventing the crust from spreading too much in the oven and maintaining its beautiful flaky texture. While it chills, whisk a large egg in a small bowl to create an egg wash. After chilling, use a pastry brush to generously brush the egg wash over the folded edges of the pie crust. This egg wash will give your galette a beautiful golden-brown sheen as it bakes. For an extra touch of sweetness and a delightful crunch, sprinkle some raw sugar (such as turbinado or demerara) generously over the egg-washed crust.
Step 6: Bake to Golden, Bubbly Perfection
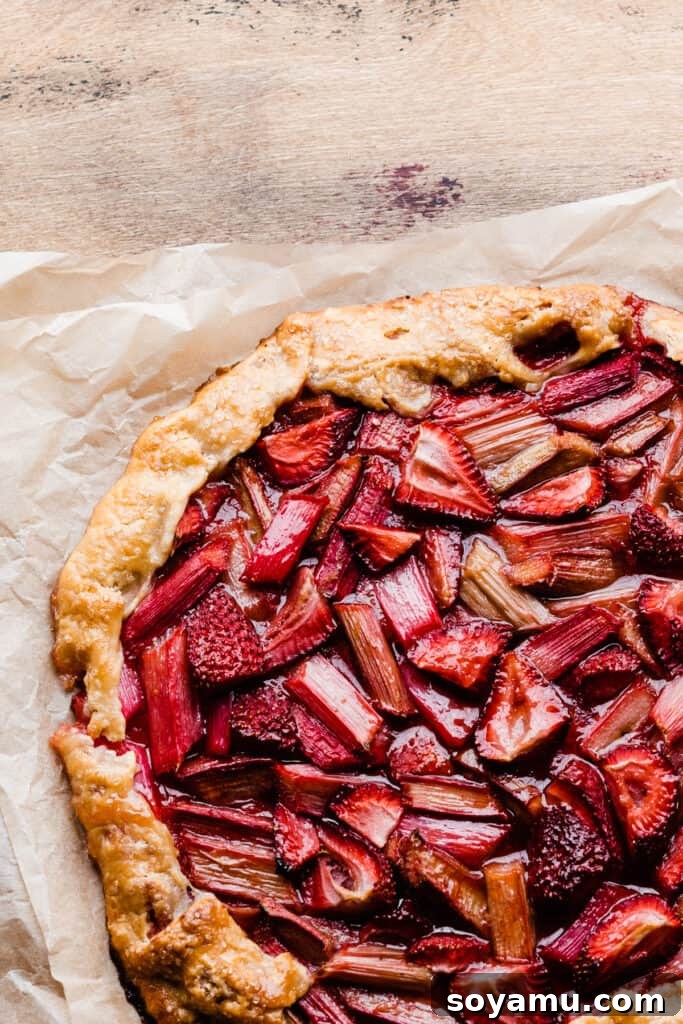
Carefully transfer the prepared galette to your preheated 400°F (200°C) oven. Bake for approximately 53 to 58 minutes, or until the crust is a deep golden brown, beautifully crisp, and the fruit filling is visibly bubbly and thickened. The bubbling of the filling indicates that the cornstarch has activated, ensuring a jammy consistency. Don’t be alarmed if a little bit of fruit filling leaks out onto the parchment paper during baking – this is quite normal for a rustic galette! As soon as the galette comes out of the oven, while it’s still warm and the juices are pliable, you can gently spoon any leaked, jammy filling back over the fruit. This enhances both the appearance and flavor of your finished dessert.
Serving Suggestions and Storage Tips
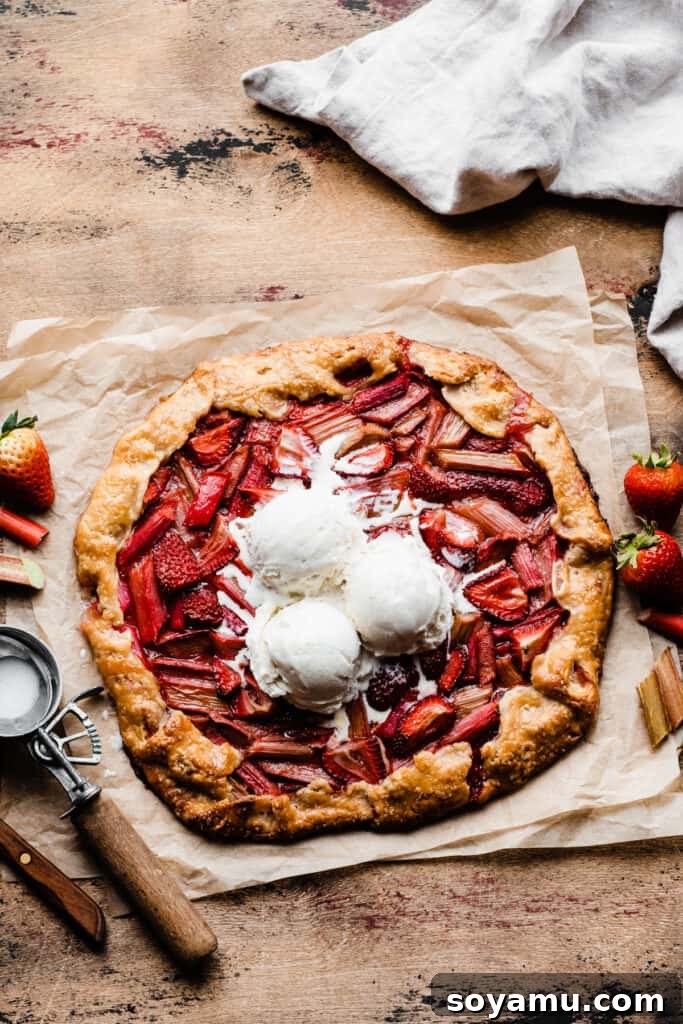
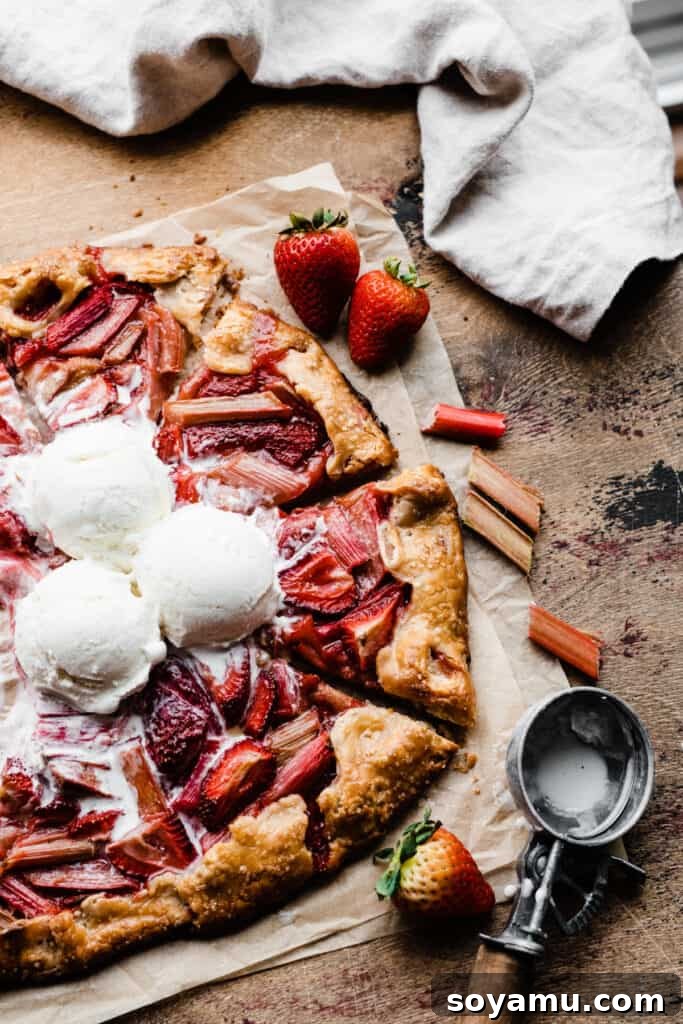
Once your galette is baked to perfection, allow it to rest on the baking sheet for about 15 minutes before attempting to slice and serve. This brief cooling period helps the filling set properly, preventing it from oozing out too much when cut. While delicious on its own, a warm slice of this galette is truly elevated with a generous scoop of creamy vanilla bean ice cream. The cold, melting ice cream creates an incredible contrast with the warm, sweet-tart fruit filling and flaky crust. Other fantastic serving options include a dollop of freshly whipped cream, a drizzle of crème fraîche, or even a light custard.
This Strawberry Rhubarb Galette is undeniably at its absolute best on the first day it’s baked, when the crust is at its crispiest and the filling is fresh and vibrant. We highly recommend enjoying it soon after it cools to experience it at its peak. If you happen to have any leftovers (a rare occurrence!), store them in an airtight container in the refrigerator for 1-2 days. Reheat gently in a low oven or toaster oven to revive some of the crust’s crispness, or enjoy at room temperature.
Expert Tips for a Flawless Galette Every Time
Achieving a perfectly flaky crust and a wonderfully set fruit filling requires attention to a few key details. Incorporate these expert tips into your baking process for guaranteed success:
- **The Power of Cold Butter:** This is perhaps the most crucial rule for a flaky pie crust. Always use butter that is straight from the fridge and cut into small cubes. The same applies to your water and sour cream—they must be ice cold. Cold butter creates pockets of steam in the oven, which separate the layers of dough, resulting in that coveted flaky texture. Room temperature butter will incorporate too easily and lead to a dense, tough crust.
- **Verify Oven Temperature with a Thermometer:** Your oven’s display might not always be accurate. An oven thermometer is an inexpensive tool that will show you the true temperature inside. Accurate oven temperature is vital for consistent baking, especially for crusts that need to brown evenly and fillings that need to set. Keep one in your oven at all times.
- **Measure Flour Precisely with a Kitchen Scale:** Baking is a science, and precise measurements are key. Using a food scale to weigh your flour (168 grams for 1 ¼ cups) ensures accuracy. Measuring by volume (cups) can vary significantly depending on how the flour is scooped and packed, leading to inconsistent dough.
- **Plan Ahead with Make-Ahead Dough:** The pie dough can be made well in advance, making your baking day much less stressful. After its initial chill, wrap the dough disc tightly and freeze it for up to 2 months. When you’re ready to bake, simply transfer it to the refrigerator to thaw overnight before rolling.
- **Don’t Skip the Chill Time for Assembled Galette:** After assembling your galette, it’s essential to pop it back into the fridge, uncovered, for several minutes (at least 8-10 minutes). Handling the dough warms it up, and chilling it again ensures the butter solidifies, helping the galette hold its beautiful shape and preventing a soggy bottom when it hits the hot oven.
- **Embrace the Leakage (and Fix It!):** It’s common for a little bit of the fruit filling to bubble over and leak out onto your baking sheet during baking. Don’t panic! This is completely normal for rustic fruit galettes. The trick is to spoon that delicious, jammy leakage back over the fruit while the galette is still hot from the oven. It adds extra flavor and a beautiful glossy finish.
Creative Variations to Explore with Your Galette
While the Strawberry Rhubarb Galette is a classic, its simple structure makes it incredibly adaptable for different flavors and occasions. Here are some ideas to inspire your next baking adventure:
- **Simplify with Store-Bought Crust:** If you’re short on time or new to pie crusts, don’t hesitate to use a high-quality store-bought refrigerated pie dough from your grocery store. You’ll still achieve a delicious and impressive dessert with minimal effort.
- **Experiment with Other Fruit Fillings:** The galette is a fantastic canvas for various fruits! Feel free to swap out the strawberries and/or rhubarb with other seasonal favorites. Some delightful combinations include:
- **Blueberry and Cherry Galette:** A sweet and slightly tart mix that’s perfect for late summer.
- **Salted Caramel Apple Galette:** A comforting, autumnal twist with warm spices and a decadent caramel drizzle.
- **Peach and Raspberry:** A succulent and vibrant pairing for mid-summer.
- **Mixed Berry:** Combine blueberries, raspberries, blackberries, and strawberries for a colorful and flavorful medley.
- **Bake Mini Galettes for Individual Servings:** Turn this large galette into charming individual portions, much like our rustic Mini Blackberry Galette recipe. Simply use a small or medium bowl (about 5-6 inches in diameter) to cut out individual dough rounds. Fill and fold as usual, adjusting baking time for smaller sizes (they will bake faster). These are perfect for parties or as personal desserts.
Frequently Asked Questions About Galettes
New to galettes or simply looking for more information? Here are answers to some common questions:
A galette is a French term for a flat, round cake often made with pastry dough or bread dough, topped with a sweet or savory filling. In baking, it commonly refers to a rustic, free-form tart or open-faced pie. Unlike a traditional pie baked in a dish, a galette is baked directly on a baking sheet, with the edges of the dough simply folded over the filling, creating a charmingly imperfect and natural border. It offers all the deliciousness of a pie with much less fuss!
A soggy galette crust can be disappointing, but several factors help prevent it. First, ensure your pie dough disc is rolled to the correct thickness (about ⅛ inch or 3 mm) so it’s sturdy enough to support the filling. Second, tossing the fruit with cornstarch is crucial, as it thickens the juices as they cook. Third, when scooping the filling onto the dough, try to leave behind any excessive liquid that may have accumulated at the bottom of the bowl. Finally, make sure to bake the galette long enough until the crust is golden brown and the filling is visibly bubbly – this ensures the cornstarch fully activates and thickens the fruit. Some slight butter leakage during baking is normal and won’t necessarily lead to a soggy crust.
Yes, the dough used for a galette is essentially the same as a traditional pie crust (pâte brisée). The key difference lies in the application and presentation. Pie crust is typically pressed into a pie dish, whereas galette dough is rolled into a circle and baked free-form on a baking sheet, with its edges folded casually over the filling. Both aim for a buttery, flaky, and tender result.
This is a matter of personal preference! Many people, myself included, love serving a galette shortly after it’s baked, while the crust is still warm and beautifully crisp, and the fruit filling is warm and gooey. The aroma filling your kitchen is an added bonus! However, like a deep-dish fruit pie, a galette is also wonderfully delicious served at room temperature, allowing the flavors to meld further. Some even enjoy it slightly chilled from the fridge, especially on a hot summer day. Experiment to find your favorite!
More Delicious Strawberry Rhubarb Desserts to Try
If you’ve fallen in love with the combination of sweet strawberries and tart rhubarb, you’ll be delighted to know there are many other ways to enjoy this classic pairing:
- **Strawberry Rhubarb Hand Pies:** Portable, individual pies perfect for picnics or a sweet snack.
- **Strawberry Rhubarb Sauce:** A versatile sauce that can top ice cream, yogurt, pancakes, or even be used in other desserts.
- **Best Ever One-Bowl Strawberry Rhubarb Crumble:** An incredibly easy and comforting dessert with a buttery, streusel topping.
- **Rhubarb Upside Down Cake:** A stunning cake featuring caramelized rhubarb baked on top, then inverted for a beautiful presentation.
- **Old Fashioned Rhubarb Torte:** A classic, layered dessert that perfectly balances the tartness of rhubarb with sweet, rich components.
Strawberry Rhubarb Galette Recipe
By Stephanie Simmons
Summary: This Strawberry Rhubarb Galette is bursting with fresh, sweet summer strawberries and tart, juicy rhubarb! The filling comes together in minutes, and it all bakes to sweet, jammy perfection inside a buttery, flaky pie crust. This is the perfect dessert for a backyard picnic, cook-out, or for when you have fresh strawberries & rhubarb from the farmer’s market!
- Prep Time: 1 hour
- Cook Time: 55 minutes
- Dough Chilling: 2 hours
- Total Time: 3 hours 55 minutes
- Servings: 8 slices
Pin Recipe | Print Recipe
Ingredients
For the Pie Crust:
- 1 and 1/4 cups all-purpose flour, spooned & leveled (168 grams)
- 3/4 tsp salt
- 1 tsp granulated sugar
- 1/2 cup **cold** salted butter, cubed (113 grams or 8 tbsp)
- 5 to 7 tbsp **ice cold** water
- 1/4 cup **cold** full-fat sour cream (60 grams)
For the Strawberry Rhubarb Filling:
- 12 ounces fresh strawberries, halved (or frozen – do **not** thaw, but halve them)
- 12 ounces fresh rhubarb, chopped into 1-inch pieces (or frozen – do **not** thaw)
- 2/3 cup granulated sugar (143 grams)
- 1 tsp vanilla extract
- 5 tsp cornstarch
- pinch of lemon zest
- 1/4 tsp lemon juice
For Finishing:
- 1 large egg (for egg wash)
- sprinkle of raw sugar
Instructions
- Make the Pie Dough: In a medium mixing bowl, whisk together the flour, salt, and sugar. Cut the cold butter into tablespoon-sized pieces and add them to the dry ingredients. Use a pastry cutter or clean hands to cut the butter into the dry ingredients until you have chunks the size of blueberries—some slightly bigger, some smaller. Drizzle in the ice-cold water and add the cold sour cream. Toss with a fork until the dough is moistened and the sour cream is mixed in. Gently gather the dough into a ball. If it holds when you push it together, it’s ready. If it’s a bit dry and crumbles, add 1 to 2 tablespoons more water. You can also flick some water onto any dry bits hiding in the bottom of the bowl. Gently flatten the ball of dough into a 1-inch thick disk. It may look a little rustic, but it should hold together. Wrap the disk tightly in plastic wrap and chill in the fridge for at least 2 hours, but preferably overnight. You can refrigerate for up to 48 hours. For freezing, chill in the fridge for at least 6 hours first to properly hydrate, then freeze for up to 2 months. Thaw overnight in the fridge before using.
- Roll out the Dough: Preheat the oven to 400°F (200°C). Line a large baking sheet with parchment paper or a silicone baking mat. Flour your countertop. Unwrap your chilled dough disc and lightly flour the top and your rolling pin. Begin rolling out the dough gently, turning continuously to prevent sticking. Sprinkle more flour underneath as needed. If the dough has some cracks, flip it over and work with the other side for a bit. Be patient; avoid stretching too much in one pass. Once the dough is about 12 to 14 inches across and about ⅛ inch (3 mm) thick, gently roll it onto the rolling pin and transfer it onto the prepared baking sheet. Cover with a kitchen towel and pop it into the fridge to keep cold while you stir up the filling.
- Make the Filling and Assemble the Galette: Rinse and dry your fruit. Cut the tops off the strawberries and halve them (or quarter if very large). Chop the rhubarb into roughly 1-inch pieces. Stir together all the filling ingredients (strawberries, rhubarb, granulated sugar, vanilla extract, cornstarch, lemon zest, lemon juice) in a large bowl. Spoon the filling onto the chilled dough, leaving a 2-3 inch border around the edge. (If the filling has sat for more than a few minutes and there’s excess liquid in the bottom of the bowl, leave that behind). The fruit filling doesn’t have to be in one thin layer, but try to keep it evenly spread. Fold up the edges of the dough, working in small sections at a time, to cover the edges of the fruit filling. Galettes are meant to be rustic—don’t fuss over making it look perfect. Drizzle a spoonful or two of any minimal liquid left in the bowl over the fruit if desired. Chill the assembled galette, uncovered, in the fridge for 8 minutes to ensure the dough is cold before baking.
- Bake: Once the galette has chilled, beat an egg in a small bowl to create an egg wash. Brush this over the folded edges of the pie crust. Sprinkle the crust generously with a little coarse sugar. Bake for 53 – 58 minutes. The crust should be golden brown and crisp, and the fruit filling will be visibly bubbly. If a bit of fruit filling leaks onto the pan, that’s normal. While it’s fresh from the oven, you can spoon that jammy bit of filling back over the top of the fruit before slicing and serving.
- Serve + Store: Let the galette rest for about 15 minutes before slicing and serving. It’s absolutely delicious with a big scoop of vanilla bean ice cream! This galette is best enjoyed on the day it’s made. If you have any leftovers, store them in an airtight container in the fridge for about 1 day.
Nutrition Information
Serving: 1 slice | Calories: 290kcal | Carbohydrates: 39g | Protein: 4g | Fat: 14g | Saturated Fat: 8g | Polyunsaturated Fat: 1g | Monounsaturated Fat: 4g | Trans Fat: 0.5g | Cholesterol: 55mg | Sodium: 323mg | Potassium: 230mg | Fiber: 2g | Sugar: 20g | Vitamin A: 478IU | Vitamin C: 29mg | Calcium: 61mg | Iron: 1mg
Nutrition information is automatically calculated, so should only be used as an approximation.
Did you make this recipe? We’d love to hear from you!
Please leave a comment below and consider rating the recipe with stars to let us know how you liked it. Your feedback is incredibly valuable and helps our small business grow!