
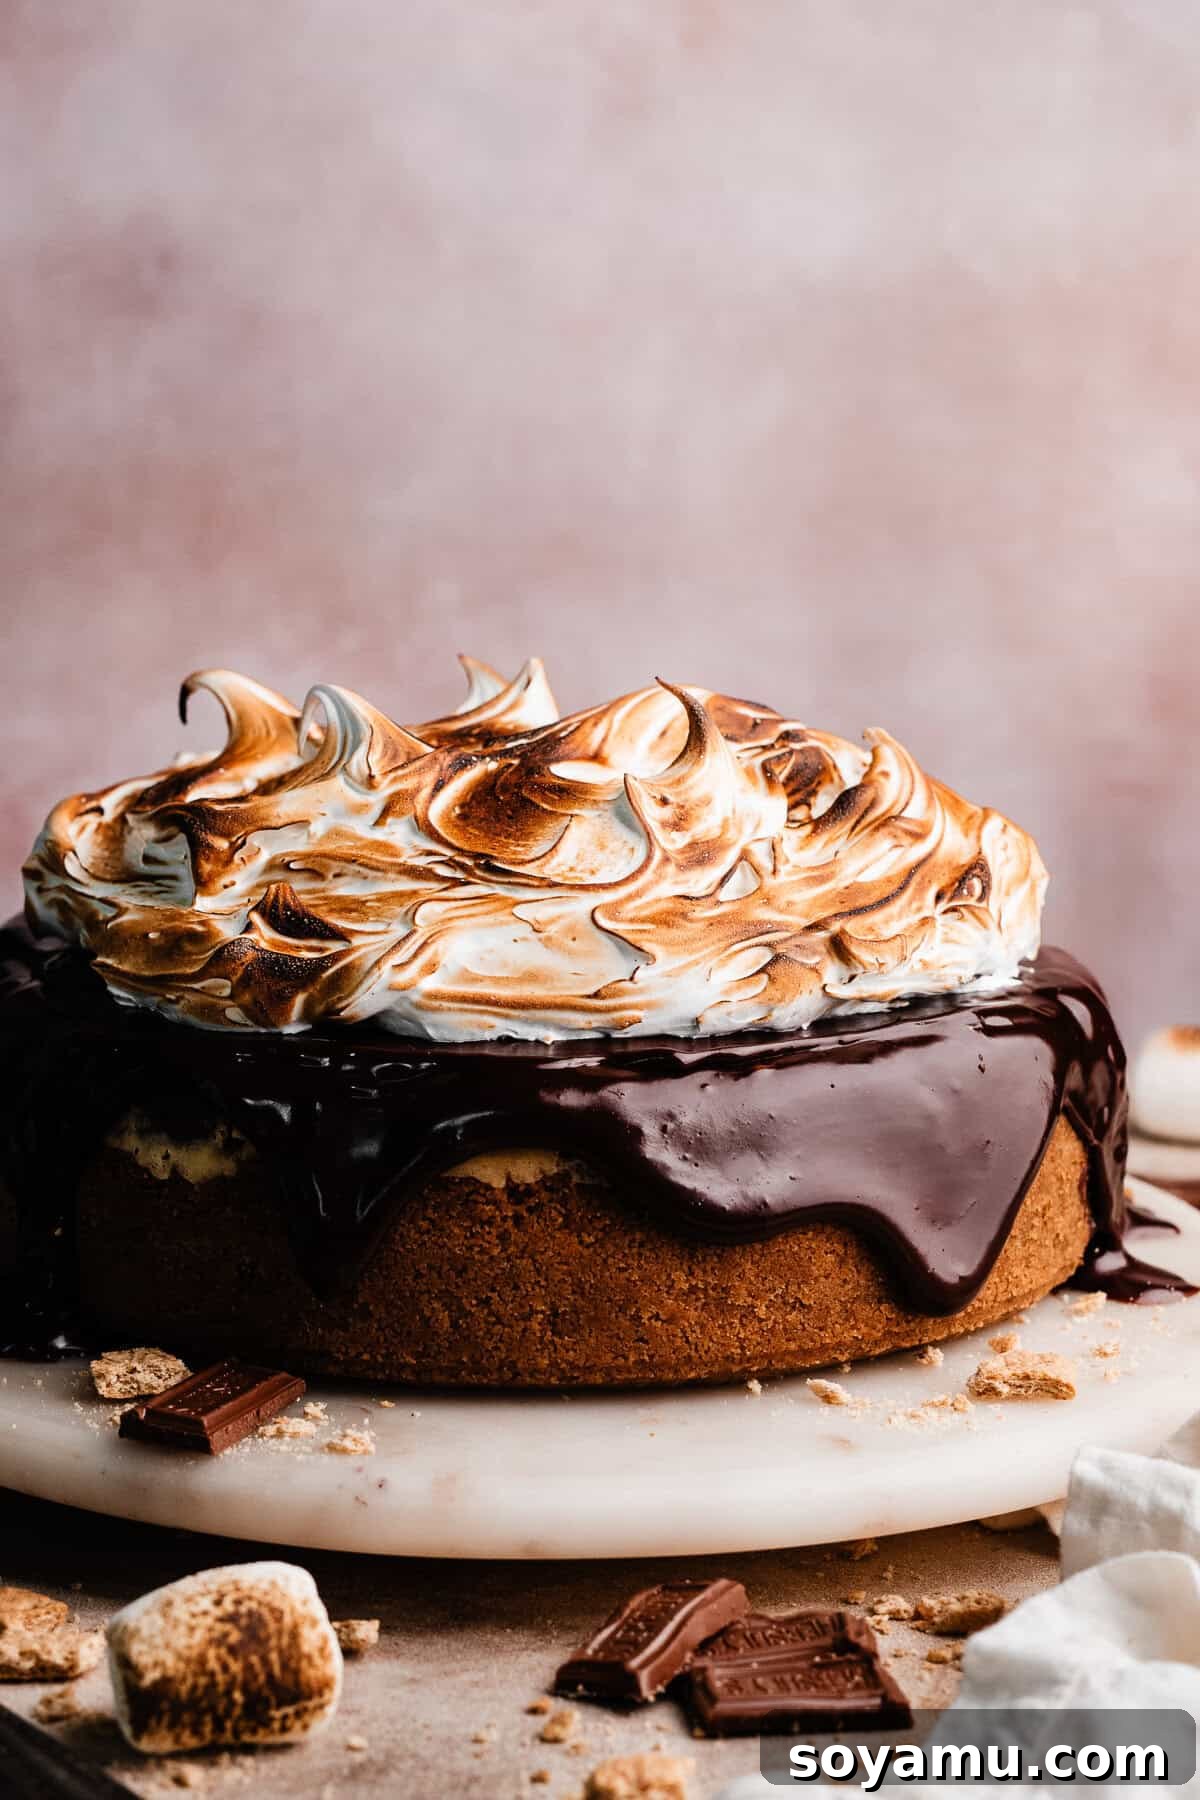
Embark on a culinary journey to the heart of summer with our irresistible **S’mores Cheesecake with Toasted Marshmallow Meringue**. This isn’t just a dessert; it’s a nostalgic symphony of flavors and textures, meticulously crafted to bring the cozy warmth of a campfire right to your kitchen. Imagine layers of rich, silky chocolate cheesecake intertwined with a delicate, toasted marshmallow batter, all nestled upon a buttery, crunchy graham cracker crust. Crowned with a cloud-like, golden-brown toasted marshmallow meringue, every bite transports you to starlit evenings and cherished memories. This ultimate homemade s’mores dessert is designed to impress, offering a sophisticated twist on a beloved classic. Whether you’re hosting a backyard gathering or simply craving a taste of summer, this elegant yet comforting cheesecake promises an unforgettable experience.
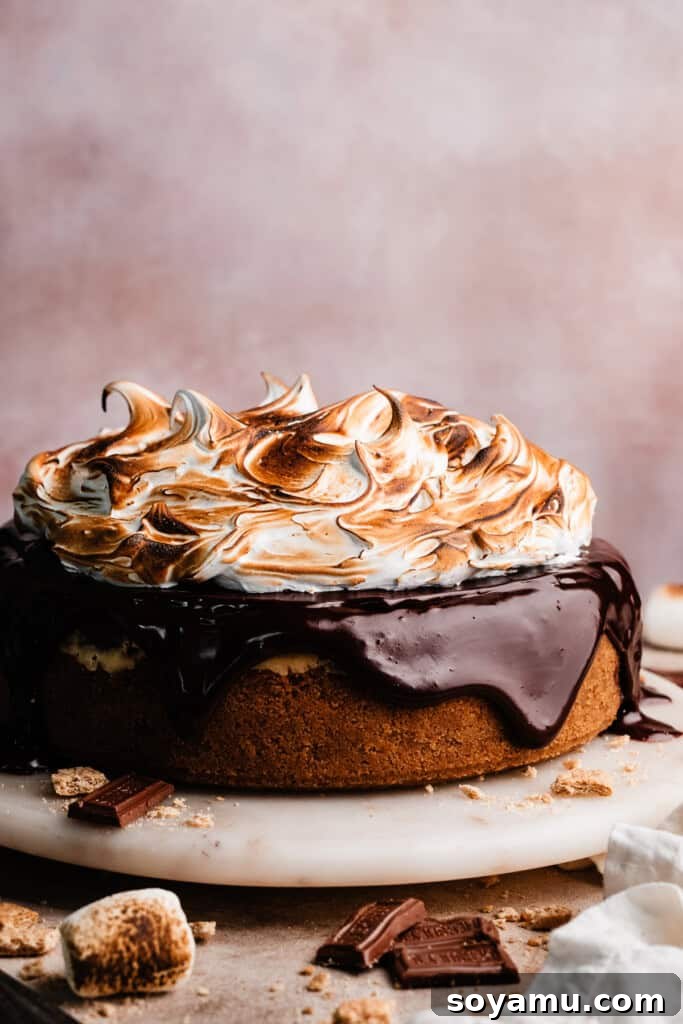
Why You’ll Fall in Love with This S’mores Cheesecake Recipe
This S’mores Cheesecake isn’t just another dessert; it’s a masterpiece that captures the essence of summer in every single forkful. Here’s why this particular recipe will become your new favorite:
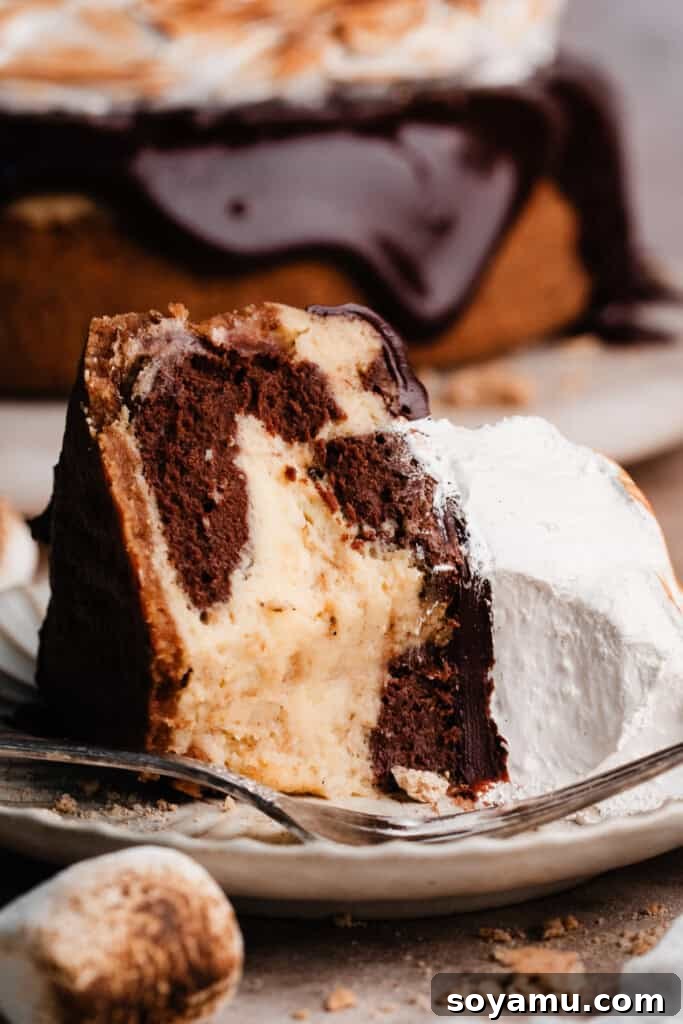
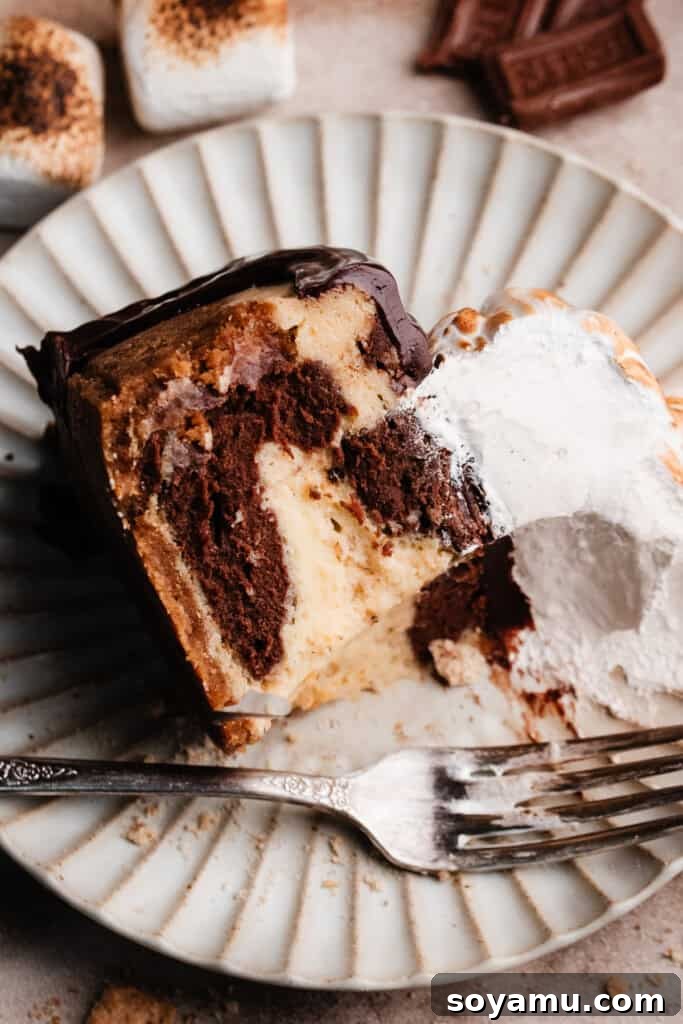
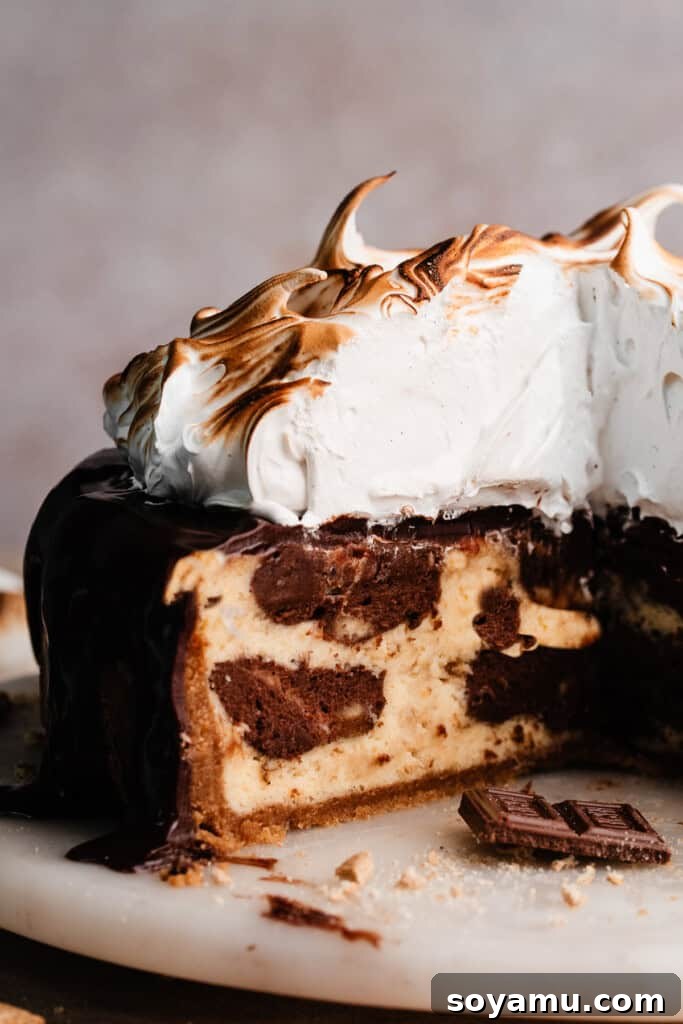
- Dual-Flavored Cheesecake Batters: Experience the full spectrum of s’mores delight with our unique dual-batter approach. One half features a velvety chocolate cheesecake, offering deep cocoa notes, while the other is infused with the subtle, caramelized sweetness of real toasted marshmallows. These batters are artfully swirled together, creating a beautiful marble effect and ensuring a balanced, complex flavor in every slice. It’s a complete s’mores experience, elevated.
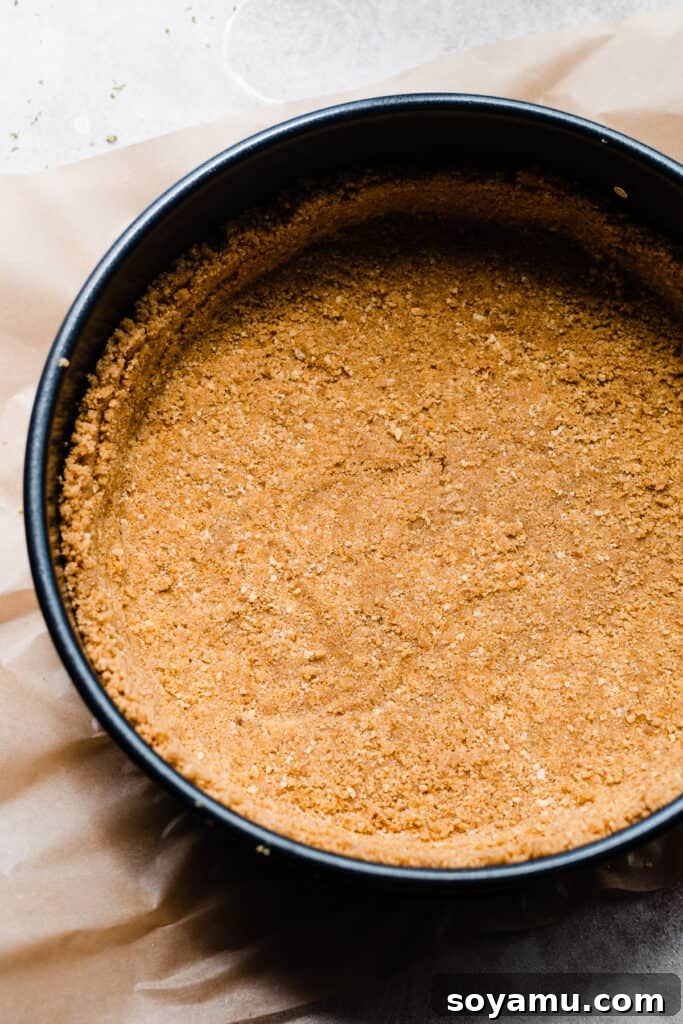
- Perfectly Crisp Graham Cracker Crust: No s’mores is complete without that iconic graham cracker crunch. Our golden-brown crust provides the ideal textural contrast to the creamy cheesecake filling. It’s buttery, slightly sweet, and serves as the perfect foundation, evoking the classic cracker base of a traditional s’more.
- Cloud-Like Toasted Marshmallow Meringue Topping: The crowning glory of this cheesecake is its luscious, homemade marshmallow meringue. Light, airy, and delicately sweet, this meringue is toasted to a beautiful golden perfection, mimicking the irresistible char of a campfire marshmallow. It adds an ethereal quality and an extra layer of authentic s’mores flavor that truly sets this cheesecake apart.
- Impressive Presentation: With its distinct swirled layers, rich ganache, and artfully toasted meringue, this cheesecake is a showstopper. It’s elegant enough for special occasions, yet comforting enough for a family treat. Prepare to receive compliments on both its beauty and its incredible taste.
- A Taste of Nostalgia: S’mores evoke happy memories of childhood, campfires, and summer nights. This cheesecake captures that cherished feeling, transforming it into a sophisticated dessert that adults and children alike will adore. It’s summer in a slice, anytime you crave it.
- Easily Adaptable: While the recipe provides a fantastic base, it’s also wonderfully versatile. You can adapt it for different pan sizes, dietary needs, or even add extra chocolate drizzles or mini chocolate chips for an even richer experience.
S’mores Cheesecake Ingredient Essentials
Crafting the perfect S’mores Cheesecake begins with understanding the role of each high-quality ingredient. Below is a detailed overview of the key components you’ll need, ensuring you achieve that rich, creamy, and utterly delicious result.
- Full-Fat Cream Cheese: This is the cornerstone of any great cheesecake. Always opt for full-fat, block-style cream cheese, not the spreadable kind from a tub. It’s crucial for achieving that characteristic dense, creamy, and tangy texture. Ensure it’s at **room temperature** before mixing to prevent lumps and ensure a perfectly smooth batter.
- Granulated Sugar: We use just the right amount of granulated sugar to sweeten the cheesecake, allowing the natural tang of the cream cheese and the distinct s’mores flavors to shine without being overly sweet. It also contributes to the cheesecake’s tender texture.
- Large Eggs: Eggs are vital for binding the cheesecake ingredients, adding richness, and helping the cheesecake set beautifully. Like the cream cheese, they should be at **room temperature** for optimal emulsification, leading to a smoother, crack-free cheesecake.
- Full-Fat Sour Cream: Adding sour cream introduces a wonderful tanginess that balances the sweetness of the cheesecake. It also contributes significantly to the incredibly creamy and moist texture. Again, room temperature is key for seamless incorporation.
- Corn Starch: A small amount of corn starch acts as a stabilizer. It helps the cheesecake maintain its structure, prevents cracking during baking and cooling, and ensures a wonderfully smooth consistency.
- Pure Vanilla Extract: Use a high-quality pure vanilla extract to enhance all the other flavors in the cheesecake. Its warm, sweet notes are essential for both the vanilla and marshmallow batters.
- Salt: A tiny pinch of salt in each component (crust, filling, meringue, ganache) is critical. It balances and brightens all the flavors, preventing the dessert from tasting flat or one-dimensional.
- Graham Cracker Crumbs: The foundation of our crust. You can buy pre-crushed crumbs or crush your own graham crackers for a fresher taste.
- Salted Butter: Melted butter binds the graham cracker crumbs together, forming a sturdy, flavorful crust. Salted butter adds an extra layer of flavor balance.
- Marshmallows (for batter and topping): For the marshmallow cheesecake batter, we toast them to impart that classic smoky, caramelized s’mores flavor directly into the filling. For the meringue, traditional marshmallows are used to create the light, fluffy topping.
- Milk Chocolate (melted): Used to create the rich, smooth chocolate cheesecake batter, providing a sweet and comforting chocolate element.
- Cocoa Powder: Enhances the chocolate flavor in the chocolate batter, adding depth and intensity.
- Heavy Cream (for ganache and chocolate batter): Essential for both the silky chocolate ganache and to adjust the consistency of the chocolate cheesecake batter.
- Semi-Sweet Chocolate (chopped): For the decadent chocolate ganache. Chopping it finely helps it melt smoothly when combined with hot cream. A mix of milk and semi-sweet offers a balanced sweetness.
- Egg Whites (for meringue): The base for our fluffy marshmallow meringue. Room temperature egg whites whip up with greater volume and stability.
- Cream of Tartar: A crucial ingredient for meringue, cream of tartar helps stabilize the egg whites, allowing them to whip into a higher, more stable volume and preventing them from collapsing.
Creative Substitutions & Exciting Variations for Your S’mores Cheesecake
While our classic S’mores Cheesecake recipe is a surefire hit, don’t hesitate to personalize it! Here are some creative substitutions and variations to tailor this delectable dessert to your taste and dietary needs.
- Gluten-Free Option: Easily transform this recipe into a gluten-free delight by simply using certified gluten-free graham crackers for the crust. The rest of the cheesecake and meringue ingredients are naturally gluten-free, making it a simple swap for a more inclusive dessert.
- Graham Cracker Alternatives: If traditional graham crackers are hard to find outside the U.S. or you simply want to experiment, digestive biscuits are an excellent comparable option for the crust. You could also try chocolate wafers for an extra chocolatey base or even crushed shortbread cookies for a buttery, less traditional flavor profile.
- Chocolate Choices: Feel free to experiment with the type of chocolate in your ganache and chocolate batter. For a richer, more intense chocolate flavor, use dark chocolate. If you prefer a sweeter profile, all milk chocolate for the ganache would be delicious. White chocolate could even be swirled into the marshmallow batter for a “golden s’mores” effect.
- Mini S’mores Cheesecakes: For individual servings or portion control, prepare this recipe in a muffin tin lined with paper liners. Reduce baking time significantly (usually around 20-30 minutes). These make adorable and convenient party treats!
- Additions to the Crust: Enhance your graham cracker crust by mixing in a tablespoon or two of cocoa powder for a chocolate graham crust, or finely chopped nuts like pecans or walnuts for added texture and flavor.
- Flavored Marshmallow Meringue: While vanilla is classic, consider adding a hint of almond extract or even a tiny splash of a complementary liqueur (like Irish cream or Kahlua) to your marshmallow meringue for an adult twist.
- Extra Toppings: After toasting the meringue, you can drizzle with extra chocolate ganache, sprinkle with miniature chocolate chips, or even add some crushed graham cracker pieces for an ultimate s’mores experience.
Mastering the S’mores Cheesecake: A Step-by-Step Guide
Creating this magnificent S’mores Cheesecake is a rewarding process. Follow these detailed steps to ensure every layer is perfect, resulting in a dessert that’s both visually stunning and incredibly delicious.
Step 1: Prepare and Bake the Graham Cracker Crust.
Begin by preheating your oven to 350°F (175°C). Lightly spray a 9-inch springform pan with nonstick cooking spray, ensuring the bottom is securely fastened. In a medium bowl, combine 3 cups of finely crushed graham cracker crumbs with 1/2 cup of melted salted butter. Mix until the crumbs are thoroughly moistened and resemble wet sand. Press this mixture firmly and evenly into the bottom of the prepared springform pan, and slightly up the sides (about 1 inch high). A flat-bottomed glass or the back of a spoon works perfectly for this. Bake the crust for 10 minutes until it’s lightly golden and fragrant. This pre-baking step helps create a crisp crust that won’t become soggy under the cheesecake batter. Once baked, remove from the oven and set aside to cool slightly. **Do not turn off your oven; reduce the temperature to 325°F (160°C) for the cheesecake filling.** Also, fill a large pot with water and place it on your stove, ready for your water bath.
Step 2: Craft the Silky Cheesecake Batter.
It is absolutely essential that all your cold ingredients—cream cheese, eggs, and sour cream—are at **room temperature** before you begin. This is key to achieving a smooth, lump-free batter and preventing cracks in your finished cheesecake. In a large mixing bowl, using an electric mixer fitted with the paddle attachment (or a hand mixer), beat the 32 ounces of softened cream cheese on medium speed for 1-2 minutes until it’s light and creamy, with no visible lumps. Gradually add 1 and 1/4 cups of granulated sugar and continue beating for another 1-2 minutes, scraping down the sides and bottom of the bowl frequently with a rubber spatula to ensure everything is well combined and smooth. Next, add the 4 large eggs, one at a time, mixing on low speed only until *just* combined after each addition. **Over-mixing the eggs is a common cause of cheesecake cracks and a “soufflé” effect**, so mix minimally. Finally, gently mix in the 3/4 cup full-fat sour cream, 1 and 1/2 teaspoons of corn starch, 1 tablespoon of vanilla extract, and a pinch of salt until everything is just incorporated. The batter should be smooth and luxurious. Divide this plain cheesecake batter evenly into two separate bowls.
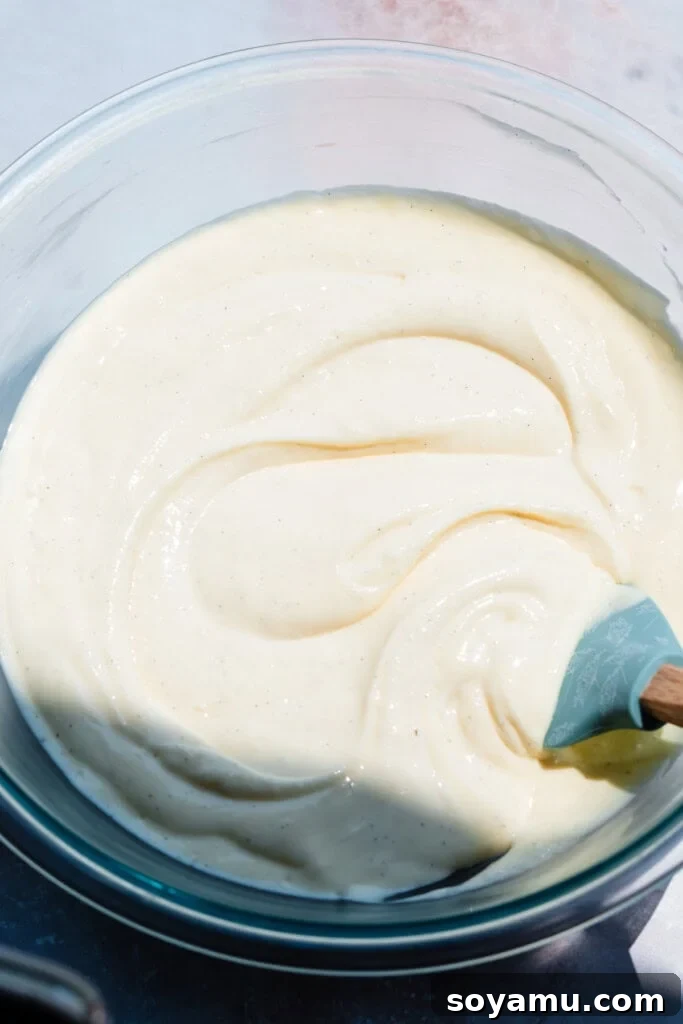
Step 3: Infuse One Batter with Toasted Marshmallow Flavor.
Take one of the divided portions of cheesecake batter. Now it’s time to bring in that authentic s’mores flavor! Arrange 25 marshmallows on a parchment-lined baking sheet. Toast them until deeply golden brown and slightly charred. This can be done under your oven broiler (watch them very closely, as they can burn quickly!) or with a kitchen blow torch for more control. Once toasted, immediately scrape the warm, gooey marshmallows into the larger portion of the plain cheesecake batter. Mix slowly with your electric mixer on low speed until the marshmallows are mostly incorporated. It’s okay if there are small, slightly lumpy pieces of marshmallow remaining; this adds to the rustic charm and intense flavor of the marshmallow swirl.
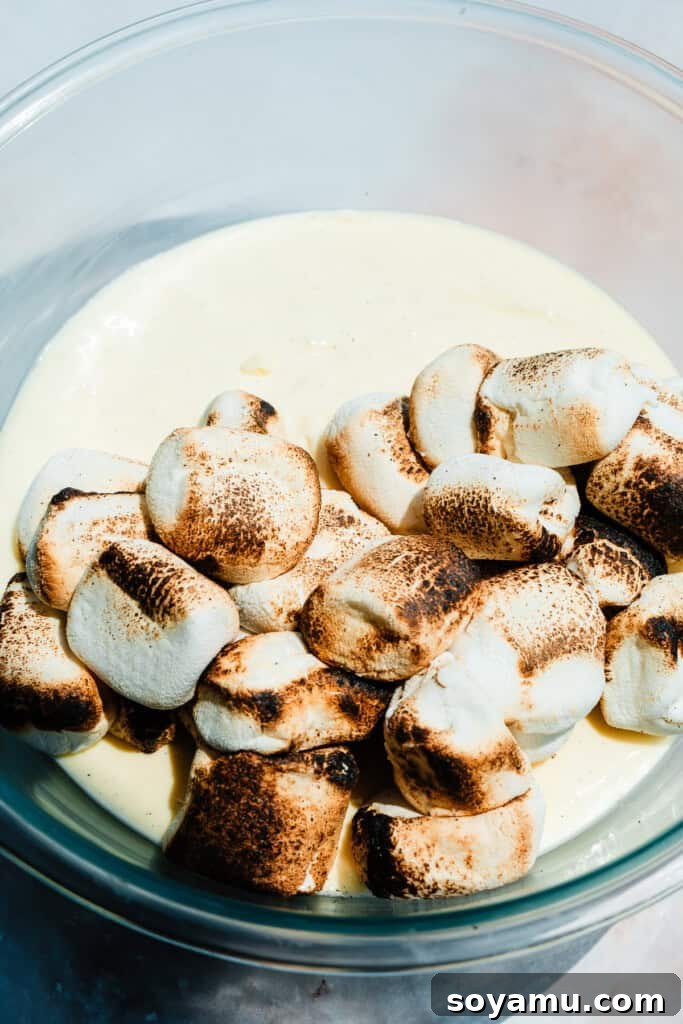
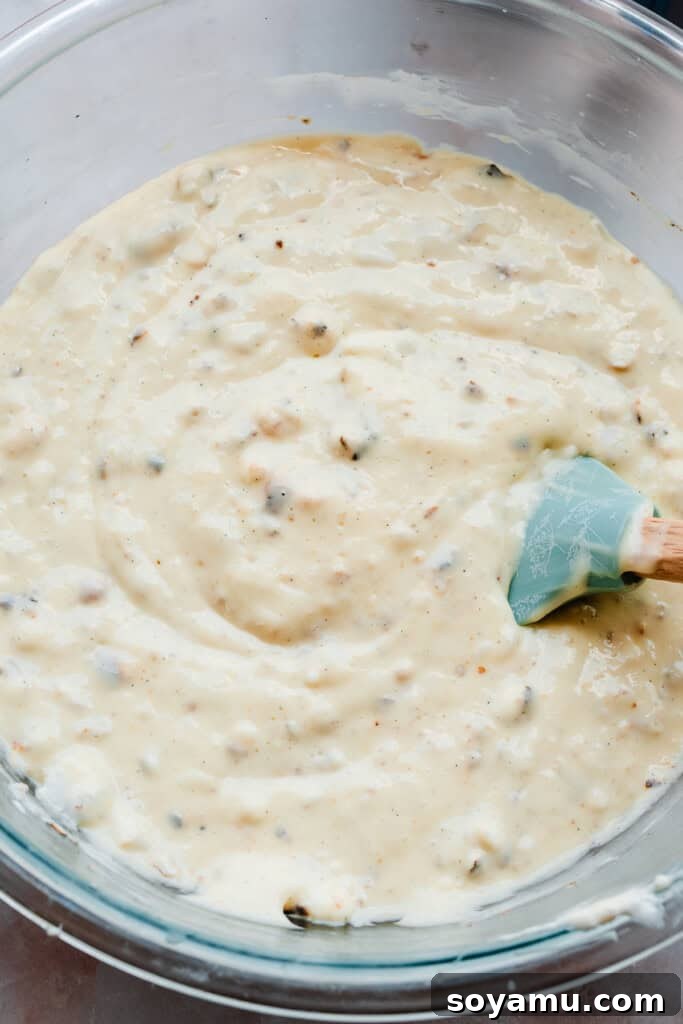
Step 4: Create the Rich Chocolate Cheesecake Batter.
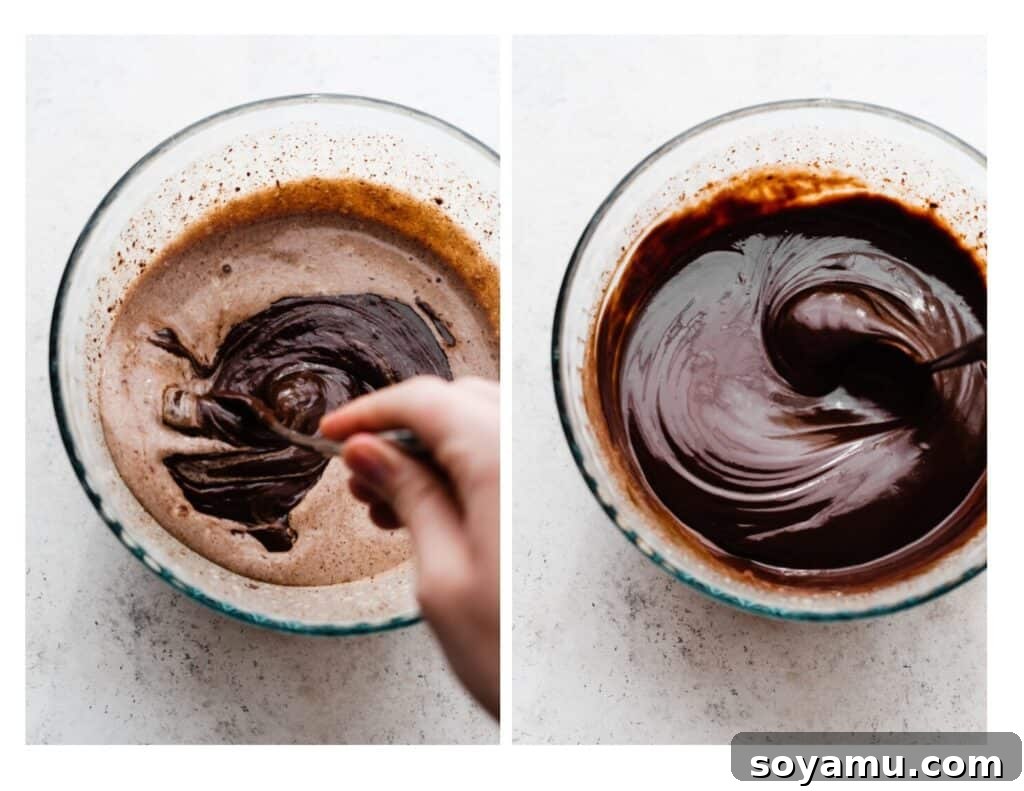
To the second portion of the plain cheesecake batter, add 5 ounces of melted milk chocolate (ensure it’s cooled slightly), 2/3 cup (60 grams) of unsweetened cocoa powder, and 2 tablespoons of heavy cream. Mix on low speed until the chocolate and cocoa powder are fully incorporated and the batter is a uniform, deep chocolate brown color. Scrape the bowl as needed. You now have two distinct and delicious cheesecake batters ready for assembly!
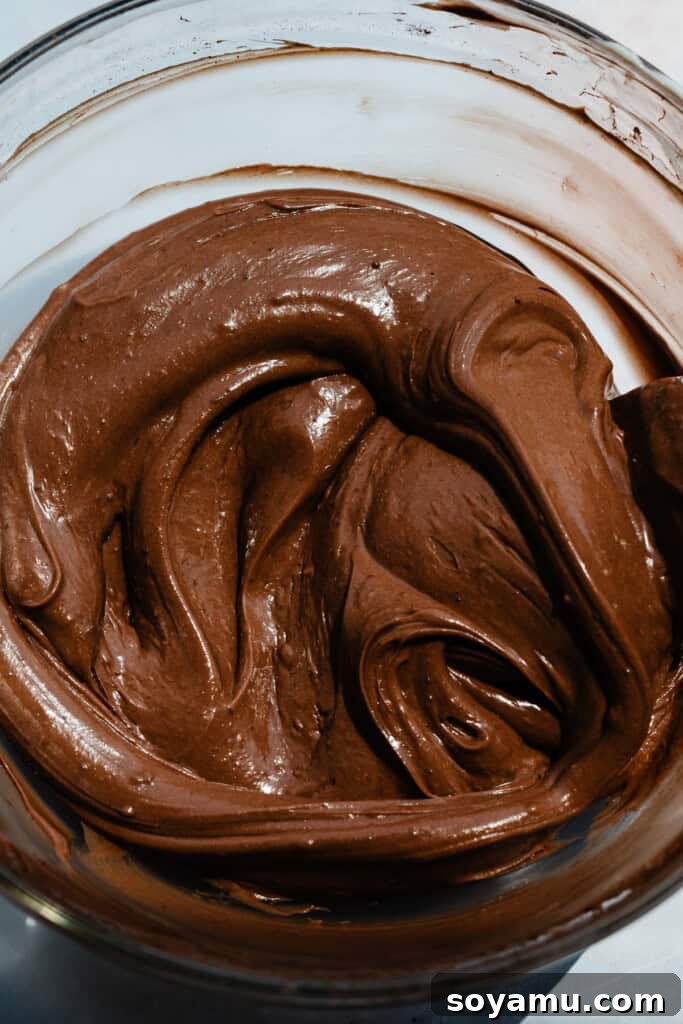
Step 5: Assemble, Swirl, and Bake with a Water Bath.
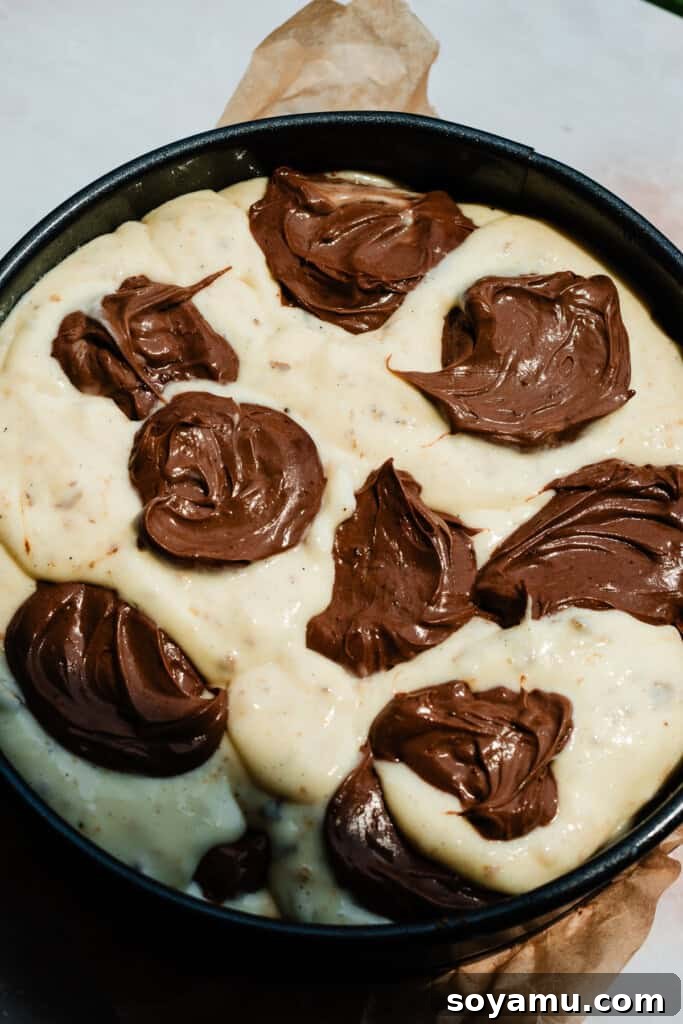
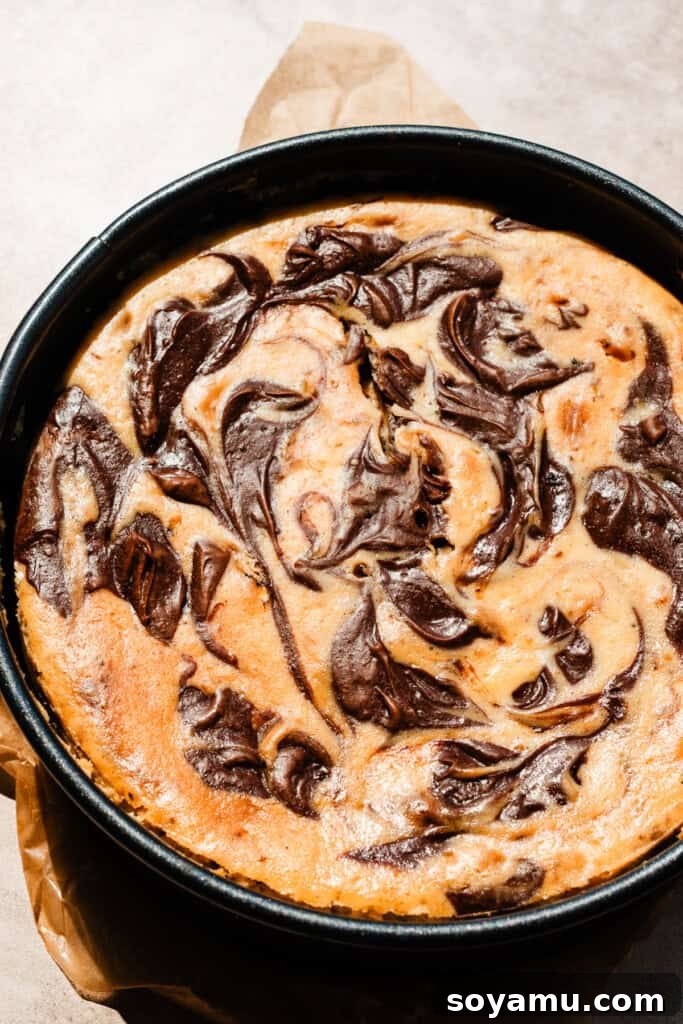
Prepare your water bath (bain-marie) for baking. Wrap the bottom and sides of your springform pan with several layers of heavy-duty aluminum foil to prevent any water from seeping in. Place the foil-wrapped springform pan into a larger roasting pan. Alternatively, for extra security, you can place the wrapped springform pan into a 10-inch cake pan, and then place that into the roasting pan. Now, alternate spoonfuls of the toasted marshmallow batter and the chocolate batter over your baked graham cracker crust. Drop dollops randomly to create an appealing visual effect. Once all the batter is in the pan, take a butter knife or a skewer and gently swirl the batters together, making graceful S-shapes or figure-eights, but avoid over-mixing to keep the distinct layers visible.
Carefully pour hot water into the roasting pan, ensuring it comes halfway up the sides of the springform pan (or the 10-inch cake pan if using). This water bath is crucial for ensuring even baking, preventing cracks, and yielding that signature silky-smooth cheesecake texture. Carefully transfer the roasting pan to your preheated oven (now at 325°F/160°C). Bake for 1 hour and 30 minutes to 1 hour and 40 minutes. The cheesecake is done when the edges are set and slightly puffed, but the center still has a slight wobble when you gently shake the pan. An instant-read thermometer inserted into the center (without touching the bottom) should register around 155-160°F (68-71°C).
Step 6: Gradual Cooling and Essential Chilling.
Once baked, turn off the oven but leave the cheesecake inside with the oven door propped open slightly (a wooden spoon works well). Allow it to cool gradually in the warm oven for one hour. This slow cooling process is critical for preventing drastic temperature changes that can cause cracks on the cheesecake’s surface. After an hour, carefully remove the cheesecake from the oven and lift it out of the water bath and roasting pan. Place it on a wire rack at room temperature to cool for another 1 to 1 and a half hours, until it’s just barely warm to the touch. Finally, transfer the cooled cheesecake (still in its springform pan) to the refrigerator. **Chill for a minimum of 6 hours, or ideally overnight (12-24 hours).** This extended chilling time is non-negotiable for a perfectly set, firm, and flavorful cheesecake. Rushing this step will result in a soft, unset cheesecake.
Step 7: Prepare the Decadent Chocolate Ganache.
While your cheesecake is chilling, or just before serving, prepare the chocolate ganache. Finely chop 6 ounces of semi-sweet chocolate (or a mix of milk and semi-sweet for a sweeter taste) and place it in a medium heatproof bowl. In a small saucepan, heat 6 ounces of heavy cream over medium-high heat until it just begins to simmer around the edges (do not boil). Remove from heat and immediately pour the hot cream over the chopped chocolate. Let it stand undisturbed for 5 minutes to allow the chocolate to melt. Then, gently whisk the mixture starting from the center and working outwards until it’s completely smooth, glossy, and emulsified. If there are still a few stubborn chocolate lumps, microwave the ganache for 5-second intervals, stirring well after each, until perfectly smooth. Let the ganache cool at room temperature for a few minutes until it thickens slightly but is still pourable. Once cool, pour it evenly over the top of your thoroughly chilled cheesecake, using an offset spatula to gently nudge it over the edges for a beautiful drip effect. Return the cheesecake to the fridge while you prepare the meringue.
Step 8: Make the Fluffy Toasted Marshmallow Meringue.
For the ultimate S’mores experience, a homemade marshmallow meringue is essential. In the heatproof bowl of a stand mixer, combine 1 cup (210 grams) of granulated sugar, 4 large room-temperature egg whites, 1/2 teaspoon of cream of tartar, and 1/8 teaspoon of salt. Place this bowl over a saucepan of simmering water (creating a double boiler), ensuring the bottom of the bowl does not touch the water. Whisk continuously by hand until the sugar is fully dissolved and the mixture reaches 160-175°F (71-79°C). This pasteurizes the egg whites and dissolves the sugar, ensuring a stable meringue.
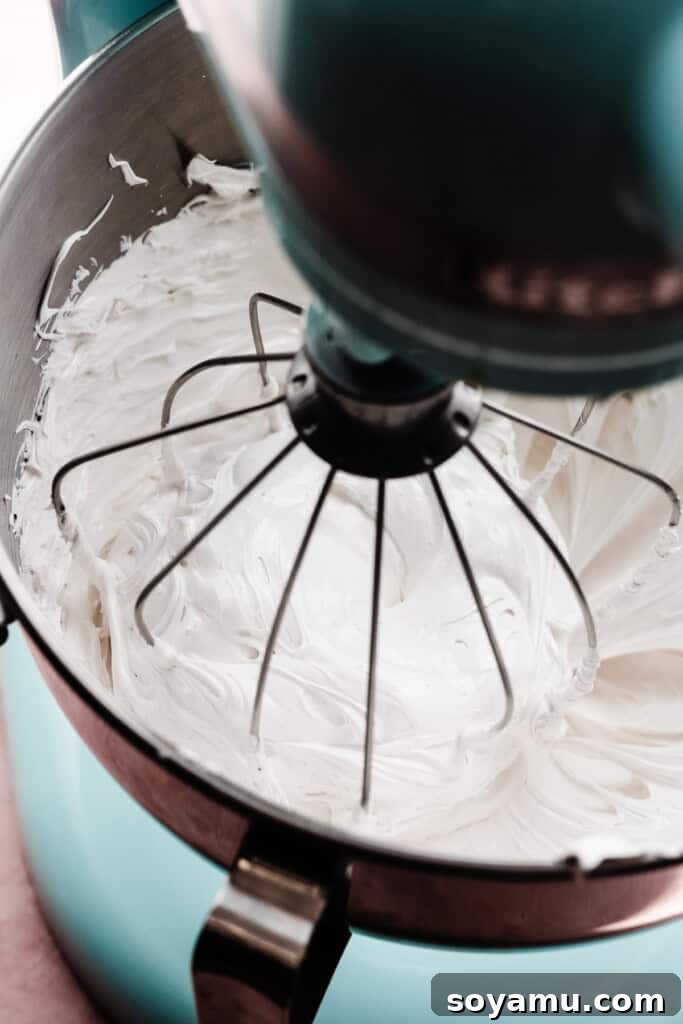
Remove the bowl from the heat and attach it to your stand mixer fitted with the whisk attachment. Beat on high speed for 8-10 minutes, or until the meringue is very thick, glossy, and forms stiff, upright peaks. Beat in 1 tablespoon of vanilla extract during the last minute of mixing. This Swiss meringue method creates a stable, pipeable meringue that holds its shape beautifully and toasts wonderfully.
Once the meringue is ready, carefully remove the chilled cheesecake from its springform pan. Pile the fluffy marshmallow meringue high onto the center of the cheesecake, then spread it outwards using the back of a spoon or an offset spatula, creating beautiful swoops and peaks. Finally, use a kitchen blow torch to toast the meringue to a gorgeous golden-brown, just like a campfire marshmallow. Serve immediately and enjoy the magic!
Serving and Storing Your S’mores Cheesecake Masterpiece
Once your S’mores Cheesecake is perfectly chilled, adorned with the glossy ganache, and crowned with the beautifully toasted marshmallow meringue, it’s time to enjoy! For the cleanest slices, use a sharp, thin knife dipped in hot water and wiped clean between each cut. This will ensure smooth, perfect portions that showcase the stunning swirled layers.
To serve, present it as a centerpiece at your next gathering or simply enjoy a slice as a decadent individual treat. The combination of the cool, creamy cheesecake, rich chocolate ganache, and the ethereal toasted meringue is truly a delight for the senses.
Storing Leftovers: This cheesecake stores remarkably well. Any leftovers should be placed in an airtight container or a cake carrier and refrigerated promptly. It will maintain its delicious flavor and texture for 3-4 days in the fridge. Thanks to the stability of the Swiss meringue, the topping will hold up beautifully, remaining fluffy and delicious even a few days after preparation. For best results, allow individual slices to come to room temperature for 10-15 minutes before serving to soften the cheesecake slightly and enhance the flavors.
Expert Baking Tips for a Flawless S’mores Cheesecake
Achieving a perfect cheesecake can be intimidating, but with these expert tips, you’ll create a S’mores Cheesecake that’s crack-free, wonderfully creamy, and utterly delicious every time.
- The Importance of Room Temperature Ingredients: This cannot be stressed enough. Ensure your cream cheese, eggs, and sour cream are at proper room temperature. Cold ingredients will lead to a lumpy batter and can affect the emulsion, increasing the risk of cracks during baking and cooling.
-
Use an Oven Thermometer: Oven temperatures can vary significantly from what the dial indicates. An reliable
oven thermometer
is an inexpensive tool that ensures your oven is consistently at the correct temperature. This accuracy is paramount for proper cheesecake baking. - Do Not Overmix the Batter (Especially with Eggs!): Once the eggs are added, mix on low speed only until *just* combined. Overmixing incorporates too much air into the batter, which can cause the cheesecake to puff up excessively like a soufflé in the oven and then collapse and crack as it cools.
- The Water Bath is Your Best Friend: A water bath (bain-marie) creates a moist, even baking environment, preventing the cheesecake from drying out, baking too quickly, and cracking. It’s essential for achieving that characteristic smooth, creamy texture.
- Preventing Water Bath Leaks: To avoid a soggy crust, double-wrap your springform pan tightly with heavy-duty aluminum foil. For ultimate protection, place the wrapped springform pan inside a 10-inch cake pan before putting it into the roasting pan for the water bath. This creates a foolproof barrier against water seepage.
- Don’t Overbake: Overbaking is a common cause of dry, cracked cheesecakes. Rely on the doneness cues: set edges with a slight wobble in the center, and an internal temperature of 155-160°F (68-71°C) when checked with an instant-read thermometer. The cheesecake will continue to set as it cools.
- Slow Cooling is Crucial: Drastic temperature changes are a cheesecake’s enemy. Allow the cheesecake to cool gradually in the turned-off oven with the door ajar, then slowly at room temperature, before moving it to the refrigerator. This gentle cooling prevents cracks.
- Embrace the Chill Time: A minimum of 6 hours, and ideally overnight, chilling in the refrigerator is essential. This allows the cheesecake to fully set, firm up, and develop its maximum flavor and creamy texture. Patience is a virtue when making cheesecake!
- Stand Mixer vs. Hand Mixer: While a stand mixer with a paddle attachment makes the job easier, a high-quality hand mixer can also achieve excellent results. Ensure you beat the cream cheese thoroughly to avoid lumps regardless of the equipment used.
Frequently Asked Questions About S’mores Cheesecake
Here are answers to some common questions you might have when making this delightful S’mores Cheesecake:
Yes, you absolutely can halve this recipe! If you’re looking to make a smaller batch, an 8×8 or 9×9 inch square pan, generously lined with parchment paper, would be an ideal choice. A 6-inch springform pan might still be a bit small for half the batter, leading to a very tall cheesecake that could be prone to cracking. Remember to adjust baking times accordingly for a smaller pan; it will likely bake faster.
Yes, the extensive chilling period is absolutely crucial for cheesecake and cannot be skipped or rushed. Cheesecake needs time to fully set and firm up, which develops its dense, creamy texture and allows the flavors to meld beautifully. After baking, the cheesecake undergoes a gradual cooling process at room temperature and then a minimum of 6 hours (ideally overnight, 12-24 hours) in the refrigerator. This ensures it’s perfectly solid, easy to slice, and prevents it from being gooey or collapsing. Trust the process – patience is key for a perfect cheesecake!
Preventing a leaky water bath is a common concern, but there are reliable methods. You have two main options:
- Elevated Water Bath: Place your roasting pan, filled with hot water, on the rack *below* your cheesecake in the oven. This creates a steamy environment without direct contact, eliminating any leak risk.
- Double Barrier Method: Wrap your springform pan very securely with several layers (at least 3-4, preferably more if using thinner foil) of heavy-duty aluminum foil. Then, place this foil-wrapped cheesecake pan into a slightly larger (e.g., a 10-inch) solid cake pan. Place *this entire assembly* into your roasting pan, and then pour water *only into the roasting pan*. The solid cake pan acts as a secondary, foolproof barrier. If you simply wrap the springform in foil and pour water directly into the roasting pan around it, water will almost always find a way to seep through, even with many foil layers.
Yes, this S’mores Cheesecake can be frozen, but it’s best to freeze it *before* adding the marshmallow meringue. Freeze the cheesecake (with the ganache layer) wrapped tightly in plastic wrap and then aluminum foil for up to 1 month. Thaw in the refrigerator overnight, then prepare and torch the meringue just before serving for the freshest taste and texture.
Standard large or mini marshmallows work perfectly for both toasting into the batter and for making the meringue. Ensure they are fresh for the best results. If you use jumbo marshmallows for toasting, you might need fewer of them.
Essential Tools for Baking Your S’mores Cheesecake
While many kitchen tools are standard, a few specialized items will significantly ease the process and guarantee the best results for your S’mores Cheesecake.
-
9-Inch Springform Pan: This is a non-negotiable item for cheesecake baking. A
springform pan
features sides that can be unclamped and removed, allowing you to beautifully release the delicate cheesecake without damaging its edges. -
Large Roasting Pan: Essential for the water bath. You’ll need a
roasting pan
large enough to comfortably fit your 9-inch springform pan (or your 10-inch barrier pan) with room to spare for water, without the pan’s rack. -
10-Inch Round Cake Pan (Optional but Recommended): This
10-inch cake pan
serves as an invaluable barrier. By placing your foil-wrapped springform pan inside it, and then placing both into the roasting pan for the water bath, you create a no-fail system to prevent any water from seeping into your cheesecake. While you can wrap your springform pan very well in 8-10 layers of aluminum foil, this extra cake pan provides superior peace of mind. - Electric Mixer (Stand or Handheld): A stand mixer fitted with a paddle attachment is ideal for whipping the cream cheese and incorporating ingredients smoothly. A powerful hand mixer can also be used effectively.
-
Kitchen Blow Torch: For achieving that perfect, deeply caramelized and slightly charred marshmallow meringue topping, a kitchen
blow torch
is invaluable. It allows for precise toasting without heating the entire cheesecake. - Instant-Read Thermometer: Crucial for checking the internal temperature of your cheesecake for perfect doneness and for accurately heating your egg white mixture for the Swiss meringue.
- Rubber Spatulas: Indispensable for scraping down the sides of your mixing bowl and gently folding ingredients, ensuring no lumps are left behind and preventing overmixing.
More S’mores Recipes to Ignite Your Cravings:
If you’ve fallen in love with the classic s’mores flavor profile, you’re in for a treat! Explore these other delightful s’mores-inspired recipes that promise to satisfy your sweet tooth and bring a touch of campfire magic into your home:
- Gooey Caramel S’mores Bars: A heavenly combination of chewy caramel, melted chocolate, and toasted marshmallows atop a graham cracker crust.
- No-Bake S’mores Pie: Quick, easy, and refreshingly cool, this pie features a graham cracker crust filled with chocolate and marshmallow, perfect for hot days.
- Marshmallow-Stuffed S’mores Cookies: Imagine warm, gooey marshmallows baked right into soft, chocolatey cookies. Pure bliss!
- Gooey S’mores Brownies: Rich, fudgy brownies topped with melted chocolate, graham crackers, and perfectly toasted marshmallows.
- S’mores Stuffed Skillet Cookie: A giant, warm chocolate chip cookie, bursting with a molten s’mores center, baked and served in a skillet.
- Skillet S’mores Dip: A crowd-pleasing, communal dessert with melted chocolate and toasted marshmallows, perfect for dipping graham crackers.
- Homemade S’mores Pop Tarts: A playful, elevated version of the breakfast classic, filled with chocolate and marshmallow and topped with sweet glaze.
Did you craft this delightful S’mores Cheesecake? We’d love to hear from you!
Please take a moment to leave a comment and a star rating below. Your feedback is incredibly valuable to us and helps our small business immensely. Let us know how much you enjoyed creating and tasting this unique dessert!
S’mores Cheesecake with Toasted Marshmallow Meringue
Stephanie Simmons
45 mins
1 hr 20 mins
7 hrs
9 hrs 5 mins
8 to 16 slices
Ingredients
For the Crust
- 3 cups graham cracker crumbs
- 1/2 cup salted butter, melted
For the Cheesecake Filling
- 32 ounces cream cheese, at room temperature
- 1 and 1/4 cups granulated sugar
- 4 large eggs, at room temperature
- 3/4 cup full fat sour cream, at room temperature
- 1 and 1/2 tsp corn starch
- pinch of salt
- 1 tbsp vanilla extract
For the Marshmallow Batter
- 25 marshmallows
For the Chocolate Batter
- 5 ounces melted milk chocolate
- 2/3 cup cocoa powder, 60 grams
- 2 tbsp heavy cream
For the Chocolate Ganache
- 6 ounces heavy cream
- 6 ounces semi-sweet chocolate, chopped (You can use a mix of milk and semi-sweet if you want a slightly sweeter ganache)
For the Marshmallow Meringue
- 1 cup granulated sugar, 210 grams
- 4 large egg whites, at room temperature
- 1/2 tsp cream of tartar
- 1/8 tsp salt
- 1 tbsp vanilla extract
Instructions
-
Make the Crust: Preheat oven to 350° F. Spray a 9-inch springform pan with nonstick spray and make sure the bottom is securely fastened. Stir together crust ingredients (3 cups graham cracker crumbs, 1/2 cup melted salted butter) and press into prepared pan and up the sides a bit. Bake for 10 minutes until lightly golden. Set aside to cool. Keep the oven on at 350°F initially. Fill a large pot with water and set it on your stove, and get out a large roasting pan – you’ll need this for your water bath later.
Reduce the oven temperature to 325℉ for the cheesecake. -
Make the Cheesecake Batter: Remember that your cold ingredients (cream cheese, eggs, sour cream) need to come to room temp before you start or the filling won’t turn out smooth. In a large mixing bowl, beat the softened 32 ounces cream cheese with an electric mixer until creamy, about 1-2 minutes. Add 1 and 1/4 cups granulated sugar & mix until well incorporated, about 1 minute. Scrape the sides of the bowl with a rubber spatula. Add the 4 large eggs one at a time, mixing on medium speed after each until just incorporated – if you over-mix, the cheesecake can inflate and overflow in the oven. Be sure to scrape the bottom of the bowl between each egg addition, as little lumps of cream cheese will hide down there. Add the 1 tbsp vanilla extract, 3/4 cup sour cream, 1 and 1/2 tsp corn starch, and pinch of salt and mix until just combined. Divide the batter into two equal portions.
-
Divide & Flavor the Batters: Take one portion of batter (approx. 2.5 cups) and add 5 ounces melted milk chocolate, 2/3 cup cocoa powder, and 2 tbsp heavy cream. Mix until fully combined for the chocolate batter. Arrange 25 marshmallows on a baking sheet. Toast the marshmallows under the oven broiler or with a blow torch until deeply golden brown and slightly charred. Scrape them into the other portion of vanilla batter. Mix in slowly with the electric mixer on low speed (to prevent them from being sucked up the beaters). Some small lumps from the toasted marshmallows are fine and add to the texture.
-
Assemble & Bake: Starting with the marshmallow batter, use ice cream scoops or large spoons to alternate adding a few dollops of each type of batter at a time to the baked crust until all batter is used. Use a butter knife or skewer to gently swirl the batters together for a marbled effect. Prepare your water bath: double-wrap the springform pan tightly with heavy-duty aluminum foil, and for extra security, place it inside a 10-inch cake pan. Place this assembly into a large roasting pan and pour hot water into the roasting pan (not into the cheesecake pan) until it comes halfway up the sides.
Bake at 325℉ (not 350!) for 1 hour and 30 minutes to 1 hour and 40 minutes. An instant-read thermometer inserted into the center of the cheesecake should read 155-160℉. The cheesecake will appear just set, with slightly raised edges and a slight wobble in the center when you move the pan.
Turn the oven off and crack the door open. Leave the cheesecake as is in the oven for 1 hour. This helps it cool gently to ensure a creamy texture and no cracks. -
Chill: After the hour is up, remove the cheesecake from the oven and carefully remove the cheesecake pan from the water bath and barrier pan. Place the cheesecake (still in its springform) on a wire rack to cool for about 1 and 1/2 hours at room temperature. Then, place it in the fridge and allow to chill for at least 6 hours but ideally overnight (12-24 hours).
-
Make the Ganache: Finely chop 6 ounces semi-sweet chocolate and add to a small or medium bowl. Heat 6 ounces heavy cream in a small saucepan over medium-high heat until it’s just simmering around the edges. Pour the hot heavy cream over the chocolate and let stand 5 minutes before stirring. Stir until completely smooth and glossy. If necessary, microwave in 5-second intervals, stirring between each, until smooth.
Let the ganache sit at room temperature for a few minutes to thicken slightly until it’s still pourable but not runny. Once cooled slightly, pour the ganache over the completely chilled cheesecake, nudging it over the sides with an offset spatula for an even coating. Pop the cheesecake back in the fridge while you make the meringue. -
Make the Marshmallow Meringue: In the heatproof bowl of a stand mixer, combine 1 cup granulated sugar, 4 large egg whites (room temperature), 1/2 tsp cream of tartar, and 1/8 tsp salt. Place the bowl over a saucepan of simmering water (not touching the water) and whisk continuously until the sugar dissolves and the mixture reaches 160-175°F. Remove from heat, attach to the stand mixer with the whisk attachment, and beat on high speed until very thick, glossy, and stiff peaks form (8-10 minutes). Beat in 1 tbsp vanilla extract during the last minute.
-
Serve + Store: Carefully remove the chilled cheesecake from the springform pan. Pile the prepared marshmallow meringue high in the center of the cheesecake, then spread it with the back of a spoon or offset spatula, creating pretty swoops and peaks. Toast the meringue with a kitchen blow torch until golden brown and slightly charred in spots. Slice with a hot, clean knife and enjoy! Store leftovers in an airtight container or cake carrier in the fridge for 3-4 days.
Nutrition Facts
Calories: 1241 kcal,
Carbohydrates: 122g,
Protein: 19g,
Fat: 79g,
Saturated Fat: 45g,
Polyunsaturated Fat: 4g,
Monounsaturated Fat: 21g,
Trans Fat: 0.5g,
Cholesterol: 280mg,
Sodium: 790mg,
Potassium: 588mg,
Fiber: 5g,
Sugar: 90g,
Vitamin A: 2525 IU,
Vitamin C: 0.3mg,
Calcium: 216mg,
Iron: 4mg
Nutrition information is automatically calculated, so should only be used as an approximation.