
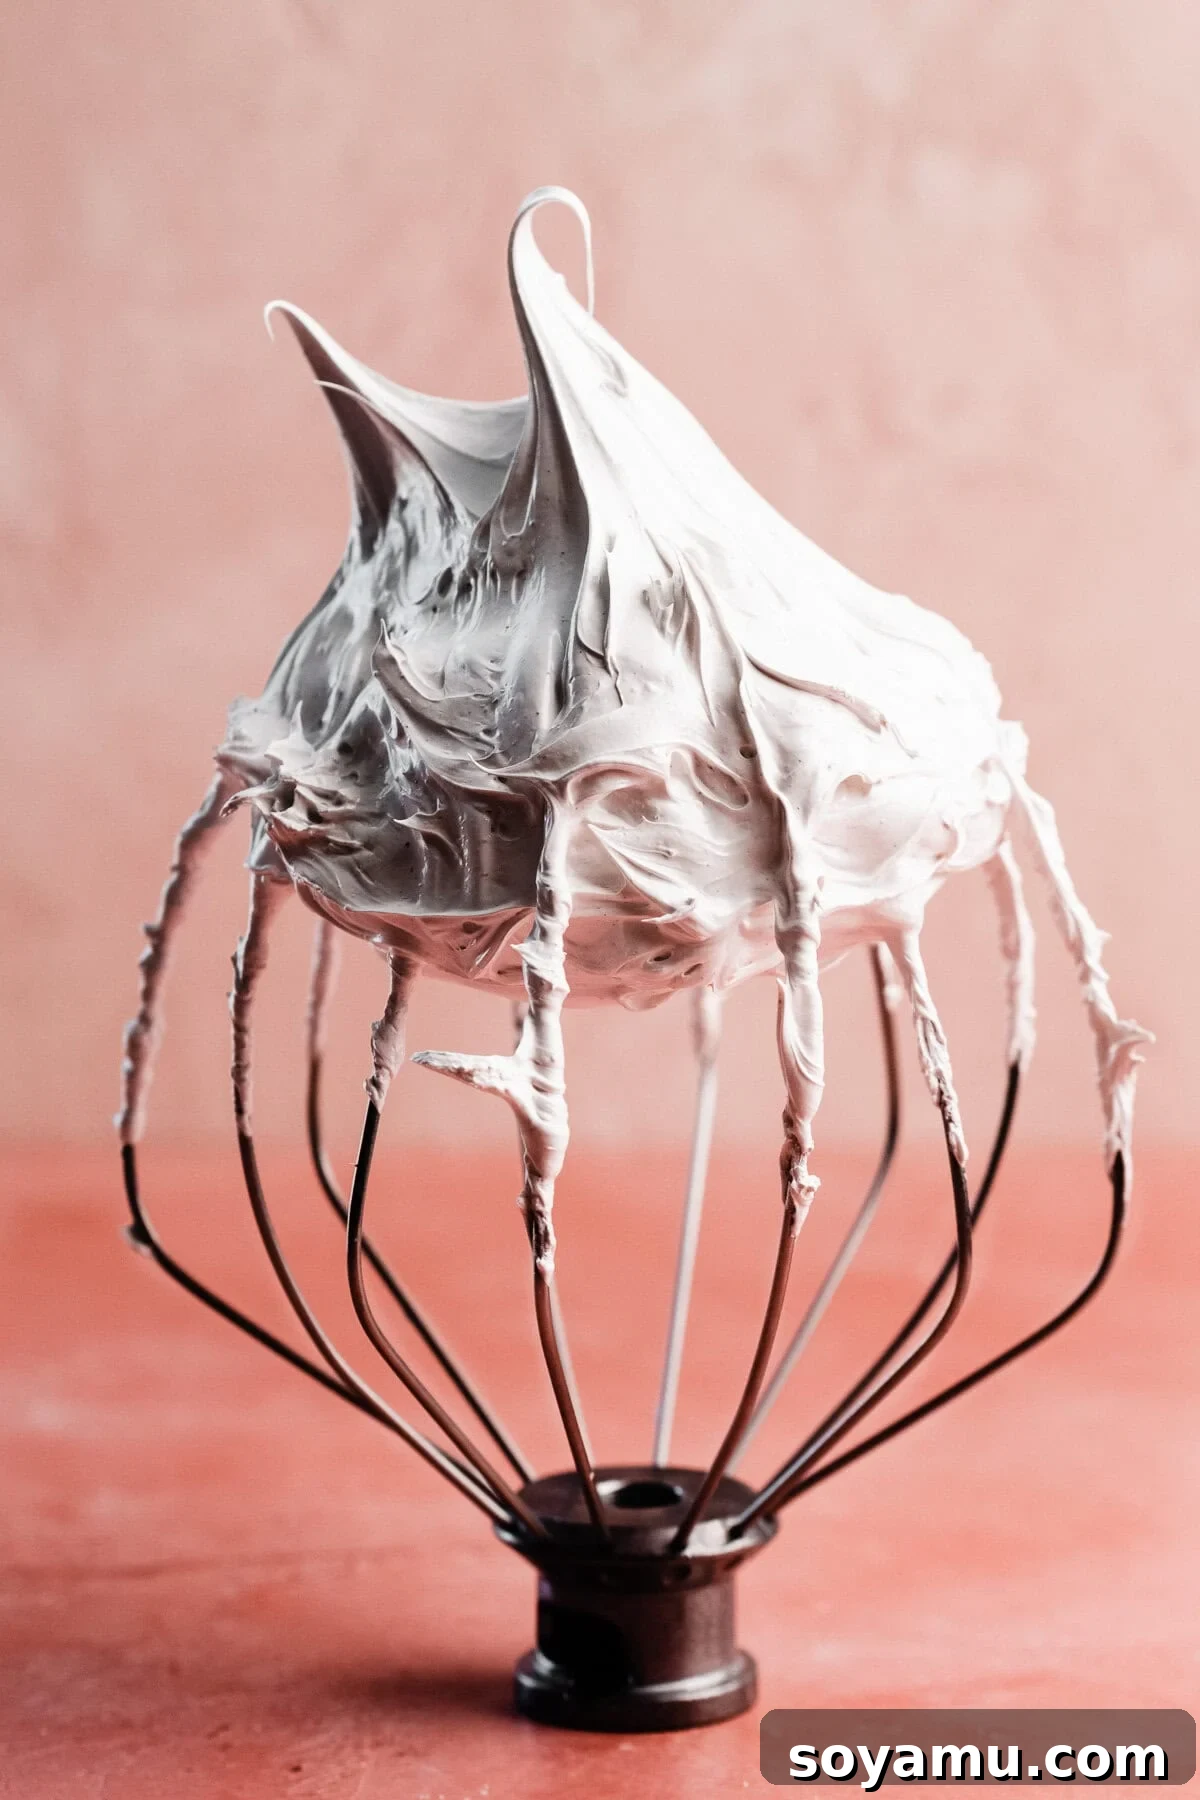
Swiss meringue, often likened to homemade marshmallow fluff, is an exquisite and versatile topping that elevates a wide array of desserts. Crafted from a handful of fundamental ingredients—egg whites, granulated sugar, cream of tartar, salt, and pure vanilla—this recipe promises a dessert component that is both visually stunning and delightfully stable. While deceptively simple, mastering the technique behind perfectly stable meringue requires attention to detail. Having meticulously refined this method over years of experimentation, I am thrilled to share the precise steps and crucial insights necessary for your first attempt to be a resounding success, allowing you to bypass common baking pitfalls and achieve flawless results.
Why You’ll Love This Swiss Meringue Recipe: Unmatched Stability and Versatility
This Swiss meringue recipe stands out as a true game-changer in your baking repertoire. Here’s why it’s destined to become your go-to:
- Unmatched Stability and Structure: The unique Swiss method of preparation results in an incredibly sturdy meringue. Unlike its French counterpart, Swiss meringue holds its shape beautifully, making it ideal for structural applications such as filling delicate layer cakes, piping intricate designs onto cupcakes and cookies, or creating impressive toppings for cheesecakes and pies. Its robust nature ensures your desserts maintain their elegant form from the first slice to the last.
- Effortlessly Elegant and Simple to Master: Despite the comprehensive guidance provided, this recipe is remarkably straightforward. My goal is to equip you with all the necessary information to achieve perfection on your very first try. I’ve distilled years of personal trial and error, offering a clear, concise pathway to success, ensuring you confidently create this impressive topping without the frustration of common baking missteps.
- Worry-Free Enjoyment: No Raw Eggs: A significant advantage of Swiss meringue is the cooking process. The egg whites are gently heated with sugar over a double boiler until they reach a safe internal temperature of 175°F (79°C). This ensures the eggs are fully cooked and safe for consumption, eliminating any concerns about raw egg whites while still delivering that coveted light and airy texture.
- Smooth, Silky, and Irresistibly Glossy Texture: Beyond its stability, Swiss meringue is celebrated for its luxuriously smooth and silky mouthfeel, coupled with a beautiful, glossy sheen. This makes it not just a topping, but an integral part of the dessert experience, adding a professional finish and delightful texture that complements a wide range of flavors.
The Essential Ingredients for Perfect Meringue: What You Need to Know
Achieving a flawless Swiss meringue begins with understanding the role of each simple ingredient. For detailed measurements and instructions, please refer to the recipe card at the bottom of this post.
- Granulated Sugar: More than just a sweetener, granulated sugar is a critical structural component in meringue. As it dissolves into the egg whites during the cooking phase, it forms a stable syrup that helps create a robust, resilient foam. This sugar also contributes to the meringue’s glossy finish and helps prevent weeping.
- Large Egg Whites: Eggs are the very foundation of meringue. It’s crucial to use large eggs. For easier separation, crack them when they are cold, as the yolks are firmer and less likely to break. Once separated, allow the egg whites to come to room temperature in a clean bowl. Room temperature egg whites whip up with more volume and create a more stable foam, as their proteins are more relaxed and able to incorporate air efficiently. Be meticulous to avoid any trace of yolk, as fat is the enemy of meringue stability.
- Cream of Tartar: This acidic salt is a crucial stabilizing agent. Cream of tartar helps to strengthen the egg white proteins, allowing them to hold air more effectively and preventing the meringue from collapsing. It also contributes a subtle tartness, beautifully balancing the sweetness of the sugar. Do not skip this ingredient, as it plays a vital role in the meringue’s structure.
- Salt: A small pinch of salt enhances the overall flavor profile of the meringue, preventing it from tasting overly sweet and adding a subtle depth. It works synergistically with the other ingredients to create a more balanced and palatable dessert topping.
- Pure Vanilla Extract or Vanilla Bean Paste: For the best flavor, always opt for pure vanilla extract or, my personal preference, vanilla bean paste. Vanilla bean paste offers an intense, aromatic vanilla flavor and beautiful visible flecks of vanilla bean, which add an elegant touch to the pristine white meringue. Since meringue has very few ingredients, the quality of your vanilla makes a significant difference.
Tailoring Your Swiss Meringue: Variations & Substitutions
One of the beauties of this Swiss meringue recipe is its inherent adaptability for certain dietary needs, though specific flavor adjustments should be approached with care.
- Naturally Gluten-Free: This recipe contains no gluten-based ingredients, making it a wonderful option for those with gluten sensitivities or dietary restrictions.
- Naturally Dairy-Free: Similarly, Swiss meringue is naturally free from dairy products, offering a light and delicious topping that fits dairy-free diets perfectly.
- Flavor Innovations: While the classic vanilla flavor is delightful, don’t hesitate to experiment! You can introduce other extracts like almond, peppermint, or even a touch of citrus zest. For advanced flavor variations and creative ideas, I highly recommend exploring Erin McDowell’s acclaimed cookbook, “The Book on Pie,” which offers expert guidance on elevating meringue flavors. When adding liquid extracts, ensure they are concentrated to avoid adding too much moisture.
- Why Substitutions Aren’t Recommended for Core Ingredients: For the egg whites, sugar, and cream of tartar, I strongly advise against making substitutions. These ingredients are precisely measured and interact chemically to create the stable structure characteristic of Swiss meringue. Altering these ratios or components could compromise the meringue’s ability to whip properly, stabilize, or achieve its desired texture.
Mastering Swiss Meringue: A Step-by-Step Guide
Follow these detailed steps to create a flawless, stable Swiss meringue every time.
Step 1: Meticulous Preparation
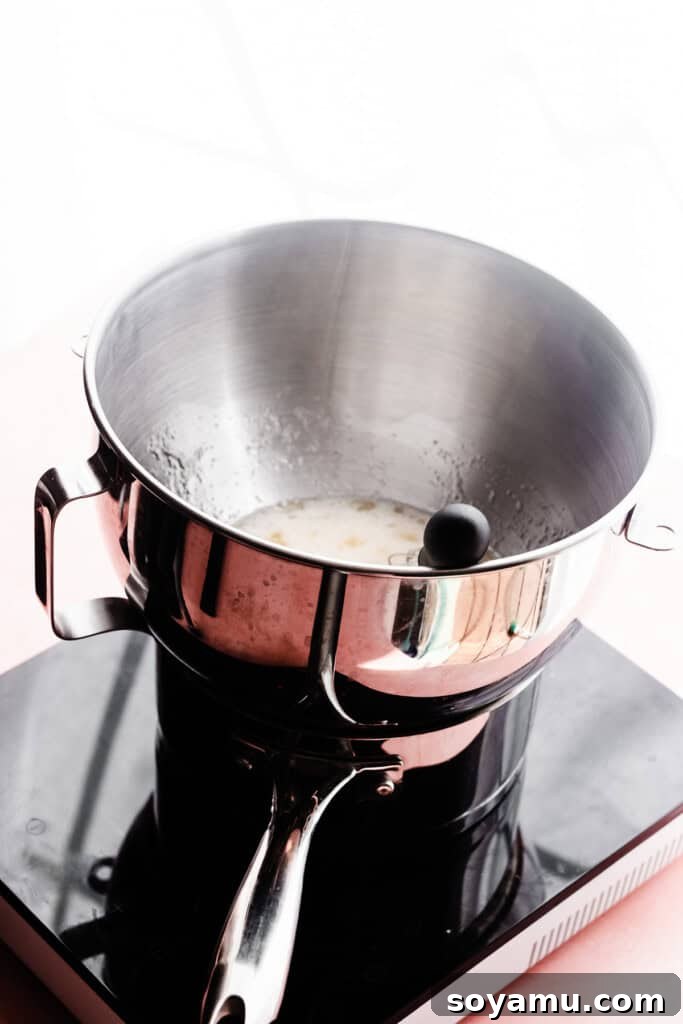
Before you even crack an egg, thorough preparation is paramount. Begin by reading the entire recipe through, ensuring you understand each step and have all necessary tools and ingredients at hand. The most critical aspect of meringue preparation is cleanliness. Any trace of fat—whether from previous baking endeavors or even a speck of egg yolk—can completely destabilize your meringue. Therefore, rigorously wash your mixing bowl (preferably metal), whisk, and beaters or whisk attachment with hot water and a splash of white vinegar. The vinegar helps cut through any lingering grease. Dry them meticulously with a clean, lint-free towel or allow them to air dry completely. You will also need a metal bowl that can comfortably sit over a saucepan with 1-2 inches of simmering water without its bottom touching the water. This creates your makeshift double boiler.
Step 2: Combining the Foundation
In your meticulously cleaned metal bowl, combine the room-temperature large egg whites, granulated sugar, cream of tartar, and salt. Whisk these ingredients gently together just until they are combined. Do not whip at this stage; the goal is simply to integrate them before heating. Using room-temperature egg whites allows for better incorporation of air later and a more even cooking process.
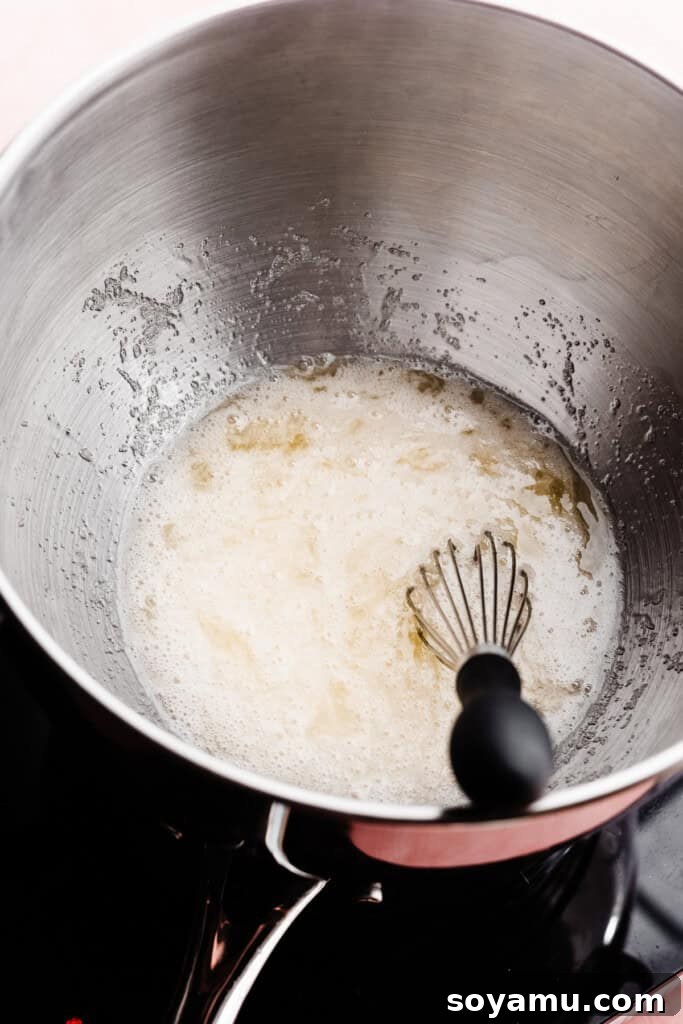
Step 3: The Gentle Cook: Dissolving & Stabilizing
Place your bowl directly over the saucepan of simmering water (ensure the water is gently simmering, not boiling furiously, and that the bowl’s bottom does not touch the water). Cook the mixture over low heat, whisking constantly and diligently. This continuous motion is crucial for two reasons: it prevents the egg whites from scrambling and ensures the sugar granules dissolve evenly. Continue cooking and whisking for approximately 8 minutes, or until the mixture registers a steady 175°F (79°C) on an instant-read thermometer. The mixture will transition from clear to a milky, opaque white and should feel smooth when a small amount is rubbed between your fingers, indicating the sugar has fully dissolved. This heating process not only pasteurizes the egg whites, making them safe to eat, but also begins to denature the egg proteins, setting the stage for a incredibly stable and voluminous meringue once whipped.
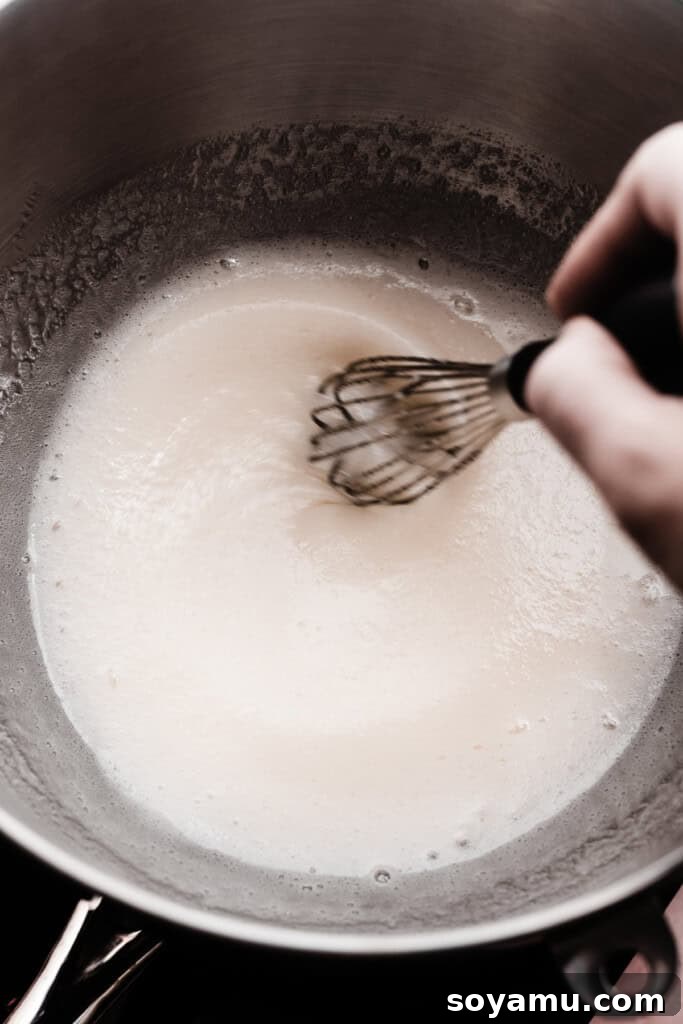
Step 4: Whipping to Perfection
Immediately remove the bowl from the heat. If using a stand mixer, carefully transfer the hot bowl to the mixer stand, attaching the whisk. If using a hand mixer, you can continue in the same bowl. Add the pure vanilla extract or vanilla bean paste to the hot mixture. Begin beating the mixture on high speed. For smaller batches, this may take 2-3 minutes; for larger quantities (like the batch pictured), expect 4-5 minutes. As you beat, the mixture will gradually transform. It will first appear foamy and voluminous, then start to thicken and become glossy. The whisking action rapidly incorporates air, cooling the meringue while simultaneously building its structure. Be patient and watch for the visible changes in texture and volume.
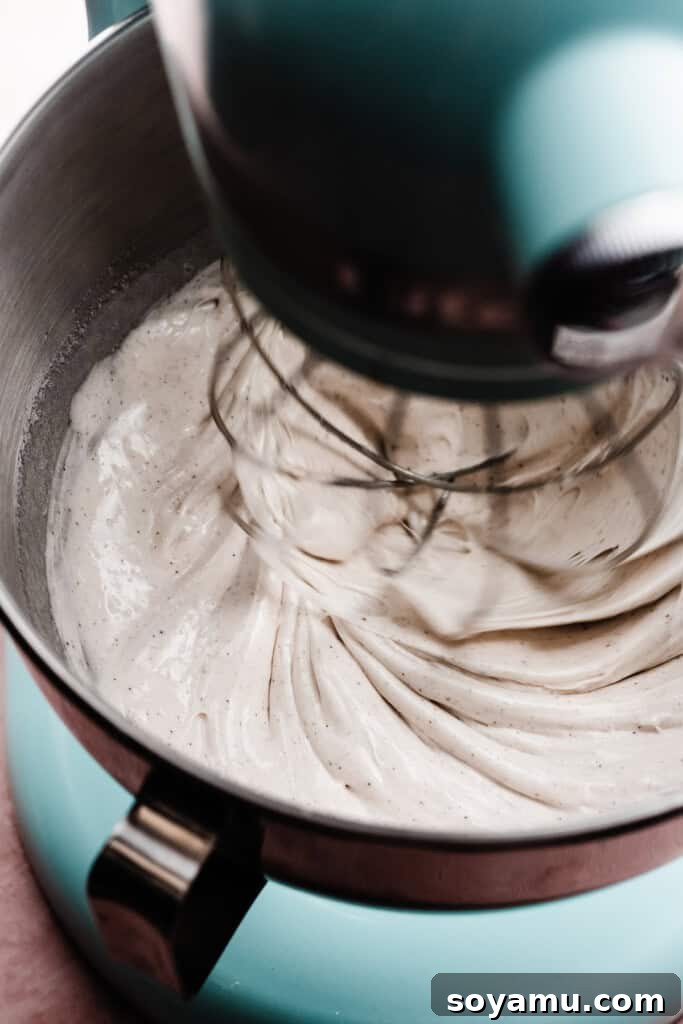
Step 5: Achieving Stiff, Glossy Peaks
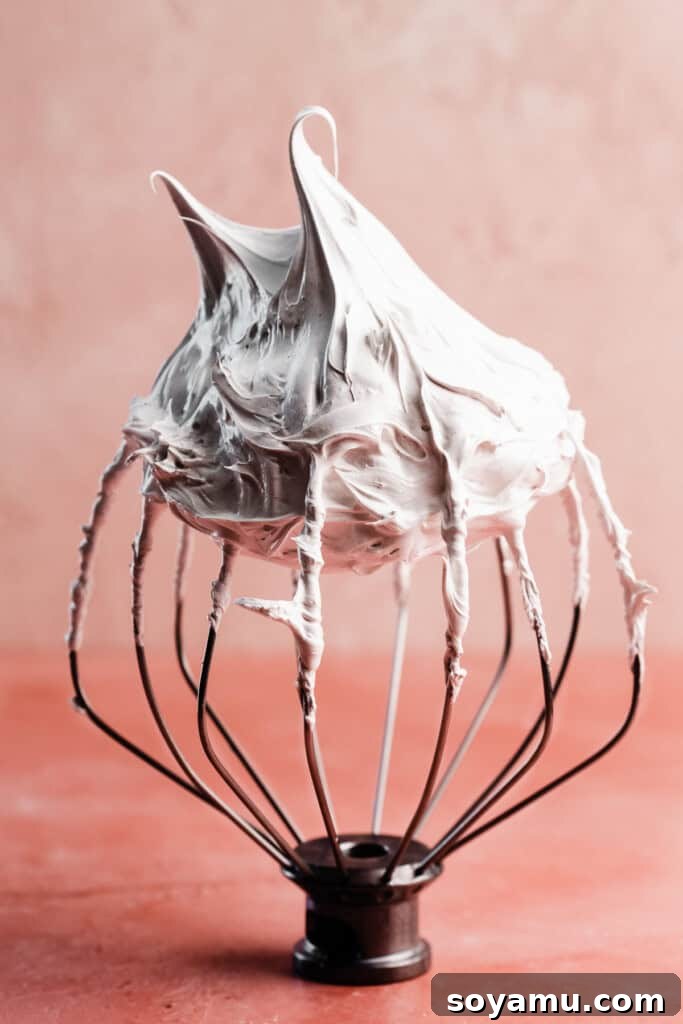
Continue to mix until the meringue is incredibly thick, super silky smooth, and holds stiff, glossy peaks. You’ll notice it growing up the sides of the bowl and eventually clumping noticeably within the whisk attachment itself. This clumping is a strong indicator that it’s nearly ready. To test for readiness, gently lift the whisk attachment straight up. The meringue peaks should stand firm and tall, with only the *slightest* hint of a gentle curl or wobble at the very tip (refer to the very first photo at the top of this page for a visual guide). Avoid overmixing, as this can break down the meringue’s structure. Once it reaches this stage, your Swiss meringue is ready for immediate use!
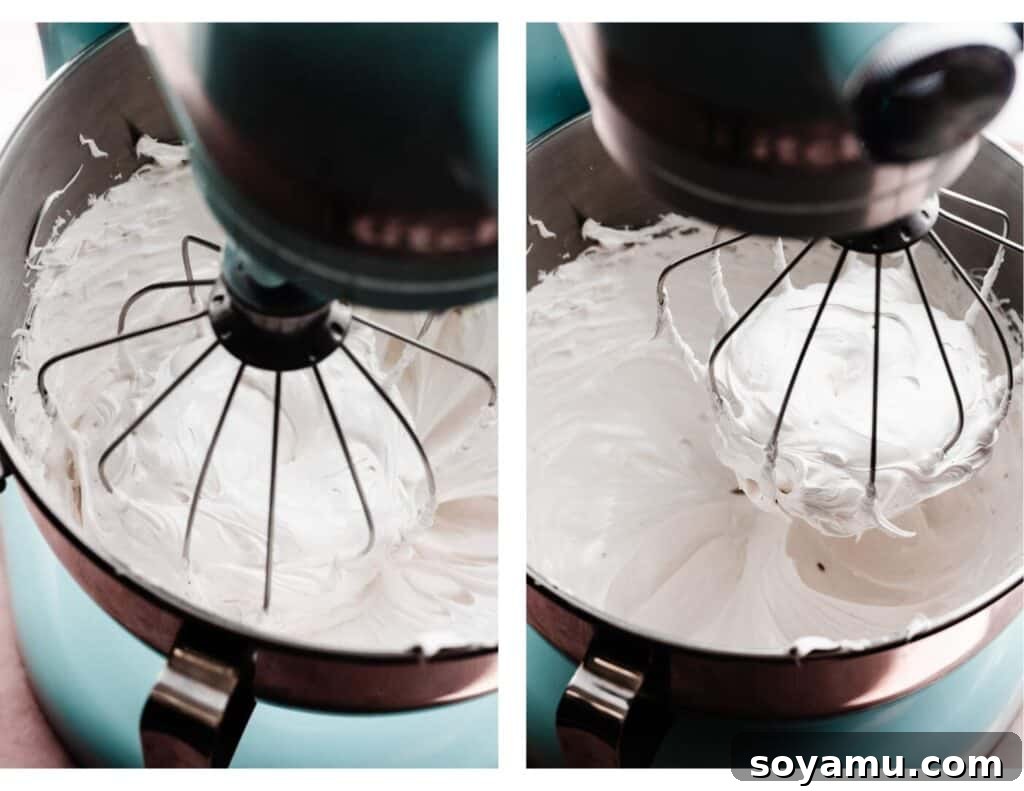
Serving Your Swiss Meringue Creation
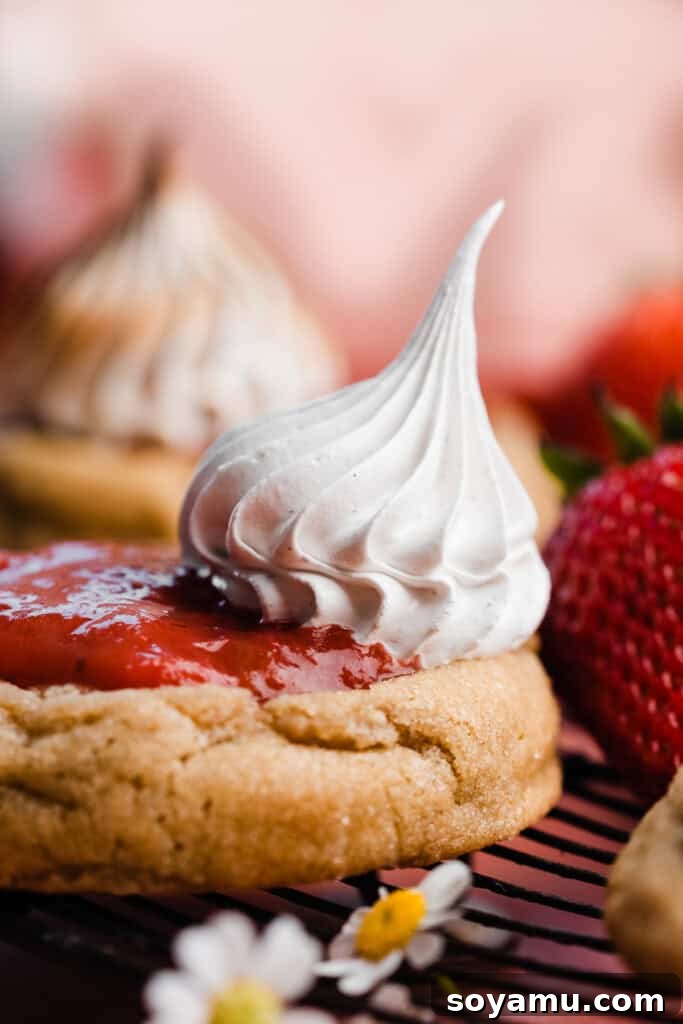
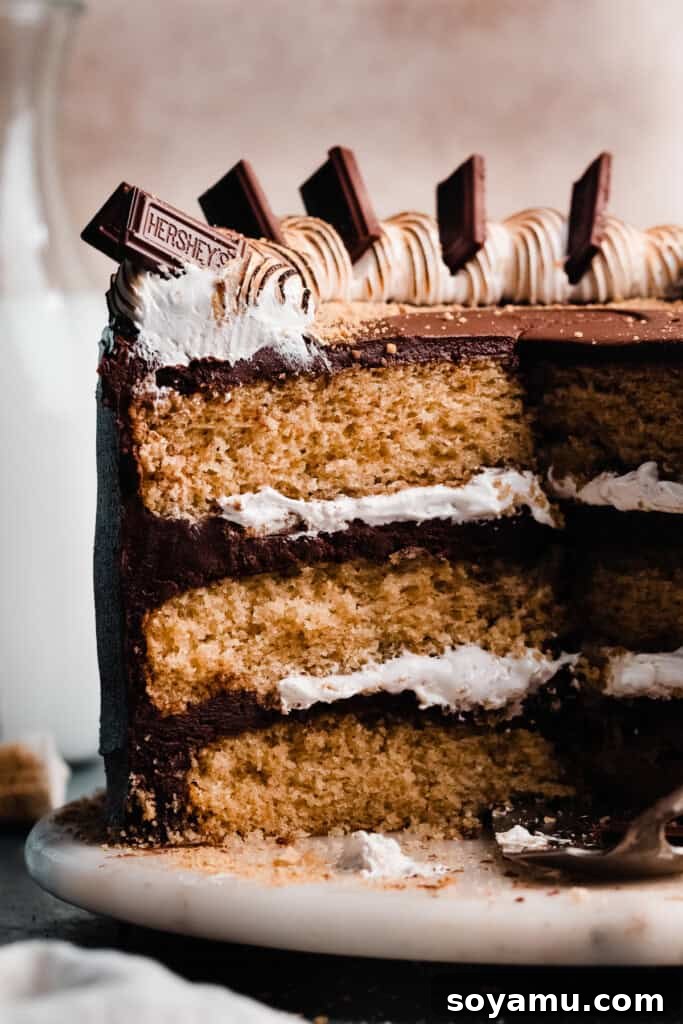
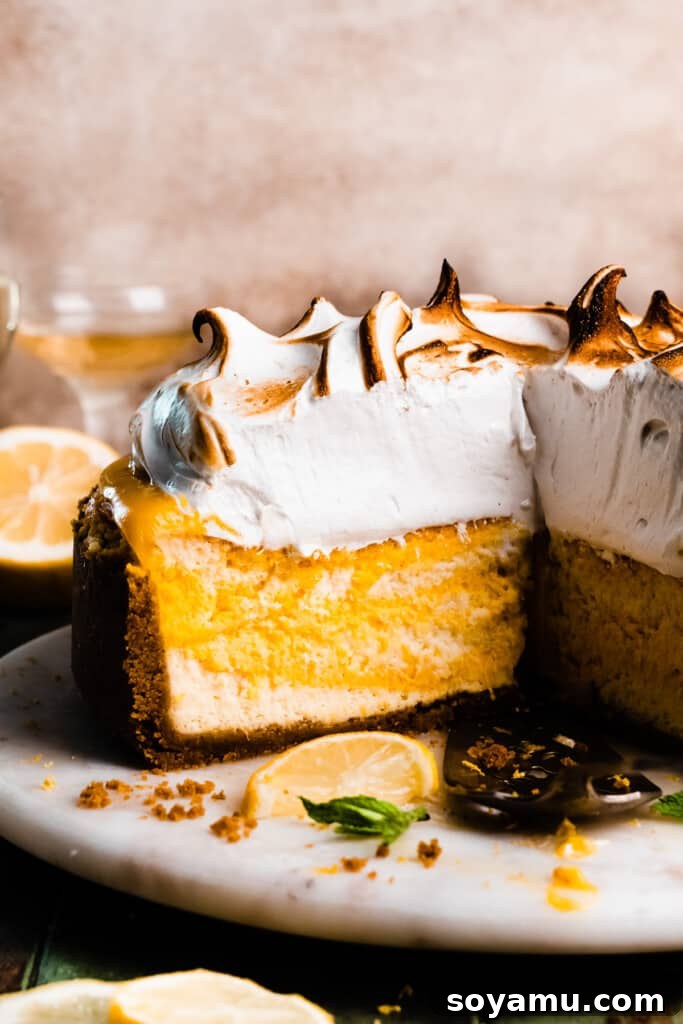
Swiss meringue is best used immediately after it’s made to maintain its optimal texture and stability. It’s not a topping that benefits from sitting around in the mixing bowl. Once prepared, spread or pipe it onto your chosen dessert. Common applications include luxurious toppings for Lemon Meringue Cheesecake, classic pies, delicate cookies, or a show-stopping S’mores Cake. For that quintessential golden-brown finish, gently torch the meringue with a kitchen torch just before serving. The beautifully toasted peaks add a caramelized flavor and appealing contrast. If your meringue is properly stabilized, as demonstrated in my photos, it will hold its shape exceptionally well. This means you can prepare a meringue-topped dessert, torch it, and then store it in the refrigerator for approximately 4-6 hours before serving without fear of collapse or weeping, making it perfect for entertaining.
Pro Tips for Meringue Success
Achieving consistently perfect Swiss meringue relies on a few expert techniques and considerations:
- Always Read the Entire Recipe First: This cannot be stressed enough. Familiarizing yourself with all steps, ingredients, and specialized equipment before you begin ensures a smooth, stress-free baking process and significantly increases your chances of success. Preparation is key!
- The Critical Role of Spotless Equipment: As mentioned, fat is the ultimate enemy of meringue. Even minute residues of butter or egg yolk can prevent egg whites from whipping properly. Beyond a thorough wash with hot water and soap, a quick rinse with white vinegar and hot water for your metal bowl and whisk attachment is a simple yet incredibly effective step. Dry them completely with a clean towel. This extra precaution guarantees no unseen fat interferes with your meringue’s stability.
- Humidity: Your Meringue’s Foe: Meringues are highly susceptible to humidity. On particularly damp or rainy days, the extra moisture in the air can make it challenging for meringue to stiffen and hold its shape. If possible, choose a dry day for meringue making. If you must bake on a humid day, ensure your kitchen is as cool and dry as possible.
- Don’t Overmix: While beating to stiff peaks is essential, overmixing can be detrimental. Once your meringue reaches the desired stiff, glossy consistency with peaks that hold their shape, stop mixing. Continuing to beat can cause the proteins to break down, resulting in a granular, less stable meringue that is prone to weeping.
Piping Techniques for Elegant Presentation
Piping Swiss meringue adds a professional and decorative touch to your desserts. It’s surprisingly simple to do:
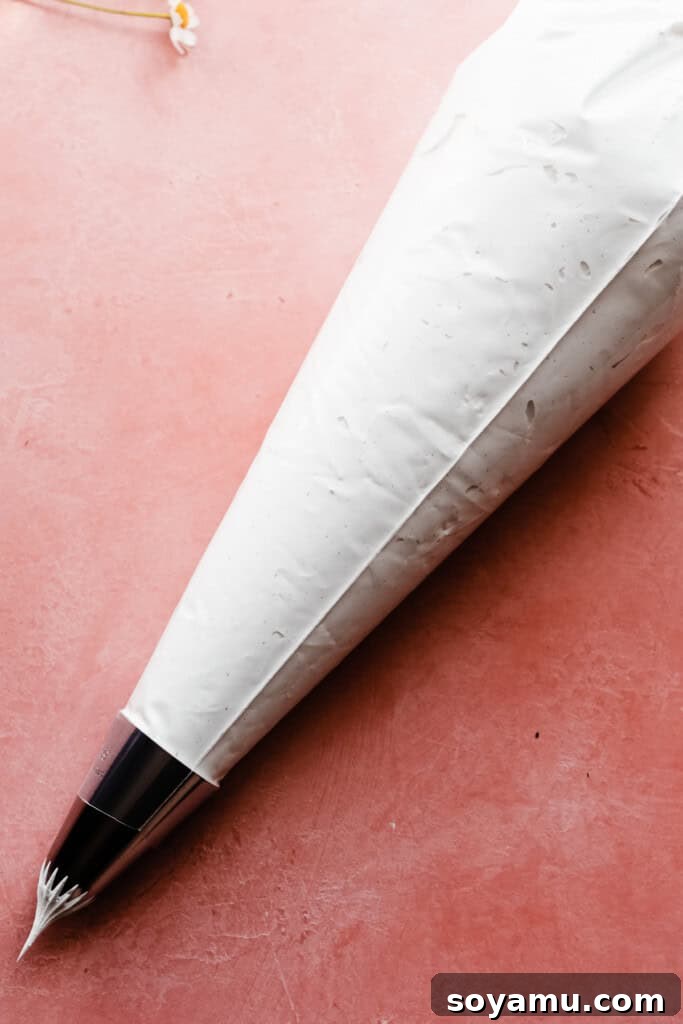
- Choosing the Right Tip: Select a piping tip that suits your desired design. For bold, swirled patterns like those seen on the S’mores Cake and cookie photo, a large open star tip (such as Wilton 6B or 1M) works wonderfully. Smaller round or star tips can create more intricate details for cupcakes or tartlets.
- Filling the Piping Bag: Fit your piping bag with the chosen tip. Fold the top edges of the bag over your hand to create a wide opening, then use a spatula to spoon the meringue into the bag. Fill it about two-thirds full to leave room for twisting the top, which helps control the meringue flow.
- Creative Piping Ideas: Experiment with different techniques—rosettes, swirls, stars, or simple dollops—to find what best complements your dessert. The sturdy nature of Swiss meringue makes it forgiving and easy to work with, allowing for beautiful, defined shapes.
Frequently Asked Questions (FAQs) About Swiss Meringue
While you can easily scale this recipe down (to a half or even a quarter batch), I do not recommend doubling it. I haven’t personally tested larger quantities, and scaling up the recipe significantly can sometimes affect the meringue’s ability to heat evenly and stabilize properly. For larger needs, it’s best to make multiple single batches.
No, Swiss meringue is best prepared just before you intend to use it. It thrives on being fresh. If left to sit in the mixing bowl for too long, it can begin to destabilize, lose its volume, and become “weepy” due to moisture separation. However, once it’s promptly applied to a dessert and properly set, it will hold its beautiful shape for several hours or even days in the refrigerator.
No, a specialized double boiler isn’t strictly necessary. You can easily create one using equipment you likely already have. Simply use a heatproof metal mixing bowl that can rest securely over a saucepan filled with 1-2 inches of simmering water. The key is to ensure the bottom of your mixing bowl does not touch the water, allowing the steam to gently heat the egg white mixture.
Absolutely! To add vibrant color, simply incorporate a few drops of gel food coloring along with the vanilla extract. Gel food coloring is highly concentrated, meaning you’ll achieve rich colors without introducing excess liquid, which could otherwise compromise the meringue’s texture.
I do not recommend using carton or boxed egg whites for meringue. These products are often pasteurized at very high temperatures, which can alter the egg white proteins, making them less capable of whipping up into the voluminous, stable foam required for a successful Swiss meringue. Fresh egg whites yield the best results.
Don’t let those delicious egg yolks go to waste! You can freeze them for later use. Place individual yolks into an ice cube tray, then transfer the frozen yolks to a freezer-safe bag. They can be stored in the freezer for up to a month. Thaw them in the refrigerator before incorporating them into recipes that specifically call for egg yolks, such as rich custards, hollandaise sauce, or lemon bars.
There are three primary types of meringue, each with a distinct preparation method and characteristic texture:
French Meringue: This is the simplest and least stable. It involves slowly adding granulated sugar to raw egg whites as they are whipped to stiff peaks. No heat is used, making it airy and crisp but prone to weeping and collapse.
Italian Meringue: Known for its exceptional stability and smooth texture, Italian meringue is made by slowly pouring a stream of hot sugar syrup (cooked to the soft-ball stage) into vigorously whipping egg whites. The hot syrup cooks the egg whites, resulting in a strong, glossy meringue often used in buttercream or as a sturdy topping.
Swiss Meringue: The method detailed in this recipe, Swiss meringue, falls between French and Italian in terms of stability. Egg whites and sugar are gently heated over a double boiler until the sugar dissolves and the mixture reaches a safe temperature, then whipped until cool and stiff. This process creates a remarkably stable, silky, and glossy meringue that holds its shape beautifully and is safe to consume.
Essential Tools for Meringue Mastery
Having the right tools can make all the difference in achieving perfect Swiss meringue:
- Heatproof Metal Bowl: A metal bowl is ideal for meringue as it conducts heat efficiently and is less likely to retain fat residue compared to plastic. Ensure it’s large enough for the meringue to expand and can sit securely over your saucepan without touching the simmering water.
- Quality Whisk (Hand or Stand Mixer): A good quality whisk, whether handheld or the whisk attachment for your stand mixer, is crucial for incorporating air and achieving the necessary volume and stiffness. A stand mixer is highly recommended for ease and consistency, allowing you to gradually heat and then vigorously whip the meringue without tiring your arm.
- Reliable Instant-Read Thermometer: An instant-read thermometer is an indispensable tool for Swiss meringue. It precisely measures the temperature of your egg white mixture, ensuring it reaches the safe 175°F (79°C) for stability and food safety. This is much easier and more accurate than relying on visual cues alone.
- Professional Kitchen Torch: To achieve those beautiful, caramelized peaks, a kitchen torch is essential. Skip the flimsy, inexpensive models that often fail quickly. Invest in a robust model like the Bernzomatic Trigger Start Torch paired with a few Propane Tanks. This type of torch offers a powerful, consistent flame, is durable, and will last for years, making it perfect for toasting your meringue safely and effectively.
Delicious Desserts to Crown with Swiss Meringue
Swiss meringue is an incredibly versatile topping that complements a variety of sweet treats. Here are some of my favorite recipes where this fluffy, stable meringue truly shines:
- Lemon Meringue Cheesecake
- S’mores Cake
- S’mores Tart
- Strawberry Rhubarb Pie Cookies
Note that Swiss Meringue is distinct from Swiss Meringue Buttercream. If you’re looking to create a silky, stable frosting, you’ll want to follow a dedicated Swiss Meringue Buttercream Recipe instead.
Did you make this recipe? Leave a comment & star rating!
Click the little stars in the header of the recipe card below to leave a comment & star rating, letting me know how you liked the recipe. I take all feedback seriously, & leaving a rating helps my small business immensely!

Swiss Meringue
By Stephanie Simmons
Swiss Meringue is the perfect topping for so many desserts! It’s made with simple ingredients – egg whites, granulated sugar, cream of tartar, salt, and vanilla. Although this is a simple recipe, it’s important to read through the recipe thoroughly before starting, so you are set up for success! I’ve tinkered with this technique for years, and have learned exactly what to do and not do for perfectly stable meringue.
Prep Time: 10 mins
Cook Time: 8 mins
Total Time: 18 mins
Servings: 1 batch
Ingredients
- 4 large egg whites, at room temperature* (It’s easier to separate them while cold, then let them come to room temperature in a bowl.)
- 1 cup granulated sugar (210 grams)
- 1/2 tsp cream of tartar
- 1/8 tsp salt
- 2 tsp vanilla bean paste (or pure vanilla extract)
Instructions
- Prep: Make sure you have read the notes on cleaning your utensils with vinegar before beginning. Gather all your equipment and ingredients. Place your cheesecake or other dessert on a serving plate if applicable. While a hand mixer can be used, a stand mixer is recommended for best results. Try to avoid making this on a very humid day, as humidity can negatively affect meringue stability.
- Make the Meringue: Add about an inch of water to a small or medium saucepan and bring to a gentle simmer. Ensure your mixing bowl (preferably metal, such as a stand mixer bowl) can sit over the pot without touching the water. In your clean bowl, whisk together the room temperature egg whites, granulated sugar, cream of tartar, and salt until just combined. Place the bowl over the simmering water. Cook, whisking constantly, until an instant-read thermometer registers a steady 175°F (79°C). This will take approximately 8 minutes, but always prioritize temperature over time. Remove the bowl from the heat immediately and stir in the vanilla.
- Whip the Meringue: Immediately transfer the bowl to your stand mixer (if using) and attach the whisk attachment, or use a hand mixer. Beat the mixture on high speed (speed 8-9 on a stand mixer) for 4-5 minutes, or until the meringue forms very stiff, glossy peaks. The mixture will expand significantly and cool down as it whips. It’s ready when it forms a ball inside the whisk attachment and, when lifted, the peaks stand firm with only the slightest curl at the very tip.
- Serve & Store: Immediately pipe or spread the meringue onto your desired dessert. For cheesecakes or pies, you can simply pile it in the center and gently swirl with the back of a spoon. Use a kitchen torch to toast the meringue to a beautiful golden brown, then serve immediately. When properly stabilized, the meringue will hold its shape perfectly on a dessert and can be stored in the fridge for about 2-3 days without weeping.
Notes
Cleaning Bowls/Utensils for Meringue: Always use metal bowls and utensils for meringue, as they are less likely to retain fat residue than plastic or silicone. Even if your equipment is already “clean,” rinse your bowl and whisk with hot water and a splash of white vinegar, then dry thoroughly with a clean kitchen towel. This step is crucial; even a tiny amount of fat can prevent your meringue from whipping properly and stabilizing. This precaution ensures your success!
Egg Whites: For easiest separation, crack eggs when they are cold, as the yolks are firmer. Once separated, allow the egg whites to come to room temperature before use, as they whip to a greater volume and more stable foam at this temperature.
Nutrition
Serving: 1 batch, Calories: 883kcal, Carbohydrates: 207g, Protein: 14g, Fat: 1g, Sodium: 513mg, Potassium: 467mg, Sugar: 207g, Calcium: 12mg, Iron: 0.3mg
Nutrition information is automatically calculated, so should only be used as an approximation.