
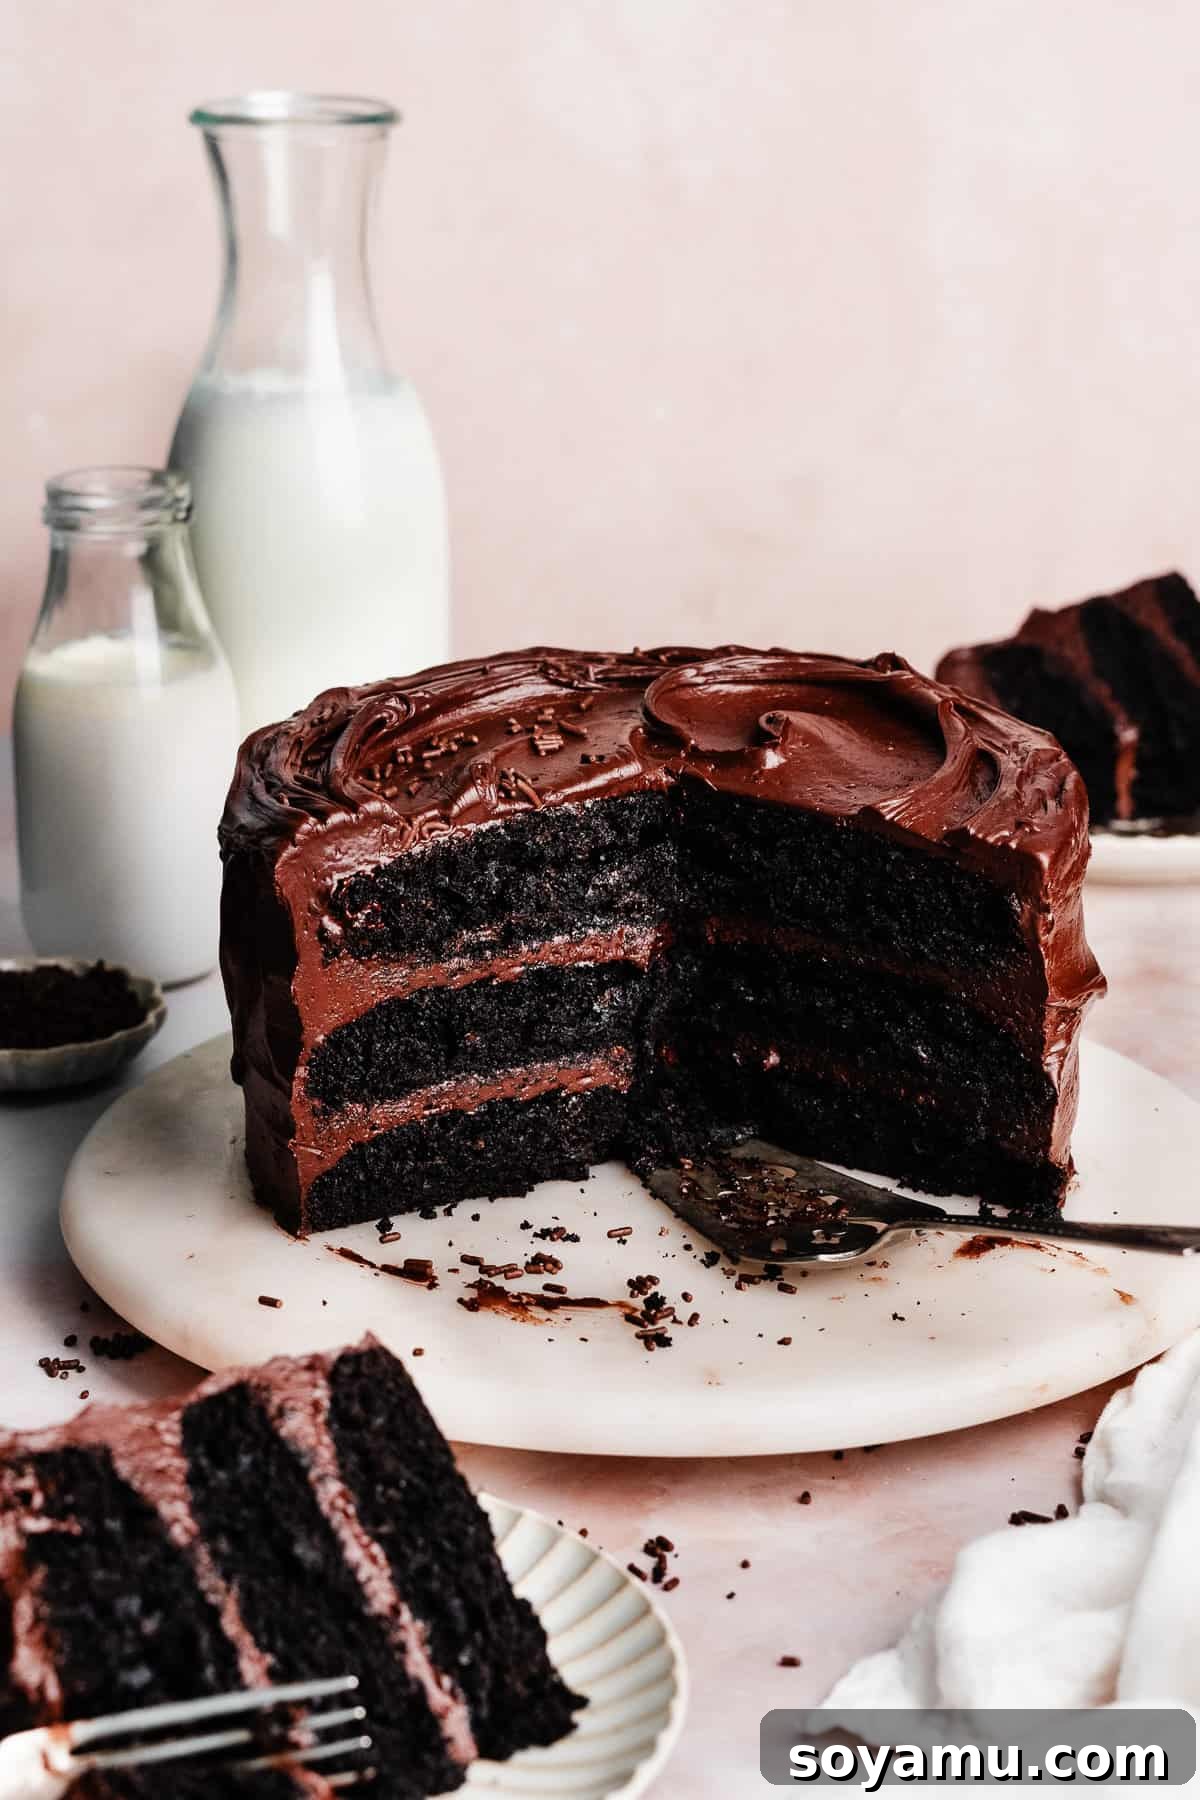
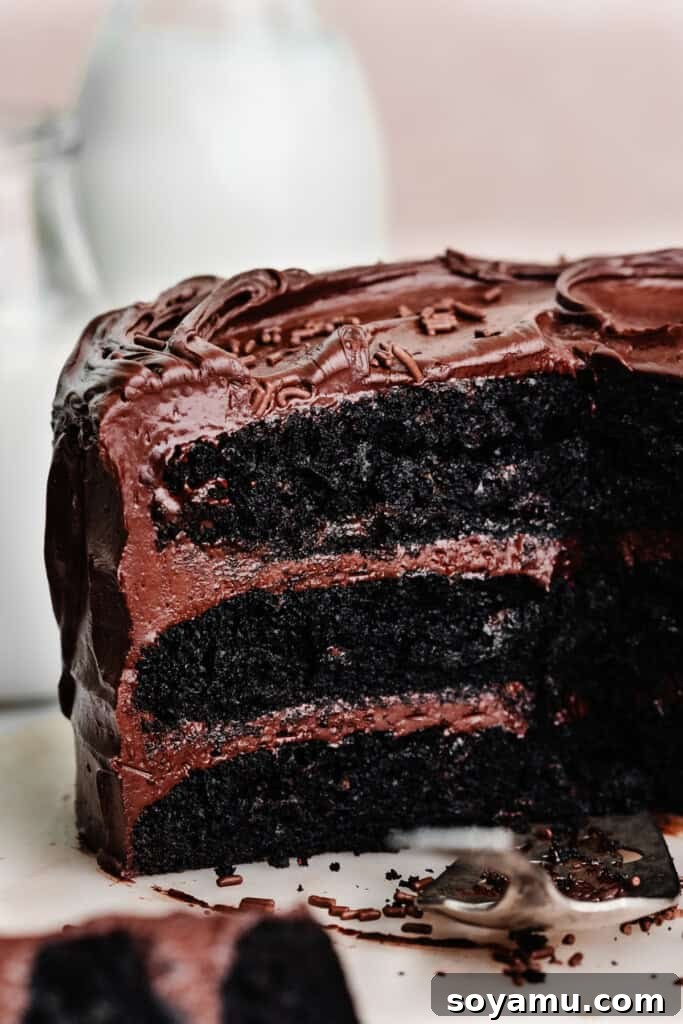
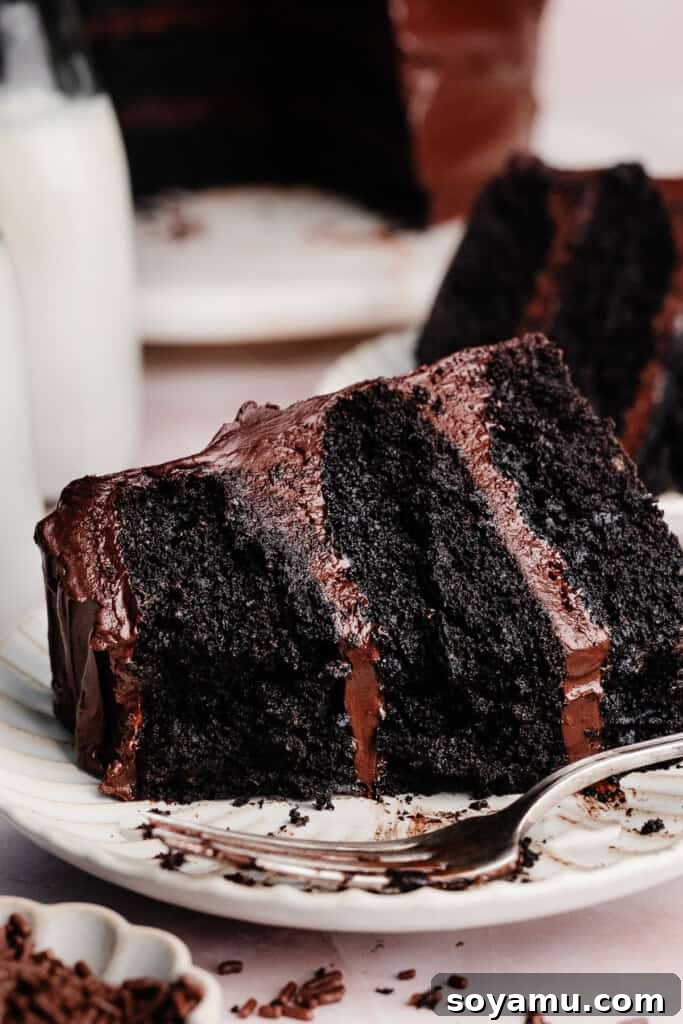
Eggless Chocolate Cake is a culinary marvel, delivering a deeply rich and exceptionally moist chocolate experience, crafted entirely without eggs or dairy. This delightful creation is crowned with a silky, intensely chocolatey fudge frosting that perfectly complements the cake’s tender crumb. Whether you’re navigating dietary restrictions or simply curious about baking alternatives, this recipe promises a show-stopping dessert that will impress even the most discerning chocolate lovers.
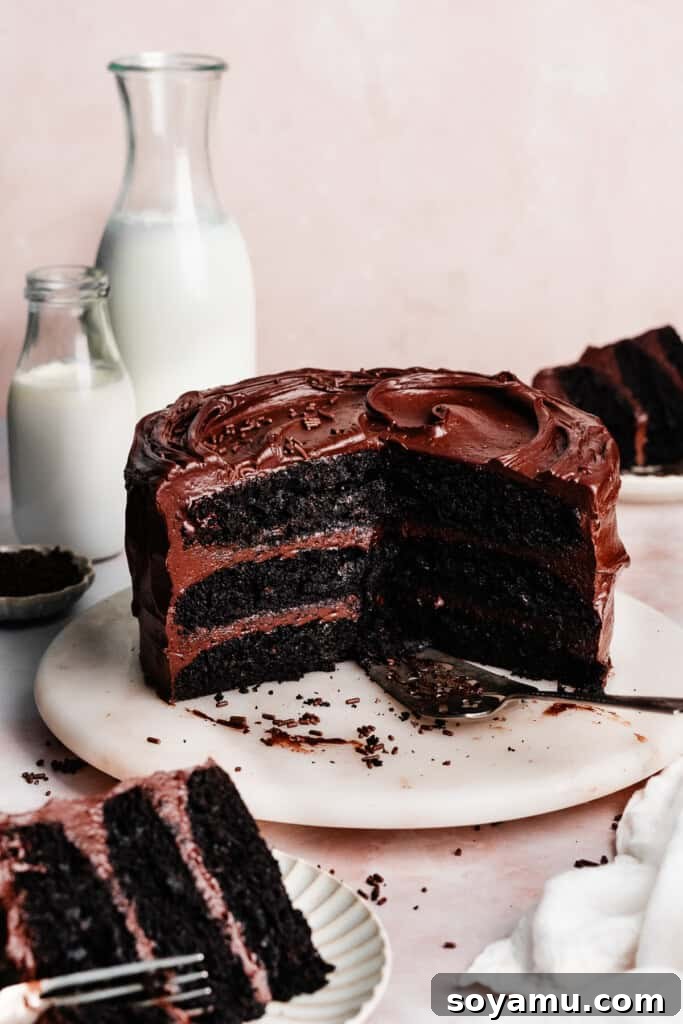
The Secret to a Perfectly Moist Eggless Chocolate Cake
It might seem surprising, but a truly rich and moist chocolate cake can indeed be made without common baking staples like eggs, milk, sour cream, or even mayonnaise. This incredible cake boasts a fluffy texture and a delightful moistness, all while being remarkably easy to prepare. Its origins trace back to a fascinating piece of culinary history – the “wacky cake” or Depression-era cake. During times of economic hardship or scarcity, resourceful bakers discovered ingenious methods to create delicious desserts using minimal and affordable ingredients. Oil and hot water emerge as the heroes in this recipe, acting as excellent moistening agents, ensuring every bite is as luscious as a traditional chocolate cake.
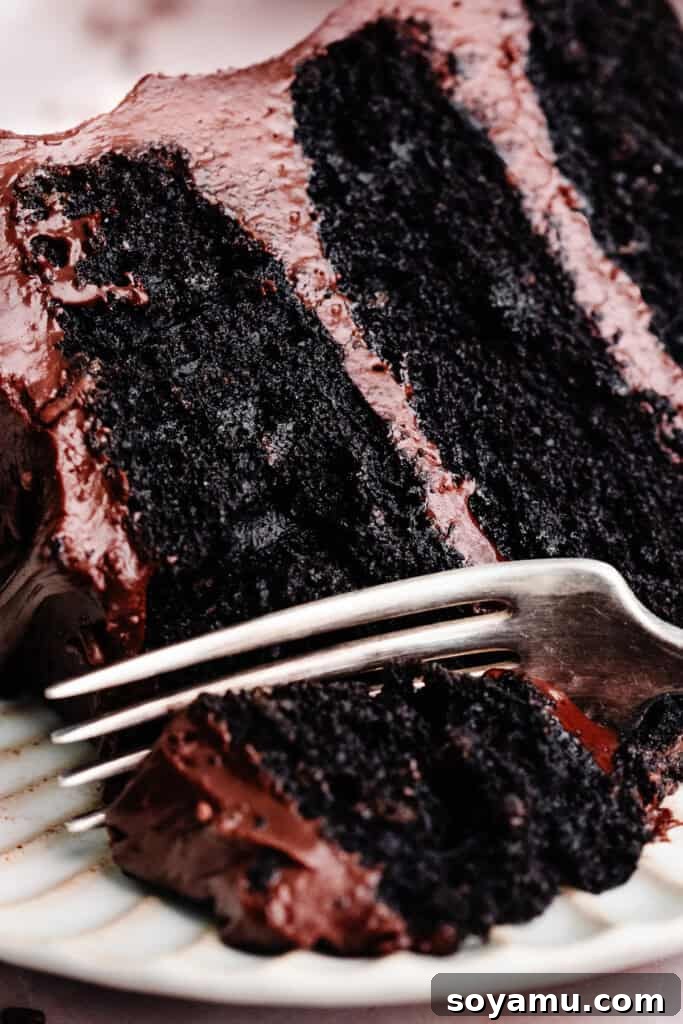
Ingredient Essentials: Crafting Your Eggless Masterpiece
Understanding the role of each ingredient is key to achieving a perfect eggless chocolate cake. While the full recipe with precise measurements and detailed instructions awaits you in the recipe card below, let’s explore the critical components that make this cake shine.
- Black Cocoa Powder: For an exceptionally deep and intense chocolate flavor, black cocoa powder is a game-changer. It not only darkens the cake to a beautiful rich hue but also imparts a sophisticated chocolate profile. You might recognize its distinct flavor from popular sandwich cookies! If black cocoa isn’t available, a good quality Dutch-processed cocoa powder will also yield excellent results, though with a slightly milder flavor and lighter color. This ingredient is also featured in our Black Velvet Cake for those seeking another dark chocolate delight.
- Hot Water: More than just a liquid, hot water plays a crucial role in “blooming” the cocoa powder. This process releases the full depth of the cocoa’s flavor and color, intensifying the chocolate experience. Additionally, it contributes significantly to the cake’s overall moisture, ensuring a tender and irresistible crumb.
- Neutral Oil: Since this recipe is egg-free and dairy-free, oil serves as a primary source of fat and moisture. Vegetable oil is a fantastic choice due to its neutral flavor, allowing the rich chocolate to take center stage. Canola oil, sunflower oil, or even a light olive oil (ensure it’s not too strong in flavor) can also be used. The oil helps keep the cake incredibly moist and contributes to its soft texture.
- All-Purpose Flour: The structural backbone of our cake. Achieving the correct flour measurement is paramount. To avoid a dry or dense cake, always spoon your flour into the measuring cup and then level it with a flat utensil. Scooping directly from the bag can compact the flour, leading to an excess amount. For the most accurate results, using a digital kitchen scale to weigh your flour is highly recommended.
- Granulated Sugar & Dark Brown Sugar: The combination of these two sugars creates a balanced sweetness and adds depth of flavor. Granulated sugar provides foundational sweetness, while dark brown sugar introduces a subtle caramel-like note and additional moisture, contributing to the cake’s tender texture.
- Baking Soda & Salt: Baking soda is the leavening agent that reacts with the acidic cocoa powder (especially if using natural cocoa) and other acidic components to create lift and airiness. Salt balances the sweetness and enhances all the flavors, making the chocolate taste even richer.
- Vanilla Extract: A touch of vanilla extract rounds out the chocolate flavor, adding complexity and warmth to both the cake and the frosting.
- Semi-Sweet Chocolate (for frosting): High-quality semi-sweet chocolate is essential for a luxurious fudge frosting. Choose baking bars or chips that melt smoothly for the best results.
- Corn Syrup (for frosting): This ingredient is the secret to an incredibly shiny, silky, and easy-to-spread frosting. It prevents crystallization and gives the frosting a professional, smooth finish. If you prefer not to use corn syrup, you can explore alternatives, but the texture might vary. Alternatively, consider our Classic Chocolate Frosting recipe for a different approach.
- Salted Butter (for frosting): For those not making it strictly dairy-free, softened salted butter provides richness and creaminess to the frosting. The salt helps cut through the sweetness and enhances the chocolate.
- Powdered Sugar (for frosting): Also known as confectioners’ sugar, this fine sugar is crucial for a smooth frosting texture. It dissolves easily, preventing graininess.
- Milk or Water (for frosting): A small amount of liquid helps achieve the desired consistency for the frosting. For a strictly dairy-free option, water works perfectly.
Recipe Substitutions & Variations: Tailoring Your Treat
This eggless chocolate cake is wonderfully adaptable, making it suitable for various dietary needs and flavor preferences.
- Dairy-Free Adaptation: The cake itself is already naturally dairy-free, thanks to the use of oil and water instead of butter and milk. To ensure your entire dessert is dairy-free, simply use dairy-free butter sticks (vegan butter) and dairy-free semi-sweet chocolate for the frosting. Many brands now offer excellent plant-based alternatives that perform beautifully in baking.
- Nut-Free Option: This recipe is naturally nut-free, making it a safe choice for those with nut allergies. Always double-check ingredient labels for cross-contamination warnings if allergies are severe.
- Adding Coffee: To intensify the chocolate flavor, consider adding 1-2 teaspoons of instant espresso powder or strong brewed coffee to the hot water used for blooming the cocoa. Coffee naturally enhances chocolate notes without making the cake taste like coffee.
- Chocolate Chips: Stir 1 cup of vegan chocolate chips into the batter before baking for an extra chocolatey experience.
- Different Frosting Flavors: While the chocolate fudge frosting is divine, feel free to experiment. A vegan vanilla buttercream, peanut butter frosting, or even a raspberry jam filling between layers could be delicious.
- Gluten-Free Flour: While not tested with this specific recipe, many bakers have success substituting all-purpose flour with a 1:1 gluten-free baking blend that contains xanthan gum. Results may vary slightly in texture.
How to Make This Unforgettable Eggless Chocolate Cake: A Step-by-Step Journey
Creating this rich and moist eggless chocolate cake is a straightforward process, broken down into manageable steps. Pay attention to the details, and you’ll be rewarded with a truly exceptional dessert.
Step 1: Prepare Your Pans & Bloom the Cocoa Powder.
Begin by preheating your oven to 350°F (175°C) and preparing three 8-inch cake pans. Grease each pan thoroughly with shortening or a dairy-free butter alternative, ensuring every surface is coated. Cut a piece of parchment paper to fit the bottom of each pan, place it down, and grease over the parchment as well. Finally, dust the greased pans with a handful of all-purpose flour, tapping to evenly coat the entire inside, then tap out any excess. Proper pan preparation prevents sticking and ensures easy release.
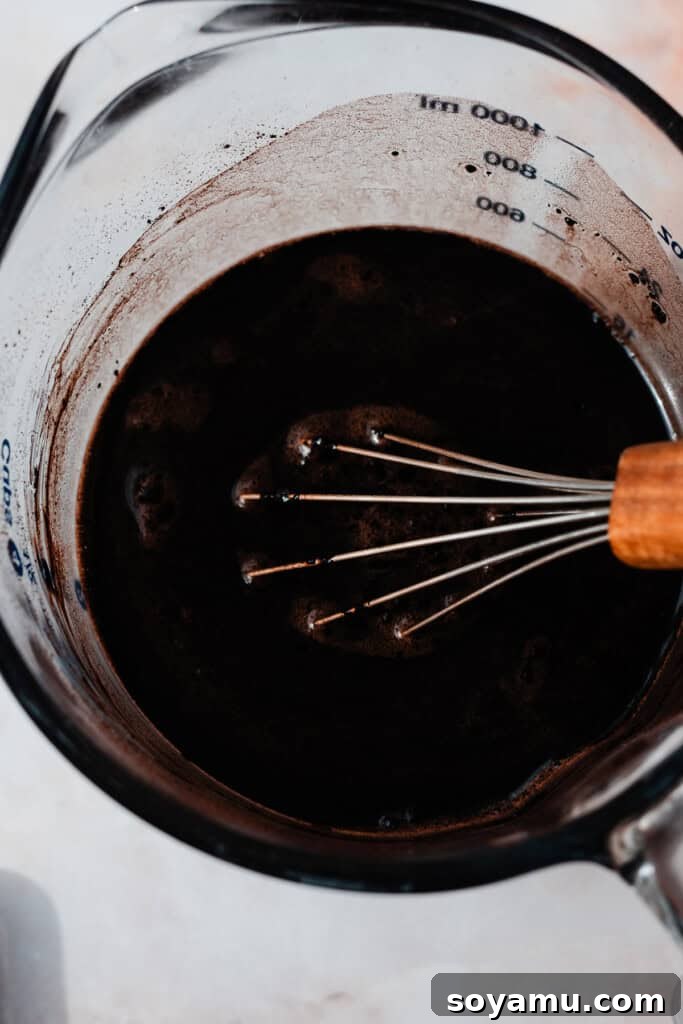
Next, it’s time to “bloom” the cocoa powder. This isn’t a fancy, intimidating phrase; it simply means adding cocoa to hot water to activate and intensify its flavor and color. In a 4-cup glass measuring cup or a medium heat-safe bowl, combine the hot water (heated in the microwave for 30-45 seconds until steaming) with the cocoa powder. Whisk well until smooth and no lumps remain. This mixture will become a rich, dark liquid. Set this aside to slightly cool while you prepare the dry ingredients. Once cooled a bit, whisk in the oil and vanilla extract.
Step 2: Whisk Dry Ingredients & Combine Everything.
In a separate large mixing bowl, combine all the dry ingredients for the cake: all-purpose flour, granulated sugar, dark brown sugar (ensure any lumps are broken up), baking soda, and salt. Whisk them thoroughly until they are well combined and evenly distributed. This ensures that the leavening agents are spread throughout the batter, promoting even rising.
Now, pour the wet ingredient mixture (the bloomed cocoa, oil, and vanilla) into the bowl with the dry ingredients. Using a spatula or whisk, gently stir until everything is just combined. It’s crucial not to overmix the batter; overmixing can develop the gluten in the flour, leading to a tough or dense cake. A few small lumps in the batter are perfectly fine – resist the urge to vigorously whisk them all away. The batter will be quite fluid, which is normal for this style of cake.
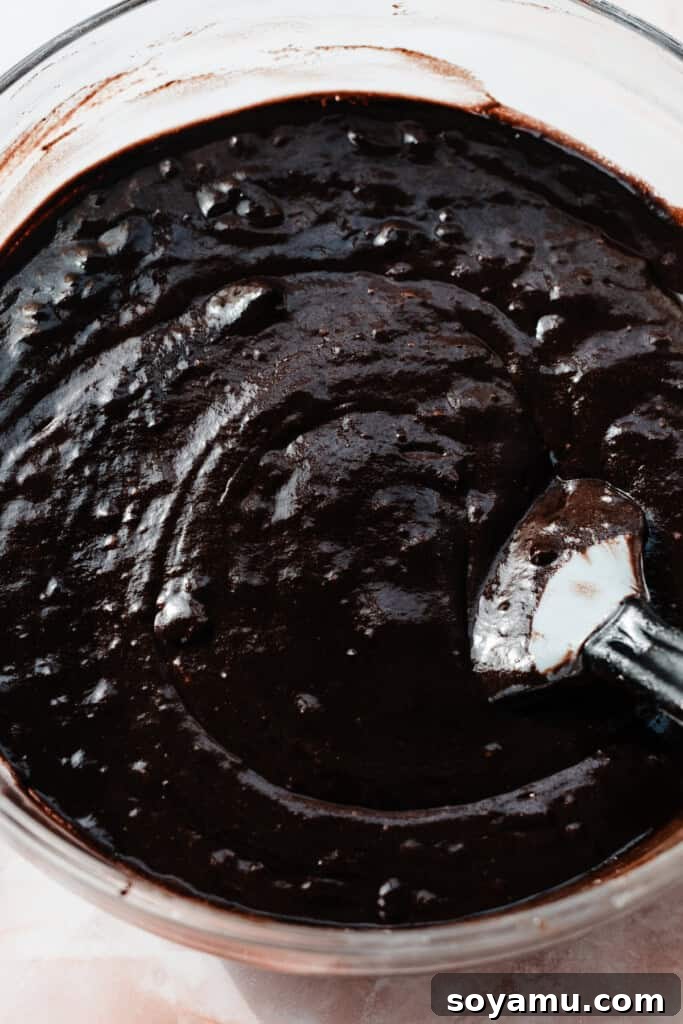
Step 3: Bake Your Cake Layers.
Divide the luscious cake batter evenly among your three prepared 8-inch cake pans. A kitchen scale can be helpful here to ensure each pan receives approximately 520 grams of batter, leading to uniformly sized layers. Place the pans in your preheated oven and bake for 10 minutes. After this initial bake, rotate each pan 180 degrees to promote even baking, then continue to bake for another 10 to 12 minutes, or until a toothpick inserted into the center of a cake comes out with moist crumbs attached. Avoid baking until the toothpick is completely clean, as this can indicate overbaking and a drier cake.
Once baked, remove the cakes from the oven and let them cool in their pans on wire racks for about 8 minutes. This allows the cakes to firm up slightly before handling. After 8 minutes, carefully run a butter knife around the edges of each pan to loosen the cakes, then invert them onto the wire racks to cool completely. Ensure the cakes are absolutely cool before you attempt to frost them; warm cakes will melt the frosting and create a mess.
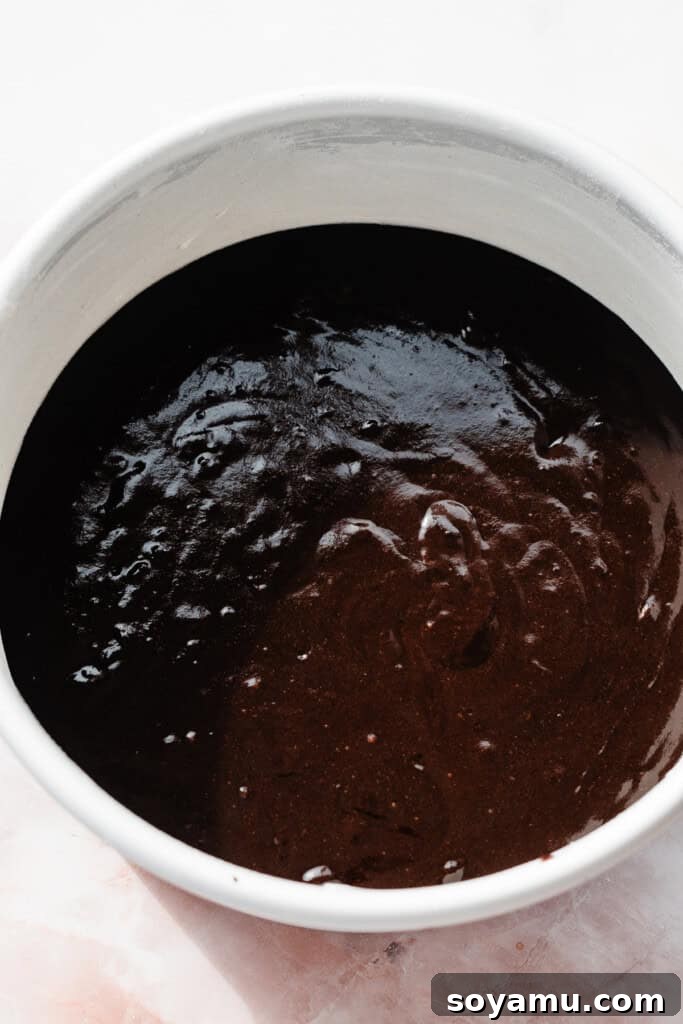
Step 4: Prepare the Silky Chocolate Fudge Frosting.
While your cake layers are cooling, prepare the rich chocolate fudge frosting. In a medium microwave-safe bowl, combine the roughly chopped semi-sweet chocolate, corn syrup, and hot water. Heat this mixture in 30-second intervals in the microwave, stirring well between each interval, until the chocolate is completely melted and the mixture is smooth and glossy. Set this aside to cool to room temperature. You can place it in the fridge for a few minutes to speed up the cooling process, but ensure it doesn’t solidify.
In a large mixing bowl, using an electric mixer, beat the softened salted butter (or dairy-free butter alternative) on high speed until it’s light and creamy, about 1 minute. Gradually add the powdered sugar in two additions, beating until smooth. If the mixture seems too thick, add 1-2 tablespoons of milk (or water for a dairy-free option) as needed to achieve a workable consistency. Next, beat in the cocoa powder on low speed until it’s fully incorporated and the frosting is uniformly chocolatey.
Finally, slowly beat in the cooled melted chocolate mixture. Don’t be alarmed if the frosting looks a little curdled or “weird” at first; this is completely normal. Continue beating on medium-high speed for 1-2 minutes, and watch as it miraculously transforms into a smooth, silky, and unbelievably luscious fudge frosting. Finish by beating in the vanilla extract and a pinch of salt. The salt helps to balance the sweetness and enhances the overall chocolate flavor.
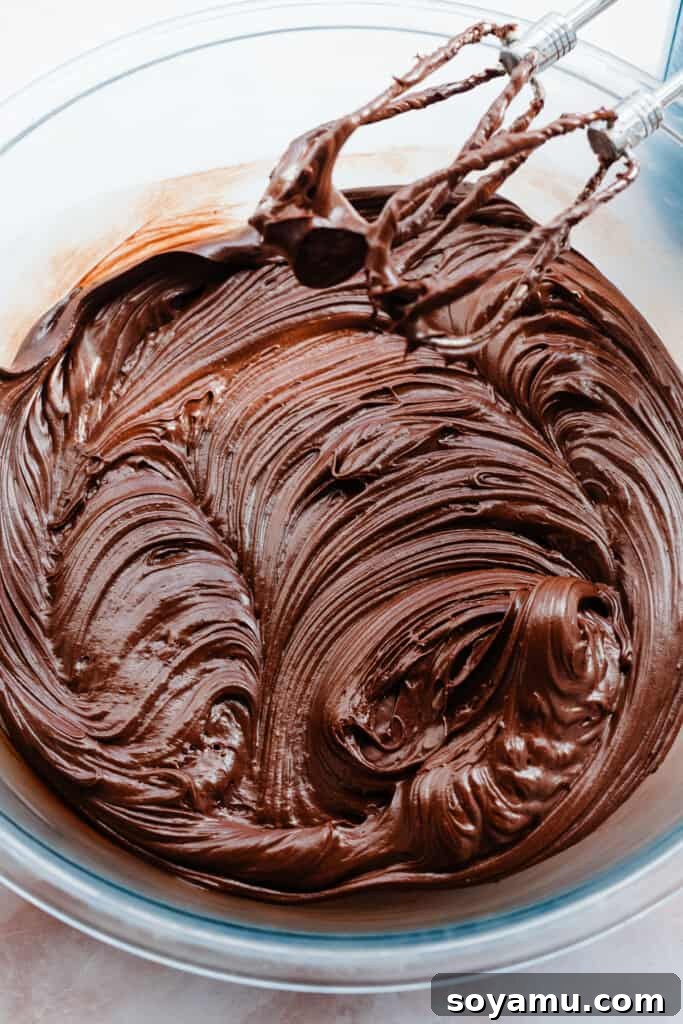
Step 5: Assemble Your Magnificent Cake.
Once your cake layers are completely cool and your frosting is ready, it’s time for assembly. Place one cooled cake layer on your chosen cake plate or serving stand. For ease of frosting, especially for beginners, placing the cake plate on a cake turntable can make the process much smoother, though it’s not strictly necessary. Spread about 1 and 1/3 cups of the chocolate fudge frosting evenly over the top of the first layer. A small offset spatula works wonders for this. To prevent the frosting from squishing out when you add the next layer, place the cake in the fridge for about 5-10 minutes to allow the frosting to firm up slightly.
Carefully place the second cake layer on top. Use your offset spatula to gently press the layers together and seal any frosting that might peek out around the sides. Repeat the chilling step for 10-15 minutes. Add the third and final cake layer. By this point, you’ll have a thin “crumb coat” of frosting around the sides of the cake, sealing in any loose crumbs. Chill the cake again for another 15 minutes. This crumb coat is crucial for a neat final frosting layer.
Finally, remove the cake from the fridge and apply the remaining frosting to the top and sides. Use your offset spatula to swirl the frosting in a rustic, appealing manner, or smooth it out for a more polished look. Take your time and enjoy the process of decorating your beautiful eggless creation!
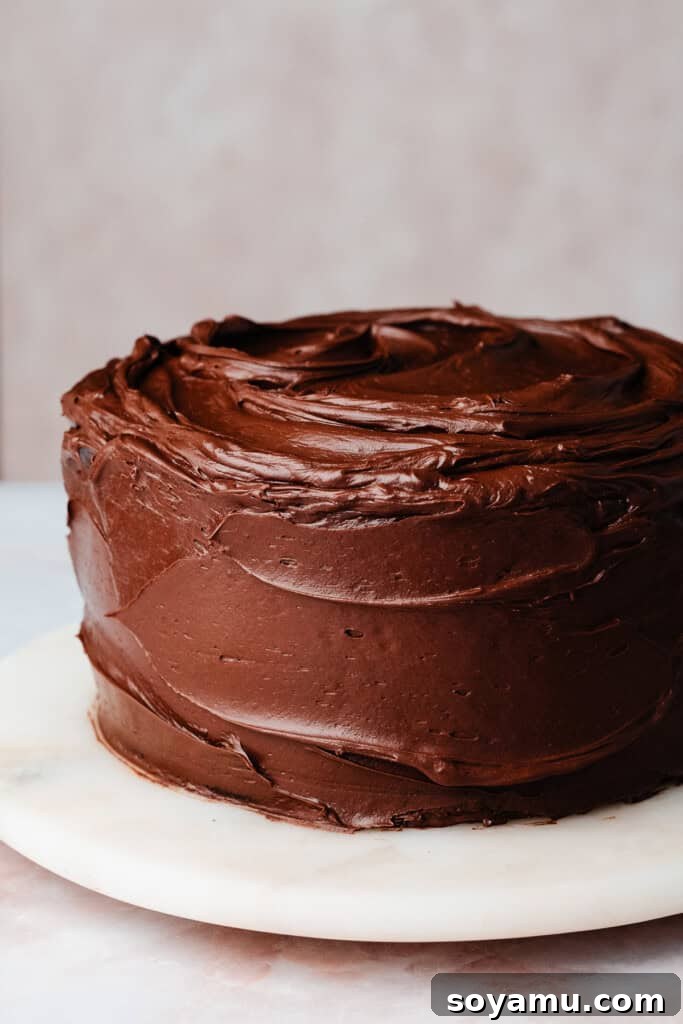
Serving & Storing Your Eggless Chocolate Cake: Maximizing Freshness
Once your magnificent cake is frosted and perhaps adorned with a sprinkle of your favorite decorations, it’s ready to be sliced and savored! This eggless chocolate cake is best enjoyed at room temperature, allowing the frosting to soften slightly and the cake’s flavors to fully develop. Serve it with a glass of cold milk (dairy or plant-based) or a scoop of vanilla ice cream for the ultimate treat.
While this cake is wonderfully moist, it’s important to note that eggless and dairy-free cakes often don’t retain their moisture in the fridge quite as long as their egg and sour cream counterparts, like our Chocolate Truffle Cake. However, it will remain deliciously moist and flavorful for up to 3 days when stored correctly. To keep it at its best, place any leftover cake in an airtight container in the refrigerator. For cut portions, press a piece of plastic wrap directly onto the exposed cake surface before sealing the container. This extra step helps to prevent drying out and locks in that precious moisture. You can also cover the entire cake with a cake dome. For optimal taste, allow chilled slices to come to room temperature for about 20-30 minutes before serving.
For longer storage, individual slices or even the entire frosted cake can be frozen. Wrap slices tightly in plastic wrap, then aluminum foil, and place them in a freezer-safe bag or container. They can be stored for up to 2-3 months. Thaw frozen cake in the refrigerator overnight, then bring to room temperature before enjoying.
Expert Baking Tips for Eggless Success: Bake Like a Pro
Achieving baking perfection often comes down to a few key techniques and tools. Here are some expert tips to ensure your eggless chocolate cake turns out flawlessly every time:
- Invest in an Oven Thermometer: Many home ovens are not calibrated accurately, meaning the temperature you set might not be the actual temperature inside. An oven thermometer is an inexpensive tool that will tell you your oven’s true temperature, which is crucial for consistent baking results, especially with delicate cakes. Keep one in your oven at all times to monitor its calibration.
- Use a Kitchen Scale for Accuracy: Flour measurements can vary significantly depending on how you scoop it and the specific measuring cup used. A food scale is the most reliable way to measure flour and other dry ingredients by weight (grams), ensuring precision and consistency in your bakes. This eliminates guesswork and is a fundamental step towards professional-level baking.
- Don’t Overmix: As mentioned in Step 2, overmixing batter develops gluten, which can lead to a tough, dense cake. Mix only until the ingredients are just combined and no streaks of dry flour remain. A few small lumps are perfectly acceptable.
- Room Temperature Ingredients (for frosting): While the cake itself uses oil and hot water, ensure your butter for the frosting is properly softened at room temperature. This allows it to cream beautifully with the sugar, creating a smooth, lump-free frosting.
- Cool Cakes Completely: Patience is a virtue in baking! Frosting a warm cake is a recipe for disaster, as the frosting will melt and slide off. Ensure your cake layers are completely cool to the touch before you even think about applying frosting.
- The Crumb Coat: Don’t skip the crumb coat step in assembly. This thin layer of frosting seals in any loose crumbs, preventing them from mixing into your final, beautiful frosting layer. It creates a smooth canvas for professional-looking results.
- Quality Ingredients: While this recipe uses simple ingredients, their quality matters. A good quality cocoa powder and semi-sweet chocolate will make a noticeable difference in the depth of flavor of your cake and frosting.
Can I Make This Recipe into Cupcakes?
Absolutely! This versatile eggless chocolate cake recipe can easily be adapted into delicious cupcakes. The batter is perfectly suited for individual portions, making them ideal for parties, lunchboxes, or simply portion control. To convert, line a standard 12-cup muffin tin with paper liners. Fill each liner about two-thirds full with batter. Bake at 350°F (175°C) for approximately 18-22 minutes, or until a toothpick inserted into the center of a cupcake comes out with moist crumbs. Keep an eye on them, as oven times can vary. Let the cupcakes cool completely on a wire rack before frosting. The recipe yields enough frosting to generously frost a batch of cupcakes, and you can pipe it on for a festive touch.
More Chocolate Cakes to Love from Our Kitchen:
If you’re a chocolate cake enthusiast, explore these other decadent recipes:
- Raspberry Chocolate Cake: A delightful pairing of rich chocolate and bright raspberry.
- Chocolate Truffle Cake: Indulge in an intensely rich and luxurious chocolate experience.
- Ultimate Nutella Cake: For lovers of hazelnut and chocolate, this cake is a dream.
- Mini Chocolate Cake: Perfect for smaller gatherings or when you need a personal chocolate fix.
- Single-Layer Baileys Chocolate Cake: An adult-friendly treat with a hint of Irish cream.
Did you try this amazing eggless chocolate cake recipe? We’d love to hear from you!
Please leave a comment and a star rating below to let us know how you liked the recipe. Your feedback is invaluable and helps our small business immensely!
Eggless Chocolate Cake with Chocolate Fudge Frosting
Stephanie Simmons
1 hour
20 minutes
12 to 20 slices
Rate
Ingredients
For the Cake:
- 2 cups hot water
- 1/2 cup + 1 tbsp cocoa powder, 49 grams
- 1 cup vegetable oil, 218 mL
- 1 tbsp vanilla extract
- 3 cups all-purpose flour, spooned & leveled or weighed out , 390 grams
- 1 cup granulated sugar , 210 grams
- 1 cup dark brown sugar, packed, 220 grams
- 1 and 3/4 tsp + 1/8 tsp baking soda
- 3/4 tsp salt
For the Frosting:
- 12.75 ounces semi-sweet chocolate, roughly chopped or broken up, 360 g
- 1/2 cup corn syrup, 330 g
- 1/2 cup hot water
- 1 and 1/4 cups salted butter, softened at room temperature , 283 grams
- 4 cups to 5 cups powdered sugar, 460 to 575 grams
- 1-2 tbsp milk or water, as needed , to help things come together – if you use water, this cake and frosting will be safe to keep at room temperature if that’s a concern for you!
- 1 and 1/2 cups cocoa powder, 140 grams
- 1 tbsp vanilla extract
- 1/8 tsp salt
Instructions
-
Prep: Preheat your oven to 350° F. Prepare three 8-inch cake pans. Use a paper towel to rub shortening all over the inside of each pan, coating them evenly and completely. Cut a piece of parchment paper to fit in the bottom. Place this on top of the greased pan bottom, then grease over the parchment paper as well. Add a handful of flour, and tap the pan around to evenly coat the entire inside with flour, tapping out the excess.
-
Make the Cake Batter: In a 4-cup glass measuring cup or in a medium bowl, add the two cups of hot water (I microwave it for 30-45 seconds, until it’s steaming). Whisk in the cocoa powder, then set aside.
In a large mixing bowl, whisk together all the dry ingredients, making sure the brown sugar chunks are broken up. Return to the wet ingredients and whisk the oil and vanilla into the measuring cup of hot water and cocoa. Pour this mixture into the dry ingredients, and stir gently until everything is combined and no streaks of flour remain. The batter may have a few small lumps throughout – that’s fine – don’t try to break them all up!
-
Bake: Divide the batter evenly between your three prepared pans (you’ll have about 520 grams of batter per pan). Bake for 10 minutes, then rotate each pan 180 degrees and bake another 10 to 12 minutes. A toothpick inserted into the center will pull out moist crumbs when the cakes are done.
Let cakes cool in the pans, placed on cooling racks, for 8 minutes. Then, run a butter knife around the edge to loosen the cakes and invert onto the cooling racks. Let cool completely while you make the frosting.
-
Make the Frosting: In a medium microwave-safe bowl, melt together the semi-sweet chocolate, corn syrup, and water in 30 second intervals, stirring between each interval until completely melted. Set aside to cool to room temperature (you can speed this up in the fridge).
In a large bowl, beat the butter on high speed with an electric mixer until creamed, about 1 minute. Beat in the powdered sugar in two additions, using milk as needed to help it come together. Beat in the cocoa powder on low, making sure it’s well mixed in. Beat in the room temperature chocolate mixture – it will look a little curdled and weird at first, but it will smooth out to silky perfection after 1-2 minutes of mixing! Beat in the vanilla and salt last.
-
Assemble the Cake: Place one cooled cake layer on your cake plate, and place this on a cake turntable (for ease, no need to run out and buy one). Add 1 and 1/3 cups of frosting and spread it in an even layer. Chill for 5 minutes in the fridge so it doesn’t all smoosh out when you add the next layer. Add the next cake layer, and use an offset spatula to seal the two layers together by spreading any frosting peeking out between the layers. Chill for 10-15 minutes, then repeat this. By the time the final layer is on, you’ll have a thin crumb coat of frosting around the side of the cake. Let this chill for 15 minutes or so before finishing frosting the top and sides of the cake, swirling the frosting in a rustic manner.
-
Serve & Store: Top with sprinkles if desired, then slice and enjoy! Store leftover cake in the fridge in an airtight container, with plastic wrap pressed over the cut portion to keep it moist. This cake keeps well for 2-4 days in the fridge (not as long as a cake that has eggs/dairy, but it still holds up pretty well!).
Nutrition
Serving: 1slice
,
Calories: 994kcal
,
Carbohydrates: 145g
,
Protein: 8g
,
Fat: 47g
,
Saturated Fat: 20g
,
Polyunsaturated Fat: 12g
,
Monounsaturated Fat: 12g
,
Trans Fat: 1g
,
Cholesterol: 43mg
,
Sodium: 484mg
,
Potassium: 458mg
,
Fiber: 9g
,
Sugar: 107g
,
Vitamin A: 490IU
,
Calcium: 69mg
,
Iron: 6mg
Nutrition information is automatically calculated, so should only be used as an approximation.
Like this? Leave a comment below!