
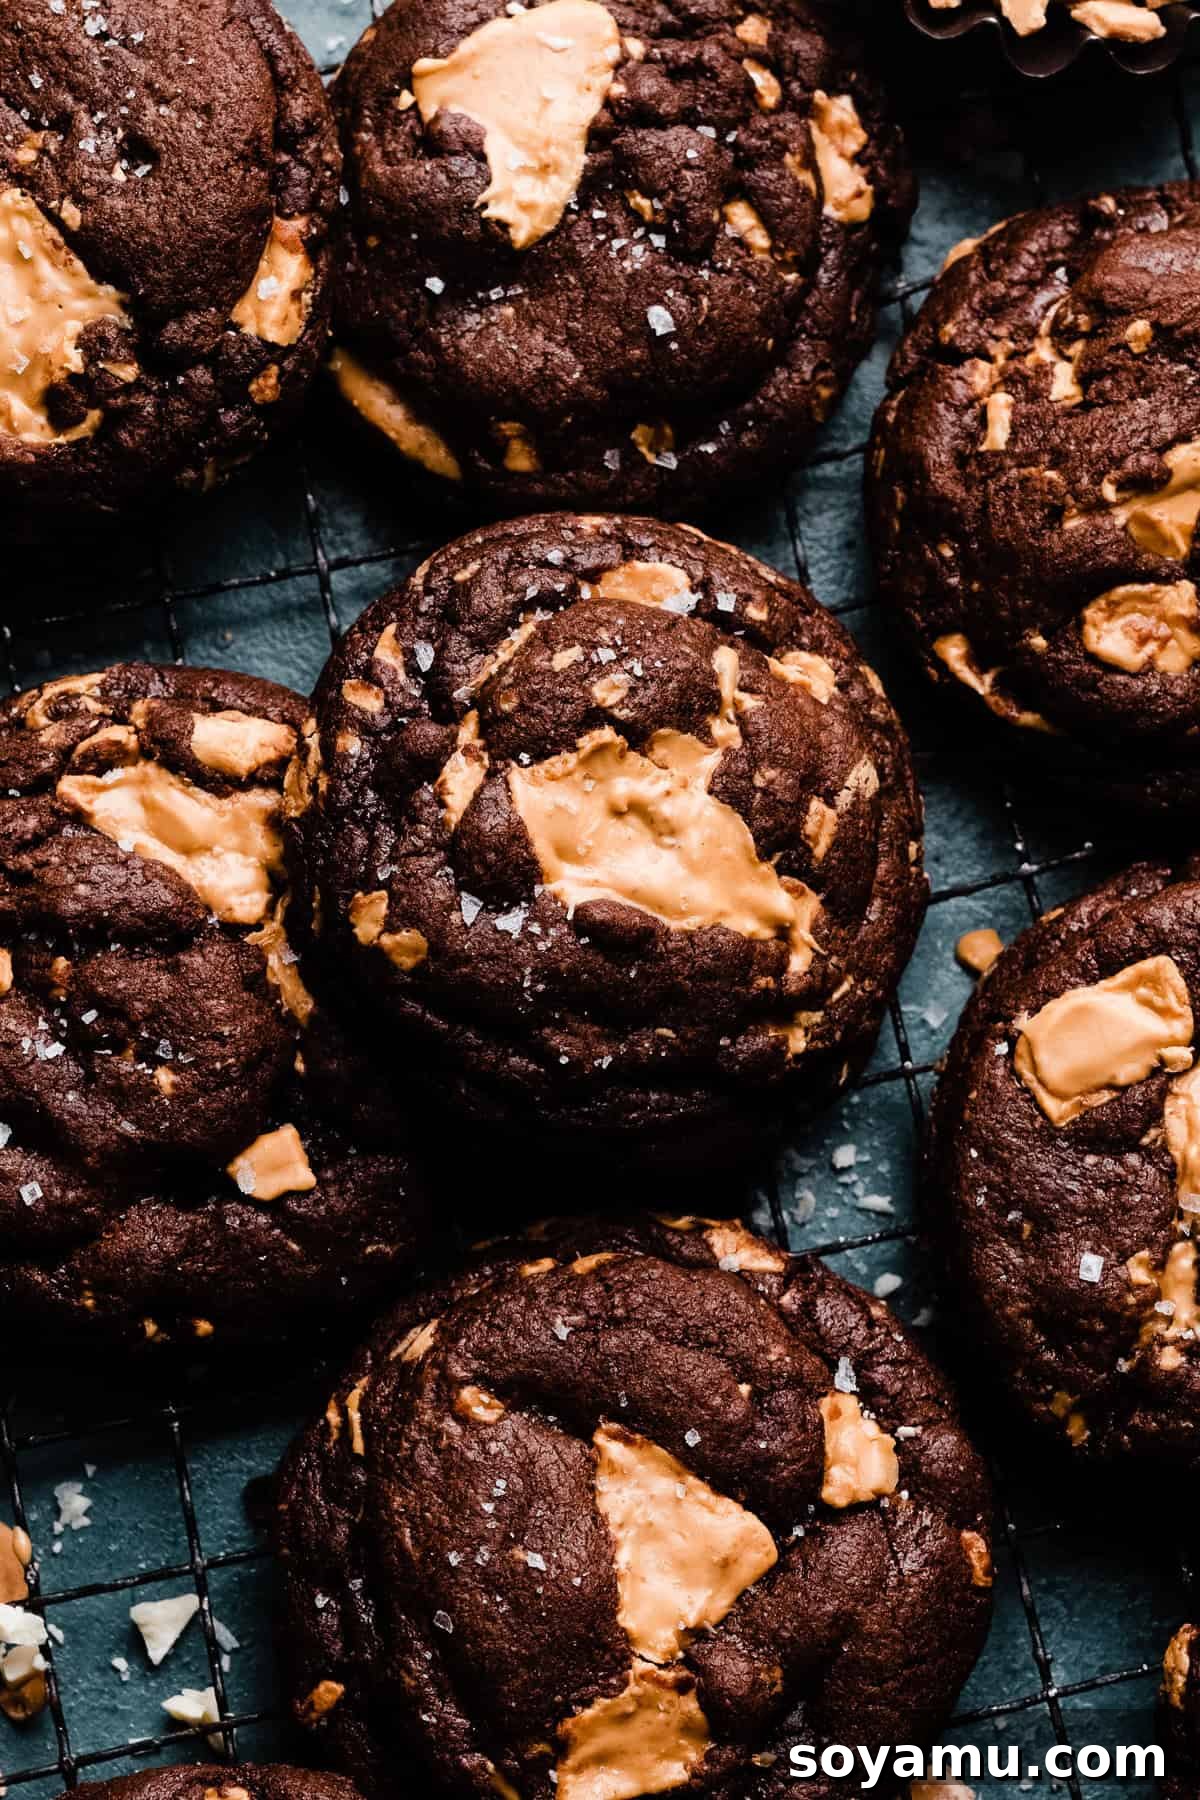
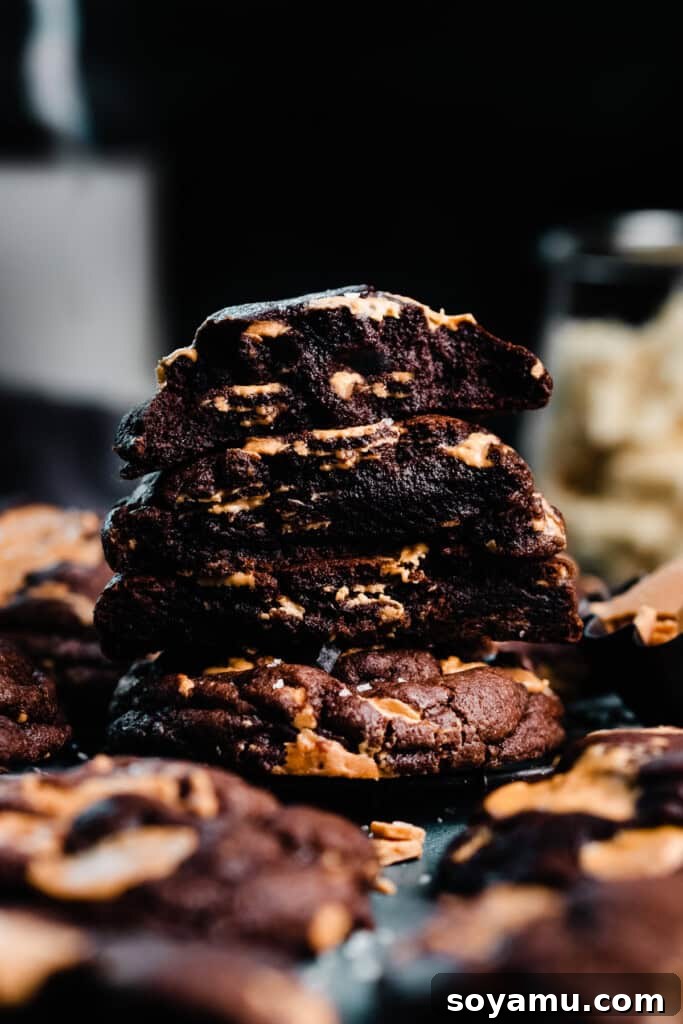
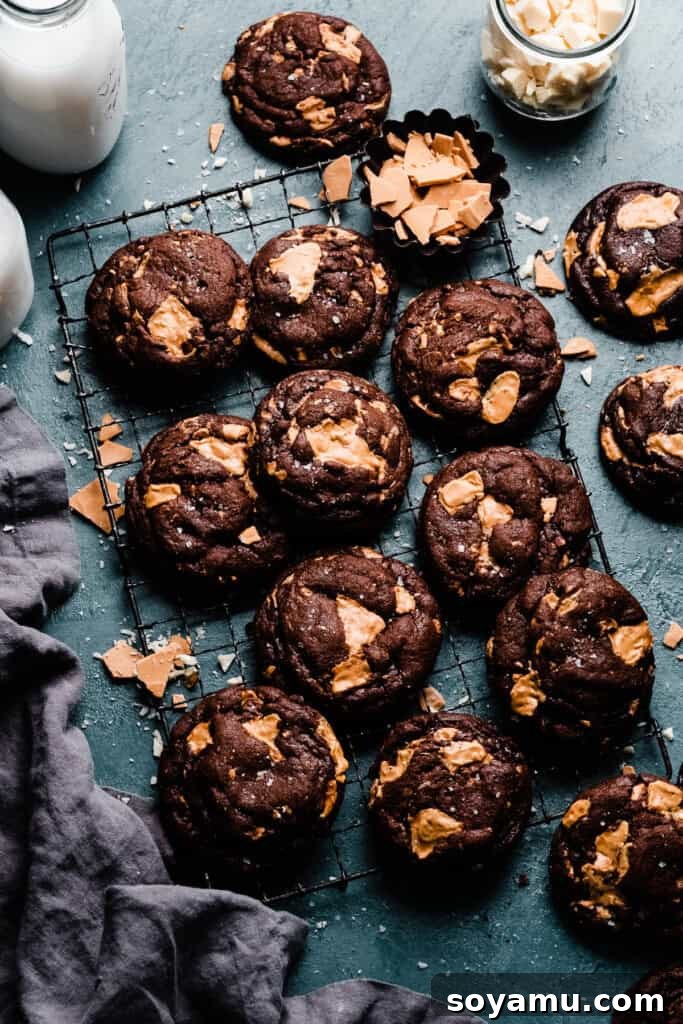
Prepare to elevate your cookie experience to an unparalleled level with these extraordinary **Chocolate White Chocolate Chip Cookies**. This isn’t just another cookie recipe; it’s a gourmet delight that redefines the classic, transforming it into something truly magnificent. Imagine biting into a rich, intensely fudgy chocolate cookie, perfectly soft and wonderfully chewy, each bite punctuated by luscious, melting chunks of homemade **caramelized white chocolate**. This unique addition, which boasts deep, toasted caramel notes and a subtle nuttiness, provides a sophisticated counterpoint to the robust chocolate flavor, creating a symphony of tastes and textures that will captivate your palate.
While the process of caramelizing white chocolate adds a layer of depth and complexity that is undeniably worth the effort, yielding an astonishingly rich flavor, we understand that time is sometimes a luxury. Rest assured, these cookies remain absolutely delicious even when made with high-quality regular white chocolate chips or chopped white chocolate bars. Whether you opt for the elevated caramelized version or the simpler route, you’re guaranteed a batch of remarkable cookies that are sure to impress family and friends alike. Get ready to bake a truly special treat that will have everyone asking for the recipe!
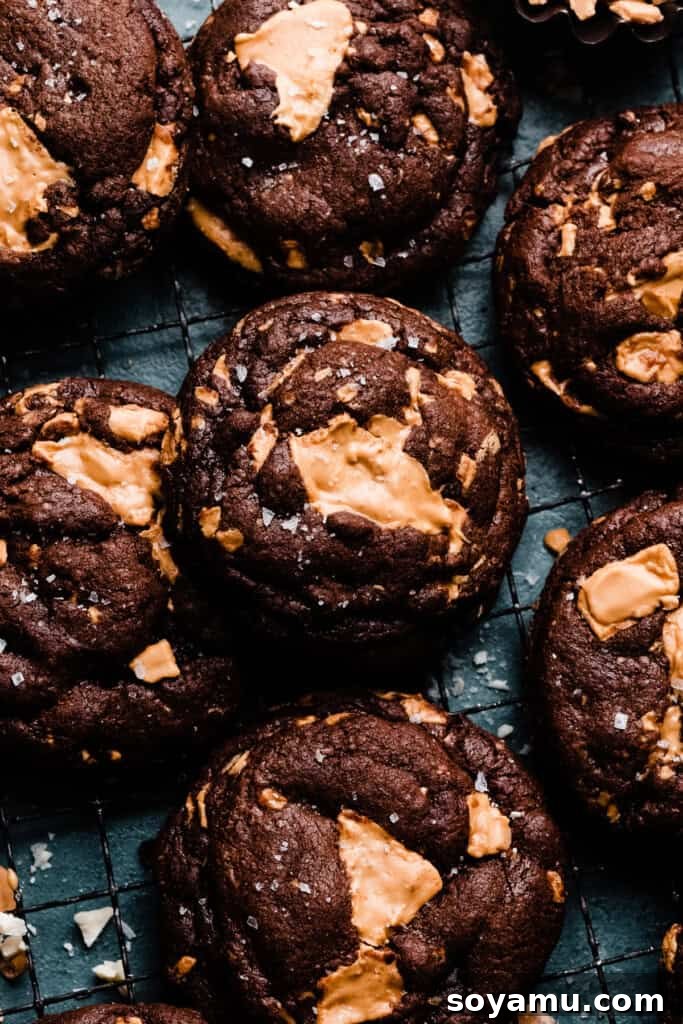
Why These Caramelized White Chocolate Chip Cookies Will Become Your New Obsession
These aren’t just any chocolate cookies; they’re an experience waiting to happen. Here’s a closer look at what makes this recipe truly stand out and why it’s destined to become a staple in your baking collection:
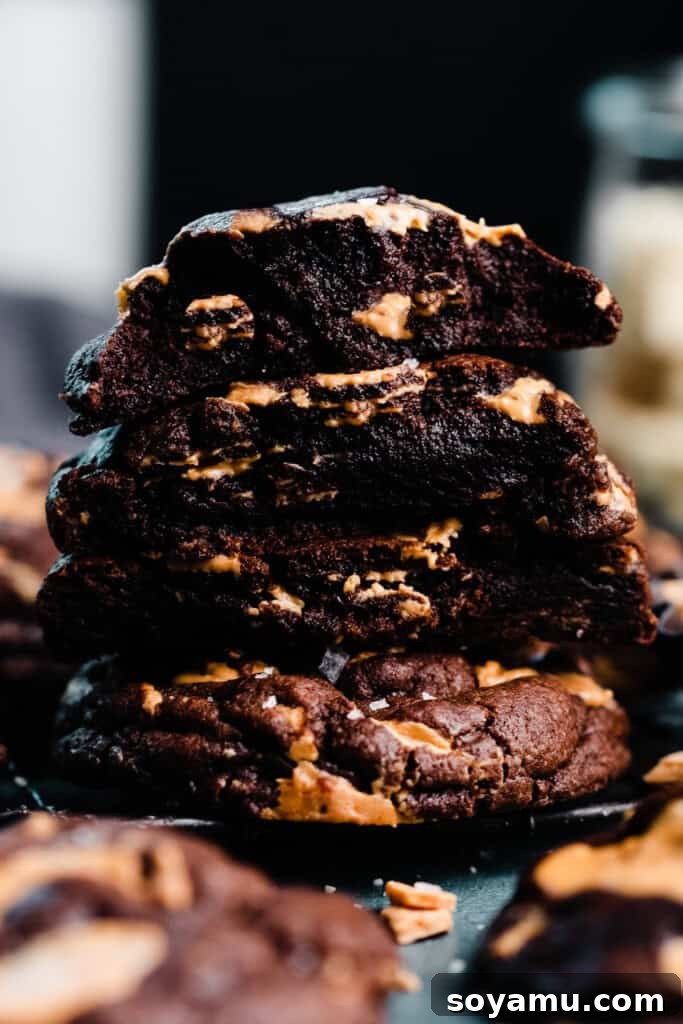
- Unrivaled Thick & Chewy Texture: Say goodbye to thin, brittle cookies. Our meticulously crafted recipe delivers the quintessential chocolate cookie texture – a marvelously thick profile boasting satisfyingly crisp, buttery edges that perfectly frame a supremely soft, moist, and delightfully chewy interior. This exquisite textural contrast in every bite makes these cookies utterly addictive and ensures they hold their shape beautifully while maintaining that coveted, tender chewiness.
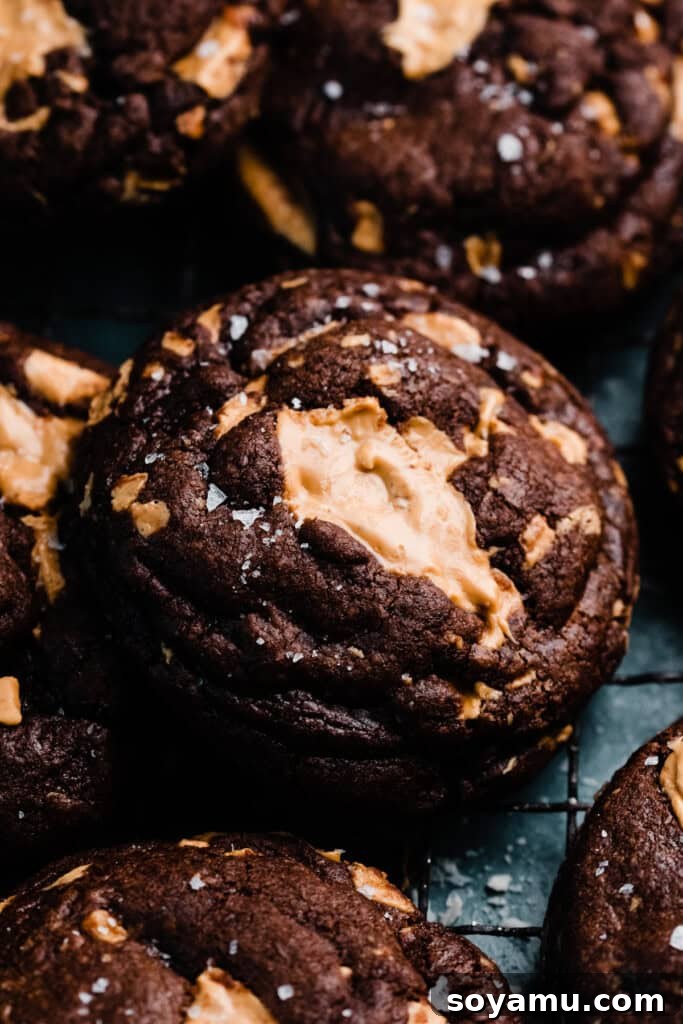
- The Transformative Magic of Caramelized White Chocolate: This is the secret ingredient that truly sets these cookies apart from the rest. We forgo standard white chocolate in favor of rich, slow-roasted caramelized white chocolate chunks. The careful caramelization process transforms the subtle sweetness of white chocolate into a complex, deep caramel flavor with enticing nutty and toasty undertones. This adds an unparalleled depth, sophistication, and a truly gourmet touch to every single cookie. The molten pockets of golden, caramelized white chocolate are an absolute revelation!
- Effortless One-Bowl Preparation: Despite their impressive flavor and luxurious appeal, these “Inside Out Chocolate Chip Cookies” (as they are sometimes fondly nicknamed) are remarkably straightforward to prepare. The entire decadent dough comes together seamlessly in just one mixing bowl, eliminating the need for a bulky stand mixer and significantly minimizing cleanup. Furthermore, with a relatively short chilling time required, you’ll be indulging in these extraordinary treats sooner than you might expect, making them an ideal choice for impromptu cravings, quick dessert solutions, or when you need to entertain with flair without the fuss.
- A Gourmet Evolution of a Beloved Classic: For connoisseurs who appreciate the deep, comforting richness of chocolate harmoniously paired with the creamy sweetness of white chocolate, this recipe offers a sophisticated and elevated upgrade. The nuanced, complex layers introduced by the caramelized white chocolate elevate the entire flavor profile, making these cookies feel genuinely special, unique, and utterly unforgettable.
Unpacking the Essential Ingredients for Unforgettable Fudgy Chocolate Cookies
The journey to crafting these remarkable cookies begins with understanding and selecting the right ingredients. While the comprehensive recipe, complete with precise measurements and detailed instructions, is conveniently located in the recipe card at the bottom of this page, here’s an in-depth exploration of each key component and its crucial role in achieving ultimate cookie perfection. Don’t forget to utilize the table of contents at the top for easy navigation through our baking guide.
- Butter (Salted): For an unparalleled depth of flavor and ideal texture, I wholeheartedly advocate for the use of **salted butter**. The subtle saltiness not only provides balance but also dramatically enhances the rich chocolate and deep caramel notes. If your pantry only holds unsalted butter, simply augment the dry ingredients with an additional pinch (approximately 1/8 to 1/4 teaspoon) of fine sea salt. Critically, ensure your butter has reached **room temperature** before commencing. Softened butter cream effortlessly with sugar, forming a light, airy, and stable base for your cookie dough. Attempting to cream cold butter will result in a denser, less uniform dough and a potentially tougher cookie.
- All-Purpose Flour: As the structural backbone of most baked goods, the correct measurement of all-purpose flour is paramount to prevent a dry, crumbly, or overly dense cookie. To guarantee accuracy, employ the **spoon-and-level method**: gently spoon your flour into the measuring cup until it overflows, then level it off precisely with a flat utensil (such as the back of a knife). Absolutely refrain from scooping your measuring cup directly into the flour bag, as this compacts the flour, leading to an excess amount and invariably dry, tough cookies. For the utmost precision and consistent results, the use of a **kitchen scale** to weigh your flour (347 grams) is always the superior method.
- Large Eggs: This recipe specifically calls for **large eggs**. Similar to butter, allowing your eggs to come to room temperature is vital. Warm eggs emulsify more effectively with the other ingredients, fostering a smoother, more cohesive dough structure and contributing to a consistently even bake throughout each cookie.
- Natural Cocoa Powder: Our recipe is tailored for **natural cocoa powder**, distinctly not Dutch-processed. Natural cocoa powder is inherently acidic, and this acidity is crucial for its reaction with baking soda, which generates carbon dioxide and aids in the cookie’s lift and spread. While this recipe thoughtfully incorporates both baking soda and baking powder, natural cocoa powder also imparts the characteristic deep fudgy texture and intense chocolate flavor we desire. I’m currently experimenting with Dutch-process cocoa for future variations, but for the intended rich and fudgy outcome, stick with natural cocoa powder. The key difference lies in their pH levels and their interactions with leavening agents.
- Brown Sugar & Granulated Sugar: A thoughtfully balanced blend of **packed brown sugar** and **white granulated sugar** is indispensable for achieving the perfect cookie texture. Brown sugar, rich in molasses, contributes essential moisture, a delightful chewiness, and subtle caramel undertones. Granulated sugar, conversely, plays a pivotal role in promoting the cookie’s desirable spread, creating those appealing crisp edges, and providing overall sweetness. This precise sugar ratio ensures your cookies are impeccably balanced in both texture and taste, steering clear of either a cakey or an excessively crispy outcome.
- High-Quality White Chocolate: For the very best caramelized white chocolate, the selection of a **premium white chocolate in bar form** is non-negotiable. Reputable brands such as Lindt, Ghirardelli, Baker’s, Callebaut, or Valrhona are exemplary choices. These professional-grade chocolates boast a higher cocoa butter content, which ensures a remarkably smooth melt and a beautiful, even caramelization. While you certainly *can* use white chocolate chips if you choose to bypass the caramelization process, they often contain stabilizers that impede smooth melting and prevent them from developing the same rich, nuanced flavor when caramelized.
- Pure Vanilla Extract: For a truly superior flavor profile, always select **pure vanilla extract**. Artificial vanilla simply cannot replicate the profound depth, warmth, and aromatic complexity that genuine vanilla imparts to baked goods, gracefully enhancing all the other sweet and rich notes within the cookie.
- Baking Soda & Baking Powder: These two leavening agents collaborate to achieve the ideal rise and texture. Baking soda, when combined with the natural cocoa powder’s acidity, helps the cookies spread and become tender. Baking powder, a double-acting agent, provides an additional lift, contributing to the thick and soft structure of the cookie.
- Salt: Far more than just a seasoning, salt is a critical flavor enhancer in baking. It masterfully balances the sweetness of the sugars and chocolates, deepening the overall flavor profile and making it more complex, enticing, and utterly delicious.
- Espresso Powder (Optional): A small, almost imperceptible amount of **finely ground espresso powder** (not instant coffee) is a secret weapon for intensifying chocolate flavor. It doesn’t make the cookies taste overtly like coffee; instead, it remarkably deepens and amplifies the cocoa notes, making them even more robust, rich, and irresistible. It’s a professional baker’s trick for chocolate enhancement.
Thoughtful Ingredient Substitutions & Adaptations for Dietary Needs
While this recipe is meticulously crafted for optimal results, we fully appreciate the importance of flexibility in the kitchen. Here are some potential substitutions and adjustments to help you adapt these delectable cookies to various dietary requirements or in situations where certain ingredients might be unavailable:
- Gluten-Free Flour Alternative: Although I have not personally conducted dedicated tests for a gluten-free iteration of these specific cookies, a significant number of our readers have reported excellent success with many of my other cookie recipes (which often share a similar foundational base) by utilizing reliable 1:1 gluten-free flour blends. Specifically, **Bob’s Red Mill Gluten-Free 1:1 Baking Flour** or **King Arthur Gluten-Free Measure for Measure Flour** are highly recommended. These blends are expertly formulated to be swapped cup-for-cup with traditional all-purpose flour, facilitating a relatively seamless transition. When attempting this, begin by adhering to the recipe as closely as possible, and be attentive to any subtle shifts in dough consistency, adjusting slightly if necessary.
- Dairy-Free Adaptation: To transform these cookies into a dairy-free treat, you will need to replace the butter with your preferred **high-quality dairy-free butter alternative**. It is crucial to select a brand that is known for performing well in baking, closely mimicking the texture and fat content of regular butter for the best structural results. For the white chocolate component, opt for your favorite **dairy-free white chocolate chips or chunks**. It is important to note, however, that **vegan white chocolate typically does not caramelize effectively, if at all**. This is primarily due to fundamental differences in its composition, specifically the absence of dairy milk solids and a different fat profile compared to traditional cocoa butter-rich white chocolate. Therefore, if you are making a dairy-free version, it is strongly advised to skip the caramelization step entirely and simply incorporate regular dairy-free white chocolate directly into the cookie dough.
Mastering the Art of Chocolate White Chocolate Chip Cookies: A Detailed Step-by-Step Guide
Creating these exceptional cookies is an incredibly rewarding culinary journey. By meticulously following these detailed steps, you are well on your way to achieving consistently perfect, fudgy, and wonderfully chewy results with every single batch:
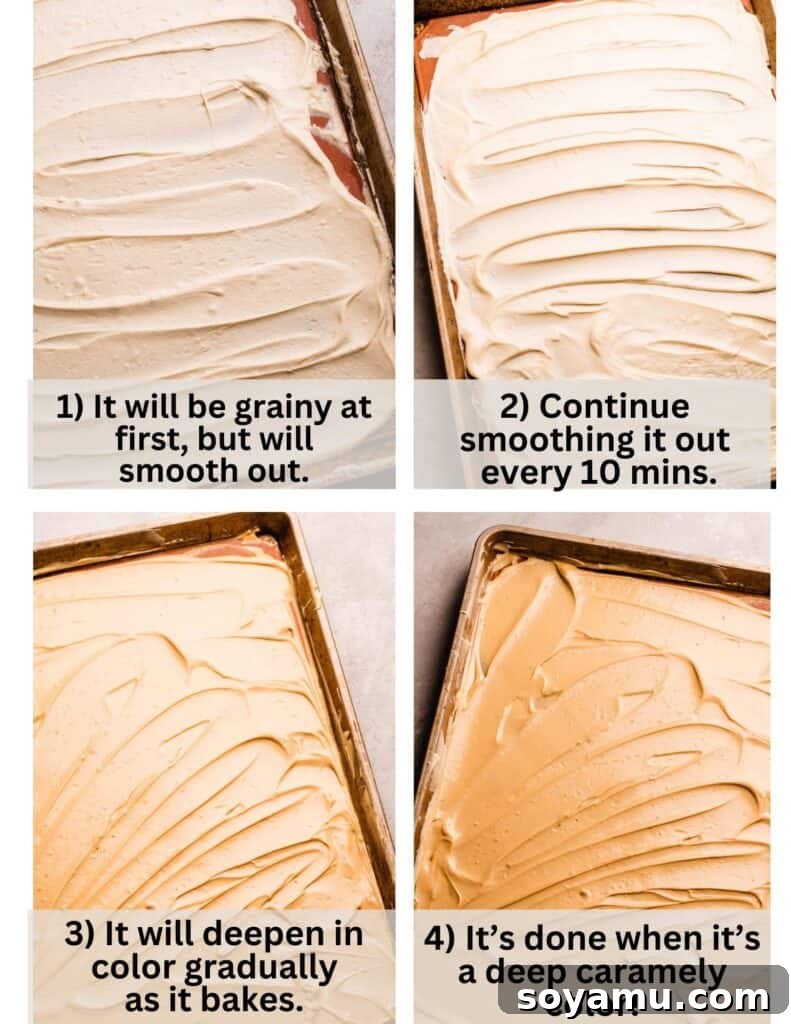
Step 1: The Flavor Elevation – Caramelize Your White Chocolate. This initial and arguably most crucial step is precisely what elevates these cookies from merely delicious to truly extraordinary. Begin by taking your chosen high-quality white chocolate (preferably a baking bar, broken into smaller, manageable pieces rather than chips) and spreading it in an even layer across a parchment-lined baking sheet. Gently melt it in a preheated oven, making sure to stir it thoroughly every 10-15 minutes. Continue this patient process for approximately one hour, or until the white chocolate undergoes a magical transformation, developing a beautiful deep golden-caramel color and imparting rich, toasted, and wonderfully nutty flavor notes. Your patience here is a direct investment in the incredible depth of flavor of your finished cookies! For a more comprehensive walkthrough, complete with step-by-step photos and invaluable expert advice, please refer to my dedicated guide: How to Caramelize White Chocolate. Once the white chocolate has reached its desired caramelization, allow it to cool completely and harden (a brief stint in the freezer can expedite this process), then break it into delightful, irregular chunks. Keep these precious chunks chilled in your refrigerator or freezer until you are ready to incorporate them into your cookie dough.
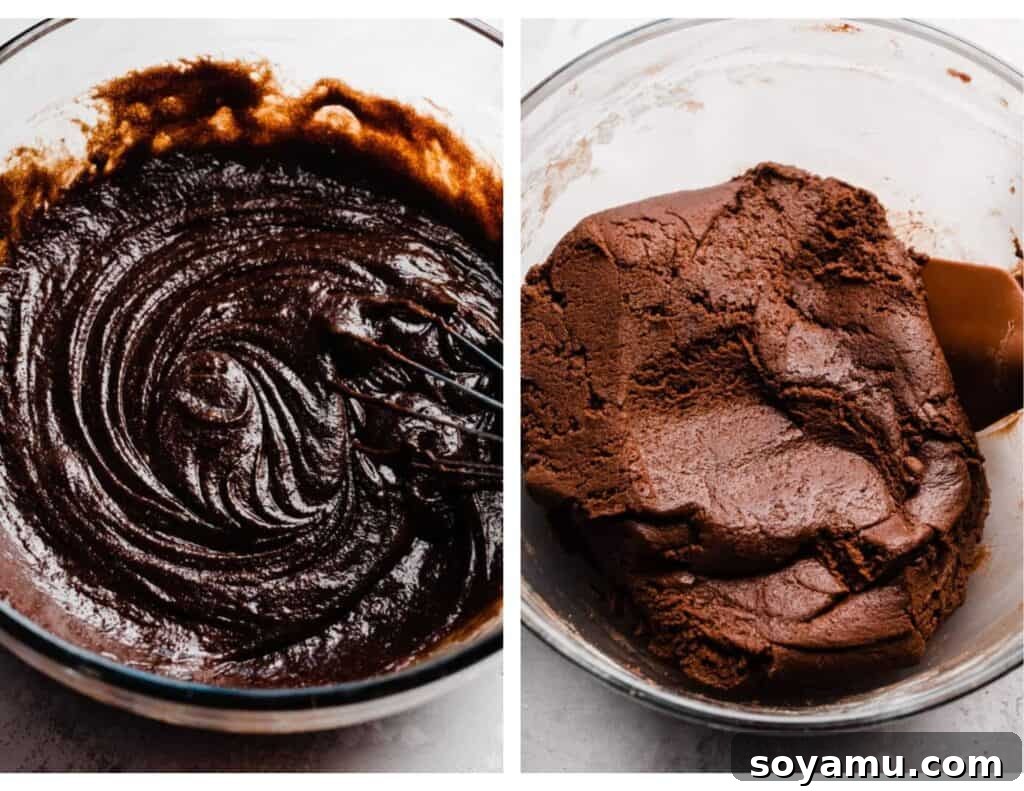
Step 2: Expertly Craft the Fudgy Cookie Dough. In a spacious mixing bowl, begin by melting your room-temperature salted butter. Once the butter is fully melted and smooth, add the natural cocoa powder and whisk it thoroughly until no lumps remain, creating a rich, intensely chocolatey base. Next, introduce both the brown sugar and granulated sugar, whisking vigorously for about a minute until the mixture becomes cohesive, smooth, and slightly lighter in color. Incorporate the room-temperature eggs, adding them one at a time and whisking well after each addition until they are fully blended and the mixture is beautifully emulsified. Stir in the pure vanilla extract. In a separate, medium-sized bowl, whisk together all your dry ingredients: the all-purpose flour (ensuring it’s perfectly spooned and leveled!), baking soda, baking powder, salt, and the optional espresso powder. Gradually add these dry ingredients to your wet mixture, mixing on low speed (or with a sturdy spoon or spatula) until they are *just* combined. It is paramount to avoid overmixing, as this can overdevelop the gluten in the flour, resulting in tough, less tender cookies. A helpful tip: the dough might feel a bit stiff or resistant when you’re initially incorporating the dry ingredients, possibly requiring a little “elbow grease” or the assistance of a hand mixer. Do not despair; I assure you, it will come together beautifully to form a cohesive dough!
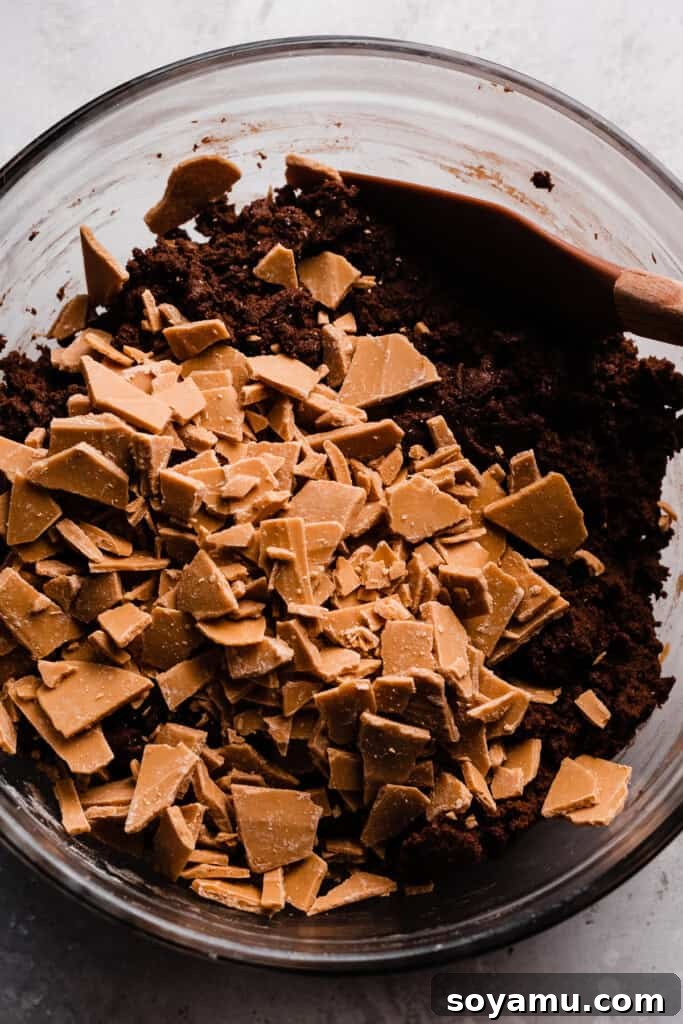
Once your gorgeously rich chocolate dough has been perfectly prepared, it’s time to introduce the star ingredient: the caramelized white chocolate. Gently fold in the chilled caramelized white chocolate chunks. Take your time to distribute them evenly throughout the entire dough, ensuring that every single bite of your future baked cookies will be graced with a delightful pocket of that exquisite, complex caramel flavor.
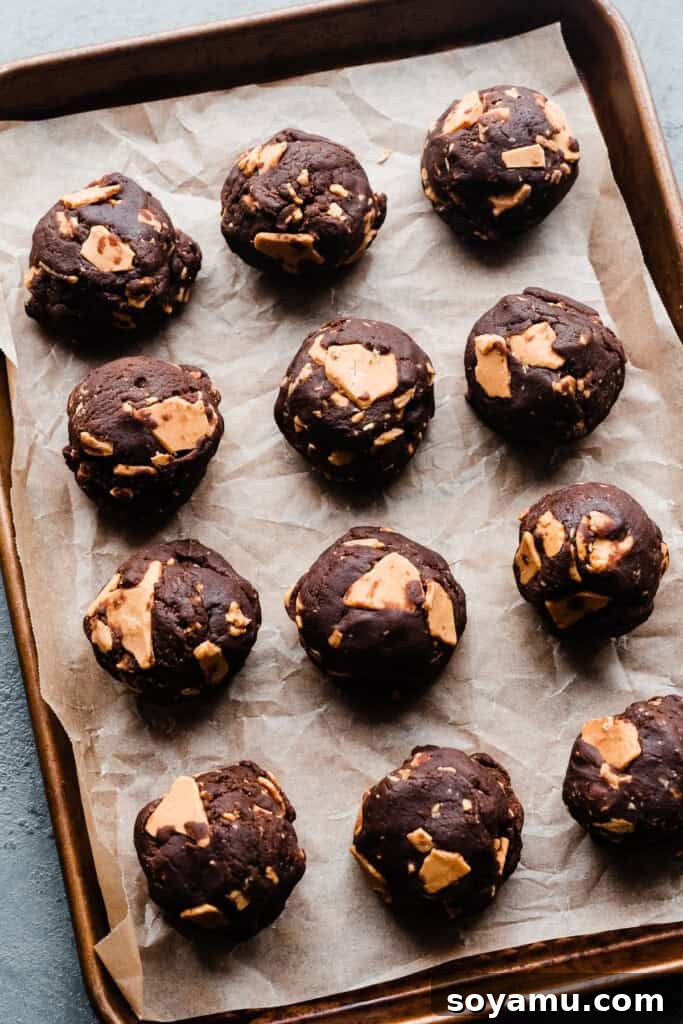
Step 3: Precision Scooping, Shaping & Essential Chilling for Optimal Results. Precision in scooping your cookie dough is a fundamental step toward achieving uniform, perfectly baked cookies. To ensure consistent size and even baking, I highly recommend using a kitchen scale to measure out individual balls of dough, aiming for approximately 65-75 grams each. Once you’ve scooped these perfectly portioned dough balls, arrange them on a plate or a small baking sheet lined with parchment paper. Now comes the crucial chilling phase: place them in the refrigerator for a minimum of 2 hours, or for a quicker chill, in the freezer for at least 1 hour. This chilling process is absolutely vital for several reasons: it allows all the magnificent flavors to meld and deepen, prevents the cookies from spreading excessively during baking (which contributes to their desirable thickness), and is a key factor in developing that signature thick, perfectly chewy texture. Furthermore, thoroughly chilled dough will result in those highly coveted crisp edges that make these cookies so irresistible.
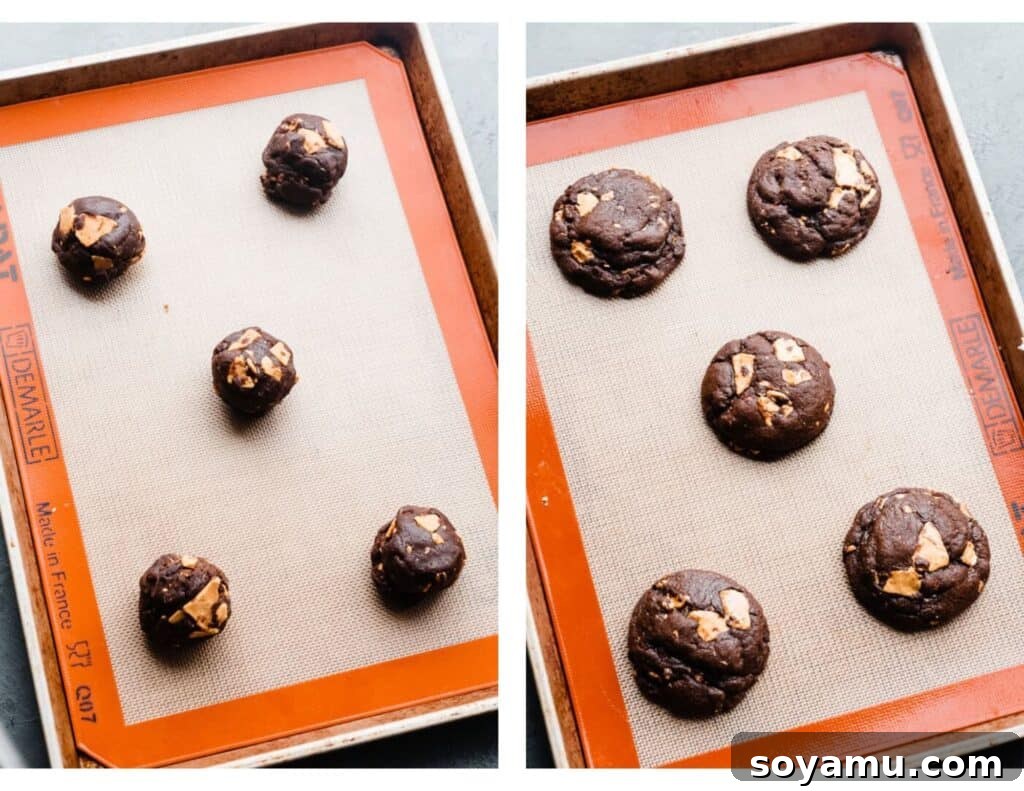
Step 4: Achieving the Perfect Bake with Our Two-Temperature Method. Begin by preheating your oven to a robust **400°F (200°C)**. Line two large baking sheets with either parchment paper or reusable silicone baking mats. Carefully place 5-6 chilled cookie dough balls onto each sheet, ensuring you leave ample space (at least 2 inches or 5 cm) between them to allow for proper air circulation and expansion during baking. Now for the crucial part of our unique two-temperature baking method: bake the cookies at **400°F for precisely 4 minutes**. This initial burst of high heat helps to quickly set the edges of the cookies, creating a satisfying crispness. Following this, without opening the oven door if possible to maintain consistent temperature, **reduce the oven temperature to 350°F (175°C)** and continue baking for an additional **4-5 minutes**. This strategic shift in temperature ensures a total baking time of approximately 8-9 minutes, resulting in beautifully crisp exteriors while preserving a wonderfully soft and gloriously gooey center. Once the cookies emerge from the oven, for that professional, perfectly round, and thick appearance, immediately use a round cookie cutter (one that is slightly larger than your baked cookies) and gently “scoot” the warm, pliable edges of each cookie inward. This simple yet effective technique creates a visually appealing, thicker, and more uniformly shaped cookie.
Serving and Storing Your Decadent Chocolate White Chocolate Chip Cookies
There is arguably no better way to savor these magnificent cookies than when they are fresh from the oven, still warm, with the caramelized white chocolate chunks gloriously gooey and their complex caramel notes at their most aromatic and potent. Allow them to cool on the baking sheet for just a few minutes – enough time for them to set slightly so they can be handled without breaking apart – before carefully transferring them to a wire rack to cool completely. For the ultimate dessert experience, pair these rich treats with a tall, cold glass of milk, a steaming mug of your favorite coffee, or even a scoop of creamy vanilla bean ice cream. For an extra touch that truly enhances both the sweet and savory elements, consider sprinkling a pinch of flaky sea salt on top immediately after they emerge from the oven. This little detail can make a significant difference!
For optimal storage, once the cookies have cooled completely to room temperature, place them in an airtight container. They will maintain their wonderful freshness, soft texture, and delightful chewiness for 3-4 days when stored at room temperature. If you wish to recapture that irresistible fresh-baked warmth, a quick 10-15 second reheat in the microwave will bring them back to life. These cookies are also excellent candidates for freezing. Once fully cooled, you can store baked cookies in an airtight container or a freezer-safe bag for up to 2-3 months. Simply thaw them at room temperature or warm briefly in the oven for a taste that’s almost as good as freshly baked. If you’re yearning for more delightful cookie inspiration after this batch, don’t miss my intensely rich Double Chocolate Chip Cookies or my elegantly flavored Chocolate Tiramisu Cookies next!
Expert Tips for Consistently Chewy & Fudgy Chocolate Cookies
Achieving bakery-quality, consistently perfect cookies every single time isn’t solely about diligently following a recipe; it also involves understanding the subtle nuances and expert tricks of baking. Here are some invaluable tips designed to ensure your chocolate white chocolate chip cookies turn out sublimely fudgy, chewy, and utterly perfect with every batch:
- Invest in an Accurate Oven Thermometer: This is, without a doubt, one of the most critical tools for any serious or aspiring baker. The internal thermostat of your oven can often be notoriously inaccurate, sometimes deviating by as much as 25-50°F (15-25°C) from the set temperature. An affordable oven thermometer (affiliate link) will provide you with an exact, real-time reading of your oven’s actual temperature. Maintaining a consistent and accurate oven temperature is paramount for achieving proper cookie spread, the desired texture, and consistent doneness. I personally keep one in my oven at all times to continuously monitor its calibration.
- Embrace the Kitchen Scale for Unmatched Precision: While we do provide helpful cup measurements, a food scale (affiliate link) represents the gold standard for accuracy in baking, especially when measuring flour. The actual weight of flour can fluctuate dramatically based on how it’s scooped and the specific design of the measuring cup used. Too much flour is the single most common culprit for producing dry, dense, or cakey cookies. A kitchen scale ensures you are always using the precise amount of each ingredient, guaranteeing the perfect moisture content and that irresistible chewiness that defines a great cookie.
- Do Not Overmix the Dough: Once you’ve introduced the dry ingredients into the wet mixture, it is absolutely crucial to mix only until they are *just* combined. Overmixing the dough excessively leads to the overdevelopment of gluten in the flour, which in turn results in tough, rubbery cookies – a far cry from the tender, soft, and chewy texture we are aiming for. Mix gently and stop as soon as the flour streaks disappear.
- The Importance of Room Temperature Ingredients: As highlighted throughout the recipe, using butter and eggs that have come to room temperature is not just a suggestion, it’s a critical step. Room temperature fats and proteins emulsify far better, creating a smoother, more uniform dough structure. This consistency ensures even baking, prevents your cookies from spreading too much (or too little), and contributes significantly to their overall delightful texture.
- Never Skip the Dough Chilling Step: This step is non-negotiable for superior cookies! Chilling the dough serves multiple vital purposes. Firstly, it allows the dry ingredients, particularly the flour, to fully hydrate, resulting in a more tender and less crumbly cookie. Secondly, and very importantly, the fats in the butter solidify when chilled, which effectively prevents the cookies from spreading too rapidly and becoming thin during baking. This crucial step directly contributes to achieving thicker, chewier cookies with a more concentrated and profound flavor.
- Avoid Overcrowding Your Baking Sheet: Always ensure you leave at least 2 inches (approximately 5 cm) of space between each cookie dough ball on your baking sheet. Overcrowding the pan can lead to a decrease in the oven’s temperature, hinder proper air circulation, prevent even baking, and ultimately cause your cookies to spread into each other, forming one giant, unappealing cookie mass. If necessary, bake your cookies in multiple batches to maintain optimal conditions.
- The Quality of Ingredients Truly Matters: The final taste and texture of your cookies are directly influenced by the quality of the ingredients you use. Investing in a high-quality natural cocoa powder, using pure vanilla extract, and selecting a premium white chocolate (especially for the caramelization process) will make a profoundly noticeable difference in the richness, depth, and overall deliciousness of your homemade treats.
Frequently Asked Questions About Our Chocolate White Chocolate Chip Cookies
Absolutely! This particular cookie recipe is wonderfully versatile and scales beautifully. Feel completely free to double the recipe if you’re planning to bake for a larger gathering, need to prepare a generous batch for an event, or simply wish to stock your freezer with ready-to-bake dough. Conversely, if you’re craving a smaller, more intimate batch for a quick treat or a cozy evening in, halving the recipe will work just as perfectly. The key to success when adjusting quantities is to ensure that you scale all ingredients proportionally, maintaining the precise ratios, for the very best results in texture and flavor.
While caramelizing the white chocolate undeniably imparts an incredible, complex depth of flavor that genuinely elevates these cookies to a gourmet level, it is **not strictly essential** if your baking time is limited. These cookies are still wonderfully delicious and satisfying when made with regular, high-quality white chocolate chips or chopped white chocolate bars. The base chocolate cookie dough itself is fantastic. In fact, you could even make the fudgy chocolate cookie base without any mix-ins at all, perhaps rolling the dough balls in granulated sugar before baking for a rich, intensely chocolatey sugar cookie. The caramelized white chocolate is indeed a gourmet flourish, but the fundamental cookie recipe remains superb on its own.
Yes, absolutely! Freezing cookie dough is an excellent strategy for enjoying freshly baked cookies on demand, whenever the craving strikes. To freeze, simply scoop the prepared dough into individual balls (following the sizing described in the recipe instructions) and arrange them on a baking sheet lined with parchment paper. Freeze them until they are solid, which usually takes about 30 minutes to an hour. Once the dough balls are frozen solid, transfer them to a heavy-duty freezer-safe bag or an airtight container. They will maintain their quality in the freezer for up to 2 months. When you’re ready to bake, there’s no need to thaw the dough! Simply place the frozen dough balls on a prepared baking sheet and bake directly from frozen, adding an extra 1-2 minutes to the recommended bake time as needed. The cookies will be done when their edges appear set and slightly firm, while their centers remain wonderfully soft.
Yes, this versatile recipe translates beautifully into delicious cookie bars! To make bars, simply press the entire batch of prepared cookie dough evenly into a metal or ceramic 9×13 inch baking pan. Be sure to line the pan with parchment paper, allowing some overhang on the sides – this will make lifting the cooled bars out incredibly easy. It’s important to **avoid using glass baking pans** for this recipe, as glass conducts heat less efficiently and can lead to uneven baking. Bake the cookie bars in a preheated oven at 350°F (175°C) for approximately 20-25 minutes. The bars are perfectly done when the edges appear set and slightly golden brown, and the center still looks just a *tad* underdone. A toothpick inserted near the center should emerge with moist crumbs clinging to it, not wet batter. The bars will continue to firm up and set to the perfect chewy consistency as they cool. Ensure they are completely cool before slicing for the cleanest cuts.
Chilling the cookie dough is a critical step that significantly enhances both the flavor and the final texture of your cookies. Firstly, the chilling period allows the dry ingredients, particularly the flour, to fully hydrate. This process results in a more tender, less crumbly, and more cohesive cookie. Secondly, and crucially for texture, the fats (butter) in the dough solidify when chilled. This solidification prevents the cookies from spreading too rapidly and excessively in the oven, which is key to achieving those desirable thick, soft, and chewy cookies. Without chilling, cookies often spread too thin. Finally, chilling the dough also provides valuable time for all the flavors to deepen, meld, and mature, creating a more complex and ultimately more satisfying taste experience. For the best possible results, do not skip this essential step!
Exciting Recipe Variations to Customize Your Chocolate Cookies
The beauty of this chocolate cookie base lies in its incredible versatility, making it a perfect canvas for endless creative variations. While the caramelized white chocolate is undeniably divine, don’t hesitate to experiment with these delicious twists to create your own signature cookie:
- White Chocolate – The Original Gourmet or the Convenient Shortcut: As we’ve passionately discussed, the **caramelized white chocolate** truly imparts an unparalleled nutty, buttery caramel depth that is profoundly worth the small investment of extra time and effort. It genuinely elevates the cookie into an extraordinary, gourmet experience. However, when time is a precious commodity, you can certainly opt for high-quality **regular white chocolate chips or chopped white chocolate bars**. The cookies will still be absolutely delicious, offering that beloved classic sweet creaminess as a delightful counterpoint to the rich chocolate dough.
- Indulgent Double Chocolate Chip Cookies: For the ultimate chocolate enthusiast, transform these into a truly decadent double chocolate chip cookie experience. Simply swap out the white chocolate entirely for your preferred type of chocolate chips or finely chopped chocolate chunks. Experiment with **milk chocolate chips** for a sweeter, lusciously creamy profile, **semi-sweet chocolate chunks** for a perfectly balanced richness, or intensely dark **chocolate pieces** for a sophisticated, bittersweet depth. You can even combine different types of chocolate for a multi-layered flavor adventure! Just be sure to keep the total amount of mix-ins within the range of 1 ½ to 1 ¾ cups to maintain the ideal dough consistency.
- Caramelized White Chocolate with a Classic Cookie Base: If your preference leans towards a slightly lighter, less intensely chocolatey cookie base, but you still yearn for the unique, complex flavor of caramelized white chocolate, we have the perfect solution! Simply incorporate these delightful caramelized white chocolate chunks into my widely adored Brown Butter Chocolate Chip Cookies. The nutty, rich aroma of brown butter paired with the deep caramel notes of the caramelized white chocolate is, without exaggeration, a match made in culinary heaven!
- Unleash Your Creativity with Other Mix-Ins: This fudgy chocolate cookie dough is an incredibly forgiving and adaptable foundation, making it the perfect canvas for almost any mix-in you can possibly imagine. Feel empowered to use a total of 1 ½ to 1 ¾ cups of any of the following to craft your own personalized, signature cookie creation:
- **Nuts:** Finely chopped pecans, walnuts, roasted almonds, or even macadamia nuts can add a delightful crunch and an extra layer of richness.
- **Diverse Chocolates:** Beyond traditional chips, consider chopped gourmet chocolate bars, miniature chocolate candies, or even chocolate-covered pretzels for an intriguing sweet and salty kick.
- **Confections:** Incorporate colorful M&Ms, buttery toffee bits, chopped peanut butter cups, or for a festive touch during the holidays, crushed candy canes.
- **Dried Fruits:** A thoughtful inclusion of tart dried cherries, sweet cranberries, or even plump raisins can introduce a lovely fruity contrast to the rich chocolate base.
Explore More Irresistible Cookie Recipes from Our Collection
If you’ve thoroughly enjoyed baking and savoring these exceptional Chocolate White Chocolate Chip Cookies, then you are truly in for a continuous treat! Our extensive collection features a diverse and delightful array of cookie recipes, each meticulously designed to deliver an extraordinary combination of flavor, texture, and baking joy. Dive into more of my very best cookie creations and discover your next irresistible baking obsession:
- Peach Cobbler Cookies
- Lemon Basil Cookies
- Cinnamon Roll Snickerdoodles
- Black Forest Cookies
- Blueberry Lemon Cookies
- Everything But the Kitchen Sink Cookies
- Chewy Chocolate Chip Cookies
- White Chocolate Macadamia Nut Cookies
Did you make this recipe? We’d absolutely love to hear about your experience!
Please consider leaving a comment and a star rating below to share your thoughts and feedback. Your invaluable input not only helps other passionate bakers but also provides immense support for our small business!
Chocolate White Chocolate Chip Cookies (Caramelized White Chocolate!)
Stephanie Simmons
20 minutes
9 minutes
29 minutes
16
cookies
Pin
Ingredients
For the Caramelized White Chocolate
- 12 ounces white chocolate, Use a good quality baking bar, not chips or almond bark
For the Cookies:
- 14 and 1/2 tbsp salted butter, 206 grams, at room temperature
- 1/2 cup + 1 tbsp natural cocoa powder, 52 grams
- 3/4 cup packed brown sugar, light or dark, 163 grams
- 3/4 cup granulated sugar, 156 grams
- 2 large eggs, at room temperature
- 1 and 1/2 tsp pure vanilla extract
- 2 and 2/3 cups all-purpose flour, spooned & leveled, 347 grams
- 1 tsp baking powder
- 1 tsp baking soda
- 1/2 tsp salt
- 1 tsp espresso powder, optional, for enhanced chocolate flavor
- 1 and 1/2 cups caramelized white chocolate chunks, or regular white chocolate chips/chunks
- flaked sea salt, for topping, optional
Instructions
-
1. Prepare the Caramelized White Chocolate: Begin by following the detailed instructions in my recipe on How to Caramelize White Chocolate. This involves slowly roasting high-quality white chocolate in the oven until it transforms into a beautiful deep golden-caramel color with rich, nutty notes. Once caramelized, allow it to cool completely and harden (a quick chill in the freezer helps), then chop it into desired chunks. Keep these chunks chilled in the fridge or freezer until you’re ready to add them to the cookie dough.12 ounces white chocolate
-
2. Create the Cookie Dough: In a large mixing bowl, melt your room-temperature salted butter. Whisk in the cocoa powder thoroughly until smooth. Add both the brown sugar and granulated sugar, whisking vigorously for about 1 minute until well combined. Incorporate the room-temperature eggs, one at a time, whisking after each, then stir in the pure vanilla extract. In a separate bowl, whisk together the all-purpose flour (spooned and leveled!), baking powder, baking soda, salt, and optional espresso powder. Gradually add the dry ingredients to the wet, mixing on low speed (or with a sturdy spoon/spatula) until just combined. Be careful not to overmix.
Tip: The dough might seem stiff when adding dry ingredients – don’t worry, it will come together! A hand mixer can assist, but avoid overworking.
Finally, fold in the chilled caramelized white chocolate chunks until evenly distributed.
14 and 1/2 tbsp salted butter, 1/2 cup + 1 tbsp natural cocoa powder, 3/4 cup packed brown sugar, 3/4 cup granulated sugar, 2 large eggs, 1 and 1/2 tsp pure vanilla extract, 2 and 2/3 cups all-purpose flour, 1 tsp baking powder, 1 tsp baking soda, 1/2 tsp salt, 1 tsp espresso powder, 1 and 1/2 cups caramelized white chocolate chunks -
3. Scoop & Chill the Dough Balls: Scoop the dough into balls, approximately 65-75 grams each for consistency. Place them on a lined baking sheet and chill in the refrigerator for at least 2 hours, or in the freezer for a minimum of 1 hour. Chilling is essential for flavor development, preventing excessive spread, and achieving thick, chewy cookies with crisp edges.
-
4. Bake with the Two-Temperature Method: Preheat your oven to **400°F (200°C)**. Line baking sheets with parchment paper. Place 5-6 chilled cookie dough balls per sheet, leaving ample space. Bake for **4 minutes at 400°F**. Then, **reduce the temperature to 350°F (175°C)** and continue baking for another **4 to 5 minutes**, for a total of 8-9 minutes. This method yields crisp edges and gooey centers. Immediately after baking, use a round cookie cutter (slightly larger than cookies) to gently “scoot” the edges inward for perfectly round, thicker cookies.
-
5. Serve Warm & Store: Let cookies cool on the baking sheet on a wire rack for 5-10 minutes, then transfer to cool completely. Enjoy while warm and gooey! Sprinkle with flaked sea salt if desired immediately after baking. Store cooled cookies in an airtight container at room temperature for 3-4 days.flaked sea salt
-
6. Freezing Cookie Dough & Make-Ahead Tips: Scoop dough balls and freeze until solid on a lined baking sheet (about 30 minutes). Transfer to a freezer-safe bag and freeze for up to 1-2 months. Bake from frozen, adding 1-2 minutes to the bake time. Cookies will hardly spread, but are done when edges are set. Refrigerated dough (3-4 days) may also require an extra minute of baking and will not spread as much.
Nutrition Information
Serving:
1
cookie
,
Calories:
325
kcal
,
Carbohydrates:
44
g
,
Protein:
4
g
,
Fat:
15
g
,
Saturated Fat:
9
g
,
Polyunsaturated Fat:
1
g
,
Monounsaturated Fat:
4
g
,
Trans Fat:
0.4
g
,
Cholesterol:
53
mg
,
Sodium:
273
mg
,
Potassium:
125
mg
,
Fiber:
2
g
,
Sugar:
27
g
,
Vitamin A:
355
IU
,
Vitamin C:
0.1
mg
,
Calcium:
61
mg
,
Iron:
2
mg
Nutrition information is automatically calculated and should be considered an approximation. Individual results may vary based on ingredients used and preparation methods.
Like this? Leave a comment below!