

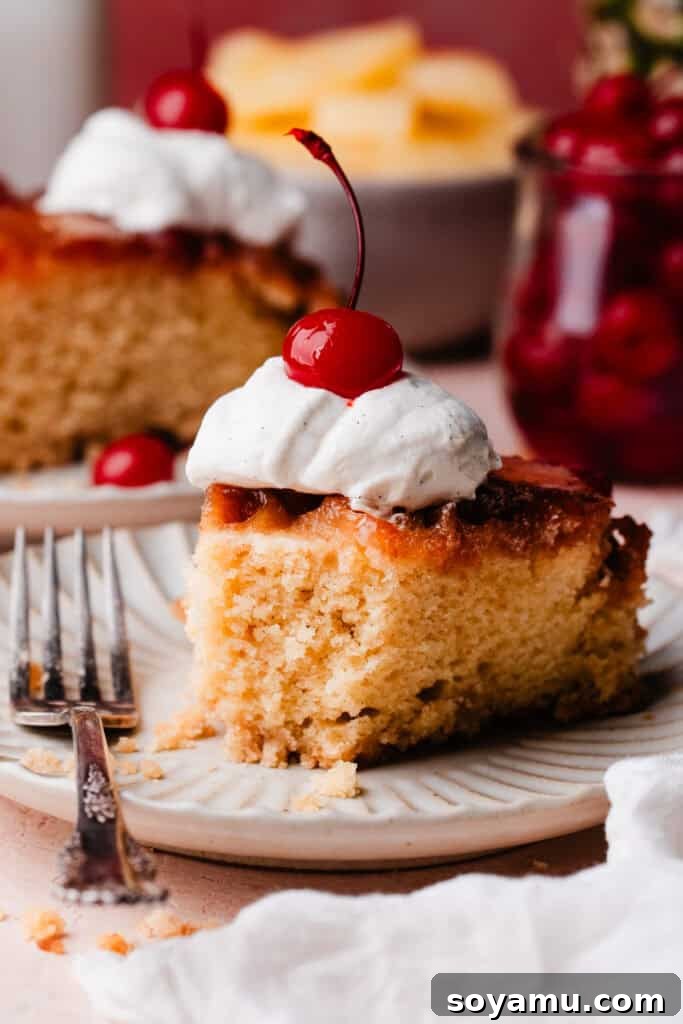
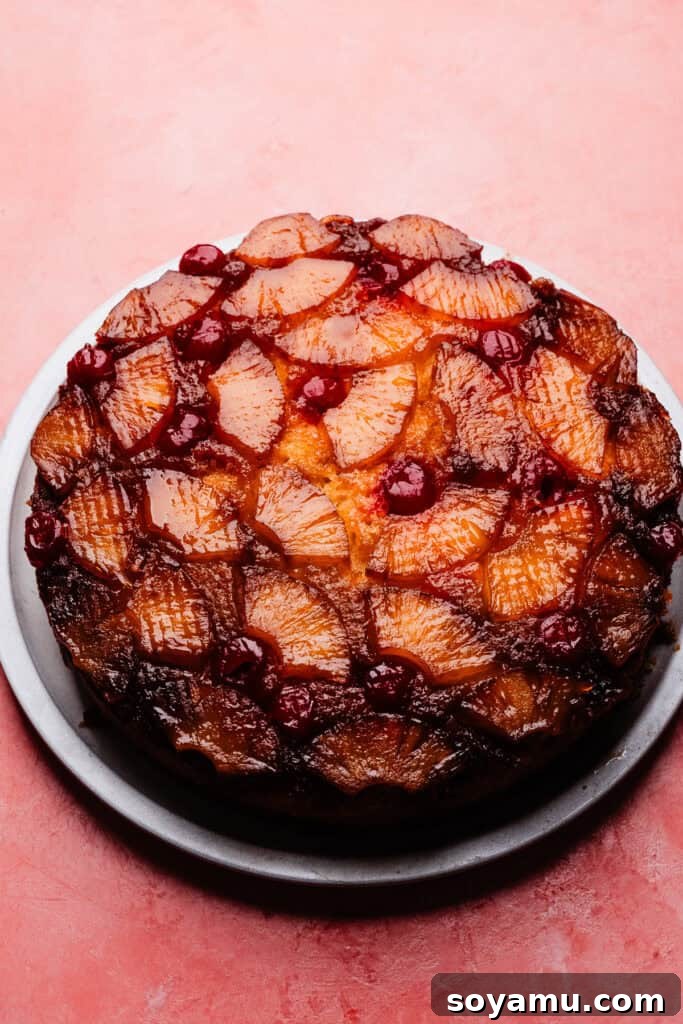
Pineapple Upside Down Cake is a timeless dessert that never fails to impress with its vibrant flavors and charming presentation. This beloved classic features a glistening layer of caramelized pineapple and sweet maraschino cherries atop an incredibly tender and moist vanilla cake. What sets this particular recipe apart is a delightful surprise crumb layer baked right into the bottom, adding an irresistible hint of crunch that elevates every bite. Whether served warm or at room temperature, this cake is perfect for family gatherings, special occasions, or simply to satisfy your sweet cravings. For a truly polished finish, consider serving each slice with a dollop of fresh whipped cream and an extra cherry.

Why This Pineapple Upside Down Cake Will Be Your New Favorite
There are countless reasons to fall in love with this particular Pineapple Upside Down Cake recipe. It perfectly balances a nostalgic charm with irresistible textures and flavors.
- Irresistibly Caramelized Pineapple: The star of the show! A generous layer of pineapple slices is nestled in a rich mixture of melted butter and brown sugar. As the cake bakes, this combination transforms into a deeply golden, sticky-sweet caramel topping that infuses the pineapple with incredible depth and a delightful tang. Each slice boasts beautiful, glistening pineapple rings that are both visually appealing and bursting with flavor.
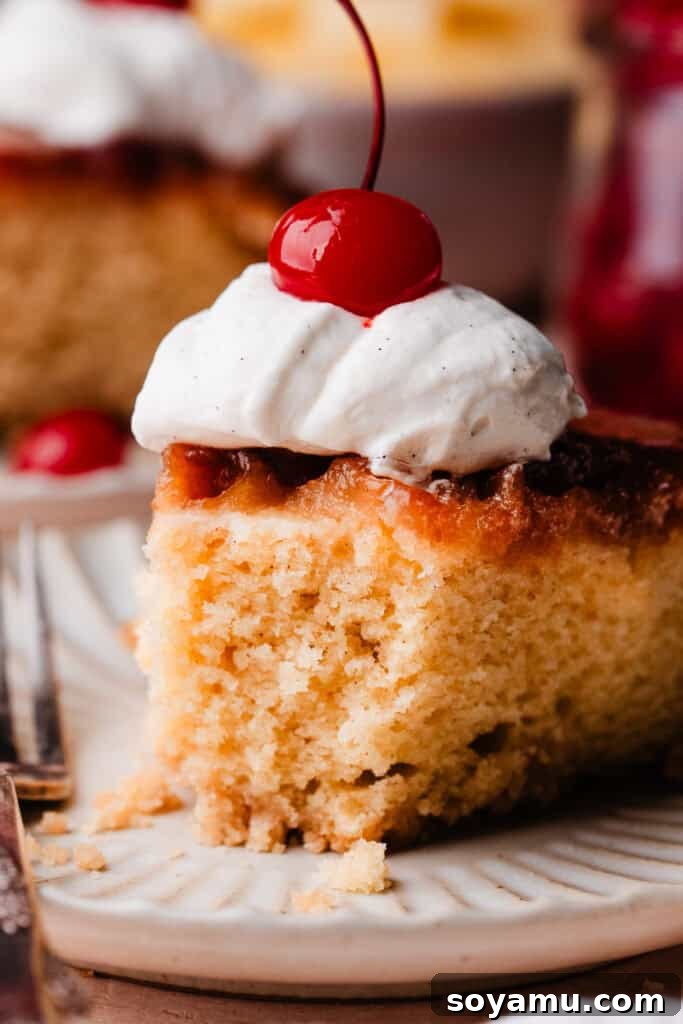
- Tender and Moist Vanilla Cake: Beneath the fruity topping lies a vanilla cake that is anything but ordinary. It’s exceptionally light, fluffy, and incredibly moist, with just a hint of warm cinnamon that beautifully complements the tropical sweetness of the pineapple. The secret to its melt-in-your-mouth texture lies in the careful balance of ingredients, ensuring a tender crumb that holds up perfectly under the caramelized fruit.
- The Delightful Surprise Crumb Layer: This recipe includes a unique and unexpected addition – a thin, crunchy crumb layer baked onto what becomes the bottom of the cake (which is the top when inverted!). Made from butter, brown sugar, and flour, this layer adds a textural contrast that provides a satisfying crunch against the soft cake and juicy pineapple, making every bite a delightful experience.
Mastering the Ingredients: A Detailed Overview
Crafting the perfect Pineapple Upside Down Cake begins with understanding each ingredient’s role. Below is a detailed look at the key components for this recipe. For precise measurements and comprehensive instructions, please refer to the full recipe card at the bottom of this post.
- Pineapple: You have the option to use either a fresh, ripe pineapple or convenient canned pineapple rings. If opting for fresh, choose a pineapple that is more yellow than green and smells sweet at the base (a good sign of ripeness!). For either fresh or canned, I recommend cutting the rings into quarters. This allows you to arrange more pieces creatively in the pan, ensuring more pineapple in every bite.
- All-Purpose Flour: The foundation of our cake’s structure. For the most accurate results and a perfectly tender cake, always spoon and level your flour into the measuring cup. Alternatively, using a kitchen scale for precise weight measurement is highly recommended, as scooping directly can compact the flour and lead to an overly dense cake.
- Eggs: Large, room-temperature eggs are crucial. They emulsify better with the other ingredients, creating a smoother, more uniform batter and contributing to the cake’s light and fluffy texture.
- Sour Cream: This is a secret weapon for moisture and tenderness. Use full-fat sour cream at room temperature. The fat content and acidity contribute significantly to the cake’s rich flavor and incredibly moist crumb.
- Milk: 2% milk is my preferred choice for baking, offering a good balance of fat and liquid. Ensure your milk is at room temperature for optimal incorporation into the batter, helping to prevent curdling and promote a smooth consistency.
- Butter: I consistently use salted butter for its enhanced flavor, which beautifully complements the sweetness of the cake. However, unsalted butter works perfectly well if that’s your preference; just add a pinch more salt to the recipe to balance the flavors. Always use softened, room-temperature butter for creaming with sugar, as this step is vital for aeration and a light cake.
- Brown Sugar (Light, Packed): Essential for both the caramelized topping and the crumb layer. Its molasses content provides a deeper flavor and contributes to the sticky, rich texture of the caramel.
- Granulated Sugar: Used in the cake batter for sweetness and structure.
- Baking Powder: Our leavening agent, responsible for giving the cake its rise and airy texture.
- Salt: A pinch of salt in both the crumb and cake layers helps to balance the sweetness and enhance all the other flavors.
- Vanilla Extract: Pure vanilla extract adds warmth and depth to the cake’s flavor profile.
- Cinnamon: A subtle hint of cinnamon in the cake batter and crumb layer adds a cozy, comforting spice that beautifully complements the pineapple.
- Maraschino Cherries: These bright red jewels add a pop of color and a touch of extra sweetness to the pineapple layer, filling in any gaps and making the cake even more visually appealing.
Recipe Substitutions & Creative Variations: Get Inspired!
While this recipe is perfect as is, it’s also incredibly versatile! Feel free to experiment with these thoughtful substitutions and exciting variations to make it your own.
- Sour Cream Alternatives: If sour cream isn’t readily available, full-fat Greek yogurt is an excellent substitute. It provides similar moisture and tang, contributing to a wonderfully tender cake. Ensure it’s at room temperature before mixing.
- Explore Other Fruits: The “upside down” cake method is fantastic with a variety of fruits. Don’t limit yourself to pineapple! Here are some other delightful ideas:
- Rhubarb Upside Down Cake: Tart rhubarb stalks create a beautiful pink topping with a lovely sweet-tart flavor contrast.
- Apple Upside Down Cake: Thinly sliced apples, spiced with cinnamon and nutmeg, bake down into a comforting, autumnal topping.
- Peach Cobbler Upside Down Cake: Sweet, juicy peaches create a tender, summery topping, perhaps with a hint of ginger or cardamom.
- Blood Orange Upside Down Cake: Stunningly beautiful and wonderfully fragrant, blood oranges offer a sophisticated citrusy twist.
- Other Ideas: Consider sliced pears, plums, or even berries arranged artfully on the bottom of the pan for unique flavor combinations.
Step-by-Step: Crafting Your Perfect Pineapple Upside Down Cake
Follow these detailed steps to create a show-stopping Pineapple Upside Down Cake that will be the talk of the table.
Step 1: Make the Crumb Mixture
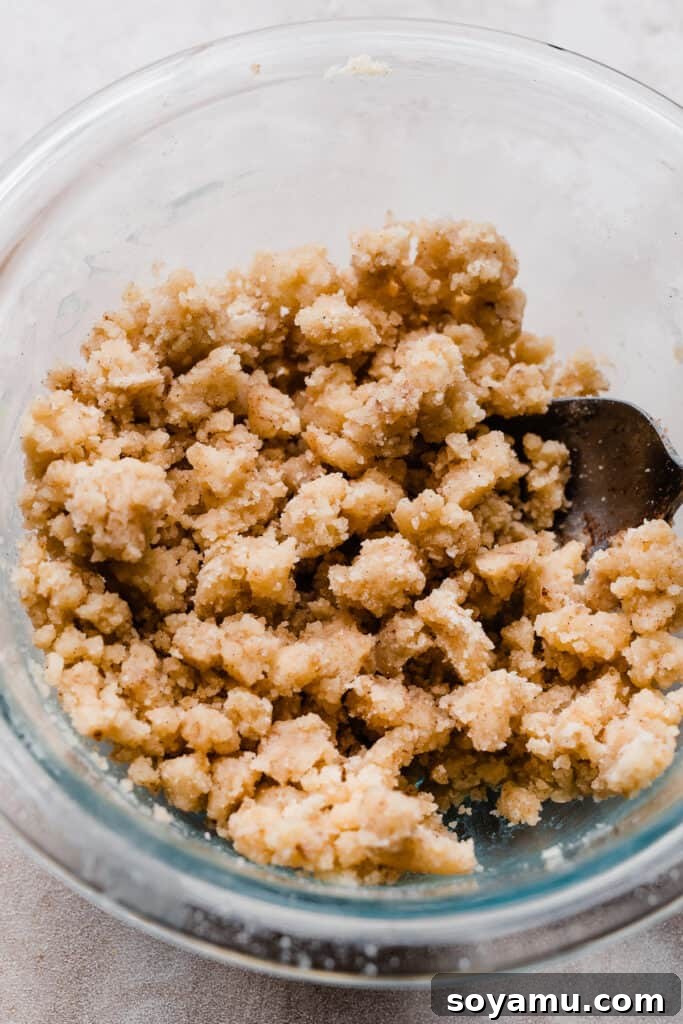
In a small bowl, combine the melted butter, all-purpose flour, light brown sugar, raw turbinado sugar (if using), a pinch of salt, and a pinch of cinnamon. Stir these ingredients together until a crumbly mixture forms. The turbinado sugar is optional but adds a lovely extra crunch and shimmer. Set this mixture aside for later.
Step 2: Prep the Pineapple Layer
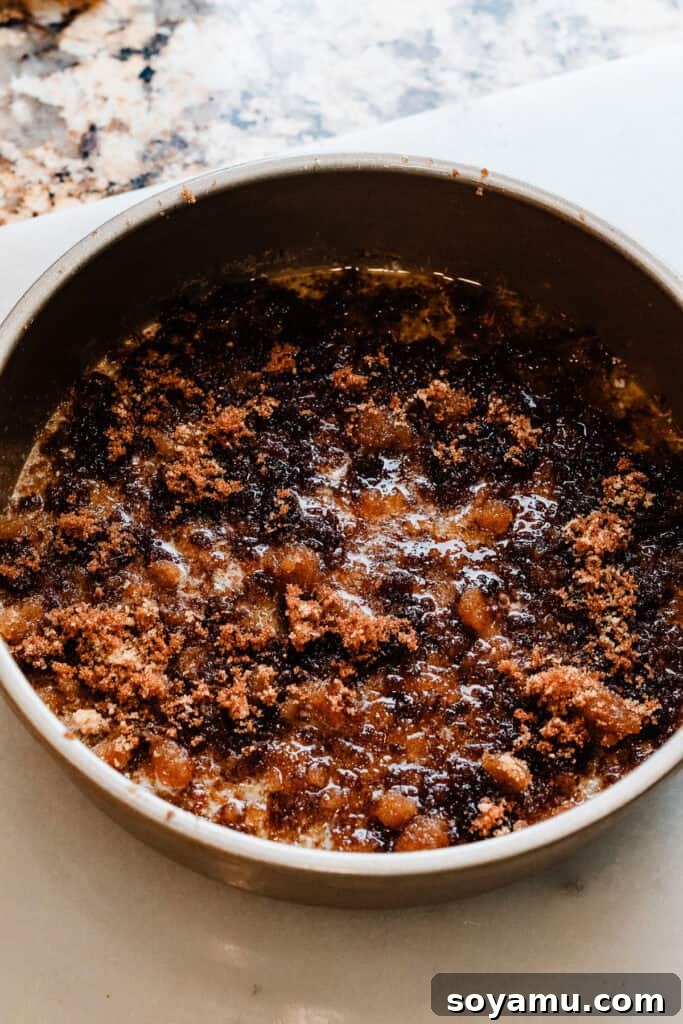
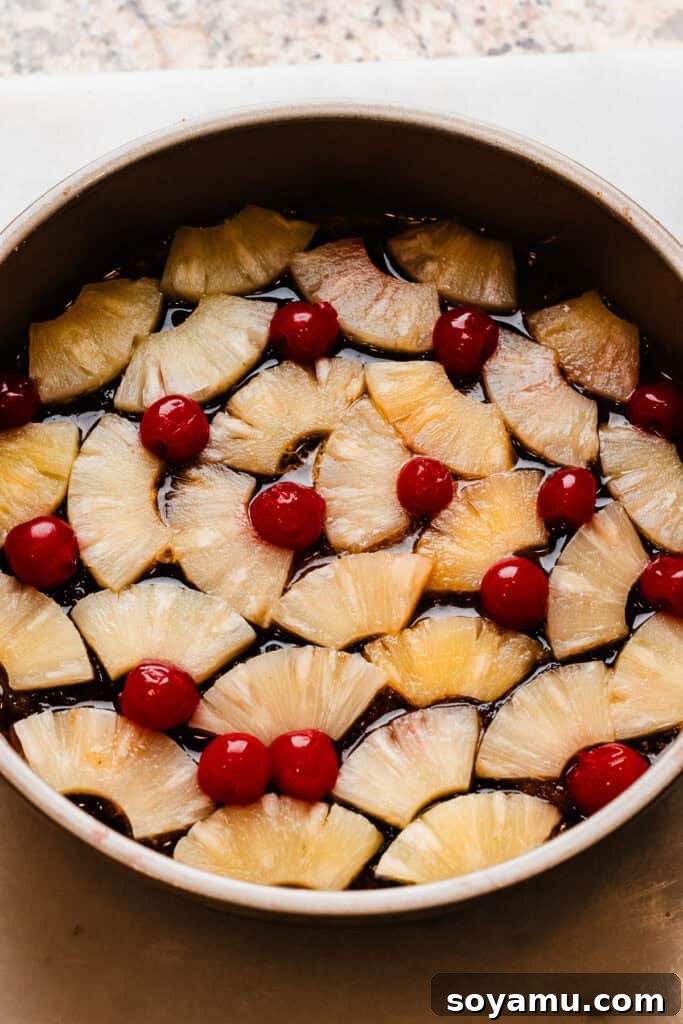
First, preheat your oven to 350°F (175°C). Generously butter a 9-inch round cake pan, ensuring every surface is covered. For extra insurance against sticking, a light spray with nonstick baking spray is also a good idea. Place 4 tablespoons of butter in the bottom of your prepared cake pan and pop it into the warm oven for 1-2 minutes, just long enough for the butter to melt completely. Carefully remove the pan from the oven. Evenly sprinkle 1/2 cup of packed light brown sugar over the melted butter. Arrange your pineapple slices (quartered, if desired) in a decorative pattern over the brown sugar. Fill any gaps or the centers of the pineapple rings with bright maraschino cherries for a beautiful presentation.
Step 3: Make the Cake Batter
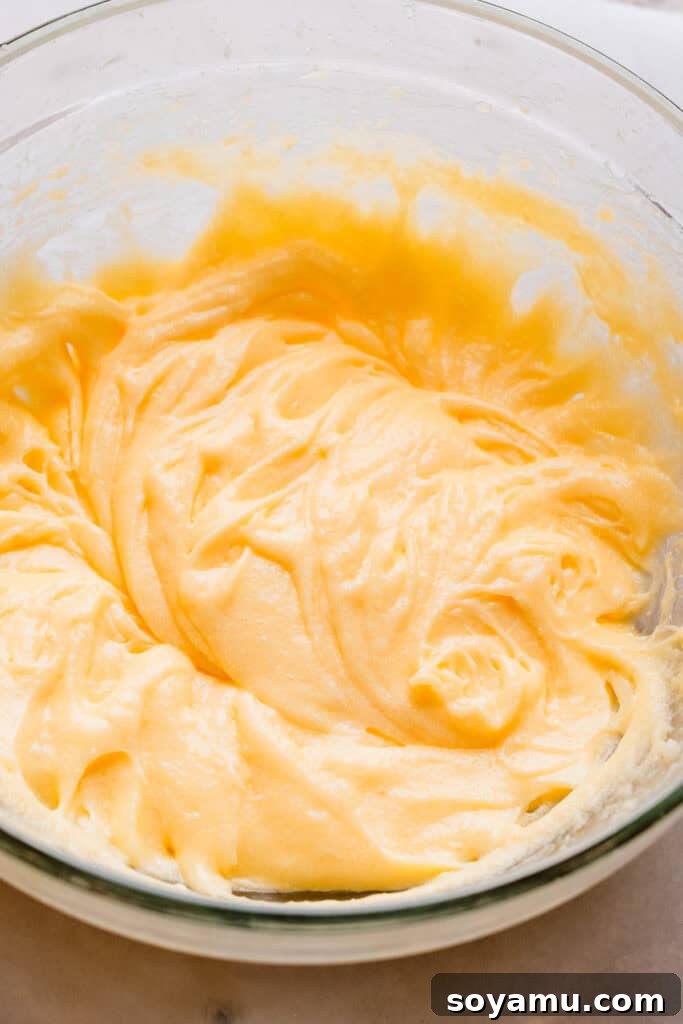
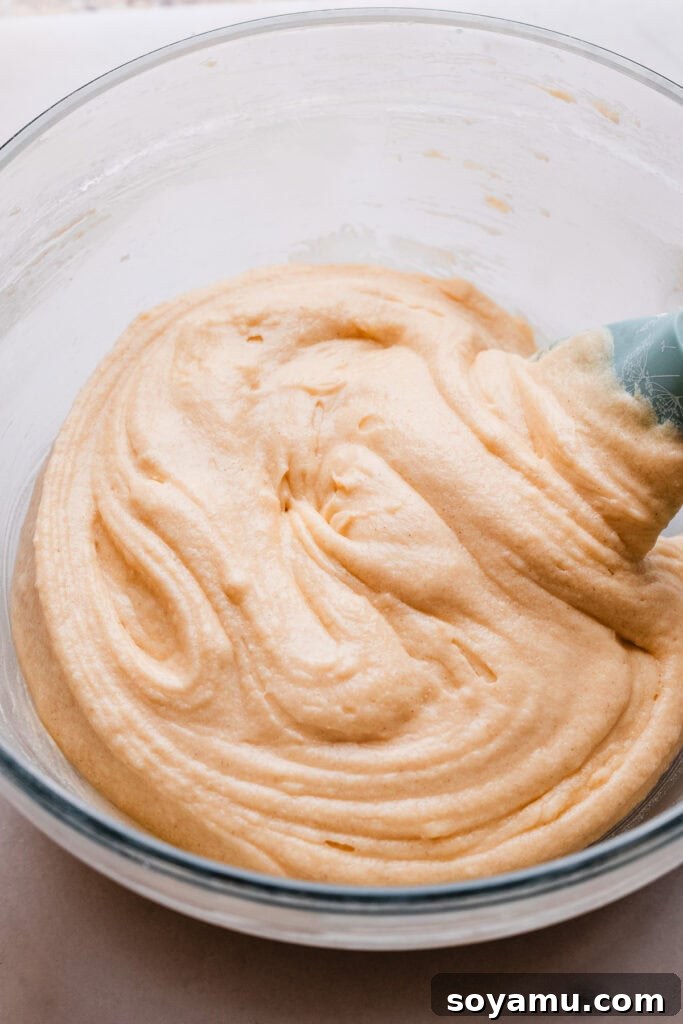
In a large mixing bowl, using an electric mixer, cream together the softened room-temperature salted butter for about 30 seconds until smooth. Add the granulated sugar and beat on high speed for about one minute until the mixture is light and fluffy. This step is crucial for incorporating air into the batter. Next, beat in the two large, room-temperature eggs one at a time, mixing on medium-high speed for about 45 seconds after each addition, until well combined and the batter appears smooth and homogenous. Scrape down the sides of the bowl as needed. Mix in the room-temperature full-fat sour cream and vanilla extract until just combined and smooth. In a separate bowl, whisk together the all-purpose flour (spooned and leveled), baking powder, and salt. Gradually add the dry ingredients to the wet ingredients on low speed. Mix until a few streaks of flour still remain. Pour in the room-temperature milk and continue mixing on low speed until just combined. Be careful not to overmix, as this can lead to a tough cake.
Step 4: Bake to Perfection and Invert
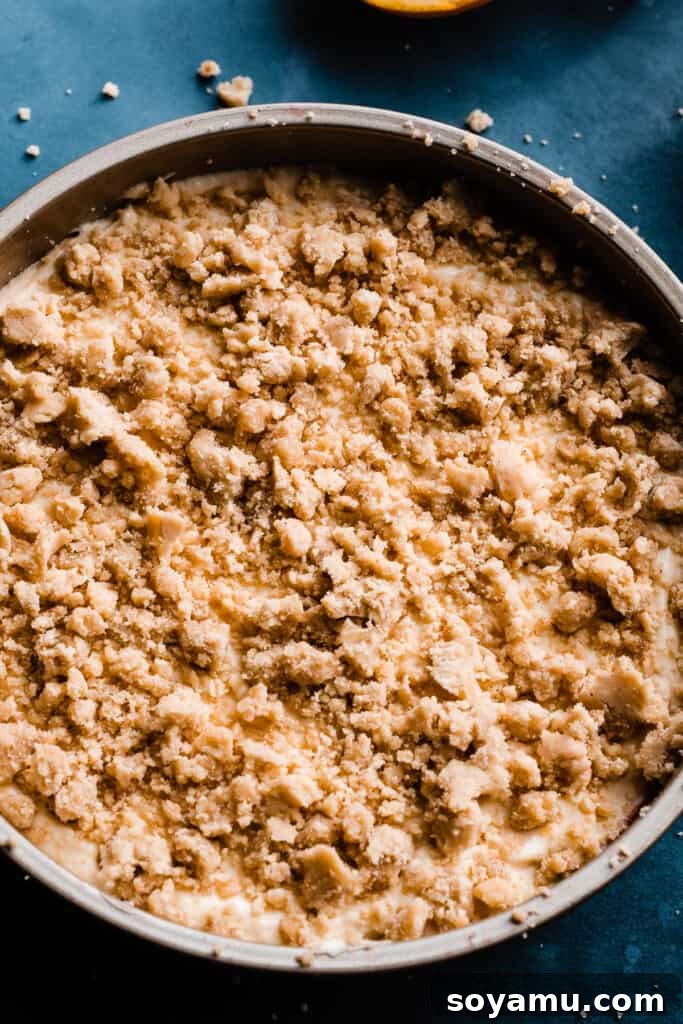
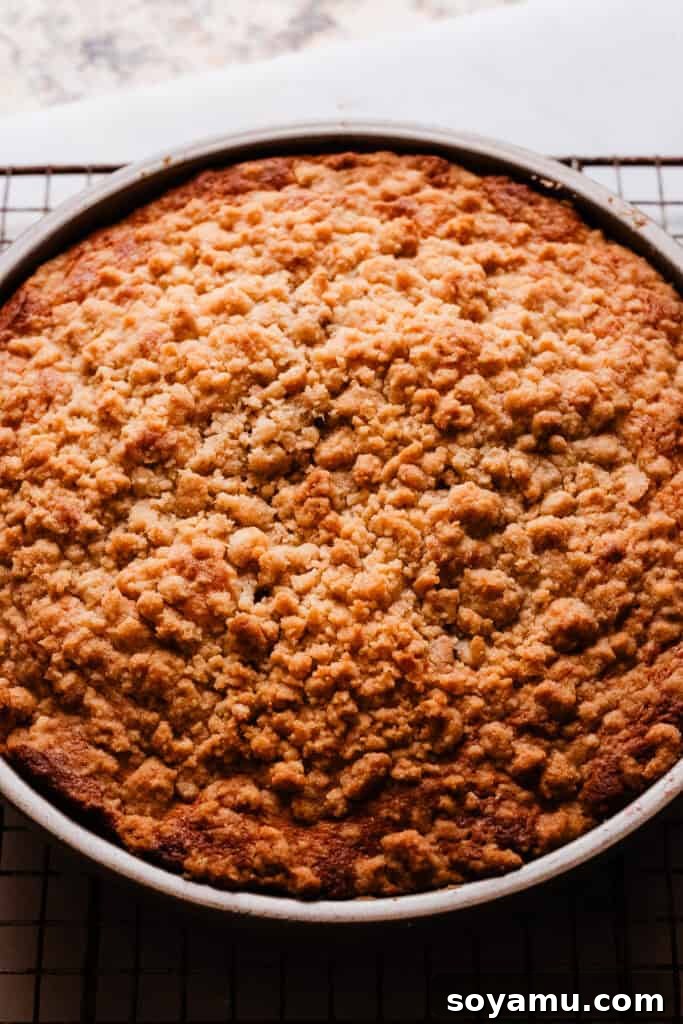
Carefully pour the prepared cake batter evenly over the pineapple layer in the cake pan, gently spreading it to the edges. Then, evenly sprinkle the reserved crumb mixture over the top of the batter. Place the cake pan in the preheated oven and bake for 45-52 minutes. The cake is done when a toothpick inserted into the center comes out with moist crumbs attached, but no wet batter. Once baked, remove the cake from the oven and let it cool in the pan on a wire rack for exactly 10 minutes. This cooling period is critical as it allows the caramel to set slightly but remain fluid enough to release. After 10 minutes, run a thin knife around the edge of the pan to loosen the cake. Place your serving plate (or a cooling rack) upside down over the cake pan, then carefully and confidently invert the cake onto the plate. If any fruit pieces stick to the pan, gently place them back onto the cake. Let the cake cool for as long as you like before slicing and serving. You can speed up the cooling by placing it, uncovered, in the fridge for about 20 minutes if you prefer it cooler. Serve warm or at room temperature.
Serving Suggestions and Storage Tips
Serving this Pineapple Upside Down Cake is almost as delightful as baking it! You can serve slices while the cake is still warm, allowing the warm caramel to melt slightly in your mouth, or wait until it cools to room temperature. Both are delicious!
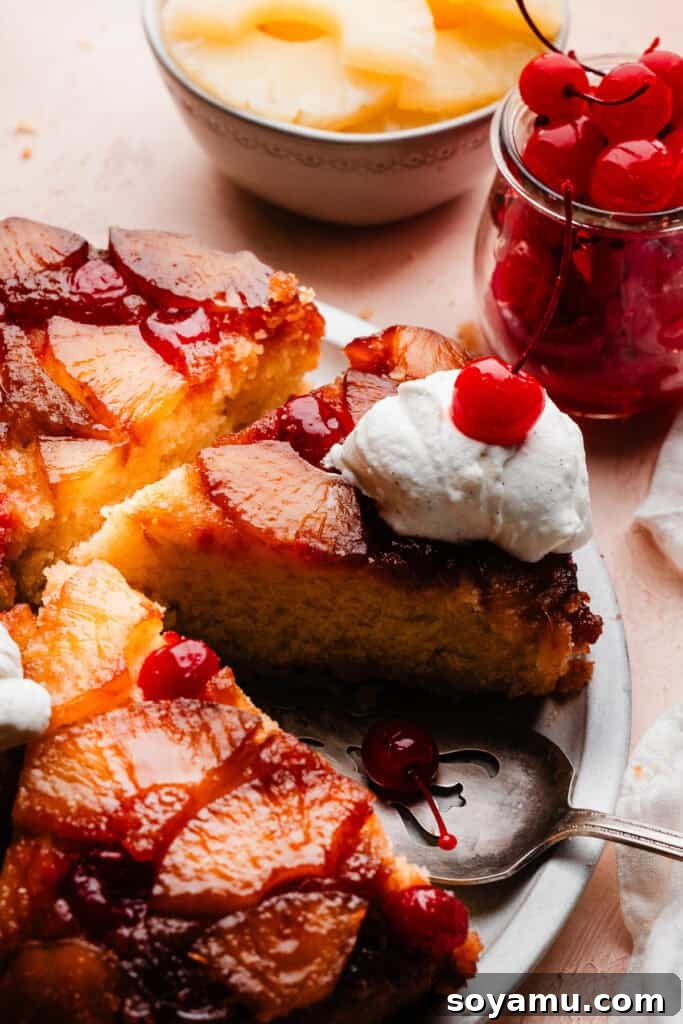
For an extra touch of indulgence, serve each slice with a generous dollop of easy homemade whipped cream. Its light, airy texture and subtle sweetness perfectly complement the rich cake and tangy pineapple. A single maraschino cherry on top of the whipped cream adds a final flourish of color and classic charm.
To store any leftovers, allow the cake to cool completely, then transfer it to an airtight container. It will keep beautifully in the refrigerator for 3-4 days. For the best flavor and texture, let individual slices come to room temperature for about 20-30 minutes before enjoying. You can also gently warm a slice in the microwave for a few seconds if you prefer it warm.
Pro Baker Secrets for Success
Achieving baking perfection often comes down to a few key techniques and tools. Incorporate these expert tips into your routine for consistently excellent results with this Pineapple Upside Down Cake and all your future baking endeavors.
- Invest in an Oven Thermometer: Many home ovens are not calibrated accurately, meaning the temperature you set might not be the actual temperature inside. An oven thermometer is an inexpensive tool that provides an accurate reading, ensuring your cakes bake evenly and don’t get over or undercooked. Consistent oven temperature is absolutely crucial for proper rise and texture.
- Embrace the Kitchen Scale: For truly consistent and professional-level baking, a food scale is a game-changer. Measuring dry ingredients, especially flour, by weight (grams) is far more accurate than by volume (cups). The amount of flour in a cup can vary significantly depending on how it’s scooped and whether it’s sifted. Using a scale guarantees you’re adding the precise amount, preventing a dense or dry cake.
- Room Temperature Ingredients are Non-Negotiable: This tip applies to butter, eggs, milk, and sour cream. Room temperature ingredients emulsify much better, meaning they blend together smoothly and evenly, creating a uniform batter. This leads to a finer crumb, a more tender texture, and a more stable cake structure. Plan ahead by taking them out of the fridge at least 30-60 minutes before you start baking.
- Don’t Overmix the Batter: Once you add the flour to your wet ingredients, mix only until just combined. Overmixing develops the gluten in the flour, which can lead to a tough, chewy cake. A few small streaks of flour are acceptable; they will disappear during baking.
Frequently Asked Questions (FAQs)
Here are answers to some common questions about making and enjoying Pineapple Upside Down Cake:
Yes, with some adjustments! If you wish to halve the recipe, you can bake it in a 6-inch round cake pan. Keep in mind that baking times may need slight adjustment, so start checking for doneness a bit earlier. For doubling the recipe, a 9×13 inch rectangular baking pan works wonderfully. When doubling, begin checking for doneness about 10 minutes earlier than the original recipe’s bake time, and add more time as needed until a toothpick inserted into the center comes out clean or with moist crumbs.
Thorough pan preparation is key! Make sure to butter the cake pan very generously, getting into all the crevices. Adding a light layer of nonstick baking spray (with flour) after buttering offers extra insurance. Also, cooling the cake in the pan for exactly 10 minutes after baking is crucial. This allows the caramel to set enough to hold the fruit but remain warm and fluid enough to release cleanly from the pan when inverted. Don’t cool for too long, or the caramel might harden and stick.
While fresh or canned pineapple rings are recommended for their texture and ease of arrangement, you could technically use frozen pineapple. However, be sure to thaw it completely and drain any excess liquid very thoroughly before arranging it in the pan. Frozen pineapple can release a lot of moisture, which might make your caramel layer watery or affect the cake’s texture.
Absolutely! Pineapple Upside Down Cake is an excellent make-ahead dessert. You can bake the entire cake a day in advance. Once cooled, store it in an airtight container at room temperature or in the refrigerator. The flavors often deepen overnight. Just add the fresh whipped cream and cherries right before serving.
Yes, this cake freezes well. Allow the cake to cool completely, then wrap it tightly in plastic wrap, followed by a layer of aluminum foil. You can freeze the whole cake or individual slices for up to 2-3 months. To thaw, unwrap the cake and let it come to room temperature on the counter for several hours, or overnight in the refrigerator.
Recommended Kitchen Tools for Effortless Baking
Having the right tools can make all the difference in your baking experience, especially for a recipe like Pineapple Upside Down Cake.
- Pineapple Corer: If you love using fresh pineapple, a pineapple corer is a single-use kitchen tool that truly earns its space. It makes peeling, coring, and slicing a whole pineapple incredibly quick and simple, turning a potentially messy task into a breeze.
- 9-inch Round Cake Pan: Essential for achieving the classic shape of this cake. A sturdy, light-colored pan will ensure even baking.
- Electric Mixer (Stand or Handheld): Perfect for creaming butter and sugar, and mixing the batter to the ideal consistency, ensuring a light and airy cake.
- Large Mixing Bowls: You’ll need at least two – one for the wet ingredients and one for the dry, plus a small one for the crumb mixture.
- Whisk and Rubber Spatula: A whisk is great for combining dry ingredients, and a good rubber spatula is invaluable for scraping down the bowl and gently folding in ingredients without overmixing.
More Tropical Delights to Explore
If you’re a fan of pineapple’s sweet and tangy flavor, you’ll adore these other delightful recipes:
- Piña Colada Cake: A truly tropical escape in cake form, featuring pineapple, coconut, and rum flavors.
- Frozen Piña Coladas: The ultimate refreshing drink, perfect for a hot day or when you dream of a beach vacation.
- Pineapple Carrot Cake: A moist and flavorful carrot cake with the added sweetness and texture of crushed pineapple, topped with a luscious cream cheese frosting.
- Pineapple Upside Down Cheesecake: A decadent fusion of creamy cheesecake and the classic caramelized pineapple topping.
Bake Along with Me!
Watch a step-by-step video guide on how to create this delicious Pineapple Upside Down Cake and see all the tips and tricks in action!
A video tutorial for making Pineapple Upside Down Cake will be embedded here soon!
Did you make this recipe? We’d love to hear from you!
Please share your experience and leave a star rating in the recipe card below. Your feedback is incredibly valuable and helps our small business grow immensely! Thank you for baking with us!

No ratings yet. Be the first to rate this recipe!
Pineapple Upside Down Cake
Stephanie Simmons
Pineapple Upside Down Cake is bursting with fresh flavor! A caramelized layer of pineapple sits on top of a tender, moist vanilla cake. The surprise crumb layer on the bottom adds the perfect hint of crunch! Add fresh whipped cream and cherries for a polished finish.
25 mins
48 mins
1 hr
13 mins
8 slices
Save
Pin
Rate
Ingredients
Crumb Layer
- 1/4 cup salted butter, melted (56 grams)
- 1/2 cup + 1 tbsp all-purpose flour (73 grams)
- 1/4 cup light brown sugar, packed (58 grams)
- 2 tsp raw turbinado sugar (optional, but gives a nice little crunch!)
- pinch of salt
- pinch of cinnamon
Pineapple Layer
- 4 tbsp salted butter + additional for greasing pan (56 grams + additional)
- 1 large ripe pineapple (See notes below for canned alternative)
- 1/2 cup light brown sugar, packed (110 grams)
- 1 jar maraschino cherries
Cake
- 1/2 cup salted butter, softened at room temperature (113 grams)
- 1 cup + 2 tbsp granulated sugar (240 grams)
- 2 large eggs, at room temperature
- 1 tsp vanilla extract
- 1/2 cup full fat sour cream, at room temperature (120 grams)
- 1 and 1/2 cups + 2 tbsp all-purpose flour, spooned & leveled (211 grams)
- 1 and 1/2 tsp baking powder
- 1/4 tsp salt
- 1/2 tsp cinnamon
- 1/4 cup milk, at room temperature (I used 2%, 60 mL)
Whipped Cream
- 2 tbsp powdered sugar
- 1 and 1/2 tsp vanilla extract
- 1/2 cup heavy cream
Instructions
-
Prep: Preheat oven to 350℉ (175°C). Butter a 9-inch cake pan very well, then give it a little spray with nonstick baking spray too. If using a whole pineapple, slice it into rings, then quarter the rings. Or, use canned pineapple rings and quarter those.
-
Make the Crumb Topping: In a small bowl, melt the butter. Stir in the remaining crumb ingredients (flour, brown sugar, turbinado sugar, salt, cinnamon) until a crumbly mixture forms. Set aside.
-
Make the Pineapple Layer: Add 4 tbsp of butter to the prepared pan and pop it in the warm oven to melt (this only takes 1-2 minutes). Once the butter is melted, sprinkle the 1/2 cup brown sugar evenly over the top. Layer on the pineapple pieces and fill in any gaps with maraschino cherries.
-
Make the Cake Batter: Cream softened butter in a large mixing bowl for 30 seconds. Add the granulated sugar and mix on high for one minute, until creamed together and fluffy. Mix in the eggs on medium-high speed for 45 seconds or so, beating until well combined and the batter is smooth. Mix in the sour cream and vanilla until just combined and smooth. In a separate bowl, whisk together the flour, baking powder, salt, and cinnamon. Mix the dry ingredients into the wet on low speed. When a few streaks of flour remain, pour in the milk and finish mixing on low speed until just combined. Do not overmix.
-
Bake: Pour batter over the pineapple layer, spreading it evenly. Sprinkle the crumb mixture evenly over the batter. Bake for 45-52 minutes, or until a toothpick inserted into the center of the cake comes out with moist crumbs, but not wet batter. Let the cake cool in the pan for 10 minutes. Then, run a knife around the edge to loosen, and invert the cake onto your serving plate. If any pieces of fruit get stuck in the pan, just gently place them back in their spot on the cake. Let cake cool as much as you like before cutting and serving. You can speed this up by moving it, uncovered, to the fridge for about 20 minutes.
-
Whipped Cream: Make the whipped cream according to my easy homemade whipped cream recipe (powdered sugar, vanilla, heavy cream). Make this just before serving the cake.
-
Serve & Store: Serve with whipped cream and cherries on top! Store leftovers in an airtight container in the fridge for 2-3 days.
Notes
Pineapple Selection: For the best results, use one can of pineapple rings, drained thoroughly, if you can’t find a ripe fresh pineapple. A ripe fresh pineapple will typically be more yellow than green on the outside, and a good sniff at its bottom (I call it sniffing the pineapple’s butt, hah!) should reveal a distinctly sweet, fruity aroma.
Nutrition
Serving: 1 slice, Calories: 698kcal, Carbohydrates: 97g, Protein: 7g, Fat: 33g, Saturated Fat: 20g, Polyunsaturated Fat: 2g, Monounsaturated Fat: 9g, Trans Fat: 1g, Cholesterol: 134mg, Sodium: 372mg, Potassium: 259mg, Fiber: 3g, Sugar: 68g, Vitamin A: 1170IU, Vitamin C: 54mg, Calcium: 141mg, Iron: 2mg
Nutrition information is automatically calculated, so should only be used as an approximation.
Like this? Leave a comment below!
Your feedback helps us create more delicious recipes.