
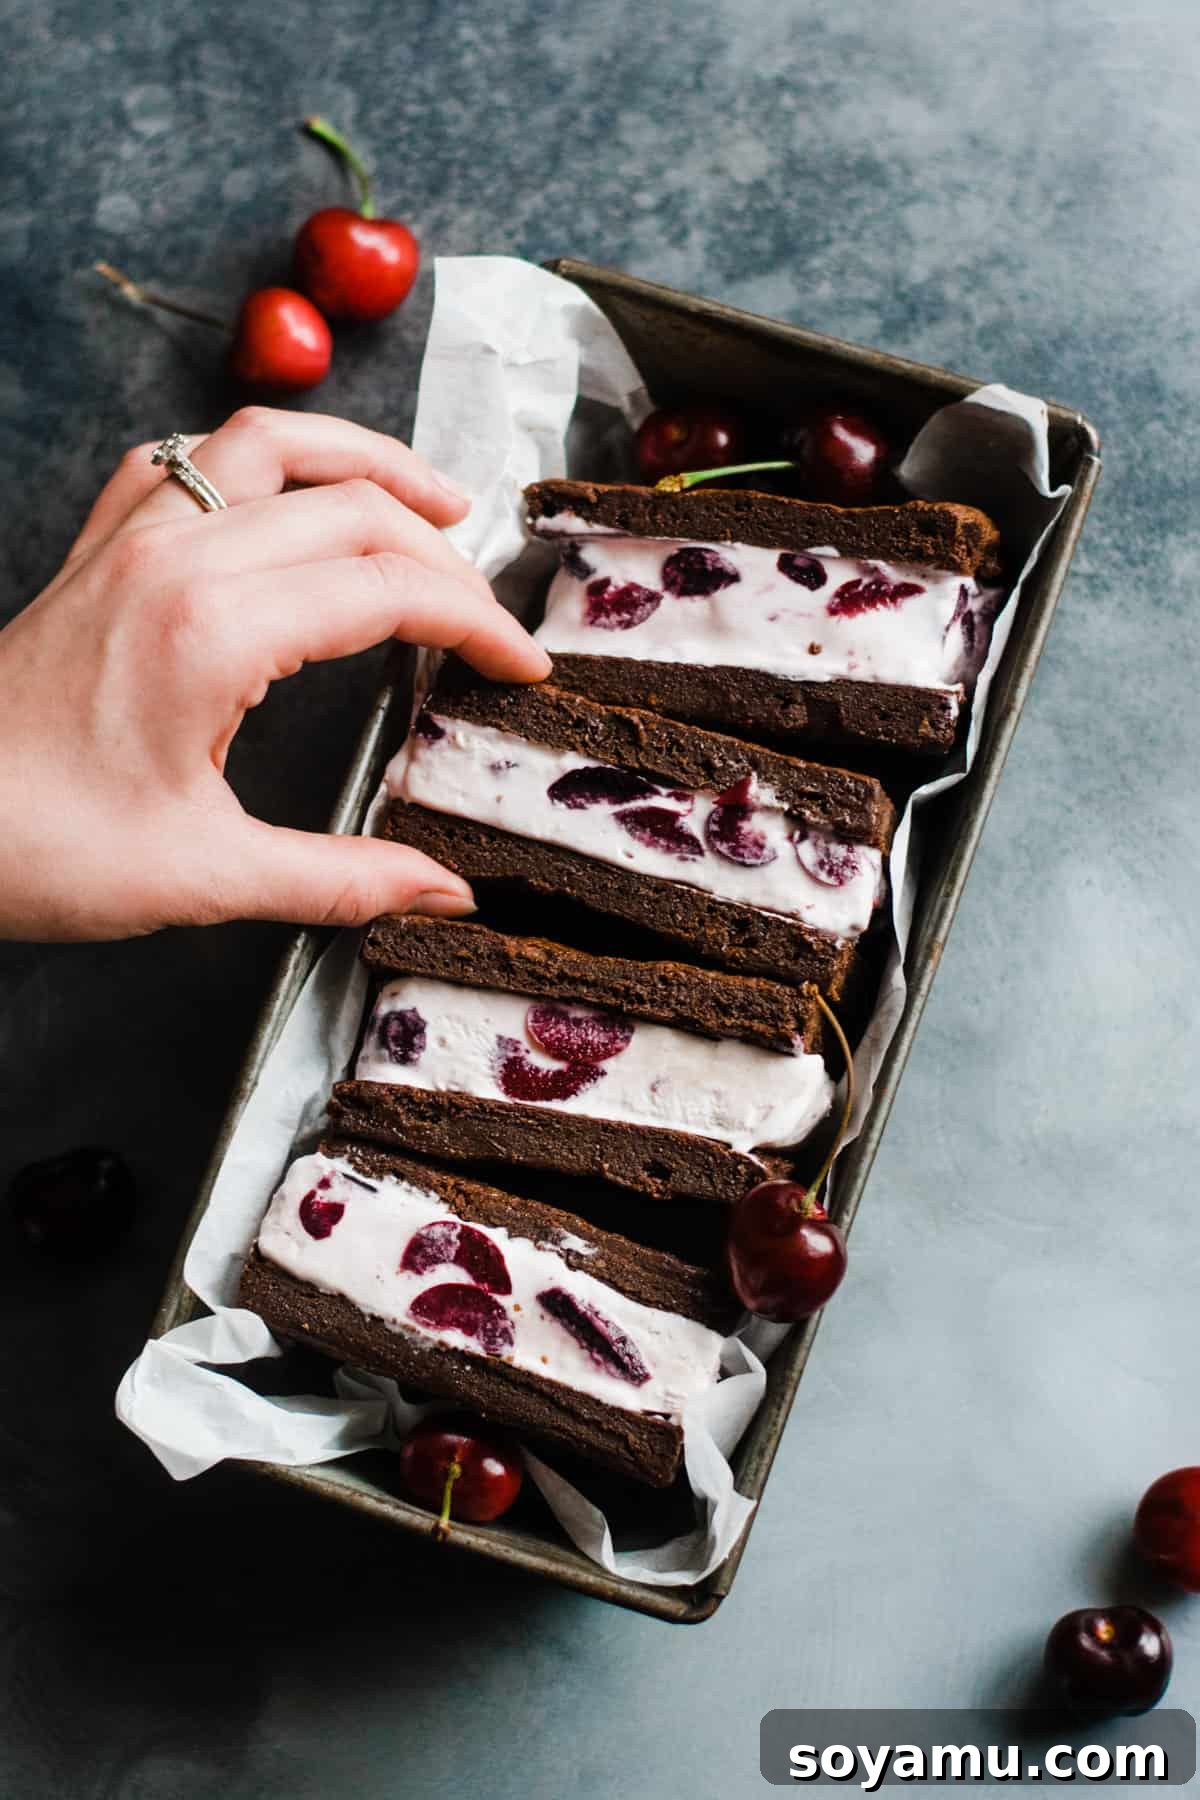
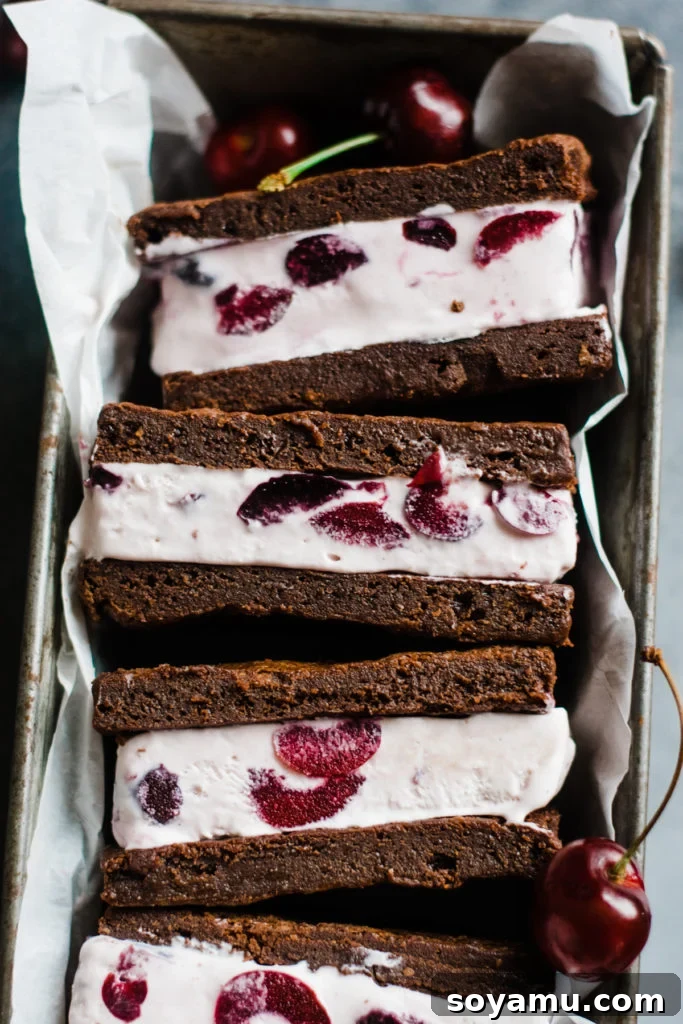
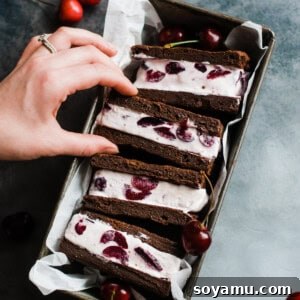
Prepare for your taste buds to sing! These homemade **Black Forest Ice Cream Sandwiches** are the quintessential summer indulgence you’ve been dreaming of. Imagine two layers of intensely rich, fudgy chocolate brownies embracing a thick, creamy slab of simple no-churn cherry ice cream, bursting with the vibrant flavor of real cherries. It’s a nostalgic treat elevated to gourmet status, perfect for cooling down on a hot day or celebrating any special occasion.
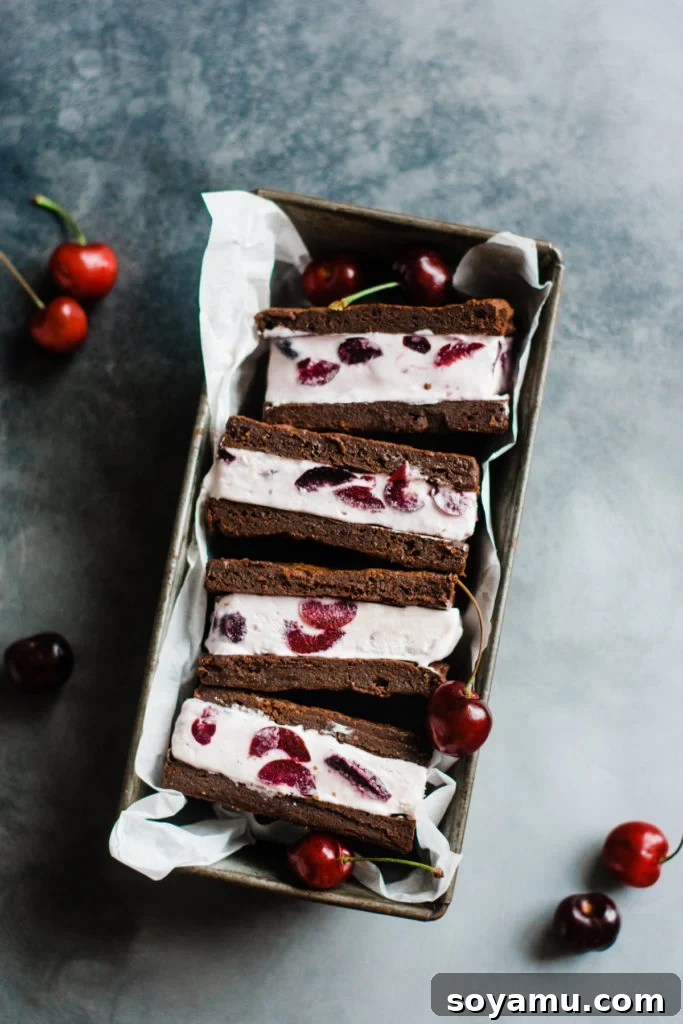
When summer arrives, there’s one dessert that reigns supreme: ice cream. Its cool, refreshing nature, combined with an endless array of flavors, makes it an undeniable favorite. For many, the classic pairing of chocolate and cherry holds a special place, evoking memories of delectable Black Forest cakes. We’ve taken that beloved flavor profile and transformed it into a handheld, freezer-friendly delight that promises pure bliss with every bite.
While traditional Black Forest Cake often includes a hint of liquor and a generous topping of whipped cream, we’ve thoughtfully adapted this recipe for a wider audience. Whipped cream, though delicious, would undoubtedly make for a rather messy ice cream sandwich. More importantly, we aimed to create a treat that everyone could enjoy, including children. Alcohol, while adding depth to some desserts, also significantly lowers the freezing point of ice cream, making it melt much faster—a definite challenge when assembling and enjoying frozen sandwiches!
If you’re keen to infuse a touch of that classic Black Forest spirit for an adult version, you can certainly add a tablespoon or two of cherry liqueur or Kirsch to your brownie batter. The alcohol will bake out during the oven process, leaving behind a subtle, sophisticated hint of flavor that is perfectly kid-safe. However, for the ice cream itself, we recommend sticking to our alcohol-free method to ensure optimal texture and enjoyment.
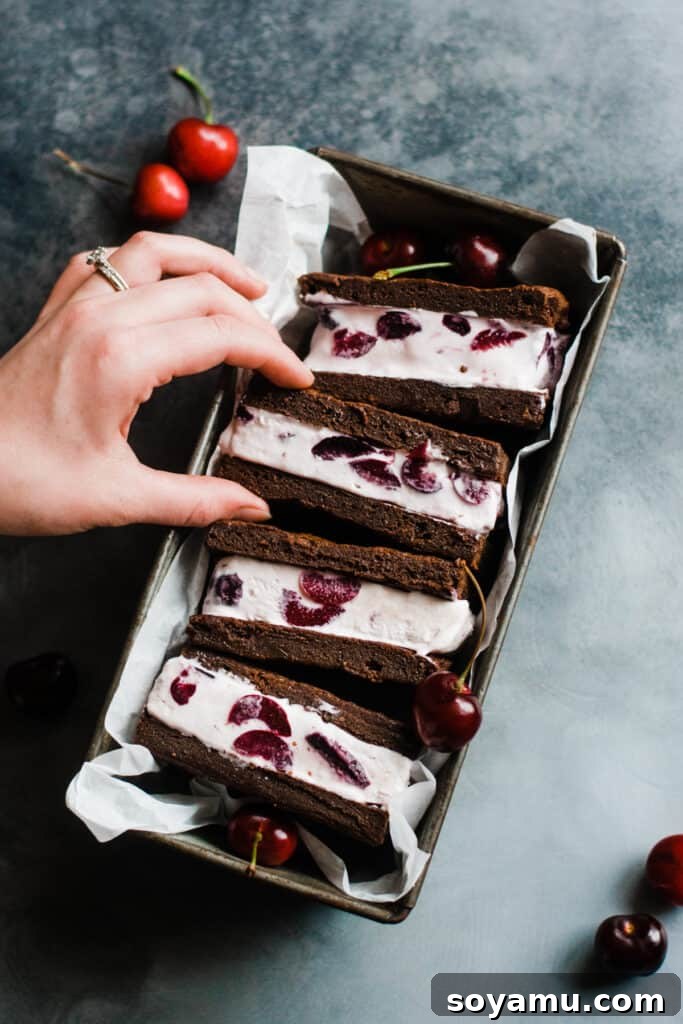
Crafting Your Own Black Forest Ice Cream Sandwiches: A Detailed Guide
Creating these spectacular ice cream sandwiches might seem like a multi-step process, but fear not! We’ll break it down into manageable, easy-to-follow stages. By tackling each component individually, you’ll find the entire process enjoyable and rewarding, even if you’re new to making homemade frozen desserts. Let’s dive into the delicious details.
1. The Luscious No-Churn Cherry Ice Cream Base
Before we even begin whipping up the ice cream base, the secret to its intense cherry flavor lies in a vibrant, homemade cherry compote. This step is crucial for infusing real fruit essence and delightful texture into your frozen treat. You’ll gently cook fresh cherries with a touch of sugar and a hint of almond extract, thickening it slightly with a cornstarch slurry. This process concentrates their natural sweetness and creates a beautiful, jam-like consistency that will be marbled throughout your ice cream. Prepare this first and allow it to cool completely in the refrigerator while you move on to the next steps. A well-chilled compote is key to preventing premature melting when mixed into the ice cream base.
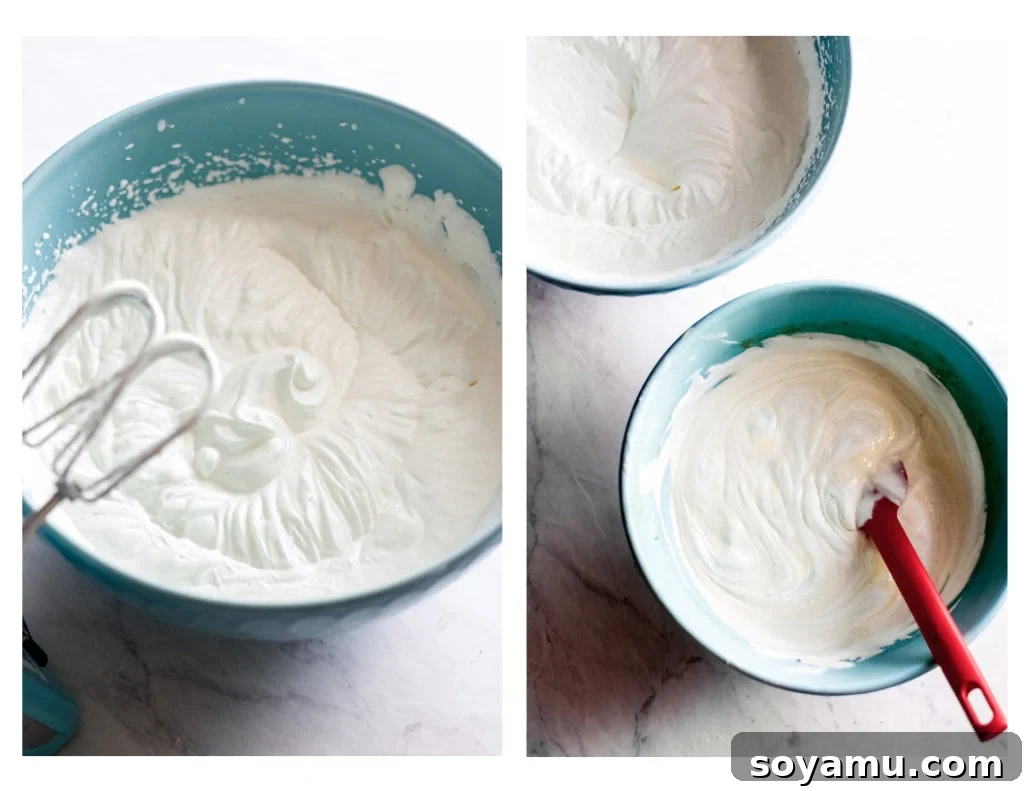
Now, onto the truly magical no-churn ice cream base! The beauty of a no-churn recipe is its simplicity – no fancy ice cream maker required, just a few key ingredients and a good mixer. The core of this creamy confection is whipped heavy cream combined with sweetened condensed milk. You’ll start by vigorously whipping very cold heavy cream until it forms stiff, ethereal peaks. This aeration is what gives no-churn ice cream its light, airy texture without the need for churning.
Next, a portion of this airy whipped cream is gently folded into sweetened condensed milk, along with a dash of vanilla. This initial mixing helps to lighten the condensed milk, making it easier to incorporate into the remaining whipped cream without deflating it. The final step involves carefully folding this sweetened condensed milk mixture back into the rest of the whipped cream, preserving as much air as possible. The goal is a light, cloud-like base that will become incredibly creamy once frozen.
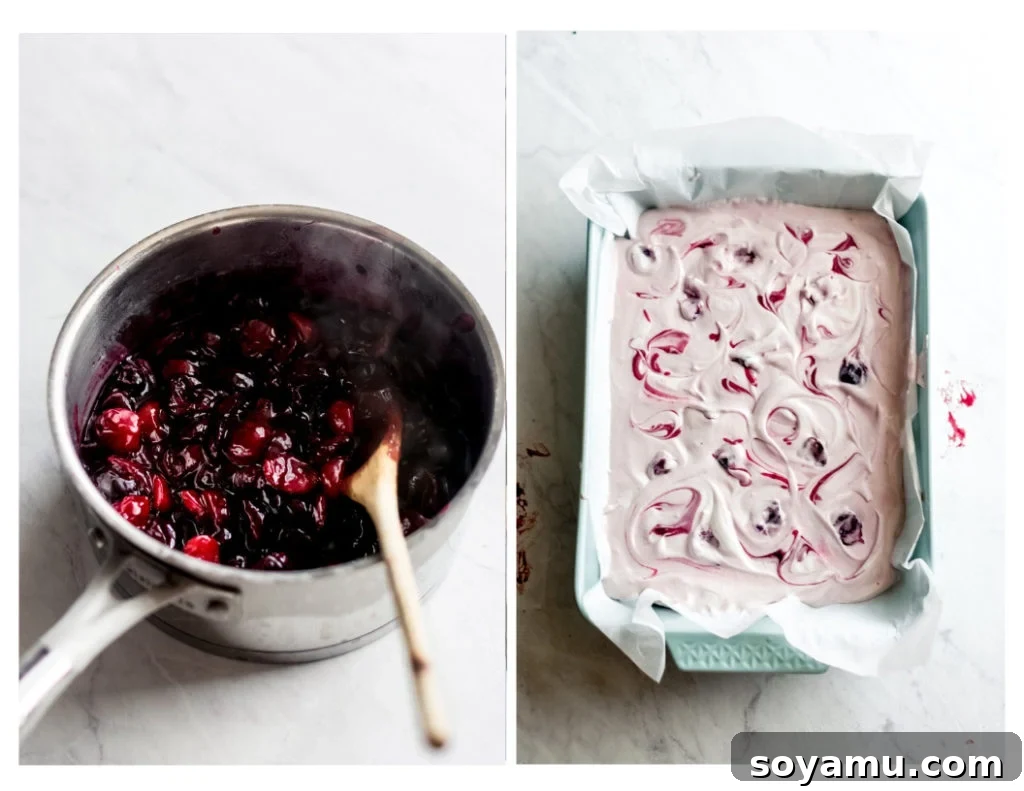
Once your no-churn ice cream base is complete, and your cherry compote is perfectly chilled, it’s time to bring them together. Gently fold the cooled cherry mixture into your prepared ice cream base, creating beautiful swirls of red and white. Line a 9×13 inch pan with parchment paper, leaving an overhang on the sides – this thoughtful detail will make removing your frozen ice cream block significantly easier later on. Pour the cherry ice cream mixture into the prepared pan, smooth the top, and cover it tightly with foil or plastic wrap. Into the freezer it goes for at least 8 hours, or ideally overnight, to set up firm and delicious.
2. The Perfect Fudgy Chocolate Brownie Layers
While your homemade cherry ice cream is chilling, you’ll turn your attention to the foundation of these sandwiches: the rich, fudgy chocolate brownies. These aren’t just any brownies; they’re designed to be dense, moist, and intensely chocolatey, providing the perfect contrast to the creamy ice cream. The recipe calls for two full pans of brownies, ensuring you have plenty of robust “bread” for your ice cream sandwich creation.
Preheat your oven and prepare two 9×13 inch pans with parchment paper, again with an overhang for easy removal. The brownie batter comes together easily by melting quality chocolate and butter, then whisking in sugars, eggs, and vanilla, followed by flour, cocoa powder, and salt. The batter will be gloriously thick and rich. Divide it evenly between the two prepared pans and bake until they’re just set with moist crumbs. Avoid overbaking, as this will prevent them from achieving that signature fudgy texture essential for a great ice cream sandwich.
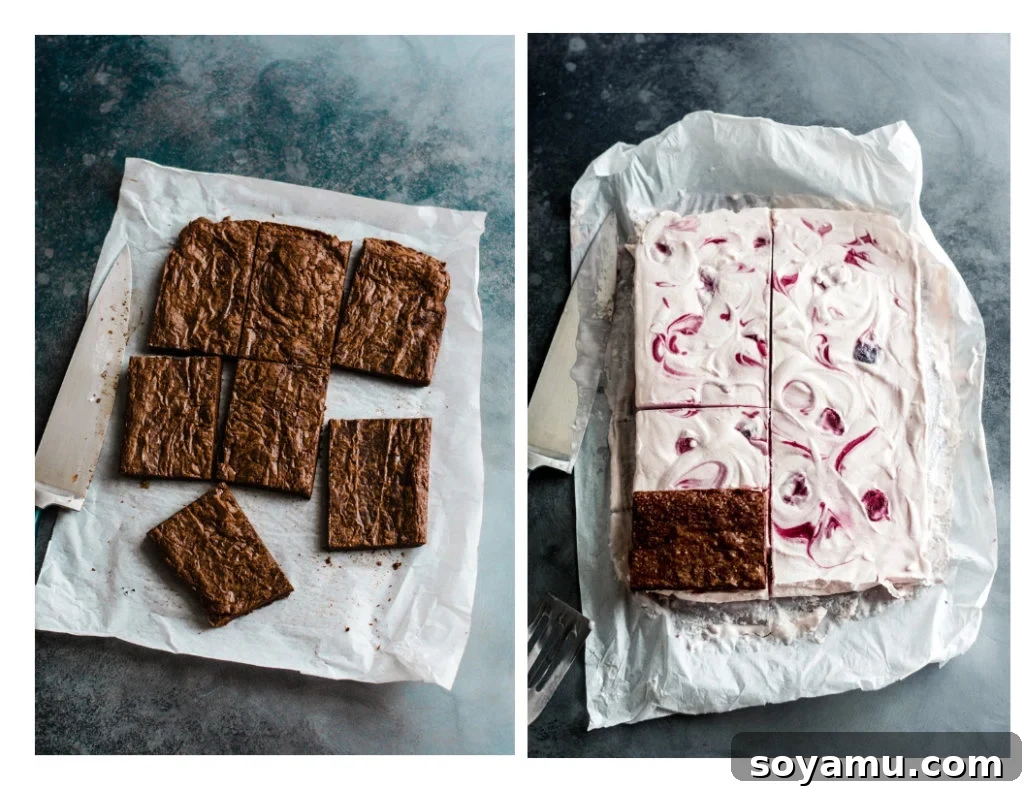
Once baked, allow the brownies to cool completely at room temperature. This is a critical step. Warm brownies will simply melt your ice cream. After they’ve cooled, cover them tightly and transfer them to the refrigerator for at least a few hours. Chilling the brownies makes them firm enough to handle, cut cleanly, and ultimately hold their shape when sandwiched with the frozen ice cream. Attempting to assemble with soft brownies will lead to a gooey, frustrating mess.
3. Assembling Your Black Forest Masterpieces
The moment of truth! Once your ice cream is thoroughly frozen and your brownies are perfectly chilled, it’s time for assembly. This part requires a bit of speed and precision to keep everything frozen solid. First, retrieve your brownies from the fridge and slice each 9×13 inch pan into 9 equal squares or rectangles. A ruler can be your best friend here if you, like many, struggle with perfectly even cuts!
Next, carefully lift the frozen cherry ice cream block out of its pan using the parchment paper overhang. On a clean cutting surface, slice the ice cream into 9 equal blocks, matching the dimensions of your brownie pieces. Work quickly here to minimize melting. Lay one brownie piece flat, place an ice cream block on top, and then gently cap it with a second brownie piece. Use a cookie flipper or spatula to handle the delicate sandwiches, transferring each completed treat onto a sheet pan. Immediately place the sheet pan back into the freezer to allow the sandwiches to firm up for another 30 minutes to an hour. This final freeze ensures they are perfectly set and ready to enjoy.
And there you have it! If you can master making a simple whipped cream and bake a batch of brownies, you are more than capable of creating these show-stopping Black Forest Ice Cream Sandwiches. The process is straightforward, and the results are incredibly rewarding.
Tips, Shortcuts, and Serving Suggestions
While we wholeheartedly encourage you to experience the full joy of making these Black Forest Ice Cream Sandwiches from scratch, we understand that sometimes time is of the essence. Here are a couple of shortcuts to make this recipe even more accessible:
- **Opt for Boxed Brownie Mix:** Instead of making the brownies from scratch, use your favorite boxed brownie mix. This significantly cuts down on prep time without sacrificing too much on flavor or texture, especially if you choose a high-quality mix. Just ensure you bake two batches to get enough layers for your sandwiches.
- **Use Store-Bought Ice Cream:** If homemade no-churn ice cream feels too daunting, a good quality store-bought cherry ice cream (or even vanilla with a swirl of cherry preserves) can be a fantastic substitute. Simply allow it to soften slightly, spread it into your parchment-lined 9×13 inch pan, refreeze, and then proceed with the assembly steps.
HOWEVER, we genuinely challenge you to try the full homemade experience at least once! There’s an unparalleled satisfaction and a superior depth of flavor that comes from crafting each component yourself. It’s an extra bit of effort that is truly worth it, and you’ll feel like a baking rockstar when you present these incredible treats!
Beyond the classic sandwich, these ingredients lend themselves beautifully to another delightful presentation: a **Black Forest Ice Cream Sundae Bar**! If you’re hosting a gathering or simply prefer a less structured dessert, slice your brownies into squares and have them ready. Freeze the homemade cherry ice cream as directed, but instead of cutting it into blocks for sandwiches, simply scoop generous portions into bowls. Set out an array of tempting toppings: warm hot fudge sauce, extra fresh cherries (perhaps macerated in a little sugar), and of course, plenty of fluffy whipped cream. It’s an interactive and equally delicious way to enjoy all the wonderful flavors of Black Forest.
Dietary Adaptations: Gluten-Free Option Available!
For those with dietary restrictions, particularly gluten sensitivities, rejoice! This recipe can be easily adapted to be completely **gluten-free**. Simply substitute the regular brownie recipe with a high-quality Fudgy Gluten Free Brownie recipe. You’ll need to double that specific GF brownie recipe and bake each batch in a 9×13 inch pan to yield enough layers for your ice cream sandwiches. The texture and flavor will be just as amazing, ensuring everyone can enjoy this fantastic summer dessert.
Perfect for Summer Celebrations, Especially the Fourth of July!
It almost goes without saying, but how absolutely perfect would these Black Forest Ice Cream Sandwiches be for a Fourth of July celebration? While they don’t feature the traditional red, white, and blue, the vibrant red of the cherries peeking through the dark chocolate brownies creates a festive and patriotic touch that’s both delicious and visually appealing. Imagine serving these at your summer barbecue or picnic – they’re guaranteed to be a crowd-plepleaser and a memorable addition to any warm-weather festivity.
Explore More Delicious Cherry Recipes
If you’ve fallen in love with the sweet and tart charm of cherries, here are a few more recipes to inspire your culinary adventures:
- **Cherry Hand Pies** – These portable, personal pies are generously filled with juicy, ripe cherries, perfect for on-the-go enjoyment or a delightful individual dessert.
- **No-Bake Cheesecake Parfaits with Boozy Cherries** – Experience one of the best no-bake desserts you’ll ever create. For a kid-friendly version, simply omit the bourbon from the cherry preparation.
- **Classic Fruit Galette** – A beautifully rustic dessert featuring a simple, flaky crust brimming with a delightful mixture of fresh blueberries and cherries.
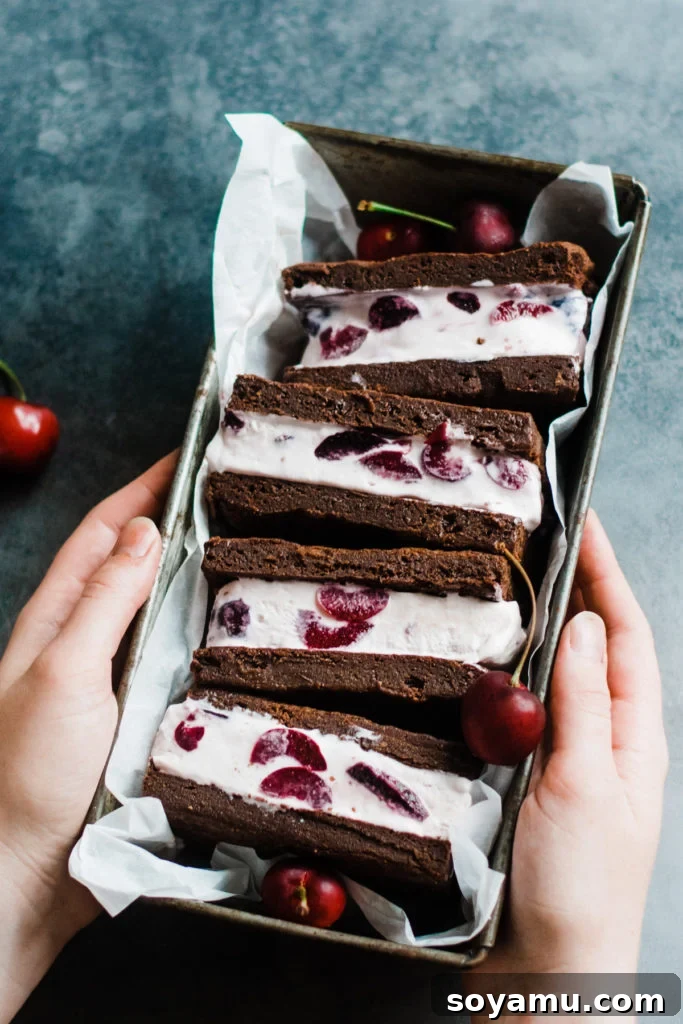
We’d love to see your creations! If you whip up a batch of these glorious Black Forest Ice Cream Sandwiches (or any of our other cherry delights), be sure to snap a photo and leave a comment below. Your feedback and shared experiences are invaluable to our community of home bakers. You can also connect with us on social media; tag your photos with #bluebowlrecipes on Instagram, or share them directly on the Blue Bowl Recipes Facebook page. Happy baking, and happy indulging!
Homemade Black Forest Ice Cream Sandwiches Recipe
By Stephanie Simmons
Made with a simple no-churn Cherry Ice Cream that’s full of real cherries, and two layers of deeply flavored, rich, chocolate, fudgy brownies!
- **Prep Time:** 1 hr 30 mins
- **Cook Time:** 36 mins
- **Freezing Time:** 1 day
- **Servings:** 9 sandwiches
Ingredients
For the Cherry Compote
- 2 cups fresh cherries, rinsed, pitted, and sliced in half
- 3 TBSP sugar
- 1/2 tsp almond extract
- 1 TBSP cornstarch
- 1 TBSP water
Cherry Ice Cream
- 2 cups heavy whipping cream (thoroughly chilled)
- 1 can sweetened condensed milk, 14 oz.
- 1 TBSP vanilla extract
Fudgy Brownies
- 3/4 cup salted butter
- 12 ounces good quality semi-sweet or dark chocolate (chopped bars or chips)
- 1 cup + 2 TBSP granulated sugar
- 1/3 cup + 1 TBSP brown sugar
- 4 large eggs
- 1 and 1/2 tsp vanilla extract
- 1 cup all-purpose flour
- 3 TBSP cocoa powder
- 1/4 tsp salt
If Serving as a Brownie Sundae Bar (Optional Toppings)
- whipped cream
- fresh cherries
- hot fudge
Instructions
- Make the Cherry Compote: Rinse and pit your cherries. In a small pot over medium heat, combine the cherries, sugar, and almond extract. Cook, stirring occasionally, until the mixture reaches a low boil and is bubbly. Reduce heat to low and continue cooking for 8 minutes. In a separate small bowl, stir the cornstarch and water together until the cornstarch is fully dissolved. Add this slurry to the cherry pot, stir well, and cook for an additional 2 minutes to thicken slightly. The compote will continue to thicken as it cools. Remove from heat and transfer to the fridge to cool completely.
- Make the Ice Cream: Line a 9×13 inch pan with parchment paper, ensuring enough overhang on the sides to easily lift out the frozen ice cream later. Set aside. Ensure your heavy cream is thoroughly chilled before starting; cold cream whips best. In a medium mixing bowl, combine the sweetened condensed milk and vanilla extract, whisking until well combined. Set aside. In a large mixing bowl, using a handheld mixer on high speed, beat the heavy cream until stiff peaks form. This typically takes 2-5 minutes. Gently scoop out one cup of the whipped cream and fold it into the condensed milk mixture with a spatula until just combined. Then, gently fold this condensed milk mixture back into the large bowl of remaining whipped cream until evenly combined, being careful not to deflate the mixture. Pour the ice cream mixture into your prepared 9×13 inch pan. Cover tightly with foil or plastic wrap and freeze for at least 8 hours, or preferably overnight, until firm.
- Make the Brownies: Preheat your oven to 350°F (175°C). Line two separate 9×13 inch pans with parchment paper, again leaving an overhang. In a large mixing bowl, melt the chocolate and butter together in 30-second intervals in the microwave, stirring after each, until smooth. Let the mixture cool for a few minutes. Whisk in the granulated sugar and brown sugar until well combined. Then, whisk in the eggs one at a time, followed by the vanilla extract. Add the all-purpose flour, cocoa powder, and salt to the wet ingredients and whisk until just combined; do not overmix. The batter will be thick. Divide the brownie batter evenly between the two prepared pans and spread it out evenly. Bake for 10-11 minutes. The brownies should look set, and a toothpick inserted into the center should come out with moist crumbs, not wet batter. Let the brownies cool completely at room temperature. Once cooled, cover them tightly and refrigerate for at least a few hours (or overnight) before assembly. Chilling makes them firm and easier to cut.
- Assemble the Sandwiches: Prepare a large sheet pan and have a thin cookie flipper or spatula ready. Remove the chilled brownies from the fridge. Using the parchment paper, lift each brownie slab out of its pan onto a clean cutting surface. Slice each 9×13 inch brownie slab into 9 equal rectangles (approximately 3×4 inches). Set aside. Retrieve the frozen cherry ice cream. Using the parchment paper overhang, lift the entire block of ice cream out of its pan. Slice the ice cream into 9 equal pieces, matching the size of your brownie rectangles. Work quickly to prevent the ice cream from melting. Place one brownie piece flat. Immediately top it with an ice cream block. Place a second brownie piece on top. Using your cookie flipper, gently lift the assembled sandwich and place it onto your prepared sheet pan. Repeat this process until all sandwiches are assembled. Transfer the sheet pan with the completed ice cream sandwiches back into the freezer for another 30 minutes to 1 hour to fully set.
- Serve + Store: Enjoy your delicious homemade Black Forest Ice Cream Sandwiches once they are thoroughly frozen! For any leftovers, store them in an airtight container in the freezer for up to one month.
Notes
- Gluten-Free Option: To make this recipe gluten-free, substitute the brownie recipe with a trusted Fudgy Gluten Free Brownie recipe. You will need to double the GF brownie recipe and divide the batter between two 9×13 inch pans for baking. Baking times may vary, so start checking for doneness at around 15 minutes, adding a few minutes at a time until a toothpick inserted comes out with moist crumbs. Proceed with the rest of the recipe as directed.
- Using Store-Bought Components: For quicker preparation, you can use store-bought ice cream. Soften it slightly, then spread it into the parchment-lined 9×13 inch pan and refreeze before cutting. For brownies, use a boxed brownie mix. If the mix yields a single 9×13 inch pan, use two mixes and divide between two pans. If it’s for an 8×8 or 9×9 inch pan, a single mix divided into two pans might suffice. Always follow box directions for baking.
- Ice Cream Sundae Bar Variation: If you prefer not to assemble sandwiches, turn this into a fun Ice Cream Sundae Bar! Cool and cut your brownies into squares. Freeze the homemade ice cream as directed, then simply scoop it into bowls with a brownie slice. Offer toppings like hot fudge, fresh cherries, and whipped cream. If choosing this option, you will yield 18 brownie pieces, but the ice cream recipe might only be sufficient for 9 servings. Consider doubling the ice cream recipe and freezing it in two separate pans to ensure ample scoops for all 18 brownie pieces. This way, you can keep one pan frozen while serving from the other.
Nutrition
Calories: 850 kcal (Nutrition information is automatically calculated, so should only be used as an approximation.)