

Embrace the vibrant essence of spring with this incredibly easy and utterly delicious One-Bowl Raspberry Lemon Bread. This quick bread recipe delivers an explosion of fresh, zesty lemon and sweet-tart raspberries in every bite, promising a delightful treat that’s perfect for any occasion. Designed for simplicity, it requires minimal cleanup and can be effortlessly elevated with a simple two-ingredient glaze. Each slice boasts a wonderfully moist and tender crumb, making it an irresistible choice for breakfast, brunch, or a delightful dessert. Get ready to fill your kitchen with the enticing aroma of freshly baked goodness!

This post was originally published in April of 2018 but I just updated it with fresh photos and enhanced details!
While the calendar might officially mark spring, some parts of the world still cling to winter’s embrace. Here in Wisconsin, where a generous blanket of snow often covers the ground even in April, the arrival of spring flavors feels like a much-needed celebration. And what better way to usher in the warmer months than with a bake that bursts with the promise of sunshine and fresh produce? This Raspberry Lemon Bread is precisely that—a little slice of spring you can enjoy, no matter what the weather outside looks like. It’s a taste of sweet optimism, reminding us that vibrant greenery and blossoms are just around the corner.
For me, there’s a certain magic in the quiet beauty of a snowy landscape, even if it delays spring’s full bloom. Growing up, a “white birthday” was almost an annual tradition, a stark contrast to the verdant springs I longed for. Yet, the anticipation of spring, seeing the first buds on the trees and tiny patches of green grass pushing through the thawing earth, is always exhilarating. This Raspberry Lemon Bread captures that feeling – a bridge between the lingering chill and the promise of warmth. It’s a simple joy, a burst of brightness that can transform any day, bringing the fresh, lively flavors of spring right into your home, regardless of the forecast.
Why You’ll Adore This Raspberry Lemon Quick Bread
This quick bread isn’t just another recipe; it’s a testament to simple indulgence. The combination of sweet, juicy raspberries and bright, tangy lemon creates a harmonious flavor profile that is truly irresistible. What sets this loaf apart is its incredibly moist and tender texture, achieved through the thoughtful inclusion of Greek yogurt (or sour cream). This addition not only keeps the bread from drying out but also adds a subtle richness that complements the fruit and citrus beautifully. Plus, the “one-bowl” method means less mess and more time to enjoy your baking.
The Perfect Pairing: Raspberry and Lemon
Some flavors are simply meant to be together, and raspberry and lemon are a prime example. The tartness of fresh lemon zest and juice cuts through the sweetness of the bread, creating a refreshing balance that awakens the palate. Meanwhile, the raspberries, whether fresh or frozen, melt into pockets of fruity goodness, releasing their sweet-tart juices and adding a lovely visual appeal with their vibrant color. This classic combination is a surefire crowd-pleaser, evoking sunny days and garden picnics, even when spring is merely a whisper.
The Magic of One-Bowl Baking
If you appreciate efficiency and despise extensive cleanup, this recipe will be your new best friend. The beauty of a one-bowl quick bread lies in its straightforward process: combine wet ingredients, then fold in the dry, and finally, add the fruit. There’s no need for multiple mixing bowls or intricate steps. This simplicity makes it an ideal recipe for beginner bakers, busy weeknights, or anyone looking for a stress-free baking project. It proves that creating something wonderfully delicious doesn’t have to be complicated.
Crafting Your Raspberry Lemon Quick Bread: A Step-by-Step Guide
Quick breads are celebrated for their ease, and this Raspberry Lemon Quick Bread is no exception. While the mixing process is delightfully fast, the most challenging part is undoubtedly the anticipation during its hour-long bake. But trust me, the wait is absolutely worth it for the golden, fragrant loaf that emerges from your oven!
Getting Started: Room Temperature and Preparation
Before you even think about mixing, ensure your oven is preheated to 350°F (175°C). This guarantees an even bake from the moment your loaf pan enters the heat. Next, prepare your loaf pan (a standard 9×5 inch pan works best) by lining it with parchment paper, leaving an overhang on the sides. This thoughtful step acts as a sling, making it incredibly easy to lift your baked bread out of the pan. A quick spray of cooking spray on the parchment and exposed pan sides will prevent any sticking. The secret to a consistently smooth batter and moist quick bread lies in using room temperature ingredients. Softened butter creams more effectively with sugar, creating air pockets that contribute to a lighter texture, while room temperature eggs and dairy integrate seamlessly without curdling the batter.
The Creaming Method: Building the Flavorful Base
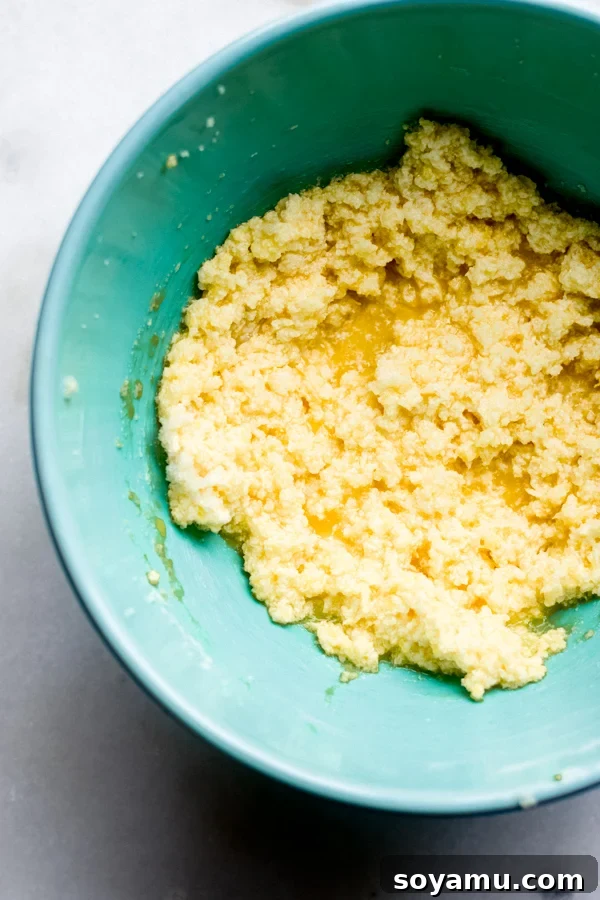
Begin by creaming your softened salted butter with an electric mixer. Start on medium speed for about 30 seconds until it’s visibly smooth and creamy. Then, add the granulated sugar and light brown sugar. Continue beating on medium-high speed for 1-2 minutes until the mixture is light, fluffy, and well combined. This creaming process is crucial for incorporating air, which helps the bread rise and gives it a tender texture. Next, crack in the two large room temperature eggs, along with the vanilla extract, fresh lemon zest, and lemon juice. Mix for another minute or so on medium-high speed until all ingredients are thoroughly incorporated and the mixture is smooth, without any clumps. (Note: Older photos might show a slightly clumpy mixture due to insufficient mixing, but current instructions emphasize a smooth, emulsified batter for best results).
Seamlessly Integrating the Dry Ingredients
Now, it’s time to add your dry ingredients directly into the same bowl. This is where the “one-bowl” magic truly shines! Measure out your all-purpose flour (spooned and leveled for accuracy), baking powder, and salt. Add them to the wet mixture and mix on low speed just until they are barely combined. The key here is to avoid overmixing. Overmixing flour develops gluten, which can lead to a tough, dry bread. A few lumps are perfectly acceptable; it’s better to slightly undermix than to overmix. At this stage, you’ll notice a thick, cohesive batter forming in your bowl, ready for the next delightful additions.

Adding Essential Moisture and Fresh Fruit
To ensure our quick bread is exceptionally moist, we’ll incorporate sour cream (or Greek yogurt), milk, and vegetable oil. Add these liquid ingredients to the thick batter and mix until just combined, once again being careful not to overmix. The sour cream/Greek yogurt is particularly effective at adding richness and moisture without making the bread heavy. Finally, it’s time for the stars of the show: the raspberries! Gently fold in your fresh or frozen raspberries. The emphasis is on “gently” – if you stir too vigorously or for too long, the delicate berries might burst, releasing their juices and slightly tinting the batter pink. While this doesn’t affect the flavor or outcome of the bread, a gentle hand helps maintain their vibrant whole appearance throughout the loaf. Remember, if using frozen raspberries, do not thaw them first; add them directly from the freezer to prevent excessive moisture release.

Ready for the Oven: Baking to Perfection
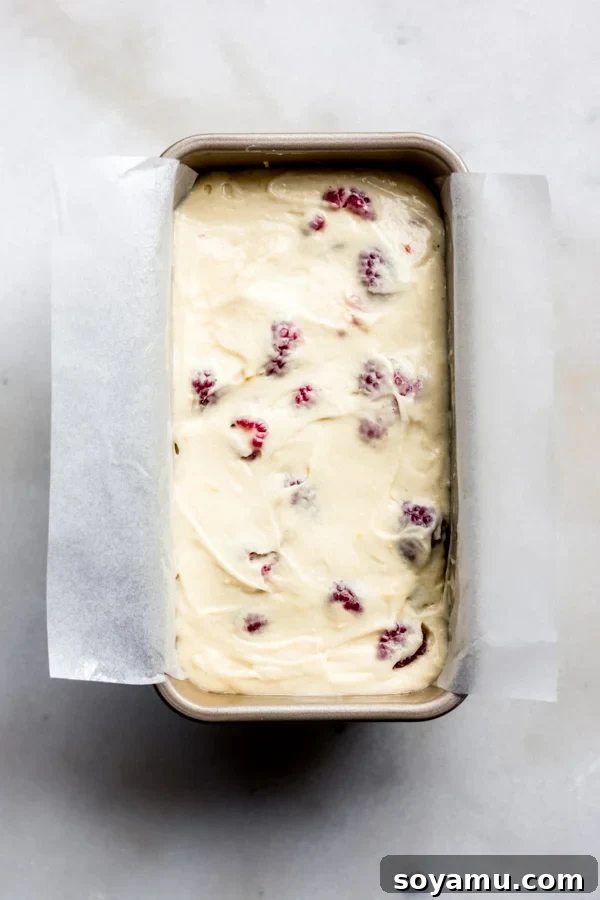
With your luscious batter complete, pour it evenly into the prepared loaf pan. For an extra touch of sweetness and a delightful crunch, consider sprinkling a little extra cane sugar over the top before it goes into the oven. Bake for approximately 45-60 minutes, or until a wooden skewer or toothpick inserted into the very center of the bread comes out with moist crumbs, but no wet batter. Around the 45-minute mark, if you notice the top edges are browning too quickly while the center is still unset, loosely tent a piece of aluminum foil over the pan. This will prevent further browning and allow the inside to finish baking through evenly, ensuring a beautifully golden crust without burning.
The Golden Reveal
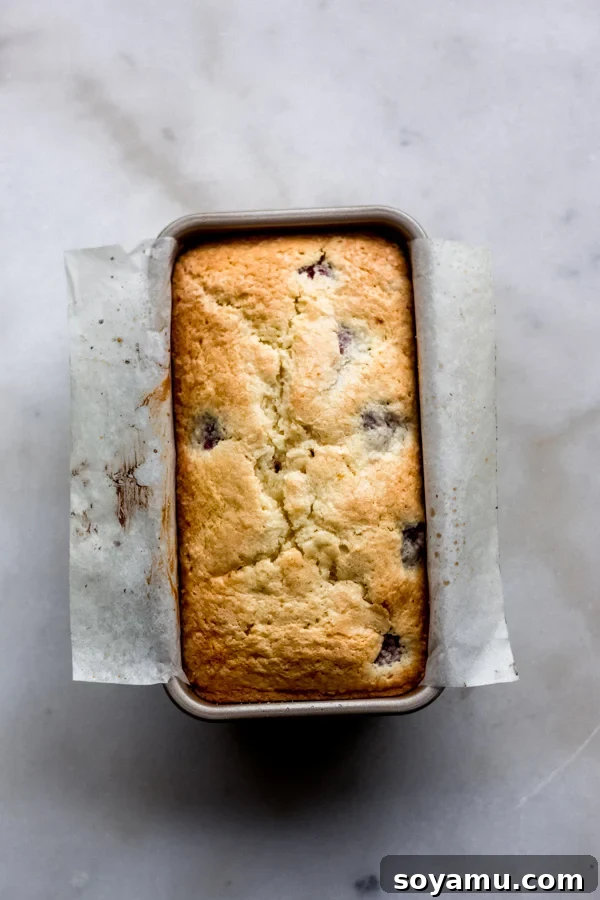
The moment you pull this Raspberry Lemon Bread from the oven, your kitchen will be enveloped in the most delightful aroma—a warm, sweet blend of lemon and berries. While it might not win a beauty contest fresh out of the pan, its rustic charm and incredible scent are merely a prelude to the deliciousness within. This humble quick bread holds its own as one of the most flavorful and comforting spring recipes you can bake, promising a moist, tender interior and a perfectly golden crust.
Elevating Your Loaf: The Simple 2-Ingredient Glaze
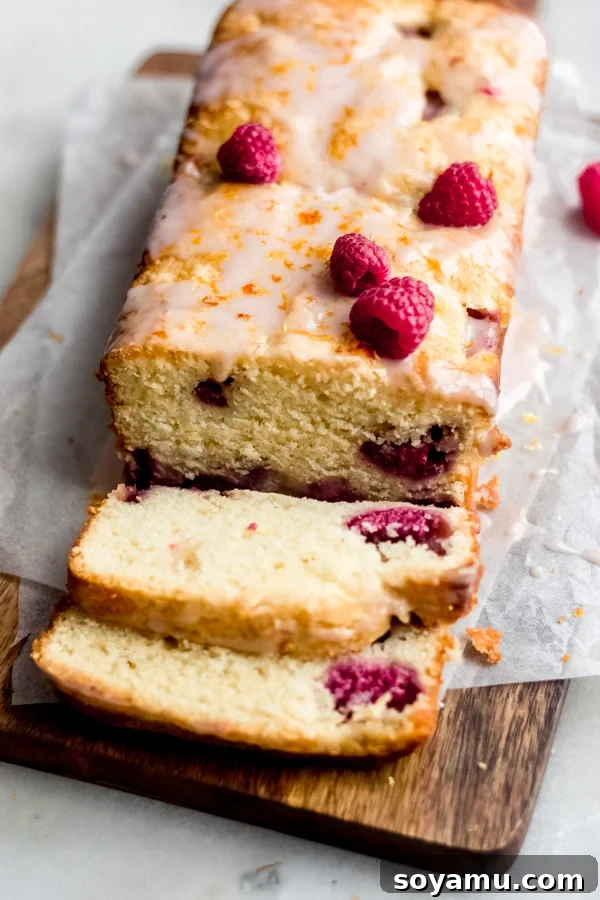
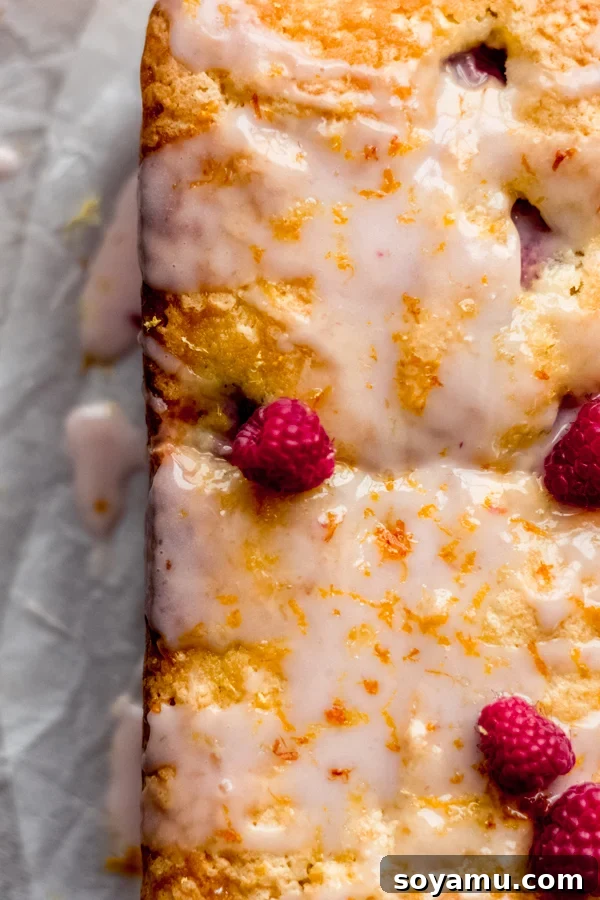
While this Raspberry Lemon Bread is absolutely fantastic on its own, a simple glaze can transform it into an elegant presentation, perfect for special occasions like bridal showers, baby showers, or a chic brunch gathering. The beauty of this glaze lies in its simplicity: just two ingredients create a perfectly sweet and tangy topping. Whisk together 1 tablespoon of fresh lemon juice with 1/2 cup of powdered sugar. The mixture will initially be quite thick, almost paste-like, but continue whisking until smooth. For an extra layer of flavor, a splash of vanilla extract can be added. If you prefer a thinner, more pourable glaze, add a tiny bit more lemon juice (or milk) drop by drop until you reach your desired consistency. Once the bread has cooled completely, drizzle the glaze generously over the top. For a stunning finish, garnish with a sprinkle of fresh lemon zest and a few extra vibrant raspberries. This simple flourish will make your loaf look like it came straight from a gourmet bakery!

Serving Suggestions and Storage Tips
This Raspberry Lemon Bread is wonderfully versatile and can be enjoyed in countless ways. Serve it warm, sliced thick, with a generous pat of butter that melts into its tender crumb. Or, enjoy it chilled, where the flavors seem to meld and deepen even further. For a truly decadent treat, especially if you’re battling the lingering chill of winter, a scoop of vanilla bean ice cream melting over a warm slice is absolute perfection. Remember, for the cleanest, most intact slices, allow the bread to cool completely before cutting. This gives the crumb time to set, ensuring each slice holds its shape beautifully.
To store any leftovers, wrap the bread tightly in plastic wrap or place it in an airtight container at room temperature. It will stay wonderfully fresh and moist for up to four days. If you’d like to enjoy this deliciousness for longer, this quick bread freezes beautifully. Wrap individual slices or the whole loaf tightly in plastic wrap, then again in aluminum foil, and freeze for up to three months. Thaw at room temperature or gently warm in the microwave or oven for a fresh-baked taste anytime.
Embracing the Seasons with Sweet Bakes
While we eagerly await the full bloom of spring and the arrival of summer’s bounty – oh, the dreams of fresh peaches! – this Raspberry Lemon Bread serves as the perfect transitional treat. It’s a culinary bridge that connects the lingering cold with the warmth and freshness to come. Baking is often my chosen way to beat the “never-ending winter blues,” as it allows me to experiment with new flavors and anticipate future seasonal ingredients. This quick bread is a delicious reminder that even when the outdoors are dull, your kitchen can be a vibrant hub of fresh, comforting flavors. I’m already busy dreaming up and testing new spring and summer recipes for you all, but for now, let this delightful loaf brighten your day.
Happy baking, everyone!

Did you make this recipe? We’d love to see it! Snap a photo and share your thoughts in the comments below!
Be sure to follow bluebowlrecipes on Instagram and tag #bluebowlrecipes with your photo! You can also post a photo of your recipe to the bluebowlrecipes Facebook page. We’d love to see what you create!
One-Bowl Raspberry Lemon Bread Recipe
A quick bread flavored with fresh lemon and raspberries, and made super moist thanks to the addition of Greek yogurt. Serve plain or with a simple 2-ingredient glaze.
- Prep Time: 15 minutes
- Cook Time: 55 minutes
- Total Time: 1 hour 10 minutes
- Servings: 8 slices
Ingredients
For the Bread:
- 1/2 cup (113g) salted butter, softened (preferably salted butter)
- 1 cup (200g) granulated sugar
- 3 tbsp (38g) light brown sugar, packed
- 2 large eggs, at room temperature
- 1/2 tsp vanilla extract
- Zest of one large lemon
- 3 tbsp freshly squeezed lemon juice
- 1 and 1/2 cups (195g) all-purpose flour, spooned & leveled
- 1 and 1/2 tsp baking powder
- 1/4 tsp salt
- 1/2 cup (120g) sour cream, at room temperature (Greek yogurt works too)
- 1/4 cup (60ml) milk, at room temperature (2% milk used)
- 2 tbsp (30ml) vegetable oil
- 1 and 1/2 cups (180g) raspberries (fresh or frozen – do not thaw frozen raspberries)
For the Glaze (optional):
- 1 tbsp lemon juice
- 1/2 cup (60g) powdered sugar
- 1/4 tsp vanilla extract (optional)
Instructions
- Prep: Preheat your oven to 350°F (175°C). Line a 9×5-inch loaf pan with parchment paper, leaving an overhang on the sides for easy removal, and spray with cooking spray.
- Make the Batter: In a large mixing bowl, cream the softened butter with an electric mixer until well creamed, about 30 seconds. Add the granulated sugar and brown sugar, and beat until completely creamed and fluffy, 1-2 minutes. Add the eggs, vanilla, lemon zest, and lemon juice, mixing on medium-high speed until well combined, about 1 minute.
- Add the dry ingredients next – flour, baking powder, and salt. Mix on low speed until just combined; do not overmix. Add the milk, sour cream, and vegetable oil, and mix until just incorporated. Gently fold in the raspberries. If you stir too forcefully or for too long, the raspberries may burst and tint the batter pink (which is fine, just a heads-up).
- Bake: Pour the batter into the prepared loaf pan. Optionally, sprinkle a little extra cane sugar on top for a crunchy crust. Bake for 45-60 minutes, or until a toothpick inserted into the middle comes out with moist crumbs, not wet batter. If the top begins to brown too quickly around the 45-minute mark, loosely tent the loaf with aluminum foil to prevent further browning while it finishes baking.
- Make the Glaze (Optional): While the bread cools, whisk together the lemon juice and powdered sugar until smooth. For a thinner consistency, add a tiny bit more lemon juice or milk, drop by drop, until desired pourable consistency is reached. Stir in optional vanilla extract. Once the bread has cooled completely, pour the glaze over the top. Garnish with extra lemon zest and fresh raspberries for a beautiful finish.
- Serve & Store: For clean, sturdy slices, allow the bread to cool completely before serving. If you cut it warm, the slices may be more delicate. Store leftovers covered tightly at room temperature for up to 4 days.
Notes
- Lemon Usage: You only need one large lemon for this recipe. Zest it first, then juice it.
- Frozen Raspberries: If using frozen raspberries, do not thaw them. Add them directly from the freezer into the batter to prevent excess moisture and a messy result.
Nutrition
Calories: 341 kcal (per slice)
Nutrition information is automatically calculated and should only be used as an approximation.