
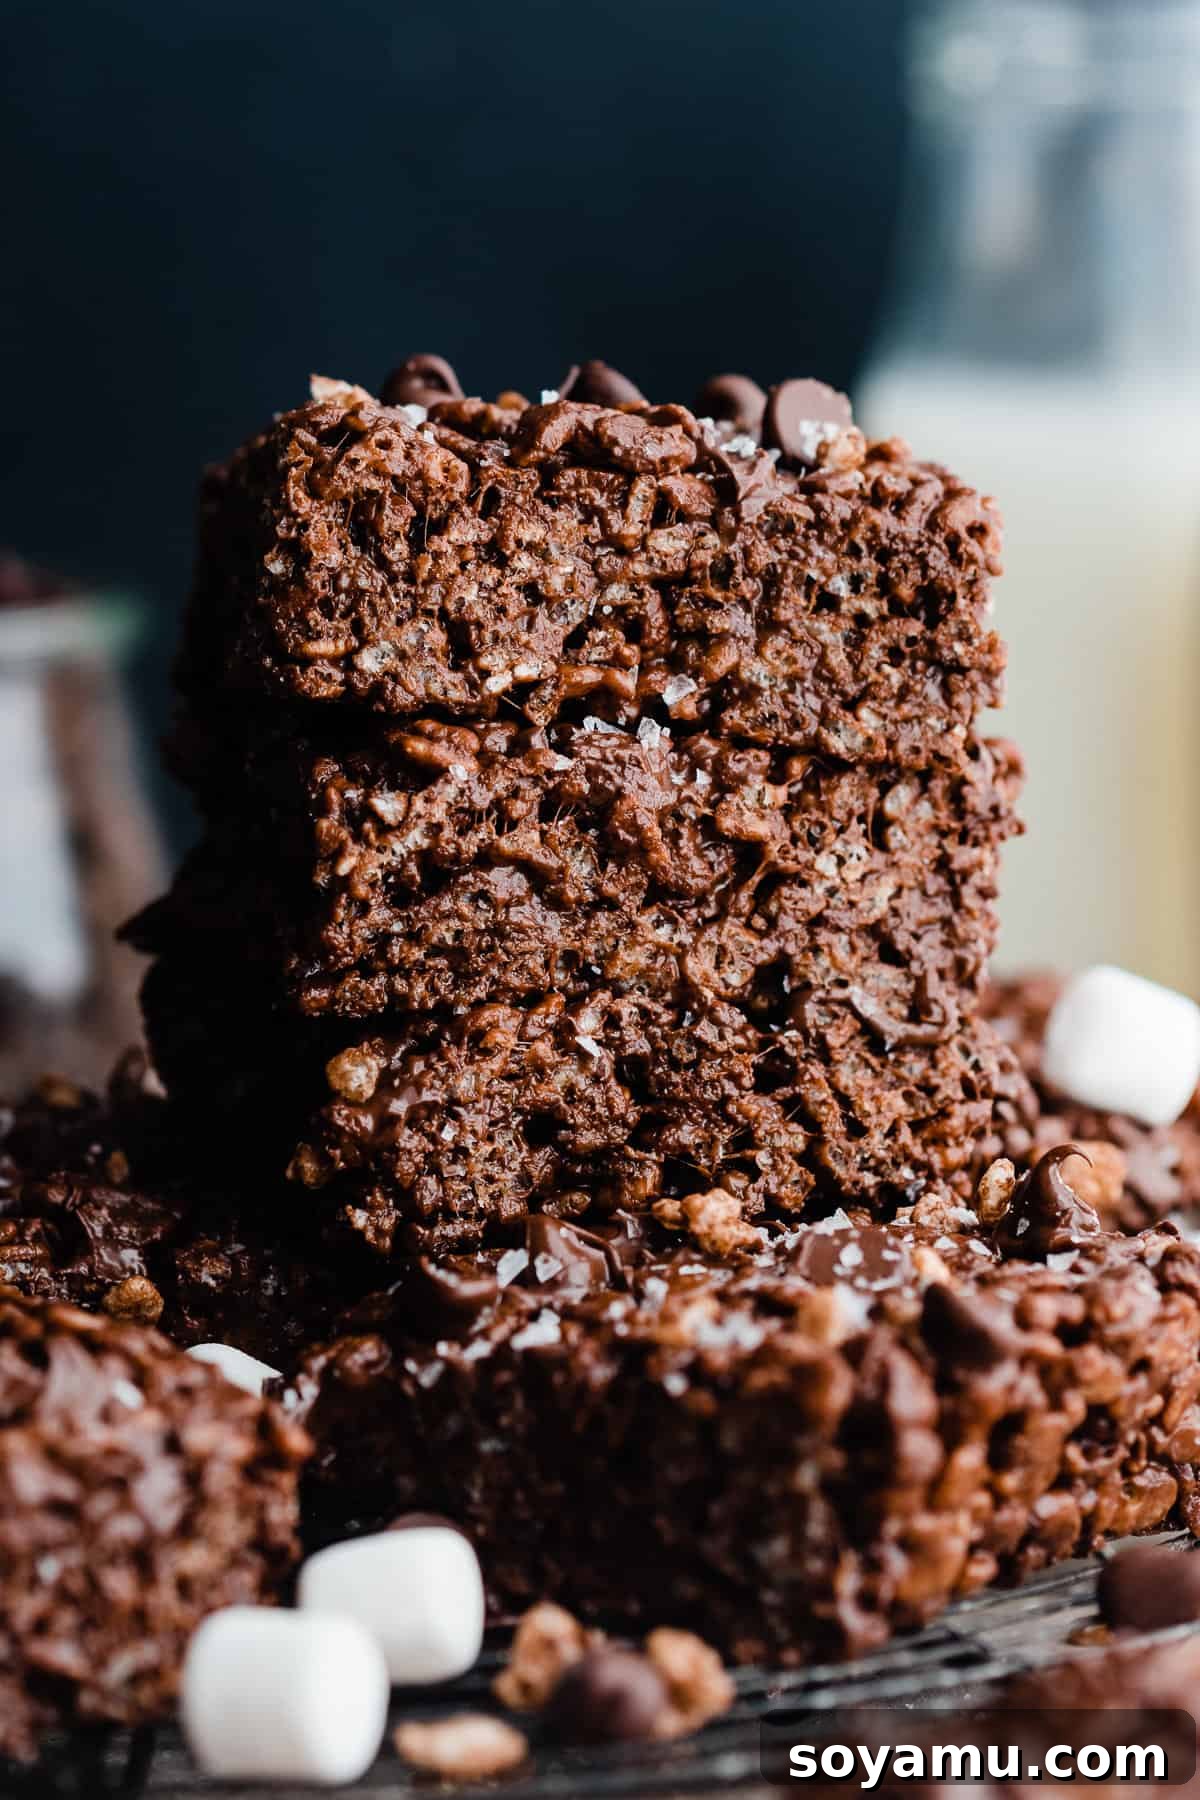
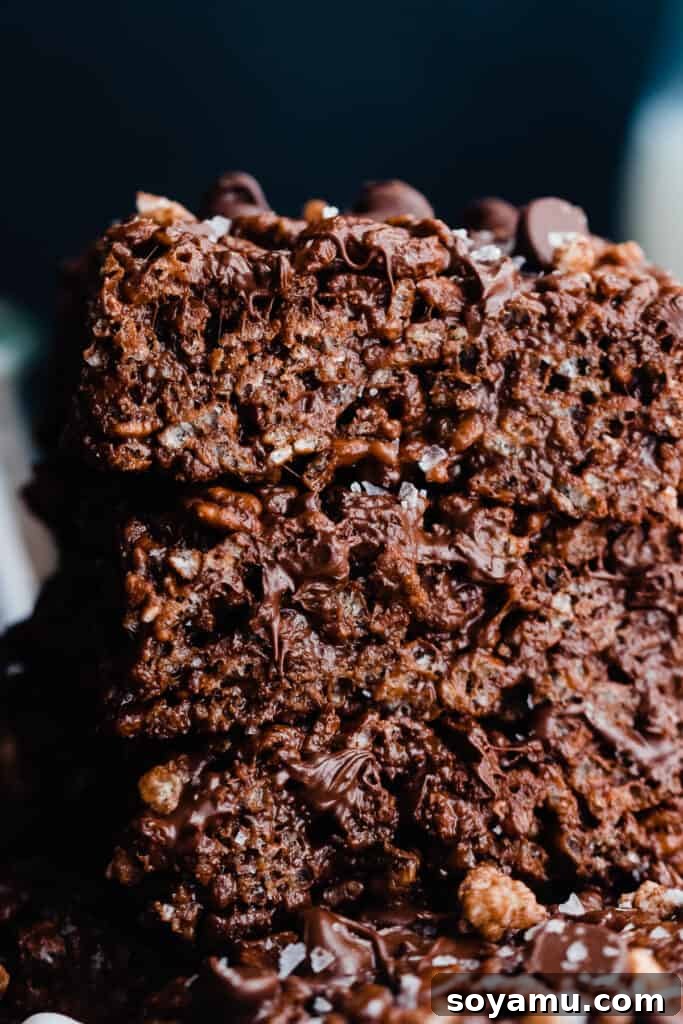
Prepare to fall in love with these Ultimate Brown Butter Chocolate Rice Krispie Treats! Forget everything you thought you knew about this classic childhood dessert. We’re taking the humble rice krispie treat and transforming it into a sophisticated, deeply flavorful, and utterly irresistible chocolate experience. These treats are wonderfully thick, delightfully chewy, and bursting with rich chocolate notes in every bite. Best of all, they’re a no-bake wonder that comes together in under 20 minutes, using just a handful of basic ingredients.
What makes our version stand out? The secret lies in the nutty brown butter, which adds an incredible depth of flavor that perfectly complements the cocoa cereal and extra chocolate chips. A sprinkle of flaky sea salt on top elevates the entire experience, creating a craveable balance of sweet and savory. Whether you’re a seasoned baker or a complete novice, this easy recipe guarantees a stunning dessert that chocolate lovers won’t be able to resist. Get ready to impress with this quick, customizable, and incredibly delicious no-bake treat!
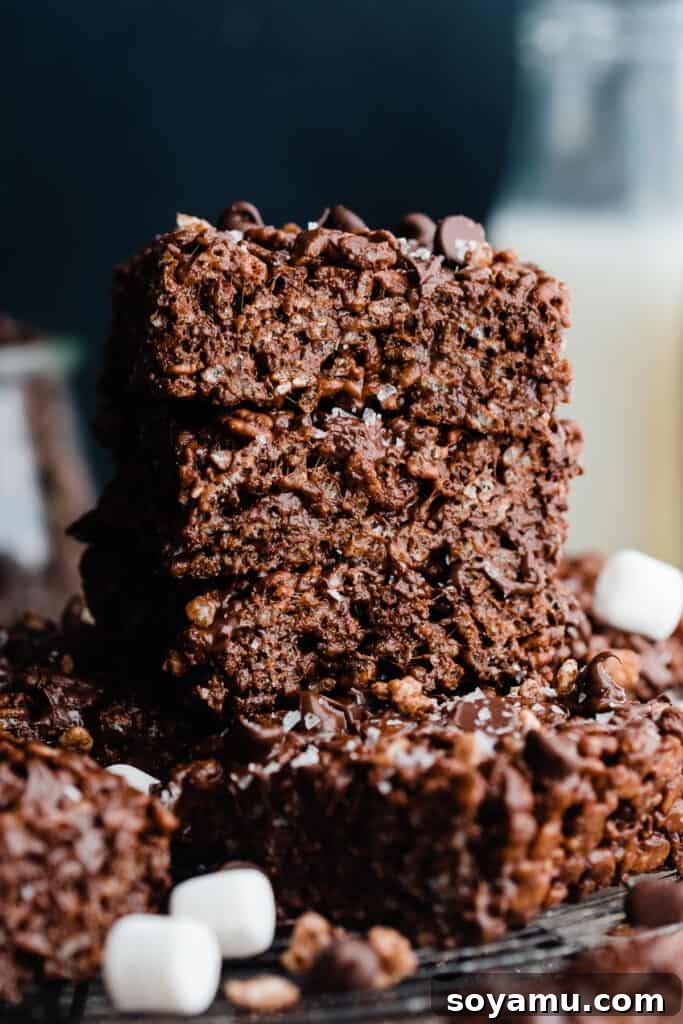
Ultimate Brown Butter Chocolate Rice Krispie Treats: A No-Bake Delight
Welcome to your new favorite no-bake dessert! These aren’t just any Chocolate Rice Krispie Treats; they’re an upgraded, gourmet version that will have everyone asking for the recipe. Combining the nostalgic crunch of rice cereal with the decadent flavor of rich chocolate and the sophisticated depth of brown butter, these treats offer an unparalleled experience. They’re perfect for parties, lunchboxes, or simply satisfying that late-night chocolate craving. Dive into the details below to see why this recipe deserves a permanent spot in your dessert rotation.
Why You’ll Absolutely Love These Brown Butter Chocolate Rice Krispie Treats
There are countless reasons why these chocolate crispy treats will become your go-to dessert. From their incredible taste to their sheer simplicity, they tick all the boxes for a perfect sweet snack.
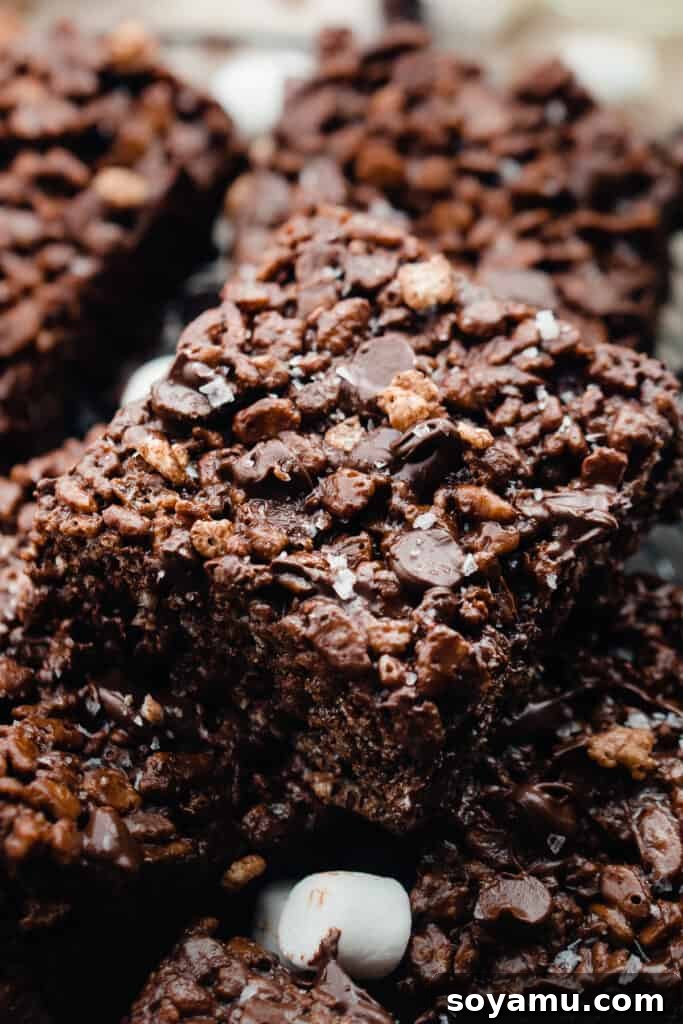
- Unforgettable Flavor & Texture Experience: Each bite of these treats is a symphony of textures and tastes. You’ll encounter the luscious chewiness of gooey melted marshmallow, the satisfying crunch of chocolate cereal, and pockets of delightful, melty chocolate chips. The rich, deep chocolate flavor is perfectly balanced by a hint of nutty brown butter, elevating the classic treat to a gourmet level. It’s a decadent twist on a beloved favorite!
- Effortless & Quick Dessert: Say goodbye to complicated baking! This incredibly easy recipe uses minimal ingredients and comes together in approximately 20 minutes from start to finish. There’s no oven required, making it ideal for hot summer days or when you need a quick dessert in a pinch. It’s simple enough for even beginner cooks or children to help prepare, making it a fun activity for the whole family.
- Infinitely Adaptable for Every Palate: One of the best aspects of this recipe is its versatility. You can easily swap out the cereal for other varieties, customize it with different mix-ins, or even adjust it to be dairy-free or gluten-free. This adaptability ensures that everyone can enjoy a personalized version of these delicious treats, catering to various dietary needs and taste preferences.
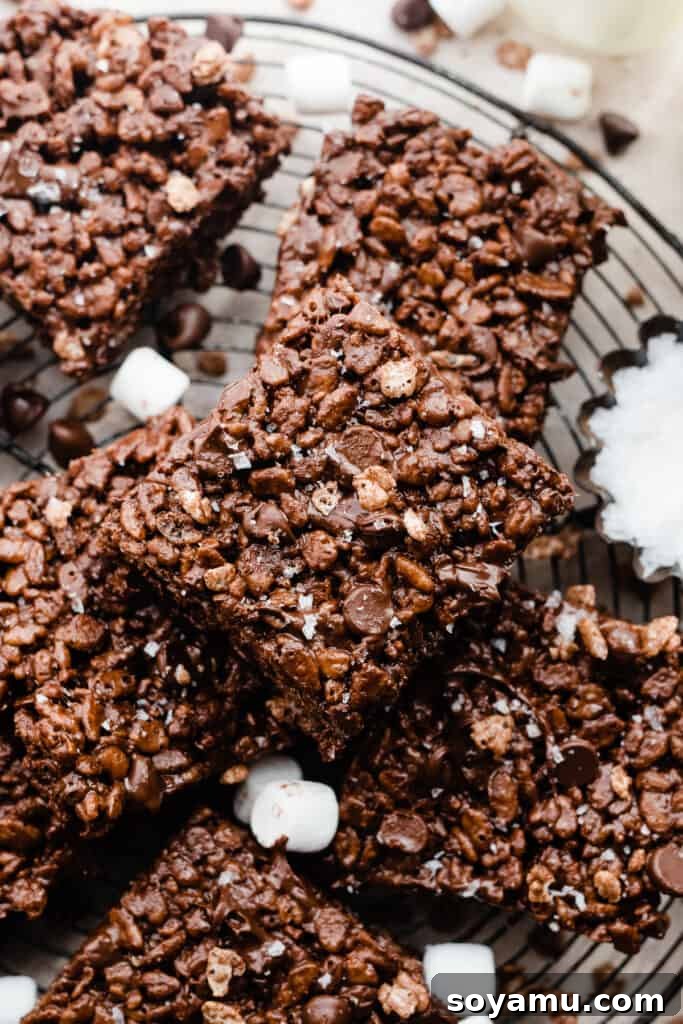
Essential Ingredients for Perfection
Crafting the perfect Chocolate Rice Krispie Treat requires a few simple, high-quality ingredients. While the concept is straightforward, the nuances of each component contribute significantly to the final delectable outcome.
- Brown Butter: The Secret Weapon: This is arguably the most crucial upgrade to your traditional rice krispie treat. Taking just a few extra minutes, browning the butter (also known as “beurre noisette”) develops a rich, nutty, and subtly caramel-like flavor. This depth perfectly complements the chocolate, adding a sophisticated dimension that ordinary melted butter simply can’t achieve. We recommend using salted butter for an even better flavor balance, but unsalted butter works perfectly if that’s your preference. The slight saltiness enhances the sweetness and complexity.
- Marshmallows: The Gooey Heart: Mini marshmallows are the ideal choice for this recipe. Their smaller size allows them to melt quickly and uniformly, creating that wonderfully smooth, gooey binder that holds the treats together. Using fresh marshmallows ensures maximum chewiness and stretchiness, which is essential for the iconic texture.
- Cocoa Krispies Cereal (or Your Favorite Chocolate Cereal): The base of our chocolatey delight! Cocoa Rice Krispies cereal, or any off-brand chocolate-flavored puffed rice cereal, can be found in most grocery stores. These provide the characteristic crunch and infuse the treats with an undeniable chocolate essence. If you can’t find cocoa varieties, don’t worry – regular Rice Krispies with added cocoa powder or extra chocolate elements work wonderfully too!
- Vanilla Extract: Aromatic Enhancement: Don’t underestimate the power of good vanilla. Using real vanilla extract (not imitation) provides a warm, aromatic note that enhances the overall chocolate flavor and balances the sweetness of the marshmallows. It’s a small addition that makes a significant difference in the final taste profile.
- Salt: Balancing Act: A tiny pinch of salt might seem counterintuitive in a sweet dessert, but it’s a vital component. Salt helps to cut through the sweetness of the marshmallows and chocolate, brightening the other flavors and preventing the treats from being overly cloying. Flaky sea salt sprinkled on top adds a pleasant textural contrast and an irresistible gourmet touch.
Customizing Your Chocolate Krispie Treats
One of the beauties of this recipe is its flexibility. Whether you have dietary restrictions or simply want to experiment with different flavors, these treats are incredibly adaptable.
- Dairy-Free Option: To make these treats suitable for a dairy-free diet, simply swap regular butter for your favorite high-quality dairy-free butter alternative. Be sure to also use dairy-free chocolate chips to ensure the entire recipe is compliant.
- Gluten-Free Option: For those avoiding gluten, the solution is straightforward: use a certified gluten-free puffed rice cereal. Many brands offer gluten-free versions of similar cereals, allowing you to enjoy this treat without compromise.
- Vegan Option: Combine the dairy-free butter recommendation with your preferred vegan marshmallows. Ensure that your chocolate chips are also certified vegan, and you’ll have a delicious plant-based treat!
- Skipping Brown Butter: While we highly recommend the brown butter for its unique flavor, you can certainly skip this step if you’re short on time or prefer a simpler taste. Just melt the butter as usual and proceed with the recipe. The treats will still be delicious!
- Alternate Cereals: If Cocoa Krispies aren’t available, or you’re looking to try something new, here are some fantastic alternatives:
- Regular Rice Krispies: Mix in an extra tablespoon or two of unsweetened cocoa powder with the dry cereal for a chocolate boost.
- Chocolate Frosted Flakes: For a sweeter, slightly different texture.
- Oreo O’s or similar chocolate loop cereals: These can add an extra layer of chocolatey goodness and a unique crunch.
- Peanut Butter Puffs: For a chocolate-peanut butter fusion.
Step-by-Step Guide to Making Irresistible Chocolate Rice Krispie Treats
Creating these delightful no-bake treats is a straightforward process, but paying attention to each step ensures optimal flavor and texture. Follow these simple instructions for success:
Step 1: Master the Art of Browning the Butter
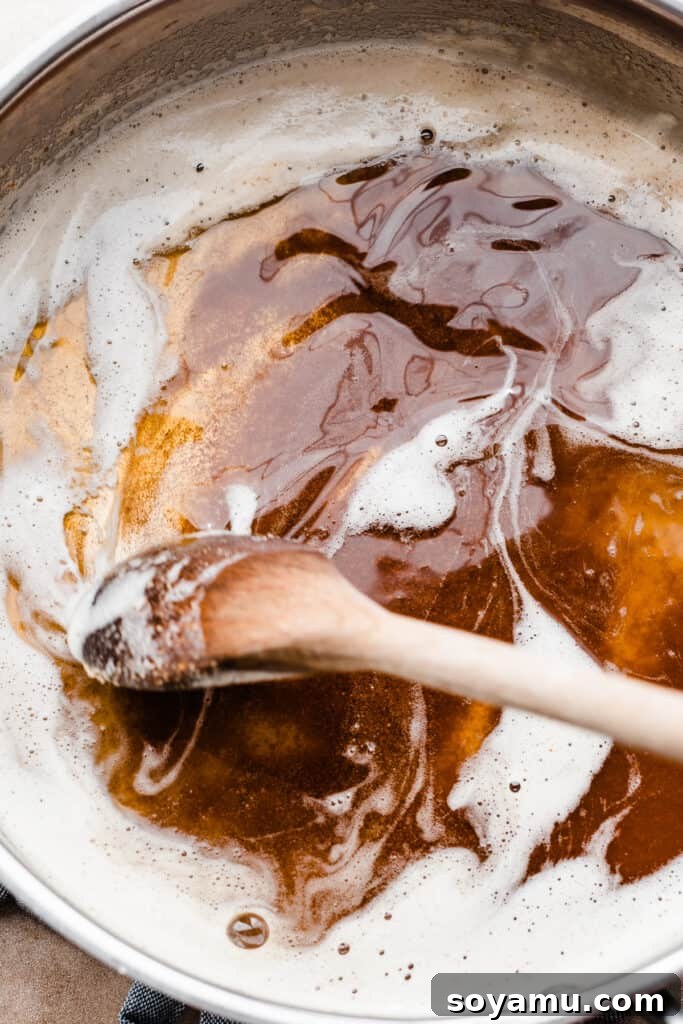
Melt the specified amount of butter in a large, heavy-bottomed pot or Dutch oven over medium heat. Allow the butter to melt completely, then continue cooking. Stir frequently to prevent scorching. Initially, it will foam, then the milk solids will begin to separate and settle at the bottom, turning golden brown. Keep a close eye on it, stirring gently, until the butter turns a rich, deep golden-brown color and emits a wonderfully nutty, caramel-like aroma. This usually takes about 5-7 minutes. Once it reaches this stage, immediately remove it from the heat to prevent it from burning.
Step 2: The Marshmallow Melt
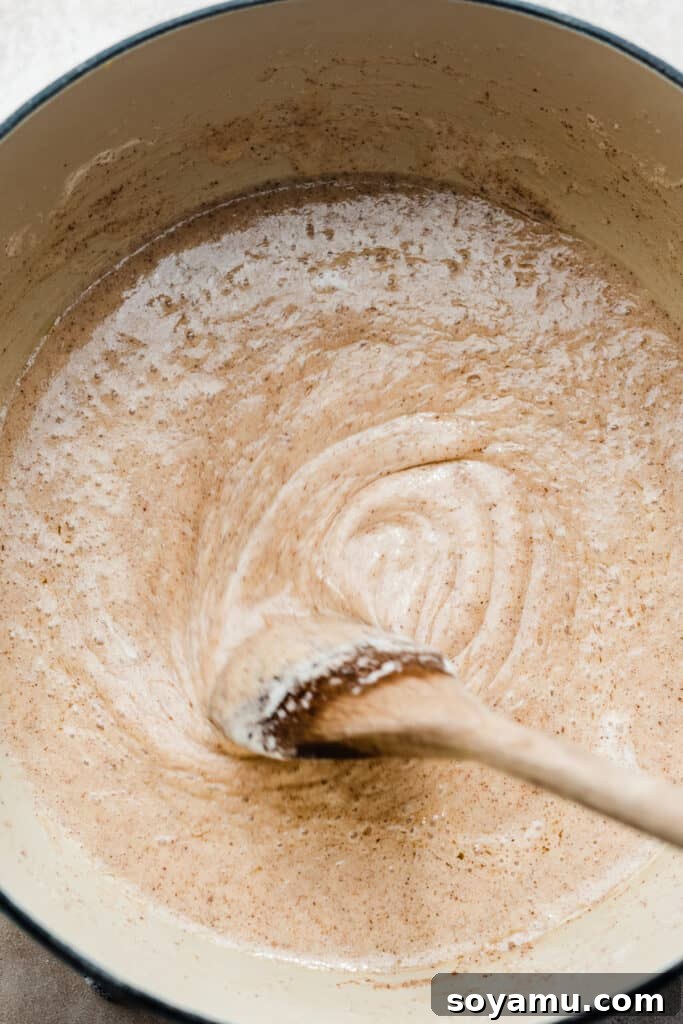
Once your butter is perfectly browned, immediately add the mini marshmallows to the hot pot. Stir continuously with a sturdy spatula or spoon until the marshmallows are completely melted and smoothly incorporated into the brown butter. Ensure there are no individual marshmallow lumps remaining. This creates the essential gooey foundation for your treats. Stir in the vanilla extract and a pinch of salt at this stage; they will quickly combine with the hot marshmallow mixture.
Step 3: Combine Cereal and Delicious Mix-Ins
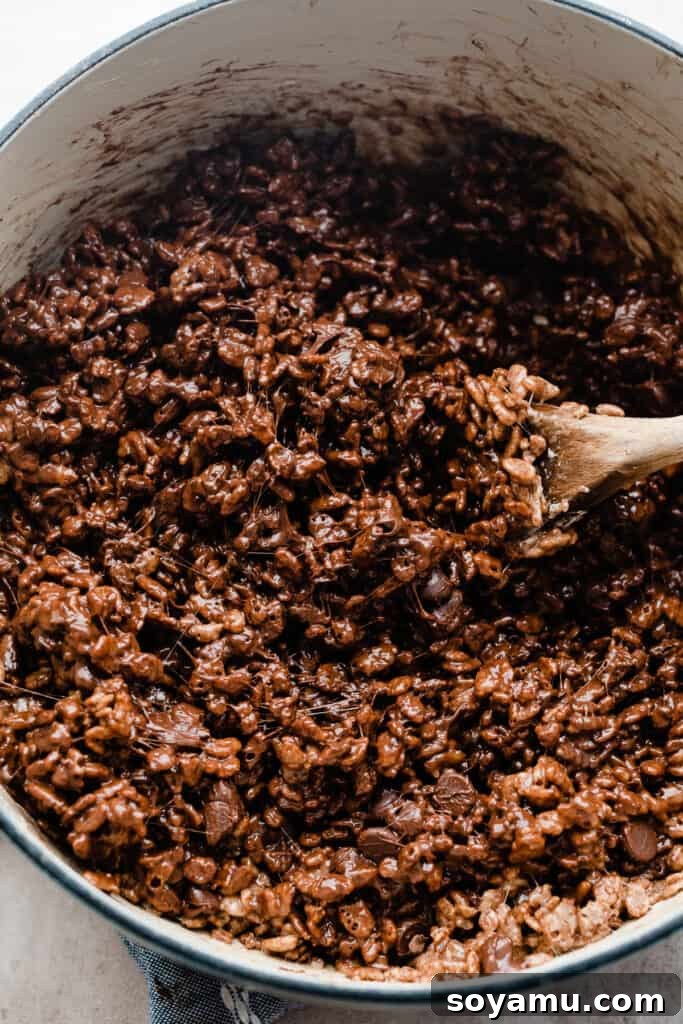
As soon as the marshmallows are melted and smooth, remove the pot from the heat. Pour the Cocoa Krispies cereal directly into the marshmallow mixture. Using your spatula, gently but quickly fold the cereal into the mixture until every piece is evenly coated. Be careful not to overmix, as this can crush the cereal. Next, stir in the chocolate chips and the reserved extra mini marshmallows. The residual heat will soften the chocolate chips and slightly melt the extra marshmallows, adding delightful pockets of chewiness and chocolate bursts throughout the treats.
Step 4: Pressing and Setting for the Perfect Bite
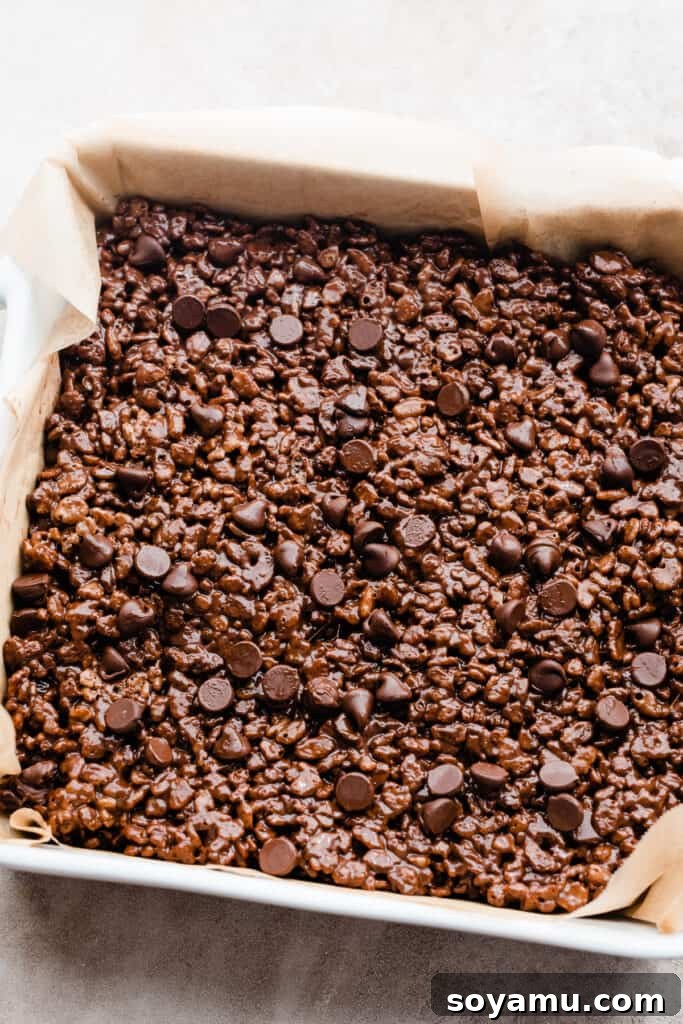
Prepare a 9×9 or 8×8 inch baking pan by greasing it lightly with cooking spray and lining it with parchment paper, leaving an overhang on two sides for easy removal. This preparation is crucial for preventing sticking. Transfer the warm cereal mixture into the prepared pan. Using a buttered spatula or your fingertips (lightly buttered or sprayed with non-stick spray), gently press the mixture evenly into the pan. Avoid pressing too firmly, as over-compressing can result in dense, hard treats instead of delightfully chewy ones. If desired, sprinkle extra chocolate chips and flaky sea salt on top for added visual appeal and flavor. Allow the treats to set at room temperature for at least 30 minutes to an hour, or until they are firm enough to slice and the chocolate chips are set. Patience is key here for the best texture!
Serving Suggestions and Storage Tips
Once your delectable Brown Butter Chocolate Rice Krispie Treats have set, it’s time to enjoy them! Proper handling and storage will ensure they maintain their incredible flavor and texture.
Achieving Optimal Texture
For the best gooey and chewy texture, allow the treats to set up at room temperature for approximately 30 minutes to 1 hour before slicing and serving. While it might be tempting to speed up the process by placing them in the refrigerator, we strongly advise against it. Chilling can make them overly firm and compromise that desirable soft, chewy consistency that makes these treats so special. Patience truly rewards you with the perfect bite!
Storing Leftovers for Lasting Freshness
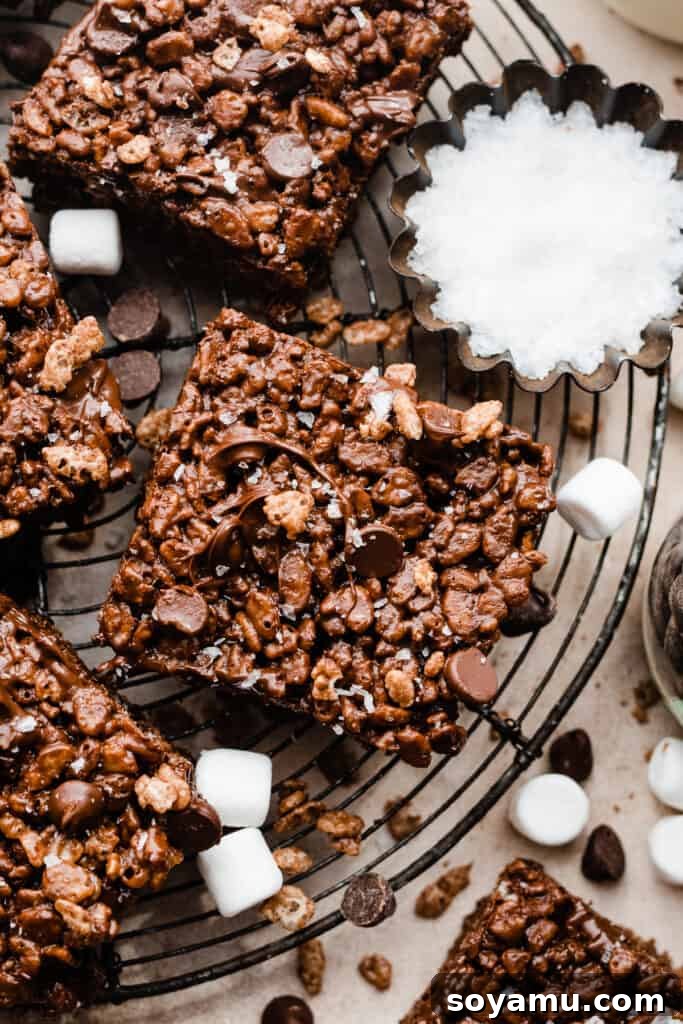
To keep your chocolate treats fresh and delicious, store any sliced leftovers in an airtight container at room temperature. They will maintain their quality and delightful chewiness for 4-5 days. Avoid refrigeration, as it can dry them out and make them hard. For longer storage, you can freeze individual squares in an airtight container for up to 2-3 months. Thaw at room temperature before enjoying.
If you’re looking for another incredibly easy no-bake treat to try next, don’t miss our Best Ever Homemade Scotcheroos!
Master Your Treats: Expert Tips for Success
Even though this is a simple recipe, a few insider tips can help you achieve perfect Brown Butter Chocolate Rice Krispie Treats every single time.
- Ensure Marshmallows are Fully Melted: The key to gooey, well-bound treats is thoroughly melted marshmallows. Stir diligently until you see no discernible individual marshmallow pieces outlined in the butter mixture. A completely smooth, homogeneous base is essential for an even texture throughout your treats.
- The Non-Stick Spatula Trick: The marshmallow-cereal mixture can be incredibly sticky! To easily press the treats into your pan without creating a sticky mess, lightly butter your spatula or give it a quick spritz with nonstick cooking spray. This simple trick will make spreading a breeze and ensure an even layer.
- Don’t Over-Compress! While it’s important to press the mixture firmly enough to hold together, avoid packing it down too tightly. Over-compressing the treats can lead to a dense, hard texture rather than the desired light and chewy consistency. Gentle, even pressure is all that’s needed to set them perfectly.
- Quality Ingredients Make a Difference: While basic, the quality of your ingredients can impact the final flavor. Use good quality butter, fresh marshmallows, and real vanilla extract for the most delicious results.
- Prep Your Pan First: Before you even start melting the butter, make sure your baking dish is greased and lined with parchment paper. The marshmallow mixture sets quickly, so you want to be ready to transfer it as soon as it’s mixed.
Frequently Asked Questions (FAQs)
Here are answers to some common questions about making these irresistible chocolate treats:
Can I double or halve this recipe?
Absolutely! This recipe is very versatile for scaling. To double the batch, simply use all ingredients in twice the amount and press the mixture into a larger 9×13 inch baking pan. If you wish to halve the recipe, use half of each ingredient measurement and a standard loaf pan (approximately 9×5 inches) for setting. Remember to adjust setting times accordingly for larger or smaller batches.
Can I use a different type of cereal?
Yes, definitely! While Cocoa Krispies provide an excellent chocolate base, feel free to experiment with other cereals. For more ideas and specific recommendations, refer to the “Ingredient Substitutions” section earlier in this post. Many chocolate-flavored cereals work well, or you can use regular rice krispies and boost the chocolate with cocoa powder.
Can I add other mix-ins to the treats?
Enhancing these treats with extra mix-ins is a fantastic idea! Consider adding a handful of chopped nuts (like pecans or walnuts) for extra crunch, mini peanut butter cups for a salty-sweet twist, or even crushed Oreos for an ultimate chocolate explosion. Add these along with the chocolate chips in Step 3 for best distribution.
How can I prevent my Rice Krispie treats from getting too hard?
The key to soft, chewy treats is gentle handling. First, avoid overcooking the marshmallows; melt them just until smooth. Second, and crucially, do not over-compress the mixture when pressing it into the pan. Use light, even pressure to spread it out. Over-packing removes air pockets, resulting in a dense, hard treat. Also, storing them in an airtight container at room temperature will help maintain their chewiness.
Exciting Recipe Variations to Explore
Unlock your creativity and customize your chocolate treats with these delicious variations. The possibilities are endless!
- Other Cereals: Beyond Cocoa Krispies, experiment with other cereal bases. As mentioned in the ingredient substitutions section, regular Rice Krispies with added cocoa, Chocolate Frosted Flakes, or even fun cereals like Oreo O’s can transform the flavor profile. For a completely different but equally delicious experience, you might enjoy our Brown Butter Fruity Pebbles Treats!
- Chocolate Overload Options:
- Different Chocolate Chips: Swap semi-sweet chocolate chips for milk chocolate for a sweeter profile, dark chocolate for a richer intensity, or white chocolate chips for a creamy contrast. Mini chocolate chips can also be used if you have them on hand.
- Dipped or Drizzled: For an extra layer of decadence, melt additional chocolate (milk, dark, or white) and either dunk one corner of each cooled rice krispie square into it, or drizzle melted chocolate generously over the tops of the bars before they fully set.
- Chocolate Coating: For the ultimate chocolate indulgence, once the treats are set and sliced, coat them completely in tempered melted chocolate and let them chill until the chocolate hardens.
- Nutty Additions: Introduce texture and flavor with nuts. Stir in chopped peanuts, pecans, walnuts, or almonds along with the chocolate chips. For an even more intense nutty flavor, lightly toast the nuts before adding them.
- Microwave Magic for Quick Prep: Don’t have a stovetop or short on time? You can make these treats in the microwave!
- Melt Butter: In a large, microwave-safe bowl, melt the butter. You can still brown it by microwaving in 30-second bursts, stirring between each, for a total of 3 to 6 minutes until it achieves a deep golden color. Watch carefully to avoid burning.
- Melt Marshmallows: Add the marshmallows to the melted butter and microwave on high for 1 minute. Remove and stir well. Continue microwaving in 30-second bursts, stirring thoroughly after each, until the marshmallows are fully melted and smooth.
- Combine: Proceed with the rest of the recipe as directed, adding the cereal, vanilla, salt, and mix-ins.
- Holiday and Seasonal Adaptations: Get festive! Add sprinkles in seasonal colors, use shaped marshmallows (e.g., pumpkin or ghost marshmallows for Halloween), or incorporate flavored extracts like peppermint for Christmas or almond for a subtle twist.
Recommended Tools for Easy Preparation
While this recipe is quite simple and doesn’t require many specialized gadgets, a few tools can make the process even smoother and more enjoyable, ensuring consistently excellent results.
- The Right Pan: A sturdy 9×9 inch or 8×8 inch square baking pan is ideal for this recipe, creating perfect, uniformly sized squares. Whether you choose a ceramic or metal pan, ensure it’s well-greased and/or lined with parchment paper for easy removal.
- A Versatile Dutch Oven: A Dutch oven is truly a workhorse in any kitchen! Its heavy bottom and even heat distribution are perfect for browning butter and melting marshmallows without scorching. Beyond this recipe, you’ll find yourself reaching for it multiple times a week for baking and cooking various dishes, making it a valuable investment.
Affiliate links above may earn us a small commission at no extra cost to you.
Discover More No-Bake Delights
If you’ve enjoyed the ease and deliciousness of these Chocolate Rice Krispie Treats, you’re in luck! We have a collection of fantastic no-bake desserts that are just as simple to make and equally satisfying. Perfect for any occasion where you want a sweet treat without turning on the oven.
- No-Bake Cookie Dough Bites
- No-Bake Black Forest Pie
- Amazing No-Bake Peanut Butter Pie
- No-Bake Nutella Tart
- Mini No-Bake Apple Pie Cheesecakes
Did you make this recipe? We’d love to hear from you!
Please consider leaving a comment and a star rating below to let us know how you liked the recipe. Your feedback is invaluable and greatly supports our small business!
Brown Butter Chocolate Rice Krispie Treats
By Stephanie Simmons
These thick and chewy Brown Butter Chocolate Rice Krispie Treats are packed with rich chocolate flavor and a delightful nutty note. A super easy, no-bake dessert that’s ready in about 20 minutes, perfect for satisfying any sweet craving!
Cook: 5 mins
Total: 20 mins
Servings: 9 to 18 squares
Ingredients
- 3/4 cup + 2 tbsp salted butter (198 grams)
- 4 and 1/2 cups mini marshmallows + 1/2 cup extra mini marshmallows (approx. one 10-ounce bag total: 234 grams + 26 grams)
- 4 and 1/2 cups Cocoa Krispies cereal (184 grams)
- 1 tsp vanilla extract
- Pinch of salt
- 1/3 cup chocolate chips (plus extra for sprinkling, if desired)
Instructions
- Prepare Your Pan: Lightly spray a 9×9 inch baking dish with cooking spray or line it with parchment paper, leaving an overhang on two sides for easy removal. Gather all your ingredients to have them ready.
- Brown the Butter: In a large Dutch oven or heavy-bottomed saucepan, melt the butter over medium heat. Continue cooking, stirring occasionally, for about 5-7 minutes until the butter becomes foamy, turns a deep golden brown, and releases a rich, nutty aroma. Immediately remove from heat to prevent burning.
- Melt the Marshmallows: Add the 4 1/2 cups of mini marshmallows to the hot brown butter. Stir continuously until the marshmallows are completely melted and smooth. Remove from heat. Stir in the vanilla extract and a pinch of salt until well combined.
- Combine Cereal & Mix-Ins: Immediately add the Cocoa Krispies cereal to the marshmallow mixture. Stir gently and quickly until the cereal is evenly coated. Then, fold in the 1/3 cup of chocolate chips and the extra 1/2 cup of mini marshmallows. The residual heat will slightly melt the chocolate and soften the marshmallows, creating delightful pockets.
- Press into Pan & Set: Transfer the mixture to your prepared baking pan. Using a buttered spatula or lightly greased fingertips, gently and evenly press the mixture into the pan. Do not over-compress. Sprinkle additional chocolate chips and flaky sea salt on top, if desired.
- Cool & Serve: Let the treats rest at room temperature for at least 30 minutes to 1 hour to set before slicing and serving. For the best gooey and chewy texture, avoid refrigerating them to speed up setting. Store any leftovers in an airtight container at room temperature for 3-4 days. Enjoy!
Nutrition Information
(Approximate values per 1 slice serving, based on 9 servings)
- Calories: 304 kcal
- Carbohydrates: 37 g
- Protein: 1 g
- Fat: 18 g
- Saturated Fat: 11 g
- Polyunsaturated Fat: 1 g
- Monounsaturated Fat: 4 g
- Trans Fat: 1 g
- Cholesterol: 41 mg
- Sodium: 201 mg
- Potassium: 53 mg
- Fiber: 0.2 g
- Sugar: 24 g
- Vitamin A: 1040 IU
- Vitamin C: 7 mg
- Calcium: 28 mg
- Iron: 2 mg
Nutrition information is automatically calculated and should be used as an approximation. Exact values may vary.
Liked this recipe? We appreciate your feedback! Please leave a comment and a rating.