
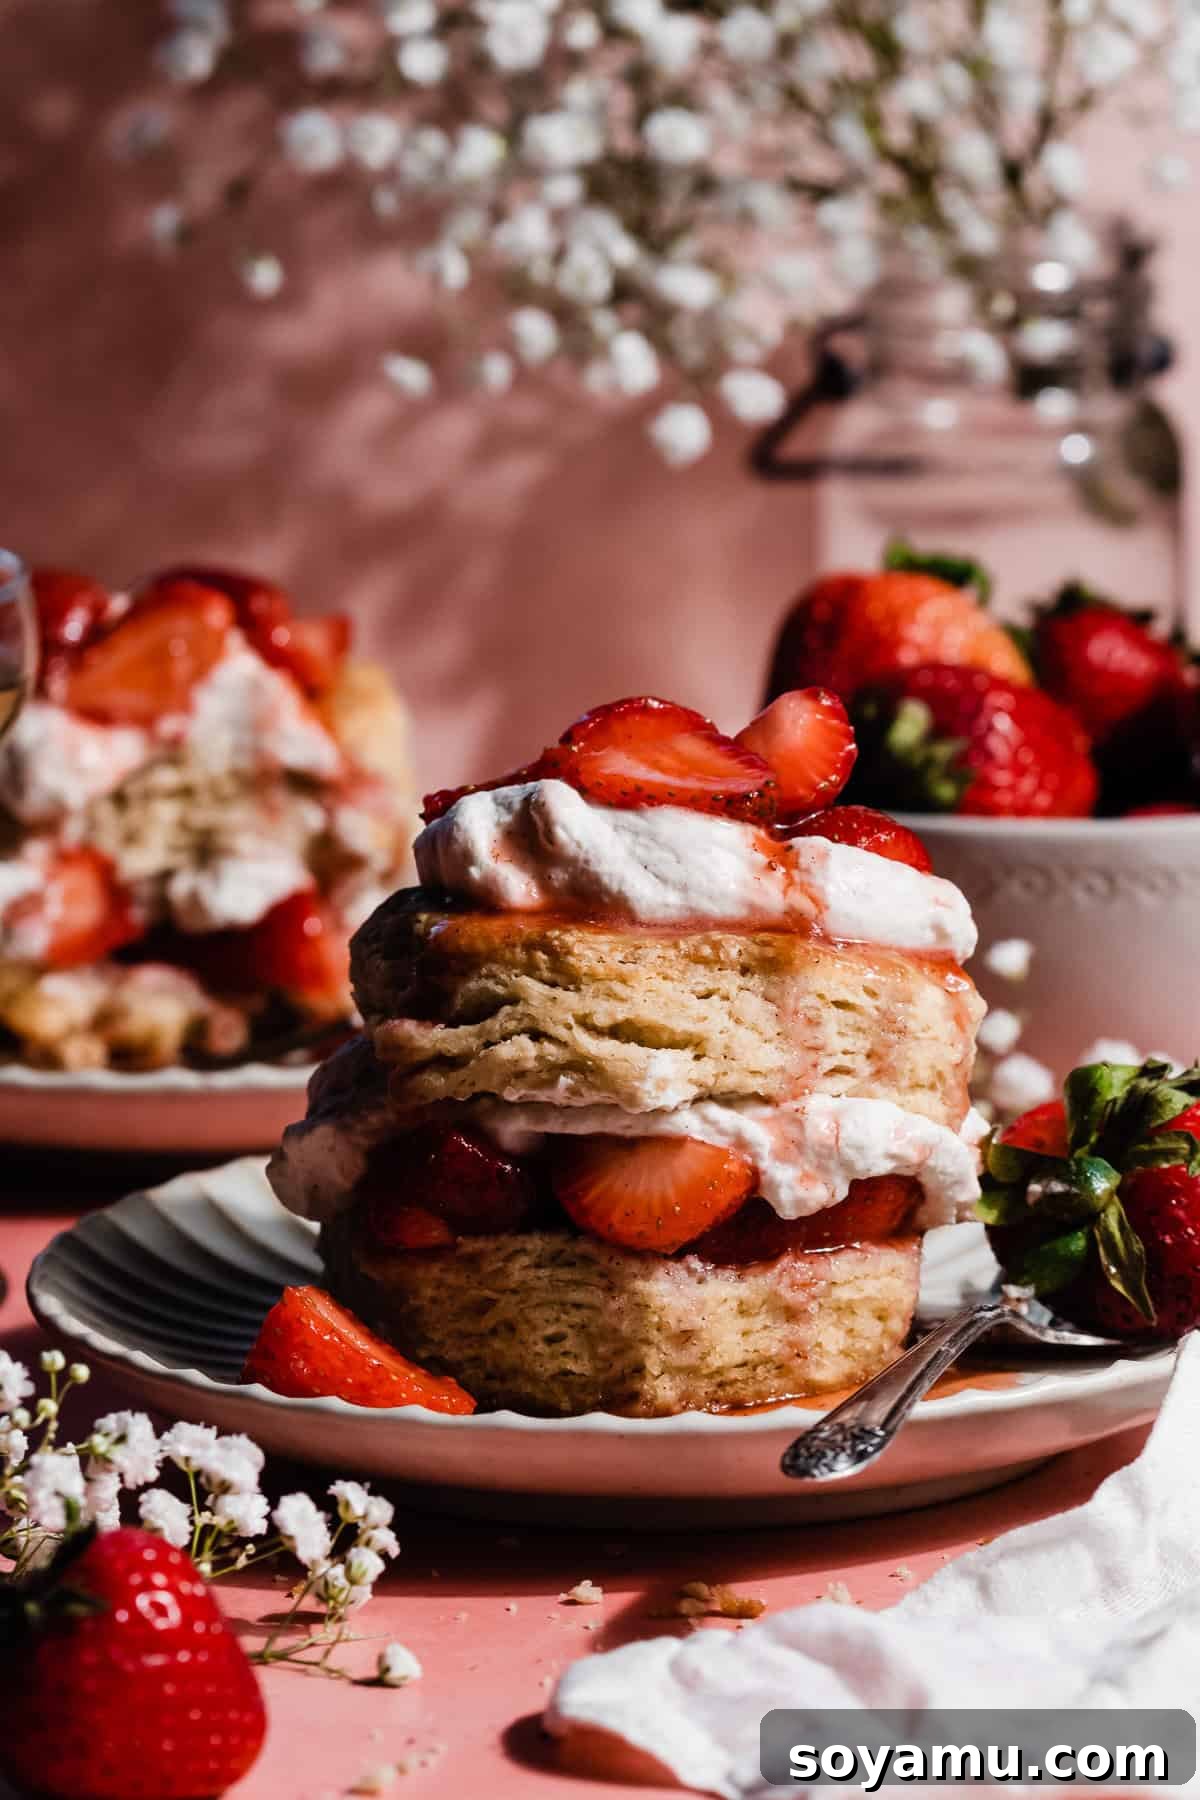
There’s nothing quite like the taste of summer, and for many, that taste comes in the form of a perfect **homemade strawberry shortcake**. This delightful dessert combines light, fluffy, and tender biscuits with an abundance of fresh, juicy strawberries and a cloud of heavenly homemade vanilla bean whipped cream. It’s a simple pleasure that feels impressive to serve, yet is surprisingly easy to create in your own kitchen. Whether you’re a seasoned baker or just starting out, this classic strawberry shortcake recipe is destined to become your go-to all season long, capturing the essence of peak strawberry ripeness in every bite.
Why This Homemade Strawberry Shortcake Recipe is a Must-Try:
Indulging in a homemade strawberry shortcake is more than just enjoying a dessert; it’s an experience. Here’s why this particular recipe will capture your heart and palate:
- Embrace Peak Season with Fresh Strawberries: The star of this classic dessert truly shines when made with vibrant, sweet strawberries picked at their peak. From late spring through early summer, typically May through July, strawberries are at their most flavorful. This recipe allows their natural sweetness and juiciness to take center stage, creating an unparalleled taste experience that simply cannot be replicated with out-of-season or frozen berries.
- Luxurious Homemade Whipped Cream: Forget store-bought aerosols! Our recipe features a rich, ethereal vanilla bean whipped cream that’s lightly sweetened to perfection. Its airy texture and delicate vanilla notes perfectly complement the robust flavor of the macerated strawberries, adding a layer of creamy indulgence that ties the entire dessert together. It’s surprisingly simple to make and elevates the shortcake from good to truly extraordinary.
- Unforgettable Tender and Flaky Biscuits: The foundation of any great shortcake is its biscuit, and ours are truly exceptional. These homemade biscuits are incredibly tender, boasting beautiful flaky layers and a buttery richness that melts in your mouth. They’re designed to be less sweet than traditional cakes, striking the perfect balance to absorb the sweet strawberry juices and the creamy whipped topping without becoming soggy or overwhelming the fresh fruit flavor.
- Effortless Elegance for Any Occasion: Don’t let the “homemade” aspect intimidate you. This easy strawberry shortcake recipe is incredibly straightforward, making it accessible even for novice bakers. With clear, step-by-step instructions and a few expert tips, you’ll achieve impressive results with minimal stress. It’s the perfect dessert for backyard barbecues, summer gatherings, or simply a sweet treat to enjoy with family. The effort is minimal, but the reward is immense!
Key Ingredients for the Perfect Strawberry Shortcake:
Crafting the ultimate strawberry shortcake begins with understanding the role each ingredient plays. While the full recipe with precise measurements can be found at the bottom of this post, here’s a detailed look at the core components:
- All-Purpose Flour: The backbone of our tender biscuits. For accurate and consistent results, always spoon your flour into the measuring cup lightly, then level it off with a flat utensil. Better yet, use a kitchen scale to weigh your flour (as specified in the recipe card). Scooping directly from the bag often compacts the flour, leading to too much flour and potentially dry, tough biscuits.
- Cold Butter: This is a non-negotiable for flaky biscuits! I prefer using salted butter for its enhanced flavor, but unsalted butter works perfectly fine if that’s your preference. The key is that your butter must be **very cold**, ideally straight from the fridge and cubed just before mixing. Cold butter creates pockets of steam in the oven, which are essential for those desirable flaky layers.
- Buttermilk: The secret ingredient for supremely fluffy and tender biscuits. The acidity in buttermilk reacts with the baking soda and baking powder, providing a significant lift and a wonderfully soft crumb. **I strongly advise against substitutions here for the best rise and texture.** While there are “homemade buttermilk” hacks using vinegar or lemon juice and regular milk, they do not produce the same superior results as real buttermilk in this recipe. However, if you’re truly in a bind, I’ve included a substitution note further down.
- Heavy Cream (for brushing): A light brush of heavy cream on top of the biscuits before baking contributes to a gorgeous, deep golden-brown crust and a subtle richness. It’s a small step that makes a big visual and textural difference.
- Fresh Strawberries: This recipe demands the best! Use only fresh, ripe, and sweet strawberries. This is one instance where frozen berries simply will not do, as they release too much water and lack the vibrant flavor and texture needed for the perfect shortcake. Save your frozen strawberries for recipes like my Strawberry Rhubarb Crumble or my 10-Minute Strawberry Compote.
- Vanilla Extract: For the most exquisite flavor, always opt for real vanilla extract or vanilla bean paste. It infuses the whipped cream with a warm, aromatic sweetness that elevates the entire dessert.
Creative Variations & Smart Substitutions:
While the classic strawberry shortcake is perfection, these delightful variations and smart substitutions offer flexibility and new flavor experiences:
- Effortless Shortcut Shortcake: For those times when you’re short on time but still crave homemade goodness, you can take a shortcut by using high-quality store-bought pound cake or angel food cake instead of making the biscuits from scratch. Simply slice the cake, pile it high with our homemade whipped cream and prepared fresh strawberries for a quick yet satisfying dessert.
- Berry Medley Magic: Why limit yourself to just strawberries? Experiment with a vibrant mix of your favorite seasonal berries! A delightful combination might include equal parts blueberries, blackberries, and strawberries. This not only adds a beautiful array of colors but also introduces a complex tart-sweet flavor profile that’s truly “berry” fun!
- Buttermilk Alternatives (with Caveats): As mentioned, real buttermilk is highly recommended for the best biscuit texture and rise. However, if you find yourself without it in an absolute pinch, you can create a makeshift substitute. Add 1 tablespoon of white vinegar or lemon juice to a 1-cup liquid measuring cup, then fill the rest of the way with whole milk until it reaches the 1-cup line. Stir gently and let it sit for 5 minutes until it slightly curdles before using. Be aware that this substitute may not yield the exact same fluffy rise as genuine buttermilk, but your biscuits will still be delicious.
- Beyond Classic Whipped Cream: While our vanilla bean whipped cream is divine, feel free to experiment with other creamy toppings. Cool whip is a convenient, time-saving option, or you could serve your shortcakes with a scoop of premium vanilla bean ice cream for an extra cool and refreshing treat. A dollop of mascarpone cream could also add a sophisticated, rich twist.
How to Prepare the Luscious Strawberries:
Preparing the strawberries is a simple yet crucial step that allows their natural juices and sweetness to develop into a delightful syrup, perfectly complementing the biscuits and cream. This process is called maceration.
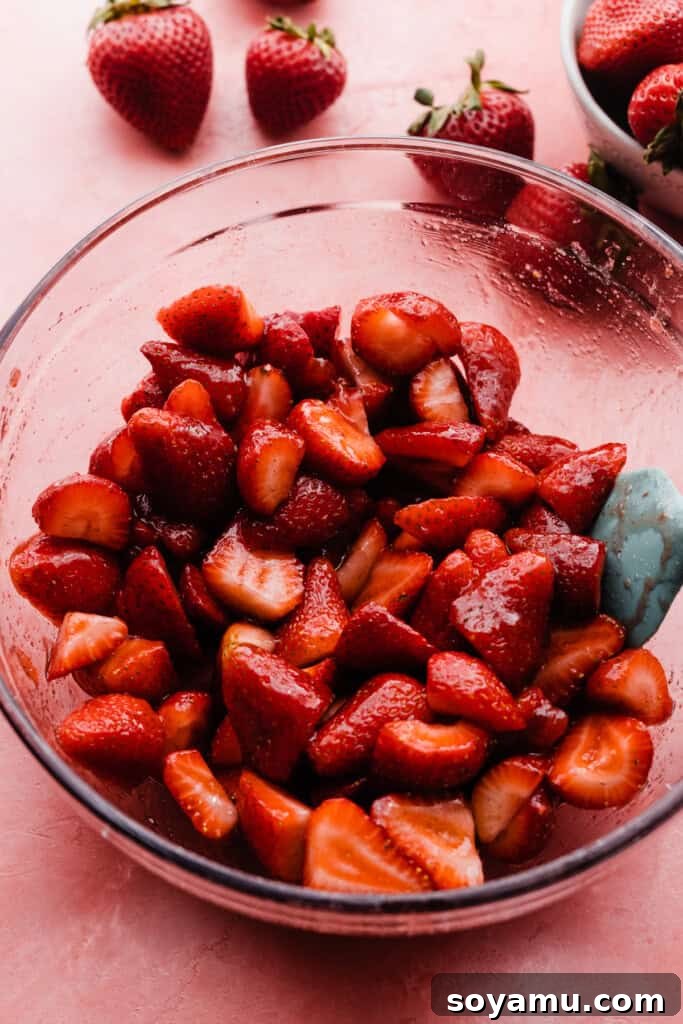
Step 1: Slice and Macerate the Strawberries. Begin by hulling and quartering your fresh strawberries. Place them in a medium bowl and toss them gently with a bit of granulated sugar. For an extra boost of flavor and juiciness, stir in a spoonful or two of strawberry jam (this is optional but highly recommended!). Let this mixture sit at room temperature while you prepare the biscuits and whipped cream. As the strawberries sit, the sugar will draw out their natural juices, creating a beautiful, sweet syrup that will soak into your tender biscuits. Stir occasionally to ensure even coating.
Crafting the Perfect Flaky Strawberry Shortcake Biscuits:
The heart of our strawberry shortcake lies in these tender, flaky homemade biscuits. Follow these steps carefully to achieve bakery-quality results:
Step 1: Combine Dry Ingredients & Cut in Cold Butter. In a large mixing bowl, whisk together your all-purpose flour, granulated sugar, baking powder, baking soda, salt, and a hint of cinnamon. This ensures all leavening agents and flavors are evenly distributed. Next, add your cubed, **very cold** butter. Using a pastry cutter, or your fingertips if you don’t have one, cut the butter into the dry ingredients until the mixture resembles coarse meal with some pea-sized pieces of butter still visible. It’s crucial not to overmix here; visible pieces of cold butter are what create those desired flaky layers in the oven.
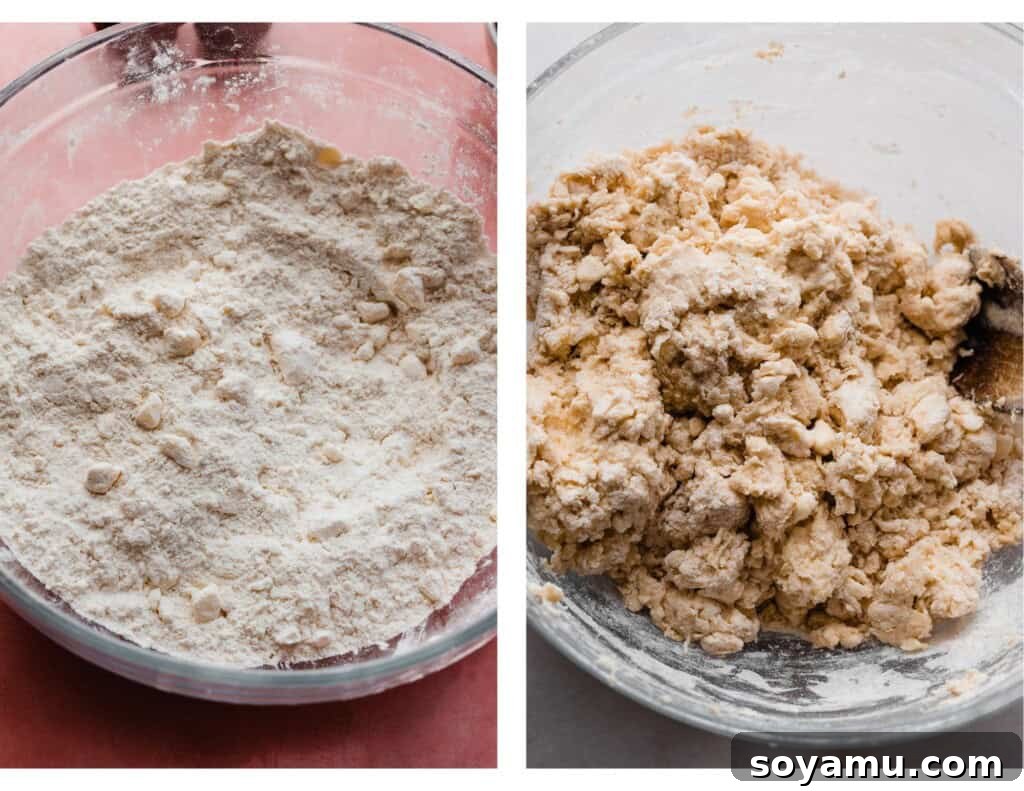
Step 2: Add Buttermilk & Gently Gather the Dough. Pour in the cold buttermilk and stir gently with a rubber spatula until the dry ingredients are just moistened and the dough begins to come together. Be careful not to overmix, as this can develop the gluten too much, leading to tough biscuits. If you notice any stubborn dry spots, flick a tiny bit more buttermilk onto them. The dough should be shaggy but cohesive, not overly wet or sticky. The photo below on the right demonstrates the ideal texture—it may have some cracks, but it shouldn’t appear dry or crumbly.
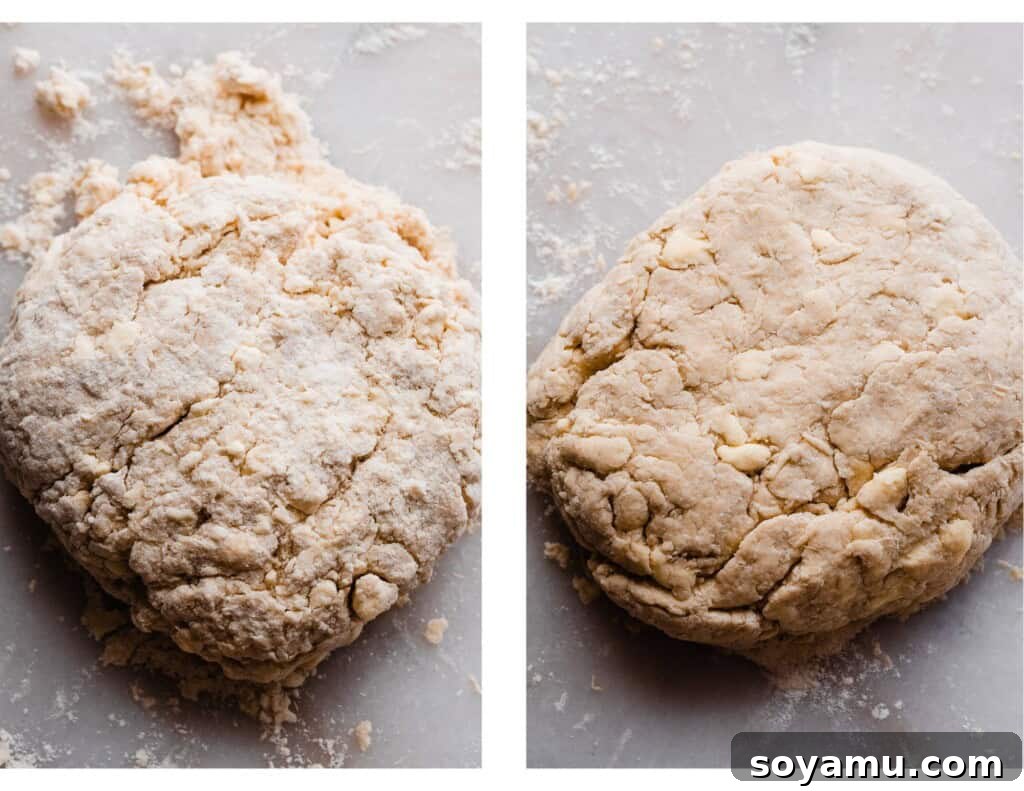
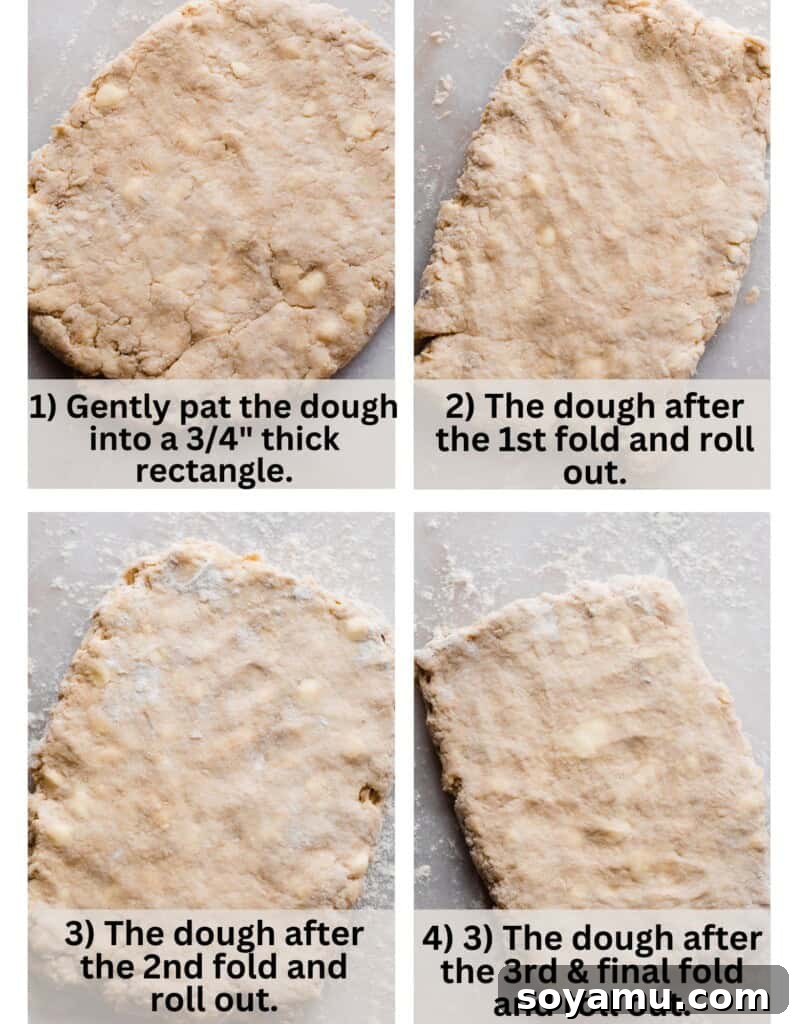
Step 3: Fold and Turn for Flaky Layers. Lightly flour your work surface and gently pat the dough into a rectangle about 3/4 inch thick. Now, for the secret to incredibly flaky biscuits: perform a “letter fold.” Fold one-third of the dough from the short side towards the center, then fold the opposite third over the first, as if you were folding a letter vertically into three sections. Rotate the dough 90 degrees. Gently pat or roll it back into a 3/4-inch thick rectangle. Repeat this folding and turning process two more times, for a total of **three folds and roll-outs**. This technique, similar to that used in my Maple Biscuits and Blueberry Scones, creates dozens of thin layers that puff up beautifully in the oven, yielding unparalleled flakiness.
Step 4: Cut the Biscuits with Precision. After the final fold and roll-out, pat the dough to your desired thickness (around 3/4 to 1 inch for taller biscuits). Using a 3-inch biscuit cutter or a round cookie cutter, firmly press straight down into the dough to cut out your biscuits. **Crucially, do NOT twist the cutter!** Twisting seals off the edges of the biscuit, preventing them from rising as tall and hindering the formation of distinct flaky layers. Gather any scraps, gently press them together without overworking, and cut out any remaining biscuits. You should yield about 7-8 biscuits.
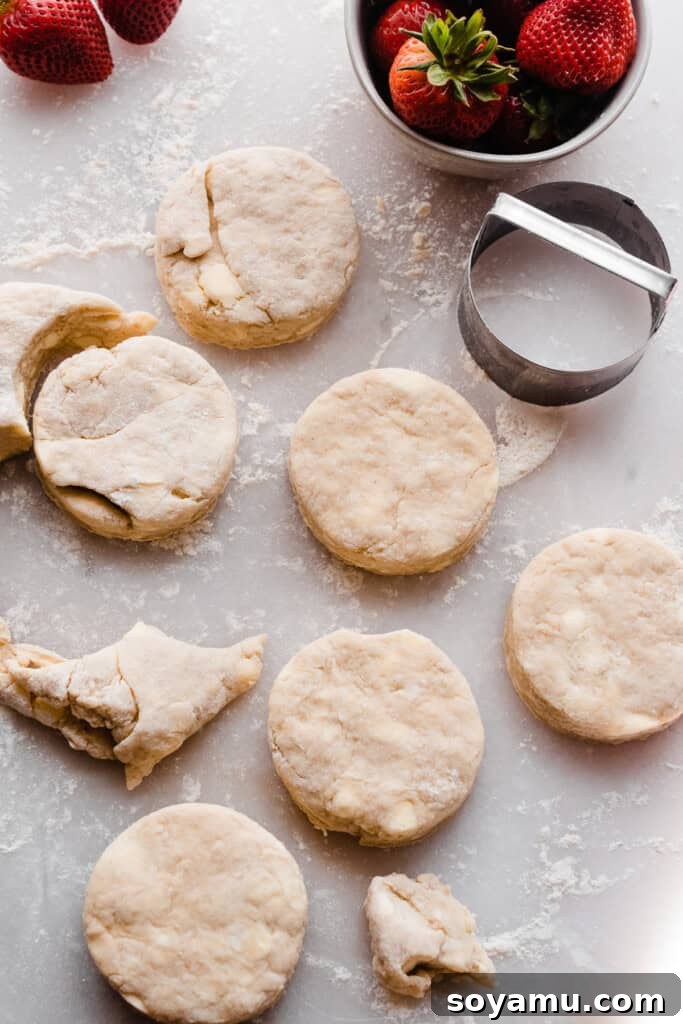
Step 5: Chill and Bake to Golden Perfection. Arrange your cut biscuits on a parchment-lined baking sheet, making sure they are nestled close together—this encourages a higher rise. Chill the biscuits in the refrigerator for at least 10 minutes while your oven preheats to 400°F (200°C). Chilling the dough ensures the butter remains very cold, which is vital for maximum flakiness. Before baking, brush the tops of the chilled biscuits with a little heavy cream and sprinkle generously with coarse sugar for a beautiful sparkle and crisp crust. Bake for 20-24 minutes, or until they are deeply golden brown and have risen beautifully. The irresistible aroma of freshly baked biscuits will fill your kitchen! Allow them to cool slightly on a wire rack before assembling.
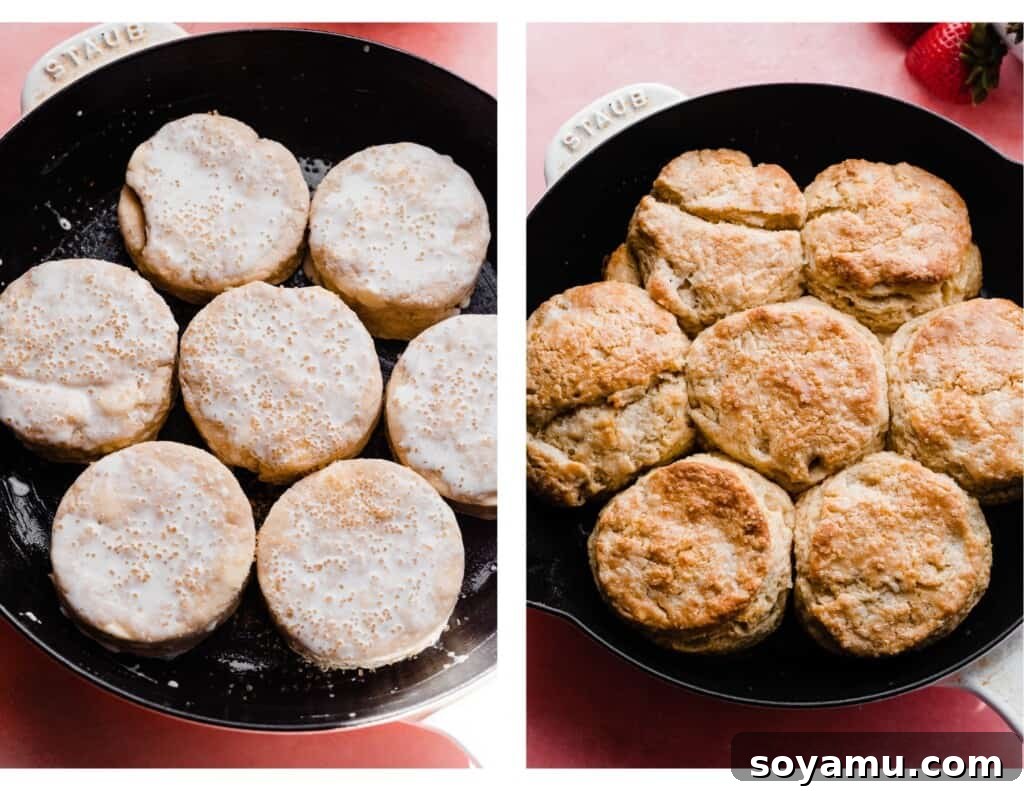
You’ll be amazed by how beautiful and professional these biscuits look! They are so easy and reliable that you might find yourself making multiple batches. They consistently turn out flaky, buttery, and just the right touch of sweet, making them the ideal canvas for your fresh strawberries and cream.
Whipping Up Heavenly Homemade Vanilla Bean Whipped Cream:
Creating your own whipped cream is incredibly simple and yields a far superior result to anything from a can. It’s the perfect light and airy complement to your shortcakes.
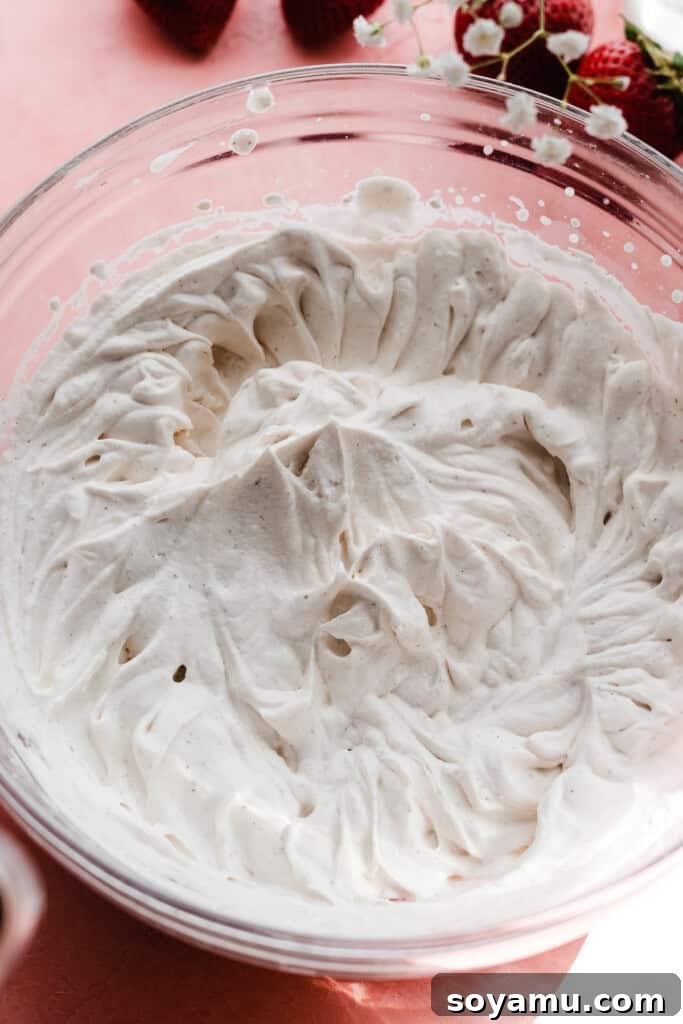
Step 1: Prepare and Whip the Cream. Ensure your heavy cream is **nicely chilled** before you begin; cold cream whips up faster and holds its shape better. In a large mixing bowl, combine the cold heavy cream, powdered sugar (also known as confectioners’ sugar), and vanilla extract (or vanilla bean paste for those beautiful specks and deeper flavor). Using an electric hand mixer or a stand mixer fitted with the whisk attachment, beat the mixture on medium-high speed. Continue beating until stiff peaks form. Stiff peaks mean that when you lift the whisk, the cream holds its shape firmly. Be careful not to overmix, as this can quickly turn your luscious cream into butter!
**Pro Tip:** To prevent splatters of heavy cream from decorating your kitchen, loosely cover your mixer and bowl with a clean kitchen towel while beating.
Assembling, Serving, and Storing Your Strawberry Shortcake:
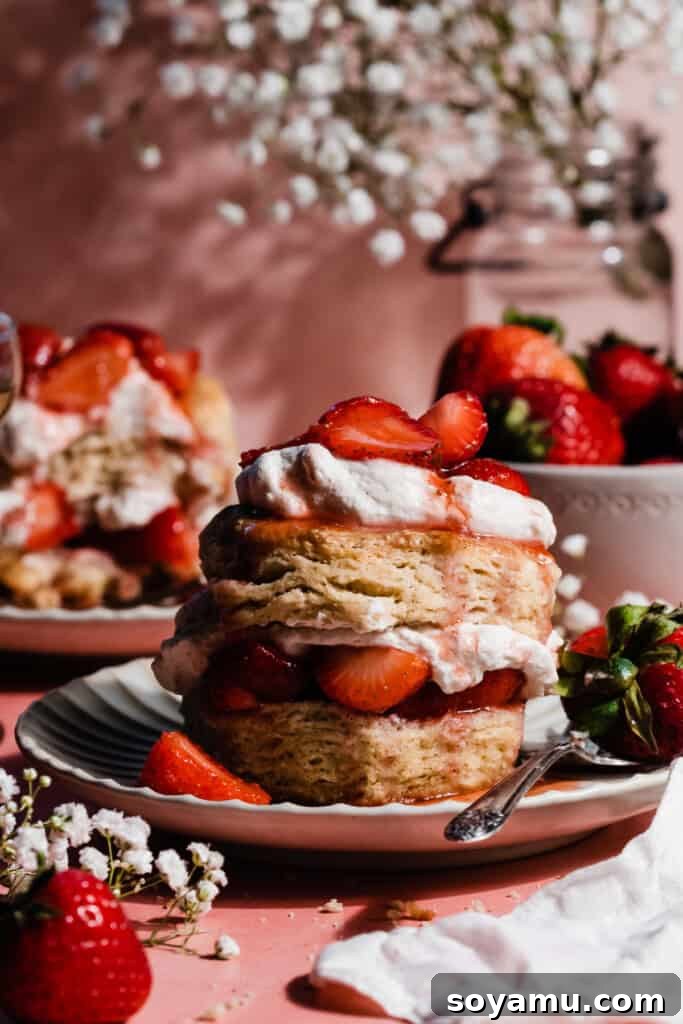
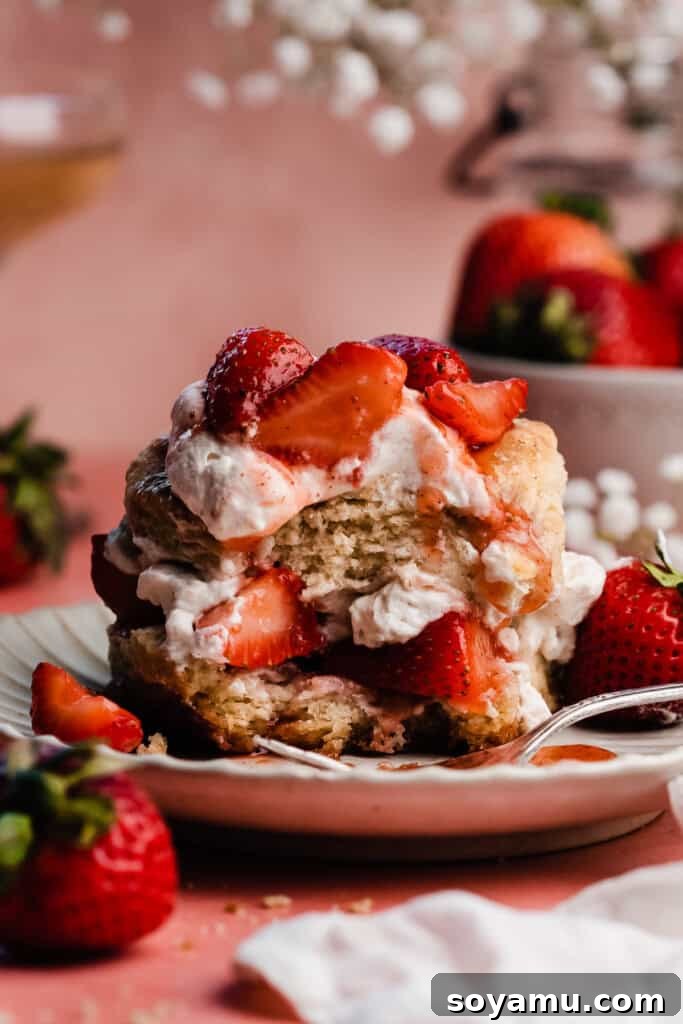
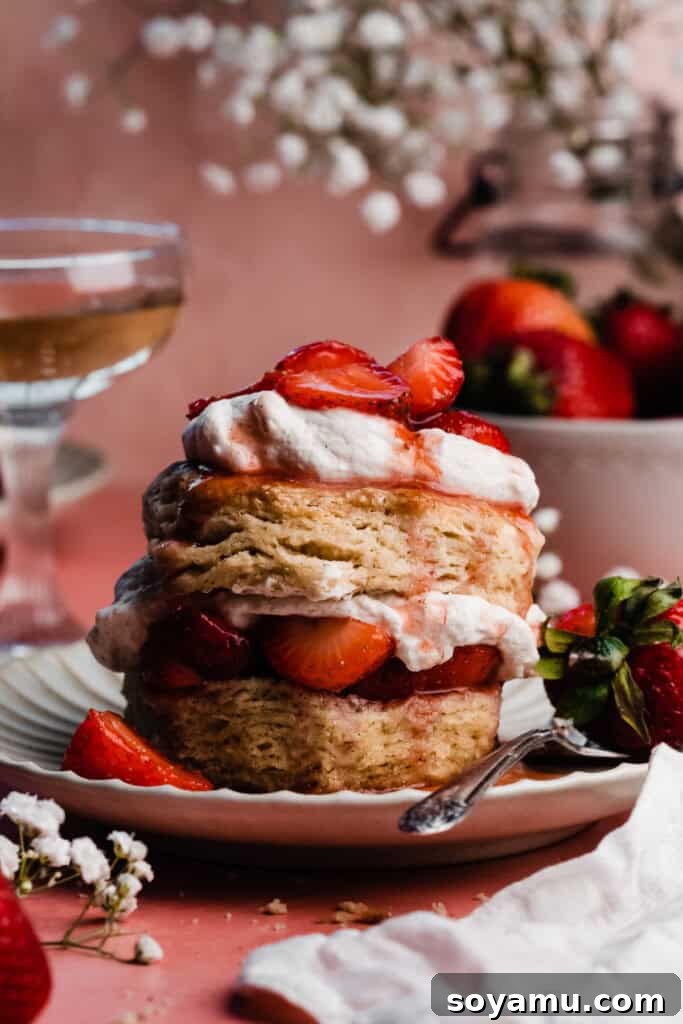
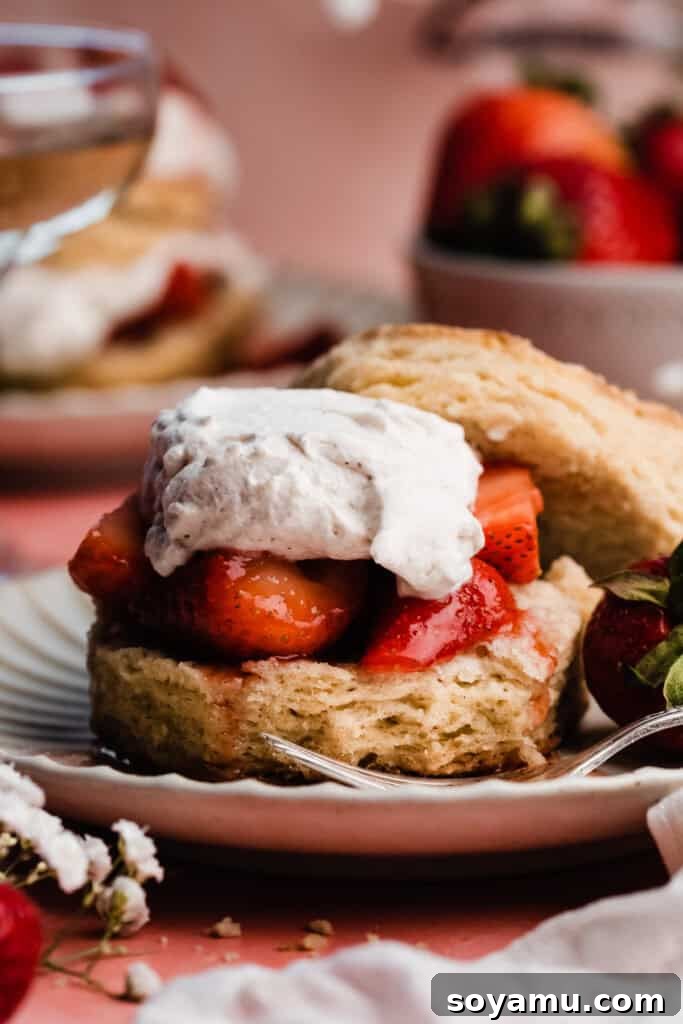
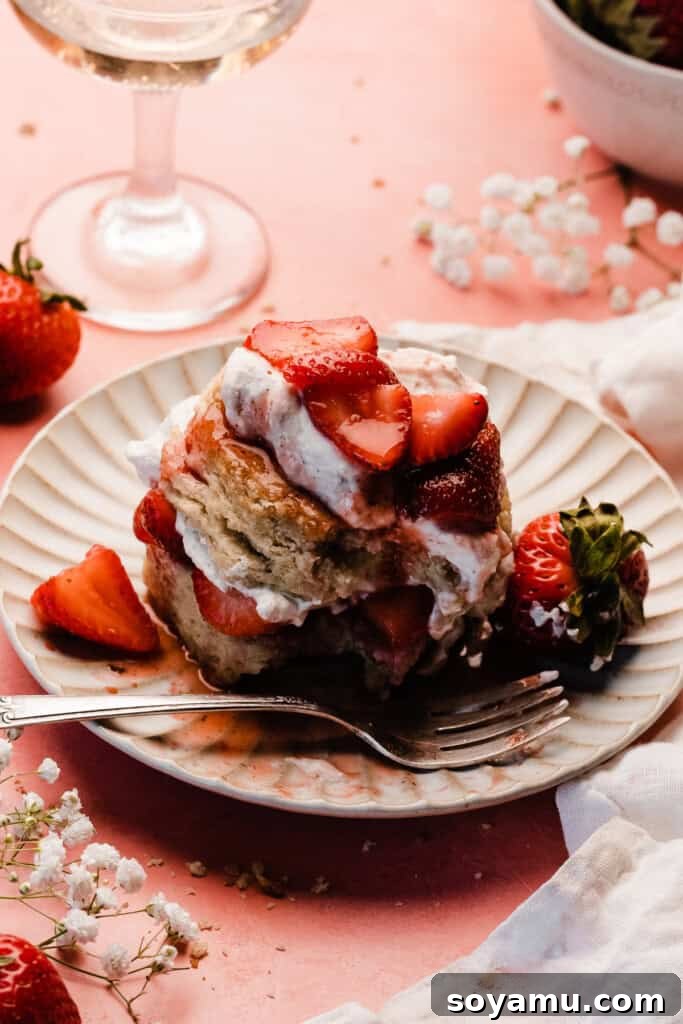
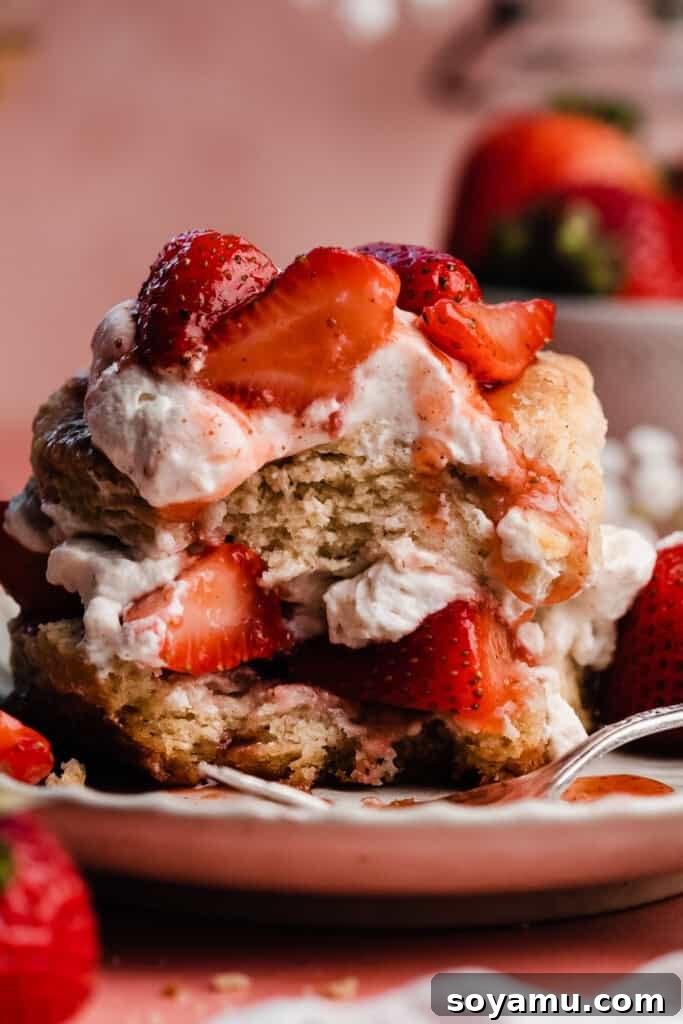
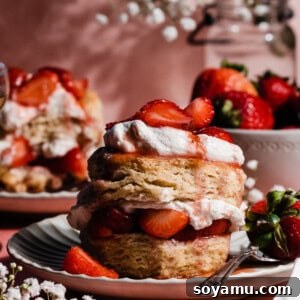
Once all components are ready, the magic happens! Gently slice your cooled biscuits in half horizontally. Spoon a generous amount of the juicy macerated strawberries onto the bottom half of each biscuit. Top with a lavish dollop of homemade vanilla bean whipped cream. Place the biscuit lid on top, and if you’re feeling extra decadent, add another spoonful of strawberries and a swirl of whipped cream on top for impressive **double-decker shortcakes** (as seen in the photos!). Dive into this strawberry heaven immediately for the best experience!
Storage Recommendations: For optimal freshness and flavor, strawberry shortcakes are truly at their best when assembled and enjoyed on the day they are made. The biscuits are particularly delightful when fresh from the oven. However, if you have leftovers or prefer to prep ahead, here’s how to store each component separately:
- Biscuits: Store leftover biscuits in an airtight container at room temperature for up to two days. While they are undoubtedly best fresh, you can gently reheat them in a preheated oven (around 300°F / 150°C) for a few minutes to regain some warmth and crispness.
- Macerated Strawberries: Keep the prepared strawberries in an individual airtight container in the refrigerator for 2-3 days.
- Whipped Cream: Store any leftover homemade whipped cream in a separate airtight container in the fridge for up to 2-3 days. It may lose a little volume over time but will still be delicious.
Expert Tips for Strawberry Shortcake Success:
Achieving perfectly tender biscuits, luscious strawberries, and airy whipped cream is easy with these expert insights:
- Invest in an Oven Thermometer: Many ovens can fluctuate significantly from their set temperature. An oven thermometer is an inexpensive tool that will show you your oven’s true temperature, ensuring your biscuits bake evenly and achieve that perfect golden hue. Accurate oven temperature is paramount for most baking, especially for delicate biscuits.
- Embrace a Kitchen Scale for Flour Accuracy: While spooning and leveling flour is a good start, a food scale provides the most accurate measurement for flour. The weight of flour can vary widely depending on how it’s measured, impacting the final texture of your biscuits. Weighing ensures consistent, professional-level results every time.
- Handle Dough Gently and Keep it Cold: Overworking biscuit dough develops gluten, leading to tough biscuits. Mix just until combined and handle the dough as little as possible. The colder your butter is when it enters the oven, the flakier your biscuits will be. If at any point your dough feels warm, pop it into the fridge or freezer for 10-15 minutes to firm up the butter before proceeding.
- Cold Cream is Key for Whipped Cream: Just like butter for biscuits, heavy cream for whipping must be **ice cold**, straight from the refrigerator. Cold cream emulsifies better and whips up faster and to a much more stable consistency. You can even chill your mixing bowl and whisk attachment in the freezer for 10-15 minutes before whipping for extra insurance.
- Don’t Overmix Whipped Cream: Whipped cream goes from perfectly fluffy to grainy and then to butter very quickly. Watch it closely and stop mixing as soon as stiff peaks form. When you lift the whisk, the peaks should stand upright firmly. If you continue mixing past this point, you risk ruining the smooth, airy texture.
- Prevent Whipped Cream Splatters: For a cleaner kitchen, try placing a clean kitchen towel loosely over your mixer and bowl while you beat the heavy cream. This simple trick effectively contains any splatters and keeps your countertop tidy.
Frequently Asked Questions About Strawberry Shortcake:
For the absolute best results—meaning the fluffiest, most tender biscuits with the highest rise—I strongly recommend using genuine buttermilk. Its unique acidity is crucial for the chemical reaction that gives these biscuits their signature texture. However, if you are in an undeniable bind and cannot get buttermilk, you can create a substitute: add 1 tablespoon of white vinegar or lemon juice to a 1-cup measuring cup, then fill the remainder with regular milk (preferably whole milk) until you reach the 1-cup line. Stir it and let it sit for about 5 minutes to slightly curdle before incorporating it into your dough. Please note that while this substitute will work, you will likely sacrifice some of the ideal rise and incredibly fluffy texture that true buttermilk provides.
Traditionally, and in this classic recipe, strawberry shortcake refers to a dessert made with flaky, scone-like biscuits, rather than a spongy cake. These biscuits are typically split and filled with fresh strawberries and whipped cream. The term “shortcake” itself refers to the “short” or crumbly, rich texture of the biscuit, achieved by a high fat content. If you’re looking for a dessert in a layer cake form that celebrates similar flavors, you might enjoy my summery Berries & Cream Cake!
Baking biscuits from freshly prepared dough yields the absolute best results in terms of rise and flakiness. I haven’t personally tested refrigerating the cut-out dough overnight, so I can’t confidently recommend it for optimal texture. However, if you want to get a head start, you can absolutely freeze the cut-out, unbaked biscuits! Arrange them on a baking sheet, freeze until solid, then transfer them to an airtight container or freezer bag. They can be stored in the freezer for up to 1 month or so. When you’re ready to bake, simply place them on a prepared baking sheet and bake directly from frozen, adding an extra 1-2 minutes to the baking time as needed. This is a fantastic method for having fresh biscuits on demand!
Essential Tools for Shortcake Perfection:
While not strictly necessary, these tools can significantly ease your shortcake-making process and enhance your results:
- 10-Inch Cast Iron Skillet: A Staub cast iron skillet (or a more budget-friendly Lodge skillet) is fantastic for baking biscuits. Its even heat distribution promotes uniform browning and a beautiful crust. Nestling biscuits together in a skillet also helps them rise taller and stay tender.
- Pastry Cutter: This simple tool, also known as a pastry blender, makes cutting cold butter into dry ingredients a breeze! It helps you achieve the perfect crumbly texture quickly and efficiently, without warming the butter with your hands.
(Note: The links above are affiliate links, meaning I may earn a small commission at no extra cost to you if you make a purchase.)
More Irresistible Summer Dessert Recipes to Explore:
If you’ve fallen in love with the fresh flavors of strawberry shortcake, here are more delightful recipes perfect for warm weather and ripe seasonal fruits:
- Strawberry Blueberry Pie: A classic fruit pie bursting with berry goodness.
- Strawberry Rhubarb Crumble: A comforting, fruity crumble that’s incredibly easy to make.
- Classic Strawberry Cheesecake: Rich and creamy, topped with a vibrant homemade strawberry sauce.
- Strawberry Rhubarb Galette: A rustic and free-form tart that showcases summer fruits beautifully.
- Summer Glory Skillet Crumble: A warm, bubbly fruit crumble baked and served right in a skillet.
- Strawberry Shortcake Icebox Cake: A no-bake, layered dessert offering a different take on shortcake flavors.
- Strawberry Bruschetta: A fresh and elegant appetizer or light dessert.
Loved this recipe? Share your thoughts & leave a star rating!
Your feedback is incredibly valuable. Please consider leaving a comment and a star rating below the recipe card, letting me know how you enjoyed making and tasting this classic homemade strawberry shortcake. Your support helps my small business immensely!
Homemade Strawberry Shortcakes with Strawberries and Perfect Whipped Cream
Rate Recipe
Print Recipe
Ingredients
Fresh Strawberries
- 5 cups fresh strawberries, hulled and quartered (23 ounces or 652 grams)
- 3 tbsp granulated sugar (40 grams)
- 1-2 tbsp strawberry jam, optional (Adds an extra juicy punch, but can be skipped)
For the Biscuits:
- 2 and 3/4 cups all-purpose flour, spooned & leveled or weighed out (358 grams)
- 1/4 cup + 2 tbsp granulated sugar (79 grams)
- 4 tsp baking powder
- 1/2 tsp baking soda
- 1/2 tsp salt
- 1/4 tsp cinnamon
- 3/4 cup salted butter, cubed & **cold** (170 grams)
- 1 cup **cold** buttermilk + 1-2 tsp extra, as needed (See note about substitutions, 240 mL, plus 1-2 tsp extra as needed)
- 1-2 tbsp heavy cream, for brushing tops of biscuits (15-30 grams)
- Coarse sugar, for sprinkling
Whipped Cream
- 1 and 1/4 cups **cold** heavy cream (300 mL)
- 3 tbsp powdered sugar (24 grams)
- 1 tbsp vanilla extract (or vanilla bean paste)
Instructions
-
Prep the Strawberries: Add the quartered strawberries, granulated sugar, and strawberry jam (if using) to a medium bowl. Gently stir together with a rubber spatula, being careful not to mash the berries. Place the bowl in the fridge while you prepare the other components. This allows the strawberries time to release their delicious juices and create a light syrup.
-
Make the Biscuits: In a large mixing bowl, whisk together the all-purpose flour, granulated sugar, baking powder, baking soda, salt, and cinnamon. Add the **cubed, cold** butter to the dry ingredients. Use a pastry cutter or your fingertips to cut the butter into the flour until the mixture resembles coarse crumbs, with some pea-sized pieces of butter still visible. This is crucial for flaky biscuits.
Pour in the cold buttermilk and stir gently with a rubber spatula until a shaggy dough forms. If there are any dry crumbs at the bottom of the bowl, add an additional 1-2 teaspoons of buttermilk to fully hydrate them. The dough should be moist but not sticky.
Turn the dough out onto a lightly floured counter and gently form it into a cohesive ball. With floured hands, carefully flatten the dough into a rectangle approximately 3/4 inch thick. Perform a “letter fold” by folding the bottom third of the dough up towards the center, then folding the top third down over it. Rotate the dough 90 degrees and gently pat or roll it back into a 3/4-inch thick rectangle. Repeat this folding and turning process **two more times**, for a total of three rounds. Lightly flour the counter and dough as needed to prevent sticking between turns.
After the third fold and turn, roll or pat the dough out to 3/4 inch thick again. Use a 3-inch biscuit cutter or round glass to cut out the biscuits. **Do NOT twist the cutter** as you press down; press straight down and lift straight up. Twisting seals the edges and can prevent proper rise. Gather any dough scraps, gently press them together, and cut any remaining biscuits. You should yield 7-8 biscuits.
Preheat your oven to 400°F (200°C). Arrange the cut biscuits on a parchment-lined baking sheet, ensuring they are nestled close together. Place the baking sheet with the biscuits into the refrigerator to chill for at least 10 minutes (or up to overnight in an airtight container) while the oven preheats. This chilling step is essential for the butter to remain cold, which creates excellent flaky layers and a good rise during baking.
-
Bake: Generously butter a 10-inch cast iron skillet (or use a regular baking sheet if you don’t have a skillet, ensuring the biscuits are still nestled together). Carefully transfer the chilled biscuits into the skillet. Brush the tops of the biscuits with 1-2 tablespoons of heavy cream and sprinkle with coarse sugar. Bake for 20-24 minutes, or until the biscuits are a beautiful deep golden brown and have risen significantly. You can gently test the center of one biscuit with a butter knife to ensure it’s baked through. Let the biscuits cool in the skillet on a wire rack for 10-15 minutes, then carefully transfer them to a rack to cool completely.
-
Make the Whipped Cream: Ensure your heavy whipping cream is thoroughly chilled before you begin; cold cream is paramount for success. In a large mixing bowl, combine the cold heavy cream, powdered sugar, and vanilla extract. Beat on high speed using an electric mixer until stiff peaks form. Stiff peaks mean the cream holds its shape firmly when you lift the beaters. **Do not overmix**, as this can cause the cream to become grainy or turn into butter. For a neat kitchen, you can loosely cover your mixer and bowl with a kitchen towel to prevent splatters.
-
Serve + Store: Once the biscuits have cooled slightly, slice them in half horizontally. Fill each biscuit with a generous spoonful of the macerated strawberries and top with a cloud of homemade whipped cream. Serve and enjoy immediately for the best flavor and texture! Leftover biscuits can be stored in an airtight container at room temperature for 1-2 days (though they are truly best fresh). Leftover whipped cream and strawberries should be stored separately in airtight containers in the refrigerator for 2-3 days.
Notes
Buttermilk Substitution: If you absolutely cannot find buttermilk, you can make a substitute: add 1 tablespoon of lemon juice or white vinegar to a 1-cup liquid measuring cup, then fill the rest with milk (preferably whole milk) until it reaches the 1-cup mark. Stir and let sit for 5 minutes before using. Be aware that this may affect the final rise and texture slightly compared to real buttermilk.
Nutrition
Calories: 634 kcal,
Carbohydrates: 67g,
Protein: 8g,
Fat: 38g,
Saturated Fat: 24g,
Polyunsaturated Fat: 2g,
Monounsaturated Fat: 10g,
Trans Fat: 1g,
Cholesterol: 107mg,
Sodium: 694mg,
Potassium: 311mg,
Fiber: 3g,
Sugar: 25g,
Vitamin A: 1333IU,
Vitamin C: 61mg,
Calcium: 235mg,
Iron: 3mg
Nutrition information is automatically calculated, so should only be used as an approximation.