
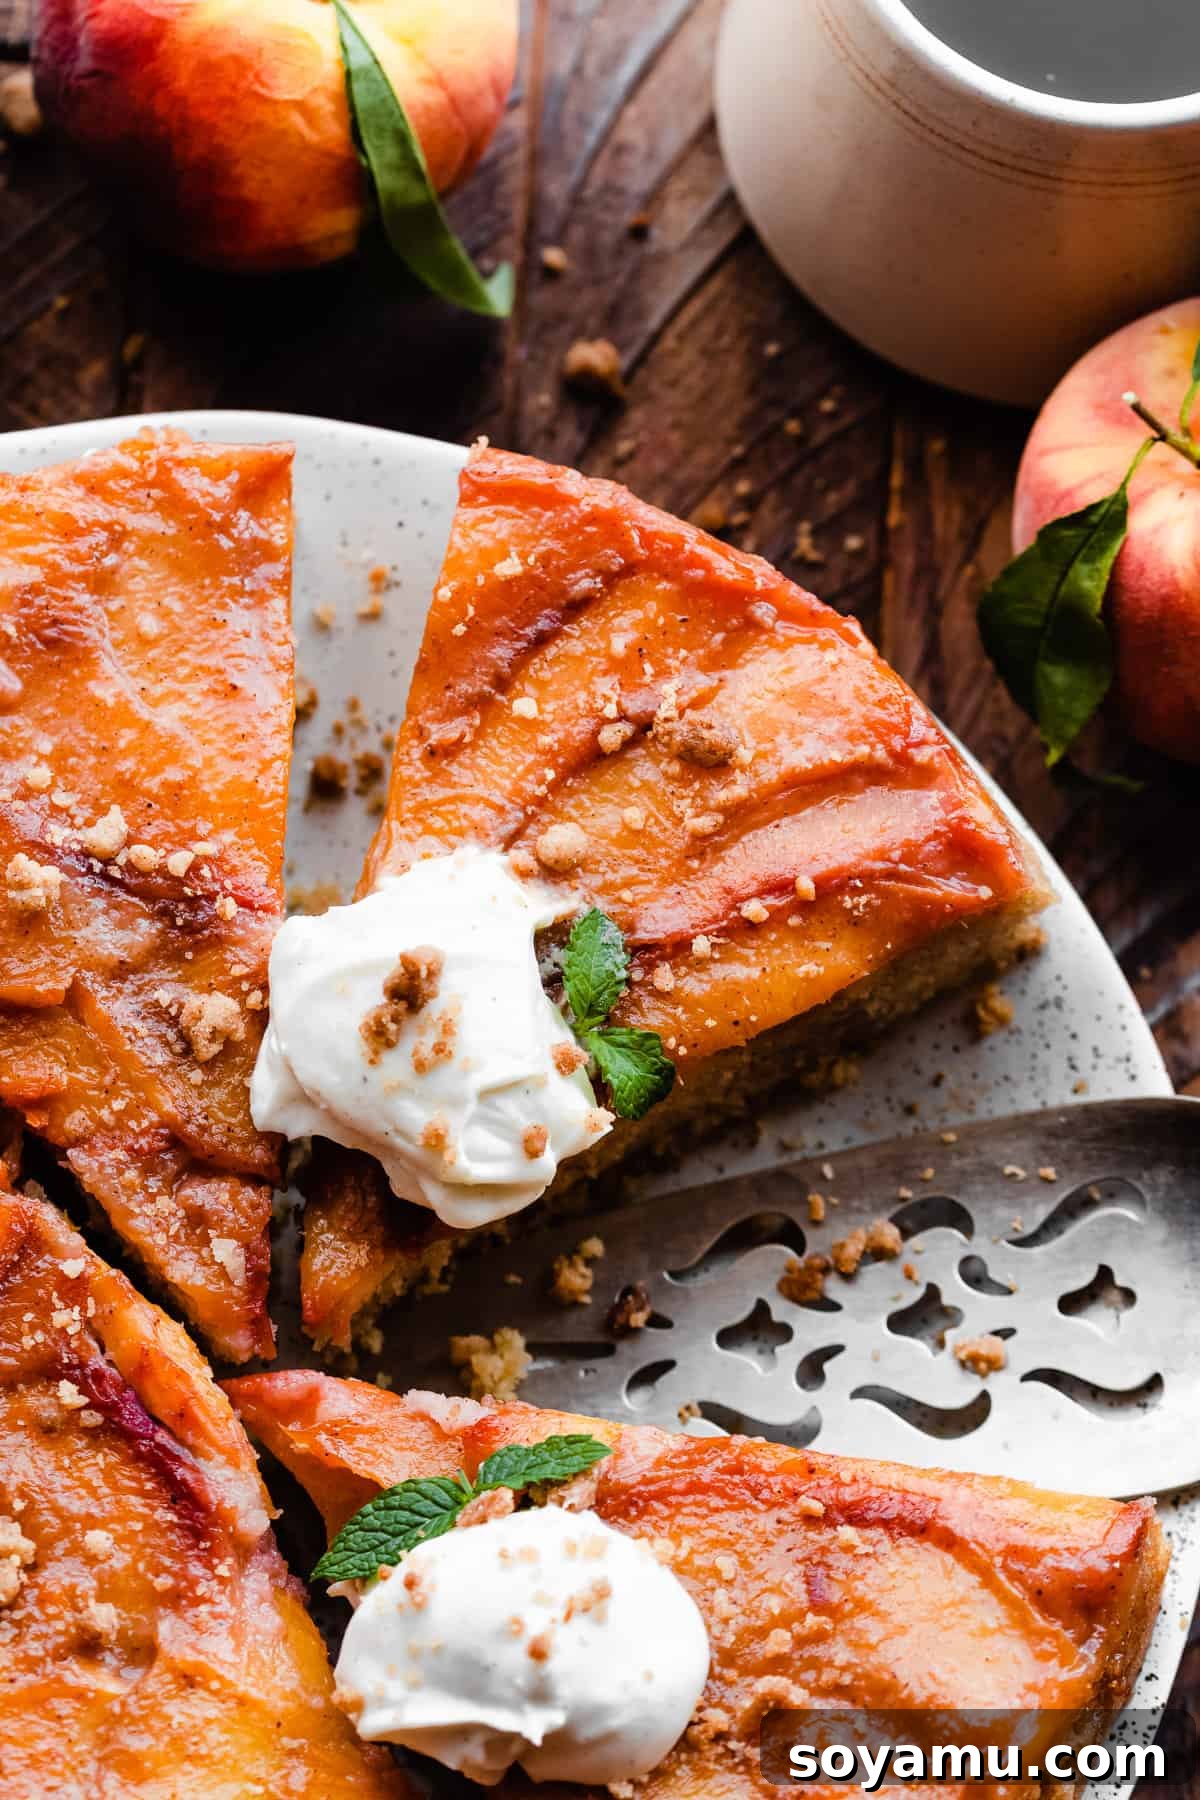
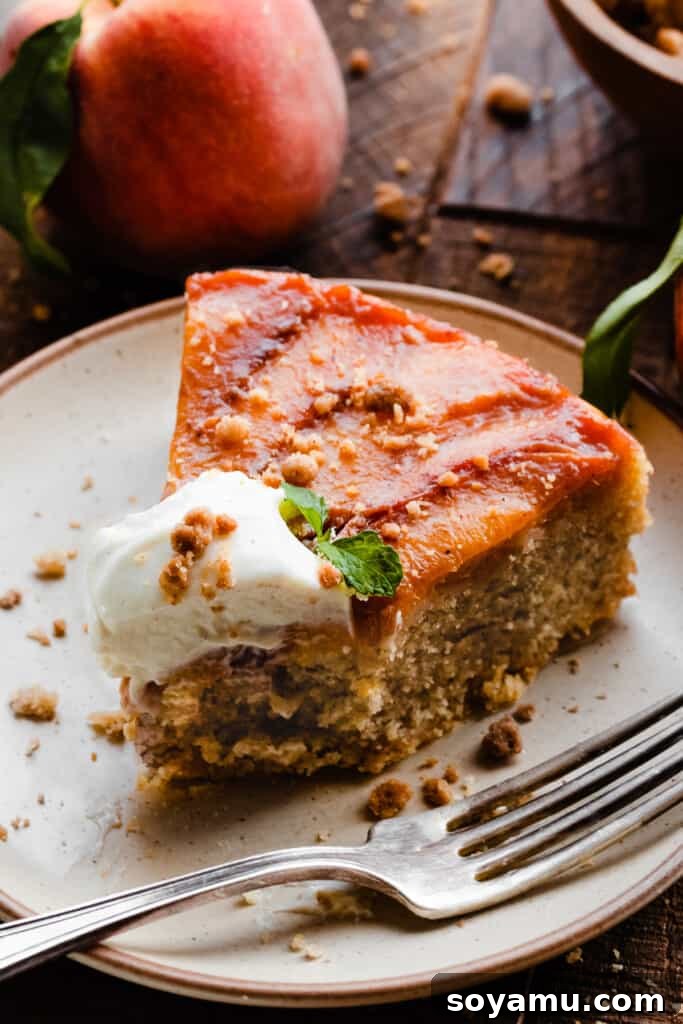
Dive into the quintessential taste of summer with our exquisite Peach Upside Down Cake. This isn’t just any upside-down cake; it’s a delightful culinary experience that layers succulent, sweet peaches under a cloud-like cinnamon vanilla cake, crowned with a surprising and utterly addictive crumb layer. Imagine the delicate crunch of a streusel topping harmoniously blending with tender fruit and fluffy cake, reminiscent of your favorite peach cobbler but elevated to an elegant snack cake. Each slice, perhaps adorned with an extra sprinkle of streusel and a generous dollop of freshly whipped cream, is a celebration of seasonal flavors – summer perfectly captured in a simple yet sophisticated dessert.

Why You’ll Fall in Love with This Peach Upside Down Cake:
This recipe isn’t just about baking a cake; it’s about creating a memorable dessert that embodies the warmth and sweetness of the season. Here’s why this particular Peach Upside Down Cake will become your new go-to summer treat:
- Caramelized Fresh Peaches – At the heart of this delightful cake lies a generous layer of perfectly ripe, juicy peaches. As they bake beneath the cake, these sweet stone fruits transform, developing a rich, caramelized flavor that’s simply irresistible. Each bite offers a burst of summery goodness, creating a truly unforgettable fruit base for our cake.
- Unbelievably Tender Cinnamon Vanilla Cake – Our cake layer is far from ordinary. It’s an ultra-fluffy, supremely moist cinnamon vanilla cake that provides the perfect contrast to the fruit. Inspired by our beloved peach cobbler cake layers, this updated recipe ensures an extra tender crumb, infused with comforting notes of cinnamon and pure vanilla extract that complement the peaches beautifully.
- That Irresistible Surprise Crumble Layer – What truly sets this upside-down cake apart is the hidden crumble layer. Baked onto what becomes the top of the cake, this easy streusel adds a delightful textural contrast and an authentic peach cobbler vibe. Its slight crunch offers a playful surprise with every forkful, elevating a classic dessert into something truly special and deeply satisfying.
- Effortlessly Elegant – Despite its impressive appearance and complex flavors, this cake is remarkably straightforward to prepare. It’s the perfect dessert to impress guests at a summer dinner party or to simply enjoy as a comforting family treat on a warm evening.
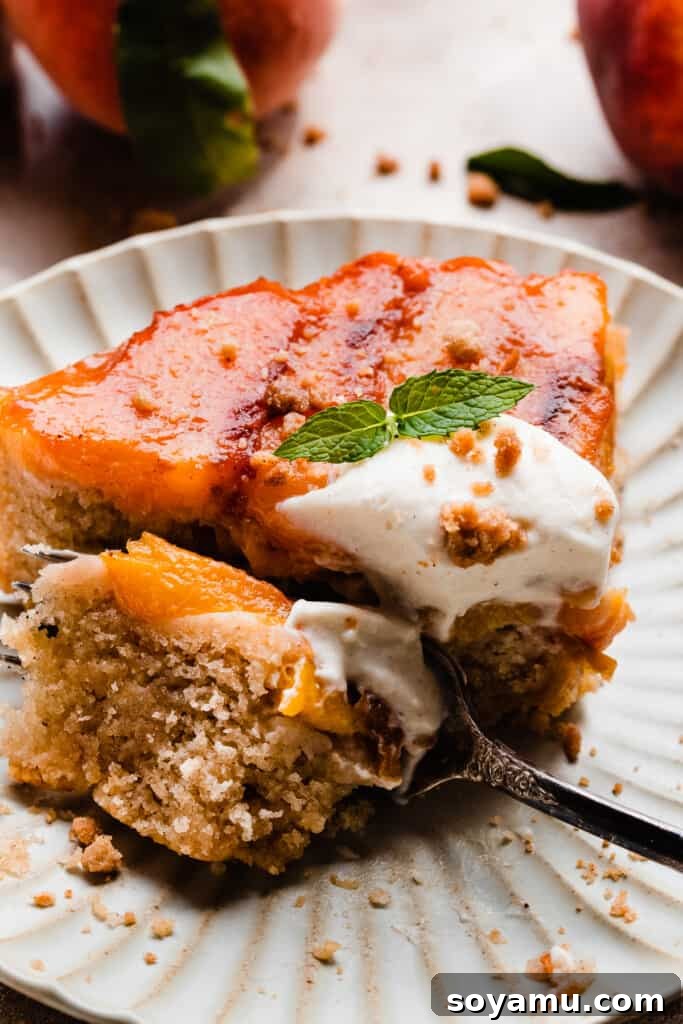
Ingredient Deep Dive: Crafting Perfection from Simple Staples:
Every great cake starts with quality ingredients. Here’s a closer look at what you’ll need and why each component is vital for achieving the best possible Peach Upside Down Cake. Remember, precise measurements and detailed instructions can be found in the comprehensive recipe card at the end of this article.
- Peaches – The star of our show! Select peaches that are ripe, fragrant, and slightly soft to the touch, but crucially, not mushy. While some bakers suggest using underripe peaches for structural integrity, I advocate for ripe peaches. Their superior flavor and juiciness contribute immensely to the overall taste and texture of the baked cake. For the finest quality, seek out peaches from your local farmer’s market or a reputable food co-op, as grocery store varieties can sometimes be inconsistent. A perfectly ripe peach will yield the most succulent, sweet, and caramelized fruit layer.
- Cake Flour – This ingredient is a game-changer for achieving an incredibly light and tender cake crumb. Cake flour has a lower protein content than all-purpose flour, which results in less gluten development and a softer texture. For optimal results, it’s crucial to measure your flour correctly. Use the “spoon and level” method: gently spoon the flour into your measuring cup until it overflows, then level it off with a straight edge. Alternatively, a kitchen scale offers the most accurate measurement. To give you an idea of the difference, 1 cup of cake flour typically weighs around 110 grams, whereas 1 cup of all-purpose flour can weigh up to 130 grams.
- Sour Cream – Full-fat sour cream is essential here. Its rich fat content and slight acidity contribute to the cake’s exceptional moisture and tender texture. It also reacts with the baking soda, aiding in leavening. Always ensure your sour cream is at room temperature before incorporating it into the batter, as cold ingredients can seize the butter and affect the emulsion.
- Butter – Whether for the crumble, the peach layer, or the cake batter, high-quality butter makes a difference. I personally prefer salted butter for its depth of flavor, which balances the sweetness of the cake. However, unsalted butter works perfectly fine if you’re mindful of adjusting the added salt. For the cake batter, ensure your butter is softened to room temperature, allowing it to cream smoothly with the sugar and create an airy base.
- Eggs – A large egg, at room temperature, is critical for binding the ingredients, adding richness, and contributing to the cake’s structure and moisture. Like sour cream and milk, room temperature eggs emulsify better with other ingredients, leading to a more homogenous and smoother batter.
- Milk – Similar to our other cold ingredients, your milk (I typically use 2%) needs to be at room temperature. This helps prevent the batter from curdling and ensures a uniform, tender crumb. Cold milk can shock the butter in the batter, leading to a less cohesive mixture.
- Vanilla Extract – Don’t skimp on quality here. A good quality, pure vanilla extract enhances all the other flavors in the cake, adding a layer of warmth and sophistication that artificial vanilla simply cannot replicate.
- Spices (Cinnamon, Nutmeg, Cloves) – These warming spices are carefully balanced to complement the sweet peaches and rich vanilla. Cinnamon is prominent, evoking that classic cobbler feel, while a hint of nutmeg and cloves adds complexity without overpowering the fruit.

Adapt Your Bake: Ingredient Substitutions for Every Need:
While this recipe is perfected with the ingredients listed, we understand the need for flexibility. Here are some common substitutions and variations to help you tailor this cake to your dietary needs or preferences:
- Dairy-Free Adaptation – To make this recipe dairy-free, you can confidently swap out dairy ingredients with your favorite trusted plant-based alternatives. Use a high-quality dairy-free butter substitute (preferably one that comes in sticks for baking), full-fat dairy-free sour cream (like a coconut or oat-based variety), and your preferred plant-based milk (almond, soy, or oat milk work well). Ensure these alternatives are also at room temperature where specified for best results.
- Gluten-Free Exploration – While I haven’t personally tested a gluten-free version of this specific recipe, many bakers have found success using a 1:1 gluten-free all-purpose flour blend (one that contains xanthan gum) as a direct substitute for regular cake flour. Be aware that texture might vary slightly, and some GF flours absorb liquid differently, so watch your batter consistency. If you try it, please share your results!
- Explore Other Fruits – This versatile recipe extends beautifully beyond peaches. It works wonderfully with other stone fruits, or even a delightful mix! Consider swapping peaches entirely for sweet nectarines or tart plums – their juices will caramelize just as wonderfully. For a cozy autumn twist, don’t miss my Apple Upside Down Cake, which brings warmth with spiced apples. And when spring arrives, my Rhubarb Upside Down Cake offers a lovely tart-sweet balance that’s simply delightful.
Mastering the Art: How to Make Peach Upside Down Cake:
Creating this stunning Peach Upside Down Cake is a rewarding process, broken down into simple, manageable steps. Follow these instructions carefully to ensure a perfect bake every time, resulting in a show-stopping dessert.
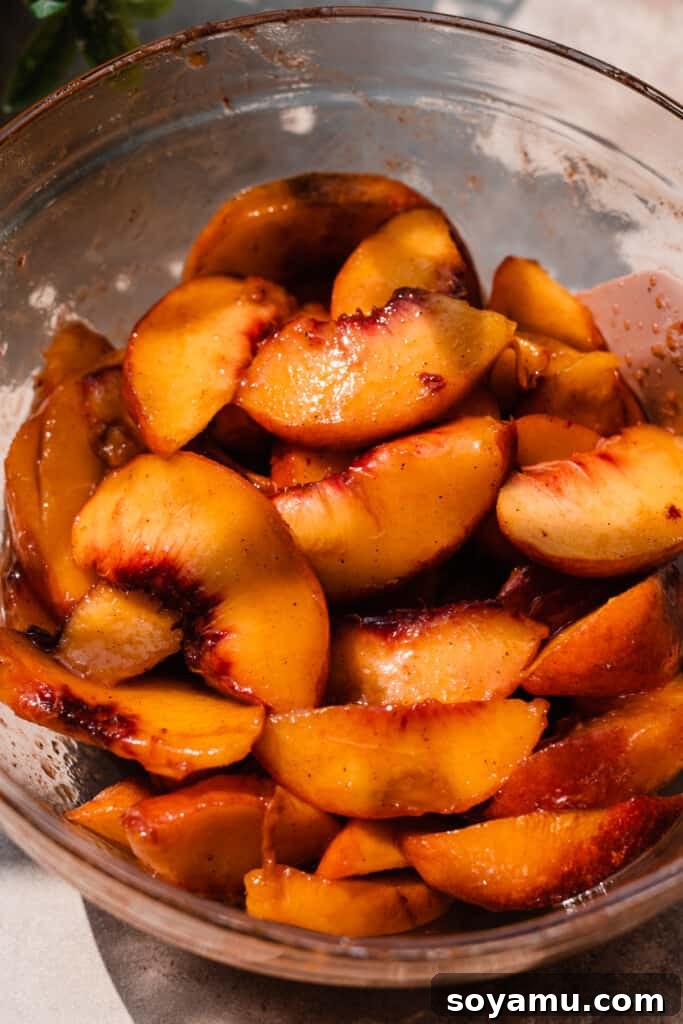
Step 1: Prepare the Peaches for Perfection. Begin by carefully preparing your peaches. Once sliced, toss them gently in a bowl with a touch of brown sugar and cinnamon. This simple step helps to draw out their natural juices and infuse them with warmth, leading to a luscious, caramelized layer once baked. If your peaches are on the less sweet side, feel free to add an extra 1-2 tablespoons of brown sugar to enhance their flavor. Set them aside for a few minutes while you prepare the crumble layer; this resting period allows the juices to develop, forming a rich syrup. Afterward, artfully arrange the sliced peaches in two concentric rings at the bottom of your prepared cake pan, ensuring an even distribution.
Note: I personally prefer not to peel my peaches. The peels soften beautifully during baking, contribute to the color, and save a considerable amount of time without compromising the texture or flavor of the cake. It’s a matter of preference, but I find it entirely unnecessary.
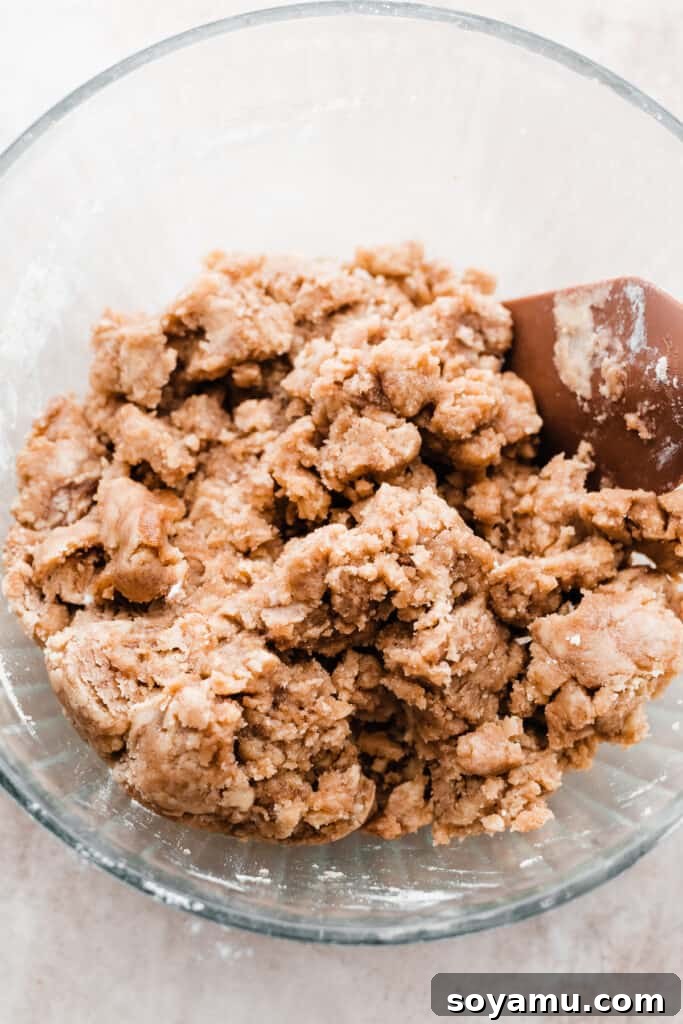
Step 2: Craft the Delightful Crumble. In a separate bowl, melt your butter. To this, stir in brown sugar, all-purpose flour, and a delicate pinch of cinnamon and salt. Mix until the ingredients are well combined and form a crumbly mixture. This streusel will bake on top of the cake, providing that wonderful textural contrast and hint of cobbler goodness when the cake is inverted.
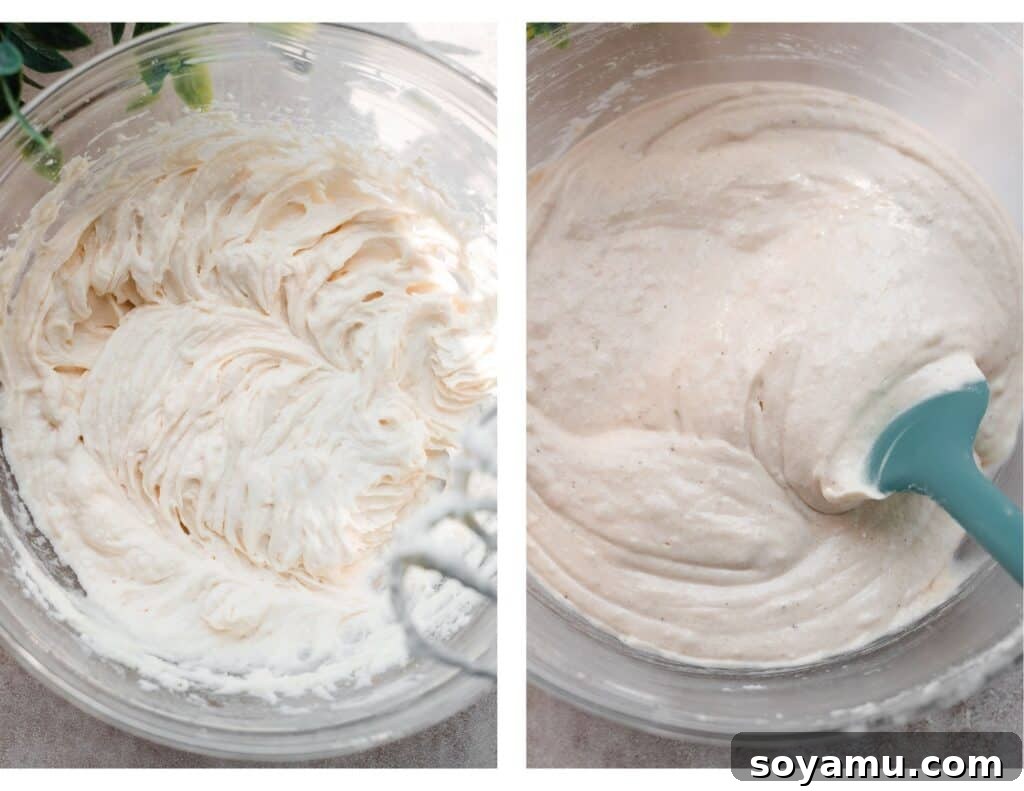
Step 3: Prepare the Fluffy Cake Batter. Begin by creaming together the softened butter and vegetable oil until thoroughly combined and light. Gradually add the granulated sugar, beating on high speed for at least two full minutes until the mixture is visibly fluffy and pale. This aeration step is crucial for a tender cake. Next, incorporate the large egg, beating until fully integrated. Gently mix in the sour cream and vanilla extract on low speed until just combined. In a separate bowl, whisk your dry ingredients: cake flour, baking powder, baking soda, salt, cinnamon, nutmeg, and a pinch of ground cloves. Gradually add half of the dry mixture to your wet ingredients, mixing on low speed until just a few streaks of flour remain. Pour in the room temperature milk, mixing until almost combined, then add the remaining dry ingredients. Finish by gently folding any lingering dry bits with a spatula. Avoid overmixing to keep the cake tender.
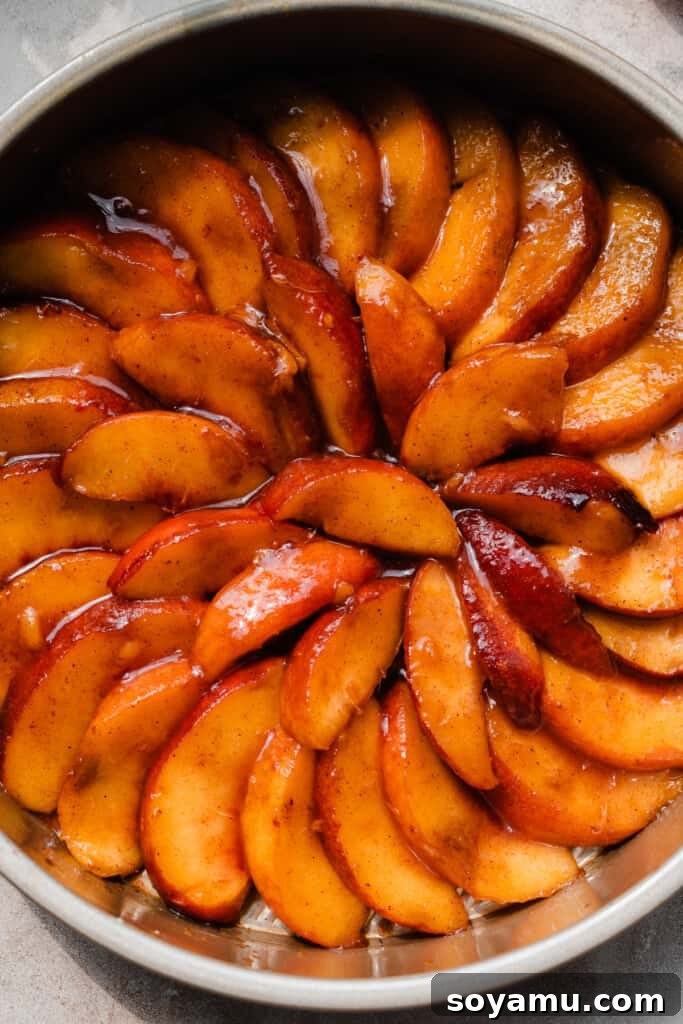
Step 4: Artfully Arrange Peaches in the Pan. Return to your prepared 9-inch buttered cake pan, where you’ve already arranged those succulent peach slices in elegant spirals. Now, don’t let any of those delicious peach juices go to waste! Pour all the collected liquid directly over the peaches in the pan. This flavorful syrup will permeate the cake during baking, adding moisture and intensifying the peach flavor.
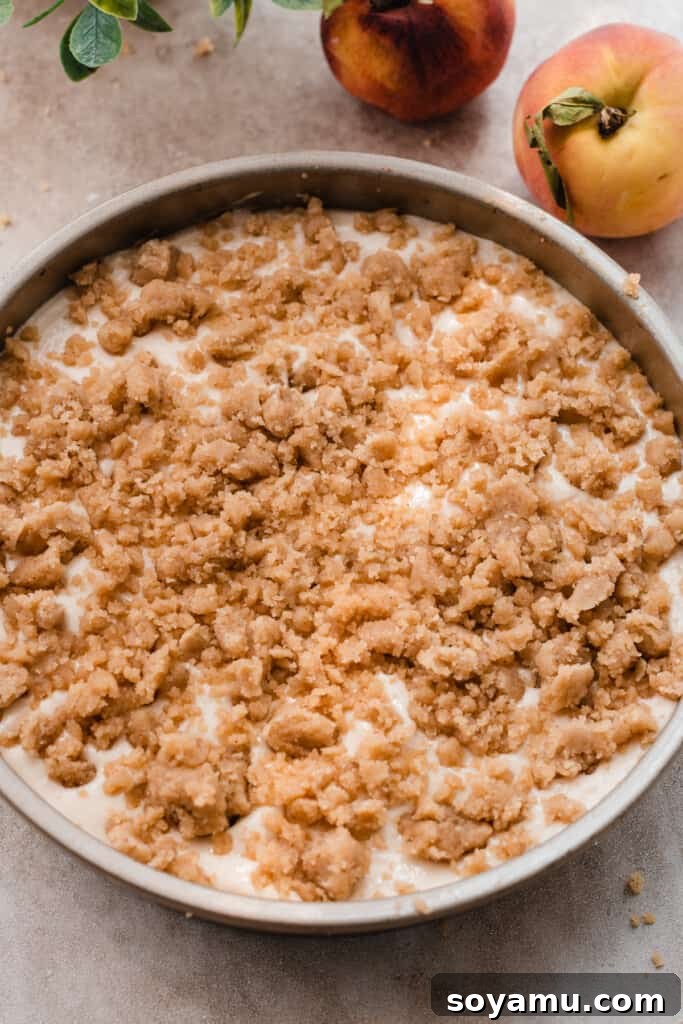
Step 5: Layer the Batter, Crumble, and Bake to Golden Perfection! Carefully spoon the fluffy cake batter over the peach layer, spreading it gently and evenly to ensure complete coverage of the fruit. Next, sprinkle the crumble mixture generously over the cake batter. This will form a beautiful, crisp topping when the cake is inverted. Bake the cake according to the directions in the recipe card below. You’ll know it’s ready when a wooden skewer or cake tester inserted into the center emerges with only moist crumbs attached, and the cake has achieved a gorgeous golden-brown hue on top.
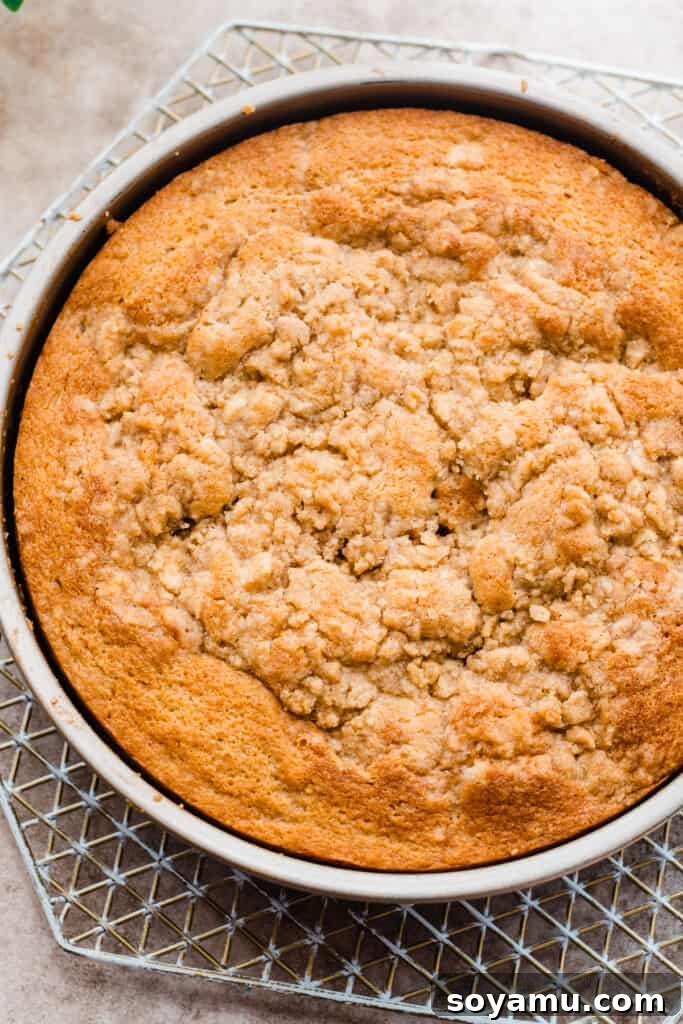
The baked cake will emerge from the oven, a golden masterpiece with a fragrant aroma filling your kitchen. The magic happens during the cooling and inversion!
Serving & Storing Your Perfect Peach Upside Down Cake:
The anticipation builds after baking! Allow the cake to cool in its pan on a wire rack for precisely 10 minutes. This crucial resting period allows the cake to set slightly and the caramelized peach juices to redistribute, ensuring a clean release from the pan. After 10 minutes, confidently invert the cake onto your chosen serving plate. For the best slicing and serving experience, let it cool for another 20 minutes or so; it will still be delightfully warm, but the fruit layer will be much easier to cut through cleanly. Of course, you can let it cool completely if you prefer. This cake truly shines when served warm, accompanied by a cloud of freshly whipped cream or a scoop of creamy vanilla bean ice cream. A final sprinkle of extra streusel (if you made a larger batch!) adds an irresistible touch. There’s truly no better dessert to savor on a beautiful summer evening than this spectacular Peach Upside Down Cake!
Should you be lucky enough to have any leftovers (a rare occurrence with this cake!), store them in an airtight container. The cake will remain fresh at room temperature overnight, or it can be refrigerated for 3-4 days. It’s delicious served cold straight from the fridge, or you can allow it to come back to room temperature before enjoying again.
Elevate Your Baking: Expert Success Tips:
Achieving baking perfection often comes down to a few key details. Incorporate these expert tips into your routine for consistently excellent results:
- Invest in an Oven Thermometer – This simple tool is a baker’s best friend. An oven thermometer will reveal the true temperature inside your oven, which often differs from what your oven dial indicates. Accurate temperature control is paramount for achieving consistent and successful baked goods. Leave one in your oven at all times to monitor its calibration.
- Embrace the Kitchen Scale – For unparalleled accuracy, especially with flour, a food scale is indispensable. The volume of flour can vary significantly depending on how it’s scooped and the specific measuring cup used. Using a scale ensures you always have the precise amount, which is critical for the delicate balance of cake recipes.
- Room Temperature Ingredients – This cannot be stressed enough! Butter, eggs, sour cream, and milk should all be at room temperature unless otherwise specified. This allows them to emulsify properly, creating a smooth, homogenous batter that holds air better and results in a lighter, more tender cake.
- Don’t Overmix the Batter – Once you add the dry ingredients to the wet, mix only until just combined. Overmixing develops gluten, which can lead to a tough, dry cake. A few small lumps are perfectly fine!
- Proper Pan Preparation – Generously butter and flour your cake pan, or use a good quality non-stick spray, especially for an upside-down cake. This prevents sticking and ensures a clean release when you invert the cake.

Common Questions About Peach Upside Down Cake:
If your peaches feel hard, they are definitely not ripe enough for baking. To ripen them, place them on your counter, stem-side down, ensuring they are slightly spaced apart to allow for airflow. Let them ripen for 2-4 days. It’s worth noting that some grocery store peaches might struggle to ripen properly due to how and when they were picked and transported. If they soften but don’t achieve peak ripeness, they will still likely work well in a baked recipe like this, as the baking process will tenderize them. However, you might need to taste them and add a pinch more sugar to the recipe if they seem a bit tart. Ideally, sourcing local peaches from a farmer’s market or a specialized fruit vendor (like The Peach Truck or Tree Ripe Fruit, which deliver fresh peaches across regions) is the best way to guarantee flavorful, juicy fruit.
Absolutely! Frozen peaches are an excellent alternative, especially when fresh peaches are out of season or if you’ve been disappointed by your local grocery store’s selection. The key is to use them straight from the freezer. Do not thaw them before adding them to the cake pan – this is a general rule of thumb for most fruit desserts, as thawing can release too much moisture and make your cake soggy. They will bake beautifully and retain their flavor.
Start by rinsing your peaches thoroughly. As mentioned before, I typically don’t peel them, as it’s a tedious task that doesn’t significantly impact the final texture of the baked cake. Using a sharp knife, carefully cut around the circumference of the peach, following the seam. Twist the two halves in opposite directions to separate them. Remove the pit from the half it remains in. Then, place each peach half flat-side down on a cutting board and slice it into even pieces, about 1/4 to 1/2 inch thick, depending on your preference.
Yes, this recipe scales up very well! If you’re looking to feed a larger crowd, you can confidently double all the ingredients. When doubling, bake the cake in a 9×13 inch baking pan. Be mindful of the baking time; start checking for doneness around 24 to 30 minutes, then continue baking as needed until a tester inserted into the center comes out with moist crumbs. Total baking time might be slightly longer than for a single batch.
Canned peaches can certainly be used in a pinch! For the best flavor, try to find varieties packed in juice or water with no added sugar. Be absolutely sure to drain the liquid completely before using them; excess moisture will make your cake soggy. If your canned peaches already have sugar added, you might want to reduce the brown sugar for the peach layer to just 1 tablespoon, then still toss them with cinnamon and allow them to rest briefly. This resting period will help them develop their own thicker, more concentrated juices for a better result.
Creative Recipe Variations to Try:
Once you’ve mastered the classic Peach Upside Down Cake, feel free to experiment with these exciting variations to create new flavor profiles:
- Alternate Fruit Choices – As mentioned, this cake is incredibly adaptable to other fruits. Don’t limit yourself to peaches! Try using other stone fruits either in place of or mixed with peaches, such as apricots, plums, or nectarines. For a citrusy twist, my Blood Orange Upside Down Cake is a vibrant and flavorful choice. And for those who love a tropical touch, a classic Pineapple Upside Down Cake recipe can be found in my cookbook, The One-Bowl Baker.
- A Hint of Almond Extract – For those who appreciate the delicate flavor of almond with peaches, consider adding a dash of almond extract to the cake batter. Start with 1/4 teaspoon; it beautifully enhances the peach flavor without overpowering it, adding another layer of aromatic complexity.
- Spiced Crumble – Enhance the crumble layer by adding a touch more cinnamon or a pinch of ground cardamom for a more aromatic and complex spice profile.
- Nutty Topping – Fold finely chopped pecans or walnuts into the crumble mixture for an added layer of crunch and nutty flavor.

More Irresistible Peach Recipes to Love:
If you’re as passionate about peaches as we are, you’ll adore these other delightful recipes that celebrate this versatile summer fruit:
- Brown Butter Peach Crisp: A classic dessert made even better with the nutty aroma of brown butter.
- Blueberry Peach Cobbler: The perfect pairing of sweet peaches and tart blueberries under a fluffy biscuit topping.
- Salted CaramelPeach Hand Pies: Portable pockets of peachy goodness with a luscious salted caramel drizzle.
- Peach Cobbler Cheesecake: A decadent fusion of creamy cheesecake and comforting peach cobbler.
- Vegan (or Regular!) Peach Cobbler: A simple yet satisfying cobbler recipe that can be made to suit various dietary needs.
- Blender Peach Mango Salsa: A fresh and vibrant salsa perfect for grilling season or as a light snack.
- Peach Pie Cupcakes: All the flavors of a peach pie, conveniently baked into individual cupcakes with a dreamy frosting.
Did you make this recipe? We’d love to hear from you! Leave a comment & star rating!
Your feedback is incredibly valuable. Please click the little stars in the header of the recipe card below to leave a comment and star rating, letting us know how much you enjoyed the recipe. Every rating helps our small business immensely!

Peach Cobbler Upside Down Cake
Ingredients
For the Crumble:
- 1/4 cup salted butter, melted, 57 grams, or 4 tbsp
- 1/2 cup + 1 tbsp all-purpose flour, spooned & leveled, 73 grams
- 1/4 cup light brown sugar, packed, 53 grams
- 2 tsp raw sugar, optional, adds a nice extra bit of crunch
- 1/8 tsp salt
- 1/8 tsp cinnamon
For the Peach Layer:
- 3 medium peaches, about 571 grams or 20 ounces, sliced
- 3 tbsp light brown sugar, packed, 40 grams
- 1/4 tsp cinnamon, plus a pinch more to taste
- pinch of nutmeg
For the Vanilla Cinnamon Cake:
- 1 and 1/4 cup + 1 and 1/2 tbsp cake flour, spooned & leveled, 148 grams
- 1 tsp baking powder
- 1/4 tsp baking soda
- 1/4 tsp salt
- 3/8 tsp cinnamon, (this is 1/4 + 1/8 tsp)
- 1/8 tsp nutmeg
- pinch ground cloves
- 1/4 cup salted butter, softened at room temperature, 57 grams, or 4 tbsp
- 3 tbsp vegetable oil, 36 mL
- 3/4 cup + 2 tbsp granulated sugar, 178 grams
- 1 large egg, at room temperature
- 2 tsp vanilla extract
- 1/4 cup full-fat sour cream, at room temperature, 60 grams
- 1/2 cup milk, at room temperature, I used 2%. 118 mL
Whipped Cream
- 1/2 cup heavy cream, cold, 4 ounces or 118 mL
- 3 tbsp powdered sugar, 23 grams
- 1 and 1/2 tsp vanilla extract
- pinch of nutmeg
Instructions
-
Prep: Thoroughly butter a 9-inch cake pan and give it an additional spray with nonstick spray for extra assurance against sticking. Preheat your oven to 350℉ (175°C).
-
Prepare the Peaches: Rinse and slice your peaches (no need to peel!). Place them in a medium bowl with the specified brown sugar and cinnamon. Toss gently to coat, then set aside to allow their juices to release while you prepare the crumble. Once the crumble is ready, return to the peaches – you should see a good amount of sweet juice at the bottom of the bowl. If not, let them rest a few more minutes. Arrange the peach slices artfully in two circles on the bottom of the prepared cake pan, starting from the outside edge and working inwards. Place one final peach slice in the remaining center opening after forming your two rings. Pour any accumulated peach juices over the arranged fruit.
-
Make the Crumble Layer: In a small bowl, melt the butter. Stir in the remaining crumble ingredients (all-purpose flour, light brown sugar, raw sugar, salt, and cinnamon) until well combined and crumbly. Optional: For extra streusel to sprinkle on top of the finished cake, make a 1.5x batch of crumble. Set aside 1/3 of this mixture, adding an extra 1/4 tsp of cinnamon to this portion. Bake this reserved streusel on a parchment-lined baking sheet at 350℉ (175°C) for 10-14 minutes, until golden brown and crisp. Let it cool completely, then break into smaller bits.
-
Make the Cake Batter: In a small bowl, whisk together all the dry ingredients: cake flour, baking powder, baking soda, spices (cinnamon, nutmeg, ground cloves), and salt. In a large mixing bowl, using an electric mixer, cream the softened salted butter for about 30 seconds until light and creamy. Add the vegetable oil and continue to cream with the butter for another minute. Gradually add the granulated sugar and beat on high speed for 2 full minutes until the mixture is light, fluffy, and pale. Add the large egg and beat on medium-high speed for 45 seconds until fully incorporated. Mix in the room temperature sour cream and vanilla extract on medium-low speed until just combined.
With the mixer running on low speed, add half of the dry ingredients to the butter mixture. Mix until only a few streaks of flour remain. Slowly pour in the room temperature milk, mixing until almost combined. Then, add the remaining dry ingredients. Once just a few streaks of flour are visible, turn off the mixer. Use a rubber spatula to gently fold in any remaining dry bits of flour into the batter, ensuring not to overmix. A few small lumps are perfectly acceptable and contribute to a tender cake.
-
Assemble & Bake: Carefully spoon the prepared cake batter over the arranged peaches in the pan, spreading it evenly with a spatula to cover the fruit completely. Sprinkle the crumble mixture generously and evenly over the cake batter. Bake for 42 to 49 minutes, or until a wooden skewer or cake tester inserted into the center of the cake comes out with only moist crumbs attached. The cake should be beautifully golden brown. Let the cake cool in the pan on a wire cooling rack for 10 minutes. This is a critical step for a clean inversion. After 10 minutes, invert the cake onto a serving plate. Prepare your whipped cream just before serving, using the recipe provided below.
-
Serve + Store: Allow the inverted cake to cool on the serving plate for approximately 20 minutes before slicing. It will still be warm, which is ideal, but the fruit will set enough to slice much more easily. You can also let it cool further if you prefer. Serve warm with a generous dollop of freshly made whipped cream and any extra streusel you may have prepared.
Store any leftover cake in an airtight container. It keeps well at room temperature overnight, or for 3-4 days in the refrigerator. The cake is delicious cold, but you can also let it come to room temperature before enjoying.
-
Make the Whipped Cream: Ensure your heavy cream is very cold – leave it in the fridge until the very last second. Cold cream is essential for proper whipping. Add all ingredients for the whipped cream (cold heavy cream, powdered sugar, vanilla extract, and a pinch of nutmeg) to a large mixing bowl. Using an electric mixer, beat on medium-high speed until stiff peaks form. Be careful not to overmix, as it can quickly turn into butter. This whipped cream is best made fresh just before serving. Store any tightly covered leftovers in the fridge for 1-2 days.
Quick Tip: For an even faster whipped cream, you can use a food processor! Pulse 6-8 times, then run it on low speed, checking in 10-15 second intervals. Stop once it reaches a thick, dollop-able consistency.
Notes
Nutrition (Cake Only)
Calories: 489kcal,
Carbohydrates: 62g,
Protein: 6g,
Fat: 25g,
Saturated Fat: 13g,
Polyunsaturated Fat: 4g,
Monounsaturated Fat: 6g,
Trans Fat: 1g,
Cholesterol: 77mg,
Sodium: 320mg,
Potassium: 174mg,
Fiber: 2g,
Sugar: 40g,
Vitamin A: 861IU,
Vitamin C: 2mg,
Calcium: 90mg,
Iron: 1mg
Nutrition information is automatically calculated, so should only be used as an approximation.
Nutrition (Whipped Cream Only)
Calories: 60kcal,
Carbohydrates: 3g,
Fat: 5g
Like this? Leave a comment below!