
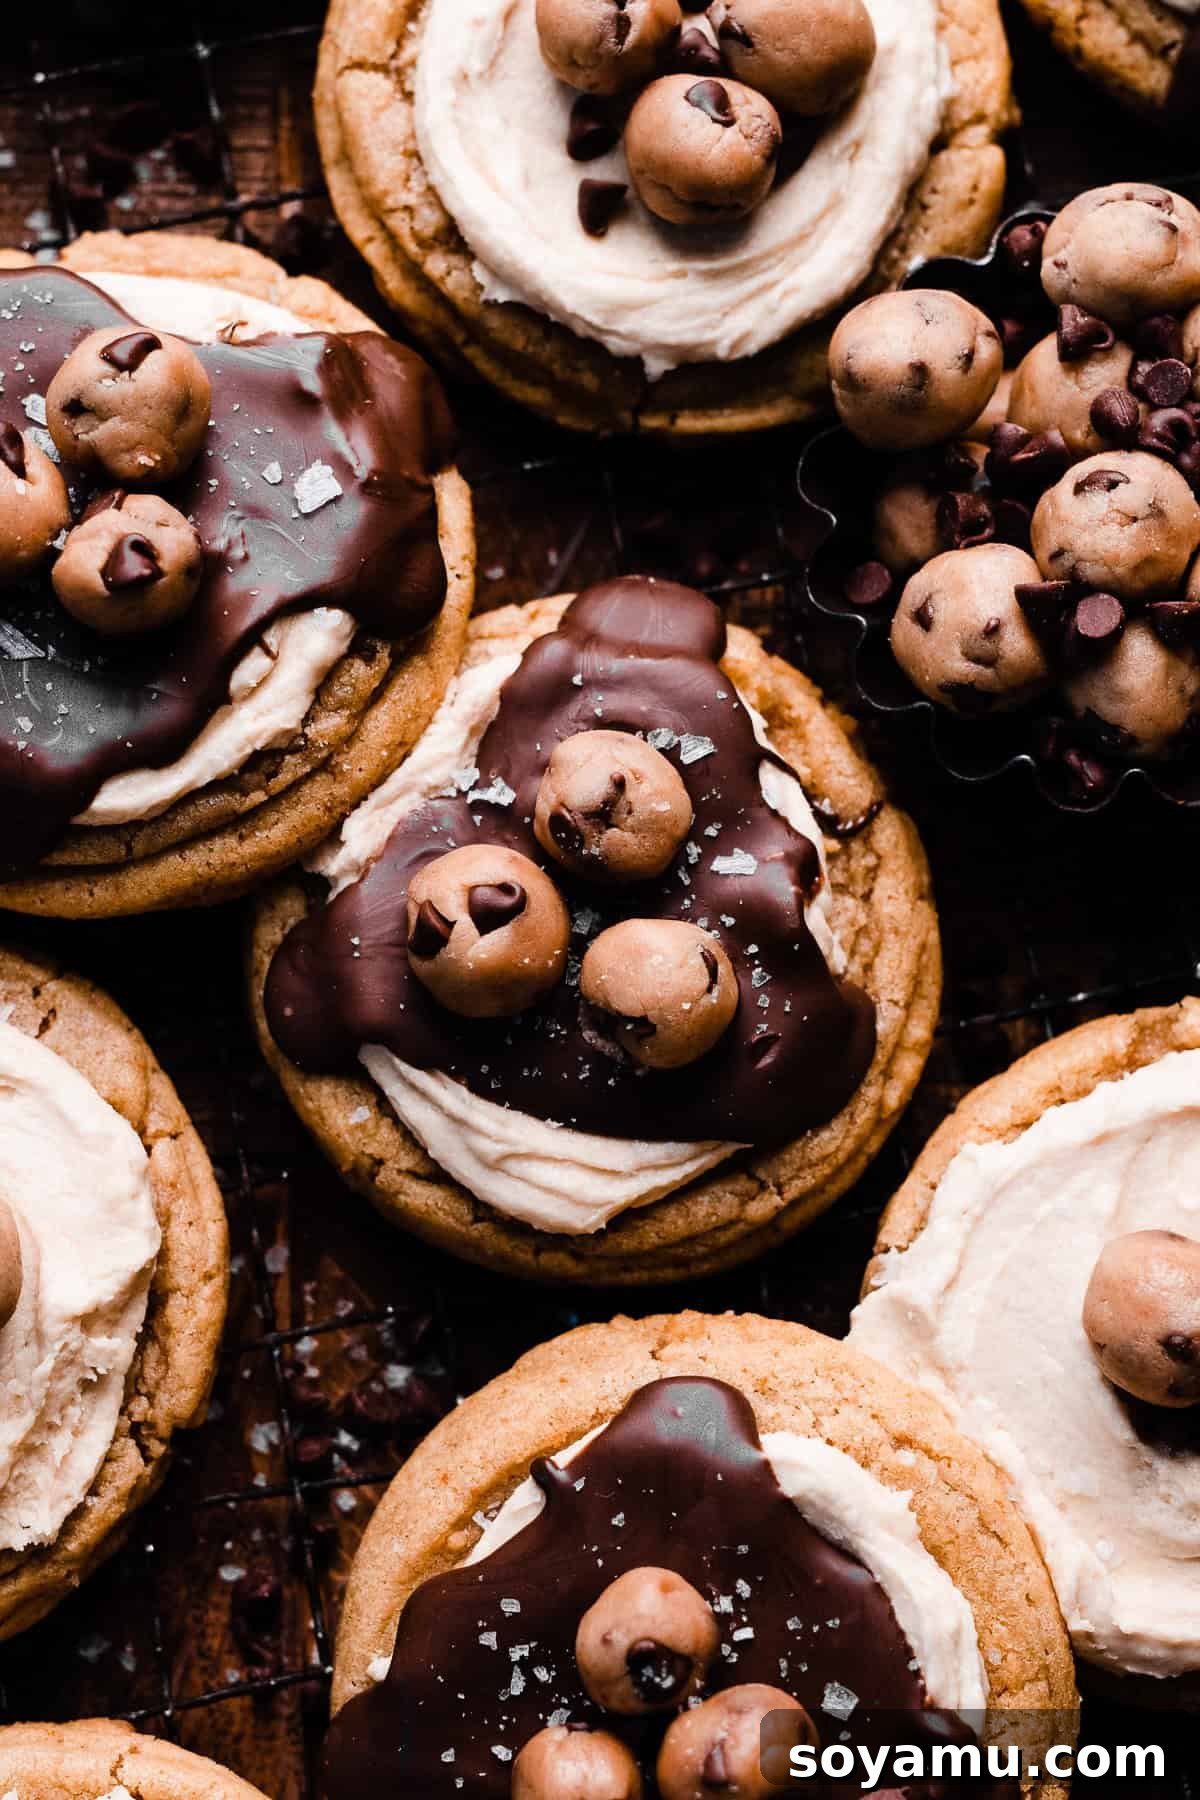
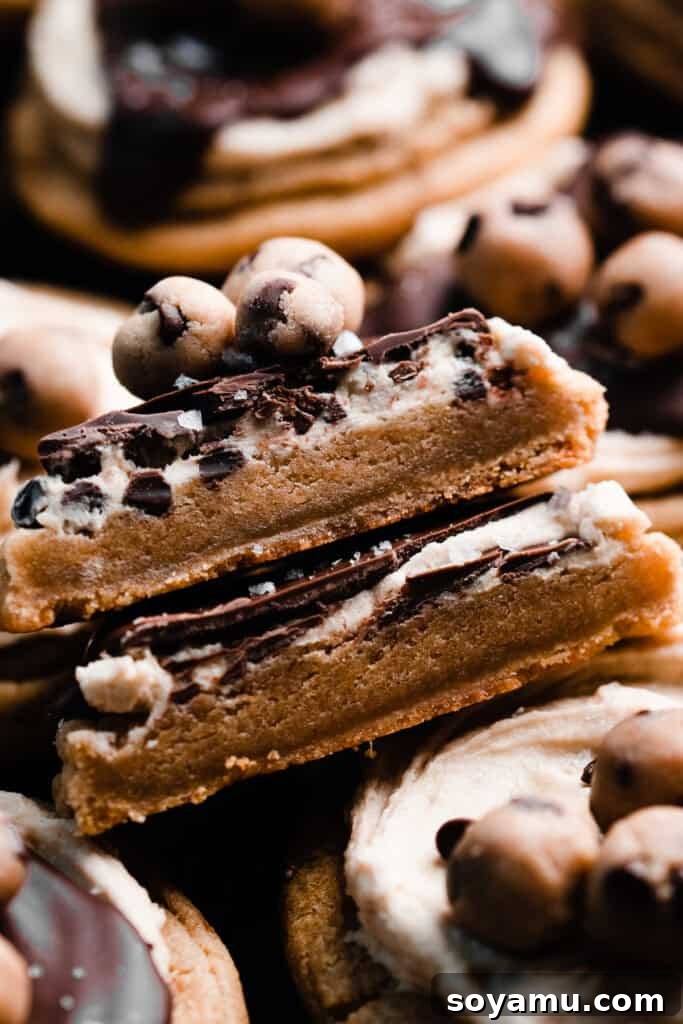
Are you a devoted fan of cookie dough? Do you secretly crave that delightful, unbaked goodness more than the actual cookie itself? If so, prepare to have your dessert dreams come true with these **Ultimate Chocolate Covered Cookie Dough Cookies**! This recipe takes everything you love about classic chocolate chip cookies and elevates it to an entirely new level, combining rich, chewy brown sugar cookies with a luscious cookie dough buttercream and a topping of real edible cookie dough bites. It’s an irresistible, multi-textured treat that promises pure bliss in every bite.
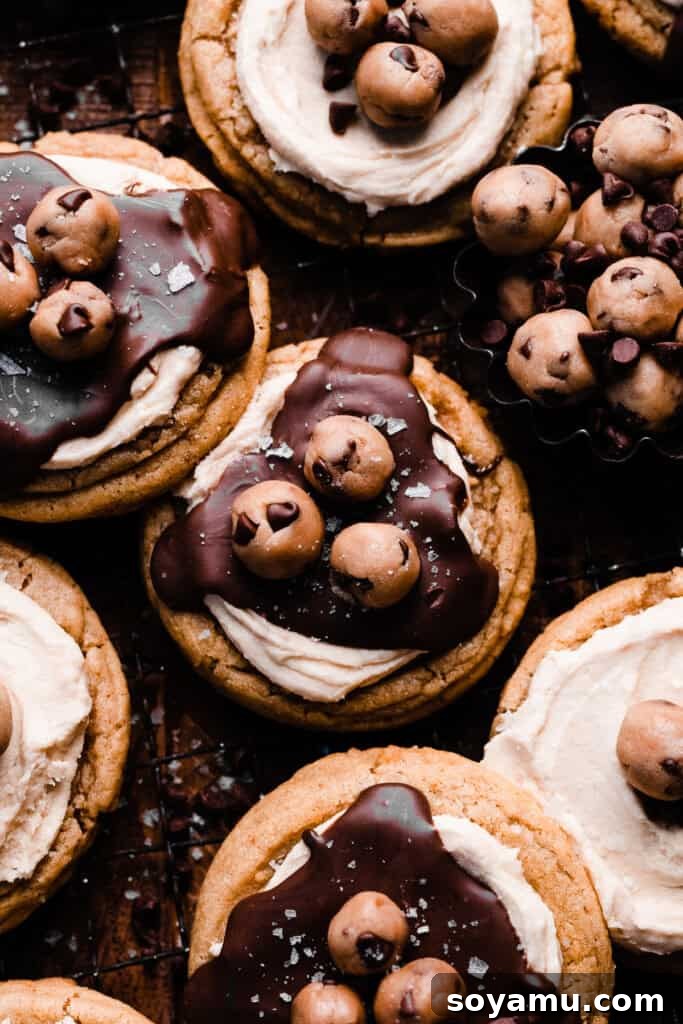
The Ultimate Chocolate Covered Cookie Dough Cookies: A Dream Treat for Dough Lovers
Forget everything you thought you knew about cookies. These aren’t just any cookies; they are an experience. Each component—from the perfectly baked base to the decadent frosting and delightful edible dough—is crafted to deliver maximum cookie dough flavor and an unforgettable texture. If you’re searching for a show-stopping dessert that will impress everyone, or simply want to indulge your deepest cookie dough cravings, you’ve found your new favorite recipe.
Why You’ll Fall in Love with These Cookie Dough Cookies
There’s more than one reason why these chocolate covered cookie dough cookies stand out from the crowd. Here’s what makes them an absolute must-try:
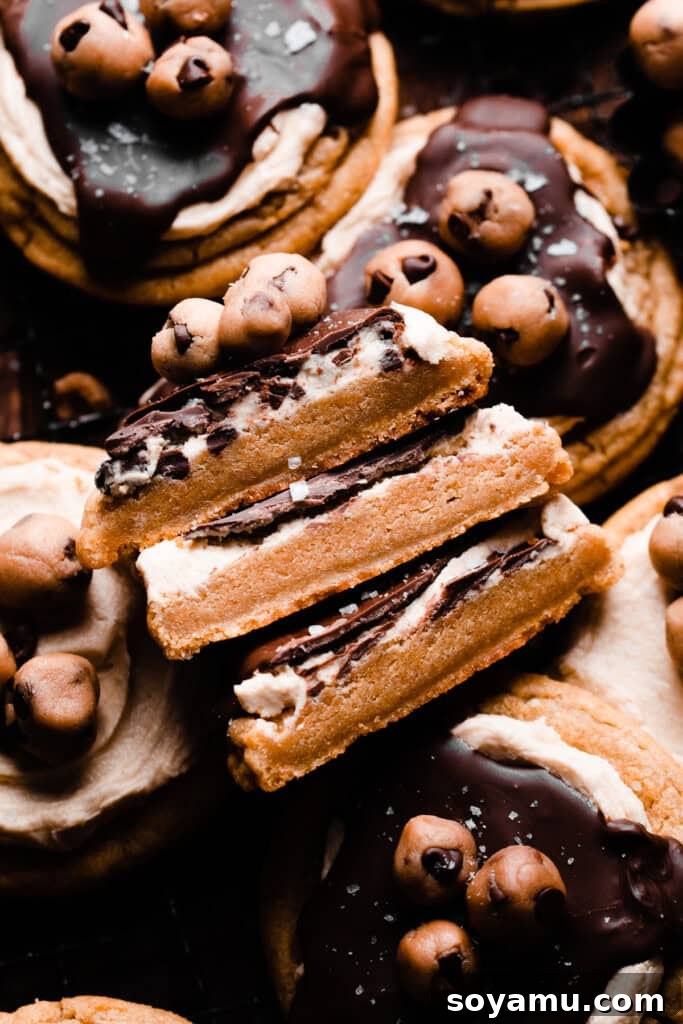
- Thick & Chewy Cookie Base: Our brown sugar cookies are baked to perfection—thick, wonderfully chewy in the center, and boasting just the right amount of crispness around the edges. This sturdy yet tender base is the ideal foundation for the layers of cookie dough goodness to come.
- Irresistible Cookie Dough Buttercream: The magic truly begins with our signature buttercream. It’s not just any frosting; it’s infused with the authentic taste of cookie dough, complete with a hint of cream cheese to perfectly balance its sweetness and add an incredibly smooth, luxurious texture.
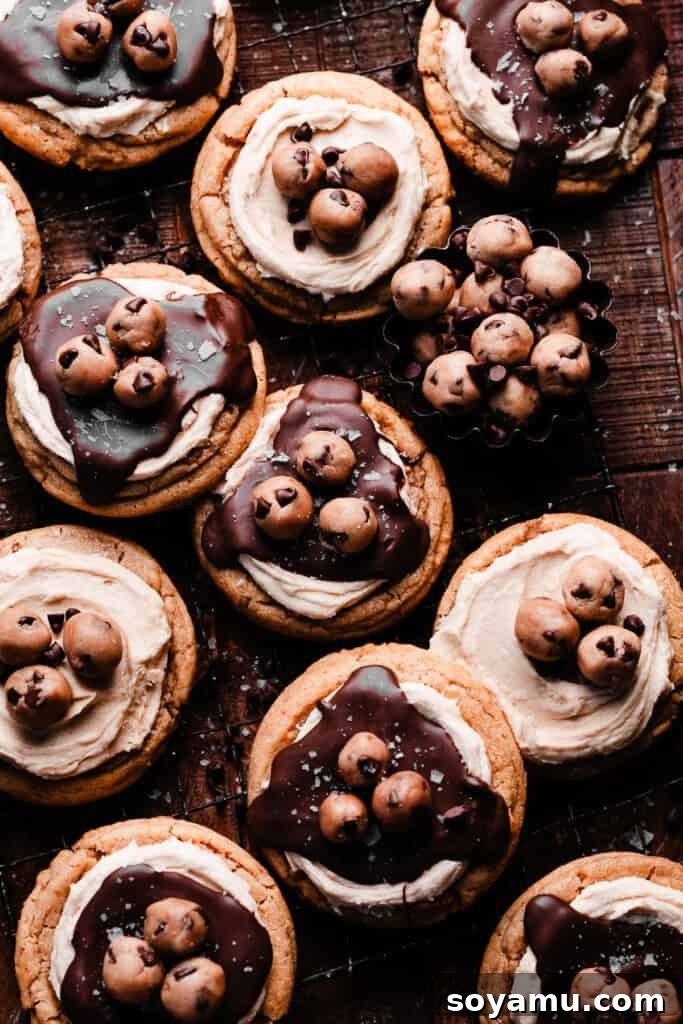
- Delightful Edible Cookie Dough Topping: The grand finale! Each cookie is adorned with a generous drizzle of melted semi-sweet chocolate and crowned with charming bites of safe-to-eat cookie dough. This final touch adds an extra layer of texture and an undeniable burst of pure cookie dough flavor.
Essential Ingredients for Flawless Cookie Dough Cookies
Crafting these extraordinary cookies requires a few key ingredients, each playing a vital role in achieving their remarkable flavor and texture. Understanding each component ensures your baking success.
- All-Purpose Flour: The Foundation: For accurate baking, always spoon your flour into the measuring cup and level it with a flat utensil. Alternatively, using a kitchen scale provides the most precise measurement. Over-scooping can lead to too much flour, resulting in a dense or dry cookie.
- Butter: Flavor and Texture: We recommend using **salted butter** for its superior flavor profile, which beautifully complements the sweetness of the cookies and frostings. However, unsalted butter can be used if preferred; just ensure you adjust the added salt slightly.
- Semi-Sweet Chocolate: Balancing the Sweetness: Throughout this recipe, semi-sweet chocolate is key. Its slightly bitter notes provide a perfect counterpoint to the rich, sweet cookie dough elements, preventing the overall treat from becoming overly saccharine.
- Eggs: Binding and Richness: Always use large eggs and ensure they are at room temperature. Room temperature eggs emulsify better with other ingredients, leading to a smoother, more uniform dough and a more consistent bake.
- Vanilla Extract: A Must-Have Flavor Enhancer: Opt for high-quality, real vanilla extract. It plays a crucial role in deepening the flavor profile of both the cookies and the buttercreams, adding a warm, aromatic note that is essential to classic cookie dough taste.
- Brown and Granulated Sugars: The combination of dark brown and granulated sugar in the cookies, along with light brown sugar in the buttercream and edible cookie dough, ensures a perfect balance of sweetness, moisture, and that signature chewy texture.
- Baking Powder and Baking Soda: These leavening agents work in harmony to give the cookies their ideal lift and texture. Ensure they are fresh for best results.
- Cream Cheese: The Secret to Creaminess: A touch of cold cream cheese in both the buttercream and the edible cookie dough adds an unparalleled creaminess and tang that cuts through the sweetness, enhancing the overall flavor and texture.
- Mini Chocolate Chips: Essential for the edible cookie dough topping, mini chocolate chips ensure that every bite delivers that classic chocolate chip cookie experience.
Customizing Your Cookie Dough Cookie Experience
While these cookies are perfect as is, you can always experiment with variations to suit different dietary needs or taste preferences.
- Gluten-Free Alternatives: Although this specific recipe hasn’t been officially tested for a gluten-free version, many readers have reported success using a 1:1 gluten-free flour blend in similar cookie base recipes. If attempting, ensure your blend is suitable for baking and adjust liquid content if needed.
- Dairy-Free Adaptations: For a dairy-free treat, simply substitute dairy butter, cream cheese, and chocolate with your favorite trusted dairy-free alternatives. Look for high-quality plant-based butters (avoid margarine), dairy-free cream cheese, and vegan chocolate chips for the best results.
- Flavor Twists & Add-ins: Consider folding in chopped nuts like walnuts or pecans into the cookie dough for added crunch. Swap semi-sweet chocolate for milk chocolate or dark chocolate, or even white chocolate chips, in the edible cookie dough. A sprinkle of flaky sea salt on top of the melted chocolate drizzle can also beautifully enhance the flavors.
Step-by-Step Guide to Baking Perfect Cookie Dough Cookies
Creating these layered treats might seem intricate, but by following these detailed steps, you’ll achieve cookie perfection with ease.
Step 1: Crafting the Heat-Treated Flour
Before you begin any mixing, you’ll need to heat-treat the flour designated for both the edible cookie dough and the cookie dough frosting. This crucial step eliminates any potential bacteria, making the raw flour safe for consumption. Spread 1 cup + 3 tablespoons of all-purpose flour evenly across two cookie sheets. Bake it at 350°F (175°C) for 10 minutes, or microwave in 30-second intervals for 1-2 minutes until it reaches 160°F (71°C). Allow it to cool completely before incorporating it into your recipes.
Step 2: Mixing and Chilling the Cookie Dough
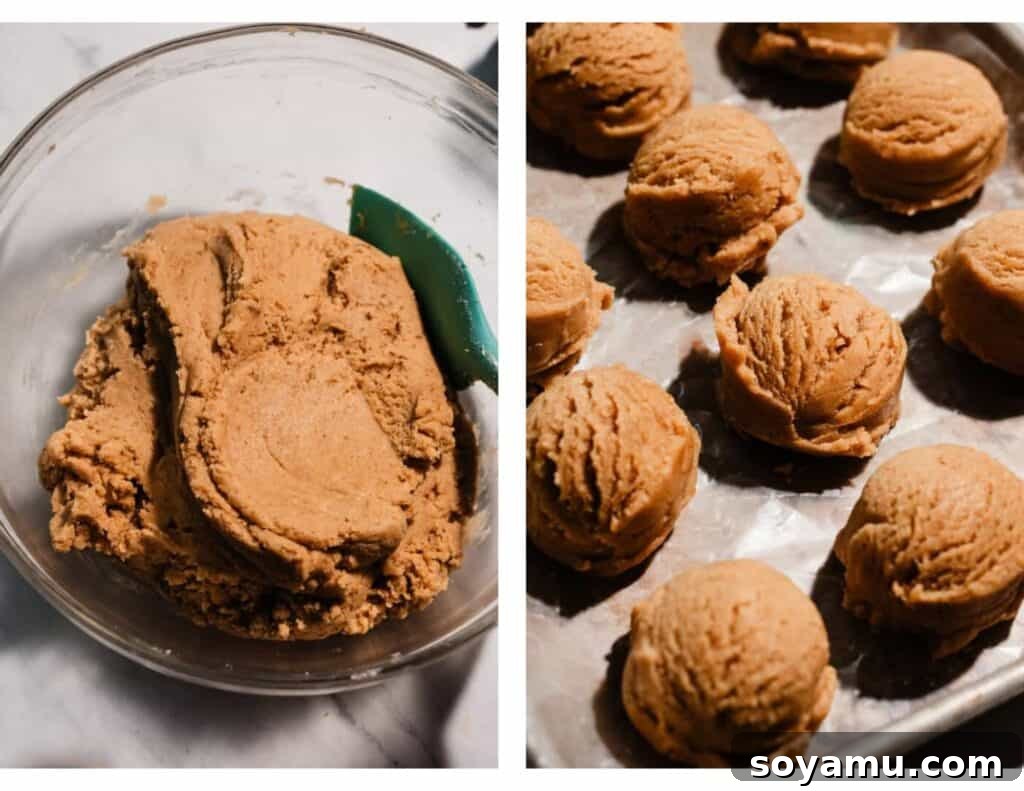
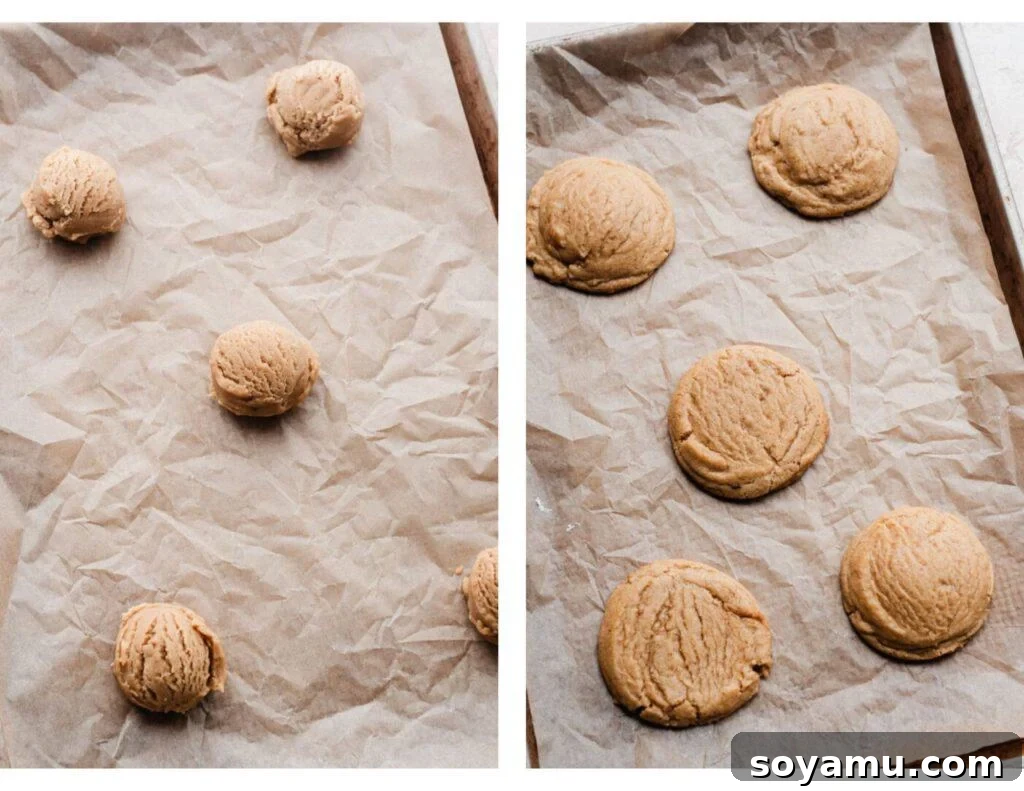
In a large bowl, melt the specified amount of butter. Whisk in both dark brown and granulated sugars for about a minute until well combined. Incorporate the room-temperature eggs and vanilla extract, whisking until the mixture is smooth and fully emulsified (approximately 30-45 seconds). Gradually fold in the dry ingredients (all-purpose flour, baking powder, baking soda, and salt) until a thick, cohesive dough forms. It might appear crumbly initially, but gentle mixing will bring it together. Once formed, scoop the dough into uniform balls, each weighing about 55 grams. Arrange them in a parchment-lined container and chill in the refrigerator for at least 1 hour, or in the freezer for 30 minutes, to prevent spreading during baking.
Step 3: Baking to Golden Perfection
Preheat your oven to 365°F (185°C). Place 5-6 chilled cookie dough balls on a parchment-lined baking sheet, ensuring they are adequately spaced. Bake for 9-11 minutes. The cookies are ready when their tops are just set, and the edges show a hint of golden brown. For that perfect, bakery-style aesthetic, gently flatten the warm cookies using the bottom of a drinking glass. Then, use a round cookie cutter to “scoot” the still-warm cookies into perfectly circular shapes. Allow them to cool on the baking sheet for about 5 minutes before transferring them to a wire rack to cool completely. (Note: If your oven doesn’t allow for 365°F, 350°F (175°C) is acceptable, though you might need to add an extra minute to the baking time.)
Step 4: Whipping Up the Dreamy Cookie Dough Buttercream
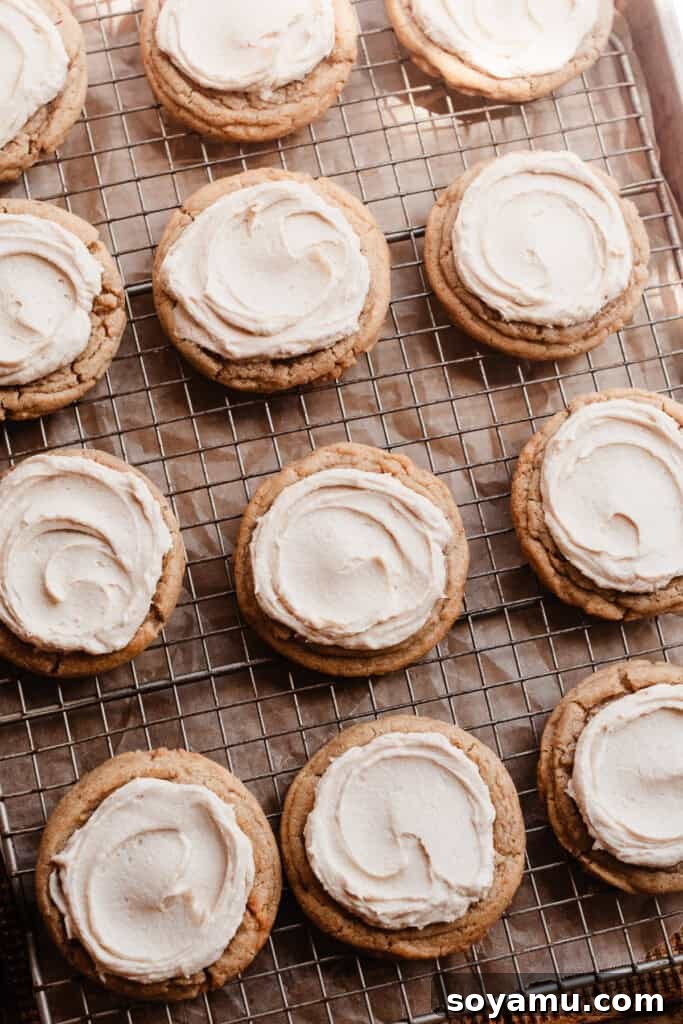
In a medium mixing bowl, beat the softened salted butter on high speed until it becomes light and creamy. Gradually add the powdered sugar, continuing to mix until a smooth consistency is achieved. Incorporate half a tablespoon of milk or heavy cream to aid in emulsification. Next, add the cooled heat-treated flour, light brown sugar, vanilla extract, and a pinch of salt, mixing until all ingredients are just combined. Finally, beat in the cold cream cheese until the buttercream is perfectly smooth and spreadable. This touch of cream cheese is what gives the frosting its characteristic cookie dough taste and luxurious texture.
Step 5: Preparing the Irresistible Edible Cookie Dough
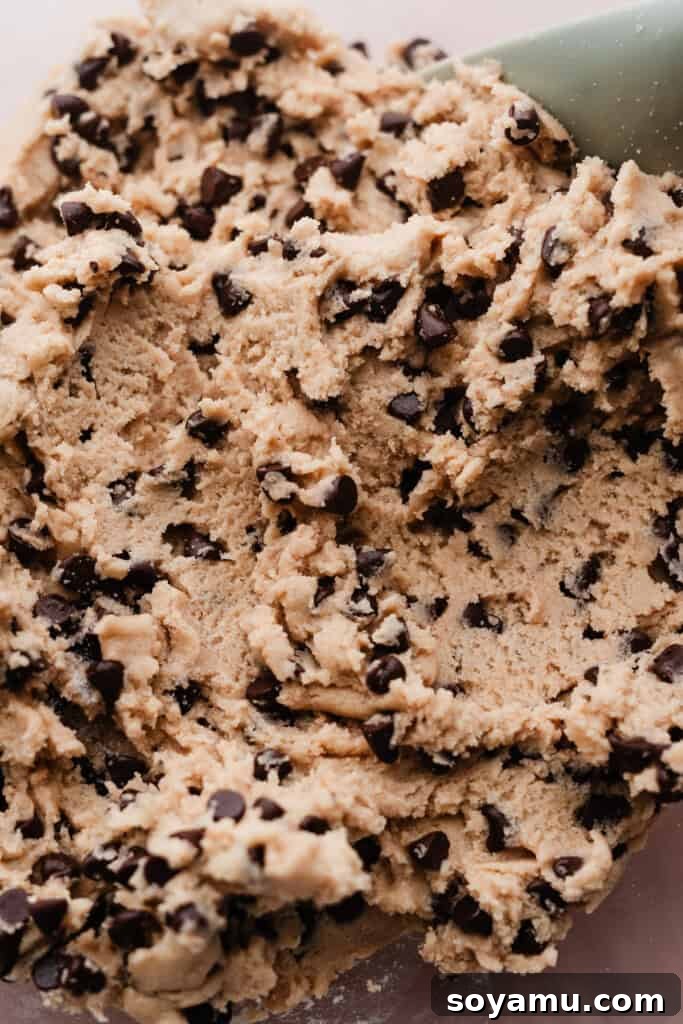
In another medium bowl, cream together the softened salted butter with both dark brown and granulated sugars using a hand mixer on high speed for about 1 minute until well combined and fluffy. Mix in the vanilla extract and cream cheese for another minute on medium speed until fully incorporated. The cream cheese acts as a fantastic egg substitute, ensuring the edible dough remains creamy and delicious. Gradually add the remaining heat-treated flour and a pinch of salt, mixing until a dough forms. It may initially be crumbly, but persist with mixing until it comes together. Lastly, fold in the mini chocolate chips on low speed until evenly distributed. Roll this delicious edible cookie dough into small, bite-sized balls.
Step 6: Assembling and Decorating Your Masterpiece
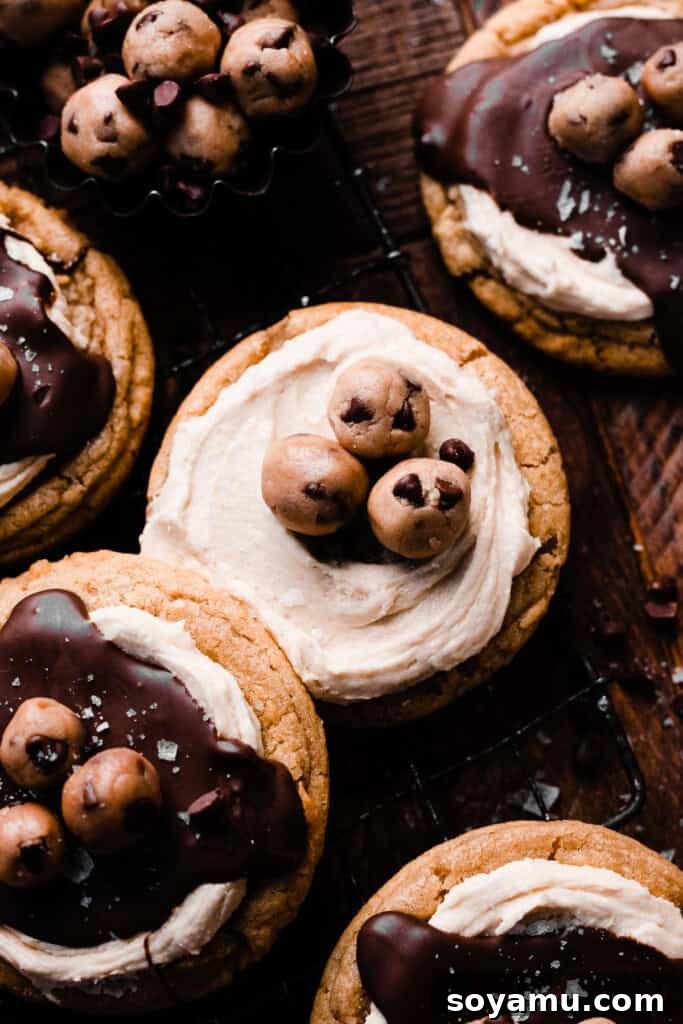
Once your cookies are completely cooled, it’s time to decorate! Gently spread a generous layer of the cookie dough frosting onto each cookie. A small cookie scoop can help with portioning for uniform application. Next, melt the semi-sweet chocolate in a microwave-safe bowl in 30-second intervals, stirring thoroughly after each, until it’s smooth and glossy. Drizzle this melted chocolate over the frosted cookies. Immediately, while the chocolate is still wet, place 2-4 small edible cookie dough balls on top of each cookie. The melted chocolate will act as a “glue,” securing the cookie dough bites in place as it hardens. For an extra touch of gourmet appeal, a sprinkle of flaky sea salt is optional but highly recommended.
Serving, Storing & Make-Ahead Tips
These cookies are a labor of love, and knowing how to best enjoy and preserve them is key.
- Best Practices for Serving: Once decorated, these cookies are ready for immediate enjoyment! For the best flavor and texture, serve them at room temperature after the chocolate has fully set.
- Storing Your Delicious Creation: Store any leftover cookies in an airtight container in the refrigerator for 3-4 days. Bringing them to room temperature for 10-15 minutes before serving will enhance their flavors and softness.
- Make-Ahead Strategies for Effortless Baking:
- Cookie Dough: The prepared cookie dough balls can be refrigerated in an airtight container for up to 48 hours before baking. For longer storage, freeze them on a parchment-lined baking sheet until solid, then transfer to a freezer-safe bag or container and freeze for up to 2 months. Bake from frozen, adding 1-2 minutes to the bake time, or thaw overnight in the fridge before baking as directed.
- Frosting: The cookie dough buttercream can be made 1-2 days in advance and stored in an airtight container in the fridge. Allow it to come to room temperature for 10-20 minutes, then re-mix it with a spatula or hand mixer until it regains its smooth, spreadable consistency.
- Edible Cookie Dough: For optimal freshness and texture, we recommend preparing the edible cookie dough just before you’re ready to use it for decoration.
Pro Baking Tips for Cookie Dough Success
Achieving bakery-quality cookie dough cookies is easier with these expert insights:
- Oven Thermometer: Your Secret Weapon: An oven thermometer is an inexpensive tool that provides invaluable accuracy. Many ovens run hotter or colder than their display indicates, which can significantly impact baking results. Keep one in your oven at all times to ensure it’s consistently at the correct temperature.
- Achieve Accuracy with a Kitchen Scale: While cup measurements are provided, a food scale is the most accurate way to measure dry ingredients, especially flour. The density of flour can vary widely depending on how it’s scooped, making weight measurements superior for consistent results.
- Room Temperature Ingredients: Always use room temperature eggs and softened butter (unless specified melted). This allows ingredients to emulsify properly, creating a smoother dough and more consistent texture in your final bake.
- Don’t Overmix the Dough: Once you add the dry ingredients to the wet, mix only until just combined. Overmixing develops the gluten in the flour, leading to tougher, less tender cookies. A few streaks of flour are acceptable; they will disappear during baking.
Frequently Asked Questions (FAQs)
Yes, absolutely! This recipe is quite flexible. You can easily double all ingredients if you’re baking for a crowd, or halve them if you only want a smaller batch of these delicious cookies.
Yes, freezing the cookie dough is a great make-ahead option! Simply portion the cookie dough into balls as directed, then freeze them on a parchment paper-lined cookie sheet until solid. Once frozen, transfer them to a freezer-safe bag or an airtight container and store for up to 2 months. When ready to bake, you can either bake them directly from frozen, adding 1-2 minutes to the bake time, or thaw them overnight in the refrigerator before baking as usual.
Heat-treated flour is flour that has been gently cooked to a temperature of 160°F (71°C), making it safe to eat raw. Raw flour can sometimes contain bacteria, similar to raw eggs. By heat-treating the flour used in the buttercream and edible cookie dough, we eliminate any risk and ensure these delicious raw components are completely safe to consume.
“Cookie scooting” is a technique used to create perfectly round, thick cookies right after they come out of the oven. While the cookies are still hot and pliable, use a round cookie cutter (slightly larger than your cookies) and place it around the edges of each cookie. Gently swirl the cookie cutter around the cookie to push its edges inwards, forming a more perfect circle and making the cookie appear thicker and more aesthetically pleasing.
Recommended Tools for Baking Excellence
Having the right tools can make your baking experience smoother and more enjoyable, especially when crafting layered desserts like these.
- Cordless Mixer: Unmatched Convenience: A cordless mixer offers incredible freedom in the kitchen, allowing you to move around without being tethered to an outlet. It’s perfect for whipping up batters and frostings anywhere you need.
- Offset Spatula: The Frosting Game Changer: An offset spatula is an indispensable tool for bakers. Its angled blade makes spreading frosting on cookies, cakes, and bars incredibly easy, creating a smooth, professional finish. You’ll also find it useful for lifting delicate items from baking pans.
- Cookie Scoops: For Uniformity: Using cookie scoops of various sizes (especially a medium one for the cookie dough and a small one for frosting) ensures your cookies are uniform in size and bake evenly.
- Parchment Paper: Non-Stick Baking: Always line your baking sheets with parchment paper. It prevents sticking, promotes even baking, and makes cleanup a breeze.
More Irresistible Cookie & Dessert Recipes to Love
If you’re a fan of these cookie dough cookies, you’ll surely enjoy exploring more of our delightful recipes. Here are some favorites:
- Ultimate Cookie Dough Cake: Indulge in layers of cake and cookie dough bliss.
- Classic Edible Cookie Dough Bites: For those times when only pure, unbaked cookie dough will do.
- Decadent Salted Caramel Chocolate Chip Cookies: A harmonious blend of sweet and salty.
- Chewy Brown Butter Chocolate Chip Cookie Bars: All the goodness of chocolate chip cookies in an easy-to-make bar form.
Did you make this recipe? We’d love to hear your thoughts! Leave a comment and star rating below!
Your feedback is incredibly valuable to us and helps our small business grow. Please share your experience by clicking the little stars in the recipe card header to leave a rating and comment.
Full Recipe: Chocolate Covered Cookie Dough Cookies
These Cookie Dough Cookies are truly the ultimate treat for any cookie dough enthusiast! We start with thick, incredibly chewy brown sugar cookies, frost them generously with a dreamy cookie dough buttercream, then drizzle with melted semi-sweet chocolate, and finish with delightful edible cookie dough bites. Prepare for a cookie experience unlike any other!
By: Stephanie Simmons
Prep Time: 50 mins
Cook Time: 10 mins
Total Time: 1 hr
Servings: 17 cookies

Ingredients
Heat-Treated Flour (for frosting & edible dough)
- 1 cup + 3 tbsp all-purpose flour, spooned & leveled or weighed out
- (See note below if you are not familiar with heat-treated flour – it’s super easy!! Make sure to only use this in the frosting & cookie dough, not in the baked cookies.)
For the Cookies
- 1/2 cup + 6 and 1/2 tbsp salted butter, melted (206 grams, 14.5 tbsp)
- 3/4 cup dark brown sugar, packed (163 grams)
- 3/4 cup granulated sugar (156 grams)
- 2 large eggs, at room temperature
- 1 and 1/2 tsp vanilla extract
- 3 cups all-purpose flour, spooned & leveled or weighed out (390 grams)
- 1 tsp baking powder
- 1 tsp baking soda
- 1/2 tsp salt
For the Cookie Dough Buttercream
- 1/2 cup + 1 tbsp salted butter, softened at room temperature (127 grams)
- 1 and 1/2 cups powdered sugar (165 grams)
- 1/2 tbsp milk, or heavy cream
- 1/4 cup light brown sugar, packed (55 grams)
- 1/4 cup + 1 tbsp of the heat-treated all-purpose flour (40 grams)
- 1 tsp vanilla extract
- Pinch of salt
- 1 and 1/2 ounces cream cheese, cold
For the Edible Cookie Dough
- 5 tbsp salted butter, softened at room temperature (71 grams)
- 1/4 cup dark brown sugar, packed (55 grams)
- 1/4 cup granulated sugar (53 grams)
- 2 and 1/2 ounce cream cheese (This is an egg substitute for edible cookie dough – it keeps it nice and creamy without the raw egg!)
- 1/2 tsp vanilla extract
- 3/4 cup + 2 tbsp heat-treated all-purpose flour (just use the remaining heat-treated flour!)
- Pinch of salt
- 2/3 cup mini chocolate chips
For Decorating
- 10 ounces semi-sweet chocolate, melted
- Flaky sea salt, optional
Instructions
- Heat Treat your Flour: Spread the total amount of flour needed for both the edible cookie dough and the cookie dough frosting (1 cup + 3 tbsp in total) on two separate cookie sheets. Bake at 350°F (175°C) for 10 minutes to heat-treat. This makes it safe to eat raw! (Alternatively, you can microwave it in 30-second intervals for 1-2 minutes until it reaches 160°F (71°C)). Let the flour cool completely before using!
- Make the Cookies: Melt the butter in a large bowl. Whisk in the dark brown and granulated sugars for about 1 minute until well combined. Add the eggs and vanilla, whisking until the mixture is smooth and fully combined, about 30-45 seconds. Stir in the dry ingredients (3 cups all-purpose flour, baking powder, baking soda, and salt) until a thick dough forms. (It may appear crumbly at first, but keep mixing, or use a mixer to help, and it will come together.)
- Scoop & Chill Cookie Dough: Scoop the dough into balls, each weighing approximately 55 grams. Place these dough balls into a parchment paper-lined airtight container and chill in the fridge for at least 1 hour, or in the freezer for a minimum of 30 minutes. Chilling is crucial for preventing the cookies from spreading too much during baking.
- Bake Cookies: Preheat your oven to 365°F (185°C). Place about 5-6 chilled cookie dough balls on a parchment-lined cookie sheet, leaving enough space between them. Keep any remaining dough balls in the fridge until you’re ready to bake them. Bake the cookies for 9-11 minutes. They should appear just set on top, with the edges beginning to turn a light golden brown. For that classic Crumbl-style shape, gently flatten the tops of the hot cookies with the bottom of a drinking glass, then use a round cutter to “scoot” them into perfect circles. (See note below for more on this technique.) Let the cookies cool on the baking sheet for about 5 minutes before carefully transferring them to a wire rack to cool completely.
- Make the Frosting: In a large mixing bowl, beat the softened salted butter on high speed until it’s light and creamy. Gradually add the powdered sugar and continue mixing until the frosting is smooth. Add half a tablespoon of milk (or heavy cream) to help achieve the desired consistency. Incorporate the heat-treated flour (1/4 cup + 1 tbsp), light brown sugar, vanilla extract, and a pinch of salt, mixing until just combined. Finally, beat in the cold cream cheese until the buttercream is perfectly smooth and fluffy.
- Make the Edible Cookie Dough: In a medium bowl, cream the softened salted butter with the dark brown and granulated sugars using a hand mixer on high speed for about 1 minute until well combined and fluffy. Add the vanilla and cream cheese, mixing on medium speed for about 1 minute until thoroughly combined. Add the remaining heat-treated all-purpose flour (3/4 cup + 2 tbsp) and a pinch of salt, mixing until a dough forms. (It might be slightly crumbly at first, but keep mixing until it comes together.) Stir in the mini chocolate chips on low speed until evenly distributed. Roll the edible cookie dough into small, bite-sized balls.
- Decorate Cookies: Melt the semi-sweet chocolate in a microwave-safe bowl. Heat in 30-second intervals, stirring well between each, until completely smooth and melted. Spread a generous layer of the cookie dough frosting onto each cooled cookie (a small cookie scoop can help with even portioning). Then, drizzle the melted chocolate over the frosting. Immediately, before the chocolate sets, place 2-4 small edible cookie dough balls on top of the melted chocolate. As the chocolate hardens, it will “glue” the cookie dough bites securely in place. For an extra touch, sprinkle with flaky sea salt if desired.
- Serve & Store: Once decorated, enjoy these magnificent cookies immediately. Store any leftover cookies in an airtight container in the refrigerator for 3-4 days to maintain their freshness and texture.
- Make-Ahead Tips:
- Cookie Dough: Cookie dough balls can be refrigerated in an airtight container for up to 48 hours before baking. For longer storage, freeze them on a parchment paper-lined cookie sheet until solid, then transfer to a freezer bag and freeze for up to 2 months. Bake from frozen, adding 1-2 minutes to the bake time as needed.
- Frosting: The cookie dough buttercream can be made 1-2 days ahead and stored in an airtight container in the fridge. Allow it to come to room temperature for 10-20 minutes before using, and re-mix it to get it back to a smooth, spreadable consistency.
- Edible Cookie Dough: We recommend making this right before you’re ready to use it for the freshest texture.
Notes
- Heat Treated Flour: This is a simple but important step. It means baking raw flour for a few minutes to kill any potential bacteria, making it safe to consume in raw form (like in our cookie dough frosting and edible cookie dough). You can do this in the oven at 350°F (175°C) for 10 minutes or in the microwave until it reaches 160°F (71°C). Always let it cool completely before mixing.
- Cookie Scooting: For perfectly round and thicker cookies, use the “cookie scooting” technique. Immediately after removing the baked cookies from the oven, take a round cookie cutter (slightly larger than your cookies) and place it around the outside of each hot cookie. Gently swirl the cookie cutter to reshape the warm cookie into a perfect circle. This also helps push the edges inward, making the cookie appear thicker and more uniform.
Nutrition
Nutrition information is automatically calculated, so should only be used as an approximation.
Serving: 1 cookie
Calories: 546kcal
Carbohydrates: 75g
Protein: 6g
Fat: 25g
Saturated Fat: 15g
Polyunsaturated Fat: 1g
Monounsaturated Fat: 6g
Trans Fat: 1g
Cholesterol: 68mg
Sodium: 311mg
Potassium: 171mg
Fiber: 2g
Sugar: 49g
Vitamin A: 583IU
Vitamin C: 0.04mg
Calcium: 65mg
Iron: 3mg