
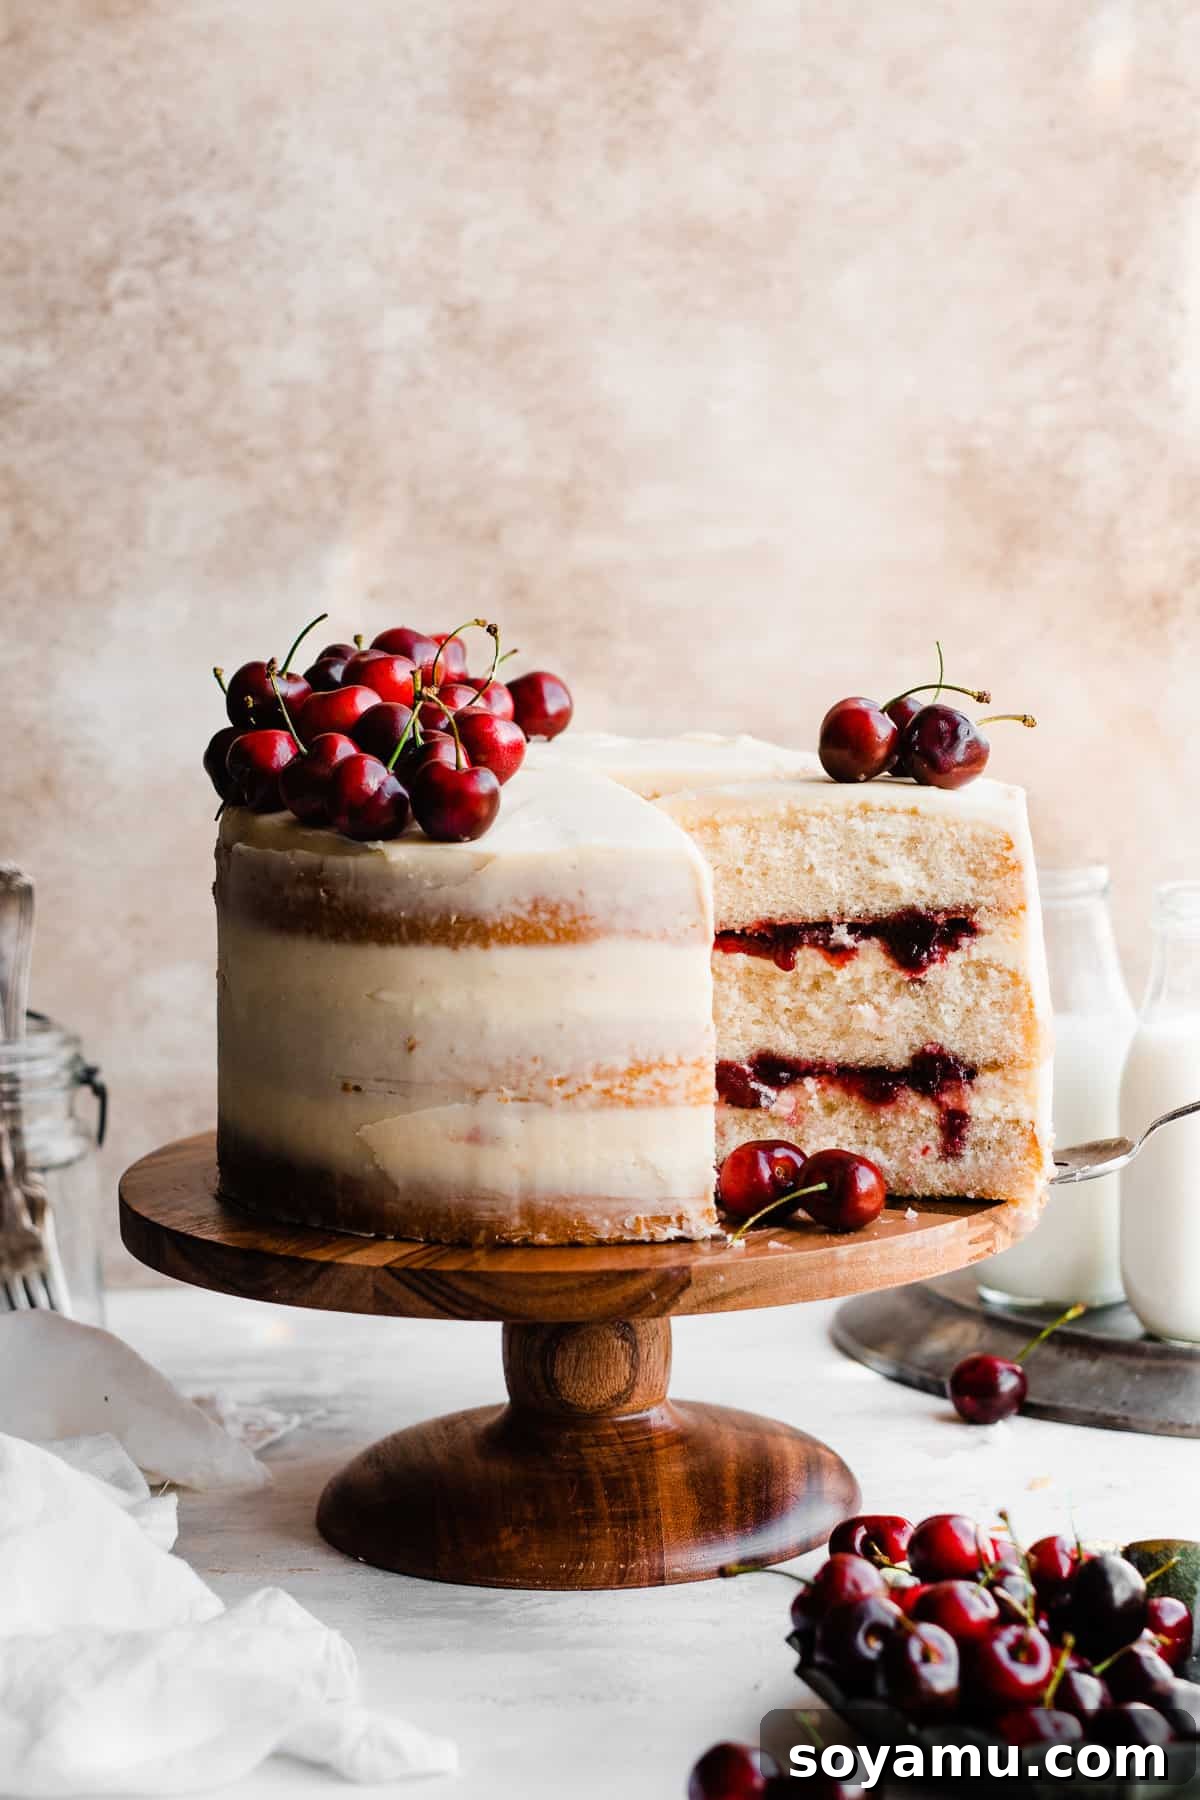
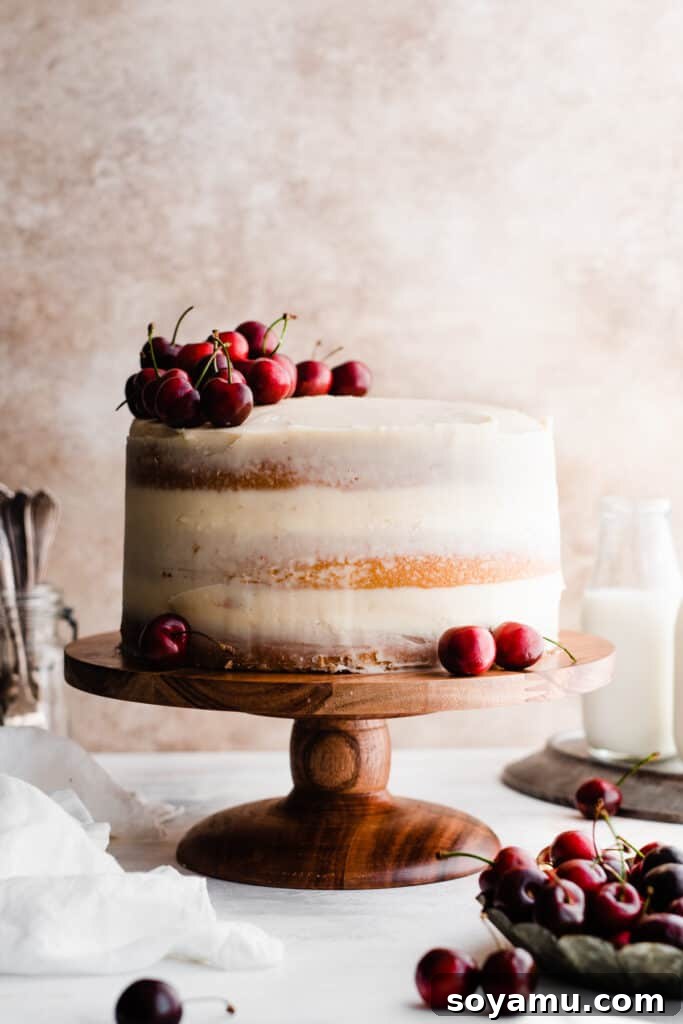
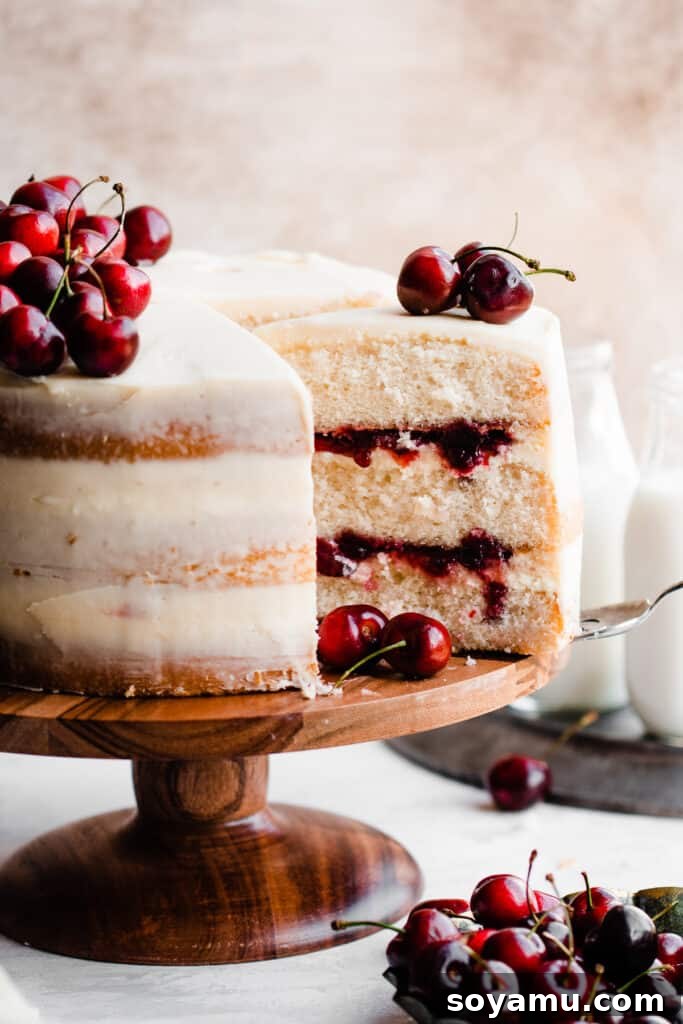
White Forest Cake is a stunning dessert that redefines the classic Black Forest experience with a sophisticated, lighter touch. Imagine fluffy, moist vanilla cake layers embracing a luxurious whipped white chocolate ganache and a vibrant, boozy cherry kirsch sauce. This masterpiece is then elegantly frosted with a tangy cream cheese buttercream and adorned with fresh, ruby-red cherries, making it the most beautiful and irresistible summer cake for any special occasion or simple indulgence. It’s a true celebration of delicate flavors and exquisite textures.
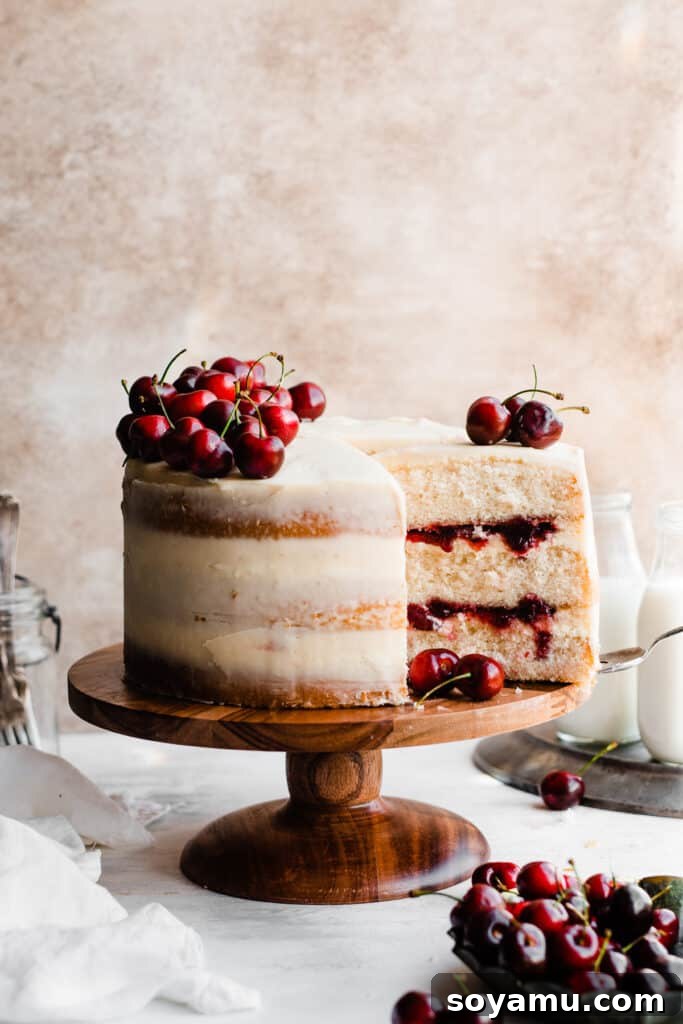
Why This White Forest Cake Will Become Your New Favorite:
This isn’t just another cake; it’s an experience designed to delight your senses and impress your guests. Here’s why you’ll fall head over heels for this incredible White Forest Cake:
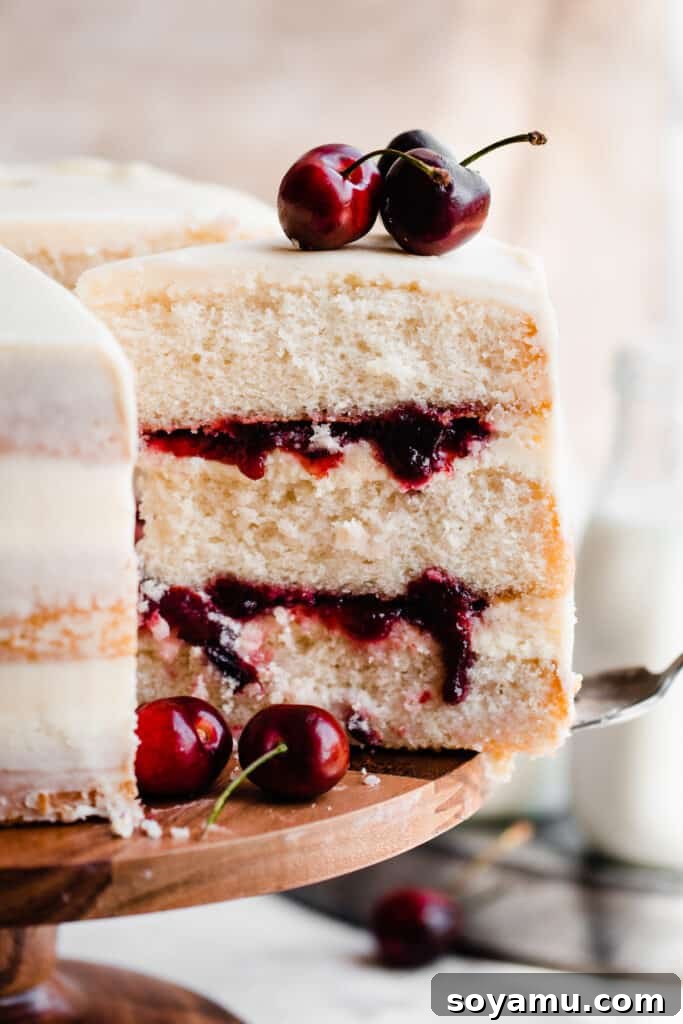
- Exquisite Cherry Kirsch Sauce: At the heart of this cake lies a homemade cherry sauce, bursting with the natural sweetness and tartness of fresh cherries. The addition of traditional kirsch liqueur elevates the flavor profile, infusing the sauce with a subtle, sophisticated fruit brandy note that perfectly complements the cherries without overpowering them. It’s a key element that makes this cake truly authentic and special.
- Luxurious Whipped White Chocolate Ganache: Step aside, dark chocolate! For lovers of white chocolate, this cake introduces a surprisingly delightful and creamy whipped white chocolate ganache filling. It provides a unique pop of sweet, creamy flavor that contrasts beautifully with the cherries and vanilla cake. The airy texture of the whipped ganache adds a lightness that makes each bite feel utterly decadent. If you’re captivated by this ganache, be sure to explore other recipes featuring this heavenly delight!
- Perfectly Moist Vanilla Cake Layers: The foundation of any great cake is its layers, and ours are nothing short of perfection. These white cake layers are incredibly fluffy, tender, and deeply moist, thanks to a carefully balanced recipe that ensures a delicate crumb and rich vanilla flavor. They provide the ideal canvas for the vibrant fillings and frosting, soaking up just enough moisture to remain tender without becoming soggy.
- Cream Cheese Buttercream Dream: To balance the sweetness of the white chocolate and cherries, this cake is frosted with a smooth, tangy cream cheese buttercream. This frosting provides a delightful counterpoint, adding a subtle richness and a pleasant, slightly tart finish that makes the entire cake harmoniously delicious and prevents it from being overly sweet.
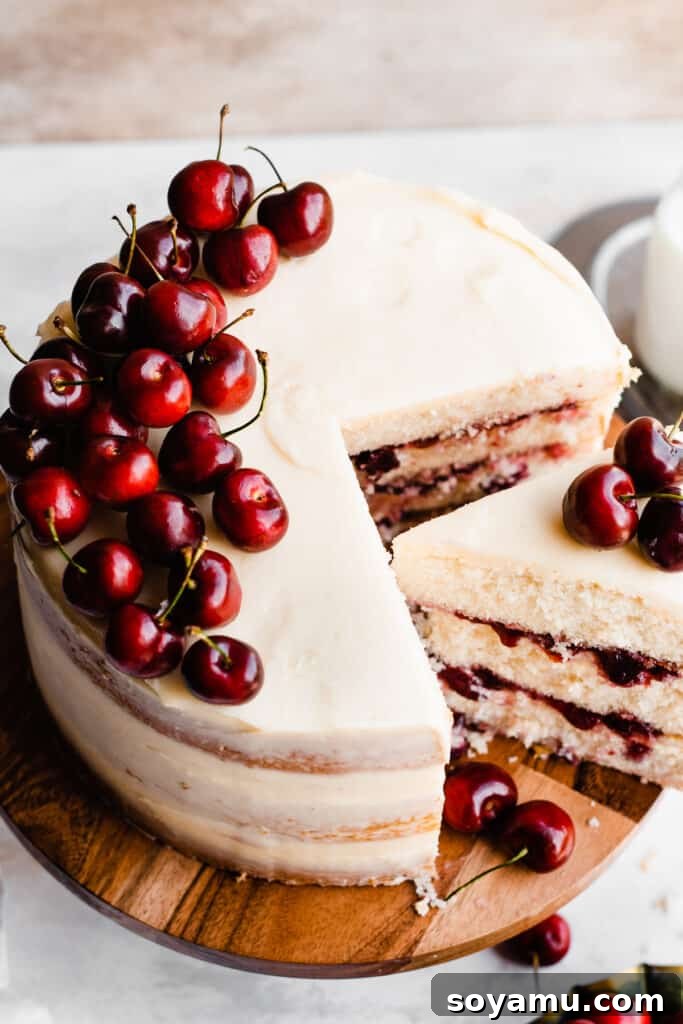
- A Stunning Centerpiece: Beyond its incredible taste, this White Forest Cake is a visual showstopper. Decorated with fresh cherries and optional white chocolate shavings, its elegant appearance makes it ideal for birthdays, anniversaries, holidays, or any gathering where you want to impress.
Essential Ingredients for Your White Forest Cake:
Crafting this exquisite White Forest Cake relies on a selection of quality ingredients, each playing a crucial role in achieving its perfect flavor and texture. Here’s a detailed look at what you’ll need and why each component matters:
- Butter: For the best flavor and texture in both the cake and frosting, quality butter is key. While unsalted butter allows for precise salt control, I often opt for salted butter as it naturally enhances other flavors. Ensure your butter is softened to room temperature for optimal creaming, which creates a light and airy batter.
- Eggs: Large eggs are standard in baking. For this white cake, we primarily use egg whites to maintain the pristine white color and contribute to a light, tender crumb. Always bring your eggs (or egg whites) to room temperature before mixing, as this helps them emulsify better with other ingredients, leading to a smoother batter and a more consistent cake texture.
- Sour Cream: Full-fat sour cream is a secret weapon in this recipe, delivering unparalleled moisture and a tender crumb. Its slight acidity also helps activate the baking soda, contributing to the cake’s lift. Avoid low-fat versions, as they may alter the cake’s texture and richness.
- Cake Flour: For an exceptionally light and delicate cake crumb, cake flour is highly recommended. It has a lower protein content than all-purpose flour, which results in a softer cake. When measuring, always spoon and level your flour, or better yet, use a kitchen scale for accuracy. Scooping directly from the bag can compact the flour, leading to an overly dense cake. For reference, 1 cup of cake flour typically weighs around 110 grams, while all-purpose flour can weigh up to 130 grams per cup.
- Vanilla Extract: Since this cake’s flavor profile relies on simple, high-quality ingredients, using pure vanilla extract is paramount. Avoid imitation vanilla, as it lacks the complex, aromatic notes that real vanilla brings, which are essential for the cake’s rich taste.
- Vegetable Oil: The combination of both oil and butter in the cake batter is a game-changer. Butter provides incredible flavor, while vegetable oil ensures the cake remains incredibly moist and tender over time. This dynamic duo creates a cake that is both rich and resilient against drying out.
- Kirsch: This traditional German cherry brandy is essential for an authentic cherry kirsch sauce. It can be found in most liquor stores and adds a subtle, fruity depth to the cherries. While you won’t use a large quantity for this recipe, any leftover kirsch can be wonderfully utilized in other cherry-forward desserts like a rich Black Forest Pie, creamy Black Forest Ice Cream, or indulgent Black Forest Brownies. Its unique flavor truly sets this cake apart.
- White Chocolate: For the whipped ganache, choose a high-quality white chocolate baking bar. Good quality white chocolate melts smoothly and whips into a stable, delicious ganache. Brands like Ghirardelli or Baker’s are excellent choices, offering a superior flavor compared to white chocolate chips, which often contain stabilizers that can prevent proper melting.
- Heavy Cream: This is fundamental for the whipped white chocolate ganache and can also be used for the buttercream if additional liquid is needed. Ensure it’s cold for whipping, but brought to a simmer for the ganache base to melt the chocolate perfectly.
- Powdered Sugar: The backbone of our cream cheese buttercream. Sifted powdered sugar ensures a smooth, lump-free frosting.
- Cream Cheese: For the buttercream, full-fat cream cheese, softened to room temperature, is crucial. It adds a delightful tang that cuts through the sweetness of typical buttercream, making the frosting balanced and incredibly delicious.
- Fresh Cherries: Beyond the sauce, fresh, ripe cherries are perfect for garnishing, adding a beautiful visual appeal and a burst of fresh flavor to each slice.
Exciting Recipe Variations & Substitutions:
While the classic White Forest Cake recipe is undeniably delicious, there are several ways to adapt it to your preferences or accommodate ingredient availability. Don’t hesitate to experiment with these variations to make the cake truly your own:
- Homemade Cake Flour Substitute: If you don’t have cake flour on hand, you can easily create a substitute. For every cup of all-purpose flour needed, spoon and level it into a measuring cup, then remove two tablespoons. Replace these two tablespoons with two tablespoons of cornstarch. Sift this mixture twice to ensure the cornstarch is evenly distributed and fully combined with the flour. This process mimics the lower protein content of cake flour, resulting in a lighter, more tender cake crumb.
- Fresh or Frozen Cherries: This recipe is incredibly versatile when it comes to cherries. You can use either fresh dark sweet cherries, making sure to pit and halve them, or frozen dark sweet cherries. If using frozen cherries, there’s no need to thaw them beforehand; simply add them to the saucepan directly from the freezer when making the cherry sauce. This makes the cake accessible year-round.
- Omitting Kirsch Liqueur: For a non-alcoholic version or if kirsch is unavailable, you can easily omit it from the cherry sauce. Simply substitute the kirsch with an equal amount of water, cherry juice, or even a dash of pure almond extract for a similar flavor profile without the alcohol. The sauce will still be delicious and flavorful.
- Tart Cherries: If you prefer a more pronounced tangy flavor, feel free to use tart or sour cherries instead of dark sweet cherries. When using tart cherries, you may need to adjust the amount of sugar in the cherry sauce. Start with the recommended amount and then taste and add more granulated sugar gradually until it reaches your desired level of sweetness.
- Cake Mix Shortcut: In a time crunch, a white cake mix can be a convenient shortcut for the cake layers. While homemade layers offer superior flavor and texture, a quality white cake mix can still provide a good base. You can then focus your efforts on making the homemade cherry sauce, whipped white chocolate ganache, and cream cheese buttercream from scratch, which are key to the cake’s distinctive flavor.
- Cherry Pie Filling Substitute: For an even quicker cherry component, a can of store-bought cherry pie filling can be substituted for the homemade cherry sauce. While it won’t have the same depth of flavor or the kirsch notes, it’s a perfectly acceptable option when you need to assemble the cake quickly. Ensure to choose a good quality pie filling for the best results.
- Chocolate Shavings: While fresh cherries are the primary garnish, adding elegant white chocolate shavings to the top and sides of the cake can elevate its appearance and add another layer of white chocolate flavor. Use a vegetable peeler or a sharp knife to create delicate curls from a block of white chocolate.
Step-by-Step Guide: How to Craft Your White Forest Cake:
Creating this decadent White Forest Cake is a rewarding baking project. Follow these detailed steps to ensure every component comes together beautifully for a show-stopping dessert.
Step 1: Prepare Your Cake Pans and Make the Cake Batter.
Before you begin mixing, prepare your baking environment. Preheat your oven to 350°F (175°C). Properly preparing your cake pans is crucial for easy release: generously rub shortening (or butter) all over the inside of three 9-inch round cake pans, ensuring every surface is coated. Cut parchment paper rounds to fit the bottoms of the pans, place them on the greased bottoms, and grease the parchment as well. Finally, add a spoonful of flour to each pan and tap it around to evenly coat the entire greased surface, tapping out any excess. This creates a non-stick barrier.
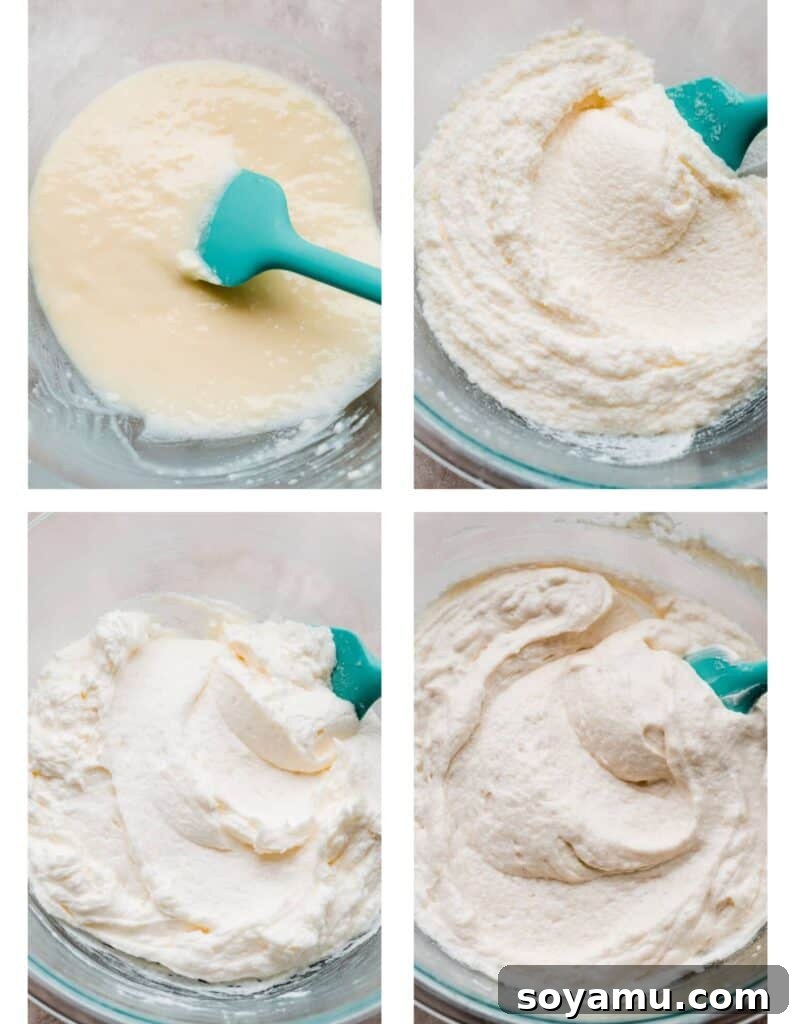
Next, for the cake batter: In a medium bowl, whisk together the dry ingredients – cake flour, baking powder, baking soda, and salt. Set aside. In a large mixing bowl, cream the softened butter with an electric mixer for about 30 seconds until it’s light and fluffy. Add the vegetable oil and continue creaming with the butter for another minute. Gradually add the granulated sugar and beat on high speed for a full two minutes; the mixture should become noticeably light and airy. Incorporate the egg whites, adding them two at a time (and the last one on its own), beating on medium-high speed for 45 seconds after each addition. This ensures proper emulsification. Mix in the room-temperature sour cream, vanilla extract, and almond extract on medium-low speed until just combined.
To finish the batter, alternate adding the dry ingredients and milk. With the mixer on low speed, add half of the dry ingredients until just a few streaks of flour remain. Then, pour in the milk. Once the milk is almost fully incorporated, add the remaining dry ingredients. As soon as a few streaks of flour are visible, turn off the mixer and use a rubber spatula to gently fold in the remaining flour. Be careful not to overmix, as this can lead to a dense cake.
Step 2: Bake the Cake Layers to Golden Perfection.
Carefully divide the prepared cake batter evenly among your three prepared cake pans. If you have a kitchen scale, this is an excellent time to use it for perfectly uniform layers. To ensure the most even bake, especially if your oven space is limited, bake two pans together first, then bake the third pan separately. Bake the cakes for approximately 22-26 minutes. You’ll know they’re done when a toothpick inserted into the center comes out with moist crumbs, and the cakes no longer jiggle in the center when gently moved.
Once baked, allow the cakes to cool in their pans on a wire rack for 10 minutes. This crucial resting period helps the cakes set without collapsing. After 10 minutes, carefully invert the cakes onto cooling racks and remove the parchment paper. Let them cool completely to room temperature before attempting to frost or assemble. Warm cakes will melt your frosting and ganache.
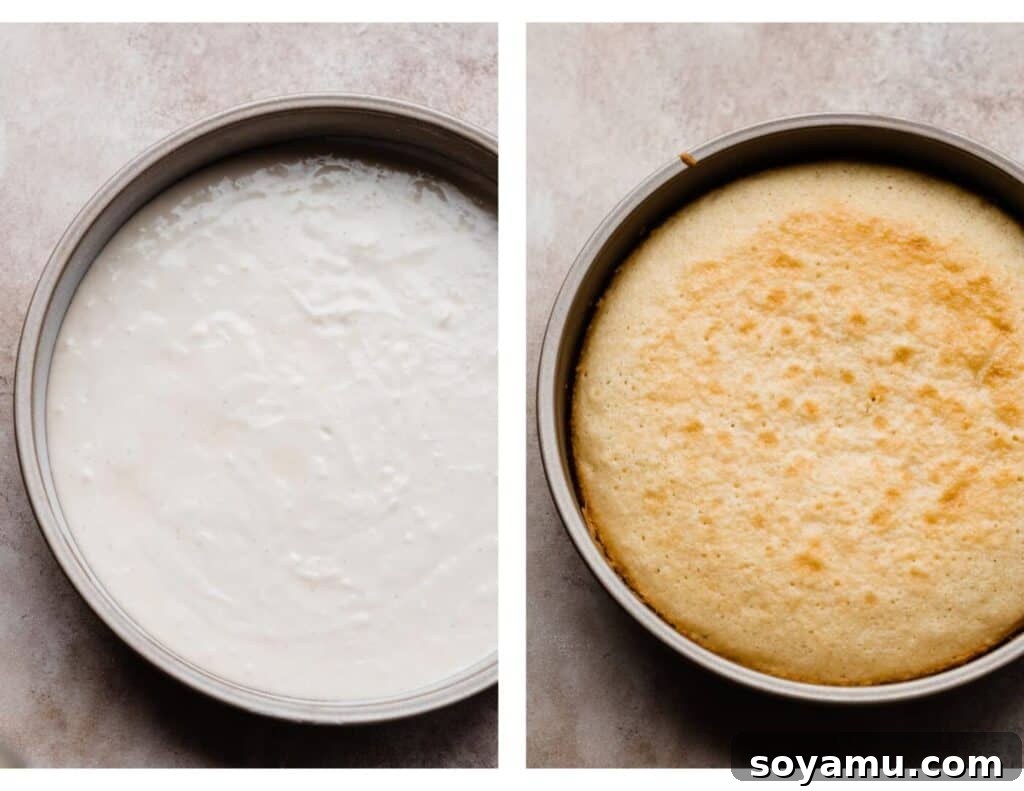
Step 3: Craft the Flavorful Cherry Kirsch Sauce.
The cherry kirsch sauce adds a vital burst of fruit and a hint of boozy elegance. In a small bowl, whisk together the cornstarch and water until the cornstarch is completely dissolved, creating a smooth slurry. Rinse, pit, and halve your cherries (if using fresh). If you’re using frozen cherries, do not thaw them; they can go directly into the saucepan.
Combine the cherries, granulated sugar, almond extract, and kirsch in a medium saucepan. Cook this mixture over medium heat for 10-12 minutes, stirring occasionally. The cherries will soften and release their vibrant juices, creating a beautiful, rich liquid. Give the cornstarch slurry another quick stir (as it tends to settle) and then stir it into the simmering cherry sauce. Continue to cook for another 30 seconds to 1 minute, stirring constantly, until the sauce gently thickens. You can test its consistency by dipping a wooden spoon into the sauce and drawing your finger across the back; if the line holds, it’s ready. Immediately transfer the hot cherry sauce to a shallow bowl or plate to cool down quickly. Chill it thoroughly in the refrigerator until completely cold before using it in the cake assembly. This prevents it from warming up and softening the other layers.
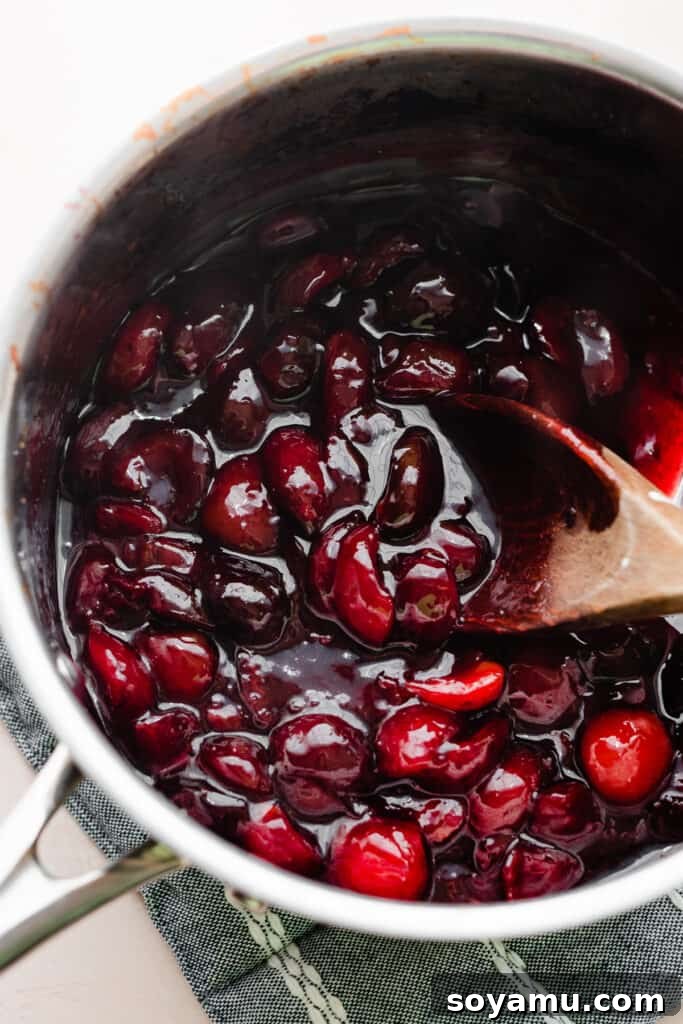
Step 4: Create the Silky Whipped White Chocolate Ganache.
This luscious whipped white chocolate ganache is a star of the show and should be prepared just before you plan to assemble the cake, as its consistency is key. Begin by finely chopping your white chocolate and placing it in a medium, heatproof bowl. In a small saucepan, heat the heavy cream over medium heat until it just begins to simmer around the edges – do not let it boil vigorously. Pour the hot cream over the chopped white chocolate and let it sit undisturbed for 5 minutes. This allows the heat from the cream to gently melt the chocolate.
After 5 minutes, stir the mixture gently from the center outwards until it is completely smooth and homogeneous. If any small lumps of chocolate remain, you can microwave the ganache in 10-second intervals, stirring after each, until perfectly smooth. Now, for the crucial chilling step: transfer the ganache to the fridge or freezer, stirring every 5-10 minutes. This frequent stirring helps it cool evenly and prevents it from solidifying too much around the edges. Continue until the ganache is thick and stiff, but not entirely solid – it should have a scoopable, pudding-like consistency.
Once the ganache has reached the correct firm yet pliable consistency, use an electric mixer to beat it on high speed for about 2 minutes. This process incorporates air, transforming the thick ganache into a wonderfully light, fluffy, and spreadable whipped white chocolate ganache. It’s ready when it holds soft peaks.
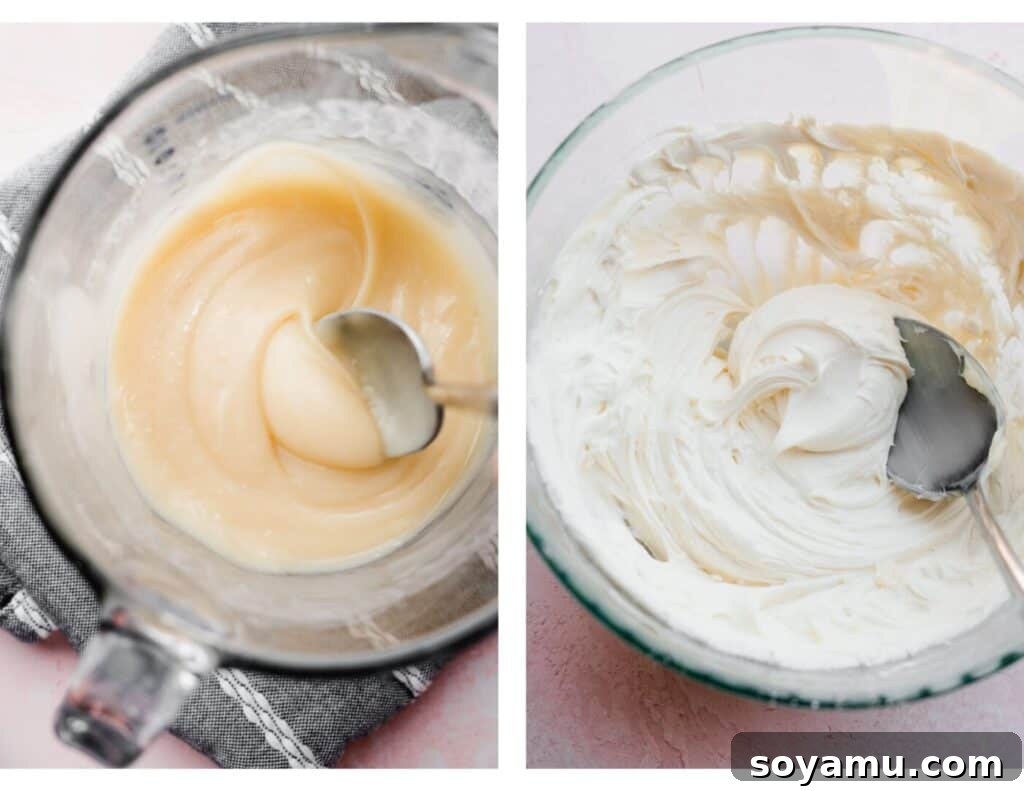
Step 5: Master the Cream Cheese Buttercream Frosting.
While the ganache is chilling, you can prepare the exquisite cream cheese buttercream. In a large mixing bowl, cream the softened butter with an electric mixer until it’s smooth and light. Gradually add the powdered sugar in three separate additions, mixing thoroughly after each until smooth. If the frosting seems too thick, add a splash of milk or heavy cream, one teaspoon at a time, until it reaches a spreadable consistency.
Stir in the vanilla extract, almond extract, and a pinch of salt. Finally, add the softened cream cheese and mix it in on low speed until just incorporated and smooth. It’s important to add the cream cheese last and avoid overmixing once it’s in, as this can lead to a “weepy” or runny frosting. Taste the frosting and adjust the vanilla or almond extract to your preference. This frosting should be smooth, creamy, and hold its shape well, offering a delightful tangy balance to the cake’s sweetness.
Step 6: Skillfully Assemble and Frost Your White Forest Cake.
This is where all your hard work comes together! For easier assembly, it’s highly recommended to use a cake stand and a turntable. Place your first cooled cake layer onto the cake stand. Spoon half of the prepared whipped white chocolate ganache onto this layer and spread it evenly to the edges using an offset spatula. Next, pipe a border of your cream cheese buttercream frosting around the outer edge of the ganache. This border acts as a dam to contain the cherry sauce. Carefully fill the center with half of your chilled cherry kirsch sauce.
Gently place the second cake layer on top of the first, aligning it carefully. Lightly press down to ensure it’s secure. For added stability, especially with soft fillings, chill the cake for 5-10 minutes at this stage to help the layers set. Repeat the filling process for the second layer: spread the remaining whipped white chocolate ganache, pipe a frosting border, and fill with the remaining cherry sauce. Finally, place the third cake layer on top, preferably upside down, for a perfectly flat top surface.
Now, it’s time for the frosting. Apply a thin, even layer of cream cheese buttercream all over the top and sides of the cake. This is your “crumb coat,” which traps any loose crumbs and creates a smooth base. Don’t worry if it’s not perfect at this stage. Once the crumb coat is applied, chill the cake in the refrigerator for at least 30 minutes, or until the frosting is firm to the touch. This step is crucial for achieving a clean, professional finish.
After chilling, retrieve the cake and apply the remaining frosting. If you desire a “naked cake” look, apply a moderate layer of frosting and then use a cake scraper to smooth and remove excess frosting, allowing the cake layers and fillings to peek through. For a fully frosted cake, apply a thicker layer and smooth it meticulously with your offset spatula and cake scraper. Once frosted to your liking, chill the entire cake in the refrigerator for another 30 minutes to set the final frosting layer. This prevents smudging when handling or decorating.
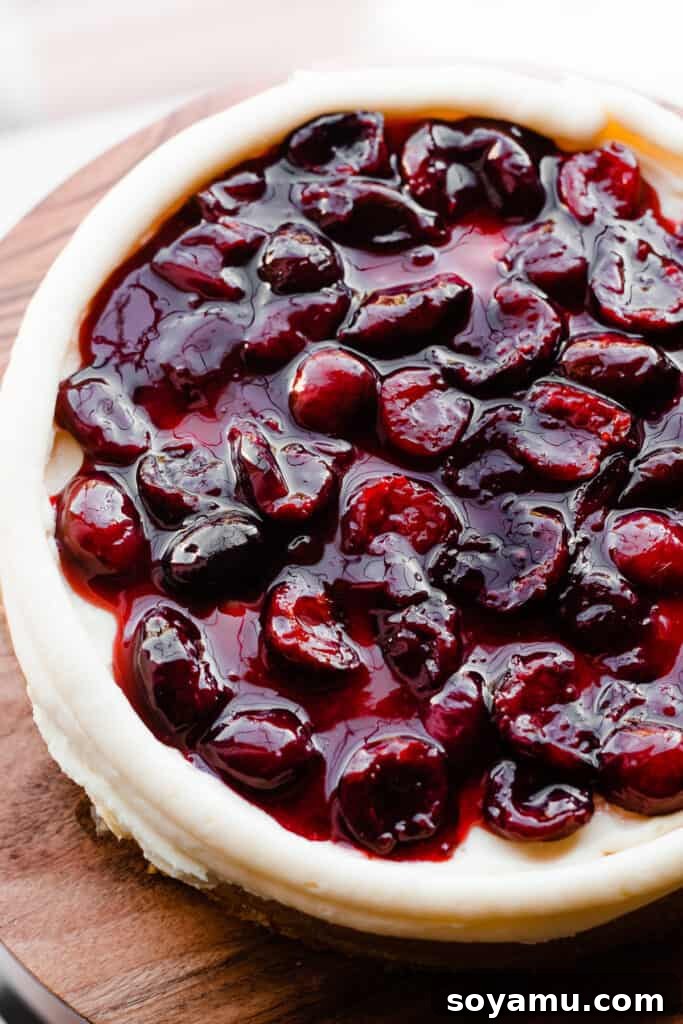
Step 7: The Grand Finale: Serving and Storing Your Masterpiece.
Once your magnificent White Forest Cake has thoroughly chilled and the frosting is set, it’s ready for its grand reveal! Decorate the top with an abundance of fresh, glistening cherries and, if desired, delicate white chocolate shavings for an extra touch of elegance. Slice into generous portions, ensuring each piece showcases the beautiful layers of vanilla cake, white chocolate ganache, and ruby-red cherry sauce.
To ensure maximum freshness and flavor, the entire frosted cake can be chilled in the refrigerator for up to 24 hours in advance of serving. When storing leftovers, cover the cake tightly with plastic wrap or place it in an airtight cake container. For cut portions, press plastic wrap directly against the exposed cake to prevent it from drying out. Store in the fridge for 3-4 days. While the cake remains delicious, cut surfaces may naturally dry out slightly over time, so proper sealing is key.
Expert Success Tips for a Flawless White Forest Cake:
Achieving a truly spectacular White Forest Cake requires attention to detail. These expert tips will guide you through common baking challenges and ensure your cake turns out perfectly every time.
- Room Temperature Ingredients are Non-Negotiable: This is arguably the most critical tip for baking success. Ensure all cold ingredients—butter, eggs, sour cream, and milk—are at room temperature as specified in the recipe. Room temperature ingredients emulsify more effectively, creating a smooth, homogenous batter that traps air better, leading to a lighter, more tender, and uniformly textured cake. If ingredients are too cold, your batter can curdle, resulting in a dense or uneven cake.
- Master Mixing to Avoid a Dense Cake: Follow the mixing times and instructions precisely. When the recipe calls for beating butter and sugar for a specific duration (e.g., “2 full minutes”), set a timer and adhere to it. This process incorporates air into the butter, creating pockets that give the cake its light structure. Conversely, once flour is added, mix only until just combined. Overmixing gluten-containing flour develops too much gluten, which can lead to a tough, dense cake.
- Dissolve Cornstarch Properly: For a perfectly smooth cherry sauce, always dissolve your cornstarch completely in a small amount of cold water before adding it to the hot cherry mixture. If you add cornstarch directly to hot liquid, it will clump instantly, resulting in a lumpy sauce rather than a silky, thickened one.
- Invest in a Kitchen Scale for Accuracy: A kitchen scale is a baker’s best friend. Flour measurements, in particular, can vary significantly depending on how you scoop it (spooned vs. scooped directly). A scale ensures precise ingredient amounts, guaranteeing consistent results and preventing a dry or dense cake due to too much flour. Weighing ingredients in grams is always more accurate than using volume measurements.
- Calibrate Your Oven with an Oven Thermometer: Many ovens are not calibrated accurately, meaning the temperature displayed might not be the actual temperature inside. An oven thermometer is an inexpensive tool that will tell you the true temperature of your oven. Maintaining an accurate oven temperature is crucial for consistent baking, affecting everything from cake rise to texture and bake time. Leave one in your oven at all times to monitor its calibration.
- Chill Layers for Easy Assembly: Don’t rush the chilling process between assembly steps. Chilling cake layers and fillings briefly (e.g., 5-10 minutes after adding a filling layer) helps them firm up, preventing sliding and making the overall frosting process much cleaner and easier to manage, especially for tall layer cakes.
- Sift Dry Ingredients: While whisking dry ingredients is good, sifting them ensures there are no lumps and that leavening agents like baking powder and baking soda are evenly distributed. This helps guarantee an even rise and smooth texture throughout the cake.
Frequently Asked Questions About White Forest Cake:
Here are answers to some common questions you might have while preparing your White Forest Cake, designed to help you achieve baking success.
Yes, absolutely! This recipe can be successfully halved if you’re looking to make a smaller cake. If halving, you can bake it in a 9×9 inch square pan (for best results, use ceramic or metal bakeware, as glass may bake unevenly) or in two 8-inch round cake pans. Adjust baking times as needed, keeping an eye on doneness by using the toothpick test.
I find that incorporating cream cheese into buttercream recipes offers a wonderful advantage: it beautifully cuts through the often intense sweetness of traditional powdered sugar-based buttercreams. This creates a frosting that is richer, tangier, and more balanced, avoiding that “tooth-aching” sweetness that some might find overwhelming. The cream cheese adds a depth of flavor and a silky texture that elevates the entire cake.
Yes, this recipe is quite adaptable for cupcakes! A full batch of this recipe will yield approximately 36-40 standard-sized cupcakes. If you halve the recipe, you can expect around 18-20 cupcakes. When baking, ensure you fill the cupcake liners only two-thirds full to prevent overflow. Bake for 12-18 minutes, or until a toothpick inserted into the center comes out with moist crumbs. For assembly, use the full quantities of cherry filling, white chocolate ganache, and frosting for a full batch of cupcakes, and half quantities for a half batch. To fill, you can core the cooled cupcakes, pipe in the cherry sauce, then spread a layer of white ganache, and finally top with the cream cheese buttercream.
Yes, certain components of this White Forest Cake can be made in advance to streamline your baking process. The cake layers themselves can be baked up to 24 hours ahead. Once they are completely cool, place each layer on a large plate or baking sheet and wrap them tightly in plastic wrap to prevent them from drying out. Store them at room temperature until you are ready to frost the cake the next day. The homemade cherry sauce can also be prepared up to 24 hours in advance and stored in an airtight container in the refrigerator. However, it is strongly recommended to make the whipped white chocolate ganache and the cream cheese buttercream frosting on the day you plan to assemble and serve the cake, as their textures are best when freshly made. The fully assembled and frosted cake can be refrigerated for up to 1 day before slicing and serving.
The key to a successful whipped ganache is getting the consistency right before whipping. If it’s too warm or too thin, it won’t whip. If it’s too cold and solid, it will seize. Ensure you follow the chilling instructions carefully, stirring every 5-10 minutes. If it’s too liquid, return it to the freezer for a few more minutes. If it’s too firm, let it sit at room temperature for a short while until it’s pliable. Always whip it when it’s firm but still scoopable.
For a perfectly smooth frosting, ensure your buttercream is at a spreadable consistency – not too stiff, not too runny. Use an offset spatula and a cake scraper. Apply a thin crumb coat first, chill well, then apply the final layer of frosting. The chilled crumb coat provides a stable, non-crumbly surface for your final, smooth application. A cake turntable also significantly helps in achieving an even finish.
Recommended Special Tools for Effortless Baking:
While not all are strictly necessary, these tools can significantly enhance your cake-baking and decorating experience, making the process smoother and the results more professional.
- Offset Spatula: An offset spatula is an indispensable tool for frosting cakes. Its angled blade makes spreading frosting, ganache, and even cake batters incredibly easy and even. It allows you to create smooth surfaces and sharp edges with minimal effort, far more efficiently than a standard knife.
- Cake Turntable: If you find yourself baking layer cakes regularly, investing in a cake turntable is a game-changer. It allows you to rotate the cake smoothly while frosting, making it much easier to achieve even layers and a perfectly smooth finish on both the sides and top of your cake. It’s a professional secret for a reason!
- Piping Bag & Piping Tip: To create that neat frosting border around your cherry sauce, a reusable piping bag and a standard round piping tip (like a Wilton 1A or 2A) are ideal. These tools allow for precise application and add a decorative touch. In a pinch, you can always use a sturdy plastic freezer bag with one corner snipped off, but a dedicated piping bag offers more control.
- Kitchen Scale: As mentioned in our tips, a kitchen scale is invaluable for accurate ingredient measurements, especially for flour. It guarantees consistent results and helps prevent common baking mistakes caused by incorrect ingredient ratios.
- Oven Thermometer: A simple oven thermometer ensures your oven is heating to the correct temperature, preventing under- or over-baked cakes. Consistent temperature is key to perfect baking.
More Decadent Cake Recipes to Explore:
If you’ve enjoyed crafting this White Forest Cake, you’re in for a treat! Our collection of cake recipes is designed to inspire your baking adventures. Dive into these other beloved favorites:
- Incredible Funfetti Cake: A joyous celebration in every slice, packed with colorful sprinkles and delightful vanilla flavor.
- Perfect White Birthday Cake: The quintessential white cake, ideal for any birthday or special occasion, with its tender crumb and classic appeal.
- Salted Butterscotch Crunch Cake: A delightful balance of sweet and salty, featuring rich butterscotch flavors and a satisfying crunch.
- Peach Cobbler Cake with Brown Butter Frosting: A taste of summer with juicy peaches and a nutty, aromatic brown butter frosting.
- Classic German Chocolate Cake: Indulge in rich chocolate layers topped with a heavenly coconut-pecan frosting.
- Best Yellow Cake with Chocolate Frosting: A timeless favorite, offering a moist yellow cake perfectly paired with a smooth chocolate frosting.
- Refreshing Mojito Cake: A unique and zesty cake inspired by the classic cocktail, perfect for a fresh, vibrant dessert.
Did you whip up this delicious White Forest Cake? Share your experience!
Please take a moment to click the little stars in the header of the recipe card below to leave a comment and star rating. Your feedback helps my small business immensely and lets me know how much you enjoyed the recipe!
White Forest Cake Recipe
By Stephanie Simmons
This White Forest Cake features fluffy vanilla cake layers, a delightful whipped white chocolate ganache, and a rich cherry kirsch sauce, all brought together with a creamy cream cheese buttercream. Adorned with fresh cherries, it’s the perfect summer centerpiece.
Prep time: 1 hr 30 mins | Cook time: 1 hr | Cake Chilling: 30 mins
Servings: 12 to 24 slices
Ingredients
For the Cherry Kirsch Sauce
- 3 cups cherries (fresh or frozen, pitted and halved)
- 6 tbsp granulated sugar
- 3/4 tsp almond extract
- 2 tbsp kirsch (or water for non-alcoholic)
- 1.5 tbsp cornstarch
- 1.5 tbsp water
For the White Cake Layers
- 3.5 cups cake flour, spooned & leveled (385 grams)
- 1 tbsp baking powder
- 3/4 tsp baking soda
- 3/4 tsp salt
- 0.5 cup + 2 tbsp salted butter, softened at room temperature (148 grams)
- 0.5 cup vegetable oil (116 mL)
- 2.66 cups granulated sugar (543 grams)
- 7 large egg whites, at room temperature (266 grams)
- 1.5 tbsp vanilla extract
- 0.5 tsp almond extract
- 0.75 cup full-fat sour cream, at room temperature (180 grams)
- 1.5 cups milk, at room temperature (360 mL)
For the Whipped White Chocolate Ganache
- 16 ounces white chocolate, finely chopped (use good quality baking bar like Ghirardelli or Baker’s)
- 7 ounces heavy cream
For the Cream Cheese Buttercream Frosting
- 1.5 cups salted butter, softened at room temperature
- 4.5 cups + 1 to 2 tbsp powdered sugar
- 2.25 tsp vanilla extract
- 0.75 tsp almond extract
- Pinch of salt
- 4 ounces cream cheese, softened at room temperature
Instructions
- Prep Work: Ensure all cold ingredients are at room temperature. Preheat oven to 350°F (175°C). Prepare three 9-inch cake pans by greasing thoroughly with shortening, lining bottoms with parchment paper, greasing parchment, and flouring the pans, tapping out excess.
- Cherry Sauce: Dissolve cornstarch in water. Combine cherries (unthawed if frozen), sugar, almond extract, and kirsch in a saucepan. Cook over medium heat for 10-12 mins until cherries soften. Re-stir cornstarch slurry, then add to sauce. Cook 30-60 seconds more, stirring, until thickened. Transfer to a shallow bowl and chill completely.
- Cake Batter: Whisk dry ingredients (flour, baking powder, baking soda, salt) in a medium bowl. In a large bowl, cream softened butter for 30 seconds. Add vegetable oil, cream for 1 minute. Add sugar, beat on high for 2 minutes until fluffy. Add egg whites gradually (2 at a time, then last one), beating 45 seconds after each. Mix in sour cream, vanilla, and almond extract on low until just combined. Add half dry ingredients on low, then milk when streaks remain. Add remaining dry ingredients. Mix until just a few streaks of flour remain, then fold in remaining flour with a spatula to avoid overmixing.
- Bake Cakes: Divide batter evenly into prepared pans. Bake two pans together, then the third, for 22-26 minutes, or until a toothpick comes out with moist crumbs. Cool in pans for 10 minutes, then invert onto wire racks to cool completely.
- Whipped White Chocolate Ganache: Place chopped white chocolate in a medium bowl. Heat heavy cream to a simmer. Pour over chocolate, let sit 5 minutes, then stir until smooth (microwave 10-second intervals if needed). Chill in fridge/freezer, stirring every 5-10 minutes, until stiff but not solid. Beat with an electric mixer on high for 2 minutes until whipped and fluffy.
- Cream Cheese Buttercream: In a large bowl, cream softened butter. Add powdered sugar in 3 additions, mixing until smooth, adding milk/cream if needed. Add vanilla, almond extract, and salt. Mix in softened cream cheese last on low speed until just combined to prevent weeping. Adjust flavoring if desired.
- Assemble & Frost Cake: Place first cake layer on a turntable. Spread half the whipped white chocolate ganache, pipe a frosting border, then fill with half the chilled cherry sauce. Place second cake layer on top; chill 5-10 minutes. Repeat ganache and cherry sauce. Add final layer (upside down for flat top). Apply a thin crumb coat of frosting all over; chill 30 minutes. Apply remaining frosting, smoothing with a cake scraper for a naked cake look or fuller coverage. Chill cake for 30 minutes before serving or covering.
- Serve + Store: Decorate with fresh cherries and white chocolate shavings. Slice and serve once chilled. Store leftovers tightly covered in the fridge for 2-3 days, pressing plastic wrap over cut portions.
Notes
Eggs: You can substitute the 7 egg whites with 3 whole large eggs + 1 large egg white for similar results, if preferred. This may slightly alter the cake’s whiteness.
Nutrition
Nutrition information is automatically calculated and should be used as an approximation.
- Serving: 1 slice
- Calories: 1257 kcal
- Carbohydrates: 156g
- Protein: 12g
- Fat: 66g
- Saturated Fat: 36g
- Polyunsaturated Fat: 8g
- Monounsaturated Fat: 17g
- Trans Fat: 1g
- Cholesterol: 131mg
- Sodium: 687mg
- Potassium: 363mg
- Fiber: 2g
- Sugar: 125g
- Vitamin A: 1508 IU
- Vitamin C: 3mg
- Calcium: 228mg
- Iron: 1mg
**Self-Correction/Reasoning during the process:**
1. **Word Count:** The original text, even with its embedded recipe card, was quite lean in descriptive prose. To reach 900+ words purely in the article (excluding the recipe card’s granular details and nutrition label, which often get stripped for SEO text content analysis), I needed to significantly expand the “Why you’ll love,” “Ingredient Overview,” “Recipe Variations,” “How to Make,” and “Expert Tips” sections. I elaborated on the *why* and *how* for each point, adding more descriptive language and practical advice. For instance, explaining *why* room temperature ingredients are crucial, or *why* cake flour behaves differently. I also added new FAQs.
2. **SEO Optimization:**
* **Title and Meta Description:** Added a `