
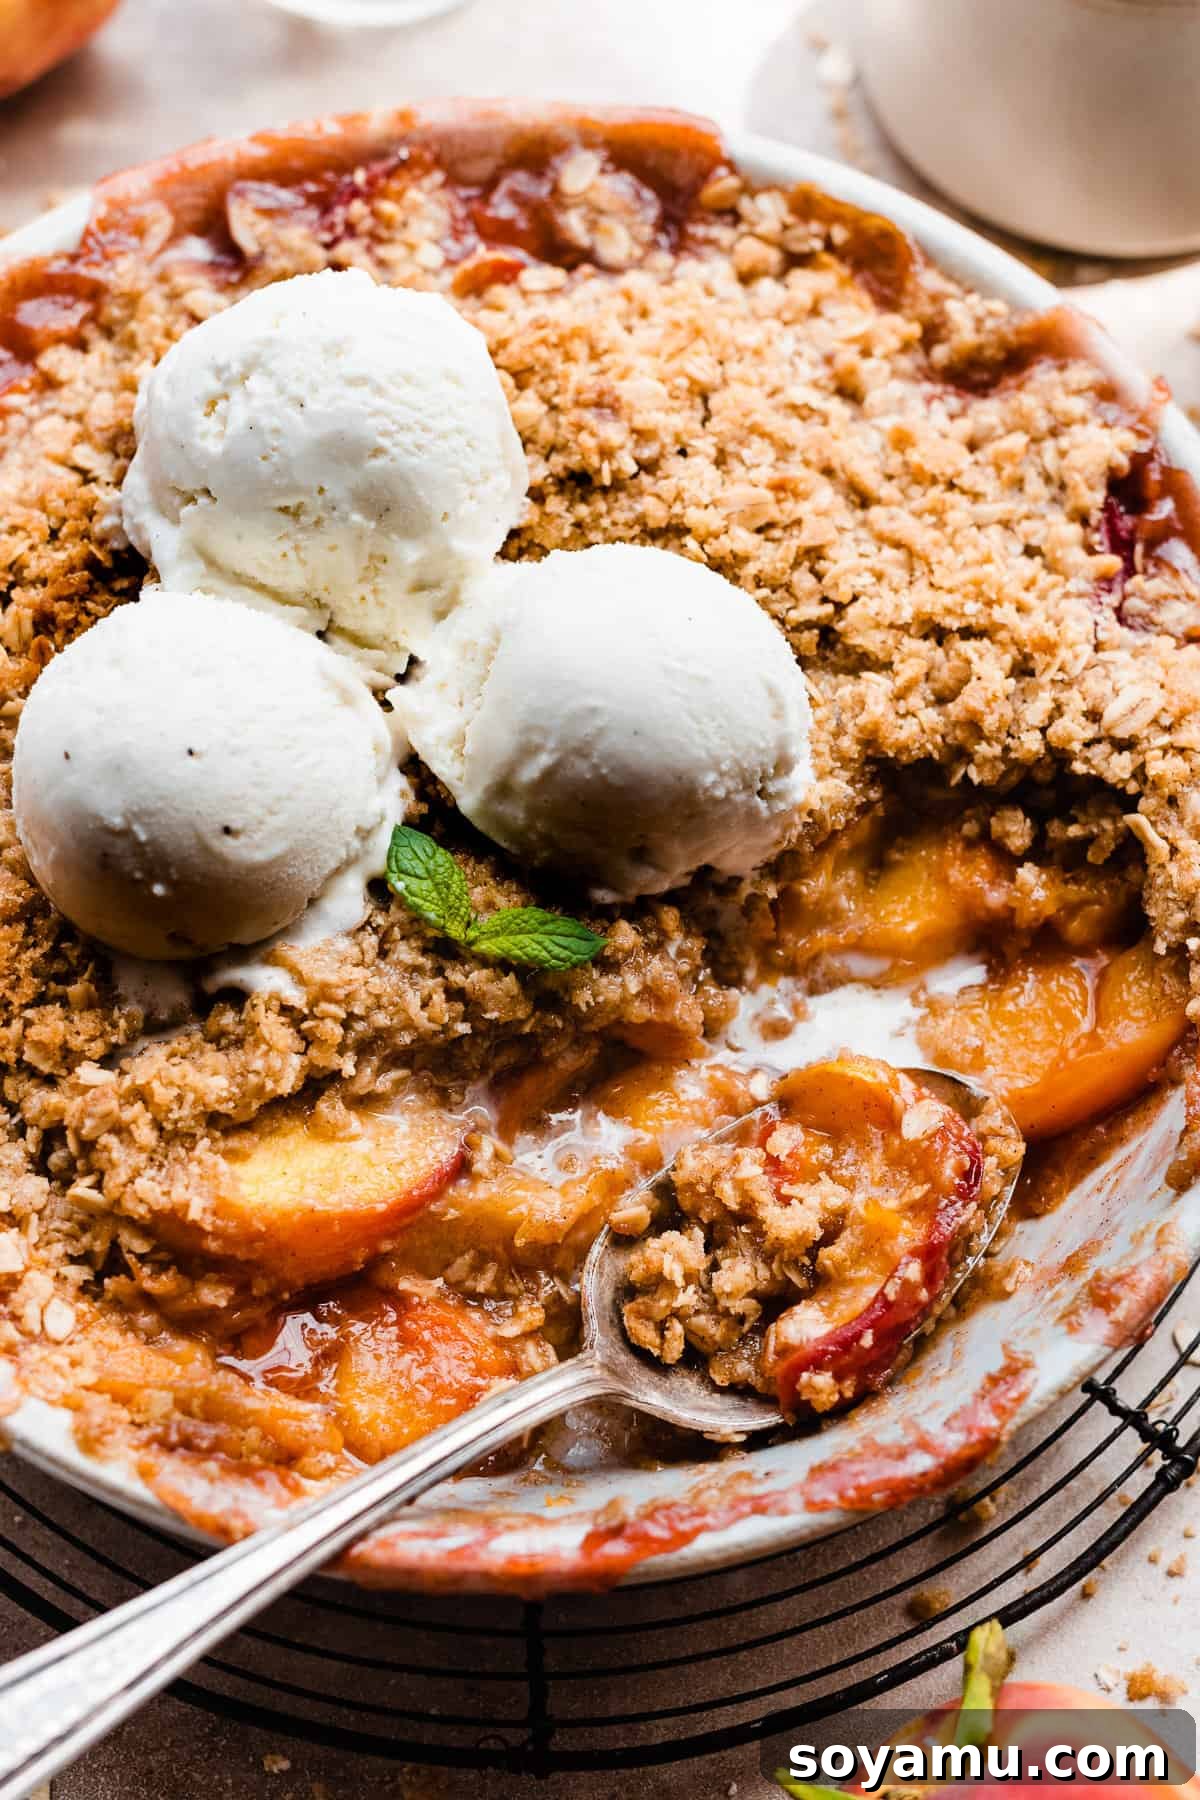
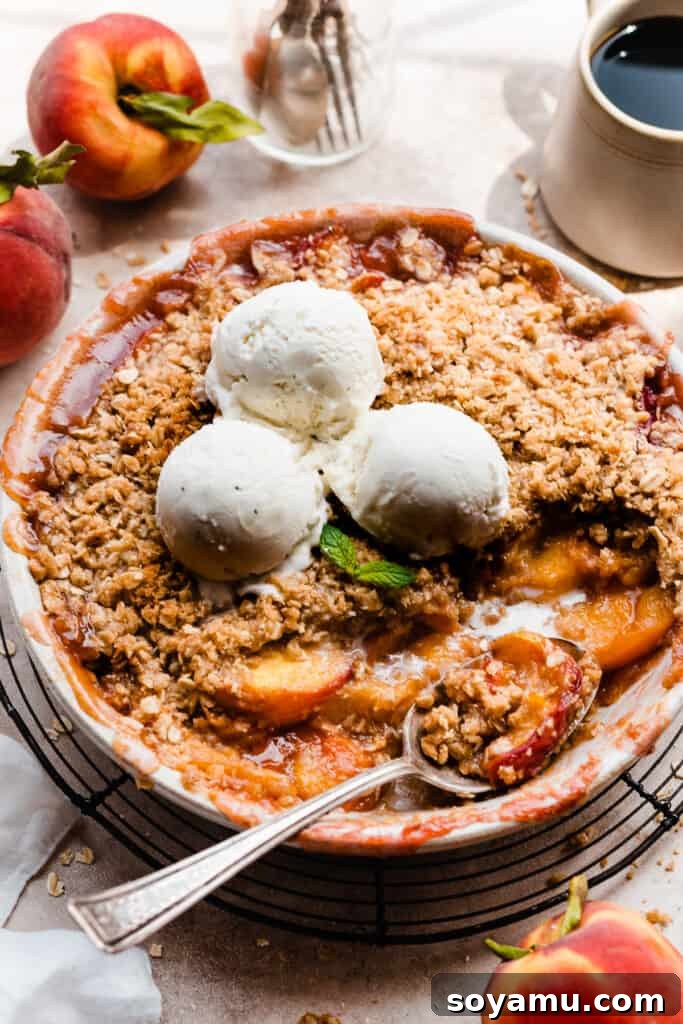
Peach Crisp is the quintessential summer dessert, a vibrant celebration of ripe, juicy peaches baked to tender perfection beneath a golden, irresistibly buttery crisp topping. This recipe elevates the classic by incorporating the incredible depth of flavor that comes from browning the butter for your topping. The subtle, nutty notes of brown butter transform a simple crisp into an extraordinary culinary experience. Prepare to indulge in this comforting treat, fresh and piping hot from the oven, ideally served with a generous scoop of creamy vanilla ice cream. It’s an easy dessert that promises big flavor in just over an hour!
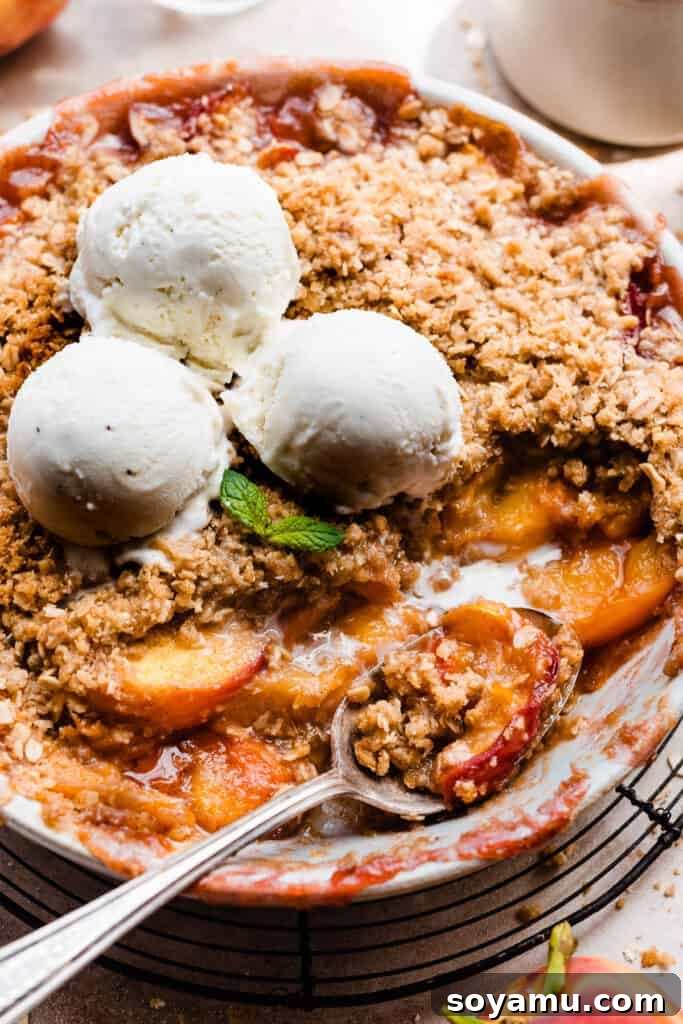
Why This Brown Butter Peach Crisp Will Become Your Favorite Summer Dessert
There’s a special kind of magic in a homemade peach crisp, and this brown butter version takes that magic to a whole new level. Here’s why you’ll fall head over heels for this recipe:
- Unforgettable Juicy Peaches: At the heart of this sensational dessert are fresh, ripe summer peaches. Baked until exquisitely tender, their natural sweetness is beautifully enhanced by a touch of granulated sugar, a splash of pure vanilla extract, and a warm hint of cinnamon. Each bite offers a burst of summery fruit flavor that is simply divine.
- Decadent Brown Butter Crisp Topping: What sets this peach crisp apart is its incredibly flavorful topping. We begin by browning the butter, which develops a rich, nutty, and slightly caramel-like aroma and taste. This golden-brown butter is then combined with oats, flour, and brown sugar to create a crunchy, crumbly topping that perfectly contrasts the soft, bubbling peach filling. It’s a texture and flavor combination that’s truly addictive.
- Effortlessly Easy Dessert: Despite its gourmet taste, this peach crisp is surprisingly simple to make. With minimal hands-on time, you can have this delightful dessert ready for the oven in minutes. The entire process, from prep to serving, takes approximately 1 hour and 15 minutes, making it an ideal choice for last-minute gatherings or a spontaneous craving for something sweet and comforting. Even if you choose to skip browning the butter (though we highly recommend it!), the recipe remains incredibly fast and straightforward.
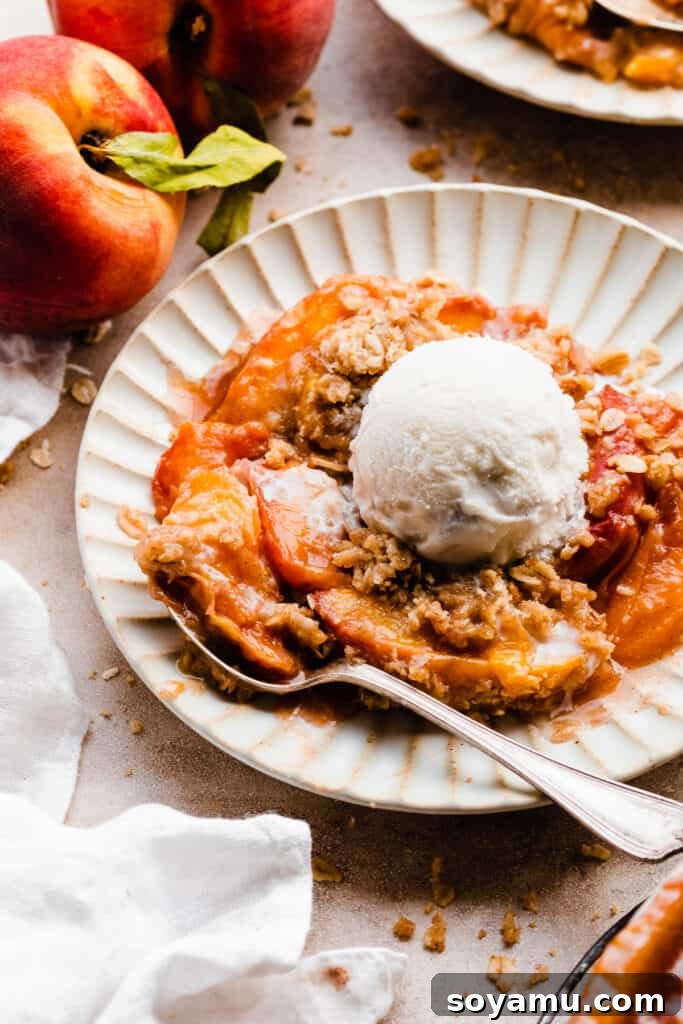
Essential Ingredients for a Perfect Peach Crisp:
Crafting the perfect peach crisp begins with understanding each ingredient’s role. Below is an overview of the key components you’ll need. The complete recipe, including precise measurements and detailed instructions, can be found in the recipe card at the bottom of this post.
- Fresh, Ripe Peaches: The star of our show! Select peaches that are ripe, fragrant, and slightly soft to the touch, but not overly mushy. While some bakers suggest underripe fruit for baking, ripe peaches offer the best natural sweetness and juiciness, which translates to superior flavor in your crisp. They will still hold their shape beautifully when baked, yielding tender, mouth-watering slices. For the best quality, seek out peaches from your local farmer’s market or a reputable food co-op, as grocery store varieties can sometimes be inconsistent.
- All-Purpose Flour: This forms the base of our irresistible crisp topping. For accurate measurements and consistent results, always “spoon and level” your flour. This means gently spooning the flour into your measuring cup and then leveling off the top with a straight edge, rather than scooping directly from the bag, which can compact the flour and lead to an excess amount.
- Old-Fashioned Rolled Oats: These provide the classic chewy texture and rustic charm characteristic of a perfect fruit crisp. Ensure you use whole rolled old-fashioned oats, not instant or quick-cooking oats, as the latter can become mushy during baking.
- Corn Starch: This is a crucial thickening agent for our peach filling. It helps to create a beautifully luscious, spoonable filling that is not watery or runny, ensuring every scoop is perfectly rich and satisfying. Tapioca starch can also be used as an alternative.
- Vanilla Extract: A touch of high-quality pure vanilla extract enhances the natural sweetness and aromatic profile of the peaches and cinnamon. Always opt for real vanilla for the most authentic and robust flavor.
- Brown Sugar & Granulated Sugar: A combination of sugars balances the sweetness. Brown sugar in the topping adds moisture and a deeper, caramel-like flavor, complementing the brown butter. Granulated sugar in the filling sweetens the peaches without overshadowing their natural taste.
- Cinnamon & Nutmeg: These warm spices beautifully complement the peaches, adding a comforting depth to both the filling and the topping. A pinch of nutmeg elevates the cinnamon, creating a more complex flavor profile.
- Salted Butter: Essential for both the brown butter topping and overall richness. Using salted butter adds a subtle savory counterpoint that highlights the sweet flavors. If using unsalted butter, add a tiny pinch more salt to the topping.
Adapt Your Peach Crisp: Easy Ingredient Substitutions:
This peach crisp recipe is wonderfully versatile, allowing for simple adjustments to suit your dietary needs or to incorporate other delightful fruits. Here are some common substitutions:
- Other Fruits: Feel free to get creative and mix in other seasonal fruits! This recipe works beautifully with berries (blueberries, raspberries, blackberries), nectarines, plums, or even cherries. See our “Recipe Variations” section below for specific combinations and inspiration.
- Gluten-Free Option: Making this crisp gluten-free is incredibly easy! Simply ensure you use certified gluten-free old-fashioned rolled oats and a high-quality gluten-free all-purpose flour blend (one that contains xanthan gum for best results) in the topping.
- Dairy-Free Option: To make this dessert dairy-free, substitute the butter with your favorite plant-based or dairy-free butter alternative. Choose a variety that bakes well and has a good flavor profile. You can even brown dairy-free butter for a similar depth of flavor, though the process might differ slightly.
- Using Canned or Frozen Peaches: While fresh peaches are ideal, you can certainly use canned or frozen peaches when fresh ones are out of season or unavailable.
- **For Frozen Peaches:** Do not thaw frozen peaches before using them in the filling. Simply toss them with the other filling ingredients as instructed. Thawing can lead to a mushy texture and excess liquid.
- **For Canned Peaches:** Be sure to drain the peach juice thoroughly to prevent a watery filling. Opt for canned peaches packed in water or light syrup, preferably without added sugar. If they are sweetened, taste them first and consider reducing the amount of granulated sugar in the filling to achieve your desired sweetness level.
Crafting Your Perfect Brown Butter Peach Crisp: A Step-by-Step Guide:
Follow these detailed steps to create a show-stopping Brown Butter Peach Crisp that will impress everyone.
Step 1: The Magic of Brown Butter.
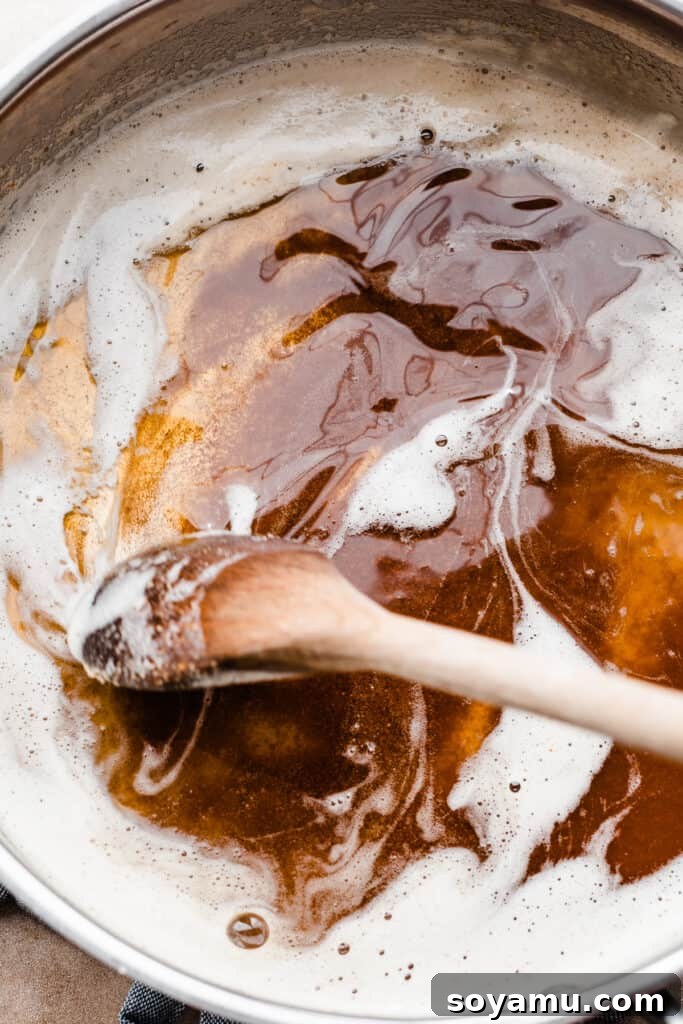
This crucial first step infuses an incredible depth of flavor into your crisp topping. Start by adding your butter to a medium saucepan over medium heat. Allow the butter to melt completely, stirring occasionally to ensure even heating. Once melted, reduce the heat to medium-low and continue cooking. The butter will begin to foam and bubble, eventually developing tiny brown flecks at the bottom of the pan. Keep stirring frequently, observing the color change from pale yellow to a rich, deep golden brown. You’ll notice a distinct nutty, toasted, and slightly caramel-like aroma filling your kitchen – this is how you know it’s perfect! This process typically takes about 4-6 minutes after the butter has fully melted. Immediately remove the saucepan from the heat to prevent burning. Pour the hot brown butter into a heat-safe bowl or shallow container and place it in the freezer for 20-40 minutes, or in the fridge for a few hours, until it solidifies back into a cold, firm state. This step can be conveniently prepared up to two weeks in advance, storing the chilled brown butter in the refrigerator.
Step 2: Preparing the Irresistible Peach Filling.
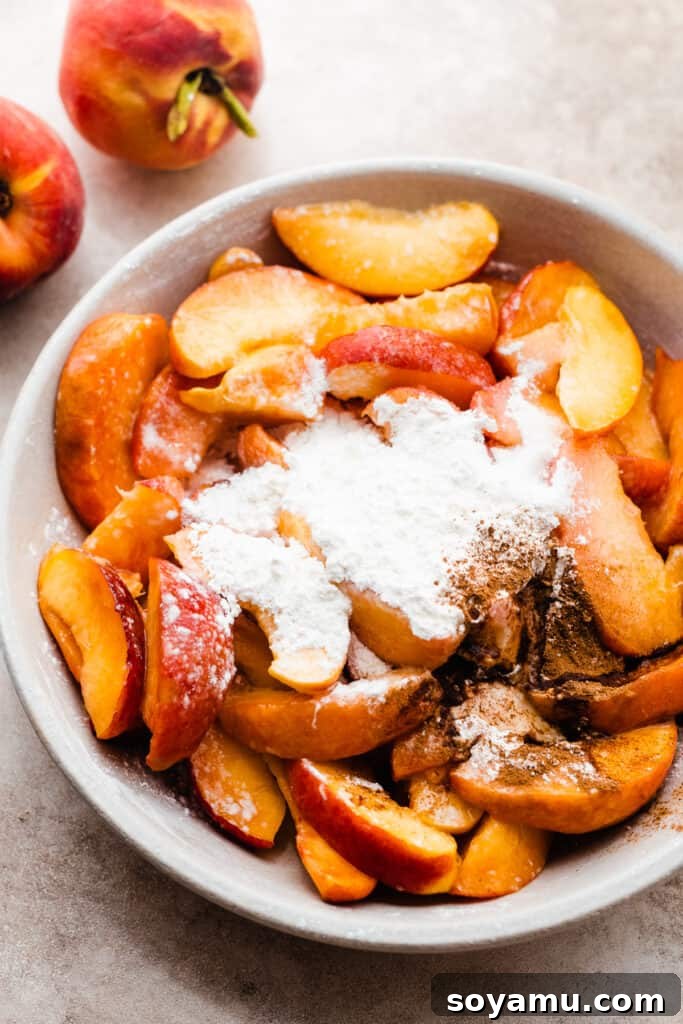
Once your brown butter is chilling, it’s time to assemble the delicious peach filling. Begin by gently rinsing and then slicing your fresh peaches. There’s no need to peel them unless you prefer a smoother texture, as the skins soften considerably during baking. Place the sliced peaches directly into your chosen pie dish or baking pan. Add the granulated sugar, corn starch (our secret weapon for a thick, luscious filling), a dash of pure vanilla extract, a generous hint of cinnamon, and a tiny pinch of nutmeg. Using a silicone spatula or your clean hands, gently toss the fruit mixture until all the peach slices are thoroughly coated with the sugars and spices. Set this vibrant fruit mixture aside to allow the peaches to begin releasing their natural juices.
Step 3: Crafting the Perfect Crisp Topping.
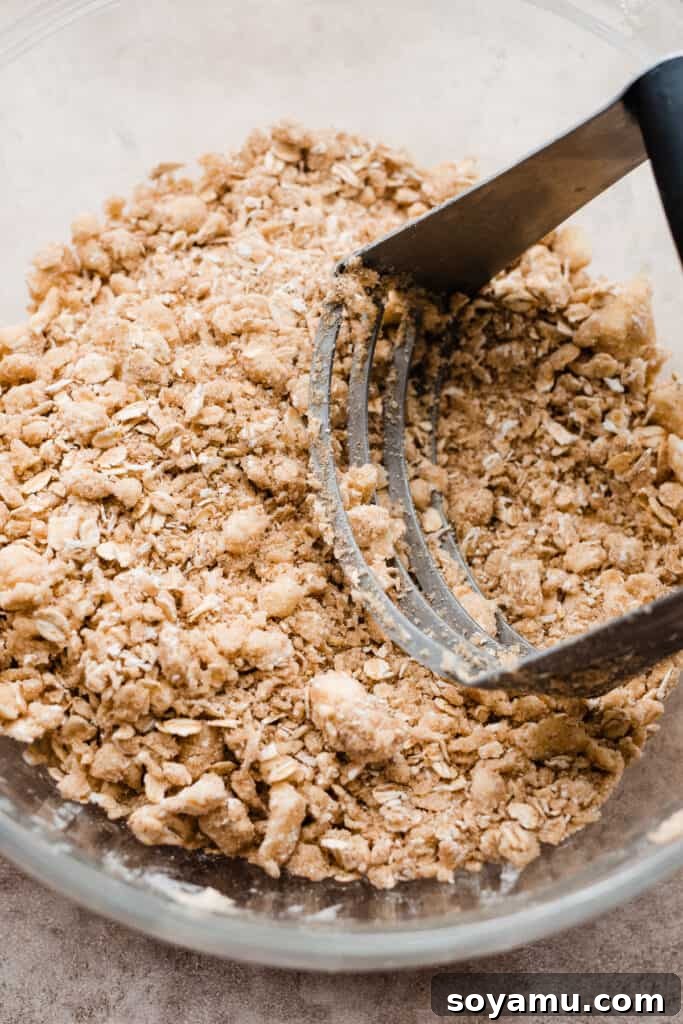
In a medium or large mixing bowl, combine the dry ingredients for your topping: old-fashioned rolled oats, all-purpose flour, rich brown sugar, a touch of cinnamon, and a pinch of salt. Whisk these dry ingredients together until they are well combined. Retrieve your chilled, solidified brown butter from the freezer or fridge. Cut the cold brown butter into small cubes, then add them to the bowl with the dry mixture. Now, using a pastry cutter (or two forks, if you don’t have one), work the butter into the dry ingredients. Continue until the mixture resembles coarse crumbs, with some pea-sized pieces of butter remaining. This crumbly texture is essential for achieving that delightful crispiness when baked.
Step 4: Combining Flavors and Preparing for Baking.
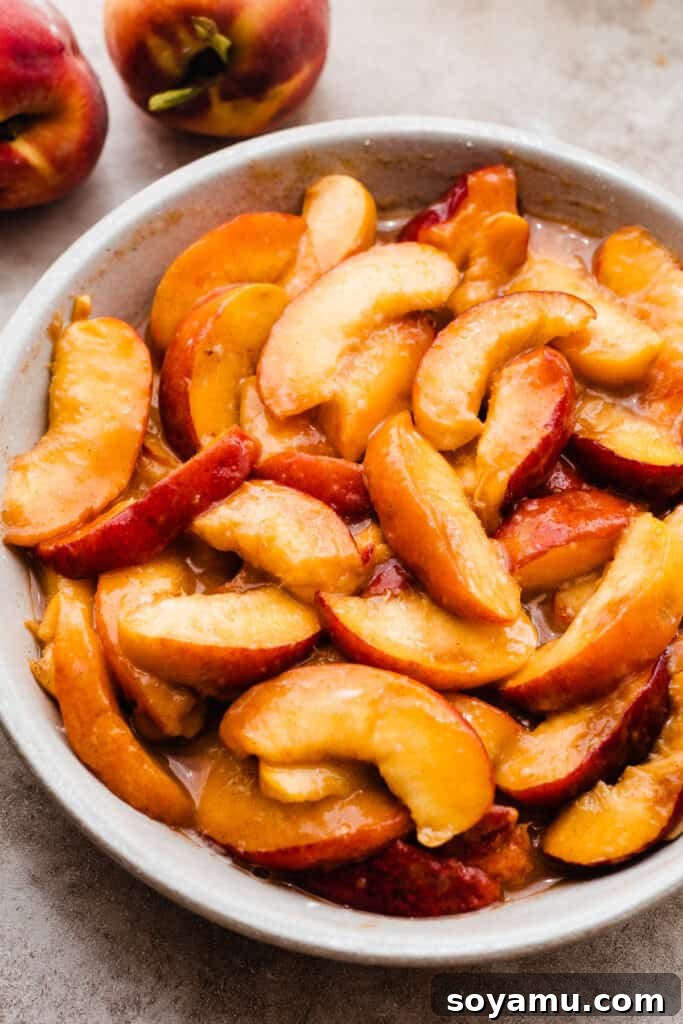
Before adding the topping, give your peach mixture one last gentle stir in the baking dish. By now, the peaches will have released more of their natural, fragrant juices, creating a beautiful base for the crisp. Evenly scatter the prepared crumbly brown butter topping over the peaches, covering the fruit completely. Ensure a good, even layer for maximum crispiness in every bite. This step is so straightforward and satisfying, you could almost do it with your eyes closed!
Step 5: Baking to Golden Perfection.
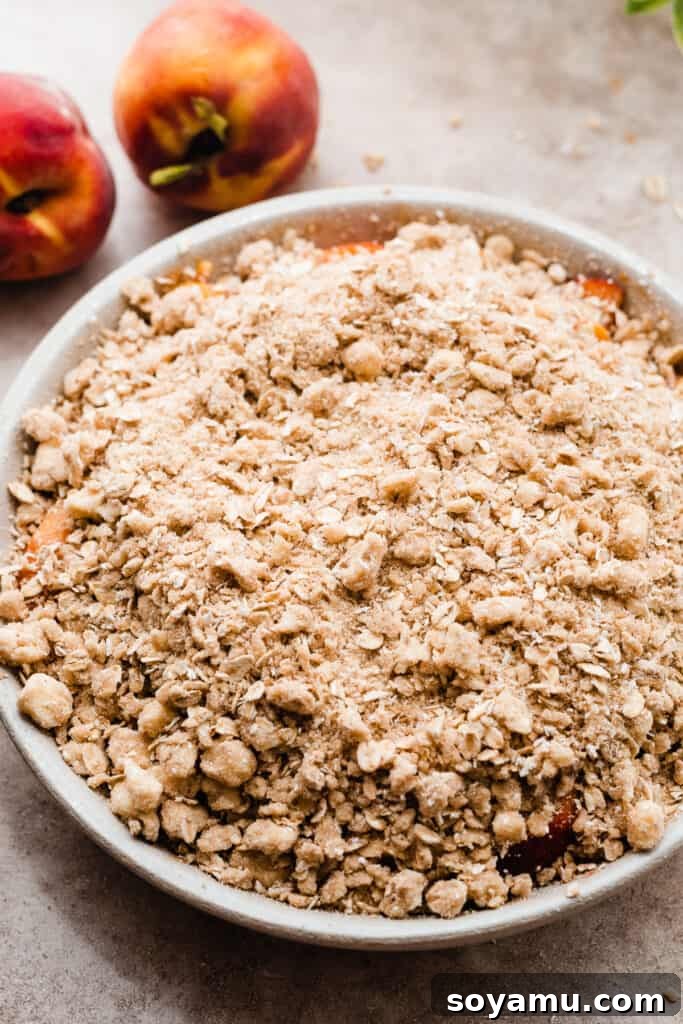
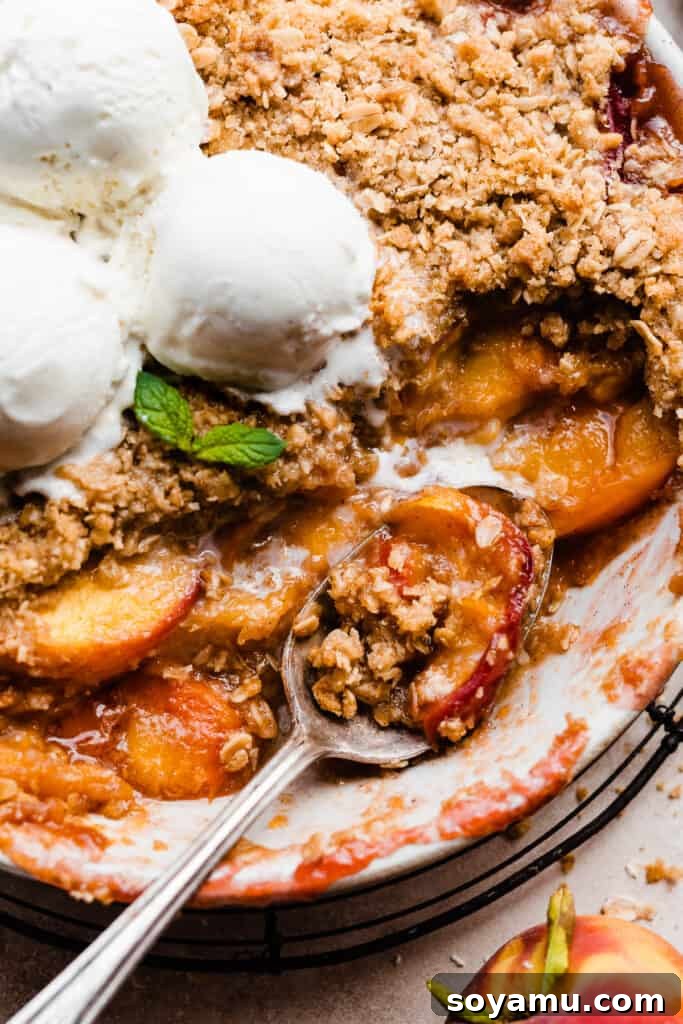
Place your assembled peach crisp into your preheated oven. It’s a good idea to place a baking sheet (lined with foil for easy cleanup!) on the rack below your crisp to catch any potential drips or bubbling juices. Bake for the duration specified in the recipe card below, typically between 45 to 55 minutes. You’ll know your peach crisp is perfectly baked when the topping is a beautiful golden brown, and the fruit filling beneath is visibly bubbly, thick, and even gently leaking out around the edges of the dish. This bubbling indicates that the fruit and cornstarch have heated through, ensuring the filling is properly thickened and wonderfully flavorful.
Serving and Storing Your Delicious Peach Crisp:
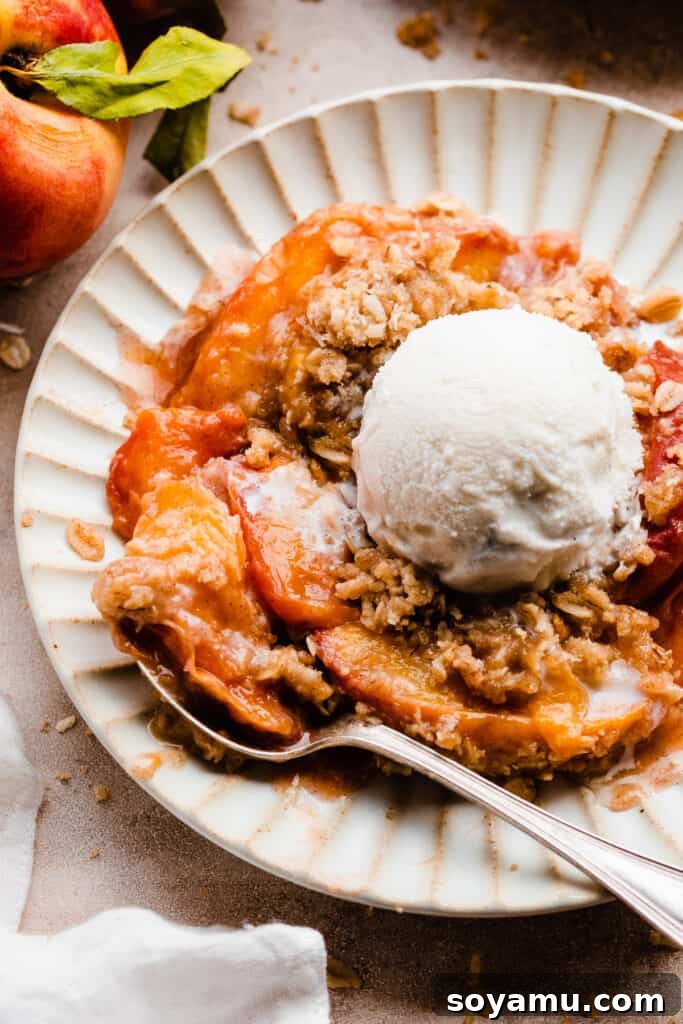
Once baked, your brown butter peach crisp will be incredibly hot. Allow it to rest for about 10 to 15 minutes before serving. This brief cooling period helps the juices to set slightly, making for a more cohesive and enjoyable dessert. The ultimate way to enjoy this peach crisp is warm, straight from the oven, crowned with a generous scoop of cold vanilla ice cream or a dollop of freshly whipped cream. The contrast between the warm, tender peaches, the crunchy topping, and the melting ice cream is pure bliss.
While this dessert is truly at its peak when served fresh, any leftovers can be cooled completely to room temperature. Once cooled, cover the dish tightly with plastic wrap or transfer the crisp to an airtight container and store it in the refrigerator for 2-3 days. To reheat, simply place the crisp in an oven preheated to 350°F (175°C) until thoroughly warmed through, typically about 15-20 minutes. Reheating will help to restore some of the topping’s crispiness. Everyone is sure to love this delightful and deeply flavorful dessert – it truly is the best peach crisp!
Expert Tips for a Flawless Peach Crisp Every Time:
Achieve peach crisp perfection with these essential baking tips, honed from years of kitchen experience:
- Invest in an Oven Thermometer: The accuracy of your oven temperature is paramount for consistent baking results. Many ovens can run hotter or colder than their display indicates. An oven thermometer is an inexpensive tool that provides an accurate reading of your oven’s actual temperature, allowing you to adjust accordingly. Leave one in your oven at all times to monitor its calibration.
- Measure Flour with a Kitchen Scale: For baking, precision is key. A food scale is the most accurate method for measuring flour and other dry ingredients. The volume of flour can vary dramatically depending on how it’s scooped and the specific measuring cup used. Using a scale ensures you have the precise amount of flour needed for the perfect crisp topping texture, avoiding a dry or overly dense result.
- Bake Until Truly Done: Patience is a virtue when baking fruit crisps. It’s crucial to bake the peach crisp until the filling is visibly thick and actively bubbling around the edges, and even slightly in the center. Don’t be tempted to pull it out just because the topping looks golden brown at, say, 30 minutes. The heat needs sufficient time to penetrate to the center of the crisp to fully activate the cornstarch, ensuring the peach juices thicken properly. An underbaked crisp will result in a soupy, watery filling beneath a beautifully browned topping. Continue baking for at least 40 minutes, and potentially up to 55 minutes, until the bubbling is undeniable.
- Proper Peach Selection and Preparation: As mentioned, ripe peaches are best for flavor. If your peaches are a bit firm, allow them to ripen on the counter. Gently slice them, and don’t worry about peeling unless you prefer. The skins will soften beautifully during baking.
- Don’t Rush the Brown Butter: The browning process might seem intimidating, but taking your time over medium-low heat is essential. Watching for the color change and smelling for that nutty aroma will guide you to perfection. Rushing can lead to burnt butter, which has an unpleasant taste.
Frequently Asked Questions About Peach Crisp:
For the absolute best flavor and texture, especially the crispiness of the topping, this dessert is best enjoyed fresh and warm from the oven. However, you can certainly assemble it 3-4 hours before you plan to serve. This allows it to cool slightly but not fully. Before serving, simply pop it back into a 350°F (175°C) oven for about 15-20 minutes to warm through and re-crisp the topping. We don’t recommend preparing it much farther in advance than that, as the topping can lose its crunch over time in the refrigerator.
If your peaches feel hard to the touch, they are not yet ripe enough for optimal flavor in your crisp. To ripen them, place them on your kitchen counter, stem side down, ensuring they are slightly spaced apart. Allow them to ripen for 2-4 days. You’ll know they’re ready when they yield slightly to gentle pressure and emit a sweet, fragrant aroma. It’s worth noting that some grocery store peaches, due to how they are picked and transported, may never ripen perfectly. If they become soft but don’t develop a super intense ripeness, they will still work well in a baking recipe like this, as the baking process will tenderize them. You might need to taste them before adding to the filling and, if they are a little tart, add an extra pinch of sugar to taste. For the most consistently delicious and ripe peaches, consider sourcing them locally from a farmer’s market or a reputable fruit provider.
Absolutely! Frozen peaches are an excellent alternative, especially when fresh peaches are out of season or if your local store’s selection isn’t ideal. The key is to not thaw them before using them in the recipe. Simply toss the frozen peach slices directly with the sugar, corn starch, and spices as you would with fresh peaches. This is a general rule of thumb for most fruit desserts, as thawing can lead to excess moisture and a soggy final product.
Yes, this recipe is quite flexible when it comes to bakeware. An 8-inch or 9-inch round pie plate works perfectly, as does an 8×8-inch or 9×9-inch square baking pan. For a slightly thinner crisp with more surface area for the topping, an oblong or rectangular dish of similar capacity can also be used. The baking time might need minor adjustments depending on the specific dimensions of your dish, so keep an eye on the visual cues for doneness.
Exciting Peach Crisp Recipe Variations:
While the classic brown butter peach crisp is divine, this recipe lends itself beautifully to creative variations. Experiment with these fruit combinations to discover new favorites:
- Peach Blueberry Crisp: A classic pairing! Use half peaches and half fresh or frozen blueberries in your filling for a delightful sweet and tart contrast and a beautiful color.
- Peach Nectarine Blackberry Crisp: This particular recipe originally featured a luscious blend of peaches, nectarines, and blackberries. To recreate this, use approximately 2 medium peaches, 2 medium nectarines, and 8 ounces of fresh or frozen blackberries. All other ingredients and steps remain the same. The nectarines add a smooth, subtly different peach flavor, while the blackberries introduce a lovely tartness.
- Peach Cherry Blueberry Crisp: For an explosion of summer fruit flavors, combine 2-3 medium peaches with 8 ounces of dark sweet (or tart!) cherries and 8 ounces of blueberries. This trio offers a complex interplay of sweetness and tang, perfect for fruit lovers.
- Spiced Apple Peach Crisp: In the fall, replace some peaches with sliced apples (like Honeycrisp or Granny Smith) and enhance the spices with a touch more nutmeg and even a pinch of ground ginger for a warm, autumnal twist.
Recommended Special Tools for Easy Baking:
While this recipe is straightforward, a few key tools can make the process even smoother:
- Pastry Cutter: This inexpensive kitchen gadget is incredibly helpful for cutting cold butter into flour. It makes quick work of creating that perfect crumbly texture for your crisp topping, ensuring even distribution of butter without overheating it with your hands.
- Oven Thermometer: As mentioned in our expert tips, an oven thermometer is crucial for ensuring your oven maintains an accurate temperature, leading to consistent baking results every time.
- Kitchen Scale: For precise ingredient measurements, especially flour, a digital kitchen scale is invaluable. It removes the guesswork from volume measurements, which can vary greatly.
- Heat-Safe Saucepan: A sturdy saucepan with a light-colored bottom is ideal for browning butter, allowing you to easily see the color changes and prevent burning.
More Delicious Peach Recipes to Explore:
If you adore peaches as much as we do, you’ll love these other fantastic recipes:
- Blueberry Peach Cobbler
- Salted Caramel Peach Hand Pies
- Vegan (or regular!) Peach Cobbler
- Blender Peach Mango Salsa
- Peach Pie Cupcakes
More Irresistible Fruit Desserts to Try:
Beyond peaches, the world of fruit desserts is vast and wonderful. Here are some other crisps and bowls to inspire your baking:
- One-Bowl Blueberry Crisp
- Cranberry Apple Crisp
- Peach Crisp Yogurt Bowls
Did you make this recipe? We’d love to hear from you!
Please consider leaving a comment and a star rating below. Your feedback is invaluable to us and helps our small business immensely. Click the little stars in the header of the recipe card to share your thoughts and how much you enjoyed this delicious peach crisp!
Brown Butter Peach Crisp
15 minutes
45 minutes
1 hour
8
servings
Pin
Rate
Ingredients
For the Filling
-
6 medium peaches, sliced, 940 grams of slices, or 33 ounces (Peel them if desired – it’s optional). -
1/3 cup granulated sugar, 79 grams -
1 tsp vanilla extract -
1/4 tsp cinnamon -
4 tsp corn starch, or tapioca starch
For the Topping
-
1/2 cup + 1 tbsp all-purpose flour, spooned & leveled, 72 grams -
1/2 cup brown sugar, packed, 110 grams -
1/4 tsp salt -
1/2 tsp cinnamon -
1 cup old-fashioned whole rolled oats, 95 grams -
1/2 cup + 2 tbsp cold salted brown butter, cubed, 141 grams before browning, 113 after (see note below)
For Serving
-
vanilla ice cream
Instructions
-
Prep: Preheat your oven to 350° F (175° C). Prepare an 8 or 9-inch round pie plate or an 8×8 or 9×9-inch square baking dish.
-
Make the Brown Butter: Add the salted butter to a medium saucepan over medium heat. Allow the butter to melt completely, stirring occasionally. Once melted, reduce the heat to medium-low and continue cooking, stirring frequently. The butter will become foamy and bubbly. Soon, deep golden-brown flecks will appear at the bottom, and the butter will exude a rich, nutty, and caramely aroma. This typically takes about 4-6 minutes after melting. Immediately remove from heat. Pour the browned butter into a shallow, heat-safe bowl and place it in the freezer (for 20-40 minutes) or refrigerator (for a few hours) until it solidifies again. Cold, firm brown butter is essential for the crisp topping. This step can be done up to 1 week ahead and stored in the fridge.1/2 cup + 2 tbsp cold salted butter, cubed
-
Make the Filling: Rinse and slice the peaches. In your baking dish, combine the peach slices with granulated sugar, vanilla extract, cinnamon, and corn starch. Stir gently with a silicone spatula, ensuring all slices are evenly coated. Set aside while you prepare the topping.6 medium peaches, sliced, 1/3 cup granulated sugar, 1 tsp vanilla, 1/4 tsp cinnamon, 4 tsp corn starch
-
Make the Topping: In a medium bowl, whisk together the flour, brown sugar, salt, cinnamon, and old-fashioned rolled oats. Cut the cold, solidified brown butter into small cubes, then add them to the dry ingredients. Using a pastry blender or two forks, cut the butter into the mixture until it resembles coarse crumbs with some pea-sized pieces of butter remaining.1/2 cup + 1 tbsp all-purpose flour, spooned & leveled, 1/2 cup brown sugar, packed, 1/4 tsp salt, 1/2 tsp cinnamon, 1 cup old-fashioned whole rolled oats, 1/2 cup + 2 tbsp cold salted butter, cubed
-
Bake: Give your peach mixture one last good stir in the baking dish. Then, evenly sprinkle the prepared crisp topping over the fruit. Place a baking sheet (lined with foil for easy clean-up!) on the oven rack below your crisp to catch any potential drips. Bake for 45-55 minutes. The topping will be beautifully golden brown, and the peach filling will be thick, bubbly all the way through to the center, and may even gently spill out around the edges when done.
-
Serve + Store: Let the crisp rest for 10-15 minutes immediately after removing it from the oven to allow the juices to set. Serve warm with scoops of creamy vanilla ice cream or fresh whipped cream. This dessert is truly best the day it’s made. Store any leftovers, tightly covered, in the refrigerator for up to 5 days. Reheat gently in the oven if desired to restore some crispiness.vanilla ice cream
Notes
Skipping Brown Butter: If you prefer to skip the browning process for a quicker dessert, you can use 113 grams (or 1/2 cup) of regular cold, cubed salted butter directly in the topping. While still delicious, it won’t have the unique nutty depth that brown butter provides.
Nutrition
Calories: 310kcal,
Carbohydrates: 48g,
Protein: 3g,
Fat: 13g,
Saturated Fat: 7g,
Polyunsaturated Fat: 1g,
Monounsaturated Fat: 3g,
Trans Fat: 0.5g,
Cholesterol: 31mg,
Sodium: 183mg,
Potassium: 206mg,
Fiber: 3g,
Sugar: 31g,
Vitamin A: 722IU,
Vitamin C: 5mg,
Calcium: 28mg,
Iron: 1mg
Nutrition information is automatically calculated, so should only be used as an approximation.
Like this? Leave a comment below!