

The Best Soft & Chewy Gingerbread Cookies: A Holiday Must-Bake
Prepare to fall in love with these truly exceptional Gingerbread Cookies. As a self-proclaimed gingerbread connoisseur, I can confidently declare this is the WORLD’S BEST gingerbread cookie recipe. Forget dry, crumbly, or overly hard gingerbread; these cookies are designed to be ultra-thick, luxuriously soft, and wonderfully chewy, delivering a deep, authentic gingerbread flavor that perfectly captures the spirit of the holidays. What’s even better? They are incredibly easy to make, with a simple trick that streamlines the dough-rolling process, and can effortlessly be adapted to be vegan-friendly.

These festive and delightfully chewy cookies are not just a treat for the taste buds; they are also a joy to create. I’ve packed this guide with essential tips and tricks to make the cutout cookie process incredibly smooth and enjoyable, along with plenty of make-ahead strategies to simplify your holiday baking. Whether you’re preparing for a festive cookie exchange, hosting a fun cookie decorating party, or simply craving that comforting taste of gingerbread, this recipe is your go-to for creating memorable moments and irresistible treats.
Why These Gingerbread Cookies Will Become Your New Favorite
There’s a reason these gingerbread cookies consistently receive rave reviews. They stand out from the crowd, offering a superior experience that you’ll want to revisit year after year.
- Unrivaled Soft & Chewy Texture: Say goodbye to hard, brittle gingerbread! Our recipe guarantees perfectly soft-baked cookies that boast a substantial thickness and an utterly delightful chewy texture. Each bite offers a melt-in-your-mouth experience, a comforting contrast to the crispier varieties. This unique texture makes them incredibly satisfying and ensures they remain tender for days.
- Authentic, Deep Gingerbread Flavor: These cookies are truly bursting with the quintessential flavor of classic gingerbread. A harmonious blend of warm spices like ground ginger, cinnamon, and a hint of nutmeg creates an aromatic and deeply satisfying profile. The rich molasses adds an unparalleled depth, making these cookies incredibly flavorful and wonderfully nostalgic. It’s a taste that instantly transports you to holiday cheer.
- Endless Decorating Possibilities: While these gingerbread cookies are undeniably fabulous enjoyed plain, their sturdy yet soft nature makes them an ideal canvas for creative decoration. Whether you prefer a simple dusting of powdered sugar for an elegant touch, a vibrant royal icing for intricate designs, or a creamy buttercream frosting for a decadent finish, these cookies are versatile. They are perfect for holiday gatherings, gifts, or a fun family decorating activity.
- Effortlessly Easy to Make: Despite their impressive appearance and flavor, these cookies are surprisingly simple to prepare. We’ve included innovative techniques, such as rolling the dough between parchment paper *before* chilling, which eliminates the struggle of working with rock-hard dough. This simple trick, combined with straightforward instructions, makes the entire baking process a breeze, even for novice bakers.
- Perfect for Holiday Traditions & Gifting: From the moment the warm spices fill your kitchen, these gingerbread cookies embody the essence of the festive season. They are an absolute must-have for holiday cookie exchanges, a delightful treat for Santa, or a thoughtful homemade gift for friends and family. Their charm and deliciousness make them a cherished part of any holiday celebration.
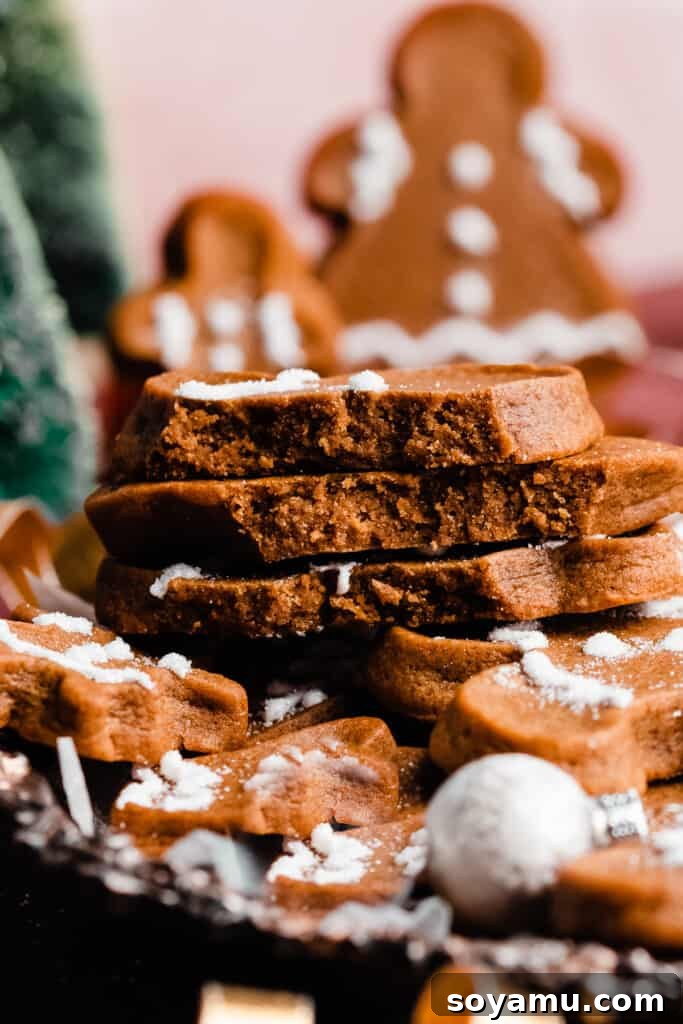
Essential Ingredient Overview for Perfect Gingerbread:
Creating the best gingerbread cookies starts with understanding the role of each key ingredient. While the full recipe with precise measurements and detailed directions can be found in the recipe card at the bottom of this post, let’s explore what makes these ingredients so crucial for our soft and chewy masterpiece. For easy navigation, feel free to use the table of contents at the top of the page, just below the first image.
- Butter: The foundation of our cookie’s rich texture and flavor. I consistently opt for salted butter because it adds a subtle depth and balances the sweetness, enhancing the overall taste. However, if you prefer, unsalted butter works perfectly – just be sure to add a tiny pinch more salt to the dry ingredients to compensate for the flavor balance. Ensure your butter is softened to room temperature for optimal creaming with the sugar.
- Molasses: This is the heart and soul of gingerbread flavor, providing its signature color, deep sweetness, and incredible moisture that contributes to the chewy texture. It’s crucial to select the right kind: look for full flavor molasses in the baking aisle of your grocery store. I highly recommend the “full flavor” variety from the Brer Rabbit brand; it delivers an exceptional depth without being overpowering. A critical note: Do NOT use blackstrap molasses! Blackstrap has a much more robust, almost bitter flavor and a lower sugar content, which will significantly alter the taste and texture of these delicate cookies, making them unpleasant. Trust me, I’ve experimented with every type, and full flavor is the undeniable winner. If you’re a molasses enthusiast, you’ll also adore my Chewy Molasses Cookies!
- Dark Brown Sugar: While the original recipe mentions it indirectly, dark brown sugar plays a pivotal role. Its high moisture content and rich, caramel-like notes contribute significantly to both the tenderness and chewiness of these cookies, as well as enhancing the deep flavor alongside the molasses. Light brown sugar can be used as a substitute, but dark brown sugar will yield a more intense flavor and softer cookie.
- All-Purpose Flour: The structural backbone of our cookies. For the best, most consistent results, it’s essential to measure your flour accurately. The best method is to spoon & level your flour: gently spoon flour into your measuring cup until it overflows, then level off the top with a straight edge (like a knife). Scooping the measuring cup directly into the flour bag can compact it, leading to too much flour and a dry, tough cookie. Alternatively, for ultimate precision, use a kitchen scale and weigh 130 grams of all-purpose flour per cup.
- Ground Ginger: The star spice that gives gingerbread its distinctive warmth and slight kick. We use a generous amount to ensure a vibrant, noticeable ginger flavor that isn’t shy.
- Cinnamon: A classic companion to ginger, cinnamon adds a sweet, woody warmth that perfectly complements the other spices, enriching the overall flavor profile.
- Nutmeg: Just a pinch of nutmeg provides a subtle, sweet, and slightly peppery undertone, adding complexity and rounding out the spice blend beautifully. For an even richer spice profile, you could also consider adding a tiny pinch of ground cloves or allspice.
- Baking Soda: This leavening agent reacts with the acidic molasses to create carbon dioxide gas, which helps the cookies rise slightly and contributes to their soft, tender crumb.
- Salt: A crucial flavor enhancer that balances the sweetness of the molasses and sugar, making all the other flavors pop and preventing the cookies from tasting overly sweet or flat.
Recipe Substitutions & Creative Variations: Tailor Your Gingerbread
This gingerbread cookie recipe is wonderfully adaptable, allowing you to customize it to fit dietary needs or simply experiment with new flavors and decorations. Here are some popular substitutions and creative variations:
- Dairy-Free Gingerbread: Making these cookies dairy-free is incredibly simple! Just swap the traditional butter for your favorite high-quality dairy-free butter sticks. Look for brands that are specifically designed for baking, as they tend to mimic the texture and fat content of dairy butter most effectively, ensuring your cookies remain perfectly soft and flavorful.
- Vegan Gingerbread: Great news for our vegan friends – this recipe is naturally vegan with the dairy-free swap mentioned above, as it contains no eggs! This makes it a fantastic option for inclusive holiday gatherings where everyone can enjoy a delicious homemade treat.
- Gluten-Free Option: While not explicitly in the original, these cookies can often be made gluten-free by substituting the all-purpose flour with a 1:1 gluten-free baking flour blend that contains xanthan gum. Ensure the blend is suitable for cut-out cookies.
- Spiced Variations: For an even deeper, more complex gingerbread flavor, consider adding a small amount of additional warm spices. A tiny pinch (1/4 to 1/2 teaspoon) of ground cloves or allspice can elevate the aroma and taste, adding another layer of traditional holiday spice. Experiment to find your perfect blend!
- Delightful Glaze Options: For a quick and elegant finish, a simple glaze works wonders.
- Plain Glaze: You can use the basic glaze recipe from my Pumpkin Muffins, easily adapting it by swapping the maple syrup for milk (dairy or non-dairy) to create a simple, sweet coating.
- Buttery Maple Glaze: For a richer, more indulgent flavor, my Buttery Maple Glaze is an excellent choice. Lightly dunk cooled cookies into the glaze or drizzle it artfully over them for an easy yet impressive decoration.
- Elegant Powdered Sugar Dusting: For a very simple, yet incredibly beautiful decoration that evokes a snowy winter scene, lightly dust the cooled cookies with powdered sugar just before serving. It’s effortless and adds a touch of rustic charm.
- Simply Plain: Don’t underestimate the power of pure, unadorned flavor! These cookies are so incredibly delicious on their own that serving them plain is a perfectly valid and satisfying option. The rich aroma and deep taste speak for themselves.
- Chocolate-Dipped Gingerbread: For an extra layer of decadence, melt your favorite chocolate (dark, milk, or white), and dip half of the cooled gingerbread cookies into it. Sprinkle with a touch of flaky sea salt or festive sprinkles before the chocolate sets for an irresistible treat.
- Turn Them into a Cookie Cake: Feeling ambitious? I’ve successfully transformed this very recipe into a delicious single-layer Gingerbread Cookie Cake! This larger format can be frosted with buttercream, adorned with royal icing designs, or simply dusted with powdered sugar, making it a show-stopping centerpiece for any holiday gathering.
- Diverse Cookie Cutter Shapes: While gingerbread people are traditional, don’t limit your creativity! Use cookie cutters in shapes like stars, snowflakes, trees, angels, or even custom holiday designs to add variety and personal flair to your platter.
How to Craft the Perfect Gingerbread Cookies: A Step-by-Step Guide:
Making these soft and chewy gingerbread cookies is a straightforward and rewarding process. Follow these steps for delicious results every time.
Step 1: Prepare the Gingerbread Cookie Dough to Perfection.
Begin by ensuring your butter is softened to room temperature – this is key for a smooth, homogenous dough. In a large mixing bowl, using an electric mixer, cream together the softened butter and brown sugar on medium-high speed until the mixture is light, fluffy, and well combined, typically about 1-2 minutes. This aeration process incorporates air, contributing to the cookies’ soft texture. Next, pour in the rich molasses and continue mixing until it’s thoroughly incorporated, ensuring a uniform deep color and flavor throughout the mixture. Finally, gradually add your dry ingredients (flour, spices, baking soda, salt) to the wet mixture, mixing on low speed until a semi-soft, cohesive dough forms. It should pull away from the sides of the bowl. If your dough appears a bit crumbly or dry after mixing, don’t fret! This can sometimes happen due to slight variations in flour or humidity. Simply add 1-2 teaspoons of milk (dairy or non-dairy) gradually, mixing after each addition, until the dough comes together beautifully. (Refer to the photos below for visual guidance on dough consistency.) If you’ve measured your flour correctly by spooning and leveling or weighing, this adjustment usually won’t be necessary.
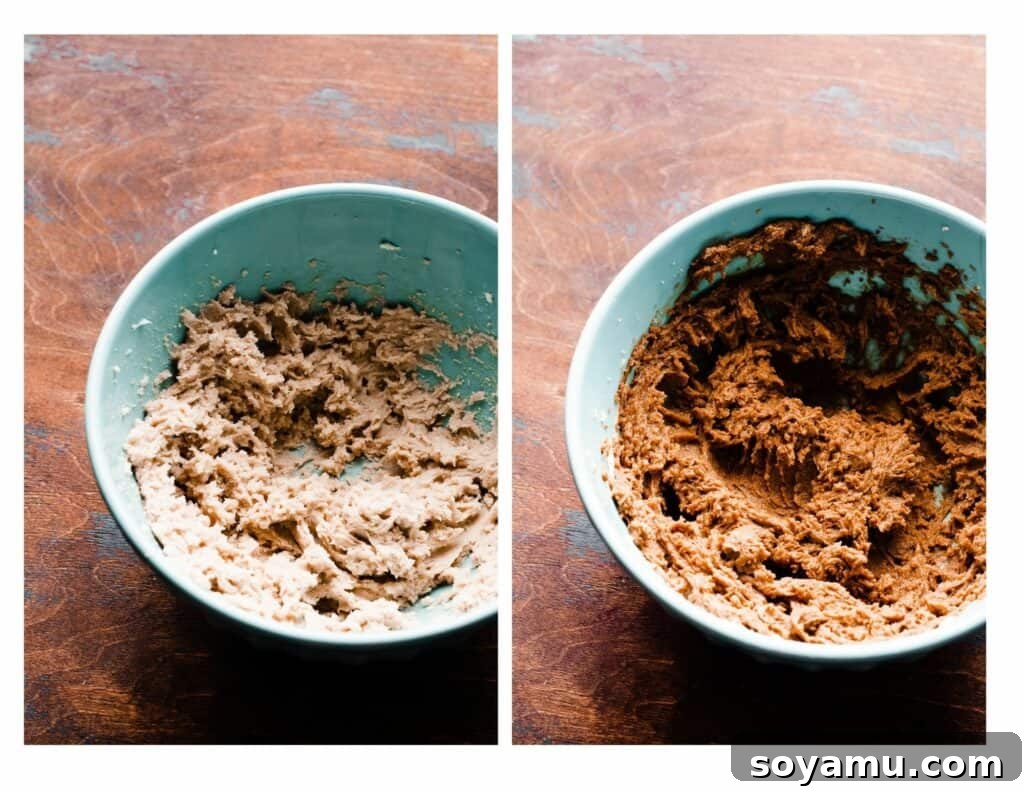
The crumbly dough on the left transforms into a cohesive, workable dough, as shown on the right, with careful mixing and possibly a touch of milk.
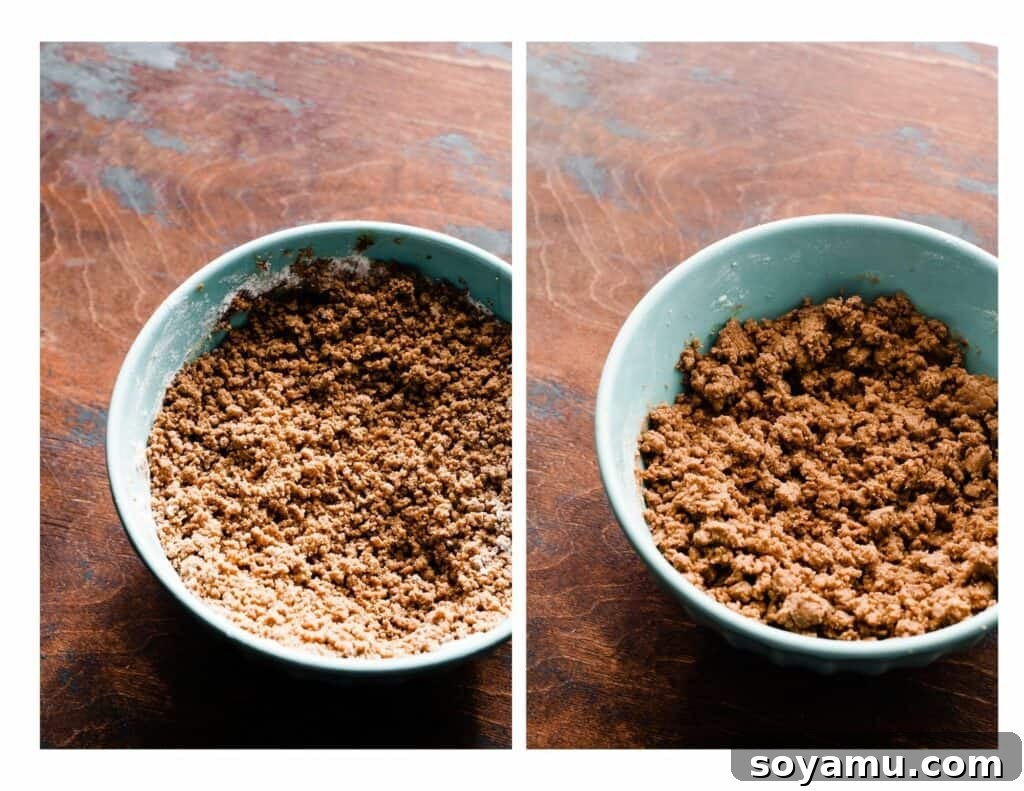
Step 2: The Smart Chill – Roll Dough Before Chilling & Cut Your Shapes.
This is where our simple trick makes all the difference! Immediately after making the dough, divide it into two manageable halves. Place one half between two sheets of parchment paper. Using a rolling pin, roll the dough out evenly to your desired thickness. We highly recommend a thickness of 3/8 inch (or even 1/2 inch for extra thick, chewy cookies). This prevents the frustration of trying to roll out rock-hard, unyielding dough later. Once rolled, transfer the parchment-sandwiched dough directly onto a baking sheet. Repeat with the second half of the dough. Loosely cover the baking sheets with a clean kitchen towel or plastic wrap, and then pop the rolled dough into the fridge to chill for at least 1-2 hours, or for a quicker chill, in the freezer for 20-30 minutes, until it’s completely firm and cold. This firm dough is essential for cookies that hold their shape beautifully in the oven. Once chilled, remove the top layer of parchment and cut out your desired shapes – classic gingerbread people, festive trees, intricate snowflakes, or elegant stars!
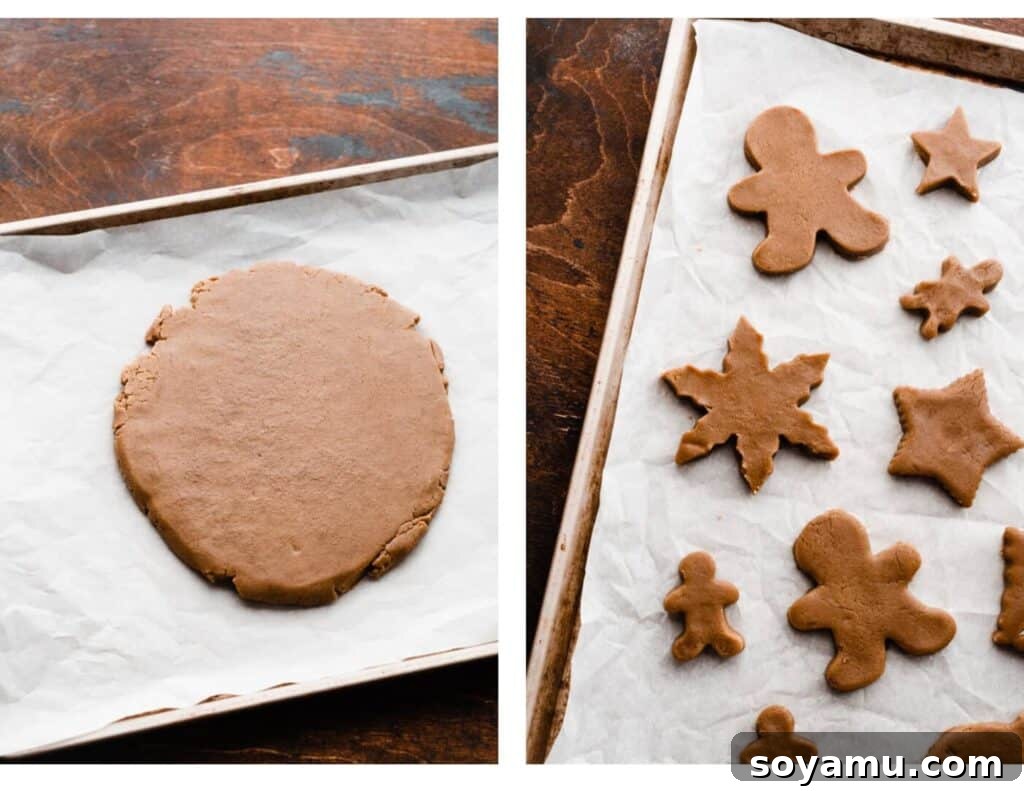
Step 3: Bake the Cookies to Soft Perfection.
Preheat your oven to 350°F (175°C). Line your baking sheets with parchment paper or silicone baking mats to prevent sticking and promote even baking. Carefully place your cut-out dough shapes a couple of inches apart on the prepared baking sheets. It’s crucial that the dough is very cold when it goes into the oven to maintain its shape. If your cut-out cookies have softened during handling, simply pop the entire baking sheet back into the fridge or freezer for 5 to 15 minutes to re-chill before baking. Bake as directed in the recipe card below, typically for 8-9 minutes. When they come out of the oven, the cookies will look just set and slightly puffy, with centers that might appear a tad underdone. Do NOT be tempted to overbake them! This is key to their signature soft and chewy texture. They will firm up and set beautifully as they cool. Allow them to cool on the baking sheet for about 10 minutes before gently transferring them to a wire rack to cool completely. Cooling completely is essential before any decorating begins.
Step 4: Decorate Your Gingerbread Masterpieces.
Once your gingerbread cookies are completely cooled, it’s time for the fun part: decorating! You have several fantastic options. You can choose a simple yet elegant dusting of powdered sugar, apply a quick and easy glaze for a smooth finish, or pipe intricate designs with royal icing. Detailed directions and additional tips for decorating, including the royal icing recipe, are provided in the recipe card below.
Mastering Royal Icing: Your Guide to Elegant Decorations
Royal icing might sound intimidating, but it’s remarkably easy to make and is the secret to those beautifully crisp, durable cookie decorations. It’s essentially a simple blend of powdered sugar, meringue powder (which helps it harden beautifully and provides stability), and water. Here’s how to achieve the perfect consistency for stunning gingerbread cookies.
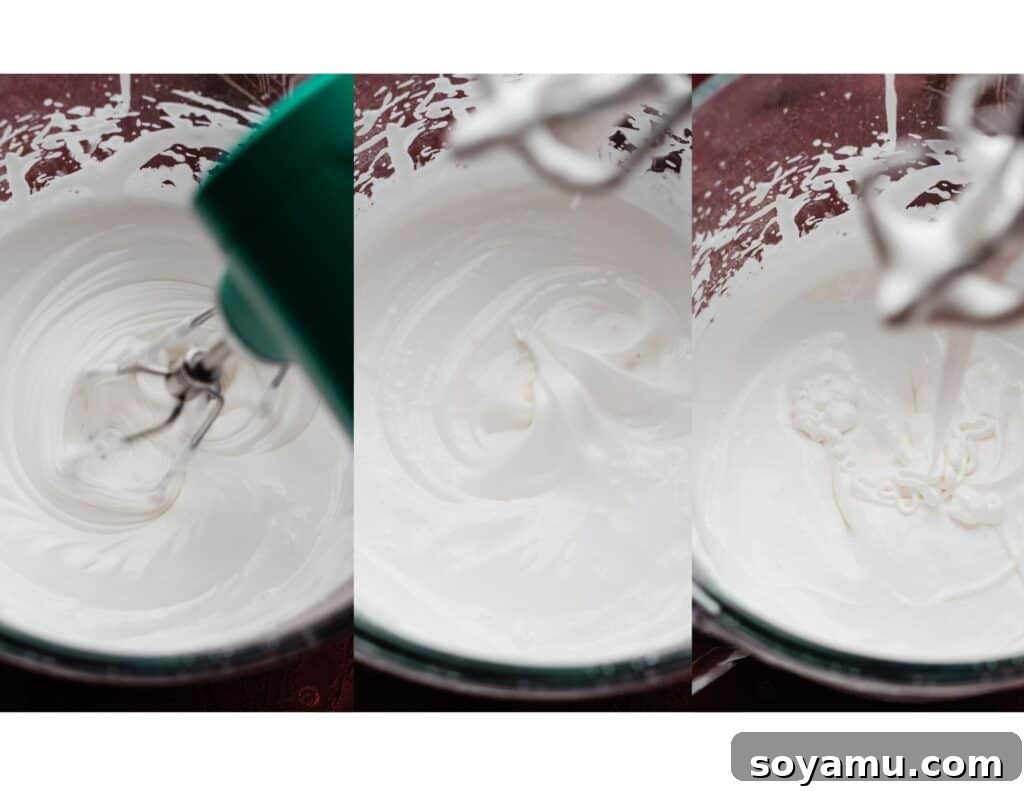
In a large bowl, combine the powdered sugar and meringue powder. Begin by adding about 4 tablespoons of water, then beat these ingredients together with an electric mixer on high speed for approximately 1 ½ to 2 minutes, until the mixture transforms into stiff, glossy peaks. The consistency is crucial for piping and setting properly. To test for the right consistency, drizzle a small amount of icing from your spoon back into the bowl. It should sit on the surface of the mixture for 5-10 seconds before slowly melting back in and disappearing. If your icing is too thick for piping, add more water, one teaspoon at a time, mixing well after each addition until the desired consistency is achieved. If it’s too thin, you can beat it for an additional 30 seconds to a minute to incorporate more air and thicken it, or incrementally add a bit more powdered sugar. The photos below offer a visual guide to achieving the perfect royal icing consistency.
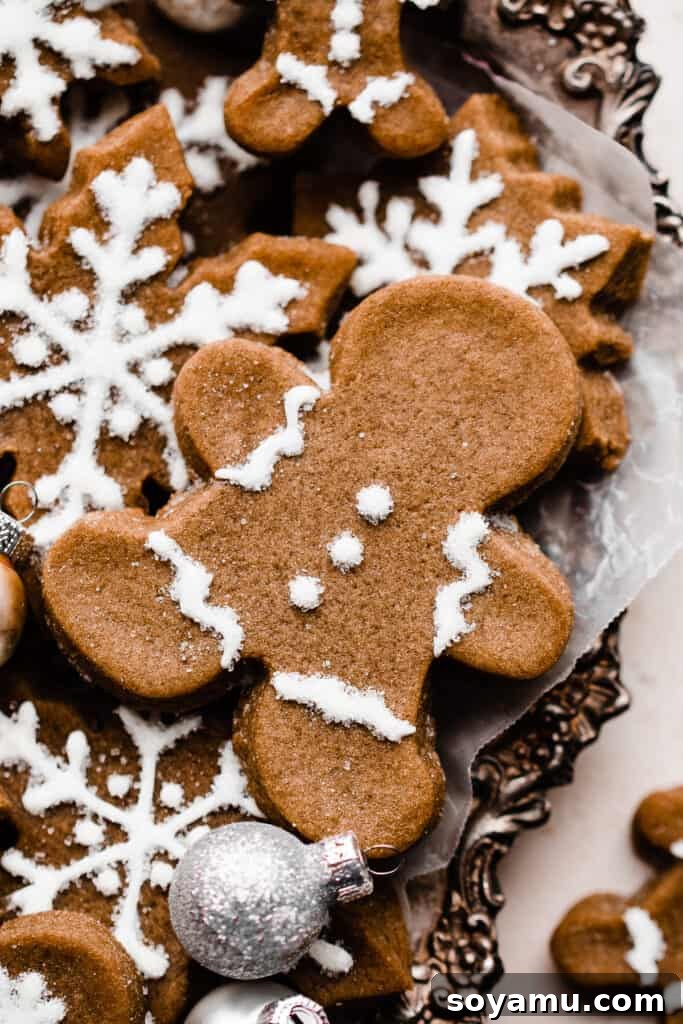
For fine, intricate details on your cookies, pipe the royal icing using a pastry bag fitted with a very thin piping tip, such as a Wilton #1 or Wilton #2. These tiny tips allow for precise lines and delicate patterns, perfect for outlining or creating snowflake designs. You can also add gel food coloring to tint your royal icing for a vibrant array of colors. For an extra touch of sparkle that catches the light beautifully, I love to sprinkle a little white sanding sugar onto the royal icing while it’s still wet, just before it sets. Allow the decorated cookies to dry completely (this can take several hours, or even overnight, depending on humidity) before stacking or storing them.
Expert Tips for Gingerbread Cookie Perfection:
To ensure your gingerbread cookies turn out perfectly soft, chewy, and beautifully shaped every single time, keep these expert tips in mind:
- The Power of Cold Dough for Shape Retention: This is arguably the most crucial tip for cutout cookies. To guarantee that your gingerbread cookies hold their intricate shapes and don’t spread excessively in the oven, the dough must be consistently cold when it enters the heat. If at any point the dough or cut-out shapes feel warm or soft from handling, immediately pop the baking sheet back into the freezer for 5-20 minutes (depending on how long they’ve been out) until they are firm and thoroughly chilled. You can even bake them directly from frozen! This cold state prevents the butter from melting too quickly, which is the main culprit for cookie spreading.
- Embrace Thickness for Optimal Chewiness: Do not skimp on the dough’s thickness! This recipe truly shines when the dough is rolled to at least 3/8 inch thick. My personal preference, for an even chewier and more substantial cookie, is 1/2 inch thick. Rolling them this thick not only ensures a delightfully chewy interior but also plays a significant role in helping the cookies maintain their shapes during baking. Thinner cookies tend to bake faster and can become crispy or hard, losing that desirable soft-baked quality.
- Verify Oven Temperature with an Oven Thermometer: An accurate oven is paramount for baking success. Most home ovens are not calibrated perfectly and can fluctuate significantly from the temperature you set. An affordable oven thermometer will accurately tell you the actual temperature inside your oven. Leaving one in at all times allows you to monitor its calibration and adjust your oven setting accordingly, preventing under- or over-baked cookies.
- Measure Flour with a Kitchen Scale: For unparalleled accuracy in baking, a food scale is your best friend, especially when measuring flour. The volume of flour can vary dramatically based on how it’s scooped or compacted in a measuring cup, as cups are not universally standardized. Weighing your flour (390 grams for 3 cups) ensures you use the exact amount specified, guaranteeing consistent results every time and avoiding dry, crumbly dough or overly wet dough.
- Don’t Overbake: This cannot be stressed enough for soft cookies! Gingerbread cookies, especially thick ones, will continue to set as they cool. They should look just set at the edges and slightly puffy, with centers that might seem a little underdone. If you bake them until they look fully golden and firm in the oven, they will likely become hard and brittle once cooled.
- Use Parchment Paper or Silicone Mats: Lining your baking sheets with parchment paper or silicone baking mats not only prevents sticking but also promotes more even baking and makes cleanup a breeze.
Frequently Asked Questions About Gingerbread Cookies:
Absolutely! This recipe is fantastic for make-ahead convenience during busy holiday seasons.
The dough can be prepared, rolled out between parchment paper, wrapped tightly in plastic wrap, and stored on a baking sheet in the fridge for 1-2 days before you plan to bake.
For longer storage, the cut-out dough shapes can be frozen. Place them in a single layer on a lined baking sheet until firm, then transfer them to a freezer-safe container with parchment paper between layers. They can be frozen for 1-2 months. You can bake them directly from frozen (adding a minute or two to the bake time) or thaw them overnight in the fridge.
Baked, cooled, and undecorated gingerbread cookies can be stored in an airtight container at room temperature for up to 2 days before you’re ready to decorate them.
Yes! Royal icing is also great for making in advance. You can prepare the royal icing and store it in an airtight container in the fridge for 1-2 days before you need to use it. To prevent a crust from forming, place a piece of plastic wrap directly on the surface of the icing before sealing the container. Leftover icing can be stored in the same manner and used for other decorating projects within 1-2 days. When you’re ready to use it after refrigeration, simply re-mix the icing for about 10-20 seconds with an electric mixer on low speed to loosen it up and restore its smooth consistency. You can then adjust the thickness as needed following the guidelines in the recipe.
The most common reasons for hard gingerbread cookies are overbaking, rolling the dough too thin, or using the wrong type of molasses. Ensure you don’t overbake; the cookies should still look slightly soft in the middle when removed from the oven. Always aim for a dough thickness of at least 3/8 to 1/2 inch. Also, make sure you’re using “full flavor” molasses, not blackstrap, as blackstrap can result in a drier, more bitter cookie.
Absolutely! While gingerbread men are classic, feel free to use any holiday-themed cookie cutters you love. Stars, snowflakes, trees, bells, or even unique animal shapes work perfectly. Just ensure your chosen cutters are similar in size for even baking.

Serving & Storing Your Gingerbread Delights:
Once baked and cooled, these gingerbread cookies are ready to be enjoyed! They make a perfect accompaniment to a warm cup of coffee, a steaming mug of hot cocoa, or a refreshing glass of milk. They’re also fantastic for holiday gifting, cookie exchanges, or simply a cozy treat for yourself.
To keep your baked and cooled cookies at their best, store them in an airtight container at room temperature. They will remain wonderfully soft and delicious for 4-5 days. If you find them starting to lose a bit of their tenderness towards the end of their shelf life, here’s a clever trick: simply add a slice of fresh bread (any type will do!) to the container with the cookies. The bread will release its moisture, helping to keep your gingerbread cookies soft and chewy for a few extra days!

Discover More Festive Christmas Cookie Recipes:
If you’re still in the mood for baking and holiday treats, explore some of our other cherished Christmas cookie recipes that are sure to delight:
- Peppermint Hot Chocolate Marshmallow Cookies
- Bakery-Style Peanut Butter Chip Chocolate Cookies
- Key Lime Slice & Bake Cookies
- Blueberry Lemon Cookies
- Peanut Butter & Jelly Thumbprint Cookies
- Funfetti Cake Batter Cookies
- Cherry Pie Cookies
Did you enjoy making this recipe? We’d love to hear from you!
Please leave a comment and a star rating in the recipe card below. Your feedback helps our small business immensely and guides other home bakers. Thank you for baking with us!

Best Soft & Chewy Gingerbread Cookies
Stephanie Simmons
1 hour hr
10 minutes mins
1 hour hr
10 minutes mins
16 to 24 cookies
Rate
Ingredients
- 1 cup salted butter, softened at room temperature, 226 grams
- 1 cup dark brown sugar, packed, 220 grams (light brown sugar works too!)
- 1/2 cup molasses, 170 grams – do NOT use blackstrap, see notes below
- 3 cups all-purpose flour, spooned & leveled or weighed out , 390 grams
- 2 1/2 tsp ground ginger
- 1 1/2 tsp cinnamon
- pinch of nutmeg
- 1/2 tsp baking soda
- 1/2 tsp salt
- Optional: 1-2 tsp milk (if dough is crumbly)
Royal Icing
- 2 cups powdered sugar, 230 grams
- 1 and 1/2 tbsp meringue powder, See note below
- 4-6 tbsp water, 56 to 85 grams
- Optional: Gel food coloring, white sanding sugar
Instructions
-
1. Make the Cookie Dough: In a large mixing bowl, beat the softened butter with an electric mixer on high speed until it’s light and creamy. Add the dark brown sugar and continue mixing for about 1 minute until the mixture is well creamed and fluffy. Pour in the molasses and mix until thoroughly combined and the mixture is a uniform color. Gradually add the all-purpose flour, ground ginger, cinnamon, nutmeg, baking soda, and salt. Mix on low speed until a semi-soft dough forms. If the dough appears a bit crumbly, add 1-2 teaspoons of milk (dairy or non-dairy) one at a time, mixing until it comes together into a cohesive dough.1 cup salted butter, softened at room temperature,
1 cup dark brown sugar, packed,
1/2 cup molasses,
3 cups all-purpose flour, spooned & leveled or weighed out,
2 1/2 tsp ground ginger,
1 1/2 tsp cinnamon,
pinch of nutmeg,
1/2 tsp baking soda,
1/2 tsp salt -
2. Roll and Chill the Dough: Divide the freshly made dough into two equal halves. Place one half between two sheets of parchment paper and roll it out evenly to a consistent thickness of 3/8 inch. You can even roll it to 1/2 inch for extra thick, chewy cookies – just don’t go thinner than 3/8 inch. This rolling-before-chilling technique is a game-changer! Place the rolled dough (still sandwiched in parchment) onto a baking sheet. Repeat with the second half of the dough. Cover the baking sheets loosely and chill the dough in the refrigerator for 1-2 hours, or in the freezer for about 20-30 minutes, until it is firm and cold to the touch.
-
3. Cut out Cookies: Preheat your oven to 350°F (175°C). Line several baking sheets with parchment paper or silicone baking mats. Take one sheet of chilled dough from the fridge/freezer, remove the top parchment layer, and use your favorite cookie cutters to cut out shapes. Carefully transfer the cut-out cookies to the prepared baking sheets, leaving about 2 inches between each. If the cookies feel soft from handling, place the entire baking sheet back into the fridge or freezer for 5 to 15 minutes to re-chill before baking. While the first batch bakes, gather your dough scraps, combine them, roll them out again between parchment paper, and cut out more shapes. Remember to re-chill the re-rolled dough as needed to maintain firmness.
-
4. Bake: Bake the cookies for 8-9 minutes. The cookies are perfectly baked when their edges appear just set and they look slightly puffy. The centers may still look a tad underdone, but resist the urge to overbake! They will continue to set and firm up as they cool, resulting in the ideal soft and chewy texture. Let the cookies cool on the baking sheet for about 10 minutes before carefully transferring them to a wire rack to cool completely. For peace of mind, bake a single test cookie first to confirm your oven temperature and ideal bake time.
-
5. Decorate: Once the cookies are completely cooled to room temperature, they are ready for decorating. Choose your preferred method: a simple dusting of powdered sugar, dipping them in this easy glaze (you can swap the maple syrup for milk if desired), or piping with homemade royal icing as described in the next step.
-
6. Make Royal Icing: In a large bowl, combine 2 cups of powdered sugar and 1 ½ tablespoons of meringue powder. Start by adding 4 tablespoons of water. Using an electric mixer, beat the ingredients on high speed for approximately 1 ½ minutes until stiff peaks form and the icing is glossy. To check the consistency, drizzle some icing back into the bowl; it should hold its shape on the surface for 5-10 seconds before smoothing out. If the icing is too thick, add more water, 1 tablespoon at a time, mixing after each addition until desired consistency. If it’s too thin, beat for another 30-60 seconds or add a little more powdered sugar incrementally. Transfer the royal icing to a piping bag fitted with a small tip (like a Wilton #1 or #2) for fine details. Pipe your desired designs; snowflakes are easily made by drawing lines to connect points and adding small “V” shapes. You can tint the icing with gel food coloring. For extra sparkle, sprinkle white sanding sugar on the wet icing. Allow icing to set completely before storing.2 cups powdered sugar,
1 and 1/2 tbsp meringue powder,
4-6 tbsp water -
7. Serve + Store: Enjoy your beautifully decorated gingerbread cookies! Ensure the royal icing has set completely and hardened before attempting to store them. Store cooled, decorated cookies in an airtight container at room temperature for 4-6 days. For slightly longer storage, they can be kept in the fridge for 6-8 days; allow them to come to room temperature for a bit before serving to restore their optimal soft texture.
-
Cookie Dough and Cookie Make-Ahead Tips: The raw dough, once rolled out and covered well, can be stored in the fridge for 1-2 days before baking. Baked and cooled cookies can be stored undecorated in an airtight container at room temperature for 1-2 days before you decorate them.
Royal Icing Make-Ahead Tips: Prepared royal icing can be stored in an airtight container in the fridge for 1-2 days. Place plastic wrap directly on the surface of the icing to prevent a crust from forming. Leftover icing can also be stored this way for 1-2 days for other decorating needs. Before using refrigerated icing, simply re-mix it for 10-20 seconds with a mixer to restore its smooth consistency, then adjust thickness as needed.
Notes
Meringue Powder Source: Meringue powder is a key ingredient for royal icing, providing stability and helping it set hard. You can typically find this in the baking aisle of craft stores like Michael’s and Joann’s, or at dedicated baking supply stores.
Yield Variation: Please note that the exact number of cookies this recipe yields will depend on the size of the cookie cutters you choose to use. Larger cutters will produce fewer cookies, while smaller cutters will yield more.
Nutrition Information
Serving:
1
cookie
,
Calories:
330
kcal
,
Carbohydrates:
55
g
,
Protein:
3
g
,
Fat:
12
g
,
Saturated Fat:
7
g
,
Polyunsaturated Fat:
1
g
,
Monounsaturated Fat:
3
g
,
Trans Fat:
0.5
g
,
Cholesterol:
31
mg
,
Sodium:
207
mg
,
Potassium:
206
mg
,
Fiber:
1
g
,
Sugar:
36
g
,
Vitamin A:
355
IU
,
Vitamin C:
0.01
mg
,
Calcium:
42
mg
,
Iron:
2
mg
Please note: Nutrition information is automatically calculated and should be used as an approximation. It may vary based on specific ingredients and brands used.
Enjoyed this recipe? Leave a comment below!