
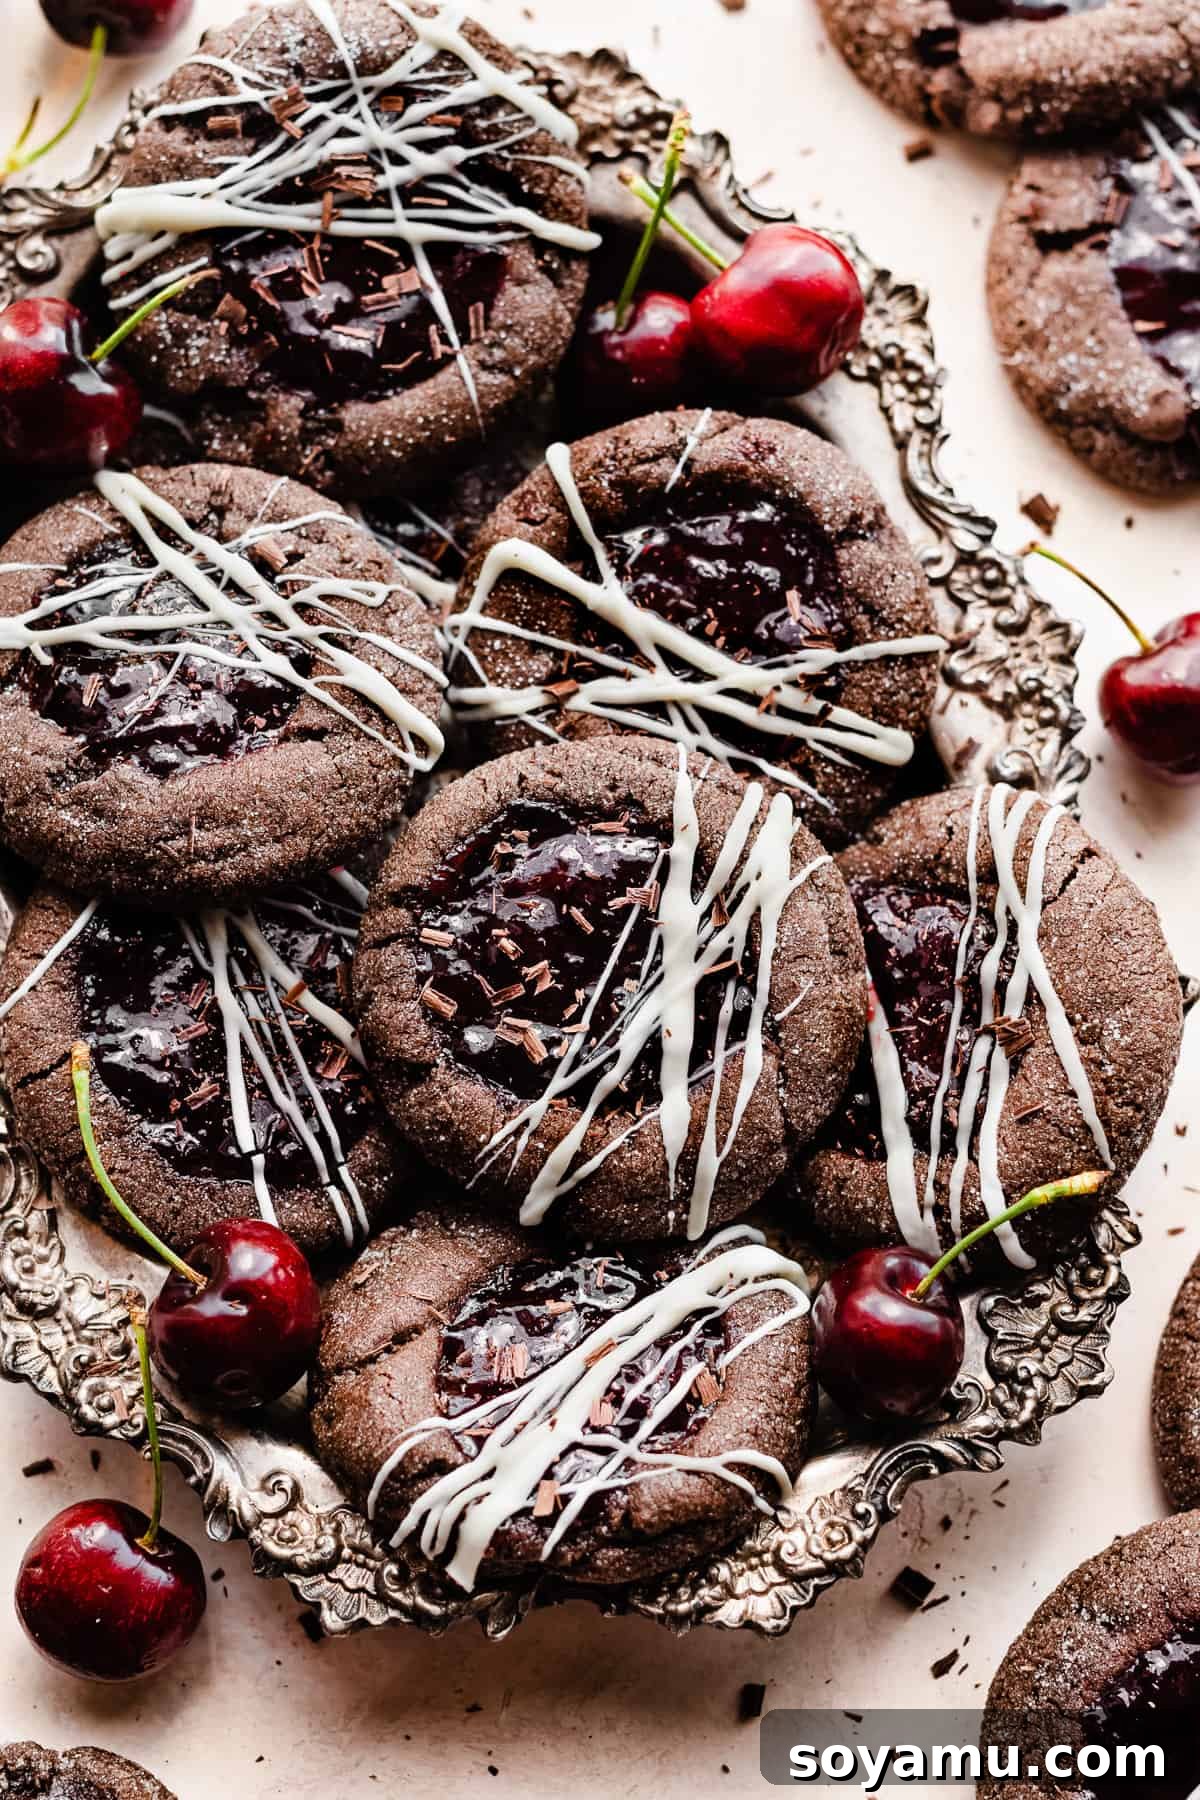
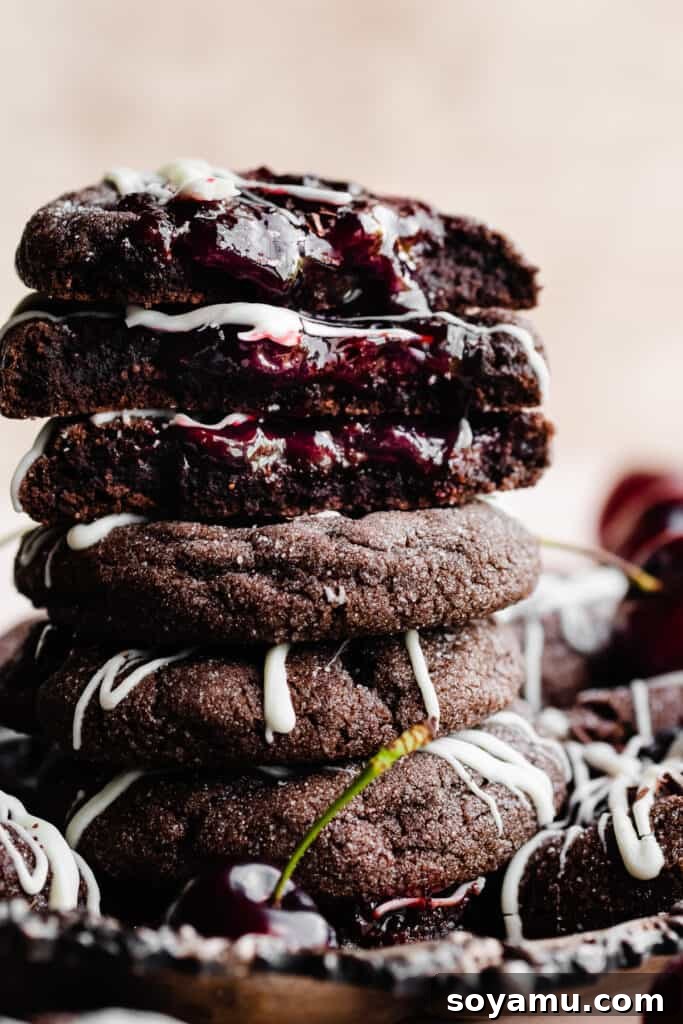
Black Forest Cookies are more than just a dessert; they are a decadent experience, perfectly marrying the rich, dark flavors of chocolate with the bright, tart notes of cherries and a subtle hint of kirsch. Imagine sinking your teeth into a thick, fudgy chocolate cookie, discovering a luscious pocket of cherry preserves within, and finishing with a delicate drizzle of white chocolate. These cookies capture the essence of the beloved Black Forest cake in a convenient, handheld form, making them an irresistible treat for any occasion. Whether you’re hosting a special event or simply craving something extraordinary, these incredibly delicious, rich cookies are surprisingly easy to make and guaranteed to impress.
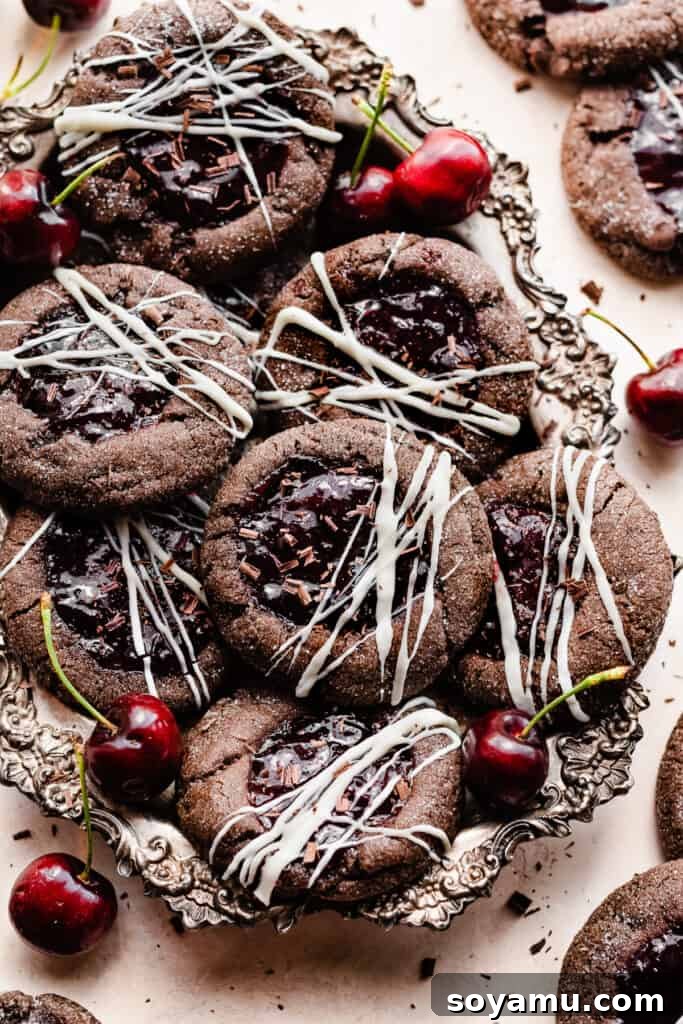
These delightful Black Forest Cookies are not only incredibly delicious but also possess an elegance that makes them suitable for the most special occasions. Yet, their simplicity means you can whip up a batch anytime you desire a sophisticated, homemade treat. Let’s dive into the details and create these culinary masterpieces together!
Why You’ll Fall in Love with These Black Forest Cookies
Prepare to be enchanted by these remarkable cookies. Here’s why they’re destined to become a new favorite in your baking repertoire:
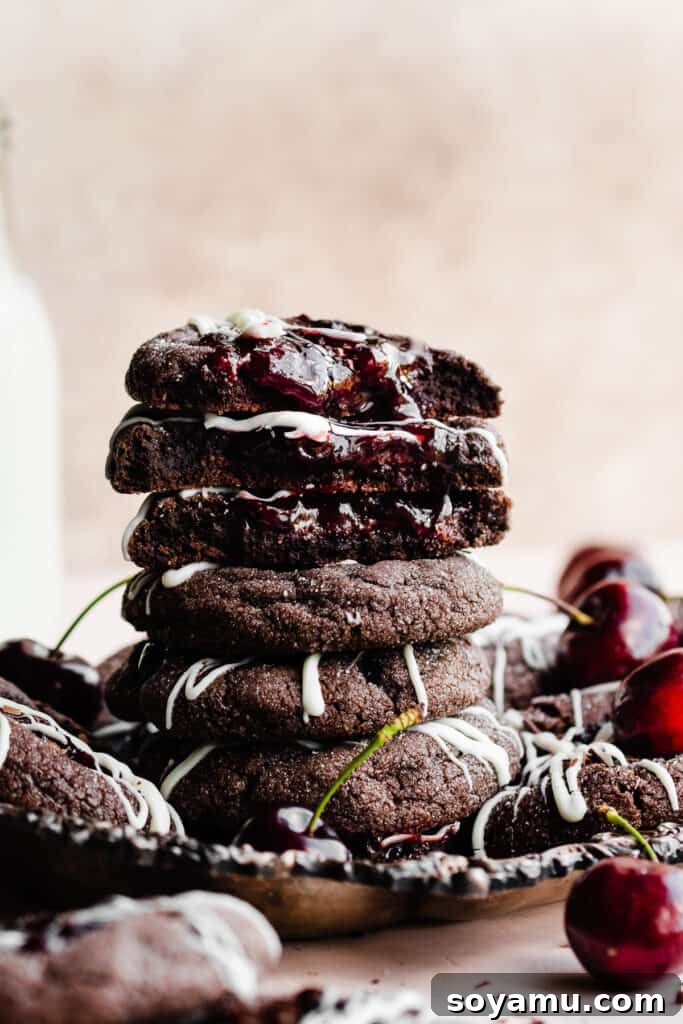
- Irresistibly Fudgy Chocolate Cookies: Forget dry, crumbly cookies. These are crafted to be wonderfully fudgy, intensely rich, and satisfyingly chewy. They offer a luxurious texture that’s akin to a thick, soft chocolate sugar cookie, but with a depth of flavor that’s truly unique.
- Bursting with Cherry Preserves: The heart of these cookies lies in their vibrant cherry filling. We use high-quality store-bought cherry preserves to ensure convenience without compromising on that essential sweet and tart cherry flavor. It’s the perfect contrast to the rich chocolate base.
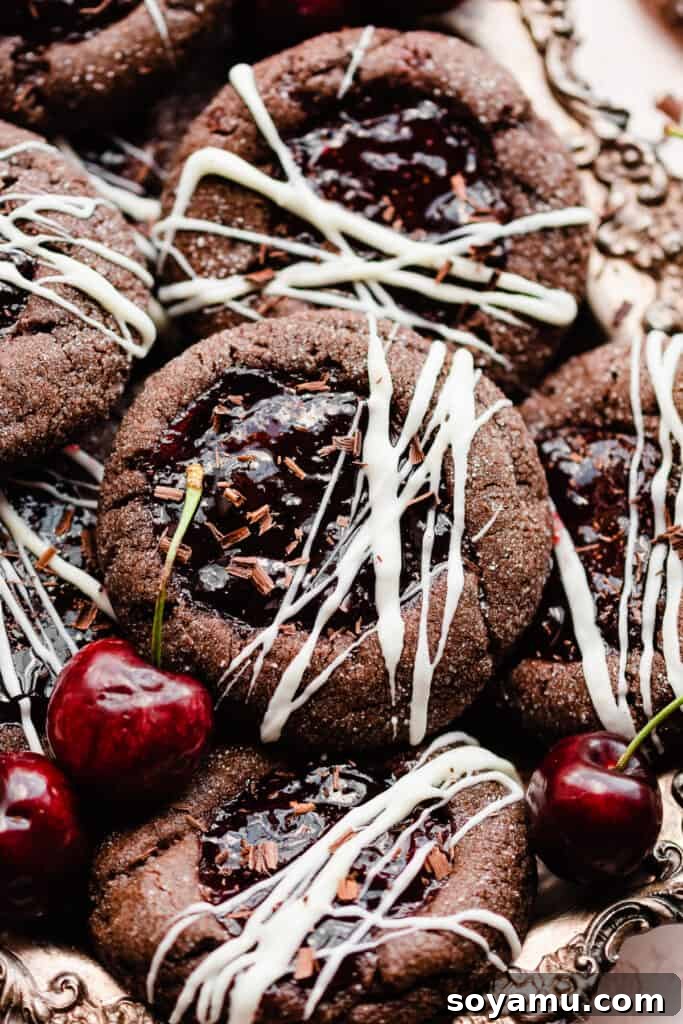
- Elegant White Chocolate Drizzle: A delicate stream of melted white chocolate adds a beautiful visual finish and a creamy, sweet counterpoint to the dark chocolate and tart cherry. This final touch elevates the cookies from simple treats to bakery-worthy delights.
- A Taste of Classic Black Forest: These cookies artfully capture the iconic flavor profile of the traditional German Black Forest cake, delivering a harmonious blend of chocolate, cherry, and a hint of kirsch.
- Easier Than You Think: Despite their sophisticated appearance and complex flavor, this recipe is designed to be straightforward and accessible for bakers of all skill levels.
The Essence of Black Forest Flavors
The inspiration for these cookies comes from the classic German dessert, Schwarzwälder Kirschtorte, or Black Forest Cherry Cake. This iconic cake is renowned for its layers of chocolate sponge cake, rich whipped cream, tart cherries, and a distinctive splash of kirschwasser (cherry brandy). Our Black Forest Cookies aim to encapsulate this beloved flavor profile, transforming it into a more approachable, single-serving treat. The deep chocolate cookie provides the cake base, the cherry preserves deliver the fruity tartness, and the kirsch infuses that authentic, aromatic brandy note, making each cookie a mini celebration of this German culinary heritage.
Ingredient Deep Dive: Crafting Perfect Black Forest Cookies
Understanding the role of each ingredient is key to achieving the perfect Black Forest Cookie. Here’s a closer look at what you’ll need and why:
- Salted Butter: For superior flavor, we recommend using salted butter, which naturally enhances the chocolate and cherry notes. If you only have unsalted butter, simply add an extra pinch of salt to your dry ingredients. Ensure your butter is softened to room temperature for proper creaming with the sugars.
- Unsweetened Cocoa Powder: Opt for high-quality unsweetened cocoa powder. Dutch-processed cocoa will yield a darker, richer chocolate flavor and a slightly less acidic cookie, while natural cocoa powder will result in a lighter color and a more pronounced chocolate tang. Both work well, but Dutch-processed is often preferred for its deep, mellow chocolate profile.
- Brown Sugar & Granulated Sugar: The combination of both sugars is crucial for achieving the desired chewy and ultra-soft texture. Granulated sugar provides structure and crispness, while brown sugar adds moisture, depth of flavor, and contributes significantly to the chewiness of the cookie. Ensure your brown sugar is packed when measuring.
- Vanilla Extract: Always use pure vanilla extract. Its aromatic warmth beautifully complements the chocolate and cherry, enhancing the overall flavor complexity of the cookies. Avoid imitation vanilla for the best results.
- Kirsch (Cherry Brandy): This is the secret ingredient that truly elevates these from simple chocolate cherry cookies to authentic Black Forest Cookies. Kirsch is a clear, colorless fruit brandy traditionally made from morello cherries. It imparts a unique, aromatic cherry depth that is essential to the classic Black Forest flavor. Don’t skip it if you want the real deal!
- All-Purpose Flour: Proper measurement is important. Spoon and level your flour into the measuring cup rather than scooping directly from the bag to avoid over-measuring, which can lead to dry, dense cookies.
- Baking Soda & Salt: Baking soda acts as a leavening agent, giving the cookies a slight lift and contributing to their soft texture. Salt balances the sweetness and enhances all the other flavors, particularly the chocolate.
Ingredient Substitutions and Creative Variations
While the classic recipe offers a perfect balance, don’t hesitate to adapt it to your preferences or what you have on hand:
- Kirsch Alternatives: If kirsch is unavailable or you prefer an alcohol-free version, you can substitute the 3 tablespoons of kirsch with 3 tablespoons of milk. For an alcoholic alternative that’s easier to find, cherry brandy or even a good quality cherry liqueur can work. Just be aware that the flavor profile might vary slightly.
- White Chocolate Swaps: The white chocolate drizzle is optional but highly recommended for both appearance and flavor. If white chocolate isn’t your preference, feel free to substitute it with melted milk chocolate, semi-sweet chocolate, or dark chocolate for a different twist.
- Cherry Preserve Options: While store-bought cherry preserves make this recipe incredibly easy, you can certainly use your own homemade cherry jam or preserves if you have them. For a sweeter, thicker filling, cherry pie filling can also be used in a pinch. Consider using tart cherry preserves for a more authentic Black Forest experience.
- Other Jam Flavors: While these are Black Forest cookies, you can experiment with other jams for a different flavor profile. Raspberry or blueberry preserves would also create delicious thumbprint-style cookies, though they wouldn’t carry the “Black Forest” name.
- Adding Nuts: For extra texture and flavor, finely chopped almonds or walnuts can be folded into the cookie dough.
How to Make These Black Forest Cookie Recipe Step-by-Step:
Creating these exquisite cookies is a straightforward process when you follow these steps carefully:
Step 1: Prepare the Cookie Dough. Begin by creaming together the softened butter, granulated sugar, and brown sugar in a large mixing bowl until the mixture is light and fluffy. This typically takes about 2-3 minutes with an electric mixer. Next, beat in the eggs one at a time, followed by the vanilla extract, scraping down the sides of the bowl as needed. Once incorporated, stir in the kirsch until just combined. In a separate bowl, whisk together the all-purpose flour, unsweetened cocoa powder, baking soda, and salt. Gradually add the dry ingredients to the wet ingredients, mixing on low speed until a slightly wet, cohesive dough forms. Be careful not to overmix, as this can lead to tough cookies.
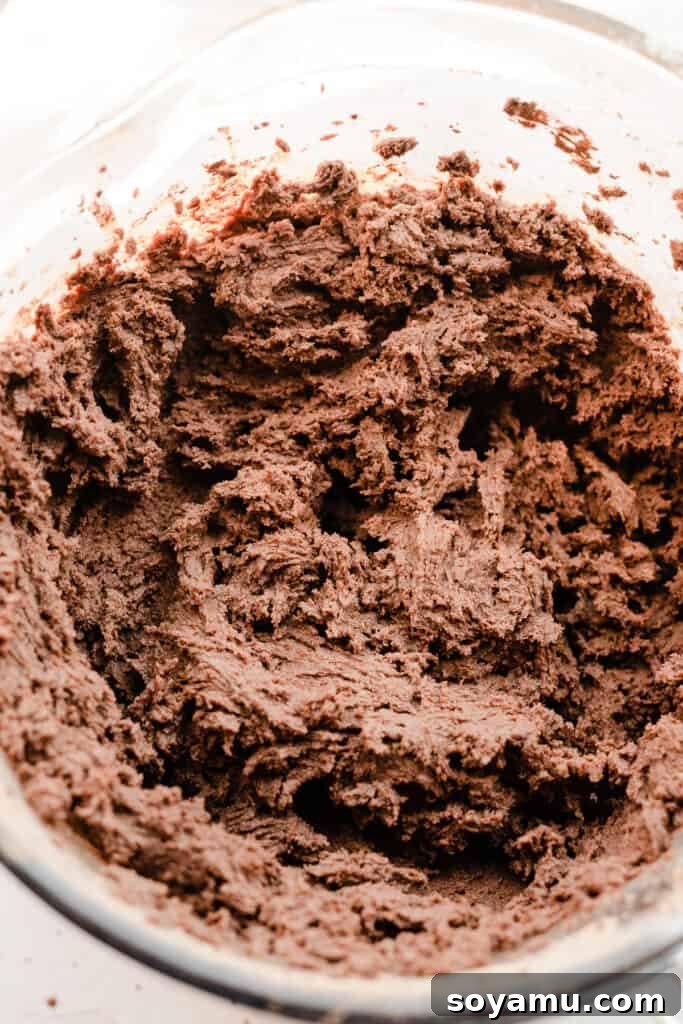
Step 2: Chill and Scoop the Cookie Dough. This is a crucial step for perfect cookies. First, chill the entire bowl of dough in the refrigerator for at least 30 minutes. This initial chill makes the dough easier to handle. After this first chill, use a cookie scoop to portion the dough into balls, each weighing approximately 60-65 grams (about 2.1 to 2.3 ounces). Place the scooped dough balls into an airtight container and return them to the refrigerator to chill for a minimum of 2 hours, or ideally up to 48 hours. This extended chilling period is vital for preventing the cookies from spreading too much in the oven and for allowing the flavors to deepen and meld beautifully. It’s imperative to scoop the dough *before* the long chill, as the dough will become too firm to scoop easily afterwards.
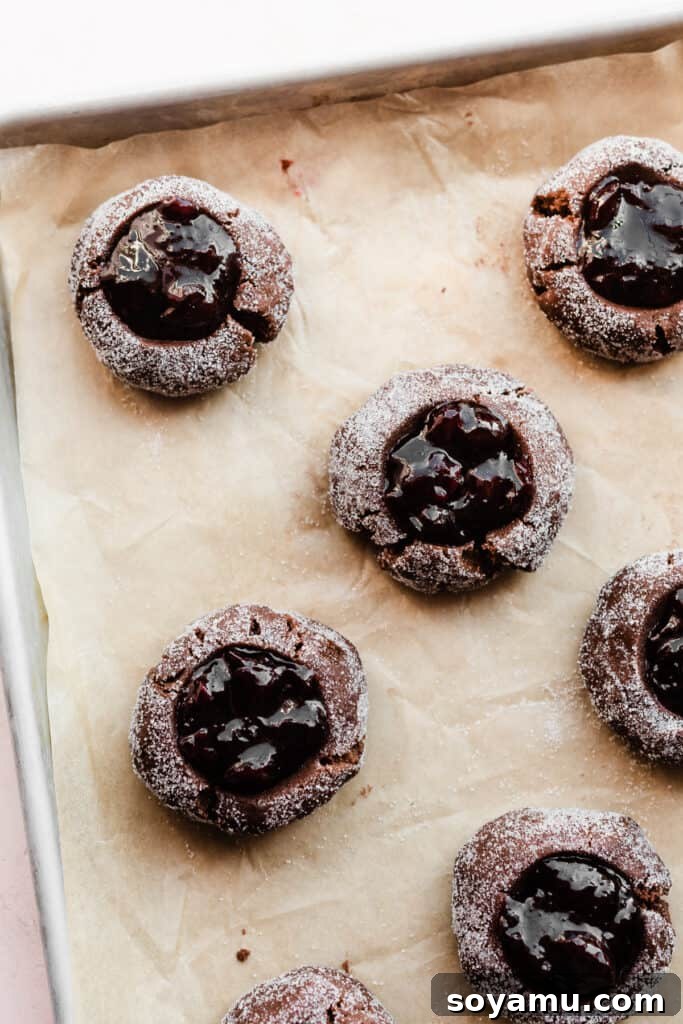
Step 3: Fill the Cookies. Once the dough balls are thoroughly chilled, preheat your oven to 350°F (175°C) and line several baking sheets with parchment paper or silicone baking mats. If your dough has been chilling for a long time (more than 4 hours), let the scooped balls sit on the counter for about 10 minutes to soften slightly, making them easier to work with. Roll each dough ball generously in granulated sugar to coat its entire surface. Then, using the back of a teaspoon, gently press an indent into the center of each cookie dough ball. Carefully fill each indent with approximately 1 and 1/2 teaspoons of your cherry preserves. This might seem like a small amount, but it’s the perfect quantity to prevent overflow during baking. Arrange about 6 filled cookies a few inches apart on each prepared baking sheet to allow for proper air circulation and even baking.
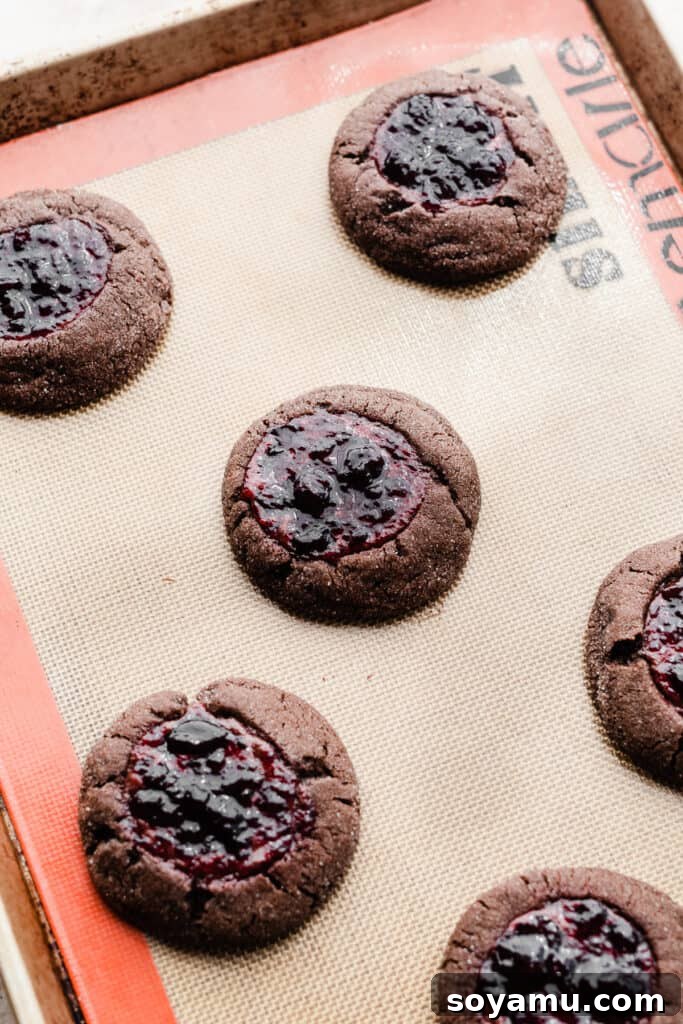
Step 4: Bake and Finish the Cookies. Bake the cookies as directed in the recipe card below, typically for 9-11 minutes. They are done when the edges appear set, but the centers still look slightly underdone and soft. The cookies will continue to set as they cool on the baking sheet. Don’t worry if they don’t look perfectly round right out of the oven; you can gently reshape them immediately after baking by swirling a round cookie cutter around the edges of each cookie. Allow the baked cookies to cool on the baking sheet for a few minutes before transferring them to a wire rack to cool completely. Once cooled, melt your white chocolate (using a microwave in 30-second intervals or a double boiler) and drizzle it artistically over each cookie for that beautiful final flourish and added touch of sweetness. If desired, you can dollop a tiny bit of extra cherry preserves into the cooled indent for an even juicier center.
This Black Forest-inspired dessert is surprisingly simple to create, resulting in incredibly fudgy and deeply chocolatey cookies. The distinct kirsch flavor permeates the cookie, marrying exquisitely with the sweet and tart cherry filling to deliver a truly authentic taste experience.
Expert Tips for Black Forest Cookie Perfection
To ensure your Black Forest Cookies turn out flawlessly every time, keep these essential tips in mind:
- Embrace the Chill Time: Do not, under any circumstances, skip the chilling steps! The dough is slightly wet, and without proper chilling, your cookies will spread excessively in the oven, turning into flat puddles rather than thick, chewy delights. Chilling also allows the flavors, especially the kirsch, to fully develop and deepen.
- Mindful Filling: Resist the temptation to overfill the cookie indents with cherry preserves. While more jam sounds appealing, too much will cause it to leak out during baking, leading to sticky, burnt edges and a less appealing cookie. The recommended 1 and 1/2 teaspoons is the ideal amount. You can always add a small dollop of extra preserves to the centers after the cookies have baked and cooled if you desire more filling.
- Even Baking: For the most consistent results, bake one sheet of cookies at a time. This ensures uniform heat distribution and prevents uneven baking.
- Don’t Overbake: These fudgy cookies are best when slightly underbaked. They will continue to set as they cool, retaining their soft and chewy texture. Overbaking will result in dry cookies.
- Room Temperature Ingredients: Ensure butter and eggs are at room temperature. This allows them to cream together properly, creating an emulsified mixture that traps air, leading to a lighter, more tender cookie.
Frequently Asked Questions About Black Forest Cookies
Yes, chilling is non-negotiable for these Black Forest Cookies! Without sufficient chill time, the dough will be too soft and spread significantly in the oven, resulting in flat, greasy cookies. Furthermore, chilling allows the flavors, particularly the kirsch, to deepen and meld, giving you a much richer and more authentic Black Forest taste.
Absolutely! This recipe is excellent for meal prep. After scooping the dough balls, you can freeze them on a sheet pan until solid. Once frozen, transfer them to an airtight freezer-safe container or bag, and they will keep well for 1-2 months. When you’re ready to bake, let the frozen dough balls thaw in the refrigerator overnight. Then, proceed with rolling them in sugar, making the indent, filling with cherry preserves, and baking as directed.
Yes, definitely! You can prepare the cookie dough up to 3 days in advance and store the scooped, unbaked dough balls in an airtight container in the refrigerator. For longer storage, refer to the freezing instructions above. This makes them perfect for entertaining or when you want fresh-baked cookies with minimal effort.
Excessive spreading is typically due to insufficient chilling of the dough, or if your butter was too warm when you started. Ensure the dough is thoroughly chilled for the recommended time, and use room temperature (not melted) butter for creaming.
The key is not to overfill the cookie indents. Sticking to 1.5 teaspoons of cherry preserves per cookie should prevent leakage. Also, make sure your indent is deep enough to hold the jam but not so thin that it breaks through the bottom.
Serving and Storing Your Delicious Chocolate Cherry Cookies
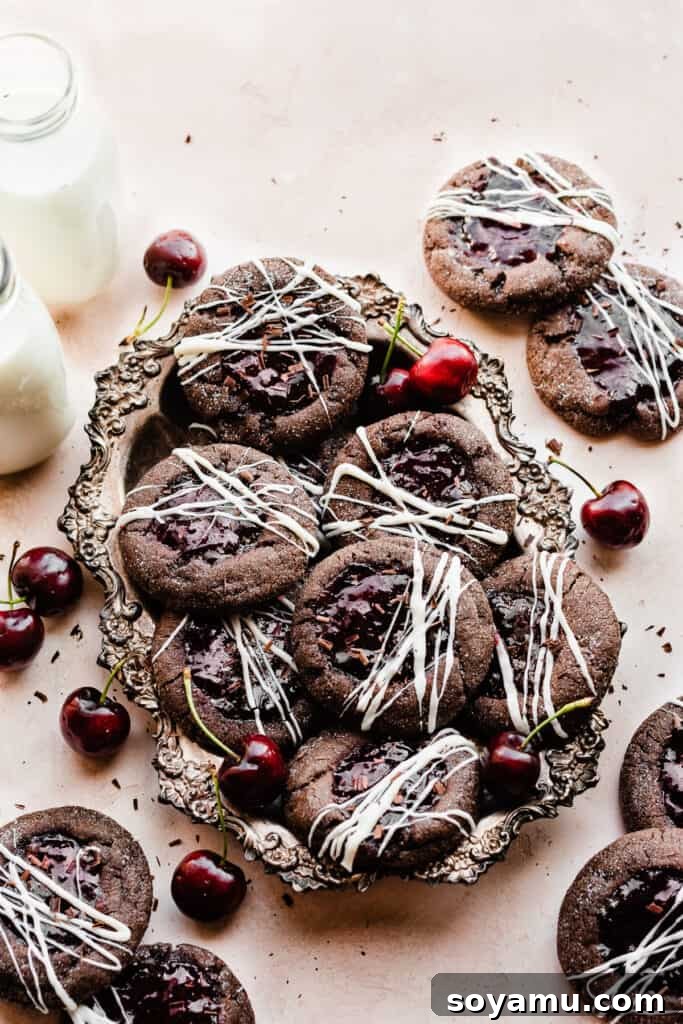
These Black Forest Cookies are best enjoyed fresh, but they also store beautifully. For optimal flavor and texture, store the cooled cookies in an airtight container in the refrigerator for up to one week. The chilled environment helps to maintain their fudgy texture and prevents the cherry preserves from spoiling. If you plan to serve them for a special occasion, consider bringing them to room temperature for about 15-20 minutes before serving to soften the chocolate and enhance the flavors. They also pair wonderfully with a scoop of vanilla ice cream or a dollop of whipped cream for an even more indulgent dessert experience.
Special Tools for Baking Success
While you don’t need a professional kitchen to make these cookies, a few key tools can make the process smoother and ensure professional-looking results:
- High-Quality Cookie Sheets: A good set of sturdy, light-colored cookie sheets is essential for even baking. They conduct heat uniformly, preventing burnt bottoms and ensuring perfectly golden edges.
- Cookie Scoop: A cookie scoop, particularly one designed for larger, bakery-style cookies (often sold as an ice cream scoop), ensures perfectly uniform cookie dough balls. This leads to consistent baking times and beautifully shaped cookies.
- Silicone Baking Mats or Parchment Paper: These non-stick surfaces are invaluable. They prevent sticking, promote even baking, and make cleanup a breeze. Silicone mats are reusable and eco-friendly.
- Round Cutters (Optional): If your cookies spread a little unevenly, a set of round cookie cutters can be used immediately after baking to gently “tidy up” their edges, making them perfectly round and aesthetically pleasing without cutting into the cookie itself.
More Delicious Cookie Recipes to Love
If you’ve enjoyed these Black Forest Cookies, you might also like to explore these other fantastic cookie recipes:
- Blueberry Lemon Cookies
- Salted Caramel Chocolate Chip Cookies
- Cherry Pie Cookies
- Key Lime Slice and Bake Cookies
- Peanut Butter & Jelly Thumbprint Cookies
Did you make this recipe? Share your creations and feedback!
Be sure to follow bluebowlrecipes on Instagram and tag #bluebowlrecipes with your photo! You can also post a photo of your recipe to the bluebowlrecipes Facebook page. We’d love to see what you bake!
Black Forest Cookies
By Stephanie Simmons
These Black Forest Cookies are thick, fudgy chocolate delights flavored with kirsch and generously filled with sweet cherry preserves. A final drizzle of white chocolate makes them truly irresistible. Prepare to fall in love with these incredibly rich and delicious cookies!
Ingredients
For the Cookie Dough
- 1 cup salted butter, softened at room temperature (16 tbsp, 2 sticks, or 226 grams)
- 1 cup granulated sugar
- 1/2 cup brown sugar, packed
- 1 1/2 tsp vanilla extract
- 2 large eggs
- 3 tbsp kirsch (or milk for non-alcoholic)
- 2 1/2 cups all-purpose flour, spooned & leveled (325 grams)
- 1/2 cup + 2 tbsp unsweetened cocoa powder
- 1 tsp baking soda
- 1/4 tsp salt
For Rolling & Filling the Cookies
- 1/3 cup granulated sugar, for rolling
- One 12-ounce jar cherry preserves
For Topping
- 3 ounces white chocolate, melted (use white chocolate chips or melts)
Instructions
- Make the Cookie Dough: In a large bowl, cream the softened butter with an electric mixer on high speed until light and fluffy. Add the granulated sugar and brown sugar, mixing until well combined and creamy, about 1 minute. Beat in the vanilla extract and eggs until just combined, scraping down the sides of the bowl as needed. Stir in the kirsch until fully incorporated. In a separate medium bowl, whisk together the flour, cocoa powder, baking soda, and salt. Gradually add the dry ingredients to the wet mixture, mixing on low speed until a slightly wet, cohesive dough forms. Be careful not to overmix.
- Chill the Dough: Chill the entire bowl of cookie dough for 30 minutes to make it easier to handle. After the initial chill, scoop the dough into uniform balls, each weighing 60-65 grams. Place the scooped dough balls in an airtight container and refrigerate for at least 2 hours, or up to 48 hours. Important: Pre-scoop the dough balls before the long chill; otherwise, the dough will be too hard to portion later.
- Fill & Bake the Cookies: Preheat your oven to 350° F (175°C). Line a few cookie sheets with parchment paper or silicone baking mats. Pour the 1/3 cup granulated sugar into a small shallow bowl. If the cookies have chilled for more than 4 hours, let them sit on the counter for 10 minutes to soften slightly. Roll each dough ball through the granulated sugar to coat its surface. Using the back of a teaspoon, create a distinct indent in the center of each cookie. Fill each indent with 1 1/2 teaspoons of cherry preserves. Place about 6 cookies a few inches apart on each prepared baking sheet. Bake for 9-11 minutes, one sheet at a time, for the most even bake. The edges will appear just set, and the centers will look slightly soft and underdone. The cookies will firm up as they cool.
- Serve & Store: Let the baked cookies cool on the baking sheet for 5-10 minutes before transferring them to a wire rack to cool completely. Once fully cooled, melt the white chocolate and drizzle it artfully over each cookie for a beautiful finishing touch. Serve and enjoy! Store cooled cookies in an airtight container in the fridge for up to a week.
Nutrition (Approximate per cookie)
Serving: 1 cookie, Calories: 299kcal, Carbohydrates: 39g, Protein: 4g, Fat: 14g, Saturated Fat: 9g, Polyunsaturated Fat: 1g, Monounsaturated Fat: 4g, Trans Fat: 0.5g, Cholesterol: 55mg, Sodium: 213mg, Potassium: 99mg, Fiber: 2g, Sugar: 22g, Vitamin A: 390IU, Vitamin C: 0.03mg, Calcium: 30mg, Iron: 1mg
Nutrition information is automatically calculated and should only be used as an approximation.
Like this recipe? Leave a comment below! We love hearing from you.