
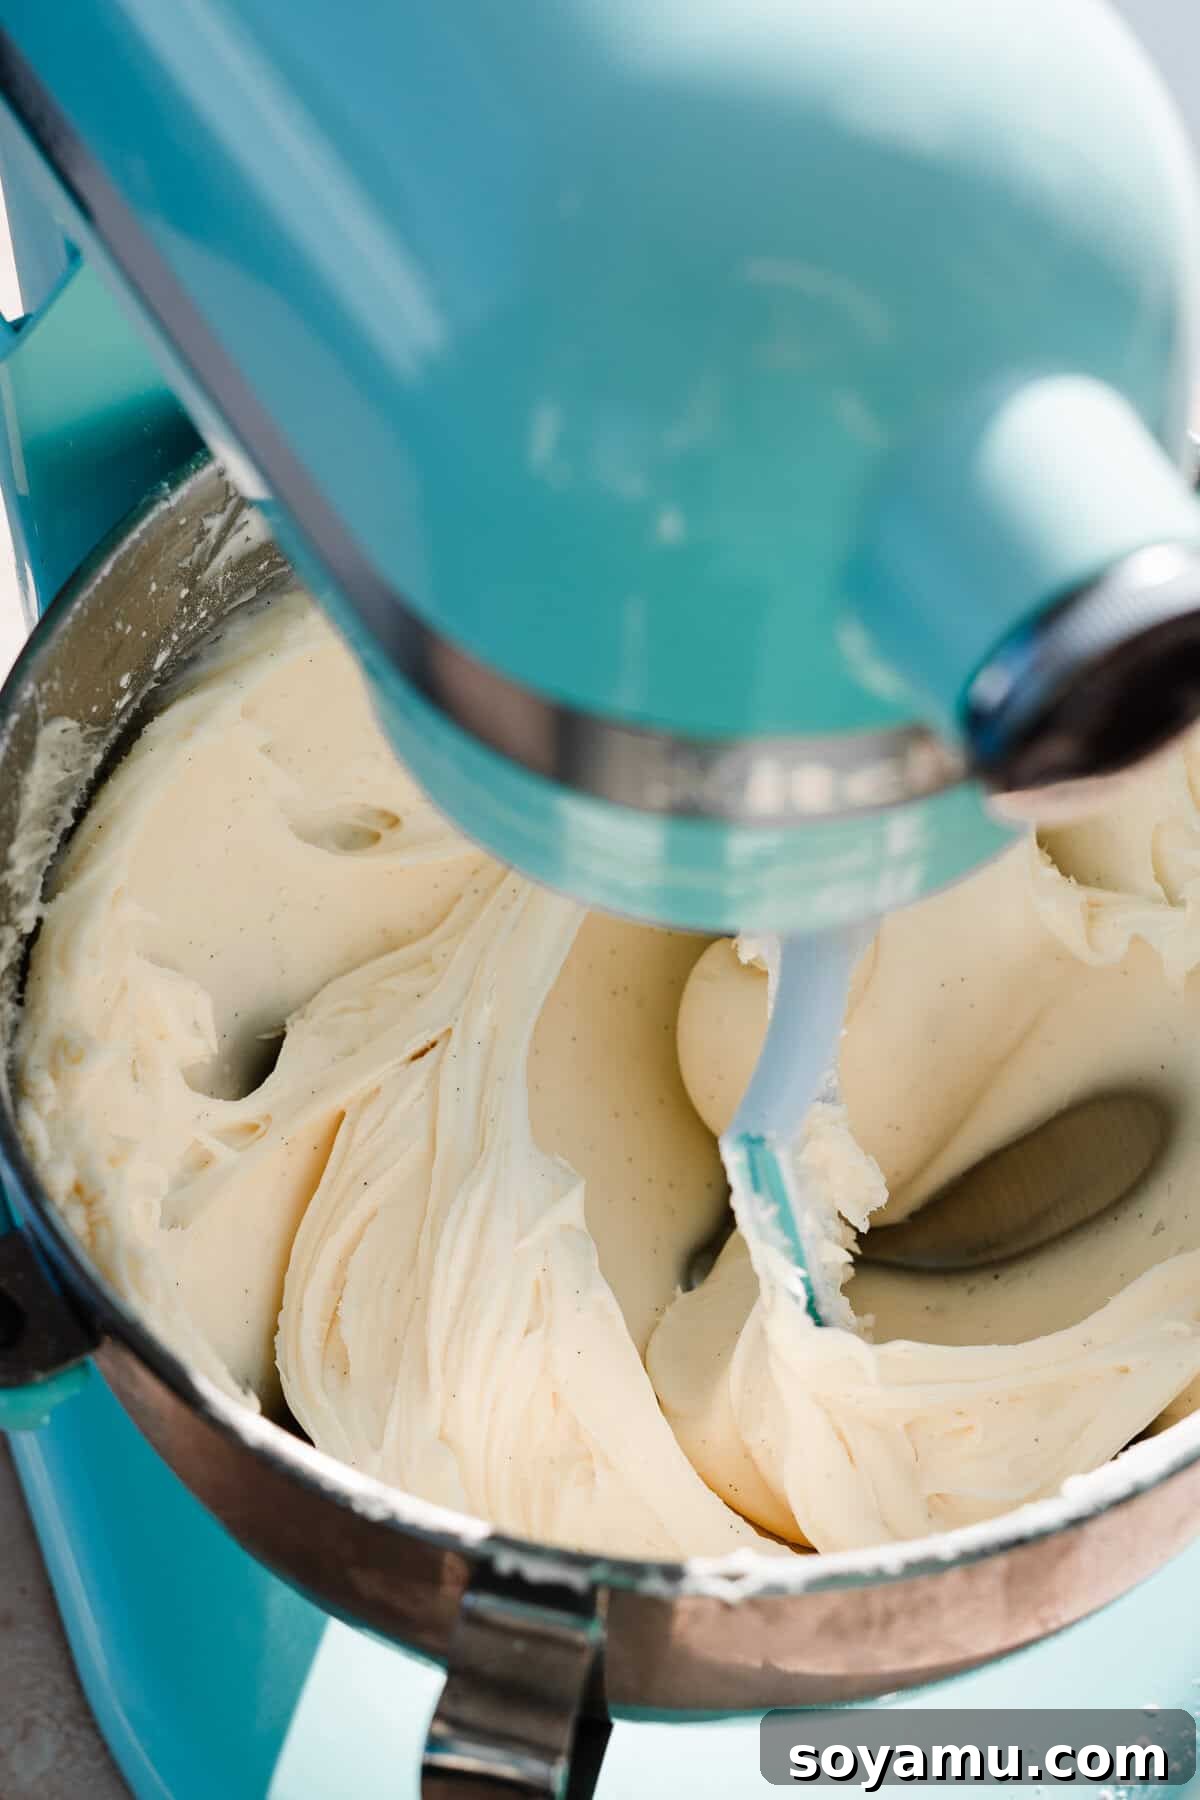
Prepare to create the most incredible, **silky smooth Cream Cheese Frosting** you’ve ever tasted, right in your own kitchen! This recipe is specifically designed for both ease and perfection, delivering a frosting that is not only luscious and soft but also delightfully stable – making it absolutely ideal for piping beautiful designs onto your favorite cakes and cupcakes. Best of all? You won’t need to sift a single speck of powdered sugar! With just a handful of common ingredients and a few minutes of your time, you’ll achieve a rich, tangy, and perfectly balanced frosting that’s never overwhelmingly sweet. Say goodbye to grainy textures and hello to a truly irresistible, professional-quality finish for all your baked goods.
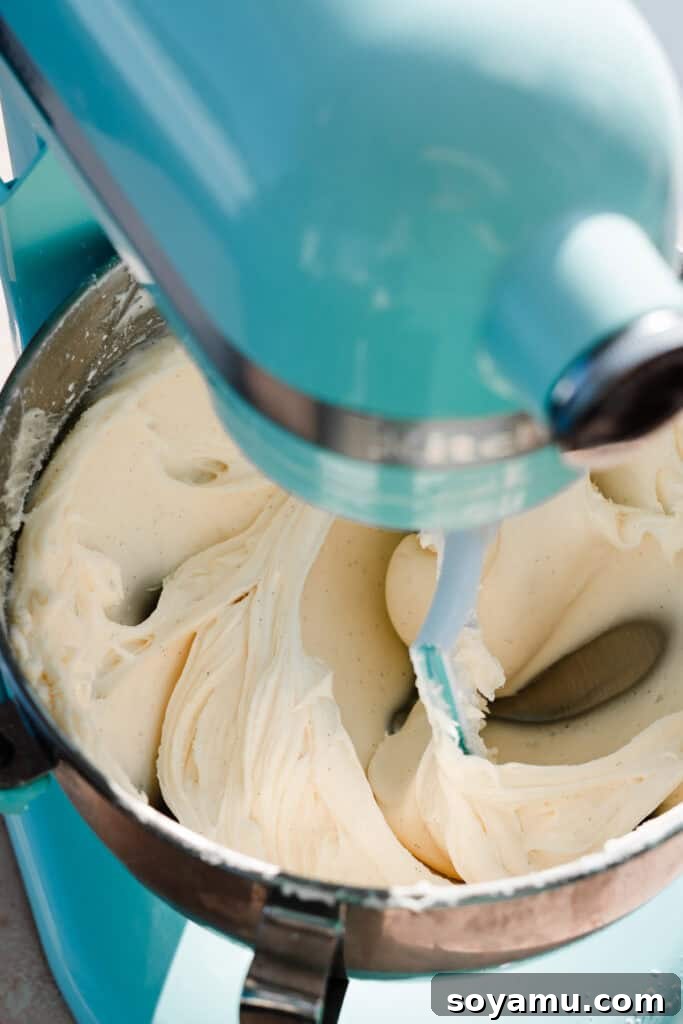
Why This Will Be Your New Favorite Cream Cheese Frosting Recipe
In the world of baking, a truly exceptional frosting can elevate a good dessert to a great one. This particular cream cheese frosting stands out from the rest, meticulously crafted to simplify your baking process while maximizing flavor, texture, and reliability. Here’s why you’ll not only love but consistently rely on this recipe:
-
Effortless & Absolutely No Sifting Required!
Let’s be honest, sifting powdered sugar is often perceived as an extra, messy step, frequently leading to a fine layer of dust across your kitchen counters. Our revolutionary method completely bypasses this tedious process! By creaming your butter thoroughly until it’s light and fluffy, and then incorporating the cream cheese until impeccably smooth (with diligent bowl scraping to ensure no stray lumps), you naturally achieve a flawlessly smooth base. Extensive baking experience has shown us that sifting powdered sugar for frosting is largely unnecessary; proper creaming and mixing are far more effective in eliminating lumps. This streamlined approach saves you valuable time and guarantees a beautifully smooth finish every single time, without the hassle.
-
Remarkably Stable and Pipeable
One of the most common frustrations with homemade cream cheese frostings is their tendency to be too soft, making them challenging for intricate piping designs or even simply frosting a multi-layer cake without it sliding. This recipe strikes the perfect balance between that desired soft, creamy texture and crucial structural stability. It boasts a wonderfully “cream cheese forward” flavor, ensuring you get that distinct, tangy cream cheese taste without the frosting becoming overly loose. The precise ratio of ingredients creates a stable frosting that holds its shape beautifully, allowing you to confidently pipe elegant rosettes, clean borders, or generous, tall swirls on cupcakes, even in slightly warmer kitchen environments.
-
Perfectly Balanced – Subtly Sweet and Tangy
A frequent complaint about many traditional frostings is their overwhelming sweetness, which can quickly become cloying and overshadow the dessert itself. Our recipe is meticulously crafted to avoid this sensation. We’ve carefully calibrated the sweetness level to perfectly complement, rather than overpower, the rich, tangy notes inherent in the cream cheese. The result is a sophisticated flavor profile that truly enhances your baked goods, offering a delightful interplay of sweet and tart. While we believe this balance is just right, you always have the flexibility to taste as you go and add a little more powdered sugar if your preference leans towards a sweeter profile.
-
Incredibly Quick and Easy to Prepare
From gathering your ingredients to achieving that perfect, fluffy consistency, this silky frosting comes together in a remarkable matter of minutes. Utilizing just 6 essential ingredients, you can effortlessly whip up a fresh batch while your cake is cooling or your cupcakes are still baking. This makes it an incredibly convenient option for both spontaneous baking urges and well-planned celebratory desserts, cutting down significantly on preparation time without compromising on quality.
-
Highly Versatile for Any Dessert
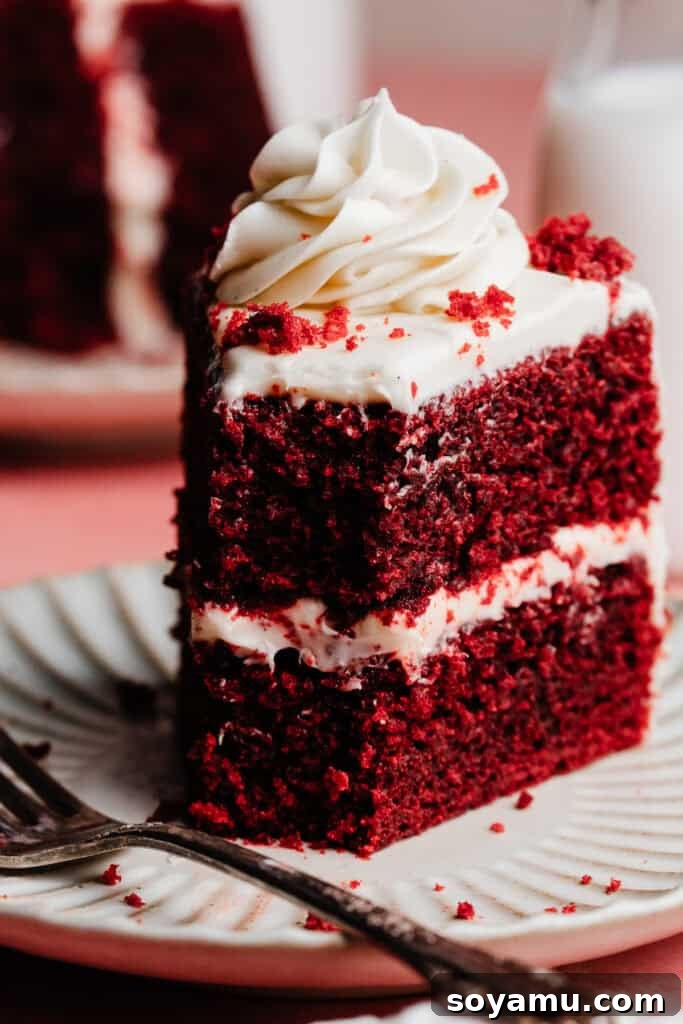
While often stereotypically paired with classic desserts like carrot cake and red velvet, this cream cheese frosting is far more versatile than you might imagine. Its delightful texture and balanced flavor make it a fantastic companion to an expansive array of sweet treats. Imagine it gracing chocolate cakes, pumpkin spice muffins, banana bread, vibrant lemon bars, decadent brownies, or even serving as a luxurious dip for fresh fruit or simple graham crackers. Its adaptability ensures it will quickly become a staple in your baking repertoire.
Essential Ingredients for Perfect Cream Cheese Frosting: A Closer Look
Crafting the perfect cream cheese frosting begins with understanding the specific role and importance of each ingredient. Using high-quality components and ensuring they are at the correct temperature are critical steps that will make all the difference in achieving that irresistible silky texture and wonderfully balanced flavor. The full recipe with precise measurements and detailed step-by-step directions can be conveniently found in the recipe card located at the bottom of this post.
-
Butter:
For this recipe, we highly recommend using high-quality, salted butter. In our extensive experience, the subtle touch of salt dramatically enhances the overall flavor profile of the frosting. It acts as a natural counterpoint, balancing the sweetness and adding a nuanced depth that unsalted butter often misses. If you only have unsalted butter on hand, simply add an extra generous pinch (about 1/4 teaspoon) of fine sea salt to the recipe. Crucially, ensure your butter is genuinely softened to room temperature – it should be pliable to the touch but not melted or greasy. This specific temperature is absolutely key for creaming it smoothly with the cream cheese and preventing any undesirable lumps from forming in your final product.
-
Cream Cheese:
This ingredient is undoubtedly the star of our frosting show! For the best, most consistent results, always opt for full-fat block cream cheese. It’s imperative to avoid using spreadable cream cheese that comes in a tub, as these varieties typically contain more water and various stabilizers. These additives can lead to a much softer, often runny frosting that fundamentally lacks the necessary structure and body required for easy spreading and, especially, for piping intricate decorations. Just like the butter, your cream cheese should also be at room temperature. This allows it to blend seamlessly and harmoniously with the butter, creating a uniform, perfectly lump-free base that is essential for a silky frosting.
-
Powdered Sugar (Confectioners’ Sugar):
Also widely known as confectioners’ sugar or icing sugar, this finely milled sugar is responsible for both the sweetness and the structural integrity of our frosting. Because of its extremely fine texture, it dissolves quickly and effortlessly into the butter and cream cheese mixture. This contributes directly to the incredibly smooth texture without any need for sifting (provided your butter and cream cheese are perfectly creamed beforehand). We recommend starting with the specified base amount and then, importantly, suggest adjusting it to your personal taste preference to achieve that absolutely perfect sweetness level that complements your dessert.
-
Vanilla Extract (or Vanilla Bean Paste):
The inclusion of a good quality vanilla is non-negotiable for achieving a superior flavor profile in your cream cheese frosting. Real vanilla extract imparts a warm, rich, and aromatic note that profoundly elevates the entire frosting experience. For an extra gourmet touch and to achieve those beautiful, tiny visible flecks of vanilla bean throughout your pristine white frosting, consider opting for high-quality vanilla bean paste. For the best possible results and an authentic flavor, it’s always advisable to avoid imitation vanilla products.
-
Salt:
Even if you are already using salted butter, a small but significant pinch of extra fine salt works absolute wonders in this recipe. Salt is a secret ingredient in baking, often overlooked, that doesn’t make things taste overtly salty. Instead, it subtly enhances and brilliantly balances all the other flavors present, particularly by cutting through the richness and sweetness. This allows the characteristic tangy notes of the cream cheese to truly shine through, creating a more complex and satisfying taste experience.
-
Milk or Heavy Cream:
A small, carefully measured splash of liquid can be a true game-changer in achieving the perfect frosting consistency. A tablespoon or two of milk or heavy cream helps tremendously in reaching that desired silky, smooth, and spreadable consistency. It also significantly assists the powdered sugar in fully incorporating into the mixture, preventing a thick, pasty, or overly dense texture. Always start with the minimum recommended amount and then add more sparingly, teaspoon by teaspoon, until you achieve your ideal, luscious consistency.
Recipe Substitutions & Creative Flavor Variations
While this cream cheese frosting recipe is absolutely perfect in its classic form, it also serves as an incredibly versatile and forgiving base for creative experimentation. Feel empowered to explore these thoughtful substitutions and exciting variations to perfectly tailor the frosting to your specific dietary needs or adventurous flavor preferences:
-
Dairy-Free Cream Cheese Frosting:
Achieving a truly delicious and satisfying dairy-free version of this frosting is certainly within reach! High-quality dairy-free butter substitutes typically perform beautifully in this recipe, effectively mimicking traditional butter’s texture and essential creaming properties. The primary consideration often lies with finding the right dairy-free cream cheese. Brands vary quite significantly in terms of their texture, flavor, and crucial stability. If you have a preferred brand of dairy-free block cream cheese that you know holds up well in baking or spreads, feel free to confidently use it here. However, it’s important to be aware that some dairy-free cream cheeses can be inherently softer or more prone to weeping, which could potentially make your final frosting a little runnier than desired. To compensate for this, you might need to gradually add a bit more powdered sugar or chill the frosting more frequently during both the preparation process and prior to its final application.
-
Exciting Flavor Variations to Try:
Beyond the beloved classic vanilla, this cream cheese frosting is remarkably adaptable to a vast array of different flavor profiles, allowing you to customize it for any dessert:
- Zesty Citrus Zing: For a bright, refreshing, and invigorating twist, incorporate 1-2 teaspoons of freshly grated lemon, orange, or lime zest. A very small amount of fresh citrus juice (about 1/2 to 1 teaspoon) can also be added for an extra punch, but exercise caution not to make the frosting too runny.
- Warm Spiced Indulgence: Introduce 1/2 to 1 teaspoon of ground cinnamon, nutmeg, pumpkin pie spice, or even a blend of allspice and ginger for a warm, comforting, and wonderfully autumnal flavor. This variation is absolutely perfect for fall-themed desserts.
- Rich Chocolate Dream: For a decadent chocolate cream cheese frosting, sift in 1/4 to 1/2 cup of unsweetened cocoa powder along with the powdered sugar. Depending on the cocoa powder’s absorbency, you might need an extra splash of milk or cream to maintain that ideal, silky consistency.
- Nutty Elegance: A few drops of pure almond extract can impart a lovely, sophisticated marzipan-like flavor, which pairs exceptionally well with fruit-based cakes, cherry desserts, or even simple vanilla cupcakes.
- Espresso Coffee Kick: Dissolve 1-2 teaspoons of instant espresso powder or finely ground instant coffee in the milk or cream before adding it to the frosting. This creates a subtle yet distinctive coffee flavor that marries wonderfully with chocolate cakes and coffee-flavored treats.
How to Master Silky Cream Cheese Frosting: A Detailed Step-by-Step Guide
Making this incredibly delicious frosting is a straightforward process, but paying close attention to a few critical details will ensure you achieve a perfectly smooth, stable, and delectable result every single time. Follow these meticulously outlined steps for guaranteed success:
-
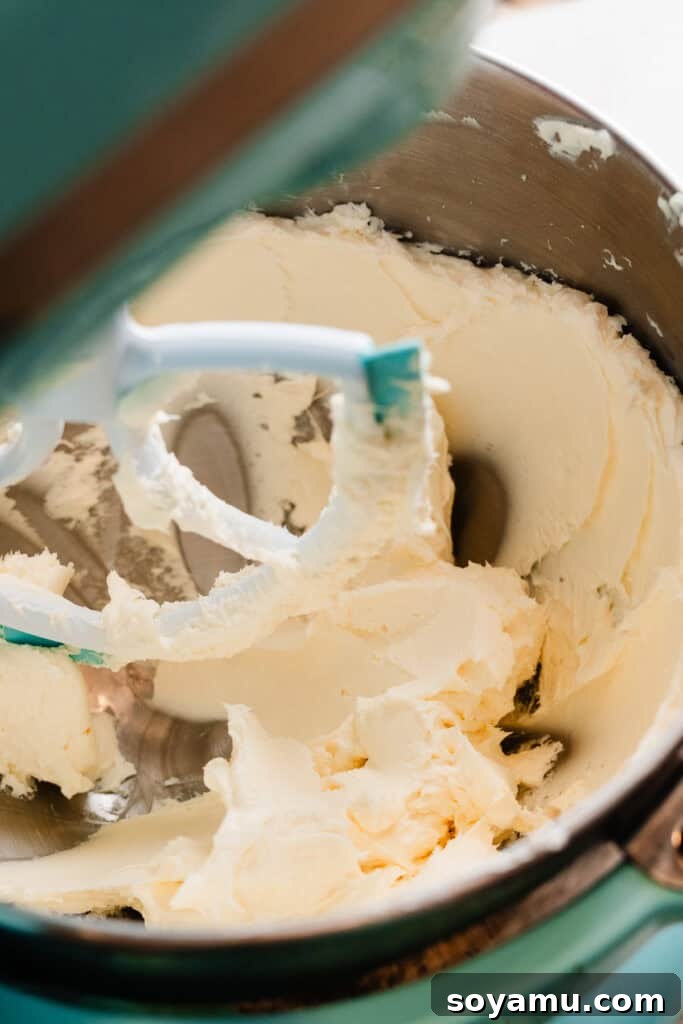
Step 1: Cream the Butter for Maximum Lightness and Fluffiness
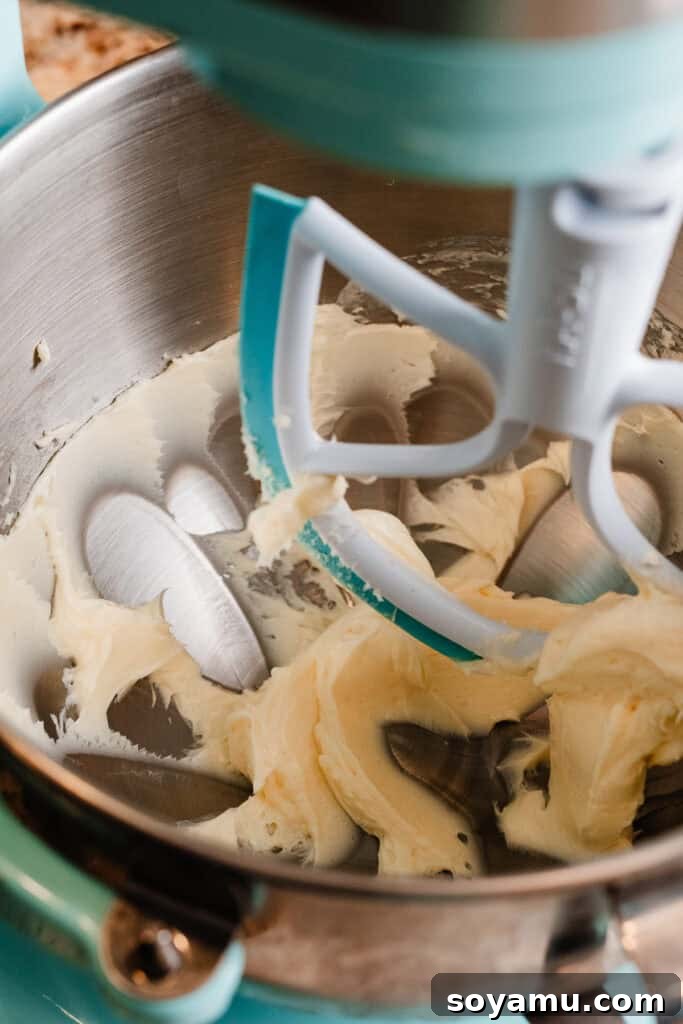
Begin by placing your properly softened salted butter into a large mixing bowl or the bowl of a stand mixer fitted with the paddle attachment. Beat the butter on high speed for a full 30-60 seconds. During this crucial stage, you are aiming for it to transform into a much lighter color and become noticeably fluffy and airy in texture. This essential aeration process is fundamental for achieving an ultimately smooth frosting and plays a vital role in preventing any unwanted lumps from forming later in the recipe.

Creaming butter properly creates the perfect light and airy foundation for your frosting. -
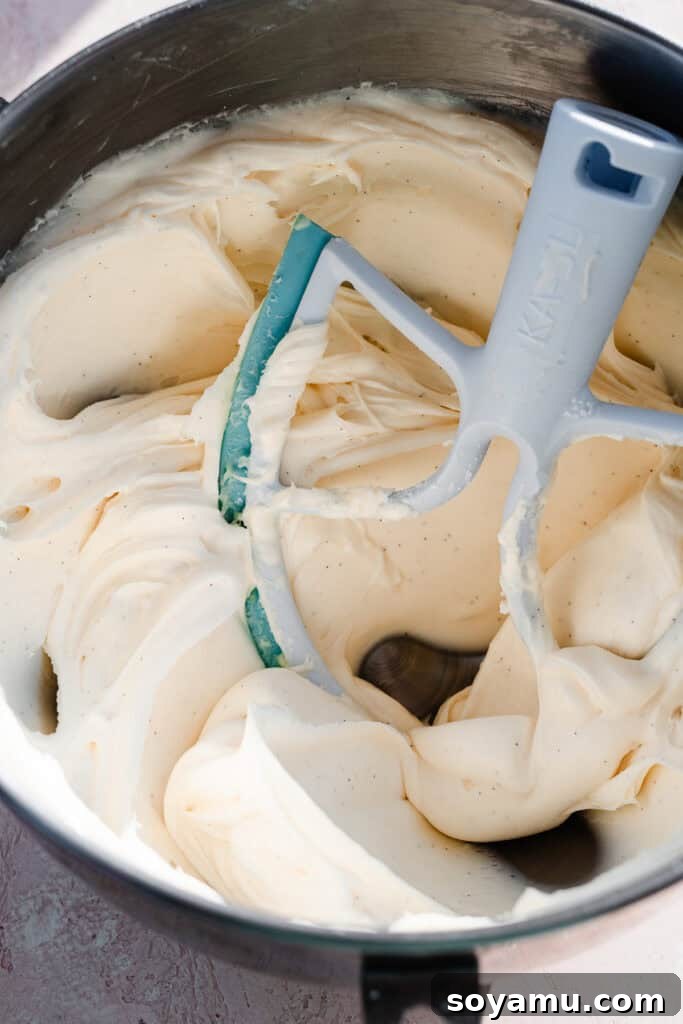
Step 2: Combine Butter and Cream Cheese Until Impeccably Silky Smooth
Next, add the room temperature, full-fat block cream cheese to your already creamed butter. Continue to beat the mixture on medium-high speed for another 30-90 seconds, or until the combination is entirely smooth, homogenous, and completely lump-free. This specific stage is where any potential lumps are thoroughly eradicated. It is absolutely essential to stop the mixer frequently and meticulously scrape down the sides and bottom of the bowl with a rubber spatula. This critical step ensures that every single bit of both butter and cream cheese is fully incorporated, leading to a uniformly creamy and silky texture before you proceed to the next stage.
Ensure no lumps remain for a truly silky and smooth frosting base. -
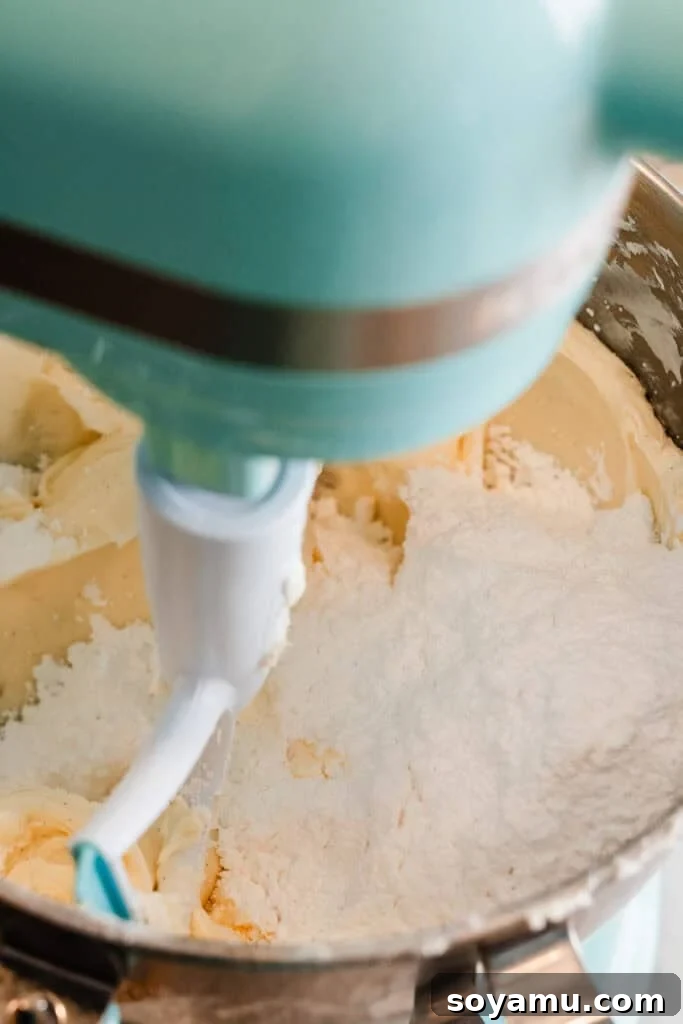
Step 3: Gradually Add Sugar and Flavorings for Perfect Consistency
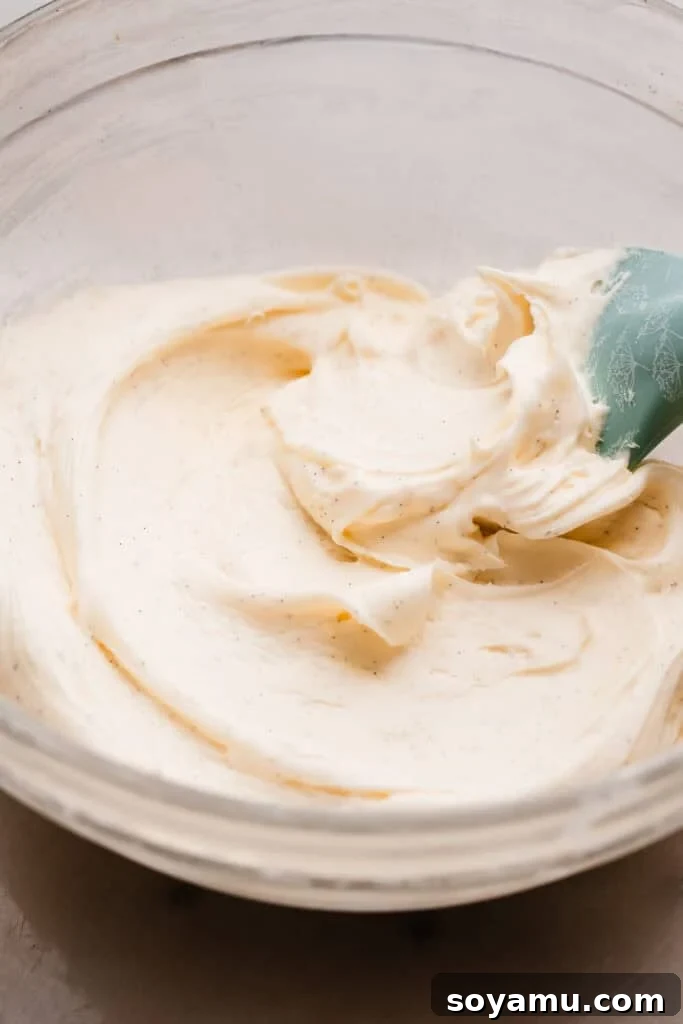
With your mixer now set to low speed, carefully add approximately half of the powdered sugar into the butter and cream cheese mixture. At this point, also incorporate the vanilla extract (or paste) and the essential pinch of salt. If the mixture appears too thick or somewhat dry, add a small splash (start with 1-2 tablespoons) of milk or heavy cream to facilitate the smooth incorporation of the powdered sugar. Once this first addition is mostly combined, add the remaining powdered sugar. Increase the mixer speed to medium-high and continue to beat for an additional 1-2 minutes until the frosting achieves a light, fluffy, and completely smooth consistency. Finally, taste the frosting and adjust for sweetness, adding a bit more powdered sugar if you prefer a sweeter profile, or another tiny splash more milk or cream if it feels overly stiff. Remember to avoid over-beating at this final stage, as this can introduce too much air into the frosting and potentially make it less stable.
Combine ingredients carefully and gradually for the ideal smooth and fluffy texture.
Serving & Storage Tips for Optimal Freshness and Enjoyment
Once your irresistible, silky cream cheese frosting is perfectly prepared, you’ll want to ensure you know the absolute best ways to use and store it to maintain its perfect texture, vibrant flavor, and overall freshness. These tips will help you enjoy your homemade frosting to its fullest potential, whether immediately or for future delights.
Immediate Use & Troubleshooting Consistency:
Your freshly made frosting is now in its prime, ready for immediate use! Go ahead and generously frost your favorite cakes, cupcakes, cookies, brownies, or any other delightful dessert that beckons for its creamy embrace. If, during application, your frosting happens to feel a little too soft or “weepy” (which can occasionally occur if your kitchen is particularly warm, or if your ingredients were not quite cold enough to begin with), there’s no need to panic. This is an easy fix! Simply pop the entire mixing bowl of frosting into the refrigerator for a quick chill – typically 10-20 minutes. For a faster firm-up, 5-10 minutes in the freezer will also do the trick. This brief cooling period will help it to stiffen up beautifully, making it perfectly stable for effortless spreading or even intricate piping designs. After chilling, give it a quick re-whip with your mixer if needed to restore its smooth, pliable consistency.
Longer-Term Storage for Leftovers:
One of the many benefits of this cream cheese frosting recipe is that it stores exceptionally well, making it ideal for make-ahead preparations or enjoying delicious leftovers. To store, simply transfer any unused frosting to an airtight container. It can be safely kept in the refrigerator for up to 5-7 days. Before you plan to use refrigerated frosting, remember to allow it to sit out at room temperature for 15-30 minutes. This crucial step helps it soften slightly. Once softened, transfer it back to your electric mixer or stand mixer (still fitted with the paddle attachment) and give it a good re-mix until it returns to its smooth, perfectly spreadable, and pliable consistency. You might find that a tiny splash more of milk or cream, added teaspoon by teaspoon, helps achieve the desired texture if it seems too stiff.
Freezing for Extended Shelf Life:
For even more prolonged storage, this amazing frosting is delightfully freezer-friendly! To freeze, carefully transfer the frosting into a freezer-safe, airtight container. Ensure there’s minimal air contact to prevent freezer burn. It can be frozen for up to 1-2 months without significant loss of quality. When you’re ready to indulge, simply thaw the frosting in the refrigerator overnight. Once fully thawed, transfer it to your mixing bowl and allow it to come to room temperature for 15-30 minutes, just like with refrigerated frosting. Then, re-whip it as described above until it’s wonderfully smooth, fluffy, and completely ready for application. This freezing method makes dessert planning and preparation incredibly convenient and flexible!
Expert Tips for Unfailingly Perfect Frosting Results
Achieving truly bakery-quality frosting at home isn’t just about diligently following a recipe; it’s about understanding and implementing a few key techniques and insights. Here are some invaluable expert tips to ensure your homemade cream cheese frosting turns out perfectly silky, stable, and utterly delicious every single time:
- Always Use Truly Room Temperature Ingredients: This is arguably the most crucial tip for producing a silky smooth frosting. Butter and cream cheese that are properly softened (meaning they yield slightly to the touch but are not melted or greasy) will cream together seamlessly and effortlessly. This creates a beautifully homogeneous base that is entirely free of lumps. Attempting to use cold ingredients will inevitably result in a lumpy, inconsistent, and frustratingly difficult-to-work-with frosting. Plan ahead and take your ingredients out of the fridge at least 30 minutes to an hour before you begin.
- Scrape Your Mixing Bowl Diligently and Frequently: During every stage of the mixing process, especially when you are combining the butter and cream cheese, make it a habit to pause frequently. Use a rubber spatula to thoroughly scrape down the sides and the bottom of your mixing bowl. This seemingly small step is vital; it ensures that all ingredients are fully incorporated into the main mixture, preventing any hidden pockets of unmixed butter or cream cheese that could otherwise lead to a grainy, uneven, or inconsistent texture in your final frosting.
- Avoid Over-Mixing Once Powdered Sugar is Incorporated: While it’s essential to beat the butter and cream cheese thoroughly to achieve that initial fluffiness, once you’ve started adding the powdered sugar, it’s important to be mindful and avoid over-mixing. Excessive beating after the sugar is added can incorporate too much air into the frosting. While this might initially make the frosting appear incredibly fluffy, it can also destabilize it over time, potentially leading to a “weeping” effect or a less firm, less pipeable consistency. Beat just until the mixture is smooth, light, and perfectly combined.
- Master the Art of Adjusting Consistency as Needed: The specified amount of milk or cream in the recipe is a guideline, and the precise amount needed can sometimes vary based on factors like the humidity in your kitchen or the exact consistency of your cream cheese. Always start with the recommended minimum amount, then add more liquid, teaspoon by teaspoon, if your frosting feels too stiff or dense. Conversely, if your frosting seems a little too soft, you can gradually beat in an additional tablespoon or two of powdered sugar (or try chilling it in the fridge, as mentioned in the storage tips) until it reaches your desired, perfect consistency.
- Invest in a Quality Stand Mixer or Electric Hand Mixer: While it is technically possible to make this frosting by hand, an electric mixer (either a stand mixer or a powerful hand mixer) significantly simplifies the entire process. More importantly, it ensures that the butter and cream cheese are adequately and consistently creamed to that vital, lump-free consistency that is absolutely essential for a truly silky end product. It’s a worthwhile investment for any baker.
- Consider Using a Kitchen Scale for Precision: For truly consistent and professional-level results in all your baking endeavors, a reliable food scale is an invaluable tool. Measuring ingredients like powdered sugar by weight rather than by volume (cups) can eliminate wide variations that frequently occur due to how ingredients are packed into measuring cups. While perhaps less critical for frosting than for delicate cakes, developing the habit of weighing ingredients is a best practice that will elevate your baking.
- Utilize an Oven Thermometer for Overall Baking Accuracy (Indirectly): Although this particular recipe is for frosting, the consistent baking results for the cakes and cupcakes you plan to frost heavily rely on an accurately calibrated oven. An inexpensive oven thermometer can quickly tell you if your oven is running hot or cold compared to its set temperature. Ensuring your baked goods are always perfectly cooked means they will be truly deserving of this amazing, silky cream cheese frosting!
Frequently Asked Questions About Silky Cream Cheese Frosting
Got more questions about perfecting your cream cheese frosting? We’ve compiled answers to some of the most common queries to help you achieve success every single time!
Absolutely, this recipe is incredibly flexible and easily scalable! If you’re preparing a large batch of frosting for multiple cakes, a big celebration, or a substantial batch of cupcakes, feel free to double all the ingredient quantities. For doubling, we highly recommend using a powerful stand mixer, as the increased volume of ingredients will be quite substantial and could be challenging to mix thoroughly and evenly by hand. Conversely, if you only require a smaller amount of frosting for just a few cupcakes, a single-layer cake, or a simple topping, you can very easily halve all the ingredient quantities precisely.
A runny or overly soft frosting is a very common issue, often stemming from one or more key factors: 1) The most frequent cause is using low-fat or spreadable cream cheese (always use full-fat block cream cheese for optimal structure!). 2) Over-softened butter or cream cheese – they should be at true room temperature, pliable but still firm enough to hold their shape, not melted or greasy. 3) Too much liquid (excess milk/cream, or even over-beating can incorporate too much air, making the frosting seem less dense and stable). 4) Insufficient powdered sugar to provide the necessary structure. To effectively fix a runny frosting, try placing the entire bowl into the refrigerator for 15-30 minutes to chill and firm up. Then, re-whip it. If it remains too soft, gradually beat in another 1/4 to 1/2 cup of powdered sugar until it reaches your desired, firm consistency.
Lumps in cream cheese frosting are almost always caused by cream cheese or butter that is too cold, preventing them from fully incorporating into a smooth mixture. The key to preventing lumps is twofold: first, ensure both your butter and cream cheese are genuinely at soft room temperature before you begin. Second, cream the butter first until it’s light and fluffy. Then, add the cream cheese and beat them together very thoroughly until the entire mixture is perfectly smooth and uniform. Remember to scrape down the bowl frequently to catch any unmixed bits. If you meticulously follow these steps, you will absolutely not need to sift your powdered sugar!
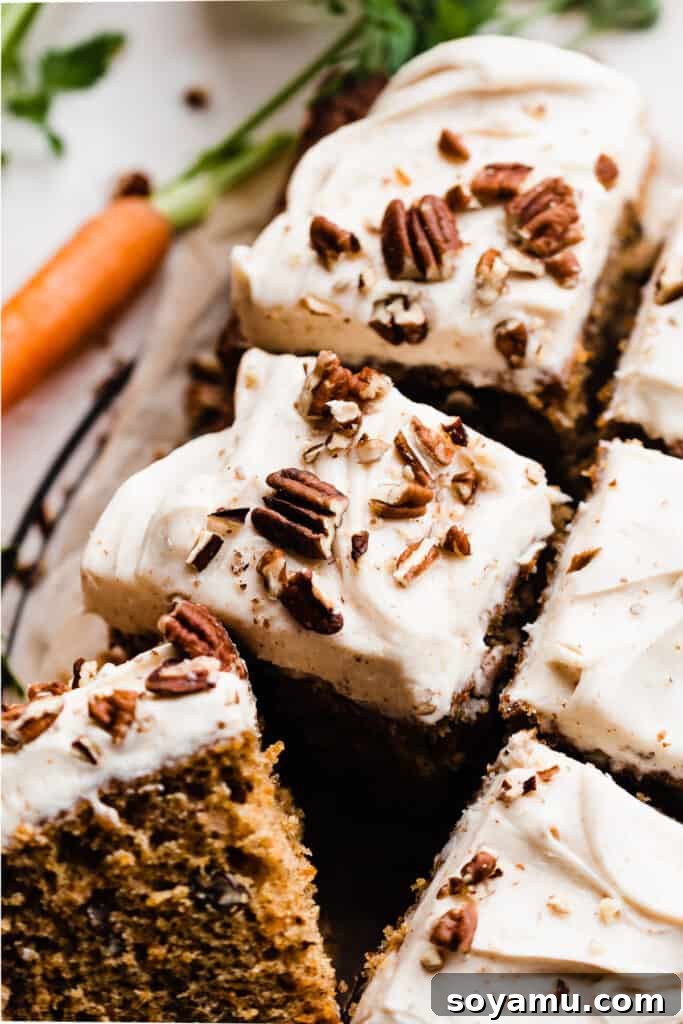
This exceptionally versatile frosting is truly a match made in heaven for an incredibly wide range of sweet treats! While classic pairings such as moist carrot cake, vibrant red velvet cake, spiced pumpkin cake or muffins, and hearty zucchini bread are perennial favorites, its delightful tangy sweetness extends far beyond. It’s equally delicious on rich chocolate cupcakes, sweet banana bread, warm cinnamon rolls, spicy gingerbread, and even serves as an elegant dip for fresh berries, fruit tarts, or sweet crackers. Its balanced flavor profile perfectly complements almost any spiced or subtly sweet baked good, making it a go-to for countless dessert creations.
Essential Tools for Frosting Perfection
While this cream cheese frosting recipe is surprisingly forgiving and doesn’t require specialized equipment, having the right tools at your disposal can significantly enhance the preparation process, making it even smoother, more efficient, and ultimately more enjoyable. These tools will help ensure you achieve that perfect, silky consistency every time:
- Stand Mixer or Electric Hand Mixer: This is arguably the most essential tool for creating this frosting. A robust stand mixer (fitted with the paddle attachment) or a powerful electric hand mixer is absolutely crucial for creaming the butter and cream cheese thoroughly and efficiently. It ensures you achieve that ultra-smooth, light, and lump-free consistency without tiring your arm, transforming what could be a laborious task into a quick and easy one.
- Sturdy Rubber Spatula: An indispensable utensil in any baker’s kitchen, a good quality rubber spatula is critical for this recipe. It’s used to meticulously scrape down the sides and the bottom of the mixing bowl during each stage of the process. This ensures that all ingredients are fully incorporated into the main mixture, leaving no unmixed pockets behind, which is vital for a uniformly silky frosting.
- Piping Bags and Tips (Optional but Recommended): If your goal is to beautifully decorate cakes or cupcakes with professional-looking swirls, rosettes, or intricate borders, investing in a set of sturdy piping bags (disposable or reusable) and a few essential piping tips is highly recommended. Popular choices include a large round tip for smooth swirls and a star tip for decorative flourishes, allowing you to elevate the presentation of your baked goods.
Explore More Irresistible Frosting Recipes to Elevate Your Baking
If you’ve thoroughly enjoyed creating and tasting this incredibly silky cream cheese frosting, we’re confident you’ll love exploring some of our other fantastic and equally delicious frosting recipes. Each one is designed to bring a touch of perfection to all your diverse baking projects:
- Luscious Blueberry Frosting – A vibrant and fruity delight, perfect for spring and summer desserts.
- Quick 10-Minute Peanut Butter Frosting – A rich and creamy frosting that comes together in a flash, ideal for chocolate lovers.
- Classic 10-Minute Chocolate Frosting – The ultimate easy and decadent chocolate frosting for any occasion.
- Decadent Chocolate Fudge Frosting – For when you crave an even richer, deeper chocolate experience.
Made this delightful recipe? We’d be absolutely thrilled to hear about your experience!
Please take a moment to leave a comment and a star rating below to share how much you liked the recipe and your results. Your valuable feedback not only helps our small business immensely but also guides and inspires other aspiring bakers in our community! Simply click the little stars in the header of the recipe card below to contribute your thoughts and rating. Thank you for being a part of our baking journey!
★
★
★
★
★
Silky Cream Cheese Frosting
Stephanie Simmons
20 minutes
20 minutes
1
batch
Pin Recipe
Rate Recipe
Print Recipe
Ingredients
-
3/4 cup salted butter, softened at room temperature , 170 grams -
16 ounces full-fat block cream cheese, softened at room temperature, 452 grams -
4 and 1/2 cups powdered sugar, or up to 5 cups (adjust to taste), 518 to 575 grams -
1-2 tbsp milk or heavy cream, 15-30 grams -
1 tbsp vanilla extract or vanilla bean paste, 12 grams -
pinch of salt
Instructions
-
1. Prepare the Frosting Base: In a large mixing bowl or the bowl of a stand mixer fitted with the paddle attachment, cream the softened salted butter on high speed for 30-60 seconds until it becomes light in color and fluffy. Add the room temperature full-fat cream cheese and continue to beat for approximately 1 minute, or until the mixture is completely smooth, well combined, and entirely free of any lumps. Ensure you pause and scrape down the sides and bottom of the bowl thoroughly with a rubber spatula to guarantee even incorporation.3/4 cup salted butter, softened at room temperature,
16 ounces cream cheese,
4 and 1/2 cups powdered sugar, or up to 5 cups (adjust to taste),
1 tbsp vanilla extract,
pinch of salt -
2. Finish and Adjust Frosting Consistency: Reduce the mixer speed to low. Gradually add about half of the powdered sugar, along with the vanilla extract (or paste) and the pinch of salt. If the mixture appears too thick or dry, add 1-2 tablespoons of milk or heavy cream to assist in incorporating the sugar smoothly. Once this initial addition is mostly combined, add the remaining powdered sugar. Increase the mixer speed to medium-high and continue to beat for another 1-2 minutes until the frosting is light, fluffy, and perfectly smooth. Finally, taste the frosting and adjust for sweetness, adding a bit more powdered sugar if desired, or another tiny splash of milk if it’s too stiff.
Serve & Store Immediately: Use your freshly made frosting right away to generously frost cakes, cupcakes, or any other desserts. If the frosting seems too soft or “weepy” (especially in a warm kitchen), simply place the entire mixing bowl into the refrigerator for 10-20 minutes, or the freezer for 5-10 minutes, to help it firm up. Give it a quick re-whip if needed after chilling. Store any leftover frosting in an airtight container in the refrigerator for up to 5-7 days.
-
3. Make-Ahead and Freezing Guidelines: To prepare this frosting in advance, store it in an airtight container in the refrigerator for 2-3 days. When ready to use, allow it to sit on the counter for 15-20 minutes to soften slightly, then re-mix with your electric mixer until it returns to a perfectly smooth and spreadable consistency.
For longer storage, freeze the frosting in an airtight container for 1-2 months. Thaw it in the refrigerator overnight, then follow the make-ahead instructions above (allowing to come to room temperature and re-whipping) before using.
Nutrition Information (Approximate)
Serving Size:
1
batch
,
Calories:
4955
kcal
,
Carbohydrates:
566
g
,
Protein:
30
g
,
Fat:
295
g
,
Saturated Fat:
179
g
,
Polyunsaturated Fat:
12
g
,
Monounsaturated Fat:
76
g
,
Trans Fat:
6
g
,
Cholesterol:
826
mg
,
Sodium:
2537
mg
,
Potassium:
692
mg
,
Sugar:
548
g
,
Vitamin A:
10371
IU
,
Calcium:
506
mg
,
Iron:
1
mg
Nutrition information is automatically calculated and provided as an estimate only. It should not be considered a substitute for professional nutritionist advice.
Loved this recipe? Share your thoughts!