
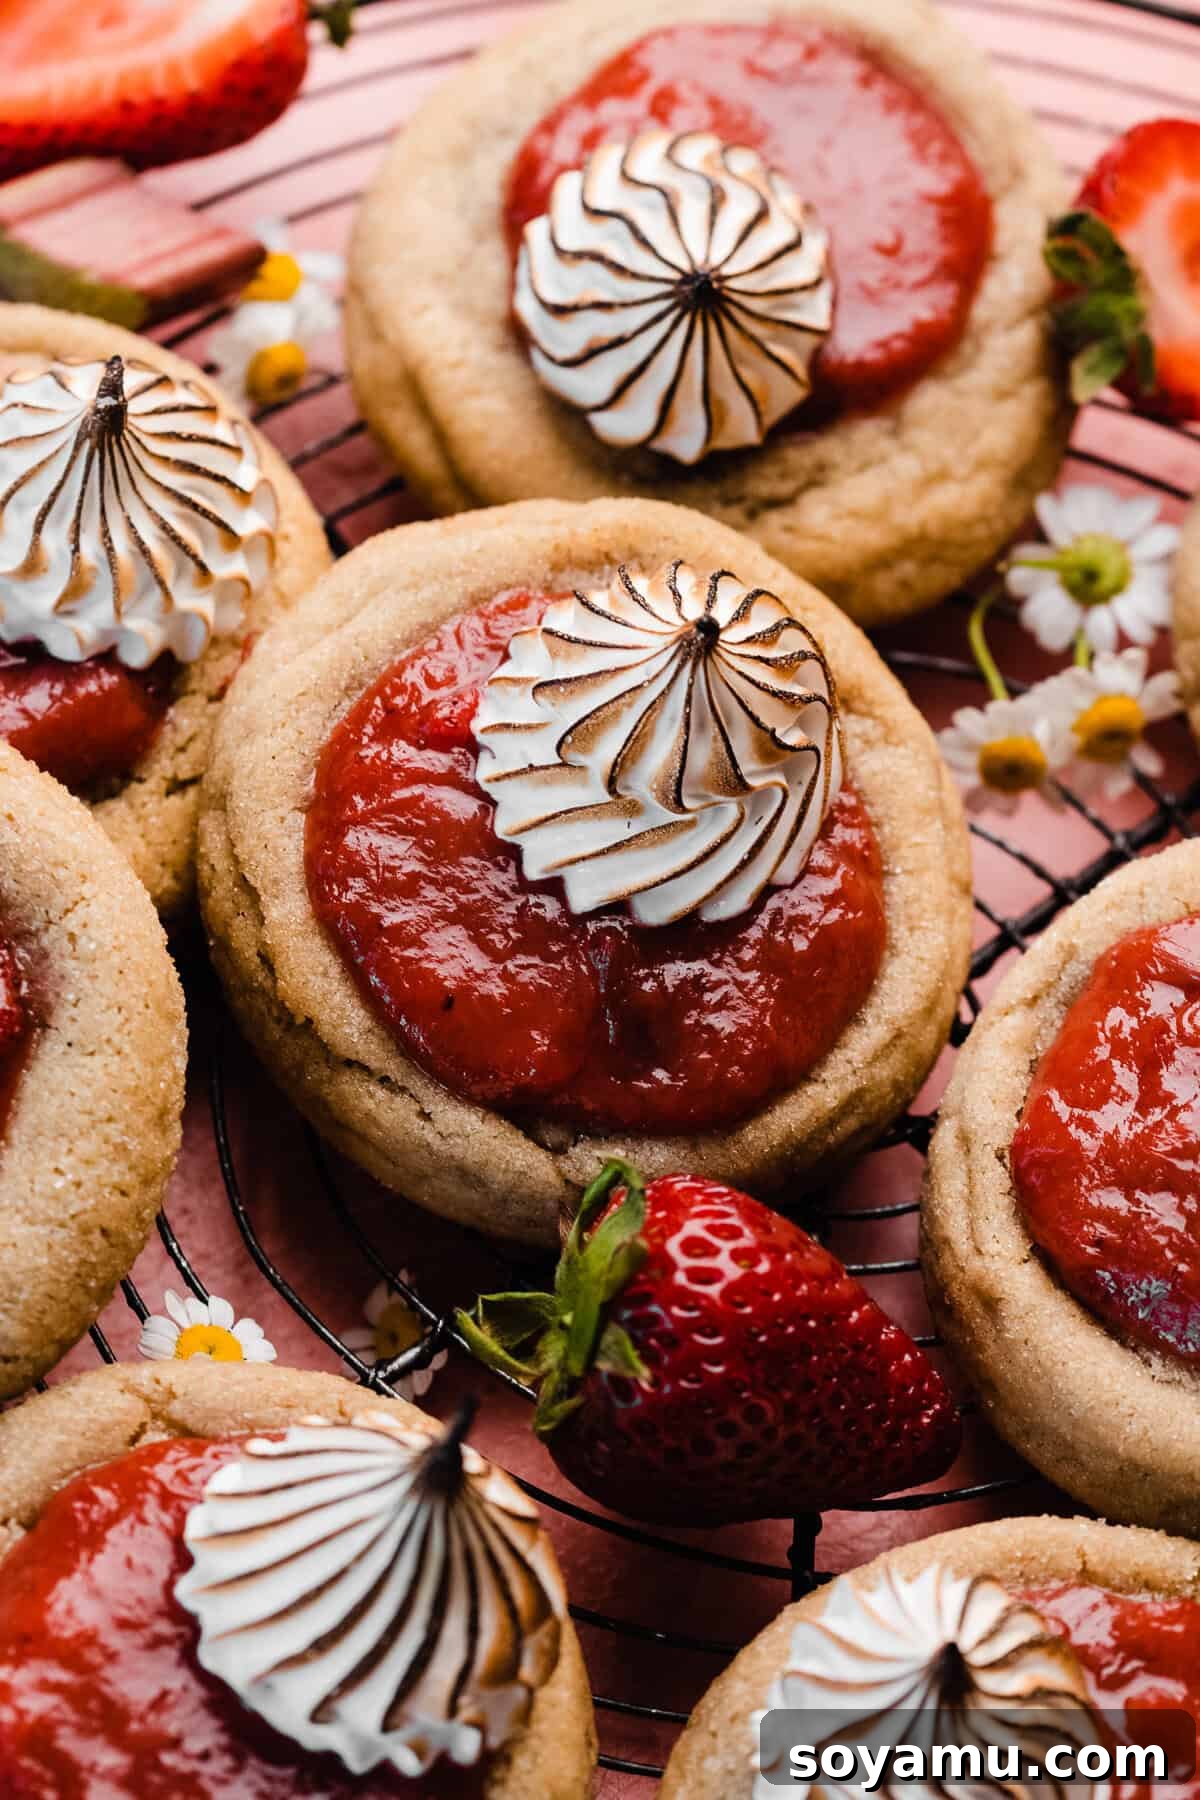
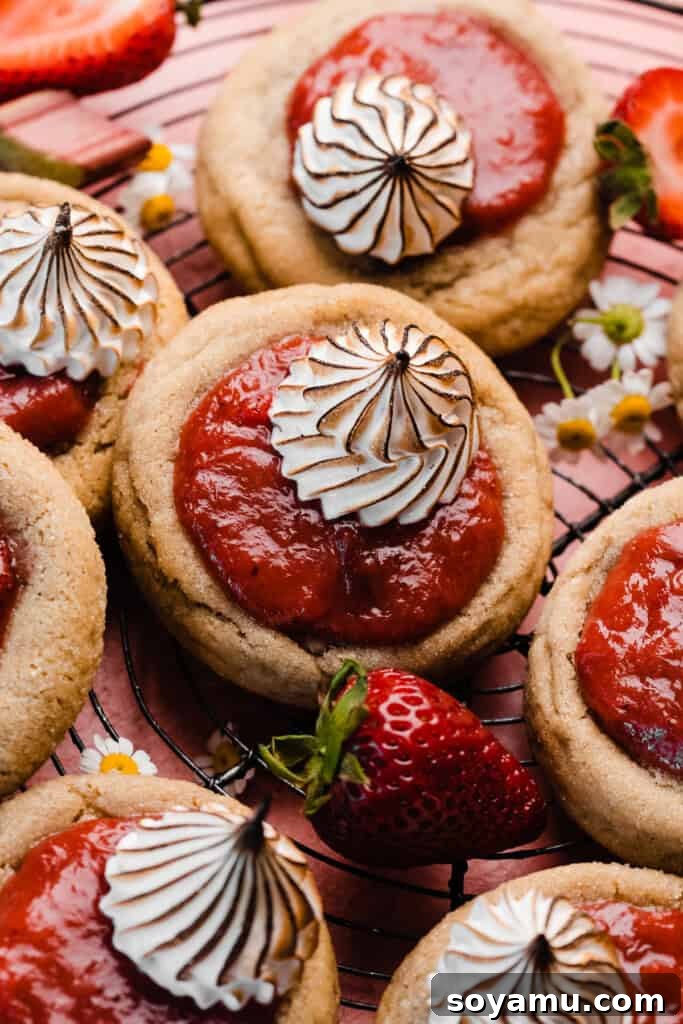
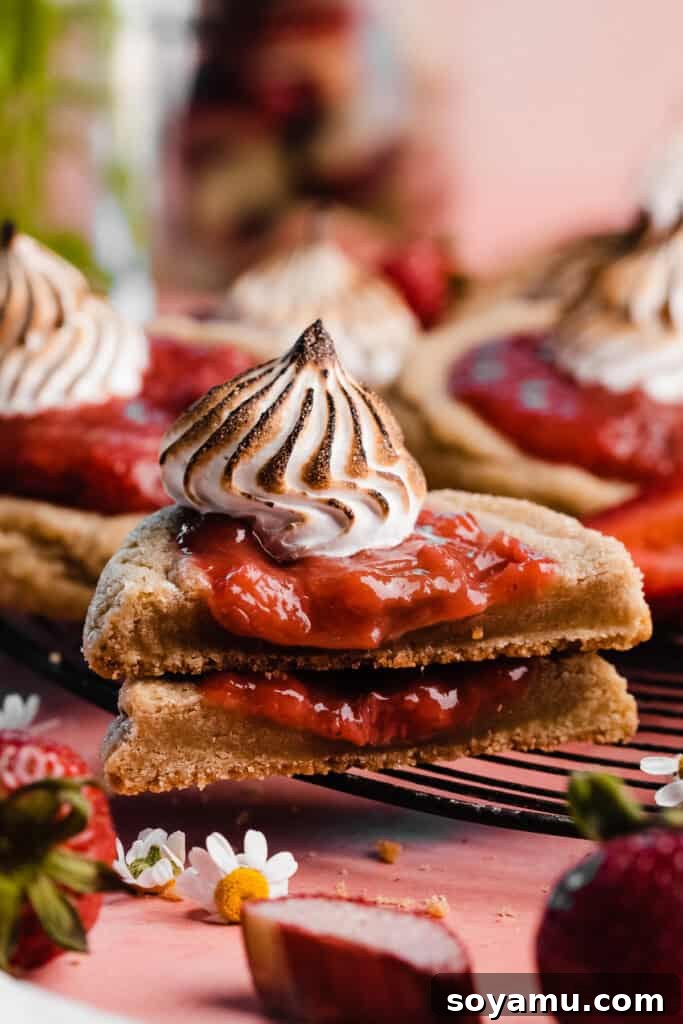
Strawberry Rhubarb Cookies are a delightful culinary innovation, transforming the beloved flavors of classic summer pie into a convenient, handheld cookie form. Imagine thick, perfectly chewy sugar cookies, each generously filled with a vibrant, tangy-sweet strawberry rhubarb compote, then crowned with elegant swirls of perfectly toasted Swiss meringue. This exquisite dessert captures the essence of a traditional strawberry rhubarb pie, offering all its comforting familiarity without the intricate fuss of a full pie crust. They’re also incredibly versatile, delicious served simply or topped with a dollop of fresh whipped cream for an added touch of indulgence.
Why These Strawberry Rhubarb Pie Cookies Will Become Your Summer Favorite:
-
Irresistible Strawberry Rhubarb Filling
At the heart of these cookies lies a luscious, homemade strawberry rhubarb filling. This juicy, tart compote bursts with the quintessential flavors of summer, striking a perfect balance between sweet strawberries and bright, tangy rhubarb. It’s cooked to perfection on the stovetop, ensuring a rich, concentrated fruit flavor that truly sings.
-
Perfectly Chewy Sugar Cookie Base
Forget dry, crumbly cookies. Our sugar cookie recipe yields a wonderfully thick and chewy texture with delightfully crisp edges. This isn’t a cakey cookie; it’s a substantial, satisfying base that holds up beautifully to the generous fruit filling and airy meringue topping, providing the ideal counterpoint to the softer elements.
-
Elegant Toasted Vanilla Bean Meringue
A cloud of delicate vanilla bean toasted Swiss meringue finishes these cookies with breathtaking elegance. Its light, airy texture and subtly sweet flavor, kissed with the warmth of a kitchen torch, truly emulate the experience of enjoying a slice of classic strawberry rhubarb pie complete with a golden-brown meringue topping. It adds a sophisticated touch and a delightful textural contrast.
Key Ingredients for Your Strawberry Rhubarb Pie Cookies:
Crafting these delectable cookies begins with understanding the role of each ingredient. The full recipe with precise measurements and detailed instructions can be found in the recipe section below.
-
Fresh or Frozen Strawberries
Both fresh and frozen strawberries work beautifully for the filling. If you’re using frozen strawberries, there’s no need to thaw them beforehand; they can be cooked directly from frozen. This convenient tip saves time and helps manage moisture. Ensure they are chopped or quartered as specified for optimal texture in the compote.
-
Fresh or Frozen Rhubarb
Just like strawberries, rhubarb can be used fresh or frozen. Frozen rhubarb typically comes pre-chopped into convenient 1-inch pieces, eliminating extra prep work. Critically, do not thaw frozen rhubarb before cooking, as this can lead to an overly watery filling. Rhubarb season spans from late spring to early summer, making it readily available at farmers markets and grocery stores. Outside of this period, many larger supermarkets stock frozen rhubarb year-round. Always remember to discard the rhubarb leaves, as they are toxic to both humans and pets; only the stalks are safe for consumption.
-
High-Quality Butter
For these cookies, I personally prefer using salted butter as it enhances the overall flavor profile of the cookies, creating a richer taste. However, if unsalted butter is your preference or what you have on hand, feel free to use it. Just be mindful of adjusting the added salt in the recipe if necessary.
-
All-Purpose Flour
Proper flour measurement is crucial for achieving the perfect chewy cookie texture. To avoid a dry bake, always spoon your flour into the measuring cup and then level it off with a flat utensil. Alternatively, for the most accurate results, weigh your flour using a kitchen scale. Scooping directly from the bag can compact the flour, leading to an excessive amount and a tougher cookie.
-
Granulated and Brown Sugar
A blend of granulated sugar and dark brown sugar (light brown sugar works too) contributes to the cookie’s irresistible chewiness and depth of flavor. The molasses in brown sugar adds moisture and a subtle caramel note, enhancing the overall sweetness profile.
-
Eggs and Vanilla Extract
These essential ingredients bind the dough, add moisture, and infuse the cookies with classic bakery flavor. Ensure eggs are at room temperature for better emulsification with the other ingredients.
Ingredient Substitutions & Creative Variations:
These Strawberry Rhubarb Pie Cookies are adaptable, allowing for dietary adjustments and exciting flavor twists.
-
Gluten-Free Option
While this recipe hasn’t been officially tested for a gluten-free version in my kitchen, many bakers have reported excellent results using a high-quality cup-for-cup gluten-free flour blend. Brands like King Arthur’s or Bob’s Red Mill are often recommended for their reliable performance in baking. If you choose this route, follow the recipe instructions precisely.
-
Dairy-Free Alternative
Making these cookies dairy-free is straightforward. Simply substitute your favorite dairy-free butter sticks for regular butter in both the cookie dough and the filling. Ensure your chosen brand melts and bakes similarly to conventional butter for best results.
-
Meringue Alternatives
If Swiss meringue seems daunting (though I promise it’s simpler than you think with my step-by-step guide!), you have delicious alternatives. A creamy vanilla bean whipped cream makes an excellent substitute. You can prepare it using a trusted recipe and pipe it onto the cookies just before serving for a similar luscious topping. Or, for a super simple approach, omit the topping entirely and enjoy the filled cookies as is!
-
White Chocolate Infusion
For an extra layer of sweetness and textural intrigue, consider adding 1 cup of white chocolate chips to the cookie dough. The creamy white chocolate complements the tart fruit beautifully. Alternatively, a drizzle of melted white chocolate over the finished cookies, in place of or alongside the meringue/whipped cream, would be absolutely divine.
How to Make Strawberry Rhubarb Pie Cookies: Step-by-Step Guide:
Creating these delightful cookies is a rewarding process, broken down into simple, manageable steps.
Step 1: Prepare the Strawberry Rhubarb Filling.
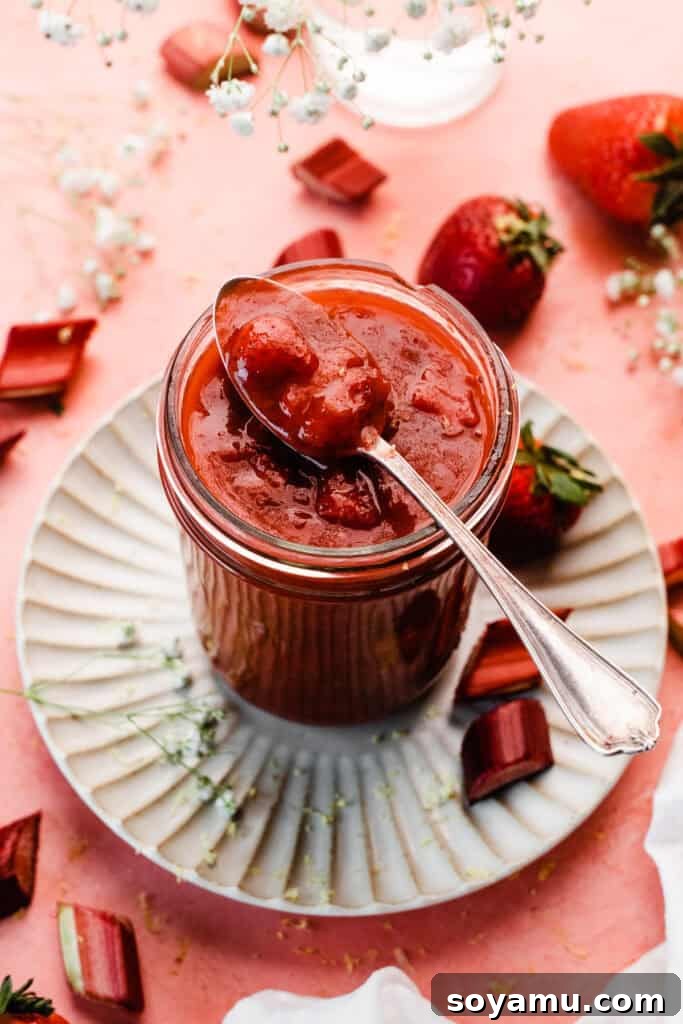
Begin by combining sliced strawberries, chopped rhubarb, granulated sugar, fresh lemon zest, a hint of vanilla, and a touch of butter in a saucepan. Cook this mixture gently over medium heat, stirring occasionally, until the fruits soften and break down into a delicious, thick compote. A cornstarch slurry is added to ensure the filling achieves the perfect consistency—thick enough to hold its shape in the cookie, but still wonderfully juicy. Allow the filling to cool completely before using to prevent it from thinning out your cookie dough. For detailed step-by-step photos and more in-depth guidance, you can refer to my dedicated strawberry rhubarb sauce recipe post.
Step 2: Create the Chewy Cookie Dough.
In a large mixing bowl, start by melting the butter. This melted butter technique contributes to the cookies’ signature chewiness. Whisk in both granulated and brown sugars until well combined. Next, incorporate the eggs and vanilla extract, ensuring the mixture is smooth and evenly blended. Finally, gradually stir in the dry ingredients – all-purpose flour, baking soda, baking powder, a pinch of salt, and a dash of ground cinnamon. Mix until a cohesive, smooth dough forms. Avoid overmixing, which can lead to tough cookies.
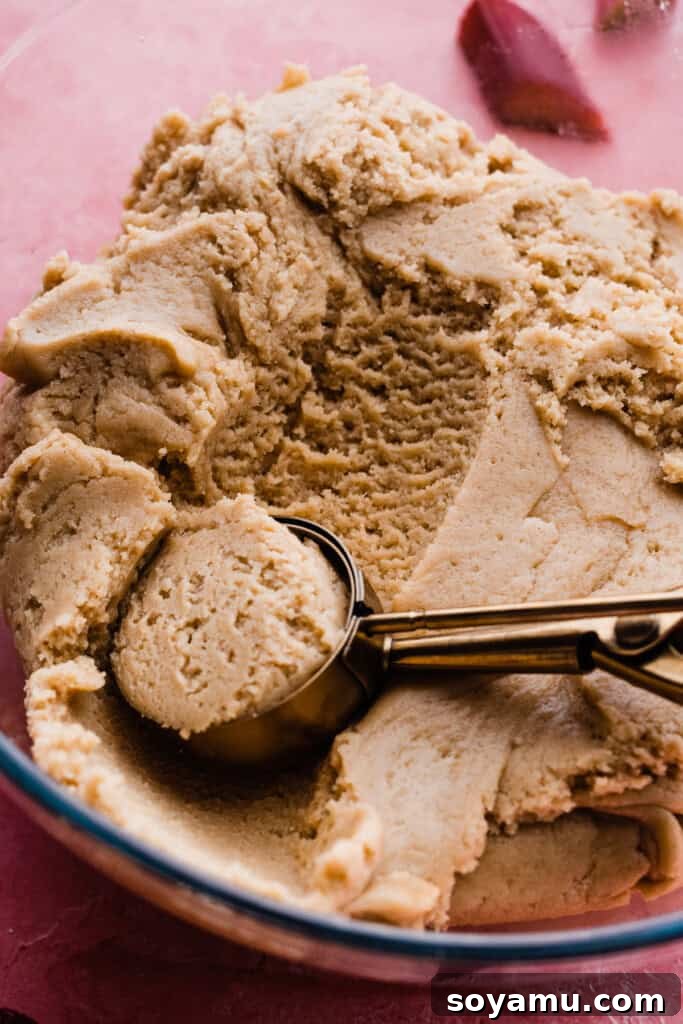
Step 3: Scoop and Chill the Dough.
Using a cookie scoop, portion the dough into uniform balls, aiming for about 65 grams each for consistent baking. Chilling the dough is a critical step; it prevents the cookies from spreading too much in the oven, enhances their flavor, and results in a thicker, chewier texture. Place the scooped dough balls in an airtight container and refrigerate for at least 2 hours, or for up to 3 days. For a quicker chill, you can place them in the freezer for at least 1 hour, or store them frozen for up to 2 months, thawing overnight in the fridge before baking.

Step 4: Bake and Shape the Cookies.
Preheat your oven to 365°F (185°C). Arrange about 5 chilled cookie dough balls on a parchment paper-lined baking sheet, leaving ample space for spreading. Bake for 9-10 minutes, or until the edges are lightly golden and set, while the centers still appear slightly puffy and a tad underdone. This slight underbaking ensures a wonderfully chewy interior. Immediately upon removing them from the oven, use a round cookie cutter slightly larger than your cookies to gently “scoot” the warm cookies into perfect circles. This technique also helps them appear thicker and more uniform. While still warm, use the back of a tablespoon or a similar rounded utensil to create a shallow indent in the center of each cookie, which will later hold the fruit filling. Allow the cookies to cool completely on a wire rack before assembly.

Step 5: Prepare the Silky Swiss Meringue.
The Swiss meringue adds a sophisticated touch. In a heatproof bowl set over a pot of simmering water (ensuring the bowl does not touch the water), whisk together granulated sugar, cream of tartar, a pinch of salt, and room temperature egg whites. Continuously whisk until the mixture reaches 175°F (79°C) on an instant-read thermometer, ensuring all sugar crystals have dissolved. Immediately transfer the hot mixture to a stand mixer fitted with the whisk attachment. Beat on high speed for 4-5 minutes until very stiff, glossy peaks form and the bowl feels cool to the touch. The meringue will be thick and voluminous. Stir in vanilla extract (or vanilla bean paste for visible flecks) at the end.
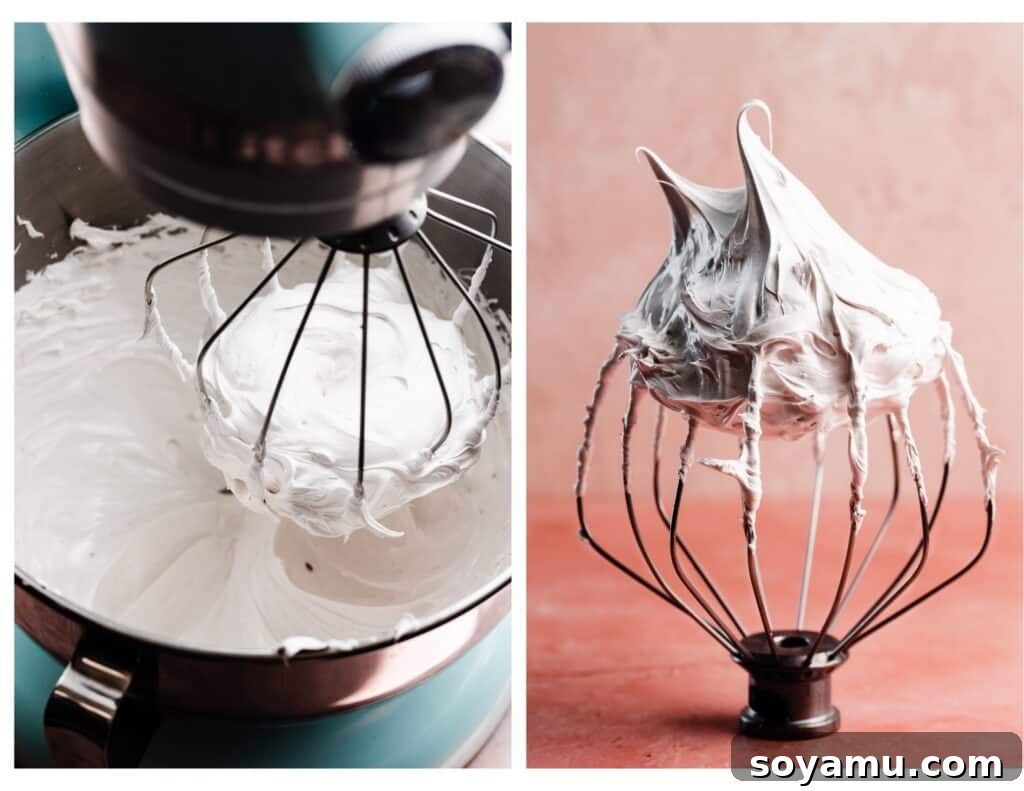
Step 6: Assemble and Finish Your Cookies.
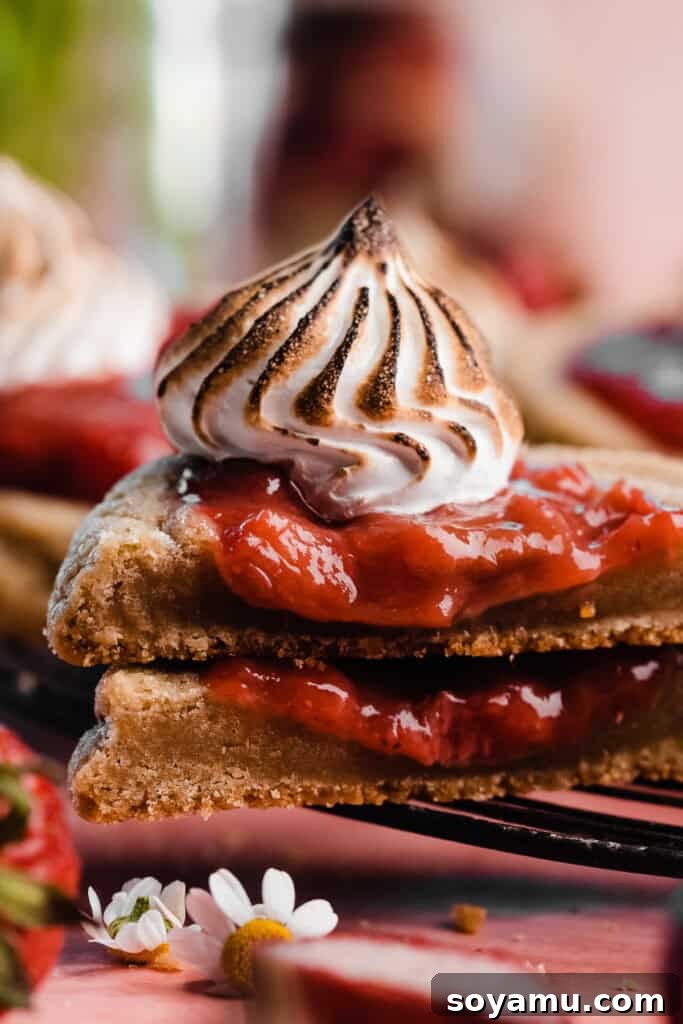
Now for the grand finale! Carefully spoon one to two generous spoonfuls of the cooled strawberry rhubarb filling into the indent of each cookie. Then, transfer the freshly made Swiss meringue into a piping bag fitted with your desired tip (a Wilton 6B works wonderfully for elegant swirls). Pipe a beautiful dollop or swirl of meringue on top of the fruit filling. For that signature “pie” finish, gently toast the meringue with a kitchen torch until it achieves a beautiful golden-brown hue. Serve these irresistible Strawberry Rhubarb Pie Cookies immediately to enjoy them at their absolute best!

Serving & Storing Your Strawberry Rhubarb Cookies:
These cookies are truly at their peak when served fresh, immediately after the meringue has been toasted. The contrast of the warm, toasty meringue with the cool fruit filling and chewy cookie is simply divine. While Swiss meringue, when prepared correctly, is more stable than other types, it still benefits from prompt serving.
Should you have any leftover Strawberry Rhubarb Cookies, store them in a single layer within an airtight container in the refrigerator. They will maintain their quality and freshness for approximately 2-4 days. Refrigeration is essential due to the fresh fruit filling and the delicate nature of the meringue.

Expert Success Tips for Flawless Swiss Meringue:
Mastering Swiss meringue can elevate your baking, and with a few key tips, you’ll achieve perfect results every time. For more in-depth information and step-by-step photos, consider visiting my comprehensive guide on How to Make Swiss Meringue.
-
Understanding Swiss Meringue
Swiss meringue stands out among its counterparts for its stability and ease of preparation. Unlike finicky Italian meringue, which requires a hot sugar syrup, or less stable French meringue, made by simply beating raw egg whites and sugar, Swiss meringue involves gently cooking egg whites and sugar over a double boiler until they reach a precise temperature of 175°F (79°C). This heating process partially cooks and stabilizes the egg whites, making them incredibly resilient. Once heated, they are whipped to stiff, glossy peaks, creating a smooth, durable, and delicious topping that holds its shape beautifully.
-
Troubleshooting Weepy or Deflated Meringue
If your meringue fails to reach stiff peaks or becomes “weepy” (releasing liquid), several factors might be at play. High humidity can sometimes hinder meringue stability, so consider baking on a less humid day if possible. Crucially, any trace of egg yolk in your egg whites will prevent them from whipping properly, as fat interferes with protein coagulation. Always separate eggs carefully. Furthermore, ensure your mixing bowl and utensils are impeccably clean and completely grease-free. Residue from previous bakes, even undetectable traces of butter or oil, can significantly impact meringue formation. Metal bowls are generally preferred over silicone or ceramic, as fat tends to cling more stubbornly to these surfaces. A quick wipe with white vinegar before starting can help ensure a pristine surface.
-
Avoiding Overmixing
While beating to stiff peaks is essential, it is possible to overmix Swiss meringue. Overmixing can cause the meringue to become grainy, lose its smooth texture, and eventually deflate. You’re aiming for firm, shiny peaks that hold their shape when the whisk is lifted, with just a slight curl at the very tip. If the meringue seems to lose volume or looks chunky rather than smooth, you may have gone too far. Following the recommended mixing times and paying attention to visual cues as outlined in the recipe card will help you achieve the perfect consistency.
Frequently Asked Questions (FAQs):
Absolutely! You can easily double or halve any individual component of this recipe, or the entire recipe itself, to suit your needs. If you choose to halve the meringue topping, it will reach stiff peaks more quickly than the time indicated for the full recipe. Conversely, if you double the meringue, expect it to take slightly longer, around 4-5 minutes, to achieve the desired stiff peaks.
Yes, the strawberry rhubarb filling freezes exceptionally well! For optimal freshness, freeze the cooled sauce in airtight containers, such as mason jars, for 2-3 months. When you’re ready to use it, simply thaw it overnight in the refrigerator. This makes meal prep and future cookie baking a breeze!
Indeed, several components of this recipe can be made ahead to streamline your baking process. The cookie dough can be scooped and chilled for up to 3 days in the refrigerator, or even frozen for up to 2 months. The strawberry rhubarb filling can be prepared, cooled, and stored in an airtight container in the refrigerator for 2-3 days before you plan to assemble the cookies. However, the Swiss meringue is best made just before you intend to use it, as it is most stable and voluminous when fresh.

Recommended Special Tools for Baking Success:
While many kitchen essentials will suffice, certain tools can significantly enhance your baking experience and results, particularly when making Swiss meringue.
-
Stand Mixer (or Hand Mixer)
A stand mixer is highly recommended for preparing the Swiss meringue. Its powerful motor and continuous mixing capability make achieving stiff peaks much easier and more consistent. While an electric hand mixer can work in a pinch, you’ll find the process smoother and less tiring with a stand mixer.
-
Instant Read Thermometer
Accuracy is key when making Swiss meringue. An instant-read thermometer is absolutely essential to monitor the egg white and sugar mixture, ensuring it reaches the precise temperature of 175°F (79°C) for optimal stability and food safety.
-
Kitchen Torch
To achieve that beautiful, golden-brown toasted meringue topping, a kitchen torch is indispensable. Many small, handheld torches can be unreliable. For a durable and high-quality torch that will last for years, I highly recommend the Bernzomatic Trigger Start Torch paired with appropriate Propane Tanks. It offers consistent flame control and superior performance.
-
Piping Tip and Bag
For elegantly swirling the meringue, a piping tip and bag are very useful. I achieved the beautiful swirls pictured using a Wilton 6B piping tip. You’ll need either a reusable piping bag or a disposable piping bag. Avoid trying to use a Ziploc bag with a snipped tip for meringue, as it often fails, leading to a messy situation. If you prefer not to purchase specialized equipment, you can always dollop the meringue onto the cookies with a spoon for a rustic charm!
More Rhubarb Desserts to Love:
If you’ve fallen in love with rhubarb, explore these other fantastic recipes that celebrate its unique flavor:
- Rhubarb Upside Down Cake
- Strawberry Rhubarb Hand Pies
- Strawberry Rhubarb Galette
- Strawberry Rhubarb Crumble
- Strawberry Rhubarb Sauce
- Old-Fashioned Rhubarb Torte
More Pie-Inspired Cookie Recipes:
Can’t get enough of pie flavors in cookie form? Check out these other delightful pie-cookie fusions:
- Peach Cobbler Cookies
- Apple Pie Cookies
- Blueberry Pie Cookies
- Pumpkin Pie Cookies
Did you make this delicious recipe? We’d love to hear from you!
Please consider leaving a comment and a star rating below. Your feedback helps our small business immensely and assists other bakers in discovering new favorites!

Strawberry Rhubarb Pie Cookies Recipe
Strawberry Rhubarb Cookies are summer’s favorite pie in cookie form! Thick & chewy sugar cookies are filled with a quick stovetop strawberry rhubarb filling and topped with swirls of toasted Swiss meringue. They’re also delicious topped with whipped cream! It’s all the flavor of a strawberry rhubarb pie without the fuss.
Ingredients
For the Strawberry Rhubarb Filling
- 8 ounces strawberries, rinsed & quartered (227 grams). If using frozen, do not thaw.
- 6 ounces rhubarb, rinsed & chopped into 1-inch pieces (170 grams). If using frozen, do not thaw.
- 1 tbsp salted butter (14 grams)
- 1/2 tsp vanilla extract
- 1/2 tsp lemon zest
- 1 tsp lemon juice
- 1/2 cup granulated sugar (105 grams) (add 1 extra tbsp to taste if too tart)
- 1 and 1/2 tsp corn starch
- 1 and 1/2 tsp water
For the Cookies:
- 14 and 1/2 tbsp salted butter, melted (206 grams)
- 1 cup granulated sugar (210 grams)
- 1/2 cup dark brown sugar, packed (110 grams) (light is fine too)
- 1 and 1/2 tsp vanilla extract
- 2 large eggs, at room temperature
- 3 cups all-purpose flour, spooned & leveled or weighed (390 grams)
- 1 tsp baking soda
- 1 tsp baking powder
- 1/4 tsp salt
- 1/4 tsp ground cinnamon
For the Meringue
- 2 large egg whites, at room temperature (separate eggs while cold, then let whites come to room temperature)
- 1/2 cup granulated sugar (105 grams)
- 1/4 tsp cream of tartar
- 1/8 tsp salt
- 2 tsp vanilla extract (vanilla bean paste for visible flecks recommended!)
Instructions
-
Make the Strawberry Rhubarb Filling: Add all filling ingredients (except the corn starch and a reserved handful of strawberry pieces) to a large saucepan. Dissolve the corn starch in water and add this slurry. Stir everything together well, cover, and let cook for about 7-10 minutes over medium heat. You don’t need to stir constantly during this initial cooking phase. The fruit is done when it’s mostly broken down but still retains some small chunks. If the sauce is too thick, stir together 1 tsp of corn starch and 1 tsp of water, and add this to the simmering sauce (it must be at an intense simmer to activate!). Cook, stirring, for 1 minute more or until thickened enough to coat the back of a wooden spoon. Stir in the reserved handful of strawberry chunks at the very end to add fresh texture. Let cool to room temperature, then store in an airtight container in the fridge until completely chilled before using. This can be done up to 3 days ahead.
-
Make the Cookie Dough: In a large bowl, melt the butter. Whisk in the granulated and brown sugars until smooth. Then, whisk in the eggs and vanilla extract until well combined and glossy. Gradually stir in the dry ingredients: all-purpose flour, baking soda, baking powder, salt, and ground cinnamon, until fully incorporated and a smooth dough forms. A hand mixer can be helpful here to ensure all ingredients are evenly blended without overmixing. The dough can be balled and frozen for up to 2 months; thaw in the fridge overnight before baking.
-
Scoop & Chill the Dough: Using a large cookie scoop (approximately 55-65 grams per ball), portion the dough into even balls. Place these scooped dough balls in an airtight container and chill in the fridge for at least 2 hours (or up to 3 days). Alternatively, for a faster chill, place them in the freezer for at least 1 hour. Chilling is crucial for preventing excessive spreading and developing flavor.
-
Bake the Cookies: Preheat your oven to 365°F (185°C). Line a few cookie sheets with parchment paper. Place about 5 chilled cookie dough balls on each prepared baking sheet, ensuring ample space between them for spreading. Keep any remaining dough in the fridge until you’re ready to bake those batches. Bake for 9-10 minutes. The cookies are ready when their edges appear set and feel firm when lightly tapped, while their centers still look slightly puffy and a touch underdone (they will continue to set as they cool). Immediately after removing from the oven, use a round cookie cutter around the outside of each cookie and gently swirl it to “scoot” them into perfectly round shapes. This also helps create a thicker appearance. Then, using the back of a tablespoon, gently press an indent into the center of each warm cookie. Let cool for a few more minutes on the cookie sheet, then, once sturdy, transfer to a wire rack to cool completely.
-
Make the Meringue: Once the cookies are mostly cool and your filling is chilled, it’s time to make the meringue. This must be used immediately after preparation. Read these instructions thoroughly before beginning to ensure success. Add an inch of water to a small/medium saucepan, ensuring your mixing bowl (preferably a metal stand mixer bowl) does not touch the simmering water when placed on top. In your chosen heatproof bowl, whisk together room temperature egg whites, granulated sugar, cream of tartar, and salt. Set the bowl over the pot of simmering water. Cook, whisking constantly, until an instant thermometer registers a steady 175°F (79°C) throughout the mixture (avoid touching the bottom of the bowl with the thermometer). This usually takes about 8 minutes. Immediately remove the bowl from the heat and stir in the vanilla extract. If using a hand mixer, beat on high speed for 2-3 minutes until a thick mixture with stiff peaks forms. If using a stand mixer, beat with the whisk attachment on high speed (settings 8-9) for 2-4 minutes. The meringue is ready when it has significantly increased in volume, looks smooth and glossy, and forms stiff peaks when the whisk is lifted (the tip might curl slightly). Immediately fill a piping bag fitted with your desired tip (a Wilton 6B is recommended) with the meringue.
-
Assemble Cookies: Immediately begin assembling your cookies. Spoon 1-2 tablespoons of the cooled fruit filling into the indent of each cookie. Using your piping bag, pipe a beautiful dollop or swirl of Swiss meringue onto the tops of the filled cookies. Toast the meringue on all the cookies with a kitchen torch until golden brown. Serve immediately!
-
Serve & Store: Enjoy these cookies as soon as they are assembled and toasted. Store any leftover cookies in an airtight container in the fridge for 3-4 days. Refrigeration is necessary due to the perishable fresh fruit filling and the meringue topping.
Notes
Runny Sauce Fix: If your chilled strawberry rhubarb sauce is too runny when you’re ready to use it, don’t worry! You can easily fix it. Return the sauce to a pan or pot on the stovetop. Bring it to a heavy simmer, then add an additional 1-2 teaspoons of corn starch dissolved in an equal amount of cold water. Cook, stirring continuously, for 1-2 minutes more, or until the sauce thickens to your desired consistency. Allow it to cool completely again before filling the cookies.
Nutrition Information (Approximate)
Serving: 1 cookie, Calories: 298kcal, Carbohydrates: 45g, Protein: 4g, Fat: 12g, Saturated Fat: 7g, Polyunsaturated Fat: 1g, Monounsaturated Fat: 3g, Trans Fat: 0.4g, Cholesterol: 49mg, Sodium: 220mg, Potassium: 98mg, Fiber: 1g, Sugar: 29g, Vitamin A: 376IU, Vitamin C: 8mg, Calcium: 40mg, Iron: 1mg
Nutrition information is automatically calculated and should only be used as an approximation.