
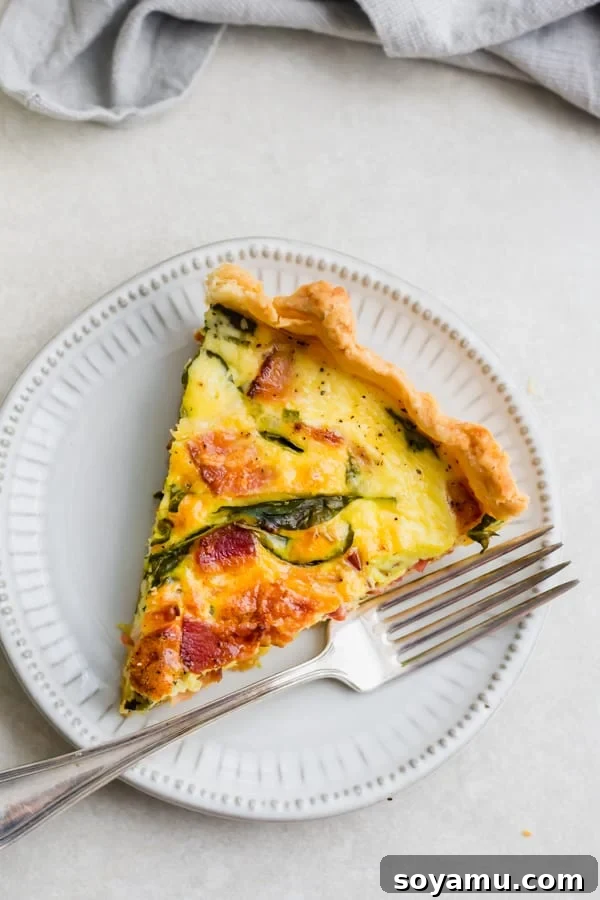
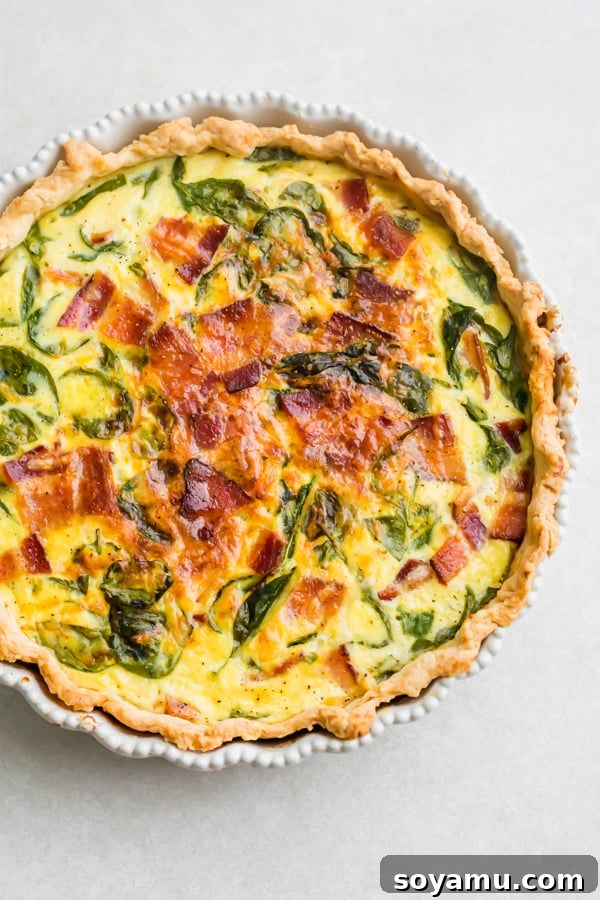
Welcome to the ultimate guide for creating a truly sensational Breakfast Quiche! Imagine a golden, buttery, and irresistibly flaky pie crust cradling a rich, creamy filling bursting with flavor. Our perfect quiche features a harmonious blend of smoky bacon, vibrant fresh spinach, aromatic garlic, and sharp cheddar cheese, all suspended in a delicate custard of milk, cream, and eggs. This isn’t just a meal; it’s an experience, designed to impress at any holiday brunch or transform a simple breakfast into an extraordinary feast. Prepare to watch this magnificent dish disappear from plates faster than you can say “more, please!”
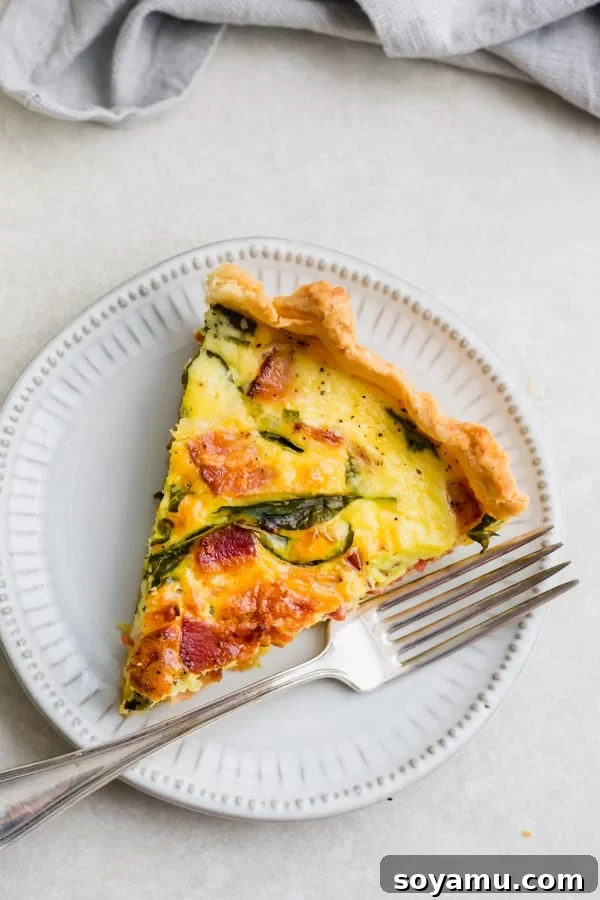
Oh, how we wish the delicious aroma of this quiche baking could waft through your screen! The incredible blend of savory bacon, fresh herbs, and melting cheese creates an olfactory masterpiece that promises pure delight. From its mouth-watering flavors to its elegant presentation, this quiche is a showstopper. Let’s make a pact right now: this will be your go-to recipe for all future brunches, weekend breakfasts, or even a delightful breakfast-for-dinner. Deal? Absolutely!
Why This Easy Quiche Recipe Will Become Your Favorite
- Incredibly Flavorful and Creamy Filling: The heart of any great quiche lies in its filling, and ours is nothing short of spectacular. We combine crispy, smoky bacon, tender fresh spinach, pungent garlic, and a generous amount of sharp cheddar cheese to infuse our creamy egg and milk base with layers of irresistible flavor. Each bite offers a perfect balance of savory, fresh, and rich notes that will tantalize your taste buds.
- The Ultimate All-Butter Flaky Pie Crust: While the filling is key, a truly exceptional quiche demands an equally outstanding crust. Our recipe calls for an all-butter pie crust, meticulously prepared to achieve that coveted golden-brown, melt-in-your-mouth flakiness. This buttery foundation not only provides structural integrity but also adds a delicate richness that perfectly complements the savory filling, ensuring no “soggy bottom” in sight.
- Perfect for Holiday Brunches and Special Occasions: Looking for a dish that’s impressive enough for a holiday gathering but surprisingly easy to assemble? This breakfast quiche fits the bill perfectly. It’s elegant enough for Thanksgiving, Christmas, or Easter brunch, yet straightforward enough for a casual weekend meal. Its make-ahead potential makes it a stress-free option for entertaining, allowing you to enjoy your guests rather than fussing in the kitchen.
- Customizable and Versatile: While we adore the classic bacon, spinach, and cheddar combination, this quiche is a blank canvas for your culinary creativity. Easily swap out ingredients to suit dietary preferences or use up leftover vegetables from your fridge. This versatility ensures that you can enjoy a fresh take on this beloved dish every time you make it.
- A Wholesome and Satisfying Meal: Packed with protein from eggs and bacon, essential vitamins from spinach, and dairy goodness from milk and cheese, this quiche offers a complete and satisfying meal. It’s a wonderful way to start your day feeling nourished and energized, or to serve as a comforting dinner.
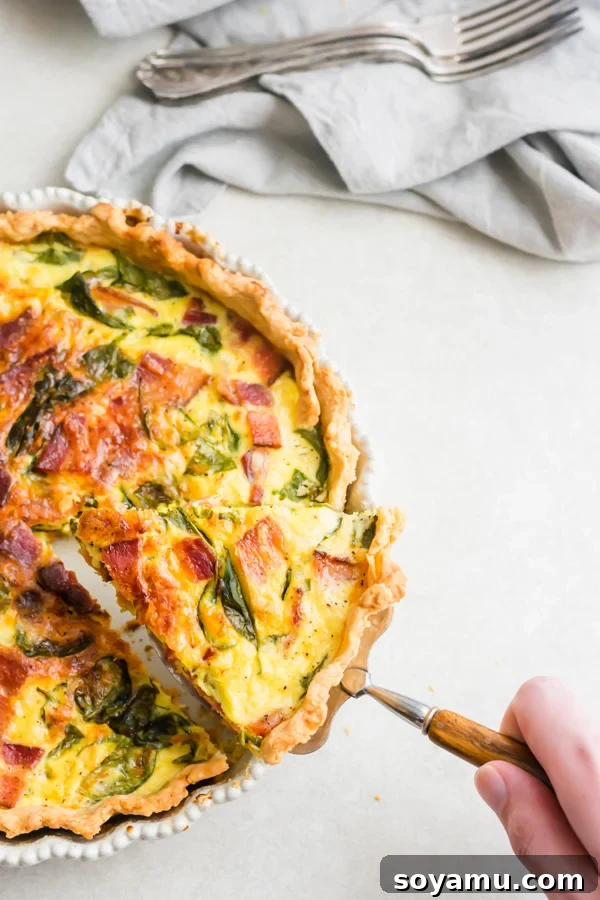
Ingredient Overview: Crafting Your Delicious Quiche
Understanding the role of each ingredient is key to achieving quiche perfection. Here’s a detailed look at what you’ll need, along with important tips for the best results.
- Butter (for the Crust): We strongly recommend using **cold, salted butter** for the pie crust. The salt in the butter enhances the overall flavor profile of the crust, complementing the savory filling. If you only have unsalted butter, simply add an extra pinch of salt to your flour mixture. Ensure the butter is cubed and kept very cold, as this is crucial for developing those desirable flaky layers.
- All-Purpose Flour (for the Crust): For the most consistent results, measure your all-purpose flour by **spooning it into the measuring cup and then leveling it off with a flat utensil**. Alternatively, using a kitchen scale for precise measurement (195 grams for 1 ½ cups) is the most accurate method. Scooping directly from the bag can compact the flour, leading to too much flour and a potentially tough or dry crust.
- Eggs (for the Filling): Always use **large eggs** for the quiche filling. They provide the perfect amount of structure and richness for the creamy custard base. Ensure they are at room temperature for better incorporation into the dairy mixture, preventing lumps.
- Heavy Cream and Milk (for the Filling): Our recipe uses a balanced blend of **half heavy cream and half milk (we prefer 2% milk)**. This combination strikes a perfect balance, making the quiche rich and luxurious without being overly heavy. You can certainly adjust this ratio: for an even richer quiche, use all heavy cream; for a slightly lighter version, use all whole milk or a combination of half and half.
- Bacon (for the Filling): Choose your favorite type of bacon, whether thick-cut or regular. The key is that it **must be cooked until crispy and then roughly chopped** before being added to the filling. Pre-cooking renders out the fat and ensures a delightful texture within the quiche.
- Fresh Spinach (for the Filling): Fresh spinach adds a wonderful touch of earthy flavor, vibrant color, and a healthy dose of vitamins. Be sure to **tear it into smaller pieces** so it distributes evenly throughout the filling and cooks down nicely.
- Cheese (for the Filling): The choice of cheese is where you can truly personalize your quiche. We love a mix of **sharp cheddar cheese and Monterey Jack** for their distinct flavors and excellent melting properties. However, feel free to experiment with other cheeses like Gouda, Swiss, Gruyère, or Mozzarella. A blend often provides the most complex flavor. Grate your own cheese for superior melting and flavor compared to pre-shredded varieties.
- Salt and Pepper (for the Filling): These essential seasonings bring all the flavors together. Adjust to your personal preference, but don’t be shy – the filling can handle a good seasoning.
- Minced Garlic (for the Filling): A touch of minced garlic adds an irresistible depth of savory aroma and flavor to the quiche, elevating it beyond a basic egg dish.
Ingredient Substitutions: Tailoring Your Quiche to Perfection
Don’t have all the ingredients on hand, or looking to customize your quiche? Here are some excellent substitution ideas to ensure your quiche is always a success:
- Gluten-Free Quiche: If you’re avoiding gluten, a ready-made gluten-free pie crust is your easiest option. Alternatively, many excellent gluten-free pie crust recipes are available online that use a blend of gluten-free flours. Ensure the crust you choose is designed to be par-baked for best results.
- Dairy-Free Quiche: To make this recipe dairy-free, simply swap the milk and heavy cream for your favorite plain, unsweetened dairy-free milk alternative (such as almond milk or oat milk). Be sure to use a dairy-free cheese alternative that melts well, and a dairy-free butter for the crust.
- Vegetarian Quiche: Easily transform this into a delicious vegetarian meal by omitting the bacon. To maintain its hearty and satisfying nature, consider adding sautéed mushrooms, caramelized onions, roasted bell peppers, or crumbled plant-based sausage. A mix of different vegetables can also provide excellent texture and flavor.
- Alternate Fillings: The beauty of quiche lies in its adaptability. This recipe is a fantastic way to use up leftover vegetables in your fridge. Think about incorporating sautéed asparagus, broccoli florets, diced zucchini, sun-dried tomatoes, or even roasted sweet potatoes. Remember to stick to a total of about 2 cups of add-ins (not including cheese) to ensure the filling sets properly.
- Crust Options: While a homemade all-butter pie crust delivers unparalleled flavor and texture, using a frozen, store-bought pie crust can significantly cut down on prep time, making this an even easier breakfast quiche recipe. Just be sure to par-bake it according to package directions before adding the filling.
How to Make this Perfect Breakfast Quiche: A Step-by-Step Guide
Creating a delicious quiche involves a few key steps, from preparing the perfect crust to baking the creamy filling. Follow these detailed instructions for an outstanding result every time.
Step 1: Prepare the Flaky Pie Crust.
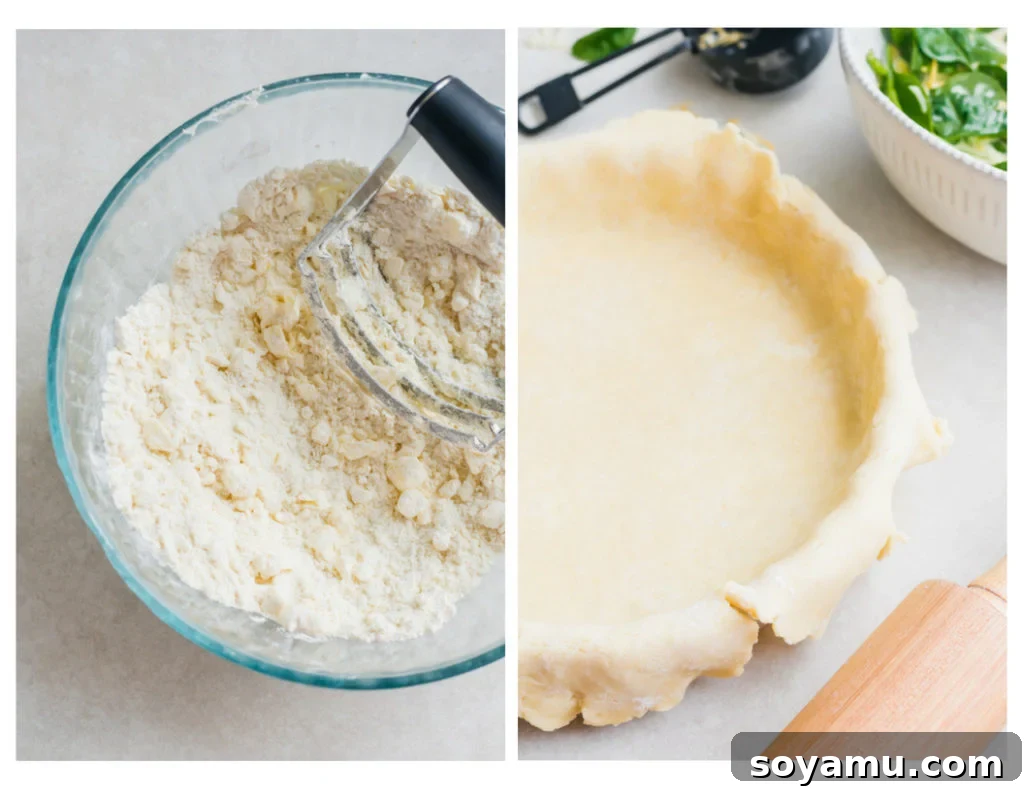
In a large mixing bowl, whisk together 1 ½ cups of all-purpose flour (spooned and leveled, about 195 grams) with ½ teaspoon plus ¼ teaspoon of salt, and a pinch of sugar (optional, for flavor). Add ½ cup plus 1 tablespoon (9 tablespoons or 127 grams) of very cold, cubed salted butter. Using a pastry cutter or your fingertips, cut the cold butter into the flour mixture until it resembles coarse meal with some pea-sized pieces of butter remaining. Gradually add 4-5 tablespoons of ice-cold water, one tablespoon at a time, mixing gently until the dough just starts to come together. Avoid overmixing. Gently form the dough into a cohesive ball, then flatten it slightly into a thick disc. Wrap it tightly in plastic wrap and chill in the refrigerator for at least 4 hours, but ideally overnight. This chilling period is crucial for hydrating the flour and relaxing the gluten, resulting in a tender and flaky crust. The dough can also be frozen for 1-2 months after this initial chill; thaw overnight in the fridge before use.
Step 2: Roll Out and Shape the Crust.
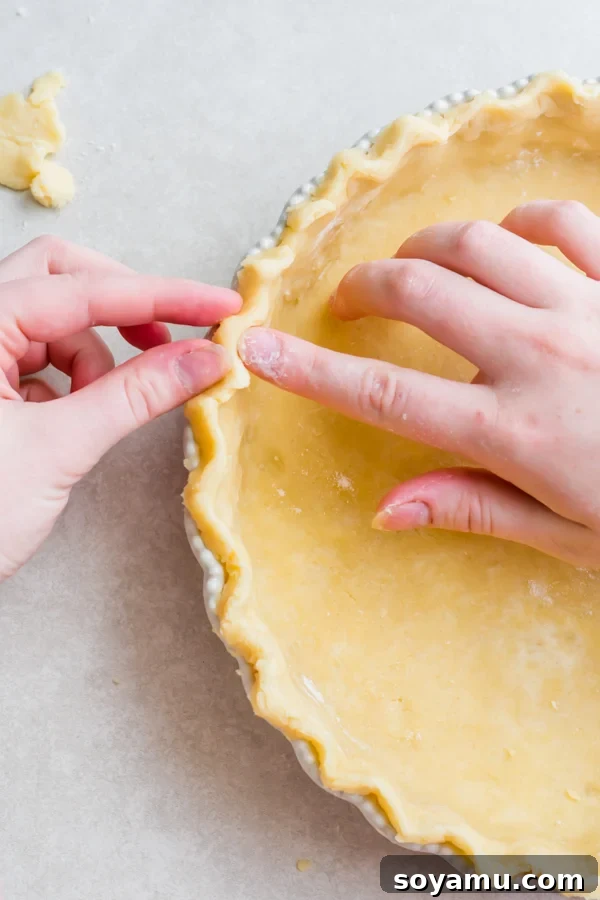
Once your dough is thoroughly chilled, lightly flour a clean work surface and your rolling pin. Gently roll out the dough, starting from the center and working outwards, turning the dough frequently to prevent sticking and cracking. Aim for a circle approximately 12-13 inches in diameter and about 1/8 inch thick. To check if it’s large enough, invert your 9-inch pie plate over the dough – you should have about 2 inches of overhang all around. Carefully drape the rolled dough over your rolling pin and transfer it into a deep 9-inch metal or ceramic pie plate. Gently press the dough into the contours of the pan, ensuring there are no air gaps. Trim any excess dough, leaving about a half-inch overhang around the edge. Now, for the decorative crimping: use your thumb and pointer finger on one hand to create a pincer shape, and with the pointer finger of your opposite hand, gently press the dough into the space created by your pincer. Repeat this technique around the entire edge of the crust to create a beautiful, fluted edge. Place the pie crust in the freezer for 10 minutes to firm up. Preheat your oven to 425°F (220°C).
Step 3: Par-Bake the Crust (Blind Baking).
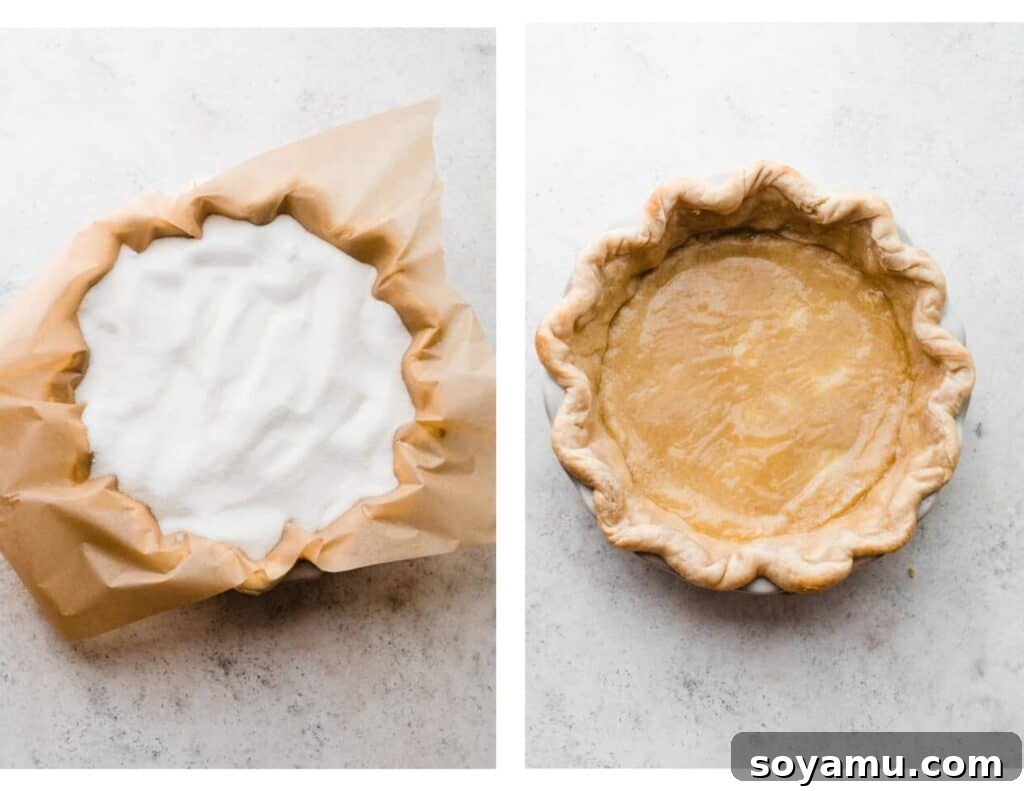
This critical step prevents a soggy bottom! Use a fork to prick holes all over the bottom of your frozen pie dough. This allows steam to escape, preventing the crust from puffing up excessively. Take two pieces of parchment paper, crumple them up, and then smooth them out. Fit these into your pie dish, on top of the dough, ensuring they cover the edges sufficiently. Pour in your pie weights – dry beans, rice, or even granulated sugar work perfectly. Make sure the weights come all the way up to the crimped edges of the crust; this is essential to prevent the edges from slipping down during baking. Place the pie plate on a baking sheet and bake for 15-19 minutes, or until the crimped edges are lightly golden brown. While it bakes, whisk one large egg in a small bowl to prepare an egg wash. Remove the pan from the oven, carefully lift out the parchment paper with the pie weights, and set them aside in a bowl. Brush the edges of the partially baked crust with your egg wash; this adds a beautiful golden sheen. Return the pie plate to the oven and bake for another 2-4 minutes, or until the bottom and sides of the crust appear set and matte (no longer shiny). This initial bake gives the crust a head start, guaranteeing a crisp foundation for your wet filling. Remove from the oven and set aside. **Reduce the oven temperature to 400°F (200°C).**
Step 4: Prepare the Flavorful Filling.
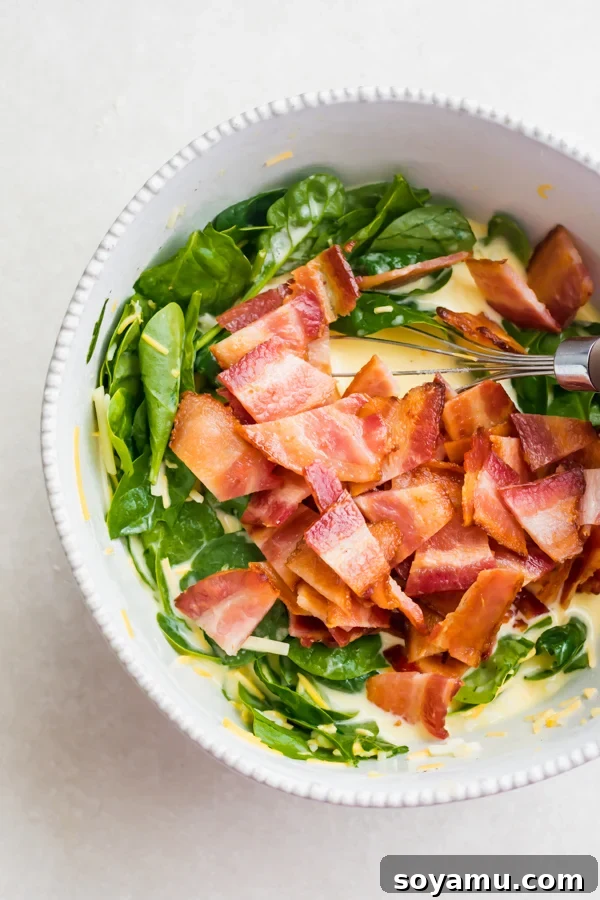
In a large mixing bowl, whisk together the 5 large eggs, ½ cup milk, ½ cup heavy cream, ¼ teaspoon minced garlic, ½ teaspoon salt, and a generous pinch of black pepper until well combined and slightly frothy. This forms the creamy custard base. Gently fold in the 1 ½ cups of fresh spinach (torn into smaller pieces), 1 ⅓ cups of shredded cheese (our preferred cheddar and Monterey Jack mix, or your choice), and the 6-8 slices of cooked, roughly chopped bacon. Ensure all the ingredients are evenly distributed throughout the egg mixture.
Step 5: Assemble the Quiche.
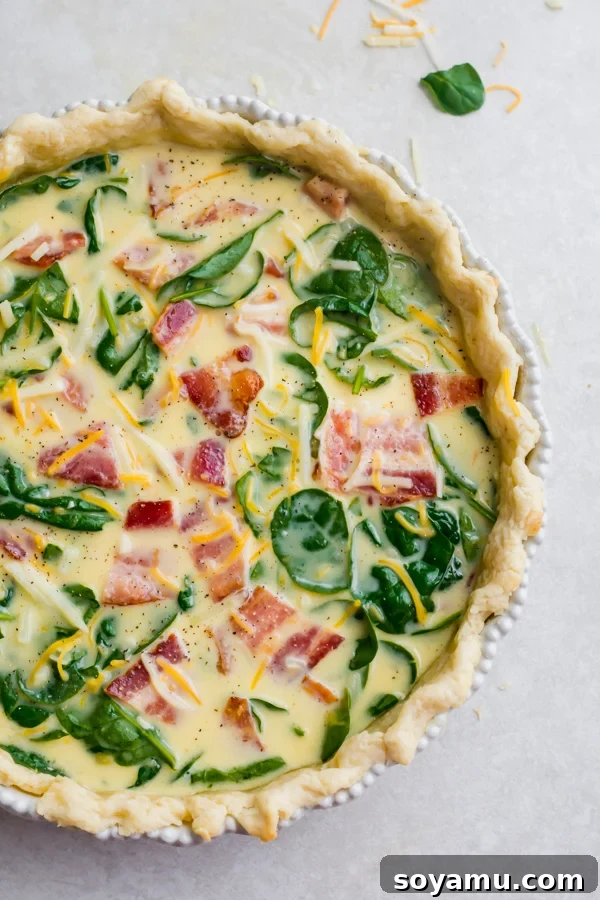
Carefully pour the prepared filling into your par-baked pie crust. Gently spread the filling with a spatula to ensure all the solid ingredients like bacon, spinach, and cheese are evenly dispersed and not clumped together. This ensures a beautiful slice every time.
Step 6: Bake the Breakfast Quiche.
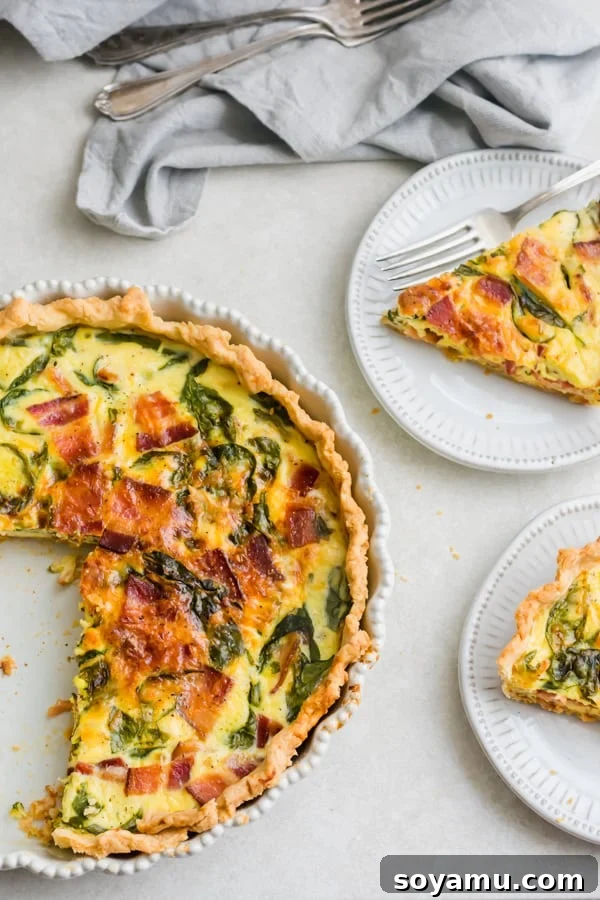
Ensure your oven temperature is now set to 400°F (200°C). Place the pie plate on a baking sheet (this makes it easier to transfer and catches any potential drips). Bake for 40-44 minutes. Keep an eye on the crust starting at about 25-30 minutes into baking. If the edges of the crust are browning too quickly, you can loosely cover them with strips of aluminum foil to act as a pie shield; however, avoid covering the center of the quiche, as it needs to brown and set properly. The quiche is done when the filling appears just set – it should not jiggle significantly when you gently move the pie dish – and the top is lightly golden brown. Don’t be afraid to let the crust get deeply golden brown for maximum flavor and crispness. Remove from the oven and allow it to cool on a wire rack for at least 15-30 minutes before slicing and serving. This resting period allows the filling to fully set, making for cleaner slices.
Serving and Storing Your Delicious Quiche
This perfect breakfast quiche is incredibly versatile, whether you’re serving it as the star of a meal or as part of a larger spread.
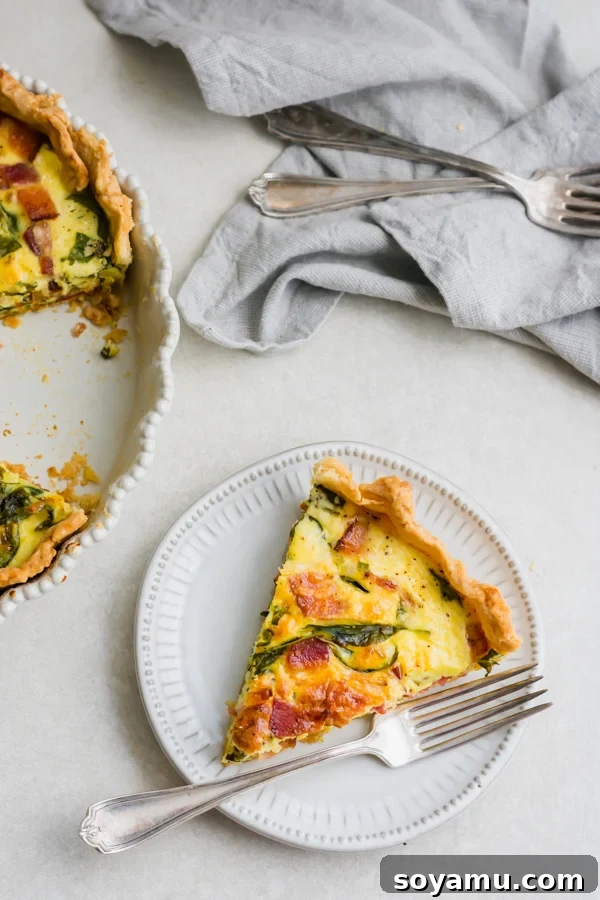
- Serving Suggestions: If this quiche is the main attraction, anticipate serving 6-8 generous slices. It pairs beautifully with a fresh green salad, a simple fruit salad, or roasted potatoes for a complete meal. For a potluck or holiday brunch where other dishes will be served, you can opt for smaller slices, extending the servings to 8-10 people. Serve it warm, after it’s cooled for about 15-30 minutes, or at room temperature.
- Storing Leftovers: Leftover quiche can be stored, covered tightly with plastic wrap or aluminum foil, in the refrigerator for up to 4 days. For best flavor and texture, allow it to cool completely before refrigerating.
- Reheating Instructions: To reheat, individual slices can be warmed in the microwave for 1-2 minutes until heated through. For a crispier crust, reheat slices in a toaster oven or conventional oven at 300°F (150°C) for 10-15 minutes, or until warm. A whole quiche can be reheated, covered with foil, in an oven at 325°F (160°C) for 20-25 minutes, then uncovered for the last 5 minutes to crisp the crust.
- Make-Ahead Options: This quiche is an excellent make-ahead dish. You can bake it entirely the day before, let it cool to room temperature, then cover and refrigerate overnight. Reheat as desired before serving. You can also prepare and par-bake the crust a day in advance, or prepare the filling mixture (without adding bacon or spinach until just before baking) and store it separately in the fridge.
Expert Success Tips for Your Best Quiche Ever
Achieving quiche perfection is easy with these tried-and-true baking tips:
- Invest in an Oven Thermometer: Many home ovens can be inaccurate, often running hotter or colder than the set temperature. An affordable **oven thermometer** placed inside your oven will provide an accurate reading, which is crucial for consistent baking results, especially with delicate dishes like quiche. We recommend leaving one in your oven at all times to monitor its calibration.
- Use a Kitchen Scale for Accuracy: When it comes to baking, precise measurements are paramount. Flour, in particular, can vary wildly in weight depending on how it’s measured. A **food scale** is the most reliable tool to ensure you’re using the correct amount of flour (195 grams for 1 ½ cups), preventing a dry or dense crust.
- Choose the Right Pie Dish: For the absolute best pie and quiche results, a **metal or ceramic pie plate** is superior. These materials conduct heat more efficiently and evenly than glass, promoting a golden-brown, crisp crust. Glass pie dishes, while common, can often lead to uneven baking and a tendency for the crust to slide down during the baking process. Trust us, once you switch to metal or ceramic, you’ll notice a significant improvement in your crust!
- Keep Ingredients Cold for the Crust: As highlighted in the crust instructions, keeping your butter and water ice cold is non-negotiable for a flaky crust. Cold butter creates steam pockets during baking, which separate the layers of dough, resulting in that desirable flakiness.
- Don’t Skip the Par-Baking: Par-baking (also known as blind baking) the crust is a vital step. It gives the crust a head start, preventing it from becoming soggy when filled with the wet quiche mixture. Follow the steps carefully to ensure a crisp base.
- Allow for Adequate Cooling Time: While tempting to dive in immediately, letting the quiche cool for 15-30 minutes after baking allows the custard to fully set. This makes for cleaner, more beautiful slices and a better overall texture.
Frequently Asked Questions About Breakfast Quiche
Absolutely! This quiche is wonderful served warm, after cooling for about 15-30 minutes. You can also let it cool completely to room temperature. For convenience, bake the quiche entirely the day before, let it cool, then cover and refrigerate overnight. It can be served cold the next day, or gently reheated.
Halving this recipe can be tricky if you don’t have a smaller pie pan (like a 6-inch or mini tart pan). For a half-sized portion, we recommend making mini quiche cups in a well-greased muffin tin. To double the recipe, you could use a 9×13 inch baking pan with a double batch of pie dough. While this hasn’t been explicitly tested with this exact recipe, it’s a common approach for larger quantities.
Yes, par-baking is essential for this recipe! It gives the crust a crucial head start in the baking process, ensuring it becomes properly crisp and golden brown before the wet quiche filling is added. Skipping this step often results in a soggy, undercooked crust.
The terms are often used interchangeably, but there’s a subtle distinction. Par-baking (or partial baking) means you bake the pie dough only partially, giving the base a firm start before adding your filling and continuing to bake. Blind baking, on the other hand, means fully baking an empty pie shell until it’s completely cooked, usually for pies with cold-set fillings like a no-bake chocolate cream or French silk pie.
Yes, you can use a tart pan, but be aware that you might have more filling than will fit, as tart pans are typically shallower than deep-dish pie plates. If you find yourself with extra filling, simply pour it into a well-greased muffin tin and bake alongside the tart for delicious mini crustless quiches.
Yes, quiche freezes beautifully! Bake the quiche completely and let it cool to room temperature. Wrap the entire quiche or individual slices tightly in plastic wrap, then an additional layer of aluminum foil. Freeze for up to 2-3 months. To reheat from frozen, bake in a 325°F (160°C) oven, covered with foil, until heated through (about 30-45 minutes for a whole quiche, less for slices).
Recipe Variations: Unleash Your Inner Chef!
One of the best things about quiche is how easily it can be adapted to suit your taste preferences or whatever ingredients you have on hand. Don’t be afraid to get creative!
- Diverse Fillings: While our classic combination is superb, feel free to experiment. You can use up to 2 cups of additional solid fillings (not including cheese) without overwhelming the egg base. Consider sautéed onions, leeks, bell peppers (roasted or diced), mushrooms, sun-dried tomatoes, asparagus, or even roasted butternut squash. Ensure any vegetables are lightly cooked before adding them to prevent excess moisture.
- Cheese Explorations: Mix and match your favorite cheeses! Beyond cheddar and Monterey Jack, consider using goat cheese for a tangy kick, crumbled feta, smoky Gouda, nutty Swiss, or sophisticated Gruyère. A combination of two or three cheeses often yields the most complex and satisfying flavor profile.
- Meat Alternatives: Swap out the bacon for other cooked meats. Cooked breakfast sausage, finely diced ham, smoked salmon, or even shredded chicken can all make excellent additions. For a robust vegetarian option, use sautéed cremini mushrooms or a flavorful plant-based sausage alternative.
- Herb Infusion: Fresh herbs can elevate your quiche. Stir in some chopped fresh chives, parsley, dill, or thyme along with the spinach for an extra layer of freshness and aroma.
- Classic Quiche Lorraine: For a traditional take, simplify your fillings to just cooked bacon and a touch of Gruyère cheese. You can even add a touch of nutmeg to the custard for an authentic French touch.
- Crustless Quiche Recipe: Looking for a lighter, gluten-free option? Simply omit the crust! Pour the prepared filling into a well-greased 9-inch pie dish and bake at 350°F (175°C) for 30-36 minutes, or until the center is set and the top is lightly golden.
Essential Tools for Quiche Making Success
While quiche doesn’t require an arsenal of specialized equipment, a few key tools can make the process much smoother and more enjoyable:
- Rolling Pin: An absolute essential for any pie or quiche maker. A simple wooden rolling pin with handles provides excellent control and is durable. It helps you achieve an evenly rolled crust, which is fundamental for a consistent bake.
- Pastry Cutter: This tool is a game-changer for incorporating cold butter into flour when making pie dough. It quickly and efficiently cuts the butter without melting it with the warmth of your hands, leading to a flakier crust. If you’re serious about homemade pie crust, this is a must-have.
- Deep 9-inch Metal or Ceramic Pie Dish: As discussed in our expert tips, a metal or ceramic pie dish is highly recommended over glass. A deep-dish version ensures ample room for the rich filling without overflowing.
- Parchment Paper: Indispensable for blind baking, parchment paper acts as a barrier between your pie weights and the dough, allowing for easy removal and preventing sticking.
- Pie Weights: Whether you use ceramic pie weights, dry beans, or rice, these are crucial for weighing down the pie crust during par-baking to prevent it from bubbling up or shrinking.
- Pastry Brush: A small pastry brush is perfect for applying an egg wash to the crust edges during par-baking. This egg wash contributes to that beautiful, deep golden-brown color and a lovely sheen on your finished quiche.
- Kitchen Scale: For precision in baking, especially with flour, a digital kitchen scale ensures accurate measurements, leading to more consistent and delicious results.
- Oven Thermometer: Ensuring your oven is heating to the correct temperature is vital for all baking, and a simple oven thermometer will verify your oven’s accuracy.
More Delicious Breakfast Recipes to Explore:
- Fluffy Zucchini Bread Pancakes
- Restaurant-Level Stuffed French Toast
- Mini Quiche Cups with Spinach, Bacon, and Cheddar
- Raspberry Lemon Crumb Cake
- Strawberries & Cream Scones
- Pumpkin Streusel Muffins
- The Best Homemade Maple Granola
Did you make this recipe? We’d love to hear from you!
Let us know how you enjoyed this Perfect Breakfast Quiche by leaving a comment and star rating below. Your feedback helps our community and small business immensely!

Perfect Breakfast Quiche
Rate Recipe
Print Recipe
Ingredients
For the Crust:
- 1 1/2 cups all-purpose flour, spooned & leveled, 195 grams
- 1/2 tsp + 1/4 tsp salt
- 1/2 cup + 1 tbsp cold salted butter, cubed, 9 tbsp, or 127 grams
- 4-5 tbsp ice cold water
For the Quiche Filling:
- 5 large eggs
- 1/2 cup milk, I used 2%
- 1/2 cup heavy cream, You can also use milk here or half and half!
- 1/4 tsp minced garlic
- 1/2 tsp salt
- pinch of black pepper
- 1 1/2 cups fresh spinach, torn, tear it up so it’s in smaller pieces
- 1 1/3 cups shredded cheese, I used a mix of sharp cheddar and Monterrey Jack, but have fun with it!
- 6-8 slices cooked bacon, roughly chopped into bite-size pieces
Instructions
-
Make the Pie Dough: In a large bowl, whisk together flour, salt, and sugar. Cut in cold cubed butter with a pastry cutter until crumbly. Stir in ice-cold water until a dough forms. Gently form into a disc, wrap tightly, and chill in the fridge for at least 4 hours, ideally overnight. (Note that you will need a deeper than standard 9-inch pie plate for this recipe, preferably metal or ceramic – not glass.)
-
Roll the Pie Dough: On a floured surface, gently roll out the chilled dough to a 12-13 inch circle. Carefully transfer to a 9-inch metal pie dish. Trim excess dough, leaving about a half-inch overhang. Crimp the edges as desired (see photos in post above). Place in the freezer for 10 minutes. Preheat oven to 425°F (220°C).
-
Par-Bake the Crust: Prick holes in the bottom of the frozen dough with a fork. Line with crumpled parchment paper and fill with pie weights (dry beans, rice, or sugar), ensuring weights reach the crimped edges. Bake for 15-19 minutes until edges are lightly browned. Remove weights and parchment. Beat one egg for an egg wash. Brush edges with egg wash (optional, for shine). Return to oven and bake for 2-4 more minutes until bottom and sides are set and matte. Set aside. Reduce oven temperature to 400°F (200°C).
-
Make the Filling: In a large mixing bowl, whisk together the eggs, milk, heavy cream, garlic, salt, and pepper. Stir in the fresh spinach, shredded cheese, and cooked, chopped bacon until evenly combined.
-
Bake: Ensure your oven is at 400°F (200°C). Pour the filling into your prepared par-baked crust, spreading it evenly. You can cover the crust edges with foil if they brown too quickly. Bake for 40-44 minutes, or until the filling is set (does not jiggle) and the top is lightly browned.
-
Serve + Store: Allow to cool for 15-30 minutes before slicing. Store leftovers, covered, in the fridge for up to 4 days. Can be served warm or at room temperature.
Nutrition
Calories: 418kcal,
Carbohydrates: 20g,
Protein: 14g,
Fat: 31g,
Saturated Fat: 17g,
Polyunsaturated Fat: 3g,
Monounsaturated Fat: 10g,
Trans Fat: 0.5g,
Cholesterol: 191mg,
Sodium: 667mg,
Potassium: 187mg,
Fiber: 1g,
Sugar: 2g,
Vitamin A: 1427IU,
Vitamin C: 2mg,
Calcium: 154mg,
Iron: 2mg
Nutrition information is automatically calculated, so should only be used as an approximation.
Note: This content may contain informational links. This in no way affects the cost of items but serves as a resource for readers.