
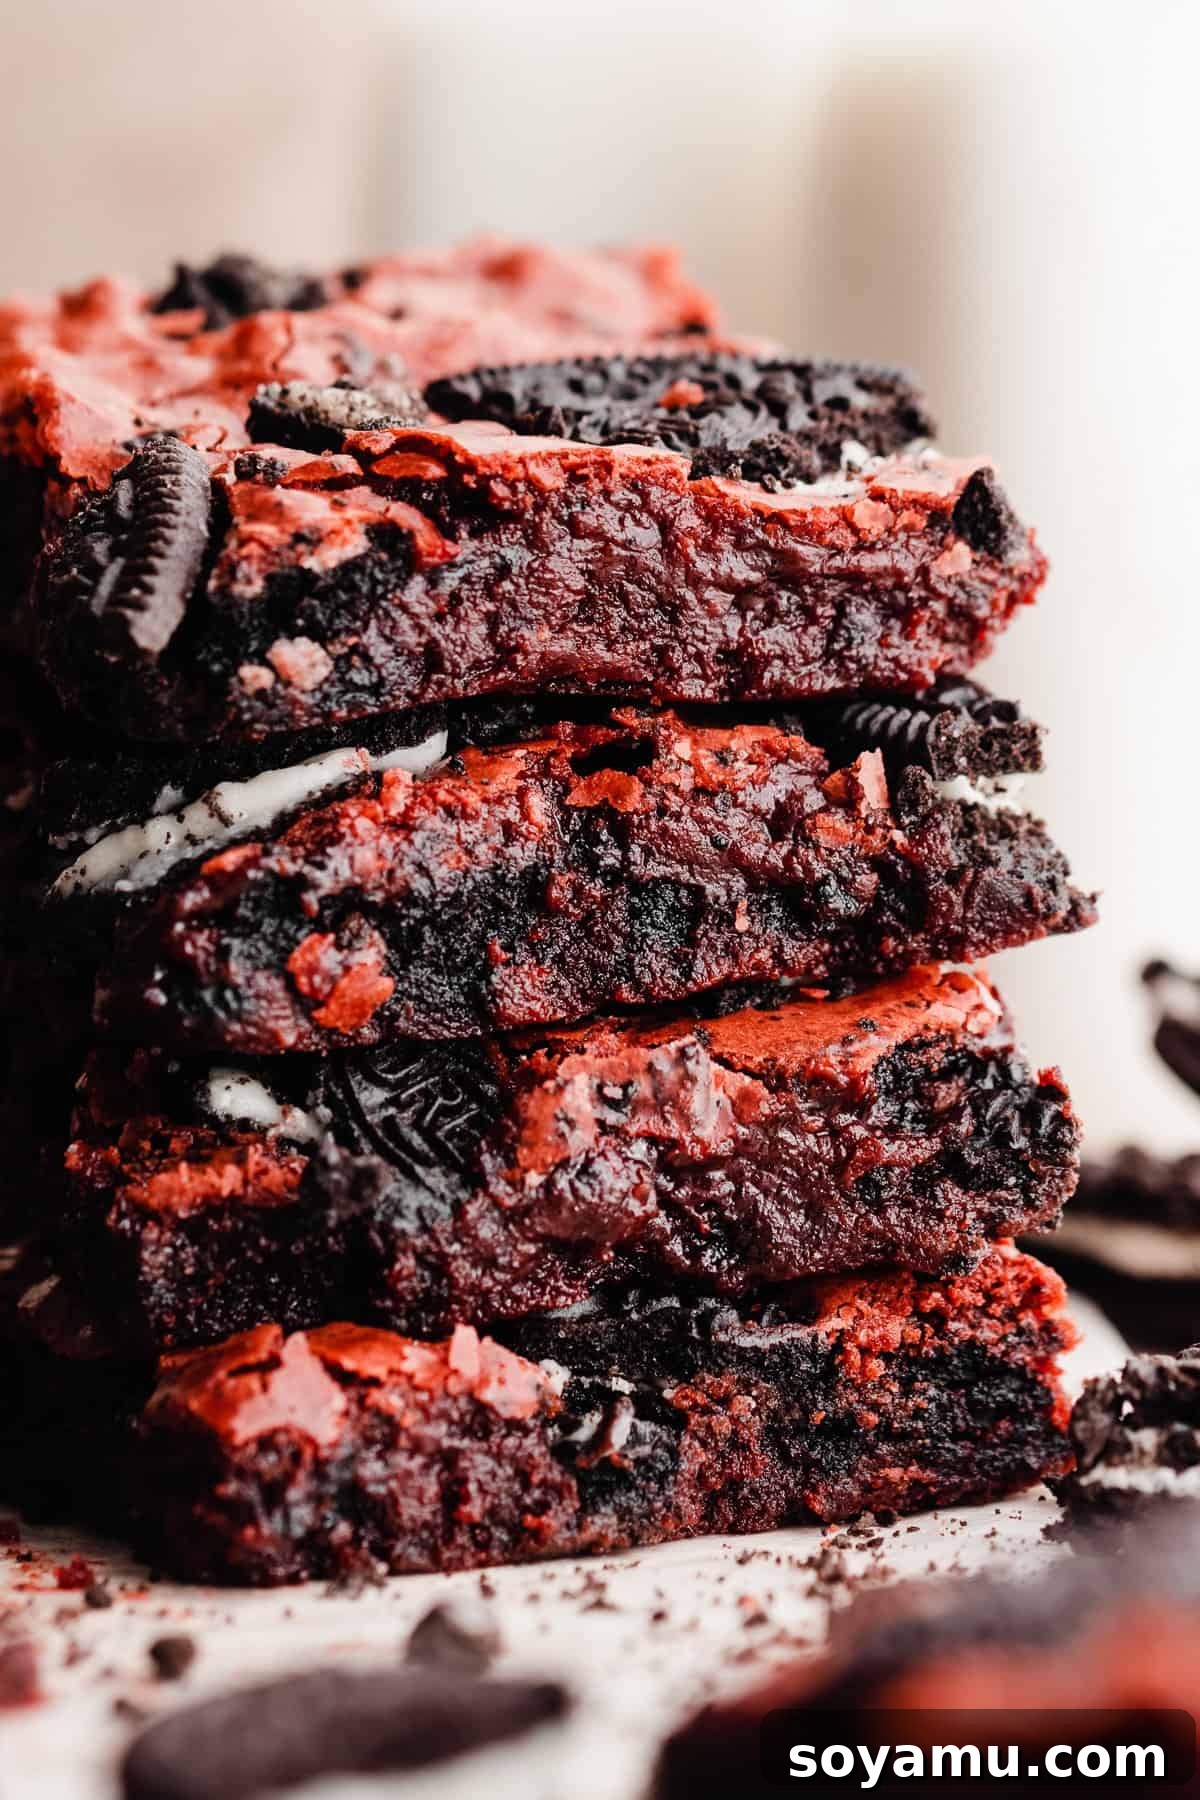
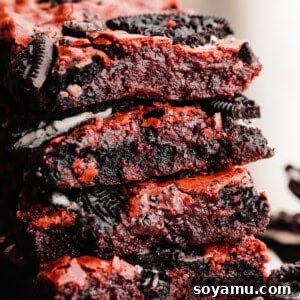
Prepare to fall in love with these **Ultimate Fudgy Red Velvet Oreo Brownies**. Imagine brownies so intensely fudgy, with that signature crackly top, and delightful chunks of Oreo cookies folded into every vibrant red bite. This recipe brings the rich, distinctive flavor of red velvet cake into a gloriously chewy brownie form. Best of all, they come together in a single bowl in just 10 minutes and bake in under 30 minutes, making them the perfect effortless treat for any craving or special occasion. Get ready to swoon!
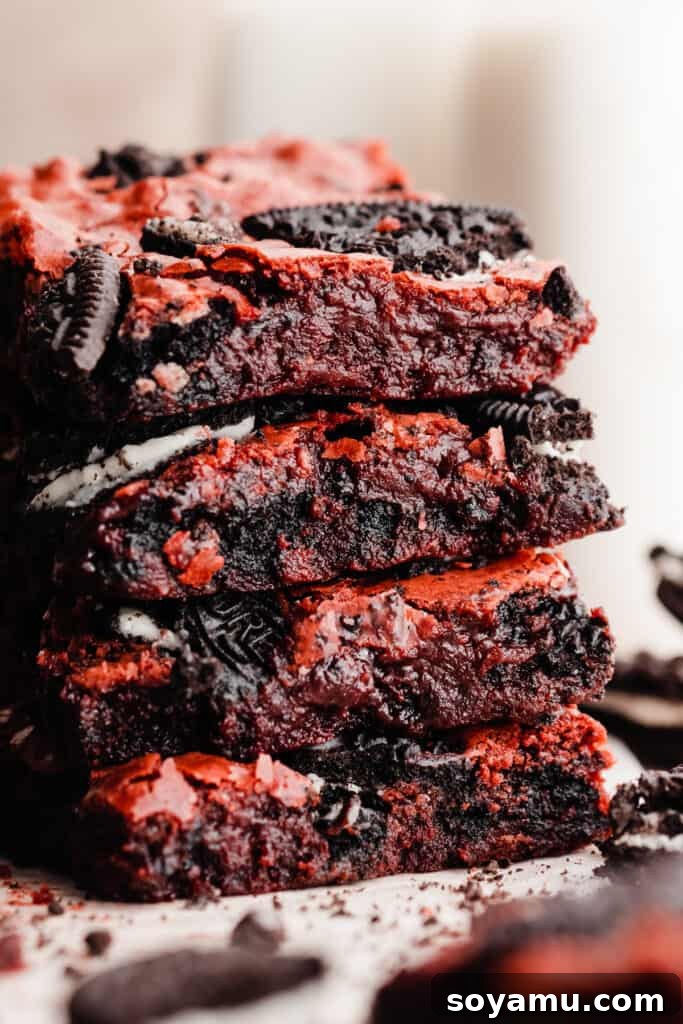
Why These Red Velvet Brownies Will Become Your New Favorite
These aren’t just any brownies; they’re a symphony of flavor, texture, and convenience. Here’s why you’ll adore this recipe:
- Authentic Red Velvet Flavor: Unlike a standard chocolate brownie, these chewy bars capture the true essence of red velvet. They offer a subtle, nuanced chocolate flavor complemented by the distinct tang that defines a classic red velvet cake. The deep crimson hue is as appealing to the eyes as the taste is to the palate.
- Irresistible Oreo Crunch: Is there a more perfect pairing than Oreos and red velvet? The delightful crunch and creamy filling of crushed Oreo pieces provide a fantastic textural contrast to the incredibly fudgy brownies. Each bite delivers a satisfying blend of soft, chewy, and crispy.
- Incredibly Easy Dessert: Life is busy, but baking doesn’t have to be complicated. This recipe is designed for maximum flavor with minimum effort. You’ll whip up the batter in just one bowl, taking less than 10 minutes, and have them baked to perfection in under 30 minutes. It’s truly the best Red Velvet Brownie recipe for ease and indulgence, making it ideal for impromptu treats or quick holiday baking, especially for Valentine’s Day!
- Stunning Visual Appeal: The deep red color makes these brownies a showstopper. Whether you’re bringing them to a potluck, serving them at a party, or simply enjoying them at home, their vibrant hue is sure to impress and entice.
- Crowd-Pleasing Perfection: Red velvet and brownies are universally loved. Combine them with Oreos, and you have a dessert that everyone, from kids to adults, will rave about. They disappear quickly, so consider making a double batch!
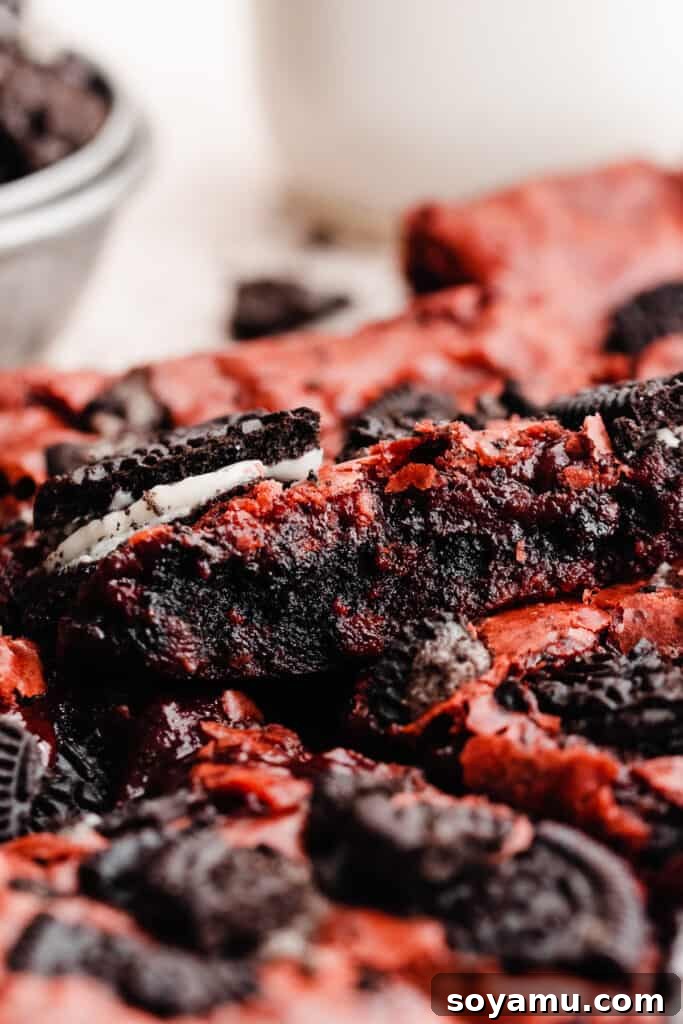
Ingredient Deep Dive: What Makes These Brownies Shine
Every ingredient plays a crucial role in achieving the perfect fudgy texture, vibrant color, and iconic red velvet flavor. Below is a detailed look at what you’ll need, along with tips for best results. As always, the full recipe with precise measurements and detailed directions can be found in the recipe card at the bottom of this post.
- Butter: I highly recommend using **salted butter** for its incredible flavor depth, which elevates the overall taste of these brownies. If you only have unsalted butter, simply add an extra pinch of salt to the dry ingredients. While some brownie recipes use vegetable oil for fudginess, butter contributes a richness and aroma that is simply unmatched, resulting in a superior flavor profile.
- Eggs: You’ll need **large eggs**. Eggs are essential for binding the ingredients, providing structure, moisture, and contributing to that desirable chewy texture. Whisking them properly with the sugar is also key for achieving the famous crackly top.
- Sugar: We use a thoughtful combination of **granulated sugar and brown sugar**. Granulated sugar provides sweetness and contributes significantly to the shiny, crackly crust. Brown sugar, with its molasses content, adds moisture, depth of flavor, and enhances the fudgy texture, making these brownies incredibly tender.
- Flour: **All-purpose flour** provides the necessary structure without making the brownies too cakey. For the most accurate measurement and best results, always spoon your flour into the measuring cup and level it off with a straight edge, or better yet, use a digital kitchen scale. Scooping directly from the bag can compact the flour, leading to an excess amount that results in dry, dense brownies.
- Cocoa Powder: To achieve the classic red velvet taste, we use **slightly less cocoa powder** than in a typical chocolate brownie recipe. This ensures a subtle chocolate note that complements the tang and color, rather than overpowering it. It’s this balance that gives red velvet its unique identity.
- Vanilla Extract: Use a good quality **pure vanilla extract** for the best aromatic flavor. Vanilla enhances the overall sweetness and complexity of the brownies, beautifully complementing both the chocolate and red velvet notes.
- Red Food Coloring: For that iconic, rich red hue, a **red gel food coloring** is indispensable. Gels are highly concentrated, allowing you to achieve a vibrant color without adding significant extra liquid that could alter the brownie batter’s consistency. Wilton gel food colors are a great choice for this. If you prefer to avoid food dyes, you can certainly omit it; your brownies will still be delicious, just a beautiful rich brown with a hint of red.
- White Vinegar: This might seem like an unusual ingredient for brownies, but **white vinegar** is a secret weapon in red velvet recipes. It reacts with the cocoa powder, enhancing its red pigments and contributing that subtle, signature tang that distinguishes red velvet cake. Don’t worry, it won’t make your brownies taste like vinegar – it simply rounds out the flavor profile beautifully!
- Oreos: We’ll be folding in **crushed Oreo pieces** to create a delightful texture contrast and an extra layer of flavor. Their crispiness and creamy filling are a match made in heaven with the fudgy red velvet base.
Customizing Your Red Velvet Brownies: Substitutions & Variations
One of the best things about baking is the freedom to customize! These red velvet brownies are wonderfully versatile. Here are some ideas for substitutions and variations:
- Dairy-Free Option: To make these brownies dairy-free, simply swap out the regular butter for your favorite **dairy-free butter sticks**. Make sure it’s a stick butter alternative designed for baking, as these typically perform best in recipes like this.
- Oreo Alternatives: If Oreos aren’t your preference, feel free to omit them entirely. Alternatively, get creative with other delicious mix-ins:
- **Chocolate Chips:** White chocolate chips, semi-sweet chocolate chips, dark chocolate chunks, or even a mix of milk and white chocolate would be fantastic.
- **Nuts:** Toasted pecans, walnuts, or almonds can add a lovely crunch and nutty flavor.
- **Other Cookies:** Crushed shortbread, chocolate chip cookies, or even pretzels for a sweet and salty twist.
- **Cream Cheese Swirl:** For a decadent twist, swirl some homemade cream cheese frosting onto the top of the batter before baking to create “red velvet cheesecake brownies.” Just ensure the brownies are fully cooled before adding any frosting.
- “Velvet” Color Play: While red is traditional, you can certainly experiment with other colors! Imagine vibrant blue velvet brownies for a baby shower, green velvet for St. Patrick’s Day, or even rainbow velvet layers for a fun birthday treat. Simply use your desired gel food coloring instead of red.
- Gluten-Free Adaptation: While not tested with this specific recipe, many successful gluten-free brownie recipes exist. You could try substituting the all-purpose flour with a high-quality **gluten-free all-purpose flour blend** that contains xanthan gum. Be aware that texture might vary slightly.
- Frosting & Toppings: These brownies are fantastic on their own, but they’re also wonderful with a simple dusting of powdered sugar, a dollop of whipped cream, or a generous spread of **cream cheese frosting** – the ultimate pairing for red velvet!
How to Make the Best Red Velvet Brownies: A Step-by-Step Guide
Making these fudgy red velvet brownies is surprisingly simple, broken down into just a few key steps. Follow along to achieve perfect results every time.
Step 1: Prepare Your Pan and Preheat Oven
Begin by preheating your oven to 350°F (175°C). Lightly spray a 9×9 inch (23×23 cm) ceramic or metal baking pan with nonstick spray. Line the pan with parchment paper, leaving an overhang on two sides. This parchment paper sling will make it incredibly easy to lift the baked brownies out of the pan for clean slicing. The nonstick spray helps the parchment paper adhere to the pan, preventing it from shifting.
Step 2: Craft the Irresistible Brownie Batter
- Melt the Butter: In a large, microwave-safe bowl, melt the butter until completely liquid. Be careful not to overheat it.
- Combine Sugars: Add both the granulated sugar and brown sugar to the melted butter. Whisk vigorously for about 30 seconds until the sugars are well incorporated and the mixture looks smooth.
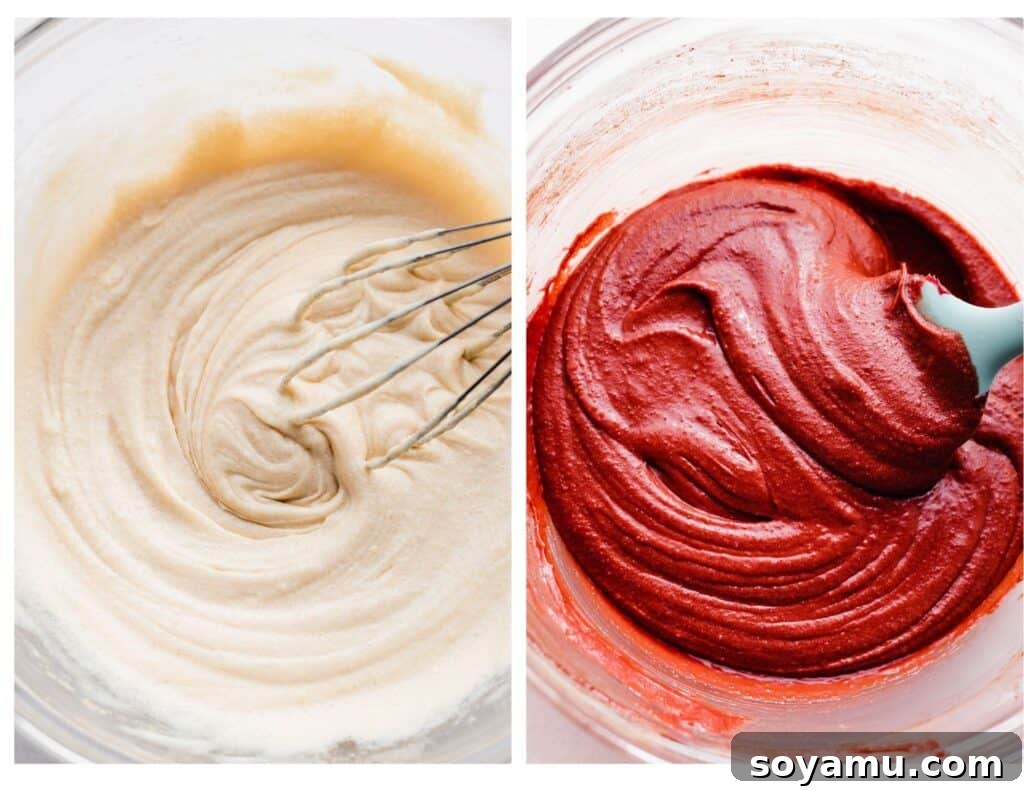
- Whisk Eggs & Vanilla for That Crackly Top: Now, add the large eggs and vanilla extract to the sugar-butter mixture. This is a crucial step for achieving those coveted crackly tops! Whisk the mixture continuously for at least **2 full minutes**. You’ll notice the mixture lighten in color and become fluffy and slightly thickened. This vigorous whisking dissolves the sugar and incorporates air, which is essential for that shiny, crinkly brownie crust.
- Add the Vinegar and Color: Stir in the white vinegar. Then, add your red gel food coloring a little at a time, mixing until you reach your desired vibrant red hue. Remember, gel colors are potent, so start with a small amount and add more if needed.
- Incorporate Dry Ingredients: In a separate small bowl, whisk together the all-purpose flour, cocoa powder, and salt. Gently fold the dry ingredients into the wet mixture using a spatula, mixing just until no streaks of flour remain. Be careful not to overmix, as this can lead to tough brownies.
- Fold in the Oreos: Finally, gently fold in about two-thirds of your crushed Oreo pieces into the batter. This ensures they are evenly distributed throughout the brownies.
Step 3: Bake to Perfection
Spread the luscious red velvet brownie batter evenly into your prepared 9×9 inch pan. Sprinkle the remaining one-third of crushed Oreo pieces over the top of the batter. This will create a beautiful presentation and provide extra crunch on top. Bake in your preheated oven as directed in the recipe card below, typically for 24 to 29 minutes. Baking times can vary depending on your oven, so pay close attention to the doneness cues.
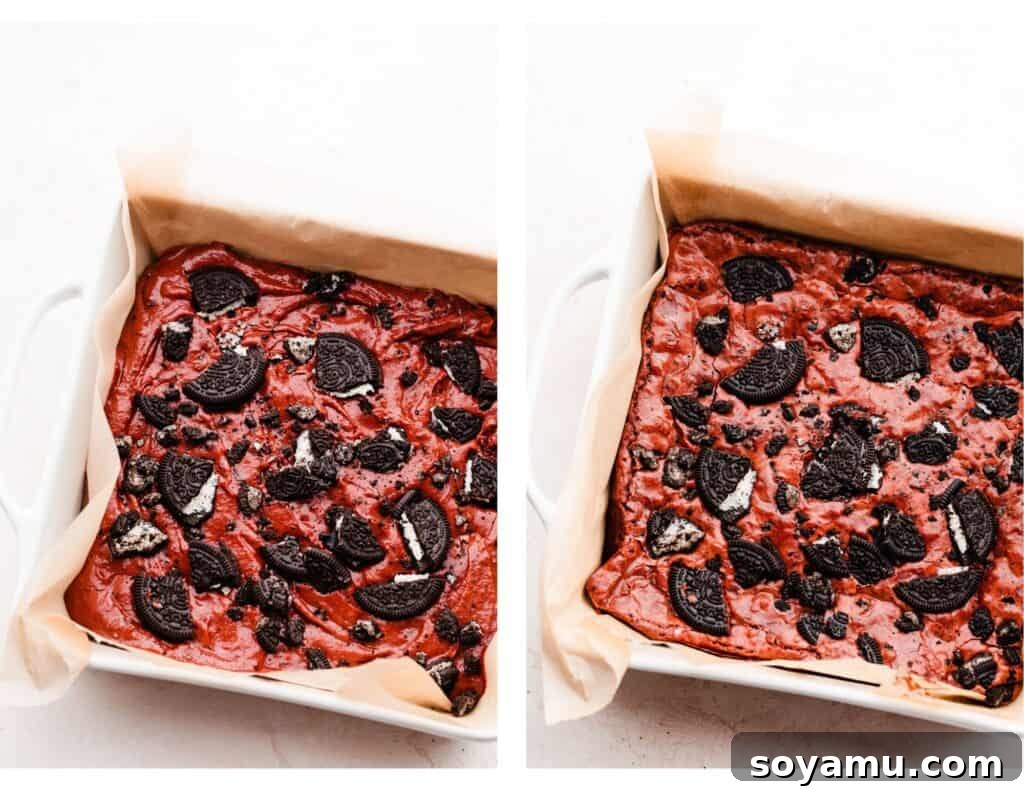
And that’s it! This incredibly easy dessert comes together in almost no time, with just two basic steps: making the batter and baking these beautiful red velvet brownies. Get ready to enjoy a truly delightful homemade treat.
Expert Tips for Perfect Red Velvet Brownies Every Time
Achieving bakery-quality brownies at home is easier than you think with these expert tips:
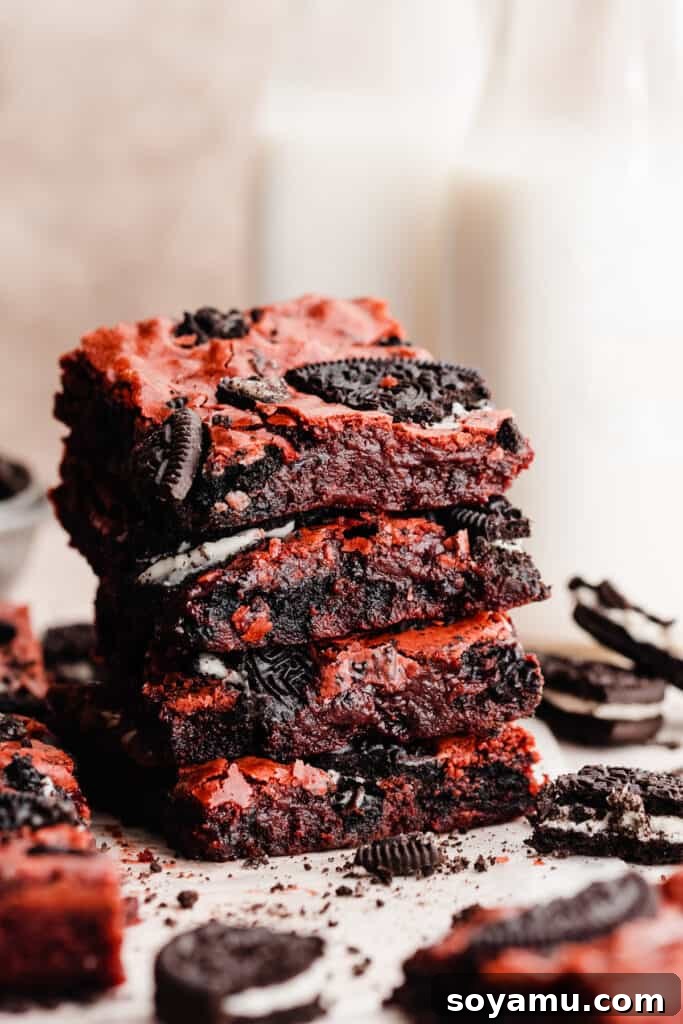
- Master the Crinkly Brownie Tops: The secret to that beautiful, shiny, crinkly top is not to skip the vigorous whisking of the eggs and sugar. Whisking for a full 2 minutes (as described in the recipe) helps to dissolve the sugar crystals and incorporate air, creating a stable, meringue-like layer on the surface that bakes into that signature crackle. It’s a small step that makes a huge visual and textural difference!
- Avoid Overbaking at All Costs: This is arguably the most critical tip for fudgy brownies. Overbaked brownies turn dry and cakey. Follow the doneness cues carefully: a toothpick inserted into the *edges* should come out clean or with moist crumbs, while a toothpick inserted into the *center* should still pull out some thick, moist batter, possibly looking slightly underdone. The center shouldn’t be super jiggly, but it should definitely not be completely clean. Remember, brownies continue to cook slightly as they cool.
- Invest in an Oven Thermometer: Your oven’s internal thermometer can be notoriously inaccurate, sometimes off by as much as 25-50°F. An oven thermometer is an inexpensive tool that will tell you the actual temperature inside your oven. Accurate oven temperature is absolutely crucial for consistent baking results, especially for sensitive recipes like brownies. Keep one in your oven at all times!
- Use a Kitchen Scale for Accuracy: Baking is a science, and precise measurements yield the best results. A food scale is the most reliable way to measure flour and other dry ingredients by weight, which eliminates inconsistencies caused by varying measuring cup sizes or how flour is scooped. It’s a game-changer for consistent baking.
- Room Temperature Ingredients: Ensure your eggs and butter are at room temperature. This allows them to emulsify better with other ingredients, creating a smoother, more uniform batter and preventing lumps.
- Parchment Paper is Your Friend: Lining your pan with parchment paper, creating a “sling,” is essential. It prevents sticking and allows you to easily lift the entire slab of brownies out of the pan once cooled, making for clean, effortless slicing.
- Cool Completely for Best Slices: While warm brownies are undeniably delicious, for perfectly neat and fudgy slices, it’s best to let them cool completely, ideally for several hours or even overnight. This allows the brownies to set fully, making them easier to cut without crumbling.
Frequently Asked Questions About Red Velvet Brownies
- Can I double this recipe?
- Yes, absolutely! To double the recipe, use a 9×13 inch baking pan. Start with a similar bake time as in the original recipe card (24-29 minutes), then add a few minutes more at a time as needed, checking for doneness as described above.
- Can I halve this recipe?
- Yes, you can halve this recipe. A standard size loaf pan (approximately 8.5×4.5 inches) works well for baking a half batch. Start checking for doneness around 14 minutes, using the same toothpick test method.
- How do I get crackly tops on my brownies?
- The key to those beautiful crinkly tops is whisking the eggs and sugar together for a good two minutes until the mixture lightens and becomes fluffy. This dissolves the sugar, creating a thin, shiny meringue-like layer on top that bakes into that desirable crackle. My Brown Butter Fudgy Brownies recipe uses this same effective method!
- Are these brownies fudgy?
- Yes, without a doubt! This recipe is specifically designed to produce ultra-fudgy and chewy brownies, not cakey ones. The balance of ingredients and precise baking instructions ensures a dense, moist, and wonderfully gooey texture.
- Can I use a different size or shape pan?
- You can certainly experiment with different pan sizes. For a similar thickness, an 8 or 9-inch oven-safe skillet or an 8 or 9-inch round cake pan can work in a pinch. Just remember that altering the pan size may slightly affect baking time, so always rely on the visual doneness cues rather than strict timing.
- Can I use regular liquid food coloring from the grocery store instead of gel food coloring?
- While you technically *can* use liquid food coloring, it is highly recommended to use gel food coloring for red velvet. Liquid food coloring is much less concentrated, meaning you would need to add a significant amount to achieve a vibrant red hue. This excess liquid could easily alter the batter’s consistency, leading to a less desirable texture. If you must use liquid, limit it to 1 teaspoon at most, and be aware that your brownies will likely have a more subtle, muted red color.
- Can I freeze these brownies?
- Absolutely! These brownies freeze beautifully. Once completely cooled, wrap individual brownies or the entire slab tightly in plastic wrap, then place in an airtight freezer-safe container or bag. They can be frozen for up to 2-3 months. Thaw at room temperature or gently warm in the microwave for a few seconds.
- What’s the best type of cocoa powder for red velvet?
- For red velvet, natural unsweetened cocoa powder (not Dutch-processed) is generally preferred. Its acidity reacts with the baking soda and vinegar in the recipe, helping to create the signature red hue and tangy flavor profile. However, if you only have Dutch-processed, it will still work, but the color might be slightly less vibrant and the tang a bit milder.
Serving and Storing Your Delicious Red Velvet Brownies
The waiting is the hardest part, but it’s worth it for the best experience!
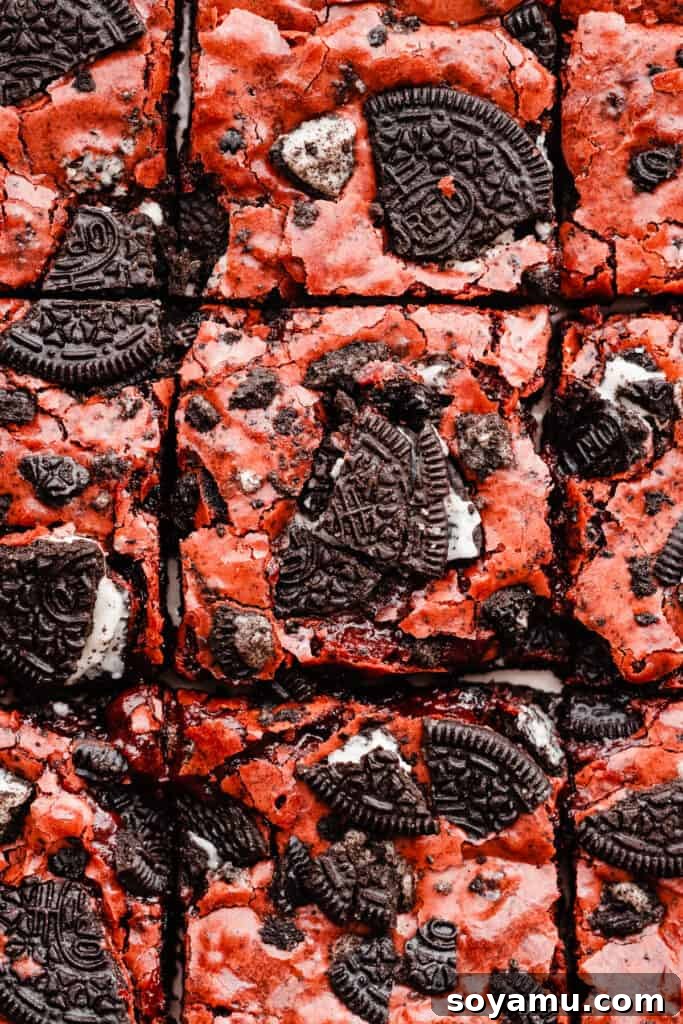
Serving: While it’s tempting to dig in immediately, these brownies truly benefit from cooling for at least 30 minutes. The longer they cool, the neater your slices will be, as the brownies will have time to set and firm up. However, there’s a special kind of magic in a slightly warm, gooey red velvet brownie, perhaps served with a scoop of vanilla bean ice cream or a dollop of whipped cream! For an extra special touch, drizzle them with a simple cream cheese glaze.
Storing: Store cooled Red Velvet Oreo Brownies in an airtight container at room temperature for 3-4 days to maintain their fudgy texture. If you prefer to extend their freshness, they can be kept in the refrigerator for 5-7 days. When storing in the fridge, I recommend allowing them to come back to room temperature before enjoying them for the optimal chewy, fudgy experience, although some people love them cold!
More Irresistible Homemade Brownies to Love
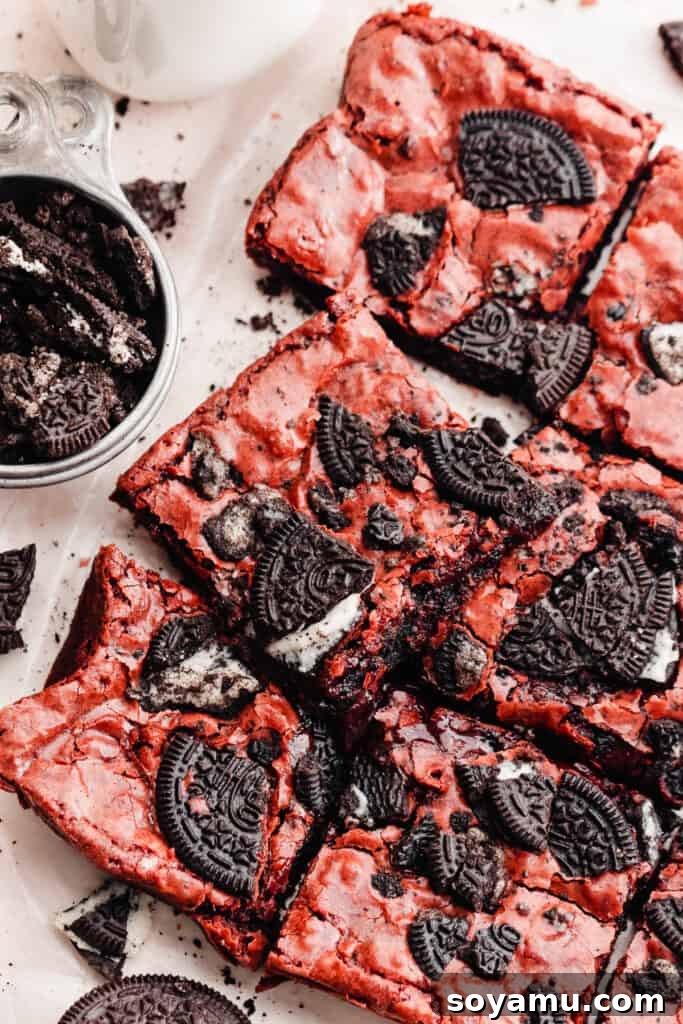
If you’re a brownie aficionado, don’t stop here! Explore these other fantastic homemade brownie recipes for endless sweet indulgence:
- Gooey S’mores Brownies
- Fudgy Gluten-Free Brownies
- Black Forest Brownies
- Layered Mint Chocolate Brownies
- Fudgy Triple Chocolate Skillet Brownie
- Salted Caramel Pretzel Brownies
- 5-Ingredient Brownies
Did you make this recipe? We’d love to hear from you!
Please leave a comment and a star rating below to let us know how you liked the recipe. Your feedback is invaluable, and leaving a rating helps our small business immensely!
Red Velvet Oreo Brownies
By Stephanie Simmons
These Red Velvet Oreo Brownies are ultra fudgy with crackly tops and oreo pieces folded in. These brownies come together in one bowl in just 10 minutes, and bake in under 30! They taste like a rich red velvet cake in brownie form – prepare to swoon!
Prep Time: 10 mins
Cook Time: 28 mins
Servings: 9 to 18 bars
Rating: 5 from 8 votes
Pin Recipe |
Rate Recipe |
Print Recipe
Ingredients
- 1/2 cup (113 grams) salted butter
- 3/4 cup granulated sugar
- 1/4 cup (60 grams) packed brown sugar
- 2 large eggs
- 1/2 tsp vanilla extract
- 3/4 tsp white vinegar
- Red gel food coloring (Use a gel to get rich color without adding tons of extra liquid – try Wilton gel food colors)
- 1/2 cup + 1 tbsp (73 grams) all-purpose flour, spooned & leveled
- 3 and 1/2 tbsp cocoa powder
- 1/4 tsp salt
- 8 Oreos, broken up
Instructions
- Prep: Preheat your oven to 350°F (175°C). Spray a 9×9 inch ceramic or metal pan with nonstick spray and line it with parchment paper (so the paper stays in place).
- Make the Brownies: Melt the butter in a large or medium bowl. Whisk in the sugars until smooth. Whisk in the eggs and vanilla extract. Then, whisk for 2 additional minutes – this will create the crackly top. Whisk in the vinegar. Add the gel food coloring to your desired effect. Fold in the flour, cocoa powder, and salt until just combined. Fold in about 2/3 of the crushed Oreos, then spread the batter evenly in your prepared pan. Sprinkle remaining Oreos on top.
- Bake: Bake for 24 to 29 minutes. A toothpick inserted into the edges will come out clean or mostly clean, and one inserted into the center will pull out some thick batter that may look a *tad* underdone – but the center shouldn’t be super jiggly anymore.
- Serve + Store: Let brownies cool at least 30 minutes before digging in. (The longer they cool, the neater your slices will be, but these are a joy to eat warm!) Store cooled brownies in an airtight container at room temperature for 4-5 days or in the fridge for 5-7 days, letting them come back to room temperature before enjoying (or try them cold if you like!)
Nutrition
Nutrition information is automatically calculated, so should only be used as an approximation.
- Serving: 1 brownie
- Calories: 274 kcal
- Carbohydrates: 37 g
- Protein: 3 g
- Fat: 14 g
- Saturated Fat: 8 g
- Polyunsaturated Fat: 1 g
- Monounsaturated Fat: 4 g
- Trans Fat: 0.4 g
- Cholesterol: 68 mg
- Sodium: 205 mg
- Potassium: 89 mg
- Fiber: 1 g
- Sugar: 27 g
- Vitamin A: 375 IU
- Calcium: 20 mg
- Iron: 2 mg
Like this? Leave a comment below!