
Experience the Magic of Butterbeer: The Ultimate Homemade Cheesecake Recipe
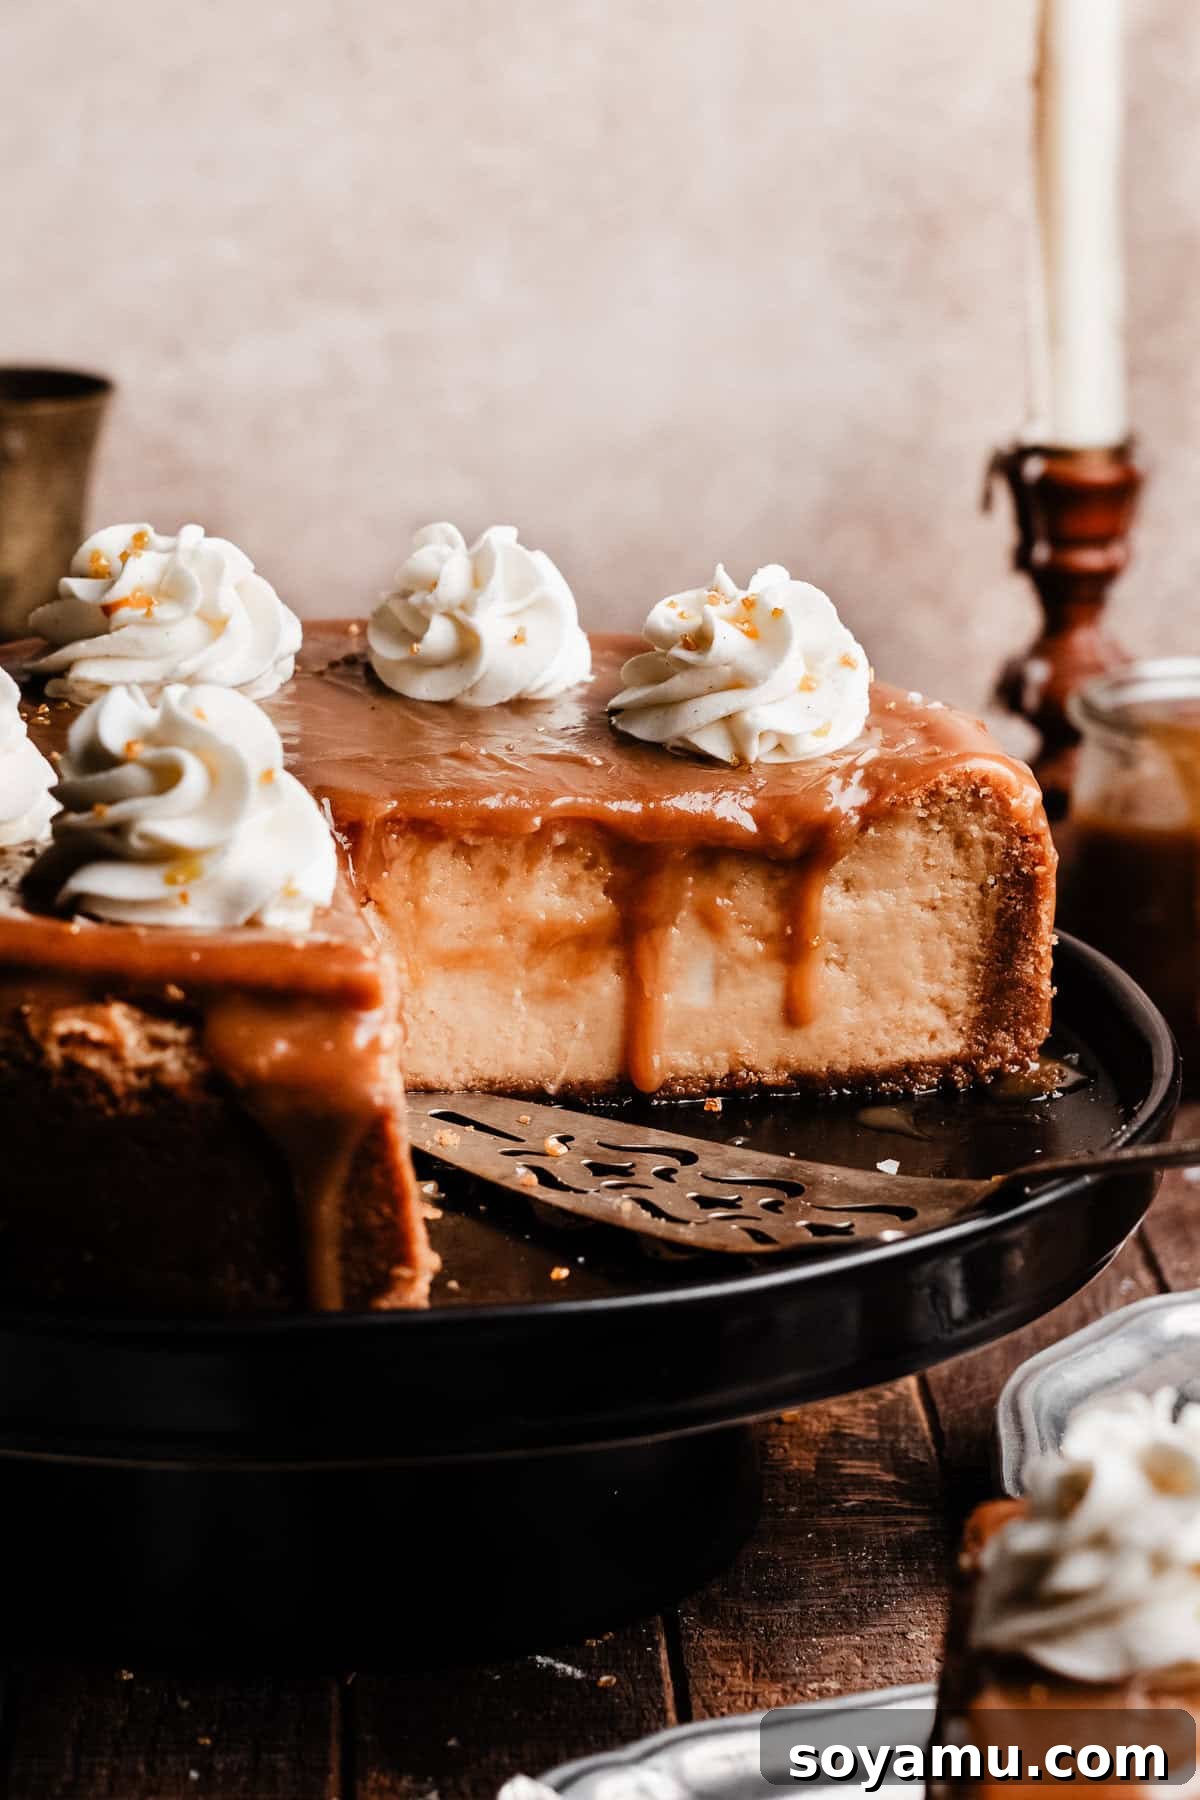
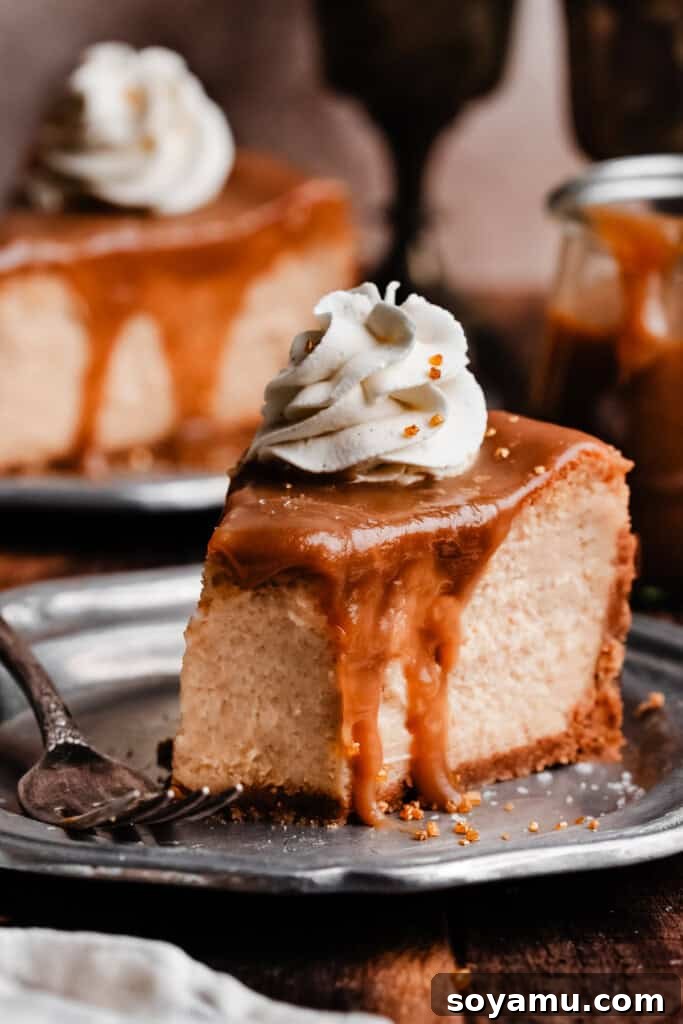
Step into the enchanting world of Harry Potter with a dessert that brings the beloved Butterbeer to life in a whole new form. Our Butterbeer Cheesecake is a creamy, dreamy masterpiece designed to delight every palate, perfectly capturing the iconic flavor profile of the wizarding world’s favorite drink. Imagine a rich, silky cheesecake infused with the distinctive notes of cream soda syrup, sweet butterscotch sauce, and a hint of butter extract. Each slice delivers a symphony of butterscotch, caramel, and vanilla, all nestled on a crisp graham cracker crust. Crowned with a luxurious salted butterscotch drizzle and airy swirls of freshly whipped cream, this cheesecake isn’t just a dessert; it’s a magical experience waiting to be savored.
Why You Need This Magical Butterbeer Cheesecake in Your Life
This isn’t just another cheesecake recipe; it’s an adventure for your taste buds. Here’s why this Butterbeer Cheesecake will quickly become your new favorite:
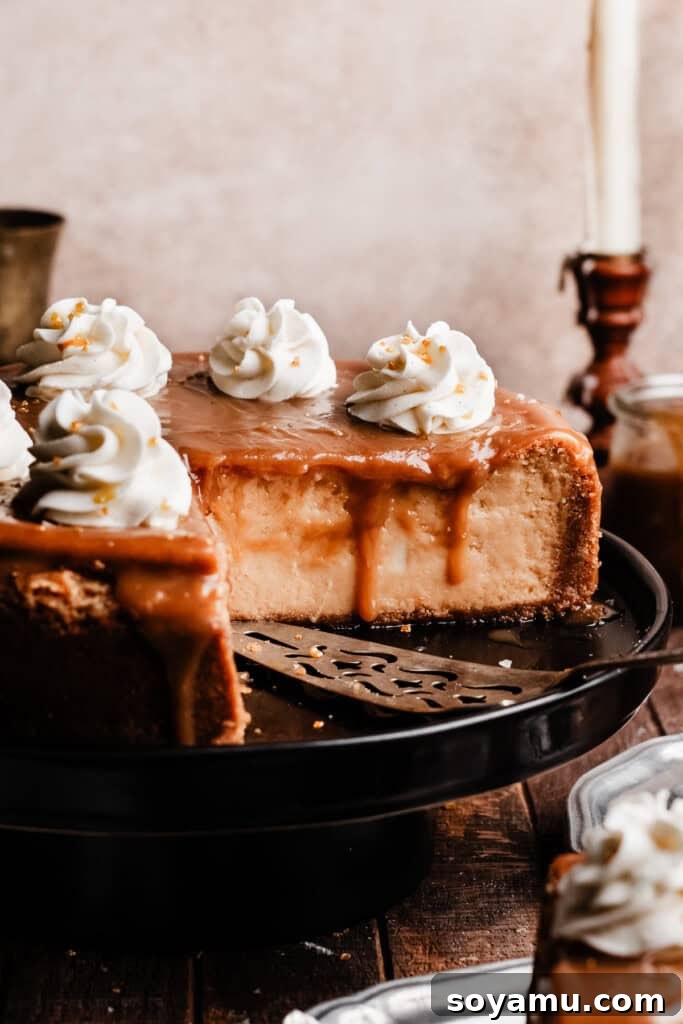
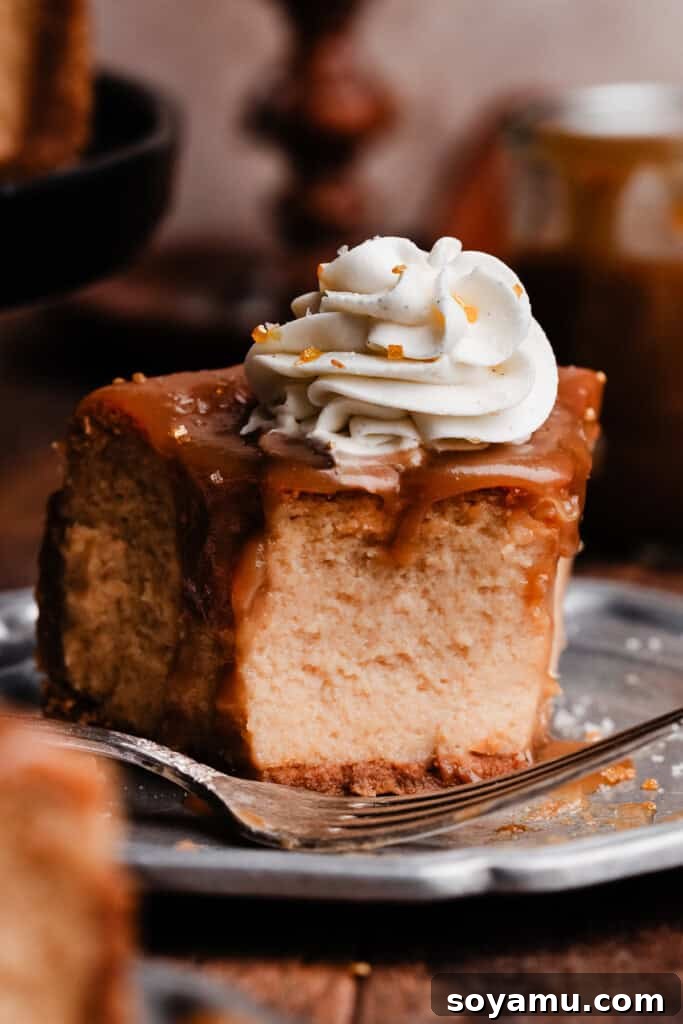
- Unforgettably Creamy Butterscotch Cheesecake: Prepare for an ultra-velvety texture that melts in your mouth. The secret lies in a harmonious blend of full-fat cream cheese, cream soda reduction, rich butterscotch sauce, and a touch of butter extract, creating an authentic Butterbeer flavor that’s both complex and comforting. This luxurious filling stands out with its smooth consistency and deep, caramel-butterscotch notes.
- Perfectly Crisp Graham Cracker Crust: A great cheesecake starts with an exceptional crust. Our recipe features a sturdy, crisp graham cracker base that provides the perfect textural contrast to the creamy filling. Baked to a golden perfection, it offers a satisfying crunch with every bite, balancing the sweetness and richness of the cheesecake beautifully.
- Luscious Salted Butterscotch Sauce & Dreamy Whipped Cream: What’s Butterbeer without its iconic frothy topping? This cheesecake is generously finished with a decadent homemade salted butterscotch sauce, adding another layer of rich, buttery flavor with a hint of salt to cut through the sweetness. Complementing this is a cloud of freshly whipped cream, which can be elegantly piped for an impressive presentation, making this dessert a true showstopper for any gathering.
- A Unique Dessert for Any Occasion: Whether you’re hosting a Harry Potter-themed party, celebrating a special event, or simply craving a truly extraordinary treat, this Butterbeer Cheesecake is guaranteed to impress. Its distinctive flavor profile and elegant appearance make it a memorable centerpiece dessert that guests will talk about long after the last slice is gone.
Essential Ingredients for Your Butterbeer Cheesecake Adventure
Crafting this magical cheesecake requires a few key ingredients, each playing a vital role in achieving that perfect Butterbeer flavor and creamy texture. Always strive for the highest quality ingredients you can find, and remember that bringing cold ingredients to room temperature is crucial for a smooth batter.
For the Luscious Salted Butterscotch Sauce:
- Salted Butter: We prefer salted butter for its depth of flavor, which naturally enhances the butterscotch. If using unsalted, you might add a tiny pinch more salt to taste.
- Dark Brown Sugar: Provides that deep, molasses-rich sweetness characteristic of true butterscotch.
- Heavy Cream: Essential for a rich, velvety sauce. Don’t substitute with lighter creams.
- Cream of Tartar & Water: This small addition is a game-changer! It prevents the sugar in the butterscotch sauce from crystallizing, ensuring a silky-smooth finish.
- Vanilla Extract: Use pure vanilla extract to complement the butterscotch notes.
- Flaky Sea Salt: A generous pinch at the end balances the sweetness and elevates the overall flavor profile.
For the Irresistible Graham Cracker Crust:
- Graham Cracker Crumbs: You can buy pre-crushed crumbs for convenience, or easily make your own by pulsing whole graham crackers in a food processor. If making your own, you might need an extra tablespoon or two of butter, as homemade crumbs tend to be drier.
- Melted Butter: Binds the crumbs together to form a firm, delicious crust.
For the Signature Cream Soda Reduction:
- Cream Soda: The heart of the Butterbeer flavor. Reducing it concentrates the unique cream soda essence, which is then incorporated into the cheesecake batter.
For the Silky Smooth Cheesecake Batter:
- Full-Fat Cream Cheese (Block Style): This is non-negotiable for a truly rich and creamy cheesecake. Ensure it’s at room temperature for at least an hour before mixing to prevent lumps.
- Light Brown Sugar: Adds sweetness and a subtle caramel depth, contributing to the Butterbeer flavor.
- Large Eggs: Act as a binder and help create the cheesecake’s structure. Crucially, they must be at room temperature and added one at a time to ensure a smooth, emulsified batter without overmixing.
- Full-Fat Sour Cream: Adds a delightful tang and contributes to the cheesecake’s exceptionally creamy texture and moisture. Also, ensure it’s at room temperature.
- Vanilla Extract: Enhances all the sweet flavors in the batter.
- Butterscotch Sauce: Part of the homemade butterscotch sauce is incorporated directly into the batter for an intense flavor experience.
- Cream Soda Reduction: The concentrated essence of cream soda infuses the cheesecake with its signature Butterbeer taste.
- Butter Extract: Boosts the buttery, rich notes, making the Butterbeer flavor truly pop.
- Salt: A tiny pinch of salt in the batter balances the sweetness.
For the Dreamy Whipped Cream Topping:
- Heavy Whipping Cream: Must be very cold to whip properly.
- Powdered Sugar: Sweetens the cream and helps it hold its shape.
- Vanilla Extract: A classic addition to whipped cream.
- Plain Powdered Gelatin & Cold Water (Optional for Stabilizing): If you plan to pipe the whipped cream and want it to hold its shape for longer, stabilizing it with gelatin is highly recommended. This ensures your beautiful swirls won’t deflate.
Recipe Substitutions & Variations: Tailor Your Magical Cheesecake
While this recipe is crafted for optimal Butterbeer flavor, here are some ways you can adapt it to suit different dietary needs or preferences:
- Gluten-Free: Easily make this recipe gluten-free by simply substituting standard graham crackers with your favorite brand of gluten-free graham crackers for the crust. The rest of the ingredients are naturally gluten-free.
- Dairy-Free: Achieving a truly dairy-free cheesecake with the same luxurious texture and flavor can be challenging. While I haven’t personally experimented with dairy-free versions for this specific recipe, I recommend exploring specialized vegan baking blogs known for their expertise in dairy-free cheesecakes. Reputable sites like The Banana Diaries or Little Blog of Vegan are excellent resources for reliable plant-based alternatives.
- Whipped Cream Presentation: The piped whipped cream adds a stunning, professional touch to the cheesecake, mimicking the frothy top of a Butterbeer. However, if piping isn’t your preference or you’re short on time, you can still prepare the whipped cream and simply dollop it generously onto individual slices just before serving. It will still provide that essential creamy contrast and flavor. For an extra touch of magic, consider adding a sprinkle of edible gold dust on top!
- No Butter Extract: While butter extract truly amplifies the Butterbeer flavor, if you can’t find it, the cheesecake will still be delicious. The butterscotch sauce and cream soda reduction will carry the main flavor profile.
Crafting Your Butterbeer Cheesecake: A Step-by-Step Guide
Creating this show-stopping Butterbeer Cheesecake involves several distinct stages, but each step is straightforward and rewarding. Patience, especially during cooling and chilling, is your best friend for cheesecake perfection.
Step 1: Prepare the Magical Salted Butterscotch Sauce
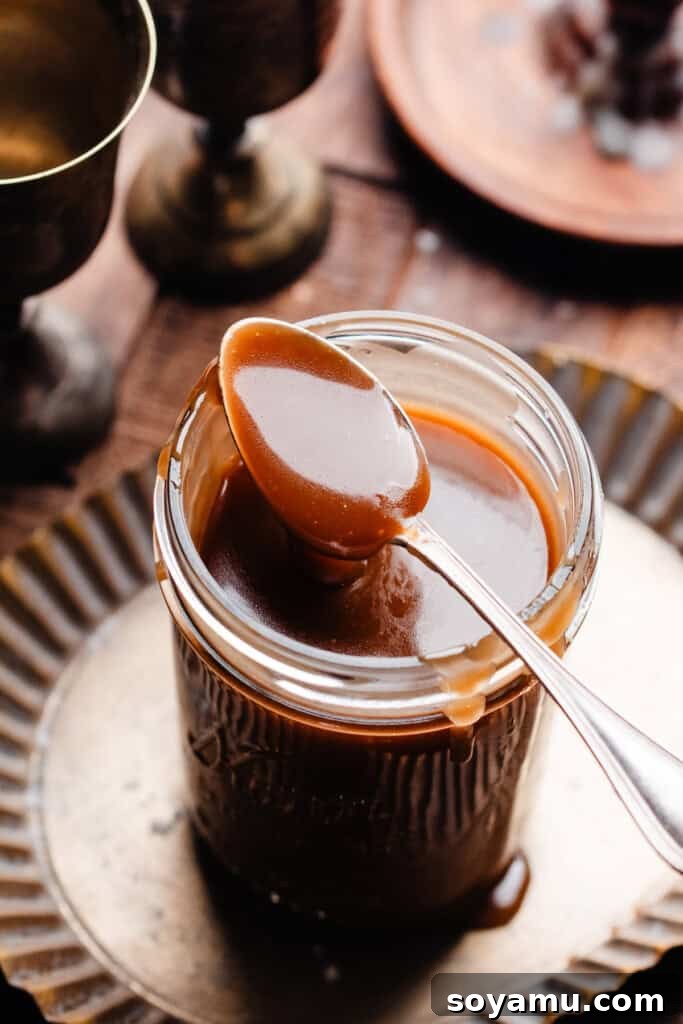
Begin by making your homemade salted butterscotch sauce. In a small bowl, combine the cream of tartar with water; this mixture is key to preventing a grainy sauce. In a medium saucepan, melt your butter over medium heat. Stir in the brown sugar, the cream of tartar/water mixture, and the heavy cream. Bring this mixture to a rolling boil and let it boil undisturbed for exactly 5 minutes. Resist the urge to stir during this critical period. Once the time is up, remove the saucepan from the heat and stir in the vanilla extract and a generous pinch of flaky sea salt. Transfer the sauce to a jar or heat-safe bowl and allow it to cool completely to room temperature before incorporating it into the cheesecake batter. Any leftover sauce makes a fantastic topping or ice cream drizzle!
Step 2: Reduce the Cream Soda to Perfection
To intensify the Butterbeer flavor, we’ll create a concentrated cream soda syrup. Pour two 16-ounce bottles of cream soda into a large or medium saucepan. Heat over high heat until it begins to bubble vigorously. Continue to cook, stirring occasionally, until the liquid reduces to approximately 1/2 cup. This process usually takes about 25-32 minutes, depending on your stovetop heat. The goal is to evaporate excess water, leaving behind a rich, concentrated cream soda essence. Pour the reduced syrup into a measuring cup and set it aside to cool completely to room temperature. You can place it in the refrigerator to speed up this cooling process.
Step 3: Form the Golden Graham Cracker Crust
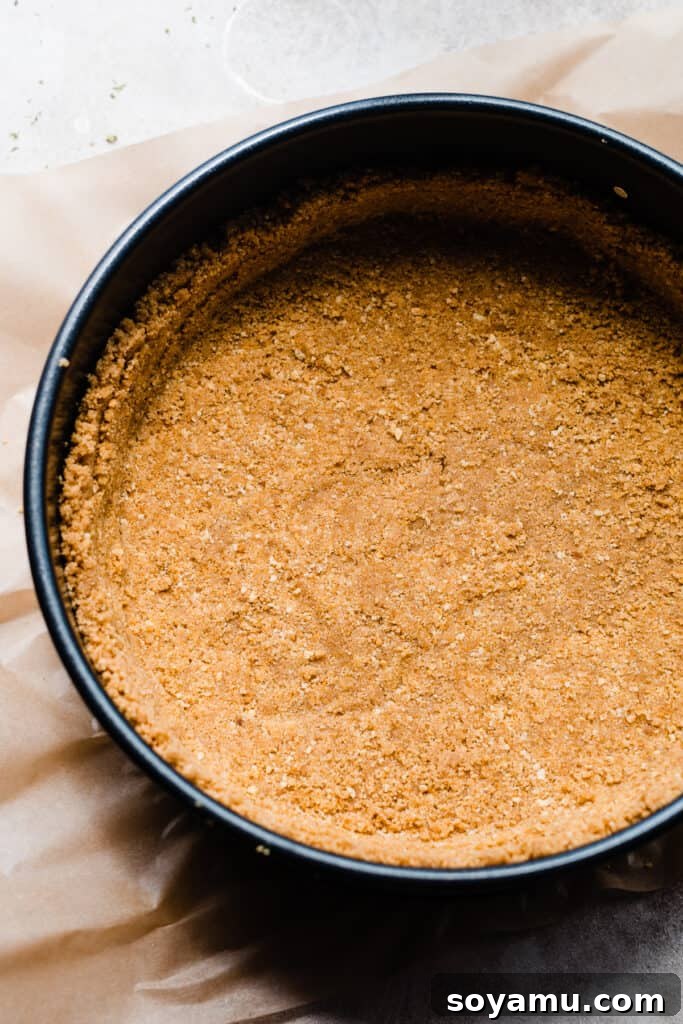
Preheat your oven to 350°F (175°C). Lightly spray a 9-inch springform pan with nonstick spray and ensure the bottom is securely fastened. In a medium bowl, combine the graham cracker crumbs, melted butter, and a pinch of sugar. Mix thoroughly until the crumbs are evenly moistened. Press this mixture firmly into the bottom of the prepared springform pan, and also press it up the sides to create a small rim (refer to the accompanying photos for visual guidance). Bake the crust for 10 minutes to set it and give it a golden hue. Remove from the oven and set aside, but keep your oven on at 350°F. Now is also a good time to start boiling a large pot of water for your water bath later.
Step 4: Whisk Up the Silky Cheesecake Batter
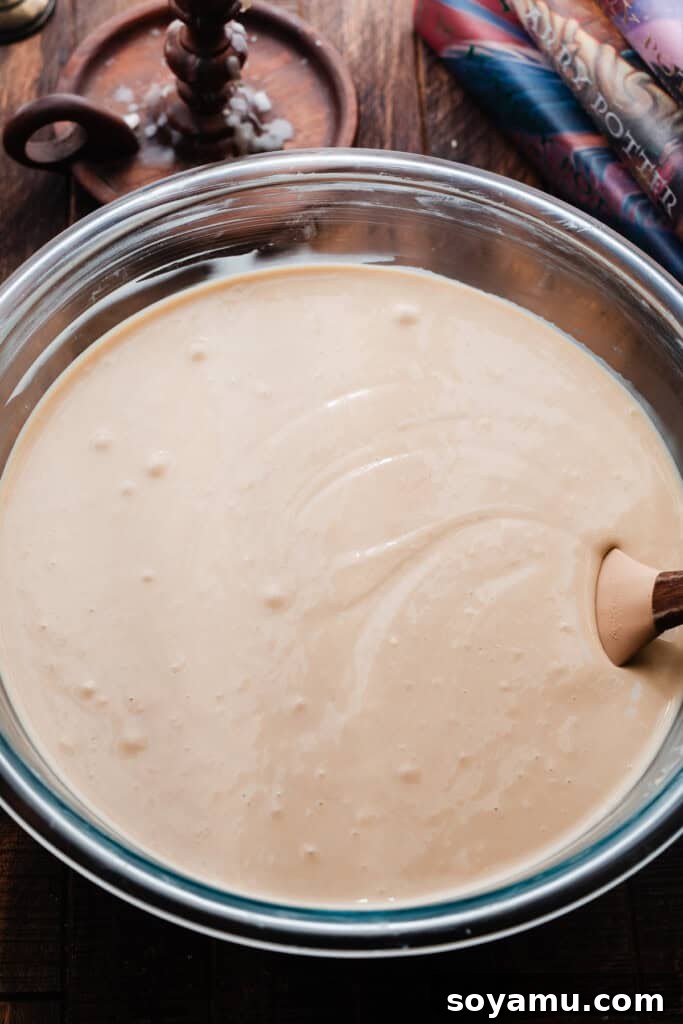
This step requires attention to detail. Ensure all your cold ingredients (cream cheese, eggs, sour cream) have reached room temperature – this is absolutely imperative for a smooth, lump-free batter. In a large mixing bowl (or the bowl of a stand mixer fitted with the paddle attachment), beat the softened cream cheese on high speed with an electric mixer for 1-2 minutes until it is incredibly creamy and smooth. Next, add the light brown sugar and continue mixing on high speed for another 1-2 minutes until fully incorporated. Frequently scrape down the sides and bottom of the bowl with a rubber spatula, as cream cheese lumps have a tendency to hide there. Add the eggs one at a time, mixing on medium speed after each addition only until *just barely* incorporated. Overmixing at this stage can incorporate too much air, leading to cracks or even an overflowing cheesecake during baking. Finally, mix in the vanilla extract, sour cream, 1/2 cup of the prepared butterscotch sauce, the cooled cream soda reduction, and the butter extract. Mix until just combined and the batter is silky. A few tiny lumps are acceptable, but aim for smoothness.
Step 5: Bake to Creamy Perfection with a Water Bath
Carefully pour the cheesecake batter into your prepared graham cracker crust. Now, for the crucial water bath: bring your large pot of water to a boil. There are two effective methods to prevent water leaks. Option 1: Place your springform pan (unwrapped) on a sturdy rack positioned in the center of your oven. Place a large roasting pan on the rack directly below it. Once in place, carefully pour the boiling water into the roasting pan on the lower rack. Option 2: Wrap the base of your springform pan securely with several layers of heavy-duty aluminum foil. Then, place this foil-wrapped cheesecake pan inside a slightly larger 10-inch cake pan. Place this assembly into the large roasting pan, then pour the boiling water into the roasting pan (around the cake pan). Both methods create the essential moist environment for even cooking and crack prevention. Bake for approximately 1 hour and 45 minutes to 2 hours.
Step 6: The Art of Cooling and Chilling
The cheesecake is done when it has only a slight wobble in the center; a knife inserted near the edge should come out clean, while one inserted into the very center might have a bit of thick batter clinging to it. An instant-read thermometer should read between 170°F and 176°F (77°C and 80°C) when inserted into the center. Once baked, turn off the oven and crack the oven door open slightly. Allow the cheesecake to cool gradually in the oven for 1 hour. This slow cooling helps prevent cracks. After an hour, carefully remove the pan from the oven. It should be cool enough to handle. Remove any foil and place the springform pan on a wire rack to cool completely to room temperature. Once at room temperature, cover the cheesecake with foil and refrigerate for at least 6 hours, or preferably overnight. This extended chilling time is essential for the cheesecake to fully set, firm up, and develop its rich, smooth texture.
Step 7: Create the Cloud-Like Whipped Cream Topping
Prepare the whipped cream topping just before you are ready to serve the cheesecake for the freshest taste and best texture. If you plan to pipe the whipped cream and want it to hold its shape for an extended period, stabilizing it with gelatin is highly recommended. To do this, add 2 teaspoons of cold water to a small bowl and sprinkle 1/2 teaspoon of plain powdered gelatin over it. Let it stand for 3 minutes to bloom. Then, microwave the mixture for 4-5 seconds, just until the gelatin re-liquifies. Set aside to cool slightly. In a medium bowl, combine the heavy whipping cream (ensure it’s very cold), powdered sugar, and vanilla extract. Beat on high speed with an electric mixer until the cream begins to thicken. If using gelatin, slowly stream the cooled liquid gelatin mixture into the cream while mixing on low speed. Continue mixing until the cream is thick, holds soft peaks, but is still smooth. Avoid over-whipping, which can result in a grainy texture. Transfer the whipped cream to a piping bag (a Wilton 6B tip works wonderfully for Butterbeer-like swirls) and pipe onto the cooled cheesecake as desired.
Step 8: Assemble Your Masterpiece
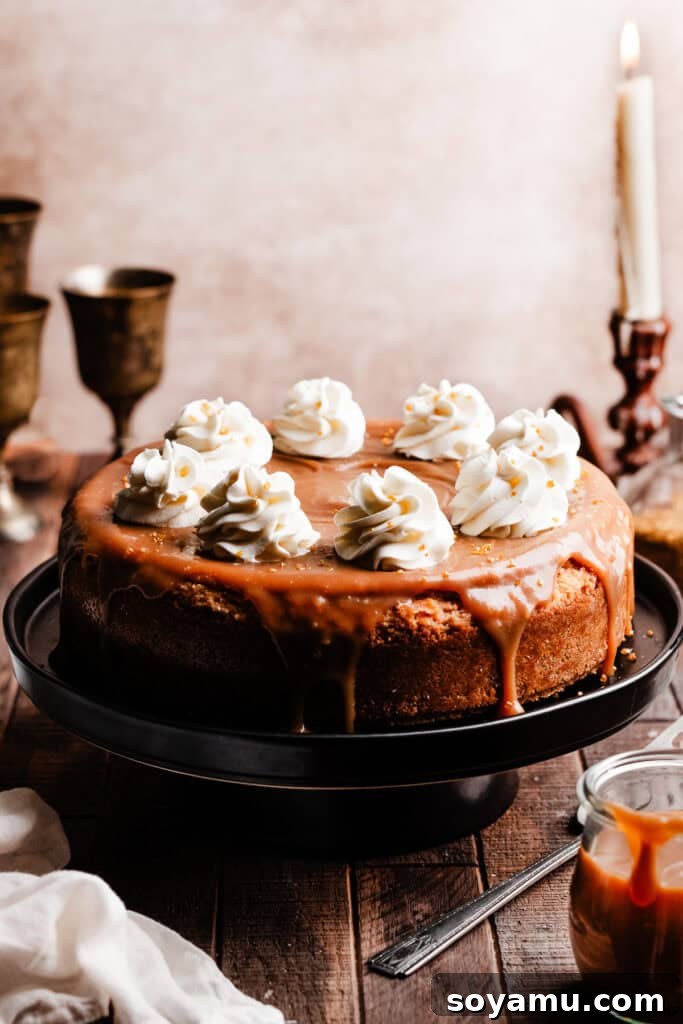
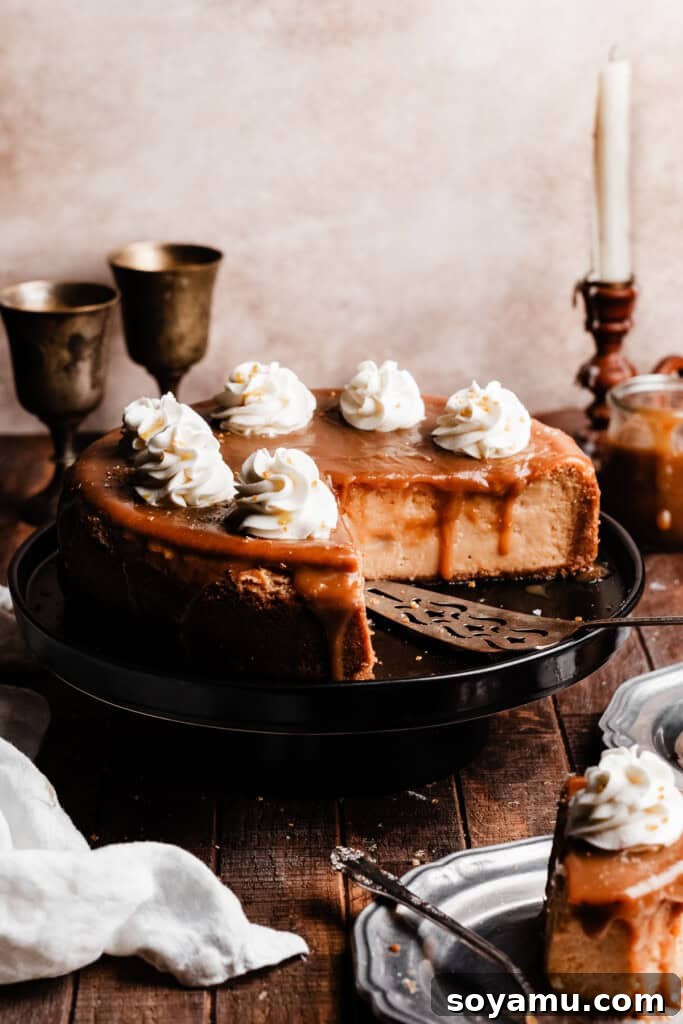
Once the cheesecake has thoroughly chilled and is firm, gently unlatch the springform pan sides and remove them. Transfer the cheesecake to a serving plate or stand. Drizzle generously with the remaining salted butterscotch sauce and adorn with beautifully piped whipped cream (or serve whipped cream on the side). Slice with a sharp, warm knife (run under hot water and wipe clean between slices for clean cuts) and enjoy your magical Butterbeer Cheesecake! Store any leftovers in an airtight container in the refrigerator for 3-4 days.
Expert Baking Tips for Cheesecake Success
Achieving the perfect, crack-free, and sumptuously creamy cheesecake is an art, but these expert tips will guide you to success:
- Room Temperature Ingredients are Non-Negotiable: This is arguably the most important tip for any cheesecake. Cold cream cheese, eggs, and sour cream will not emulsify properly, leading to a lumpy batter and a less smooth finished product. Plan ahead and take these ingredients out of the fridge at least 1-2 hours before you start mixing.
- Don’t Over Mix the Batter (Especially with Eggs): Over-mixing incorporates too much air into the batter. This air will expand in the oven, causing the cheesecake to puff up, and then collapse and crack as it cools. Mix only until ingredients are just combined, particularly after adding eggs.
- Embrace the Water Bath: A water bath (bain-marie) creates a moist, even-heat environment in your oven. This prevents the edges of the cheesecake from cooking too quickly and drying out, ensuring a consistently creamy texture from edge to center and significantly reducing the risk of cracks.
- Prevent Water Bath Leaks: To avoid water seeping into your crust, you have two reliable options:
- Place your springform pan on an upper rack and the roasting pan with water on the rack directly below it.
- Wrap the outside of your springform pan thoroughly with heavy-duty aluminum foil, then place it inside a slightly larger cake pan. Place this entire assembly into the roasting pan before adding water to the roasting pan. Never pour water directly into the roasting pan with just a foil-wrapped springform pan, as it often finds a way to leak.
- Don’t Over Bake: Over-baking is another common cause of dry, rubbery cheesecake and unsightly cracks. The cheesecake should still have a slight wobble in the very center when you turn off the oven. It will continue to cook and set as it cools. An instant-read thermometer is your best friend here, aiming for 170-176°F (77-80°C) in the center.
- Slow and Steady Cooling: Rapid temperature changes shock the cheesecake and cause cracks. Always cool your cheesecake gradually in the oven with the door propped open for an hour, then transfer it to a wire rack to cool completely to room temperature before refrigerating.
- Patience is a Virtue (Chill, Chill, Chill!): The extended chilling time (at least 6 hours, preferably overnight) is crucial. It allows the cheesecake to fully set, firm up its texture, and lets the flavors meld and deepen. Rushing this step will result in a soft, unset, and less flavorful cheesecake.
- Invest in an Oven Thermometer and Kitchen Scale: An oven thermometer ensures your oven is actually running at the temperature you set, as oven calibrations can vary wildly. A food scale provides precise measurements for ingredients like flour, sugar, and cream cheese, leading to consistent and reliable baking results every time.
Frequently Asked Questions (FAQs) About Butterbeer Cheesecake
Yes, you can absolutely halve this recipe. It’s best baked in an 8×8 or 9×9 square pan, ideally lined with parchment paper for easy removal. A 6-inch springform pan might still be a bit too small for half the batter, leading to an overly tall cheesecake that might bake unevenly. Remember to adjust baking times accordingly – a halved recipe will generally bake faster, so start checking for doneness earlier.
Yes, the long chilling time is non-negotiable for a perfect cheesecake. After baking and cooling to room temperature, the cheesecake needs at least 6 hours, and ideally overnight (up to 24 hours), in the refrigerator. This allows the internal structure to fully set, making it firm enough to slice cleanly without crumbling. It also allows the flavors to deepen and meld, resulting in that signature dense, creamy texture. Rushing this step will result in a soft, potentially runny, and less satisfying cheesecake.
While some cheesecake recipes omit it, I strongly recommend against skipping the water bath for this recipe. The hot water surrounding the cheesecake pan creates a moist, consistent heat environment in the oven. This gentle baking prevents the cheesecake from cracking, ensures an incredibly even bake, and results in that wonderfully smooth, silky, and creamy texture that is characteristic of a high-quality cheesecake. It’s a small extra step that makes a world of difference in the final product’s appearance and taste.
Water bath leaks are a common concern, but easily avoidable with the right technique. You have two excellent options:
- Rack Placement: Position your cheesecake pan (without foil) on a rack in the center of the oven, and place a large roasting pan filled with boiling water on the rack directly below it. The steam will rise and create the necessary moist environment without any direct contact.
- Double Pan Method: Wrap your springform pan with several layers of heavy-duty aluminum foil, then place it inside a 10-inch cake pan (or another pan slightly larger than your springform). Place this entire assembly into the large roasting pan, then pour the boiling water into the roasting pan around the outer cake pan. This double-barrier method provides superior protection against leaks. Avoid simply wrapping the springform pan in foil and placing it directly into the water-filled roasting pan, as water often finds a way to seep through the foil folds.
Absolutely! Cheesecake is an excellent make-ahead dessert. You can bake and chill the cheesecake up to 2-3 days in advance. Store it covered in the refrigerator. Prepare the whipped cream and butterscotch sauce fresh on the day of serving for the best texture and appearance. This makes it perfect for entertaining.
Cracks in cheesecake are usually caused by rapid temperature changes or over-mixing. To prevent them:
- Ensure all cold ingredients are at room temperature.
- Do not over-mix the batter, especially after adding the eggs.
- Always use a water bath during baking.
- Cool the cheesecake gradually in the turned-off oven with the door ajar for an hour before transferring it to a wire rack.
- Avoid dramatic temperature shifts during cooling.
Serving and Storing Your Magical Dessert
Once your Butterbeer Cheesecake has had ample time to chill and firm up, it’s ready to be unveiled and enjoyed! For the best presentation, use a sharp knife warmed under hot water and wiped clean between each slice. Serve each slice with an extra drizzle of the luscious salted butterscotch sauce and a generous dollop or swirl of freshly made whipped cream. This cheesecake pairs wonderfully with a cup of coffee or, for the ultimate experience, a glass of actual Butterbeer! Store any leftover slices in an airtight container in the refrigerator for 3-4 days. For longer storage, you can freeze individual slices (without whipped cream) wrapped tightly in plastic wrap and then foil for up to 1 month. Thaw in the refrigerator overnight before serving.
Explore More Enchanting Cheesecake Recipes
If you’ve fallen in love with the art of cheesecake making, be sure to try some of our other delightful recipes:
- Strawberry Cheesecake
- Pecan Pie Cheesecake
- Bailey’s Chocolate Cheesecake
- Biscoff Cheesecake
- Triple Nutella Cheesecake
- Lemon Blueberry Cheesecake
Did you make this recipe? Leave a comment & star rating!
We cherish your feedback! If you tried this Butterbeer Cheesecake, please share your thoughts and a star rating below. Your comments help us immensely and guide fellow bakers on their culinary journey.
Butterbeer Cheesecake Recipe
This Butterbeer Cheesecake captures the magic of the iconic wizarding world drink in a rich, creamy cheesecake form! Infused with cream soda reduction, butterscotch sauce, and butter extract, it sits on a crisp graham cracker crust and is topped with luscious salted butterscotch sauce and whimsical swirls of whipped cream.
Ingredients
Butterscotch Sauce
- 1/8 tsp cream of tartar
- 1/2 tsp water
- 1/2 cup salted butter (113 grams)
- 1 cup dark brown sugar, packed (220 grams)
- 1 cup heavy cream (236 mL)
- 1 and 1/2 tsp vanilla extract
- Pinch of flaky sea salt
For the Crust:
- 3 cups graham cracker crumbs (276 grams)
- 1/2 cup salted butter, melted (113 grams)
For the Cream Soda Syrup:
- Two, 16 ounce bottles of cream soda
For the Cheesecake Batter
- 32 ounces full fat cream cheese, softened at room temperature (906 grams)
- 1 and 1/2 cups light brown sugar, packed (330 grams)
- 4 large eggs, at room temperature
- 3/4 cup full fat sour cream, at room temperature (180 grams)
- 2 tsp vanilla extract
- 1/2 cup butterscotch sauce (153 grams)
- 1/2 cup cream soda reduction (from above)
- 1 tbsp butter extract
- 1/8 tsp salt
For the Whipped Cream
- 2 tsp cold water (optional, for piping the cream)
- 1/2 tsp plain powdered gelatin (optional, for piping the cream)
- 1/2 cup heavy whipping cream (118 mL)
- 3 tbsp powdered sugar
- 2 tsp vanilla extract
For Decorating:
- Remaining butterscotch sauce
Instructions
- Make Salted Butterscotch Sauce: Combine the cream of tartar and water in a small bowl. Melt the butter in a medium saucepan over medium heat. Stir in the brown sugar, cream of tartar/water mixture, and heavy cream. Then, let the mixture come to a boil and boil for 5 minutes without stirring. When the time is up, remove from the heat and stir in the vanilla and a generous pinch of flaky sea salt (to taste). Transfer to a jar or bowl to cool completely before using. (Store any leftover in the fridge.)
- Reduce the Cream Soda: Add the cream soda to a large or medium saucepan and heat over high heat until bubbling. Cook, stirring occasionally, until reduced to 1/2 cup. This will take about 25-32 minutes. Pour the reduced cream soda into a measuring cup and set aside to cool to room temperature. (You can speed this up in the fridge.)
- Make the Crust: Preheat oven to 350° F (175°C). Spray a 9-inch springform pan with nonstick spray and make sure the bottom is securely fastened. Stir together crust ingredients and press into the prepared pan and up the sides. Bake for 10 minutes. Set aside. Keep the oven on at 350°F. Fill a large pot with water and set it on your stove; you’ll need this for your water bath later.
- Make the Cheesecake Filling: Remember that your cold ingredients need to come to room temperature before you start. In a large mixing bowl, beat the softened cream cheese with an electric mixer until creamy, about 1-2 minutes. Add the sugar & mix on high speed until well incorporated, about 1-2 minutes. Scrape the sides & bottom of the bowl with a rubber spatula as you go to catch any lumps. Add the eggs one at a time, mixing on medium speed after each until just barely incorporated, and scraping the bottom of the bowl between each addition. Do not overmix when adding the eggs; this can cause your cheesecake to puff up, crack, or overflow. Add the vanilla, sour cream, butterscotch sauce, cream soda reduction, and butter extract and mix until just combined. Tip: You can also do this in a stand mixer fitted with the paddle attachment.
- Prepare the Water Bath + Bake: Bring the large pot of water to a boil. Set your springform pan on a rack positioned in the center of the oven, and place the roasting pan on the rack below. Alternatively, wrap the base of the cheesecake pan in foil and place it inside a 10-inch cake pan inside the roasting dish. Pour the boiling water into the roasting pan. Both of these methods help prevent leaks.
- Bake: Bake the cheesecake for 1 hour and 45 minutes to 2 hours. When done, the cheesecake will have only a slight wobble in the center, and a knife inserted into the edge will come out clean, but will have just a bit of thick batter when inserted into the center. An instant-read thermometer should read between 170℉ and 176℉ (77-80°C) when inserted into the center/towards the bottom. Turn off the oven and crack the door open. Let the cheesecake cool in the oven for 1 hour before removing it.
- Cheesecake Cooling: Once the hour is up, remove the pan from the oven. It should be cool enough to handle. Remove the foil and set the springform pan on a wire rack. Let cool completely at room temperature, then cover with foil and refrigerate at least 6 hours or up to 1 day before removing from the pan and serving.
- Make the Whipped Cream: Make the whipped cream just before you’re ready to serve the cheesecake; it’s best made fresh. If you plan to pipe the whipped cream, I recommend stabilizing it. Add the water to a small bowl and sprinkle the powdered gelatin on top. Let stand for 3 minutes. Then, microwave for 4-5 seconds, just to re-liquefy the mixture. Set aside while you begin the cream. Add the heavy whipping cream, powdered sugar, and vanilla extract to a medium bowl and beat on high speed until it begins to thicken. Slowly stream in the liquid gelatin mixture while mixing on low. Keep mixing until cream is thick but still smooth. Add cream to a piping bag (a Wilton 6B tip works well) and pipe on the cheesecake as desired.
- Serve & Store: Serve with extra butterscotch sauce on top, and pipe on the whipped cream (or serve it on the side), then slice and enjoy! Store leftovers in an airtight container in the fridge for 3-4 days.
Nutrition Information (Approximate)
Serving: 1 slice
Calories: 849 kcal
Carbohydrates: 74 g
Protein: 10 g
Fat: 59 g
Saturated Fat: 34 g
Polyunsaturated Fat: 3 g
Monounsaturated Fat: 15 g
Trans Fat: 1 g
Cholesterol: 221 mg
Sodium: 576 mg
Potassium: 280 mg
Fiber: 1 g
Sugar: 61 g
Vitamin A: 2105 IU
Vitamin C: 0.3 mg
Calcium: 178 mg
Iron: 2 mg
Nutrition information is automatically calculated and should only be used as an approximation.