
Mastering Food Photography: 10 Essential Tips for Stunning Food Photos
Welcome, culinary creatives and visual storytellers! If you’re passionate about food and eager to capture its beauty through your lens, you’ve come to the right place. While many visitors might be scrolling for delicious recipes, today, we’re focusing on the magic behind those irresistible images.
As a food blogger or an aspiring food photographer, you understand the power of a captivating photograph. It’s what draws readers in, makes them salivate, and ultimately compels them to try your recipes. Over the past year, I’ve transformed my food photography, elevating it from amateur snapshots to a level that truly reflects the artistry of cooking. And the good news? It doesn’t require a complete overhaul of your gear or years of experience. I’m thrilled to share ten quick, actionable tips that made the biggest difference in my journey, and I’m confident they can do the same for yours!
Transforming your food photos doesn’t have to be daunting. With a few strategic adjustments and a deeper understanding of light and composition, you can achieve incredible results. These are the very techniques that helped me significantly enhance my food photography in less than twelve months, taking my visual storytelling to new heights.
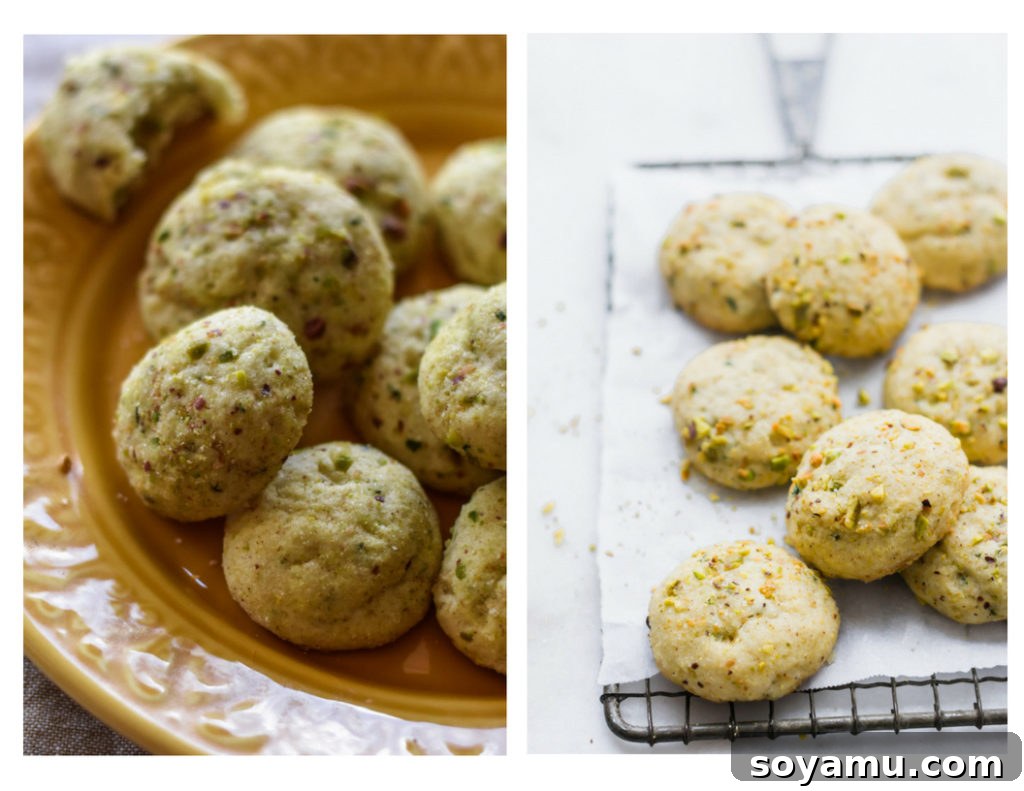
And yes, you’re seeing correctly – those are the exact same Lemon Basil Cookies! The only difference is the application of these simple yet powerful food photography principles. Let’s dive in!
1. Master Your Light Source: Say No to Kitchen Lights
One of the most common pitfalls in amateur food photography is relying on overhead kitchen lights or any built-in indoor lighting. These fixtures typically emit a strong, yellowish-orange light that casts harsh, unflattering shadows and distorts the natural colors of your food. The result is often an unappetizing, dull image that doesn’t do justice to your culinary creations.
The golden rule? Turn off all your internal household lights when shooting food. Instead, opt for either natural light, which is often the most beautiful and accessible option, or a dedicated artificial light source. Natural light provides a soft, even glow that enhances textures and colors, making your food look vibrant and fresh. If natural light isn’t available or consistent, a good quality artificial light setup can offer controlled, consistent illumination. The key is singularity: ensure only one light source (natural or artificial) illuminates your scene to avoid confusing shadows and color casts.
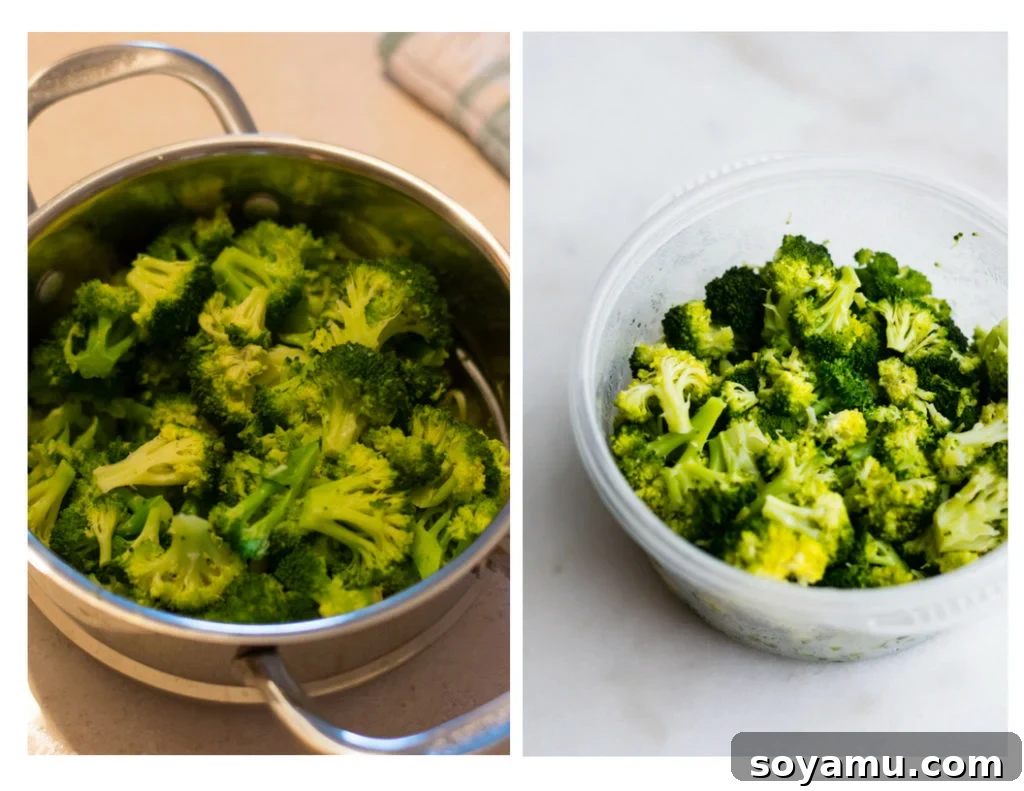
The difference is truly remarkable, as illustrated in the comparison above. The photo on the left, taken under typical kitchen lights, appears flat, yellow, and less appealing. The one on the right, bathed in natural light, showcases the broccoli with inviting vibrancy and texture, proving that light choice is paramount.
2. Unlock the Power of Lighting Angles: Side, Back, and Corner Light
Once you’ve chosen your light source, the next crucial step is understanding how its angle impacts your photograph. Shooting with light directly hitting the front of your food is generally discouraged because it flattens the subject, removing depth and dimension. Instead, focus on three flattering angles that will bring your food to life: side light, back light, and corner light.
Each of these angles creates a distinct mood and highlights different aspects of your food. Experimenting with them will help you discover which works best for specific dishes and desired aesthetics. Understanding how light interacts with your subject is fundamental to professional food photography.
Side Light: This occurs when your primary light source is positioned directly to the left or right of your food. Side lighting is excellent for emphasizing texture, creating inviting shadows that add depth, and giving your dish a more three-dimensional feel. It’s a versatile angle that works well for a wide range of foods, from rustic breads to intricate pastries. The shadows it creates are soft yet defined, adding a sense of realism and volume.
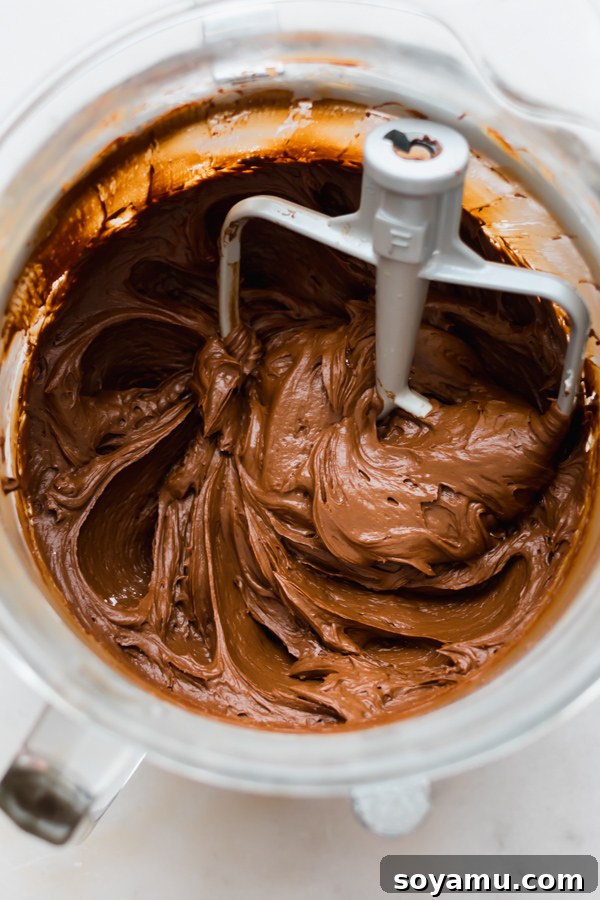
Back Light: With back light, the light source is directly behind your food, facing the camera. This angle is superb for creating a dramatic, luminous effect. It makes translucent foods (like sauces, liquids, or glazed items) glow, emphasizes steam rising from hot dishes, and creates beautiful rim lighting around your subject, separating it from the background. It can be challenging to manage as the front of your food might appear dark, often requiring a reflector to bounce some light back onto the front of the dish for balance.
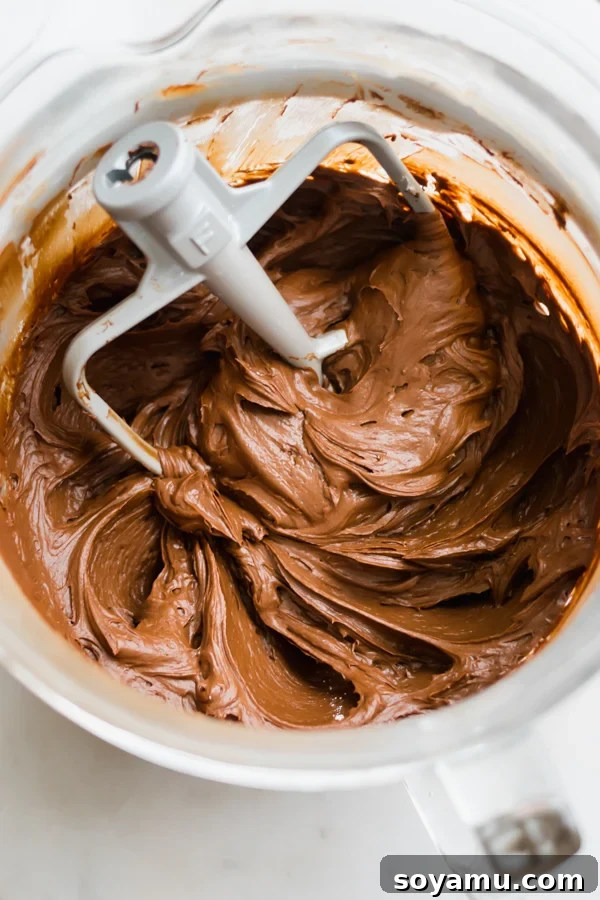
Corner Light: Also known as 45-degree light, corner light positions the source at the top left or top right corner, diagonally illuminating your scene. This angle offers a balanced approach, combining the best aspects of side and back lighting. It provides good texture rendition while also creating some lovely highlights and a gentle glow. Corner light often feels very natural and inviting, making it a favorite for many food photographers because of its versatility and ability to produce appealing, well-rounded images.
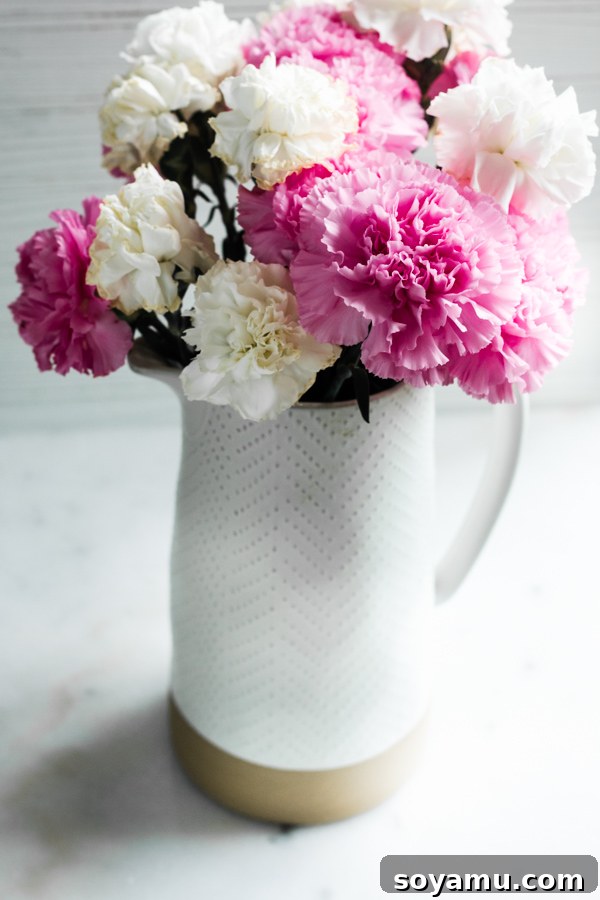
3. The Quest for the Perfect Window: Your Natural Light Studio
For those relying on natural light, finding the “perfect window” in your home is a game-changer. This isn’t a one-size-fits-all tip; it requires a bit of detective work and experimentation. Different windows will yield vastly different lighting conditions depending on their orientation (north, south, east, west) and the time of day. A north-facing window often provides the most consistent and soft light throughout the day, while east and west-facing windows offer beautiful morning and afternoon glows, respectively, but can be harsher during midday. South-facing windows can be challenging due to direct, intense sunlight.
To identify your ideal photography spot, dedicate some time to a “light mapping” exercise. Go around your house and take test photos at various windows at different times, such as mid-morning (around 11 am) and early afternoon (around 2 pm). These times often provide softer, more diffused light compared to the harsh midday sun. As you take your test shots, use sticky notes to label each photo with the window location and the exact time of day. This systematic approach allows you to compare the light quality – its softness, color temperature, and the shadows it produces – across different locations and times. You might be surprised to discover that a window you never considered before is actually your home’s best natural light studio! This simple exercise will save you countless hours of frustration and help you achieve consistent, beautiful results.
4. Diffuse Your Light Source: Embrace Softness
Whether you’re using natural sunlight or an artificial lamp, direct light can be incredibly harsh. It creates sharp, distracting shadows and can lead to blown-out highlights on your food, losing valuable detail. This is where diffusion comes in. Diffusion scatters the light, making your light source appear larger and thus creating softer, more flattering illumination. On a naturally cloudy day, you already have a perfect, built-in diffuser – the clouds themselves act as a giant softbox. However, on sunny days, or when using artificial lights, you’ll need to create your own.
For natural light, hanging a sheer, white curtain or a piece of dedicated light-diffusing fabric over your window can significantly soften direct sunlight. The goal is to mellow out that harsh intensity without blocking too much light. I personally invested in this light diffusing fabric from Amazon for a mere $10, and it has been one of the most impactful purchases for my food photography. Before that, I used a white bed sheet, but it was often too thick, blocking too much light and making the scene too dim. A thinner, more translucent material is ideal.
Diffusion is equally vital for artificial light setups. You can create DIY diffusers using a clean white t-shirt (ensure your light source’s instructions confirm this is safe and not a fire hazard!) or invest in professional options like softboxes, umbrellas, or dedicated light diffusion panels. These tools are designed to spread the light evenly, eliminating harsh shadows and creating a soft, appealing glow on your food. Companies like Neewer and Godox offer affordable diffusers and softboxes, such as these options, which can significantly improve the quality of your artificial lighting.
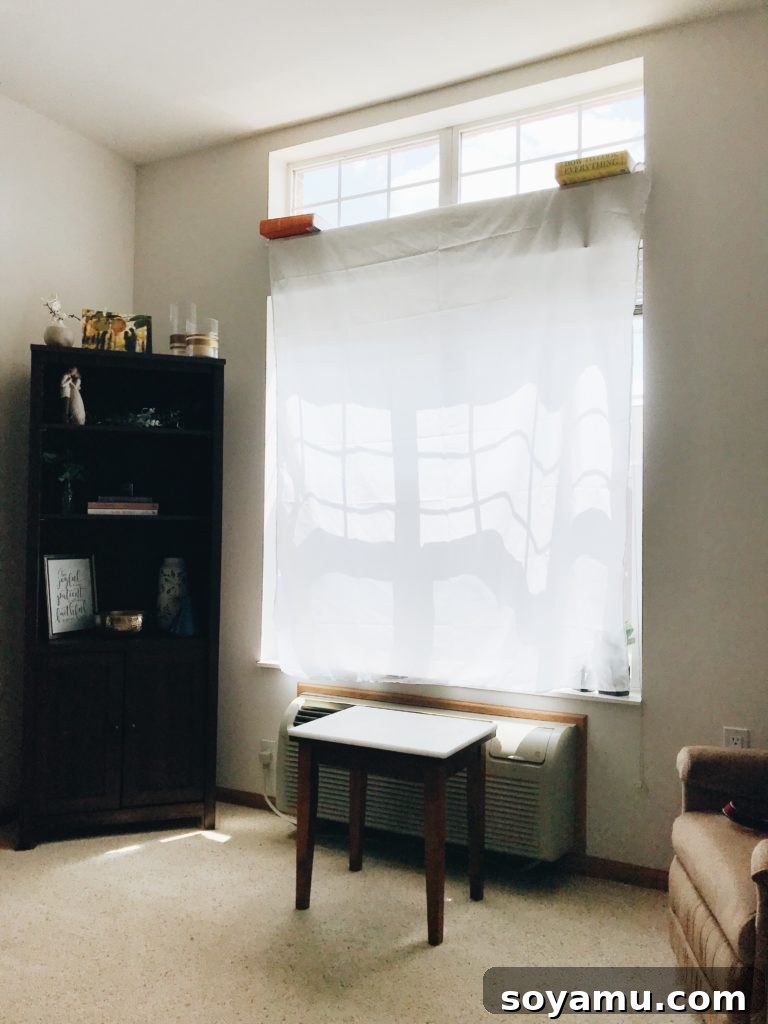
My own setup is far from glamorous, often consisting of a simple white sheet or diffusing fabric draped over a stand, but it proves that effective diffusion doesn’t require expensive equipment. It’s about understanding the principles of light.
5. Unlock Creativity: Shoot in Manual Mode
The idea of shooting in manual mode can feel intimidating, but it’s arguably the most crucial step in taking full control over your food photography. Automatic modes make assumptions, but manual mode puts you in the driver’s seat, allowing you to dictate exactly how your camera captures light and depth. It’s an investment of time to learn, but the returns in image quality and creative freedom are immeasurable. Understanding your camera’s core settings – aperture, shutter speed, and ISO – will fundamentally change how you approach every shot.
Aperture (F-stop): This controls the depth of field in your photo. A wide aperture (small f-number like f/1.8 or f/2.8) creates a shallow depth of field, meaning your subject is sharply in focus while the background is beautifully blurred (known as bokeh). This is incredibly popular in food photography to isolate the dish and make it pop. A narrow aperture (large f-number like f/8 or f/11) keeps more of the scene in focus, which can be useful for flat lays or when you want all elements of a complex dish to be sharp. It took me almost a year to truly grasp aperture, but once I did, it was a complete game-changer, allowing me to craft artistic, focused images.
Shutter Speed: This dictates how long your camera’s shutter stays open. A fast shutter speed (e.g., 1/250th of a second) freezes motion, perfect for capturing falling ingredients or a splash. A slow shutter speed (e.g., 1/15th of a second) allows more light in and can create motion blur, which can be artistic for certain effects, but often avoided in static food shots to maintain sharpness.
ISO: This setting controls your camera’s sensitivity to light. A lower ISO (e.g., 100 or 200) produces cleaner images with less noise or grain. A higher ISO (e.g., 800 or 1600) makes your camera more sensitive to light, useful in dim conditions, but it also increases image noise. The goal is to keep your ISO as low as possible while achieving proper exposure with your desired aperture and shutter speed.
This excellent post delves deeper into camera settings, providing a solid foundation for your learning journey. As you can see below, understanding aperture allows you to focus precisely on key elements, like the fresh spinach, while artfully blurring the rest of the scene.
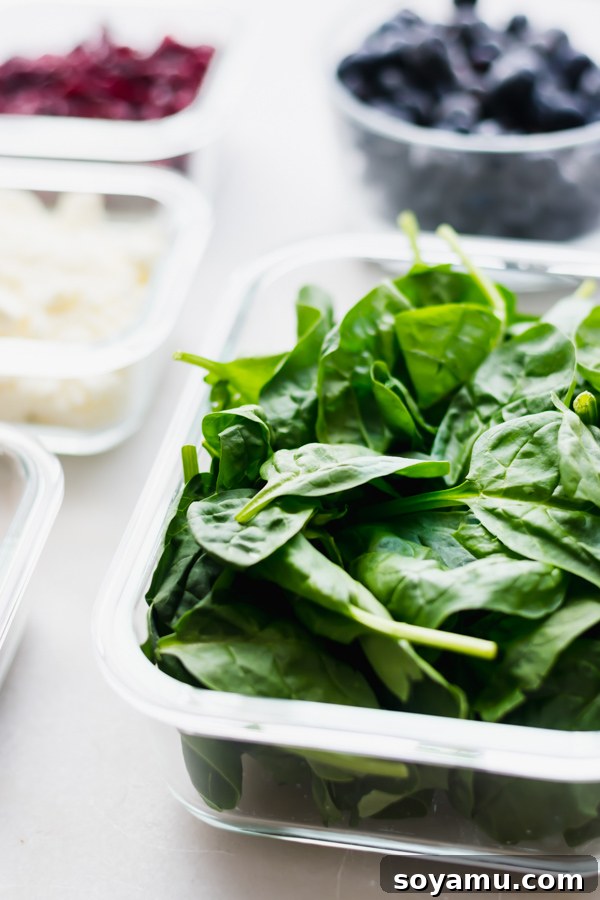
6. Cultivate a Consistent Visual Identity with Light
Consistency in your food photography is paramount for building a recognizable brand and a cohesive portfolio. When a visitor lands on your blog or social media feed, a unified visual style tells a story and makes your content instantly recognizable. One of the most effective ways to achieve this is by consistently using the same lighting conditions for all your photos.
If you’re using natural light, this means committing to shooting in the same spot, preferably at the same window, and around the same time of day. This disciplined approach minimizes variations in light intensity, color temperature, and shadow patterns, ensuring a uniform look across your images. Over time, your audience will come to associate this consistent aesthetic with your brand. However, if your schedule or natural light access is unpredictable, artificial light becomes an invaluable tool. By controlling your artificial light setup – using the same light, diffuser, and position – you can replicate consistent lighting conditions regardless of the time of day or external weather, offering ultimate flexibility and control over your visual identity. My own journey has shown that sticking to one prime natural light spot has significantly improved the overall consistency and professionalism of my photo gallery.
7. Refine Your Aesthetic: Consistent Editing
Beyond capturing great light, consistent editing is the final brushstroke that unifies your food photography. It’s how you refine colors, tones, and mood, creating a signature style that makes your work uniquely yours. There’s a vast world of editing tools and techniques available, designed to streamline this process and ensure uniformity across all your visuals.
Presets: These are pre-saved collections of editing adjustments that can be applied to your photos with a single click. They are a powerhouse for efficiency and consistency. You can find an abundance of free and paid presets online, tailored for various photography styles. Investing in a quality preset or finding one that aligns with your desired aesthetic can instantly elevate your entire body of work, ensuring that every image carries your distinctive visual fingerprint. It’s worth exploring different options and seeing which ones resonate with your brand’s voice.
Creating Your Own Preset: For the ultimate personalized touch, consider developing your own custom preset. After editing a photo to perfection, most editing software (like Adobe Lightroom, Capture One, or even mobile apps) allows you to save those exact adjustments as a new preset. This custom preset then becomes a powerful tool in your arsenal, enabling you to apply your unique color grading, contrast, and tone profile to all subsequent photos. This not only ensures unparalleled consistency but also reinforces your individual artistic vision, making your food photos stand out in a crowded digital space.
8. Embrace the Vertical Frame: Shoot Vertically
While horizontal photos certainly have their place, especially for wide-angle shots or specific layouts, vertical food photography has surged in popularity and often yields more impactful results. If horizontal compositions have been your go-to and they work for your specific brand, by all means, continue with what resonates! However, there are compelling reasons to prioritize vertical framing in much of your food photography.
Aesthetically, vertical images often feel more dynamic and compelling. They draw the eye upwards, emphasizing height, layers, and details within the dish. Practically, vertical photos are incredibly versatile across various digital platforms: they fit seamlessly into modern blog layouts, especially those designed for full-width images, and they are inherently optimized for mobile viewing. Given that a significant portion of online content is consumed on smartphones, shooting vertically ensures your food looks its best on smaller screens, requiring less scrolling and presenting a more immersive experience.
Furthermore, social media platforms, particularly image-driven ones like Pinterest and Instagram, heavily favor vertical content. Pinterest, in particular, actively promotes vertical pins, as they take up more screen real estate and tend to receive higher engagement rates. By embracing vertical compositions, you’re not only enhancing the visual appeal of your food but also optimizing your content for broader reach and better performance across the digital landscape.
9. The Unsung Hero: Use Matte Dishes and Props
This tip might seem minor, but it can dramatically impact the professionalism of your food photos. Shiny, non-matte dishes, cutlery, and props are notorious for creating harsh reflections and distracting glares when exposed to light. These bright spots can draw the eye away from your beautiful food, make your images look unprofessional, and are often difficult, if not impossible, to fix in post-processing without extensive effort.
The solution is simple: gravitate towards matte finishes for all your tableware and props. Matte surfaces absorb light rather than reflecting it, resulting in a softer, more natural appearance. They allow the light to interact with the food itself, enhancing its textures and colors without creating visual noise. Opt for ceramics, stoneware, wooden boards, linen napkins, and rustic metal props. These materials not only prevent glare but also add a layer of warmth, texture, and authenticity to your food photography, making your dishes feel more inviting and visually rich. Remember, your props should always complement and enhance the food, never overshadow or distract from it. The matte plate and pouring vessel in the image below are perfect examples of how subtle, non-reflective elements can elevate a photo without stealing the spotlight from the delicious syrup and pancakes.
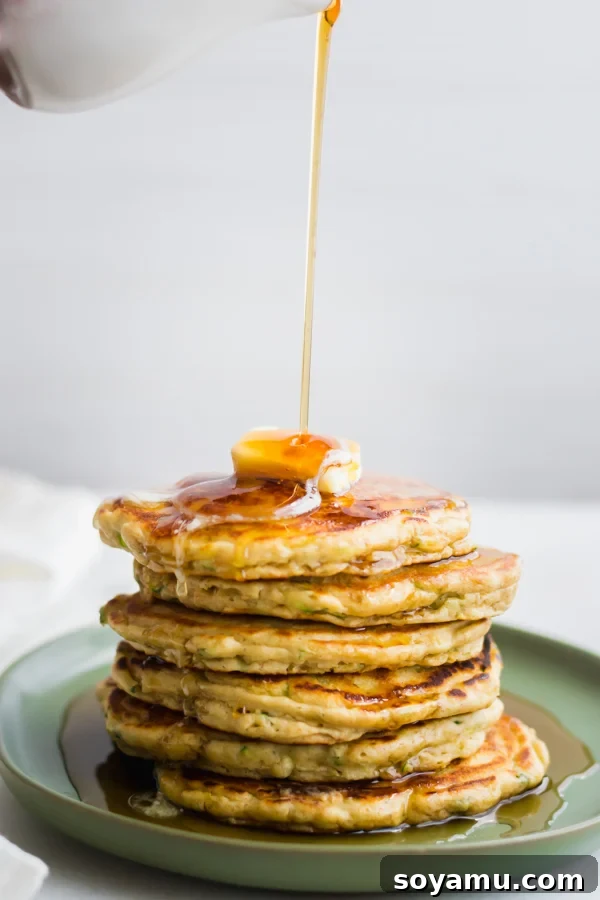
10. Enjoy the Journey: Practice, Practice, Practice!
Ultimately, the most powerful tool in your food photography arsenal isn’t your camera, your lenses, or your props – it’s your dedication to continuous learning and practice. Don’t be afraid to experiment, make mistakes, and discover what truly works for your unique style and vision. Photography is an art form, and like any art, it flourishes with consistent effort and joyful exploration.
Seek inspiration relentlessly. Create a dedicated Pinterest board or an Instagram collection filled with food photos that captivate you. Then, go beyond mere admiration: study these images. Analyze the lighting angles, the composition, the styling choices, and the editing techniques employed by photographers you admire. How do they use light to create mood? What elements do they include (or exclude) in their frames? Dissecting their work will provide invaluable insights that you can adapt and integrate into your own practice.
Crucially, practice isn’t just about shooting when you have a gourmet meal ready. Even on days when cooking isn’t on the agenda, grab some store-bought cookies, a bowl of fruit from your kitchen counter, or even a simple piece of toast. Set it up, play with your lighting, try different angles, and experiment with your camera settings. These low-stakes practice sessions are where true growth happens, allowing you to build muscle memory and hone your eye without the pressure of a “perfect” dish. Remember, growth as a photographer is a cumulative process built through time, patience, and persistent practice, not by acquiring the fanciest equipment. Your skill and artistic vision will always outweigh the cost of your gear.
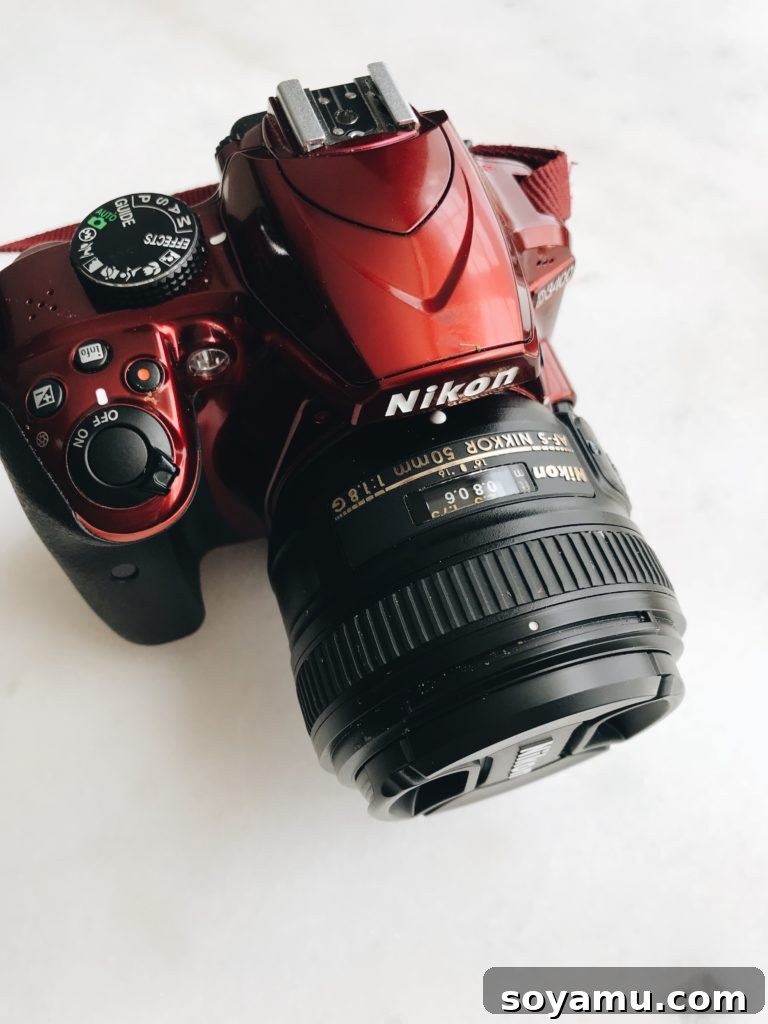
These quick and easy tricks will undoubtedly help you embark on a path to more professional and mouth-watering food photography. However, if I could leave you with one ultimate piece of advice, it’s this: never stop practicing, and always remember to have fun with it! Your passion will shine through your lens.
P.S. For those curious about my gear, this is the camera I currently use. It’s user-friendly and consistently delivers excellent results for my needs. My go-to lens, and truly a food photographer’s best friend, is the 50mm prime lens, known for its superb sharpness and beautiful bokeh.
This post contains Amazon affiliate links. This means that if you click on a link and make a purchase, we may earn a small commission at no extra cost to you. These commissions help support Blue Bowl Recipes and allow us to continue creating valuable content. Thank you for your continued support!