
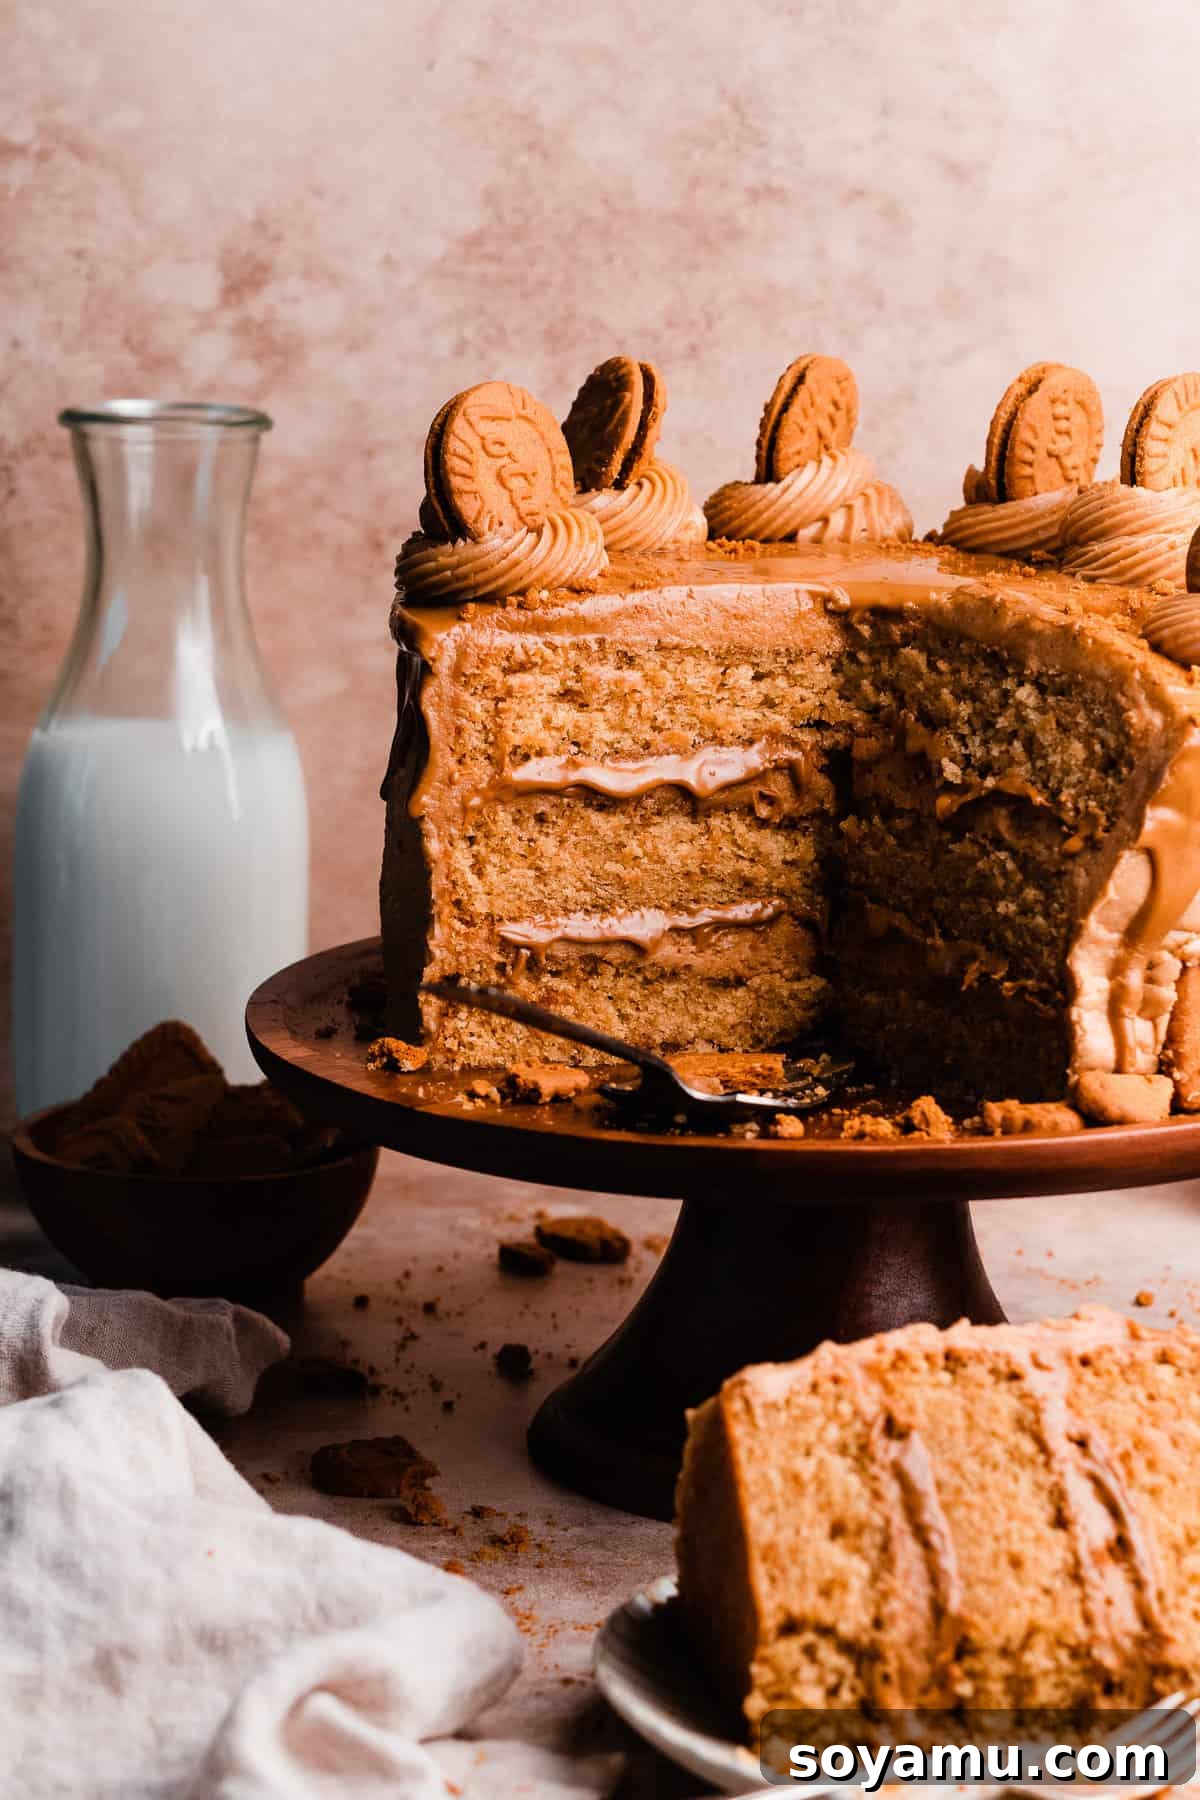
The Ultimate Lotus Biscoff Cake: An Irresistible Cookie Butter Masterpiece
Prepare to fall in love with the **Lotus Biscoff Cake**, the quintessential dessert for every cookie butter enthusiast! This magnificent creation features luxuriously tender cake layers, each baked with a generous infusion of cookie butter and crushed Biscoff cookies. But the indulgence doesn’t stop there; it’s adorned with a smooth, velvety cookie butter buttercream, boasts a rich cookie butter filling nestled between the layers, and is elegantly topped with more delightful Biscoff cookies. With Biscoff flavor permeating every single bite, this cake truly is a celebration of all things cookie butter!

Why You’ll Adore This Biscoff Cake: A Symphony of Flavors
This Lotus Biscoff Cake isn’t just a dessert; it’s an experience, meticulously crafted to deliver an unforgettable cookie butter sensation. Here’s why this recipe will become your new favorite:
- **Deeply Infused Cookie Butter Cake:** Unlike other cakes that merely hint at flavor, ours bakes Biscoff spread and finely crushed Biscoff cookie crumbs directly into the batter. This ensures a tender crumb and an incredibly rich, caramelized cookie butter flavor that runs through every forkful of the cake itself. It’s a true foundation of Biscoff goodness.
- **Luscious Cookie Butter Filling:** Prepare for an extra layer of delight! Between each moist cake layer, you’ll discover a generous spread of creamy cookie butter, enhanced with even more delightful Biscoff cookie crumbs. This creates a delightful textural contrast and intensifies the signature speculoos taste.
- **Silky Smooth Cookie Butter Frosting:** The grand finale is a sumptuously smooth and airy cookie butter buttercream. This frosting perfectly complements the cake layers and filling, tying all the components together with its sweet, spiced elegance. It’s truly the crowning glory of this magnificent dessert, providing a rich, melt-in-your-mouth finish.
- **A Visual Spectacle:** Beyond its incredible taste, this layered Biscoff cake is a feast for the eyes. With its elegant presentation, shimmering cookie butter drip, and charming Biscoff cookie garnishes, it’s guaranteed to impress at any gathering or celebration.
- **The Ultimate Treat for Cookie Butter Lovers:** If you find yourself consistently reaching for a spoonful of cookie butter, or can’t resist a Biscoff cookie, this cake is explicitly designed for you. It amplifies all the best qualities of Biscoff into a truly decadent dessert.

Essential Ingredient Overview: Crafting Perfection
Achieving the perfect Biscoff cake starts with understanding your ingredients. Below is a detailed look at the key components for this recipe. Remember, precise measurements and quality ingredients are crucial for the best results.
- **Cookie Butter (Biscoff Spread):** This is the star of our show! While Lotus Biscoff brand spread is the classic choice, feel free to use any brand of cookie butter you prefer. Trader Joe’s offers a highly-rated alternative. Ensure it’s at room temperature for smooth integration into the batter and frosting.
- **Lotus Biscoff Cookies:** These iconic spiced shortbread cookies are essential for both texture and flavor. They are incorporated into the cake batter as fine crumbs and used whole as a beautiful garnish. Look for them in the cookie aisle; they are sometimes labeled as speculoos cookies.
- **Butter:** We recommend using **salted butter** for its ability to enhance the overall flavor profile of the cake and frosting. However, unsalted butter works just as well if that’s your preference; simply add a small pinch of extra salt to balance the sweetness. Always ensure your butter is softened to room temperature for optimal creaming.
- **Cake Flour:** For an exceptionally tender and light cake crumb, **cake flour** is highly recommended. It has a lower protein content than all-purpose flour, which results in a softer texture. When measuring, always *spoon and level* your flour. Scooping directly from the bag can compact the flour, leading to an excess amount and a dry cake. For accuracy, using a kitchen scale is ideal: 1 cup of cake flour weighs approximately 110 grams, compared to 130 grams for all-purpose flour.
- **Sour Cream:** Full-fat sour cream adds essential moisture and a subtle tang that balances the sweetness of the cake. It contributes to a moist, rich crumb. Make sure your sour cream is at room temperature to prevent it from curdling when mixed with other ingredients.
- **Eggs:** Large eggs at room temperature are vital for proper emulsification and structure in the cake batter. Cold eggs can cause the batter to seize and affect the overall texture.
- **Granulated Sugar:** Provides sweetness and contributes to the cake’s tender texture.
- **Vegetable Oil:** Adds additional moisture and ensures a super moist cake that stays fresh longer.
- **Baking Powder & Baking Soda:** The leavening agents that give the cake its rise and light texture.
- **Milk:** Helps to achieve the perfect batter consistency and adds to the cake’s richness. Use room temperature milk.
- **Powdered Sugar:** The base for our irresistibly smooth buttercream. Sifting it can help prevent lumps.
- **Heavy Cream:** Used sparingly in the frosting to adjust consistency and achieve that silky smooth texture.
- **Cream Cheese:** A touch of cold cream cheese in the frosting adds a wonderful tang and stability, preventing it from weeping.
- **Vanilla Extract, Salt, Cinnamon:** Flavor enhancers that deepen the complexity of the Biscoff taste.
Creative Recipe Variations to Explore
While this Biscoff cake recipe is perfect as is, you can easily adapt it to suit your preferences or ingredient availability. Here are a couple of popular variations:
- **DIY Cake Flour Substitute:** If you don’t have cake flour on hand, you can create your own! For every 1 cup of cake flour needed, spoon and level 1 cup of all-purpose flour into a measuring cup. Remove two tablespoons of this flour (scoop and level them off). Then, add two tablespoons of cornstarch back into the measuring cup. Sift this mixture twice to ensure the cornstarch is evenly distributed and fully incorporated with the flour, providing a similar light texture to commercial cake flour. This sifting step is crucial for success.
- **Alternative Cookies for Crumbs:** Should Lotus Biscoff cookies be unavailable, don’t despair! Gingersnap cookies make an excellent substitute due to their similar crunchy texture and spiced flavor profile (cinnamon, ginger, and sometimes cloves). Other thin, crispy spiced biscuits could also work well. The goal is to find a cookie that offers a comparable flavor and crunch.
- **Nut-Free Version:** For those with nut allergies, Biscoff spread is naturally nut-free, making this cake a fantastic option. Always double-check ingredient labels to ensure all components are suitable.
- **Spice It Up (or Down):** Adjust the amount of cinnamon or add a tiny pinch of nutmeg or ground ginger to the cake batter or frosting to subtly enhance the spiced notes if you desire a bolder flavor.
Step-by-Step Guide: How to Make This Biscoff Cake
Creating this stunning Biscoff cake is a rewarding process. Follow these detailed steps carefully for the best results:
Step 1: Prepare Your Irresistible Cake Batter
Begin by ensuring all your cold ingredients, such as butter, eggs, milk, and sour cream, have come to room temperature. This is crucial for a smooth batter and an evenly baked cake.
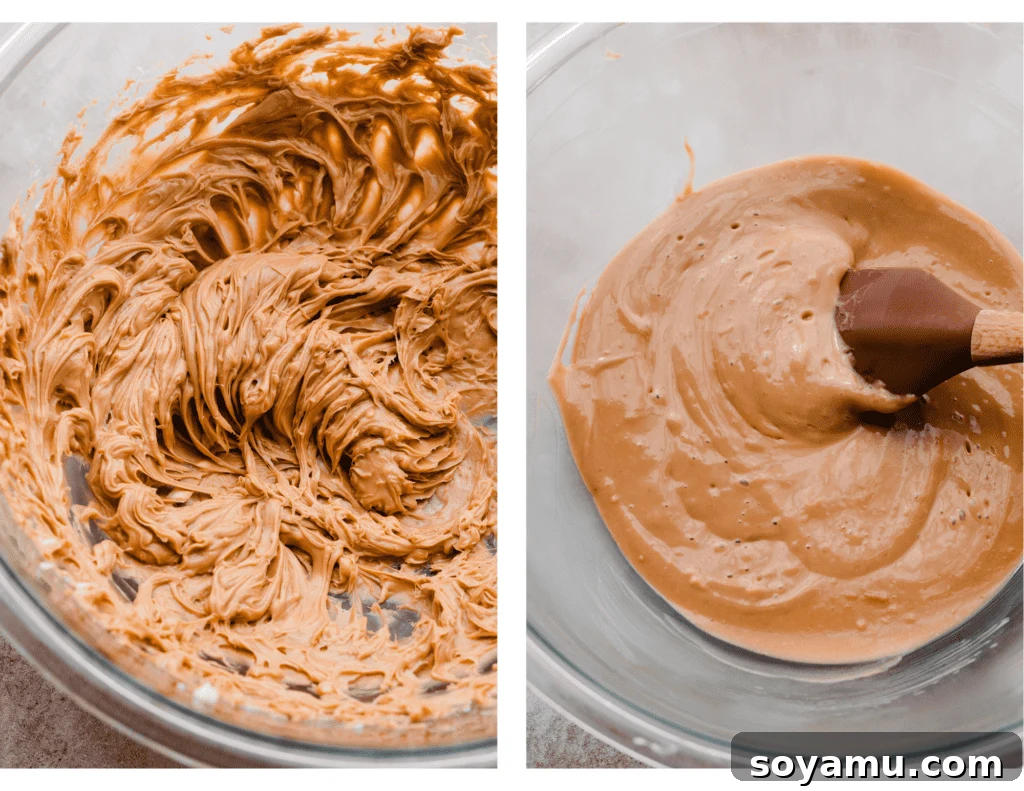
In a large mixing bowl, combine the softened butter and creamy cookie butter. Using an electric hand mixer or a stand mixer fitted with the paddle attachment, cream these together until light and fluffy. This usually takes about 2-3 minutes on medium-high speed. Next, gradually beat in the vegetable oil until the mixture is smooth and slightly thinned. Incorporate the granulated sugar and continue to beat on high speed for another 2 minutes until the mixture is visibly lighter in color and fluffy. This step incorporates air, contributing to a light cake.
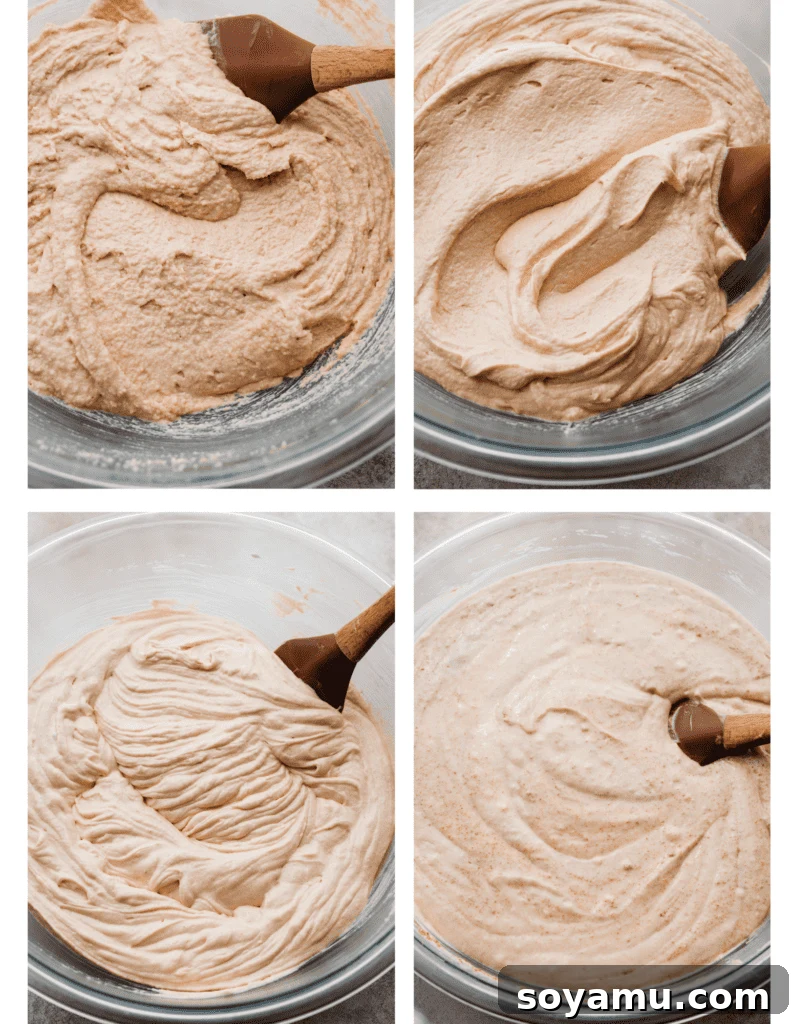
Add the eggs, one at a time, beating well after each addition until fully incorporated. The mixture will become even fluffier. Mix in the room temperature sour cream and vanilla extract until just combined. In a separate bowl, whisk together your cake flour, baking powder, baking soda, and salt. Gradually add half of these dry ingredients to the wet mixture, mixing on low speed until just combined. Pour in the milk, mixing until almost fully incorporated. Finally, add the remaining dry ingredients. Once only a few streaks of flour remain, turn off the mixer and gently fold in any remaining dry bits by hand. Be careful not to overmix; a few lumps are perfectly fine and preferable to an overmixed, dry cake. Stir in the Biscoff cookie crumbs last, ensuring they are evenly distributed throughout the batter.
Step 2: Bake the Golden Layers
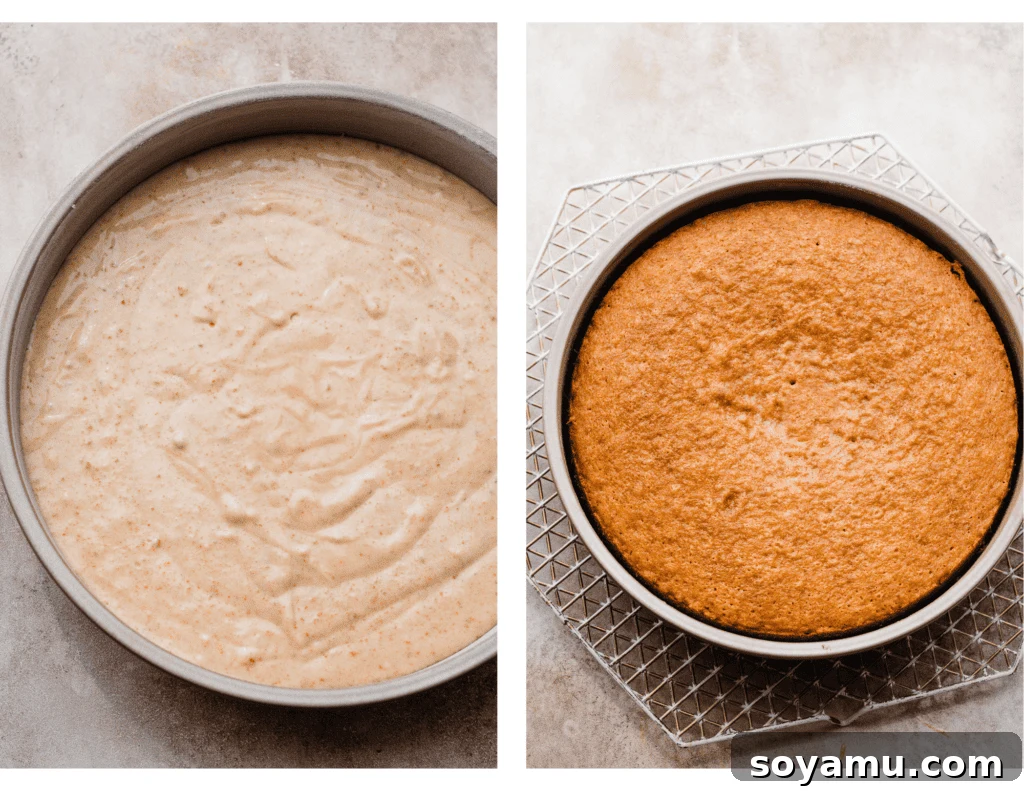
Prepare three 9-inch (or three 8-inch for taller layers) round cake pans. Generously grease them with shortening, ensuring all corners are covered, then dust thoroughly with flour, tapping out any excess. This will help your cakes release effortlessly. Divide the prepared cake batter evenly among the pans. For precision, use a kitchen scale to ensure each pan has the same amount of batter (approximately 736 grams per pan for 9-inch pans).
Bake in a preheated oven (refer to recipe card for exact temperature and time). The cakes are done when a toothpick inserted into the center comes out with moist crumbs, but no wet batter. Allow the cakes to cool in their pans on a wire rack for about 10 minutes. This resting period helps them firm up slightly. After 10 minutes, carefully invert the cakes onto the cooling rack to cool completely. This is a crucial step; attempting to frost warm cakes will lead to melted frosting and a messy result.
Step 3: Whip Up the Velvety Cookie Butter Frosting
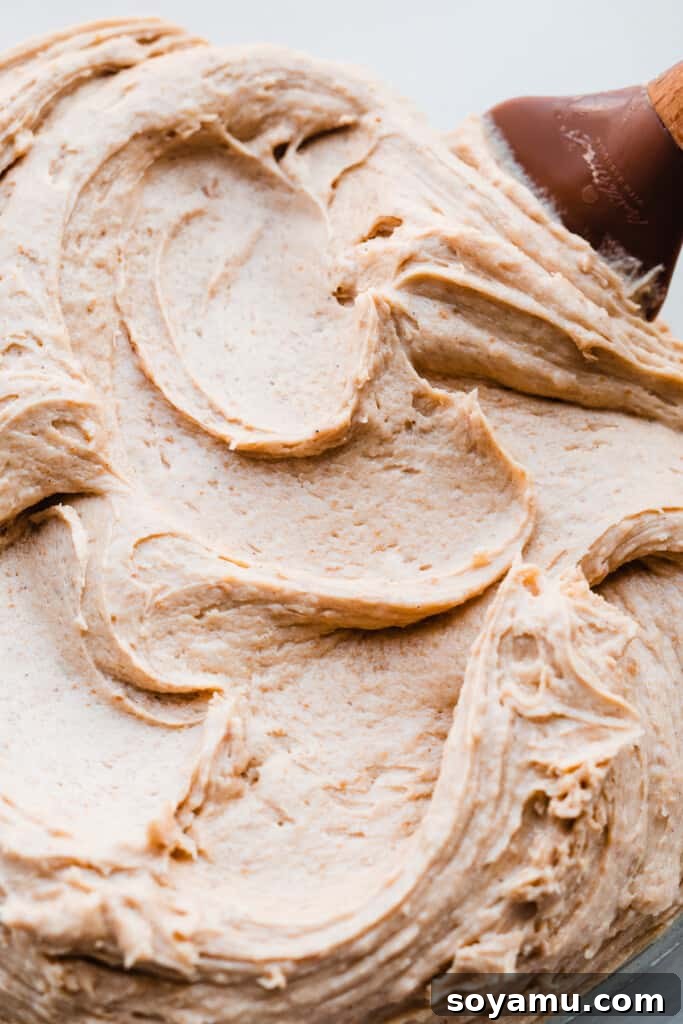
While your cake layers are cooling, prepare the star of the frosting: the cookie butter buttercream. In a large mixing bowl, cream together the softened butter and Biscoff cookie butter until they are light, smooth, and well combined. This can take a few minutes on medium-high speed. Gradually add the powdered sugar, vanilla extract, a pinch of salt, a pinch of cinnamon, and 1-2 tablespoons of heavy cream. Start with one tablespoon of cream and add more as needed to achieve a creamy, spreadable consistency. Beat on medium speed until the frosting is smooth and fluffy, scraping down the sides of the bowl as needed.
Finally, add the cold cream cheese. Beat it into the frosting on medium speed until just incorporated and smooth. Be careful not to overmix the cream cheese, as this can make the frosting too soft. If the frosting feels too soft at any point, simply chill it in the refrigerator for 15-20 minutes, then re-whip briefly to restore its perfect consistency.
Step 4: Assemble and Frost Your Masterpiece
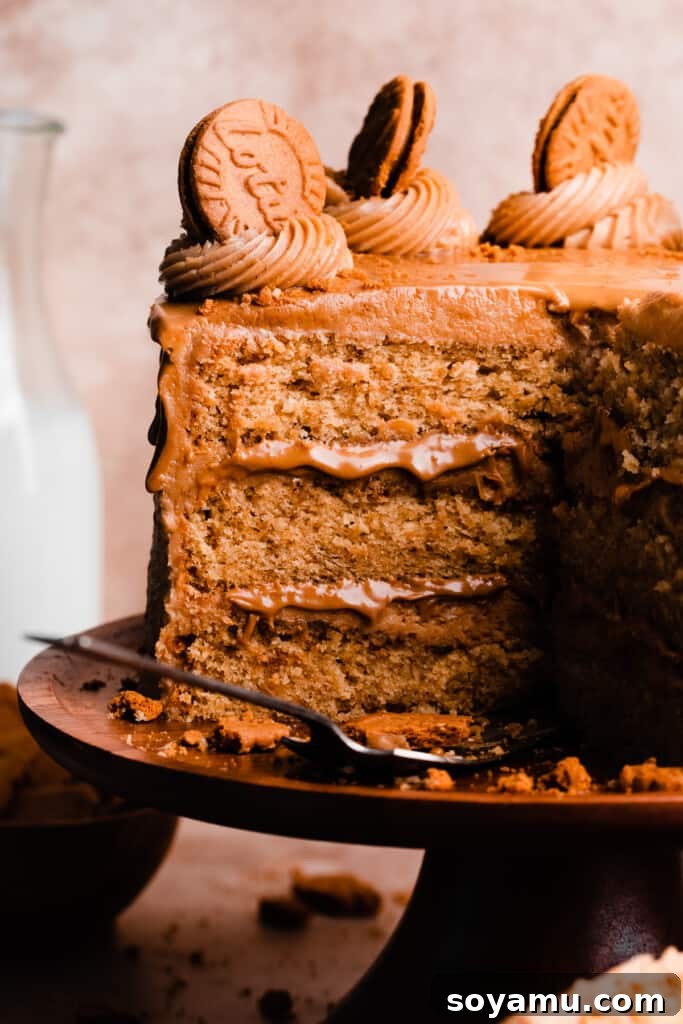
Once your cake layers are completely cool, it’s time for assembly. Place your first cake layer on a cake stand, ideally on a cake turntable for ease of frosting. Spread about 1.5 cups of the cookie butter frosting evenly over the top of this layer using an offset spatula. Next, pipe a border of frosting around the edge of the cake layer. Fill this border with half of the melted cookie butter filling and sprinkle generously with extra Biscoff cookie crumbs.
Carefully place the second cake layer on top. To prevent the layers from sliding, chill the partially assembled cake in the fridge for 5-10 minutes. Repeat the frosting and filling process for the second layer. Place the final cake layer on top.
Now, apply a thin layer of frosting over the entire cake – top and sides. This is known as the “crumb coat,” which traps any loose crumbs, ensuring your final layer of frosting is perfectly smooth. Use a cake scraper to smooth out and remove excess frosting. Don’t worry if it’s not perfect; its purpose is functional. Refrigerate the cake for at least 30 minutes to allow the crumb coat to set.
Once the crumb coat is firm, apply the remaining frosting to the cake. Use your offset spatula and cake scraper to create smooth, even sides and a flat top. For crisp edges, use a warm offset spatula (dipped in hot water and wiped dry) to glide over the frosting. Chill the entire frosted cake in the fridge for another 30 minutes, or until the frosting is completely set. This is crucial before moving to the drip or serving.
Step 5: Add the Iconic Cookie Butter Drip and Decorations
For the stunning Biscoff drip, gently melt the remaining 3/4 cup of cookie butter in the microwave in short bursts (10-15 seconds at a time), stirring between each, until it’s smooth and pourable but not hot. Test the consistency on the edge of a drinking glass first: it should drip down into a smooth stream when drizzled from a spoon and run down the side of the glass without immediately pooling at the bottom. If it’s too thick, warm it for a few more seconds; if too thin, let it cool slightly.
Once the perfect consistency is achieved, pour the melted cookie butter over the center of your chilled cake. Using an offset spatula, gently spread it towards the edges, allowing it to naturally waterfall down the sides for that beautiful drip effect. Continue turning the cake on the turntable as you spread to achieve an even drip all around.
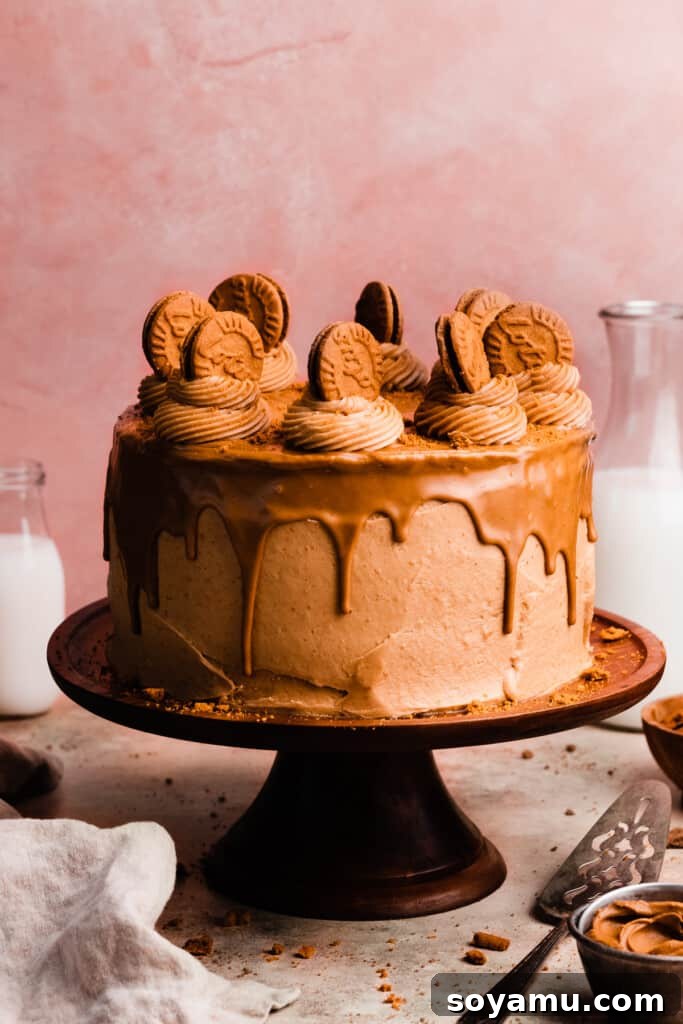
Allow the drip to set in the fridge for another 20-30 minutes, or until it’s firm to the touch. With any remaining frosting, pipe decorative swirls on top of the cake. Place a whole Biscoff cookie into each swirl for a charming and recognizable garnish. If the frosting has softened, place the cake back in the fridge briefly before slicing.
Serving & Storing Your Biscoff Cake
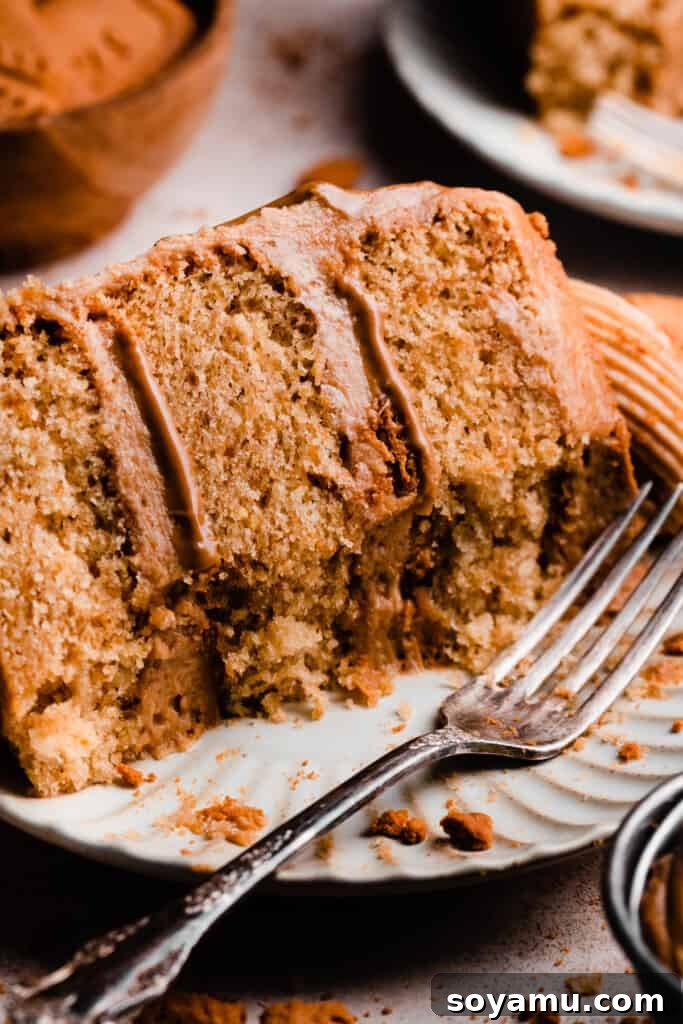
For the best experience, ensure your cake is well-chilled and the cookie butter drip is fully set before serving. This will make for cleaner slices and a firmer texture. Once ready, slice your cake with a sharp, warm knife (run under hot water and wiped dry between cuts) and prepare to enjoy the symphony of Biscoff flavors!
Store any leftover cake in an airtight container in the refrigerator for 3-4 days. To prevent the cut portions from drying out, gently press a piece of plastic wrap directly onto the exposed cake surface before covering the container or placing a cake lid. This keeps the layers moist and delicious for longer. Bring individual slices to room temperature for about 15-20 minutes before serving for optimal flavor and texture.
If you’re utterly smitten with Biscoff, don’t let the cookie butter magic end here! After this glorious cake disappears, consider trying our equally delightful **Biscoff Cheesecake** or our adorable **Biscoff Cupcakes**. They are incredible desserts sure to please any dedicated cookie butter fan!
Expert Success Tips for Your Biscoff Cake
Baking a show-stopping layered cake requires attention to detail. These expert tips will help ensure your Biscoff cake turns out perfectly every time:
- **Proper Mixing Technique is Key:** For a tender and moist cake, avoid overmixing the dry ingredients into the wet batter. Once you add the flour, mix on low speed only until just combined. Stop as soon as the last streaks of flour disappear. Overmixing develops the gluten in the flour, leading to a tough, dry cake. A few small lumps in the batter are perfectly acceptable.
- **Frosting Consistency Matters:** When preparing the cookie butter frosting, ensure the cookie butter itself is at room temperature but *not melted*. Melting it will alter its texture and make the frosting too runny. The cream cheese, however, should be cold when added to the frosting; this helps stabilize the frosting and prevents it from “weeping” (separating).
- **Verify Oven Temperature with a Thermometer:** One of the most common baking pitfalls is an inaccurate oven temperature. An oven thermometer is an inexpensive yet invaluable tool that displays your oven’s true temperature, helping you achieve consistent baking results. Keep one in your oven at all times to monitor its calibration.
- **Measure Ingredients by Weight:** For ultimate precision, especially with flour, a food scale is a baker’s best friend. The volume of flour can vary significantly based on how it’s scooped. Measuring by weight (grams) eliminates this variability, ensuring you use the exact amount needed for the perfect cake texture.
- **Room Temperature Ingredients:** As mentioned, butter, eggs, milk, and sour cream should all be at room temperature before mixing. This allows them to emulsify properly, creating a smooth, uniform batter that bakes evenly and yields a tender, moist cake.
- **Don’t Rush the Cooling:** Patience is a virtue in baking. Ensure your cake layers are completely cooled before attempting to frost them. Warm cake will melt your beautifully prepared frosting, leading to a frustrating and messy experience.
- **Chill Between Frosting Steps:** For a professional-looking layered cake, chill the cake after the crumb coat and after the final frosting layer. This helps set the frosting, making it easier to work with and ensuring stability, especially before adding the drip.
Frequently Asked Questions (FAQs)
Absolutely! This recipe is excellent for make-ahead preparation. You can bake the cake layers up to two days in advance. Once completely cooled, wrap them tightly in plastic wrap and store them at room temperature. The frosting can also be prepared a day ahead and stored in an airtight container in the fridge. Before frosting the cake, allow the frosting to come to room temperature for about 30-60 minutes, then re-whip it with an electric mixer until it’s smooth and spreadable again.
Yes, you can easily halve this recipe. Halve all the ingredient quantities for the cake batter and bake it in two 8-inch cake pans for smaller, two-layer cakes, or in a single 9×9 inch square pan. If using a square pan, once the cake is cooled, you can slice it horizontally through the middle to create two square layers. Regardless of your chosen pan shape, you’ll only need half the amount of frosting specified in the full recipe for a halved cake.
Yes, this cake batter is perfectly suitable for cupcakes! A full batch of this recipe will yield approximately 36 standard-sized cupcakes. If you halve the recipe, you can expect to get around 18 cupcakes. Adjust baking time accordingly; cupcakes typically bake for a shorter duration (around 18-22 minutes), so watch them closely.
A food processor is the most efficient and recommended tool for crushing Biscoff cookies into fine crumbs. Process them until they resemble fine graham cracker crumbs, as this texture is ideal for incorporating into both the cake batter and the frosting. If you don’t have a food processor, you can place the cookies in a sturdy Ziploc bag and crush them with a rolling pin or the bottom of a heavy pan until very fine. For decorating the top of the cake, you can crumble a few cookies by hand for larger, more rustic pieces.
Recommended Special Baking Tools
While not all these tools are strictly necessary, they will undoubtedly elevate your baking experience and help achieve professional-looking results for your Biscoff cake:
- **Offset Spatula:** An offset spatula is invaluable for spreading cake and brownie batters evenly, and it makes frosting layered cakes incredibly easy. Its angled blade allows for smooth, controlled application of frosting without getting your knuckles in the cake.
- **Piping Bag & Piping Tips:** For creating neat frosting borders around your filling and beautiful swirls on top of the cake, a good quality piping bag and a selection of tips are essential. A Wilton 1A or 2A piping tip is perfect for the border, while a Wilton 6B tip will create lovely decorative swirls.
- **Cake Turntable:** If you bake cakes more than once or twice a year, a cake turntable is a game-changer. It allows you to effortlessly rotate the cake as you frost, resulting in much smoother sides and a more efficient decorating process.
- **Parchment Rounds:** Save yourself time and effort with pre-cut parchment paper rounds. These eliminate the need to trace and cut parchment each time you bake cakes, ensuring your cakes never stick to the bottom of the pan. The 8-inch size is versatile and works well for both 8 and 9-inch cake pans.
- **Kitchen Scale:** As mentioned in our tips, a food scale is indispensable for accurately measuring flour and other ingredients by weight, guaranteeing consistent results every time.
- **Oven Thermometer:** An oven thermometer helps you maintain accurate baking temperatures, preventing under or over-baked cakes.
Affiliate links above may provide a small commission at no extra cost to you.
More Biscoff Recipes to Love
If you’ve been captivated by the delightful flavor of Biscoff, explore these other incredible recipes that celebrate this unique cookie butter:
- **Biscoff Stuffed Brownies**: Fudgy brownies with a hidden Biscoff surprise.
- **Triple Biscoff Cheesecake**: A creamy cheesecake, rich with Biscoff flavor and texture.
- **Biscoff Mug Cake**: A quick and easy single-serving Biscoff treat.
- **Biscoff Swirled Blondies**: Chewy blondies swirled with cookie butter goodness.
Did you make this recipe? We’d love to hear from you!
Please consider leaving a comment and a star rating below to share your experience. Your feedback is invaluable to us and helps our small business immensely!
Lotus Biscoff Cake with Biscoff Buttercream Recipe
By Stephanie Simmons
The ultimate cookie butter dessert! This tender Biscoff cake features cookie butter and cookie crumbs baked into the cake, a rich cookie butter buttercream, a decadent cookie butter filling, and Biscoff cookies for decoration. Get ready for Biscoff flavor in every single bite – cookie butter lovers, rejoice!
Prep time: 1 hour 15 minutes
Cook time: 24 minutes
Total time: 1 hour 39 minutes
Yields: 16 slices
Ingredients
(US Customary / Metric conversion notes are approximations)
For the Biscoff Cake:
- 3 ½ cups cake flour, spooned & leveled (385 grams)
- 3 tsp baking powder
- ½ tsp baking soda
- ¾ tsp salt
- ½ cup + 2 ½ tbsp salted butter, softened at room temperature (148 grams)
- ½ cup biscoff cookie butter (140 grams)
- ½ cup vegetable oil (119 mL)
- 2 ⅔ cups granulated sugar (564 grams)
- 3 large eggs, at room temperature
- 1 large egg white, at room temperature
- 1 tbsp vanilla extract
- ¾ cup full fat sour cream, at room temperature (180 mL)
- 1 ½ cups milk, at room temperature (360 mL)
- 1 cup biscoff cookie crumbs (from approx. 14 cookies, 100 grams)
For the Cookie Butter Filling:
- ½ cup melted and slightly cooled cookie butter, divided in half (140 grams)
- Extra biscoff cookie crumbs
For the Cookie Butter Frosting:
- 1 ½ cups + 2 tbsp butter, softened at room temperature (368 grams)
- 2 cups biscoff cookie butter (560 grams)
- 6 cups powdered sugar (690 grams)
- 2 tsp vanilla extract
- 1-2 tbsp heavy cream (15-30 grams, as needed to help things come together)
- Pinch of salt, to taste
- Pinch of cinnamon
- 14 ounces cream cheese, cold
For Decoration:
- ¾ cup cookie butter, melted (210 grams, for the drip)
- Extra biscoff cookies, for topping
Instructions
- Prep: Preheat your oven to 350°F (175°C). Grease three 9-inch round cake pans with shortening (using a paper towel to get into all corners). Then, dust the pans with flour, tapping to coat the shortening. This ensures perfect cake release.
- Make the Cake Batter: In a medium bowl, whisk together the cake flour, baking powder, baking soda, salt, and 1 cup of Biscoff cookie crumbs. In a large mixing bowl (or stand mixer), cream the softened butter well with an electric mixer on high speed. Add the ½ cup cookie butter and cream until completely combined. Beat in the vegetable oil for 1 minute on high speed. Add the granulated sugar and cream for 2 minutes on high speed until light and fluffy. Add two whole eggs, beating on medium-high for 45-60 seconds after each. Repeat with the last whole egg and the single egg white. The mixture should be fluffy. Mix in the sour cream and vanilla until just combined. With the mixer on low speed, add half of the dry ingredients. Add the milk when only a few streaks of flour remain, then add the remaining dry ingredients. Once just a few streaks of flour remain, turn off the mixer and fold in any last dry bits by hand. Do not overmix; a few lumps are fine.
- Bake: Divide the cake batter evenly among your prepared pans (approximately 736 grams per pan for 9-inch). Bake for 23 to 28 minutes, or until a toothpick inserted into the middle of the cake comes out with moist crumbs, but no wet batter. Let cakes cool in the pans for 10 minutes, then invert onto a wire cooling rack and allow them to cool completely before frosting.
- Make the Frosting: In a large mixing bowl, cream the softened butter and 2 cups of Biscoff cookie butter until light and smooth. Add the powdered sugar, vanilla extract, a pinch of salt, a pinch of cinnamon, and 1-2 tablespoons of heavy cream. Mix on medium speed until creamy and fluffy. Finally, add the cold cream cheese and beat until just incorporated and smooth. If the frosting is too soft, chill it in the fridge for 15-20 minutes, then re-whip briefly to regain desired consistency.
- Frost & Assemble Cake: Place the first cooled cake layer on a cake stand, preferably on a turntable. Spread about 1.5 cups of frosting evenly over the top using an offset spatula. Pipe a border of frosting around the cake layer. Fill the center with ¼ cup of the melted cookie butter filling and sprinkle with extra Biscoff cookie crumbs. Place the second cake layer on top and chill for 5-10 minutes to set. Repeat with the second layer. Add the final layer. Apply a thin layer of frosting over the entire cake (top and sides) for a crumb coat, using a cake scraper to smooth it. Chill the cake in the fridge for 30 minutes to set the crumb coat. Then, apply the remaining frosting, smoothing the top and sides with a cake scraper. Chill the entire cake in the fridge for another 30 minutes, or until the frosting is firm.
- Add Cookie Butter Drip & Pipe Swirls: Ensure the cake is well-chilled and the frosting is set before adding the drip. Melt ¾ cup of cookie butter in short bursts (10-15 seconds) until smooth and pourable. Test the consistency on a glass edge. Pour the melted cookie butter over the center of the chilled cake. Using an offset spatula, gently spread it towards and over the edges as you turn the cake, creating a waterfall drip effect. Let the drip set in the fridge for 20-30 minutes, or until solid. Pipe decorative swirls on top of the cake with any remaining frosting. Place a whole Biscoff cookie in each swirl for decoration.
- Serve & Store: Slice and serve the cake! Store leftovers in an airtight container in the fridge for 3-4 days. For cut portions, press a piece of plastic wrap directly onto the exposed cake surface to prevent it from drying out, even if covered with a cake lid.
Note: Always ensure your oven is running at the correct temperature by using an oven thermometer. It’s a lifesaver for bakers!
Nutrition Information
(Note: Nutrition information is an approximation and can vary)
- Serving: 1 slice
- Calories: 1155 kcal
- Carbohydrates: 141 g
- Protein: 14 g
- Fat: 61 g
- Saturated Fat: 24 g
- Polyunsaturated Fat: 5 g
- Monounsaturated Fat: 9 g
- Trans Fat: 1 g
- Cholesterol: 109 mg
- Sodium: 649 mg
- Potassium: 196 mg
- Fiber: 1 g
- Sugar: 103 g
- Vitamin A: 892 IU
- Vitamin C: 0.1 mg
- Calcium: 194 mg
- Iron: 1 mg
Love this recipe? Leave a comment below!