
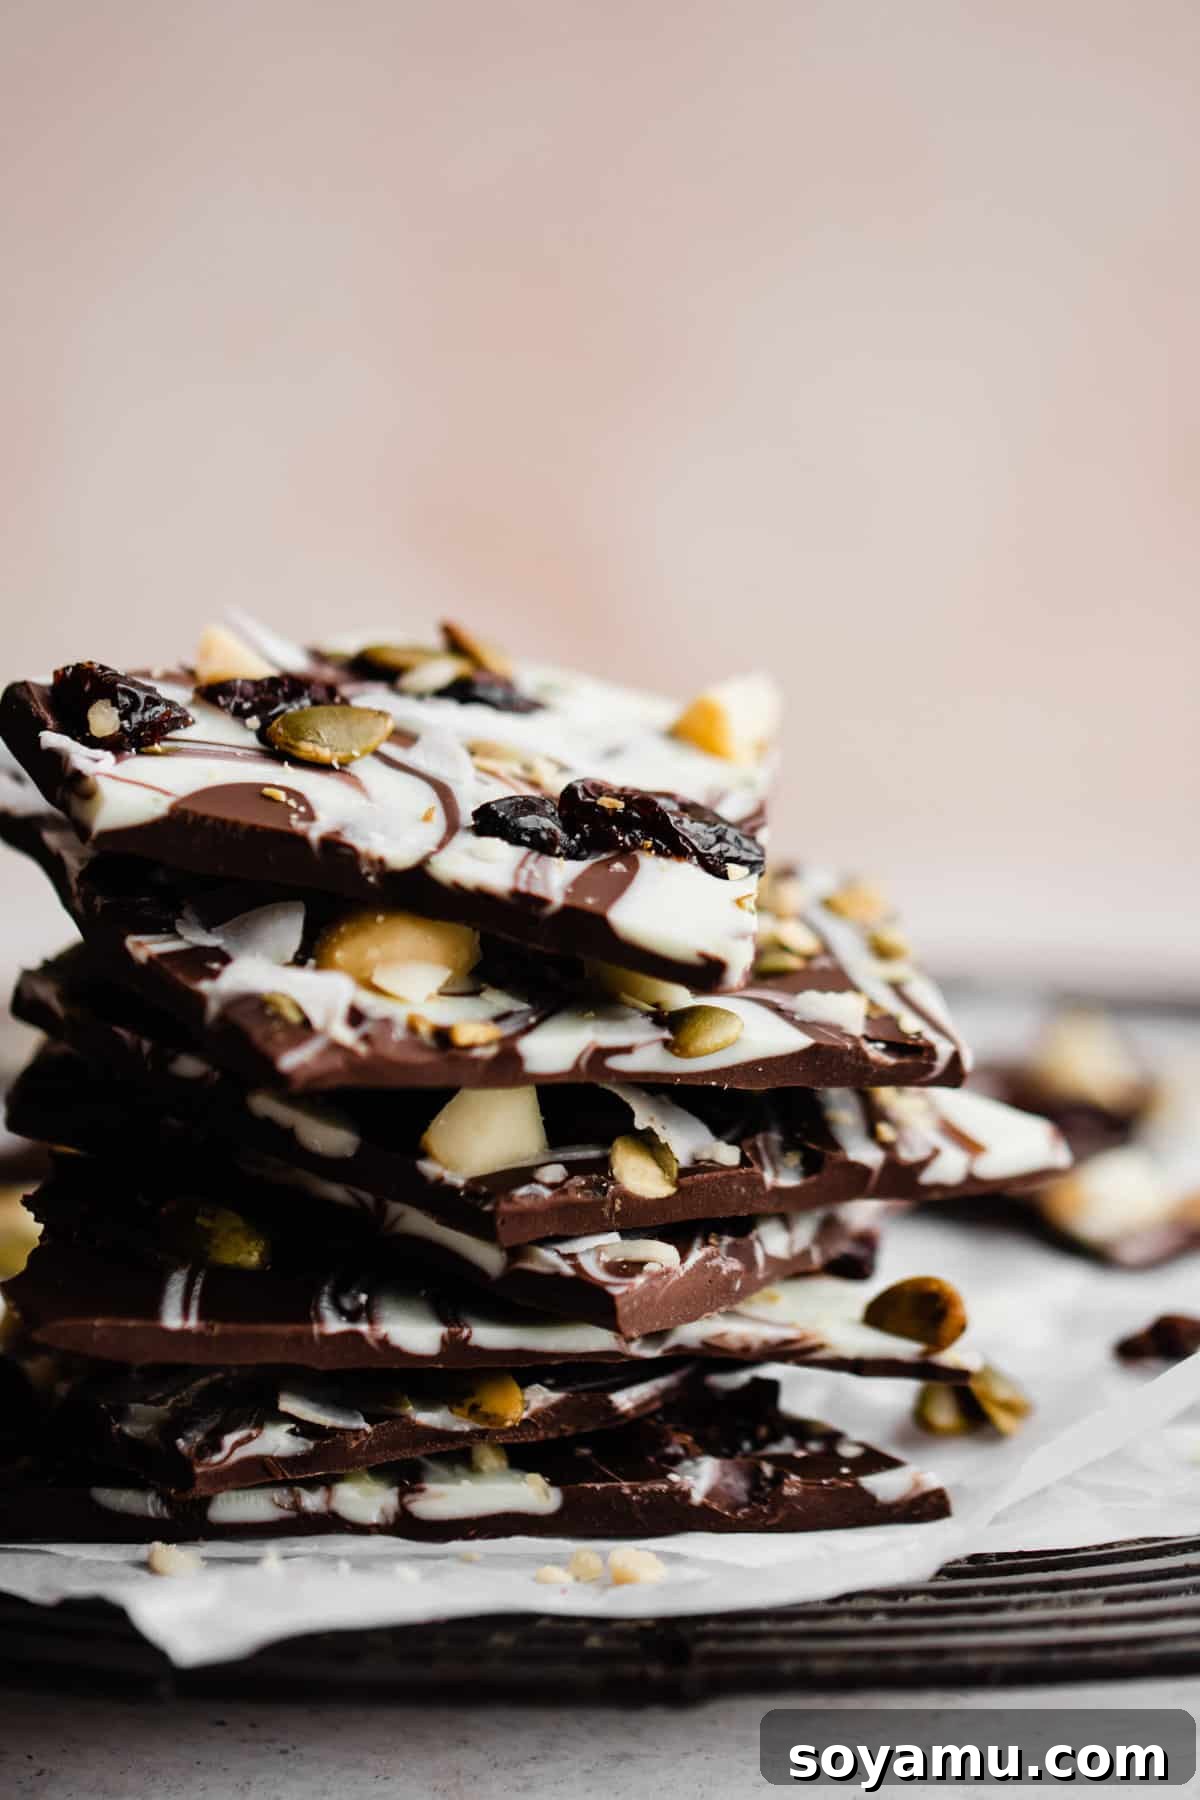
Homemade Chocolate Bark: Your Go-To Recipe for Easy, Customizable Sweetness
Craving a delightful sweet treat that’s incredibly simple to make yet impressive enough to gift? Look no further than Homemade Chocolate Bark! This recipe stands out as one of the easiest 5-ingredient snacks you’ll ever create, requiring minimal effort and no baking expertise. All it takes are a few basic components – high-quality chocolate, crunchy nuts, chewy dried fruit, and a sprinkle of something extra – to create a delicious confection that’s both elegant and utterly irresistible. Forget complicated desserts; this homemade bark is your secret weapon for satisfying sweet cravings or crafting the perfect edible present.
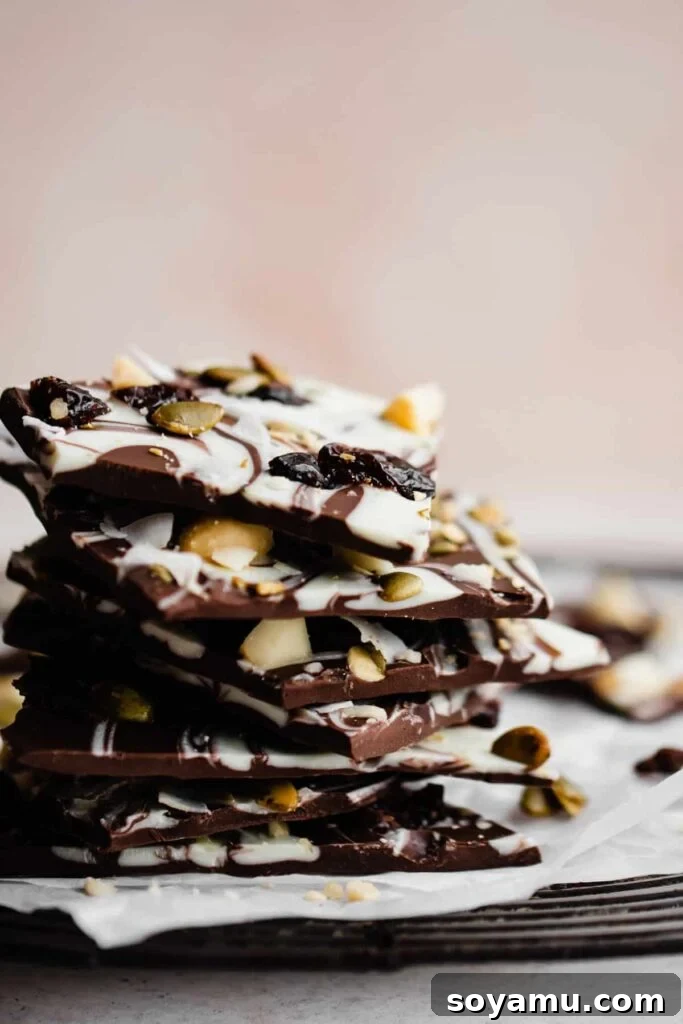
Why You’ll Absolutely Love Making Homemade Chocolate Bark
This chocolate bark recipe isn’t just easy; it’s a game-changer for anyone looking to whip up something special without the stress. Here are three compelling reasons why this sweet creation will quickly become a staple in your kitchen:
- Effortless Simplicity: A Beginner-Friendly Delight
You don’t need to be a seasoned baker to master this recipe. Homemade chocolate bark is incredibly straightforward, requiring nearly zero effort beyond melting chocolate and arranging toppings. If you can use a microwave or manage a double boiler, you’re halfway there! It’s the perfect project for busy individuals, kids (with adult supervision), or anyone new to confectionery who wants to achieve stunning results with minimal fuss. Enjoy the satisfaction of creating something beautiful and delicious with ease. - The Perfect Edible Gift for Any Occasion
There’s something truly special about a homemade gift, and this chocolate bark fits the bill perfectly. Pack up small, elegant packages for holiday gifting, thoughtful tokens for teachers, or a sweet surprise for neighbors and friends. Its customizable nature allows you to tailor flavors to individual preferences, making each gift feel personal and unique. A beautifully presented tin or bag of homemade chocolate bark speaks volumes about your care and thoughtfulness, making it an ideal present for any celebration or just because. - Unleash Your Creativity: Limitless Customization
This recipe is your canvas! Go wild (or should we say *nuts*?) with your favorite toppings and flavor combinations. The beauty of chocolate bark lies in its incredible versatility. Whether you prefer a classic combination of nuts and dried fruit, a playful mix of candies and sprinkles, or a sophisticated blend of spices and sea salt, the possibilities are truly endless. This is *your* party, and you get to decide the flavor profile. Experiment with different chocolates, textures, and tastes to create a bark that’s uniquely yours every time.
Mastering the Ingredients for Perfect Chocolate Bark
While the beauty of chocolate bark lies in its simplicity, choosing the right ingredients is key to achieving that professional finish and irresistible flavor. Below is an overview of the core components, designed to guide you towards a truly delicious result. (As always, the full recipe with precise measurements and detailed directions can be found in the dedicated recipe card section at the bottom of this article.)
- The Heart of the Bark: High-Quality Chocolate
Like most successful chocolate recipes, the foundation of exceptional bark is good quality chocolate bars, not chocolate chips. Why the distinction? Chocolate chips typically contain stabilizers that help them maintain their shape during baking. This means they won’t melt as smoothly or spread as evenly, and can even seize up more easily. For a truly luscious and glossy bark, opt for premium chocolate bars available in semi-sweet, dark, white, and milk varieties at most grocery stores, usually found near the baking aisle. Brands like Ghirardelli, Callebaut, or even high-quality store brands will yield superior results, creating a beautifully tempered and smooth finish. - Crunchy Delights: Pepitas and Beyond
For that essential textural contrast, I’ve opted for salted pepitas (shelled pumpkin seeds). Their subtle saltiness perfectly complements the sweet chocolate, and their delightful crunch adds an addictive quality. However, the world of crunchy mix-ins is vast! Consider using crushed pretzels for a salty-sweet twist, roasted almonds, hazelnuts, or even crispy rice cereal for a lighter bite. - Nutty Indulgence: Macadamias and Their Substitutes
Salted macadamia nuts are a luxurious choice, offering a rich, buttery flavor and a satisfying crunch. Their larger size and unique texture make them stand out. But don’t feel limited! Any nut you adore can be a fantastic substitute. Think toasted pecans, walnuts, pistachios, or even a mix of your favorites. Just ensure they are roughly chopped to distribute evenly across the bark. - Fruity Zing: Dried Cherries and Other Jewels
Dried cherries provide a wonderful tartness and chewy texture that cuts through the richness of the chocolate. Whether you choose unsweetened or sweetened varieties is entirely up to your preference. Other vibrant dried fruits like cranberries, blueberries, apricots (finely diced), or even candied orange peel can add bursts of flavor and color, elevating your bark to gourmet status. - Tropical Touch: Coconut Flakes
Lightly toasted coconut flakes add a subtle tropical flavor and a delicate chewiness. They are a fantastic addition for those who enjoy a hint of the exotic in their sweets. Ensure your flakes are unsweetened to avoid overly sweetening the bark, or lightly toast them yourself for an enhanced flavor.
Endless Possibilities: Creative Ingredient Substitutions & Variations
The beauty of homemade chocolate bark lies in its inherent adaptability. This recipe encourages experimentation, allowing you to tailor it to dietary needs, personal preferences, or seasonal themes. Here are some fantastic ways to get creative with your ingredients:
- Dairy-Free & Vegan Options
Making this recipe dairy-free and vegan is incredibly simple. Just choose your favorite high-quality dairy-free chocolate bars. Many excellent brands are available today that melt beautifully and taste just as rich as traditional chocolate. Ensure any other mix-ins you choose (like marshmallows or certain candies) are also vegan-certified. - Customize Your Chocolate Canvas
While I love the visual appeal of swirled milk and white chocolate, you are free to use a single type of chocolate or any combination you desire.- All Milk Chocolate Bark: For a classic, creamy, and sweet indulgence that’s a universal crowd-pleaser.
- All Dark Chocolate Bark: For a more intense, sophisticated flavor. Experiment with different cocoa percentages (e.g., 60%, 70%, or even 85%) to find your ideal bitterness level.
- All White Chocolate Bark: Creates a sweet, vanilla-forward base that pairs wonderfully with tart fruits or colorful sprinkles.
- Layered or Swirled Chocolates: Mixing different types, like dark and white, creates a visually stunning marbled effect and a more complex flavor profile.
- Nutty Adventures
Not a fan of nuts? Simply leave them out for a smoother bark. If macadamias aren’t your preference, consider swapping them for:- Pecans: Toasted pecans offer a buttery, earthy flavor.
- Walnuts: A slightly bitter, robust nut that pairs well with dark chocolate.
- Almonds: Sliced, slivered, or chopped, they add a delicate crunch.
- Pistachios: Their vibrant green color and distinct flavor make for an elegant addition.
- Peanuts: For a classic salty-sweet combination, especially with milk chocolate.
- Dried Fruit Fantasia
Dried cranberries are a popular alternative to cherries, offering a similar tart chewiness. But don’t stop there!- Dried Blueberries or Raspberries: For smaller bursts of berry flavor.
- Diced Apricots or Figs: Adds a richer, more substantial chew.
- Candied Ginger or Orange Peel: For a zesty, aromatic twist.
- Raisins or Golden Raisins: A classic and affordable option.
- Beyond the Basics: Exciting Mix-Ins
This is where you can truly let your imagination run wild! In addition to nuts and dried fruit, consider these fun additions:- Toffee Bits: For a buttery, caramelized crunch.
- Pretzel Pieces: A fantastic salty contrast to sweet chocolate.
- Mini Marshmallows: Adds a soft, chewy texture.
- Crushed Cookies: Oreos, graham crackers, shortbread – perfect for themed barks.
- Sprinkles: Festive and fun, especially for holiday or birthday bark.
- Seeds: Chia seeds, sesame seeds, or sunflower seeds for added nutrition and texture.
- Sea Salt Flakes: A must for enhancing chocolate flavor and providing a delightful textural pop.
- Spices: A dash of cinnamon, chili powder, or even a hint of cayenne can add intriguing warmth.
- Espresso Powder: Intensifies the chocolate flavor without adding coffee taste.
Step-by-Step Guide: How to Make Easy Homemade Chocolate Bark
Creating beautiful and delicious chocolate bark is a straightforward process, but paying attention to a few key details will ensure your success. Follow these steps for a perfect batch every time:
Step 1: Prepare Your Workspace
Before you even touch the chocolate, ensure your workspace is ready. Line a large baking sheet (approximately 13×18 inches or similar) with parchment paper or a silicone baking mat. This crucial step prevents the chocolate from sticking and makes for easy removal and clean-up later. Having everything prepped in advance makes the process smoother and faster, which is important when working with melting chocolate.
Step 2: Expertly Melt the Chocolate
The secret to smooth, glossy bark lies in how you melt your chocolate. Finely chopping your chocolate bars is the first step, as smaller pieces melt more evenly and quickly, reducing the risk of scorching.
- Microwave Method: This is the quickest and easiest approach. Place your finely chopped chocolate into a microwave-safe bowl. Heat in 20 to 30-second intervals, stirring thoroughly with a rubber spatula after each interval. Continue until the chocolate is about 80% melted, with a few small lumps remaining. Remove from the microwave and continue stirring until the residual heat melts the remaining chocolate into a smooth, uniform consistency. This gentle melting prevents overheating. If you’re using white chocolate, be extra cautious; heat in shorter 15-second intervals as white chocolate is more prone to seizing or scorching due to its different fat and sugar composition.
- Double Boiler Method: For a more controlled melt, use a double boiler. Place your chopped chocolate in a heat-proof bowl set over a pot with about 2 inches of simmering water. Ensure the bottom of the bowl does not touch the water. Melt gently over medium heat, stirring continuously with a rubber spatula. Once the chocolate is about 75-80% melted, remove the bowl from the heat and continue stirring until completely smooth. The steam provides indirect, gentle heat, making it harder to burn the chocolate.
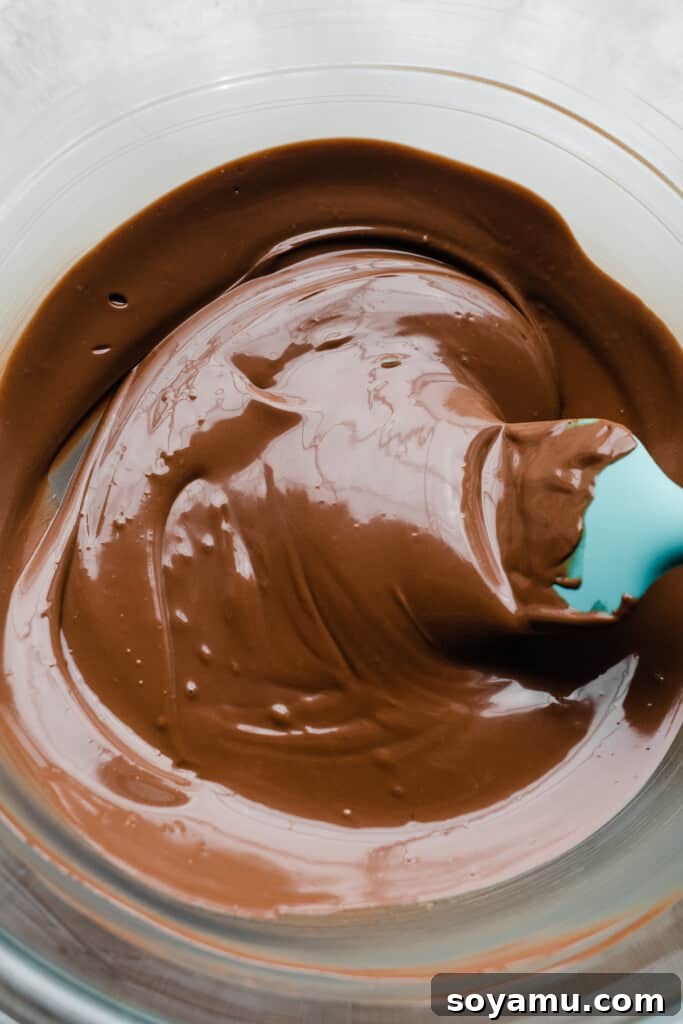
Step 3: Spread and Swirl for Visual Appeal
Once your chocolate is perfectly melted, it’s time for the artistic part! Pour your first type of melted chocolate onto the prepared baking sheet. Using an offset spatula or the back of a spoon, spread it into a thin, even layer, aiming for about 1/8 to 1/4 inch thickness. The thinner the bark, the easier it will be to break and enjoy.
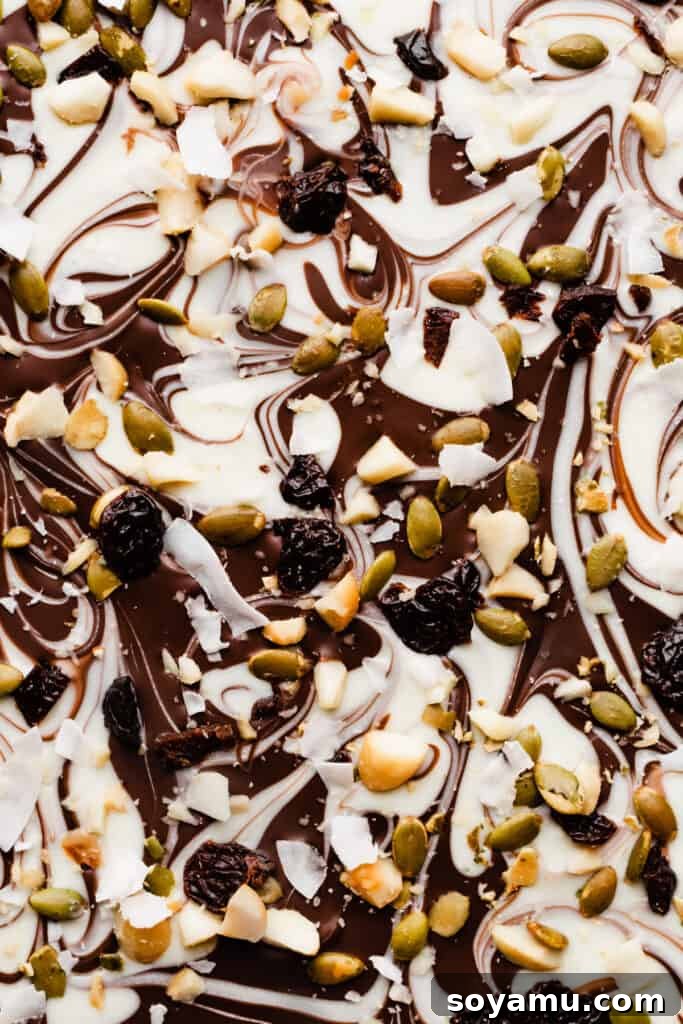
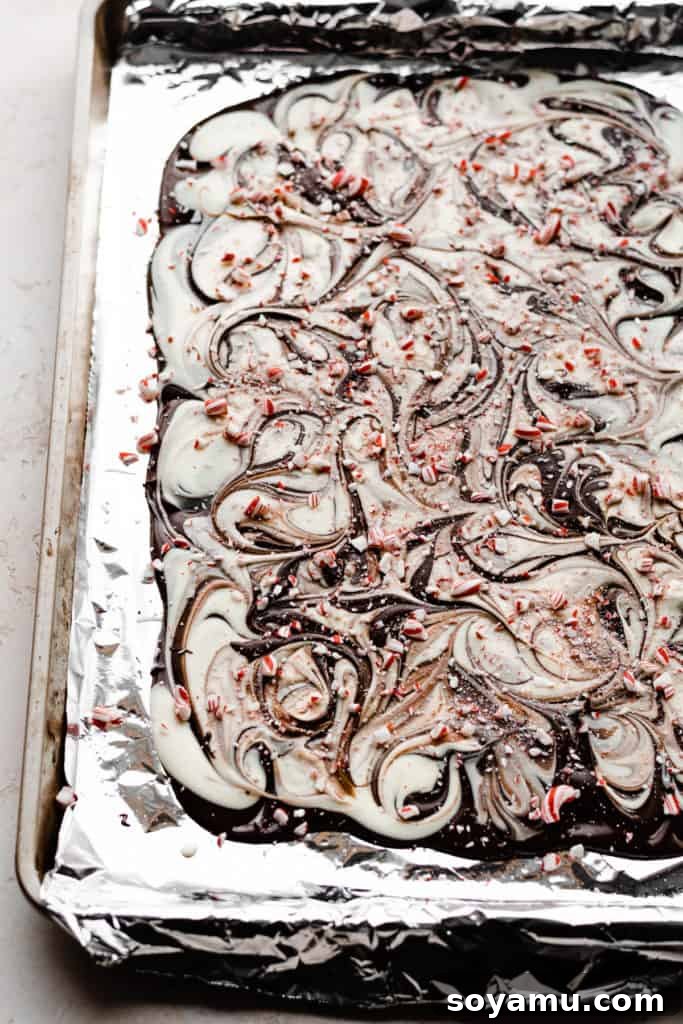
If you’re using a second type of chocolate (e.g., white chocolate over dark), pour it on top of the first layer and gently spread it, ensuring it stays within the edges of the base layer. Then, take a butter knife or a toothpick and gently swirl the two chocolates together to create beautiful, eye-catching marbled patterns. Don’t overmix, or the colors will blend entirely; aim for elegant ribbons and swirls. (The photo below showcases a similar swirling technique, demonstrating the idea perfectly!)
Step 4: Lavishly Top Your Creation
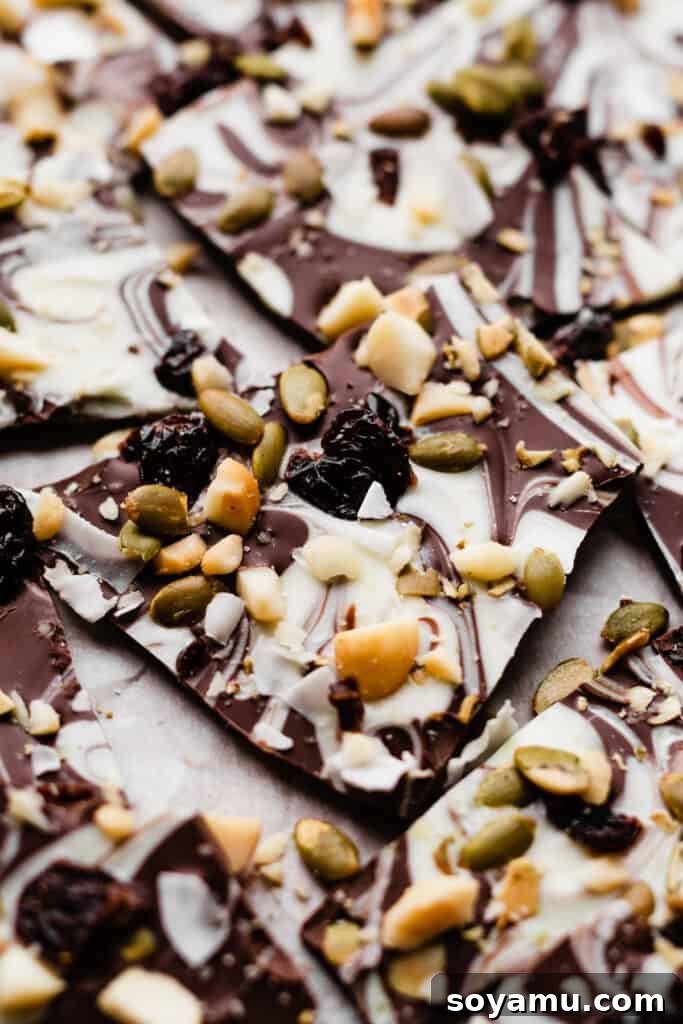
This is where the fun really begins! While the chocolate is still wet and pliable, generously sprinkle your chosen mix-ins over the entire surface. I used a delightful combination of dried cherries, crunchy coconut flakes, salted pepitas, and sea salt macadamia nuts. However, remember the rule of customization: you have immense flexibility here! Feel free to use any dried fruits, nuts, candies, or other toppings you desire. Gently press the toppings into the chocolate to ensure they adhere well as the bark sets.
Step 5: Chill to Perfection
Once topped, transfer the baking sheet to the refrigerator. Chill the chocolate bark for approximately 30 minutes to an hour, or until it is completely firm and set. Resist the urge to rush this step; proper chilling ensures the chocolate hardens uniformly and breaks cleanly. You’ll know it’s ready when it’s hard to the touch and easily lifts off the parchment paper.
Step 6: Break and Enjoy!
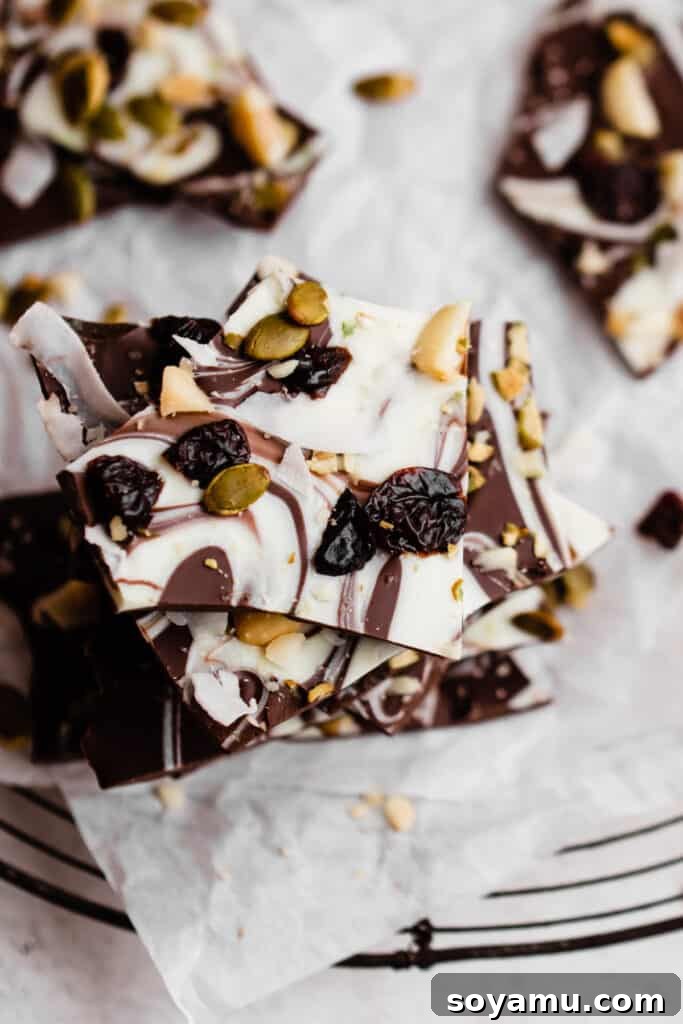
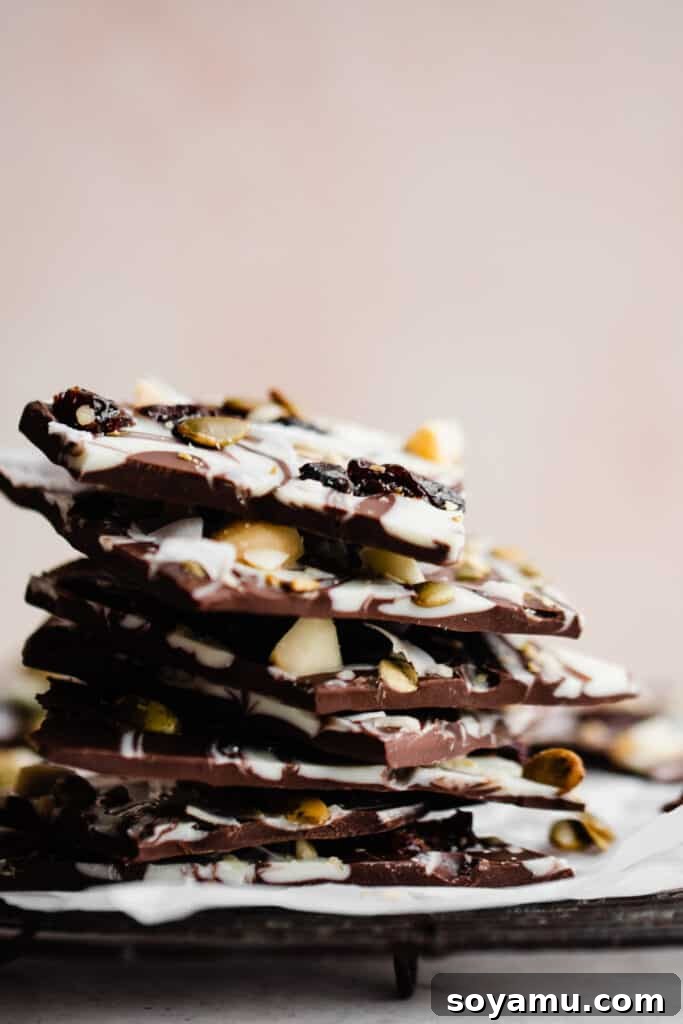
Once thoroughly chilled and set, remove the bark from the fridge. Gently peel it off the parchment paper. Now comes the satisfying part: breaking it into irregular pieces of your desired size. You can snap it with your hands for rustic charm, or use a sharp knife for more precise cuts. Arrange the pieces on a platter for serving, or prepare them for gifting. Each bite offers a delightful crunch and a burst of flavor!
Serving & Storage Tips for Optimal Freshness
Proper serving and storage are key to enjoying your homemade chocolate bark at its best. Once your chocolate bark has completely set and been broken into pieces, it’s ready to be devoured or shared.
To ensure no melty chocolate mishaps, especially in warmer environments, store your bark in an airtight container. While it can often keep for a few weeks at cool room temperature (below 70°F/21°C) in an airtight container, refrigeration is always the safest bet for extending its shelf life and maintaining its crisp texture. Stored in the fridge, homemade chocolate bark will remain fresh and delicious for 2-3 weeks, or even longer. If refrigerating, consider letting it come to room temperature for a few minutes before serving to fully appreciate the nuanced flavors and textures.
Pro Tips for Chocolate Bark Success
Elevate your chocolate bark from great to truly exceptional with these insider tips and tricks:
- Invest in Quality Chocolate: It Makes All the Difference
We cannot stress this enough: the quality of your chocolate directly impacts the final taste and texture of your bark. Opt for reputable brands like Ghirardelli, Baker’s chocolate bars, or melting wafers (specifically designed for smooth melting). Avoid standard chocolate chips if possible, as their stabilizers prevent them from melting into the beautifully smooth, glossy consistency ideal for bark. A higher quality chocolate also has a richer, more complex flavor. - Consider Tempering for the Ultimate Finish (Optional)
For the most professional, snap-able bark with a beautiful shine and resistance to melting at room temperature, consider tempering your chocolate. Tempering involves carefully heating and cooling chocolate to stabilize its crystal structure. While not strictly necessary for delicious bark, it’s a technique that yields superior results for serious chocolate enthusiasts. You can find many guides online for both seed tempering and microwave tempering methods. - Transform Leftover Holiday Candy into a Fun Bark
Beyond nuts and dried fruit, chocolate bark is a fantastic way to utilize leftover holiday candy! Crush peppermints for a festive peppermint bark (especially with white chocolate), chop up candy canes, M&Ms, or even snickers bars. This less “healthy” route turns your bark into a fun, whimsical candy creation that’s perfect for parties or as a special treat. It’s a creative way to prevent waste and enjoy seasonal flavors. - Seasonal & Themed Bark Ideas
Think beyond the standard toppings! Tailor your bark to different seasons or holidays:- Christmas: Crushed candy canes, green and red sprinkles, dried cranberries, white chocolate.
- Halloween: Candy corn, mini marshmallows, edible googly eyes.
- Fall: Toasted pecans, dried apples, cinnamon, a drizzle of caramel.
- Summer: Freeze-dried berries, citrus zest, shredded coconut.
- Don’t Forget the Sea Salt!
A final sprinkle of flaky sea salt (like Maldon) over your finished bark, especially dark chocolate bark, is a chef’s secret weapon. It beautifully enhances the chocolate’s flavor, cuts through the sweetness, and adds a delightful pop of texture.
Frequently Asked Questions about Chocolate Bark
Absolutely! This recipe is incredibly versatile and scales beautifully. Whether you’re making a small batch for yourself or a large quantity for gifts or a party, feel free to double, triple, or halve the ingredients as needed. Just ensure you use an appropriately sized baking sheet to maintain the desired thickness of the bark.
Homemade chocolate bark makes an exceptional and highly appreciated gift! Here are some ideas for presentation:
- Elegant Tins: Arrange pieces neatly in a decorative tin, perhaps with a layer of parchment paper between layers to prevent sticking. Tie a beautiful ribbon around the tin for a polished look.
- Cellophane Bags: Place a few pieces in clear cellophane bags, tie with a twist tie or ribbon, and add a custom label.
- Mason Jars: Layer smaller pieces in a clean mason jar for a rustic yet charming gift.
- Gift Boxes: Use small bakery boxes or gift boxes, lined with tissue paper or parchment, for a professional touch.
It’s perfect for holiday gifts, teacher appreciation, neighborly gestures, or just to brighten someone’s day. Paired with a simple card, it’s a gift from the heart.
Chocolate seizes (becomes thick, lumpy, and unworkable) when it comes into contact with even a tiny amount of water or is overheated. White chocolate is particularly sensitive. To prevent this, ensure all your bowls, spatulas, and tools are completely dry. When melting over a double boiler, make sure no steam or water splashes into the chocolate. If it does seize, sometimes you can rescue it by stirring in a teaspoon of vegetable oil or melted shortening at a time, until it smooths out. However, the texture and shine might not be as perfect.
Typically, chocolate bark takes about 30 minutes to an hour to fully set in the refrigerator. If you’re using very thin layers or a colder fridge, it might be quicker. At room temperature, depending on ambient temperature and humidity, it could take several hours. For best results and the quickest set, always chill it in the refrigerator.
Essential Tools for Making Perfect Chocolate Bark
While chocolate bark is known for its simplicity, having a few key tools on hand can make the process even smoother and more enjoyable, helping you achieve professional-looking results with ease:
- Large Cookie Sheet: You’ll definitely need a sturdy, large cookie sheet (like a standard half-sheet pan, roughly 13×18 inches) to spread your chocolate. This provides ample surface area for a thin, even layer of bark, which is crucial for easy breaking and a pleasant eating experience.
- Parchment Paper or Silicone Baking Mat: This is non-negotiable! Lining your cookie sheet with parchment paper or a reusable silicone baking mat prevents the chocolate from sticking, making for effortless removal and clean-up. Do not skip this step.
- Offset Spatula: While not strictly essential, an offset spatula is a game-changer for spreading chocolate smoothly and evenly. Its angled blade allows you to spread with precision without your knuckles dragging through the chocolate. It’s also incredibly useful for frosting cakes, spreading batters, and many other kitchen tasks.
- Heat-Proof Bowls: Whether you opt for the microwave or double boiler method, a good set of heat-proof glass or ceramic bowls is necessary for melting your chocolate safely and effectively.
- Rubber Spatula: For stirring chocolate during melting and scraping down the sides of the bowl, a flexible rubber spatula is invaluable. It ensures all chocolate is evenly melted and prevents waste.
(Note: Some links may be affiliate links, meaning I may earn a small commission at no extra cost to you if you make a purchase.)
More Delightful Sweet Treats & Edible Gifts
If you loved making this easy chocolate bark, you’re sure to enjoy these other fantastic recipes. Perfect for gifting, sharing, or simply treating yourself!
- Black Forest Chocolate Truffles: Indulge in rich, decadent truffles with a hint of cherry, reminiscent of the classic Black Forest cake. These are a sophisticated and impressive edible gift.
- 10-Minute Salted Caramel Sauce: A silky-smooth, perfectly balanced sweet and salty caramel sauce that comes together in a flash. Drizzle it over ice cream, use it in coffee, or gift it in a pretty jar.
- Easy Chex Mix: While not sweet, this savory, crunchy snack is equally addictive and customizable. A fantastic party snack or a savory alternative for gifting.
- White Chocolate Peppermint Puppy Chow: A festive and fun holiday treat, combining crispy cereal with creamy white chocolate and refreshing peppermint. Perfect for seasonal gatherings.
- Classic Puppy Chow: The original, irresistible sweet snack mix made with peanut butter, chocolate, and powdered sugar. A nostalgic favorite that’s always a hit.
- Double Chocolate Swirled Peppermint Bark: A seasonal twist on classic bark, featuring layers of dark and white chocolate swirled together and topped with crushed peppermint candies.
Did you make this recipe? We’d love to hear from you! Leave a comment & star rating!
Your feedback helps our small business immensely. Please share your experience and let us know how you enjoyed this easy and delicious chocolate bark recipe.
Recipe Card: 5-Ingredient Homemade Chocolate Bark
By Stephanie Simmons
Homemade Chocolate Bark is the easiest 5-ingredient snack you’ll ever whip up. All you need are 5 simple (and customizable!) ingredients – chocolate, pepitas, dried cherries, coconut flakes, and any type of nuts. This is the perfect grab-and-go snack or edible gift!
Prep Time: 15 mins
Chill Time: 1 hr
Total Time: 1 hr 15 mins
Servings: 16 pieces
Ingredients
- 12 ounces milk, semi-sweet, or dark chocolate (340 grams), finely chopped
- 12 ounces white chocolate (340 grams), finely chopped
- 1/2 cup dried cherries, roughly chopped
- 1/2 cup sea salt macadamia nuts, roughly chopped
- 1/2 cup salted pepitas
- 1/2 cup coconut chips
Instructions
- Prep: Line a large cookie sheet with a piece of parchment paper.
- Melt Chocolate: For dark, milk, or semi-sweet chocolates, melt the chocolate in the microwave, in 30-second intervals, stirring well between each, until almost melted. Continue stirring until the residual heat melts the remaining chocolate into a smooth consistency. For white chocolate, use only 15-second intervals at a time, as it tends to seize up more easily. Alternatively, melt chocolate using a double boiler: place chocolate in a heat-proof bowl over a saucepan with 2 inches of simmering water (bowl not touching water). Remove from heat when 75% melted and stir until smooth.
- Make the Chocolate Bark: Pour the melted darker chocolate (if using) onto the prepared pan. Spread to your desired thinness (about 1/8 to 1/4 inch). Pour the melted white chocolate (if using) on top, spreading it just within the edges of the darker chocolate. Use a butter knife or toothpick to create beautiful swirls. Then, immediately sprinkle on your desired mix-ins – dried fruits, nuts, seeds, coconut, etc. Remember, feel free to customize with any toppings you like!
- Chill: Chill the chocolate bark in the fridge for about 30 minutes to an hour, or until the chocolate has completely set and is firm to the touch.
- Serve + Store: Once completely set, gently peel the bark off the parchment paper and break it into irregular pieces. Serve immediately or store. Store in an airtight container at room temperature (if cool) or in the fridge to prevent melting. It will keep for a few weeks at room temp and even longer in the fridge.
- Gift It: This chocolate bark is a fantastic homemade gift! Package it in a cute tin for the holidays with a ribbon on top, or arrange it on a decorative plate for neighbors and friends to enjoy.
Nutrition
Nutrition information is automatically calculated and should only be used as an approximation.
Serving: 1 piece, Calories: 319kcal, Carbohydrates: 28g, Protein: 4g, Fat: 22g, Saturated Fat: 11g, Polyunsaturated Fat: 1g, Monounsaturated Fat: 8g, Trans Fat: 0.02g, Cholesterol: 6mg, Sodium: 24mg, Potassium: 240mg, Fiber: 3g, Sugar: 23g, Vitamin A: 152IU, Vitamin C: 0.3mg, Calcium: 65mg, Iron: 2mg