
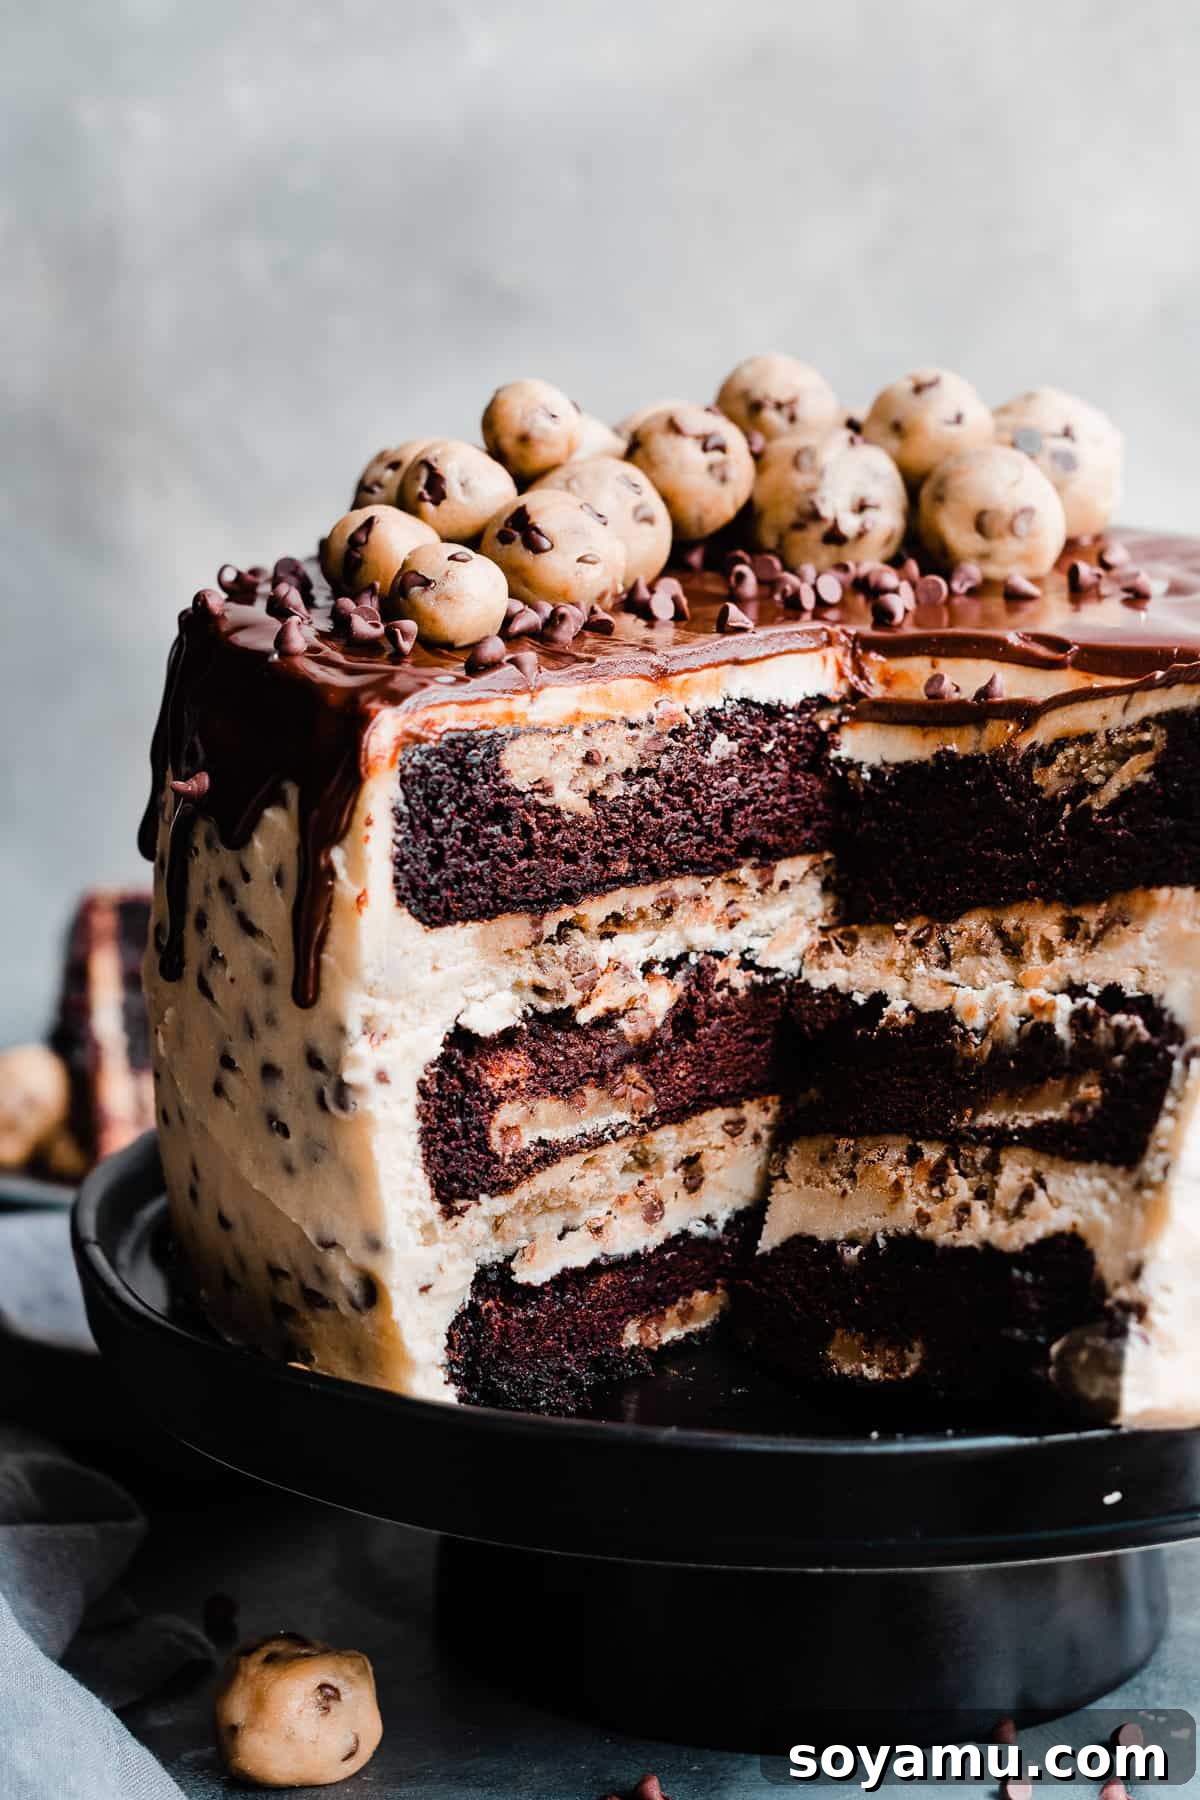
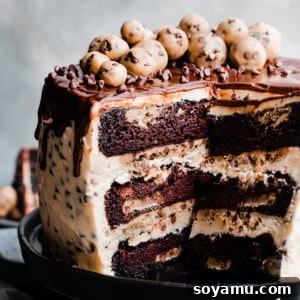
The Ultimate Cookie Dough Cake offers an unparalleled sensory journey for every dessert enthusiast, delivering the most extravagant edible cookie dough experience imaginable! This magnificent creation features exquisitely rich and incredibly moist chocolate cake layers, generously studded with delectable edible cookie dough. Each layer is then enveloped in a lavish cookie dough buttercream, and at its heart lies a generous filling of pure, edible chocolate chip cookie dough. To crown this masterpiece, a silky smooth chocolate ganache drips elegantly down the sides, adorned with charming cookie dough balls. For those who adore the irresistible combination of chocolate and cookie dough, prepare to rejoice – this is truly the dessert of your wildest dreams, meticulously crafted to satisfy your deepest cravings!
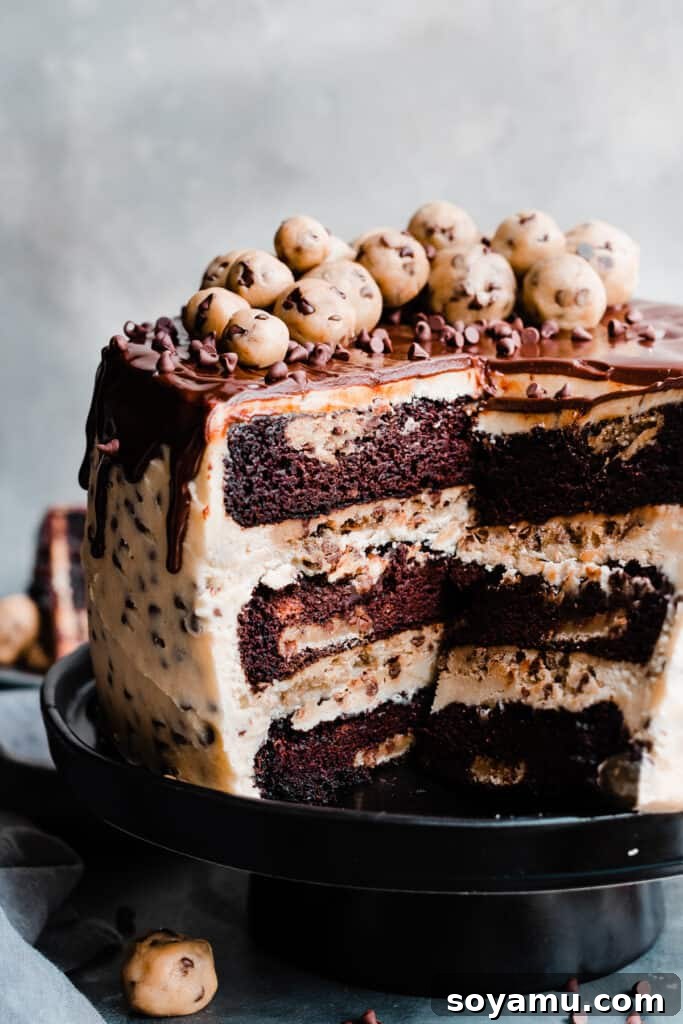
This show-stopping, mouthwateringly decadent cookie dough cake isn’t just a dessert; it’s an event! It’s the perfect centerpiece for a joyous birthday celebration, a memorable anniversary, or any special occasion that calls for an extraordinary treat. While this recipe involves several delightful components, rest assured that each step is broken down into manageable parts. We’ll guide you through making the incredibly moist chocolate cake layers, preparing the safe-to-eat cookie dough, crafting the dream-like cookie dough buttercream, and perfecting that elegant chocolate ganache drip. We’ve included helpful make-ahead tips and suggestions to streamline the process, ensuring your baking experience is as enjoyable as the finished product. Now, let’s embark on this delicious adventure and dive into crafting this ultimate cookie dough dream!
Why You’ll Fall in Love with This Chocolate Chip Cookie Dough Cake:
This isn’t just any cake; it’s a carefully crafted indulgence designed to bring sheer joy with every bite. Here’s why this Ultimate Cookie Dough Cake will quickly become your new favorite dessert:
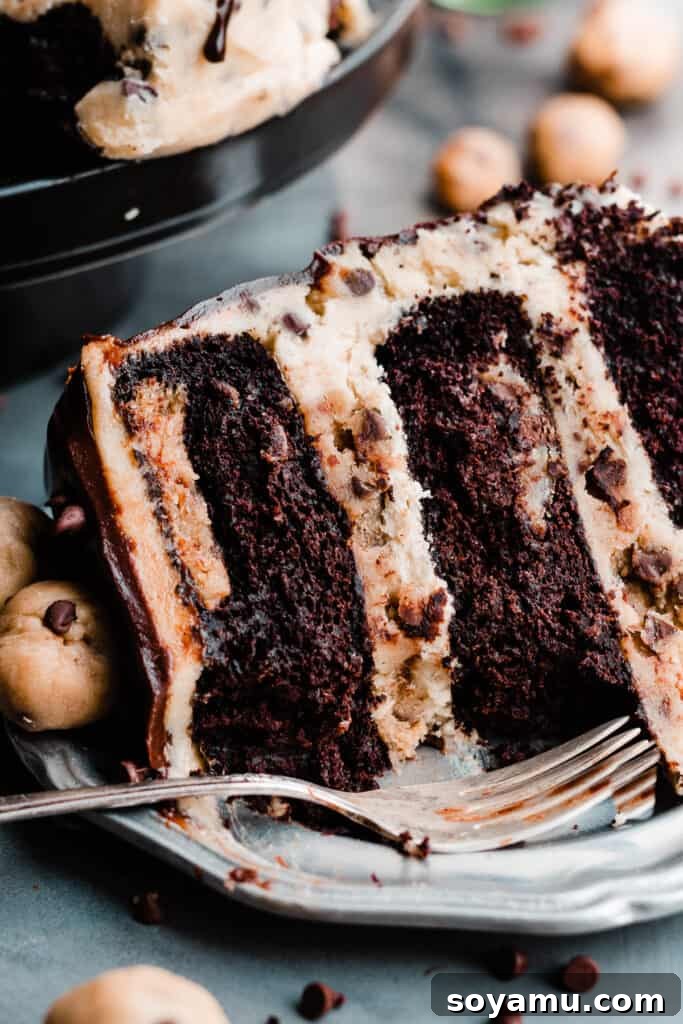
- Unbelievably Moist Chocolate Cake Layers – The foundation of this decadent masterpiece is an incredibly easy yet supremely moist chocolate layer cake. We’ve perfected a recipe that guarantees a tender crumb and an intensely rich chocolate flavor, making it the ideal canvas for our cookie dough elements. You’ll be amazed at how simple it is to achieve such a luxurious base.
- Double the Edible Cookie Dough Delight – Prepare for a dual-layered cookie dough experience! Specially prepared edible cookie dough discs are baked right into the chocolate cake layers, infusing every slice with pockets of chewy, sweet goodness. Beyond that, generous, larger discs of our safe-to-eat cookie dough are strategically placed between each cake layer, creating distinct, irresistible sections. For the ultimate finishing touch, extra cookie dough balls crown the cake, ensuring every bite is a celebration of classic chocolate chip cookie dough.
- Irresistible Cookie Dough Frosting – Our signature frosting is a game-changer! This luscious buttercream tastes precisely like raw edible cookie dough, but in a perfectly smooth, spreadable form. We achieve its authentic flavor using heat-treated flour and rich brown sugar, ensuring that classic cookie dough taste and texture that will have you craving more.
- Elegant Chocolate Ganache Drip – Elevate the visual appeal and flavor of this stunning cake with an effortlessly applied chocolate ganache drip. This glossy, silky finish adds a touch of sophistication and another layer of rich chocolate flavor, perfectly complementing the cookie dough elements. And of course, don’t forget to adorn it with those charming extra cookie dough balls for a truly complete presentation!
Essential Ingredient Overview:
Crafting the perfect Cookie Dough Cake starts with understanding the role of each ingredient. Below is an overview of the key components, highlighting their importance. For precise measurements and detailed instructions, please refer to the full recipe card at the bottom of this post.
- Butter – We opt for salted butter to enhance the overall flavor profile of both the cake and the cookie dough. Its rich fat content contributes significantly to the cake’s moistness and the buttercream’s luxurious texture, acting as a superior alternative to vegetable oil for depth of flavor. If using unsalted butter, a small pinch of extra salt can be added to balance the sweetness. Ensure your butter is softened to room temperature for optimal creaming.
- Sour Cream – Full-fat sour cream is a secret weapon for achieving an incredibly moist and tender chocolate cake. Its acidity reacts with the baking soda, contributing to a lighter texture, while its fat content ensures richness. Always use sour cream at room temperature to prevent the batter from seizing and to ensure smooth incorporation.
- Cake Flour – For the chocolate cake layers, cake flour is highly recommended. Its lower protein content results in a finer, more tender crumb that simply melts in your mouth, elevating the cake’s delicate structure. Accurate measurement is crucial; always spoon and level your flour or, ideally, use a kitchen scale for precision. For reference, 1 cup of cake flour typically weighs 110 grams, while 1 cup of all-purpose flour is 130 grams. Scooping directly can compact the flour, leading to an overly dense cake. Additionally, remember to heat-treat the flour for the edible cookie dough and frosting to ensure it’s safe for consumption – detailed instructions are in the FAQs and recipe card.
- Eggs – Large eggs, brought to room temperature, are essential binders and provide structure, richness, and moisture to the cake batter. Room temperature eggs emulsify better with other ingredients, creating a smoother, more uniform batter.
- Cocoa Powder – Use natural cocoa powder for this recipe, not Dutch process. Natural cocoa powder is acidic and reacts with the baking soda in the cake, contributing to its rise and rich chocolate flavor. Dutch process cocoa has been alkalized, neutralizing its acidity, and would require a different leavening agent.
- Milk – Any percentage of milk will work, but 2% milk is a great standard for baking. It adds moisture and helps to create a tender texture in the cake. Ensure it’s at room temperature for seamless blending with other ingredients.
Smart Ingredient Substitutions:
While the original recipe delivers optimal results, sometimes dietary needs or pantry availability call for smart substitutions. Here are some trusted alternatives:
- Dairy-Free Alternatives – If you need a dairy-free version, this recipe can be adapted. Use your favorite reliable dairy-free butter (stick form is best for baking), dairy-free sour cream (or a thick plant-based yogurt), and dairy-free milk. For the cream cheese in the buttercream, look for a good quality dairy-free cream cheese alternative. Always ensure all your chosen dairy-free products are at room temperature as specified.
- Gluten-Free Adaptation – While I haven’t personally tested a gluten-free version of this specific cake, many bakers have success using a high-quality 1:1 gluten-free baking flour blend that contains xanthan gum. Be sure to measure by weight (grams) for accuracy and allow the batter to rest for 15-20 minutes before baking to allow the gluten-free flours to hydrate properly. Please share your results if you try it!
- Cornstarch as an Egg Substitute – In our edible cookie dough, a mixture of cornstarch and water replaces raw eggs, ensuring food safety without compromising texture. For an equally delicious alternative, you can substitute 4 ounces (approximately 113 grams) of softened cream cheese for the cornstarch and water slurry. Both options yield a wonderfully rich and authentic cookie dough taste.
- Sour Cream Replacement – If sour cream isn’t available, full-fat Greek yogurt, brought to room temperature, makes an excellent substitute. Its similar tanginess and thick consistency will maintain the cake’s desired moisture and tender crumb.
- Homemade Cake Flour – No cake flour on hand? No problem! You can easily make your own. For every cup of all-purpose flour, spoon and level 1 cup into a measuring cup, then remove two tablespoons. Replace these two tablespoons with two tablespoons of cornstarch. Sift this mixture thoroughly twice. This crucial step ensures the cornstarch is evenly distributed, mimicking the light, tender texture of commercial cake flour.
How to Make this Ultimate Cookie Dough Cake: A Step-by-Step Guide
Creating this showstopping cake is a rewarding process. Follow these detailed steps to ensure every component comes together beautifully.
Step 1: Prepare the Edible Cookie Dough Foundation
Begin by heat-treating all-purpose flour for both the edible cookie dough and the cookie dough frosting to eliminate any potential food safety concerns. Spread the required amount of flour evenly across two baking sheets and bake in a preheated oven at 350°F (175°C) for 10 minutes, or microwave in 30-second intervals for 1-2 minutes until it reaches 165°F (74°C). Allow it to cool completely before use. While the flour cools, whisk together the cornstarch and warm water in a small bowl until the cornstarch is fully dissolved. This mixture will act as our egg substitute.
In a large mixing bowl, using an electric mixer on high speed, cream together the softened butter and both sugars until light and fluffy, usually for at least a minute. This aeration is key to a tender dough. Beat in the vanilla extract, followed by the prepared cornstarch-and-water egg substitute, mixing on medium speed for about another minute until thoroughly combined. Gradually add the dry ingredients (heat-treated flour, baking soda, and salt) to the wet mixture, mixing on low speed until a dough begins to form. It might appear crumbly at first, but continue mixing until it comes together into a cohesive dough. Finally, gently fold in the mini chocolate chips until evenly distributed throughout the dough.
From this prepared cookie dough, portion out 24 small balls, each approximately 2 teaspoons in size. These will be flattened into discs and baked into our cake layers. Next, portion two larger chunks of cookie dough, each weighing about 265 grams (or approximately 1 cup), and flatten them into large discs. These will serve as luscious filling layers between your cake. Wrap all portions tightly in plastic wrap and chill them in the fridge while you prepare the cake. Use any remaining dough to form extra cookie dough balls for decorating the finished cake, storing them in an airtight container in the fridge.
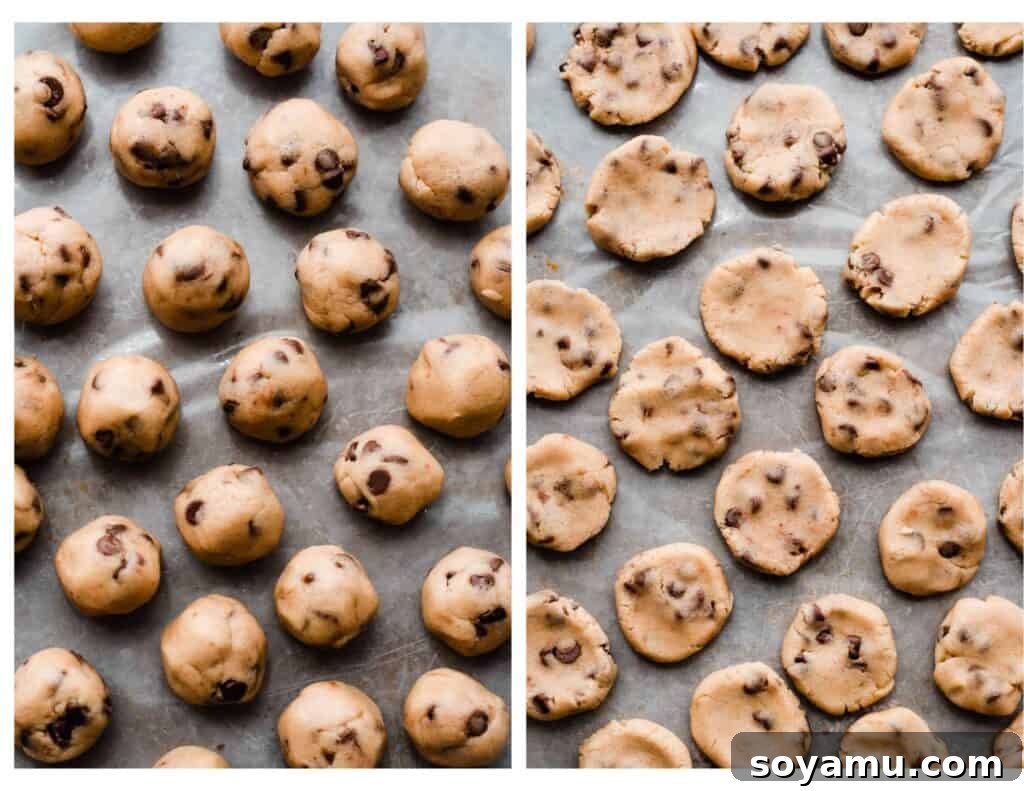
Ensure these larger discs are uniform in thickness so they layer beautifully within your cake. Their presence guarantees an incredible textural surprise in every slice.
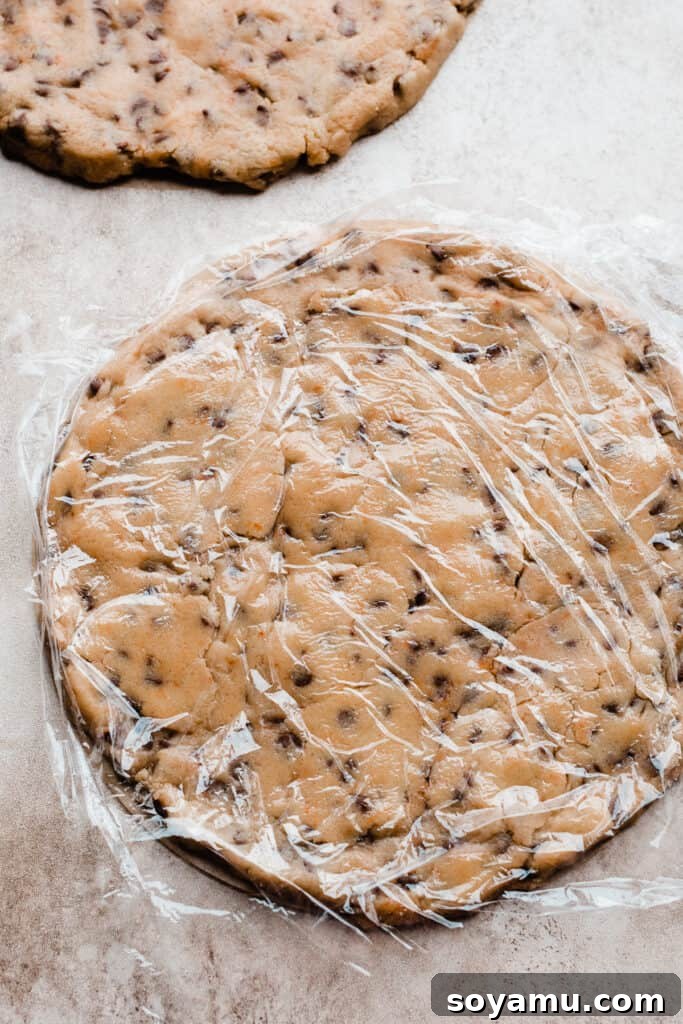
Step 2: Craft the Luxuriously Moist Chocolate Cake Batter
Preheat your oven to 350°F (175°C) and prepare three 9-inch cake pans. Grease each pan thoroughly with shortening or butter, then line the bottoms with parchment paper circles, greasing over the parchment as well. Finally, dust the inside of each pan generously with flour, tapping out any excess. This meticulous preparation prevents sticking and ensures your beautiful cake layers release perfectly.
In a 4-cup glass measuring cup or a large bowl, combine the hot water and cocoa powder, whisking vigorously until the cocoa is completely dissolved and no lumps remain. Set this aside to cool down to room temperature. It’s crucial that this mixture isn’t hot when added to the rest of the batter.
In a separate, very large mixing bowl, whisk together all the dry ingredients for the chocolate cake: cake flour, both brown and granulated sugars, baking soda, baking powder, salt, and espresso powder. Ensure they are thoroughly combined. Next, add the wet ingredients: the room temperature sour cream, milk, large eggs, vegetable oil, and vanilla extract. Pour in the cooled cocoa-water mixture. Whisk everything together until just combined. Overmixing can lead to a tough cake, so stop as soon as the streaks of dry ingredients disappear. A few small lumps are perfectly fine and often indicate a properly mixed batter.
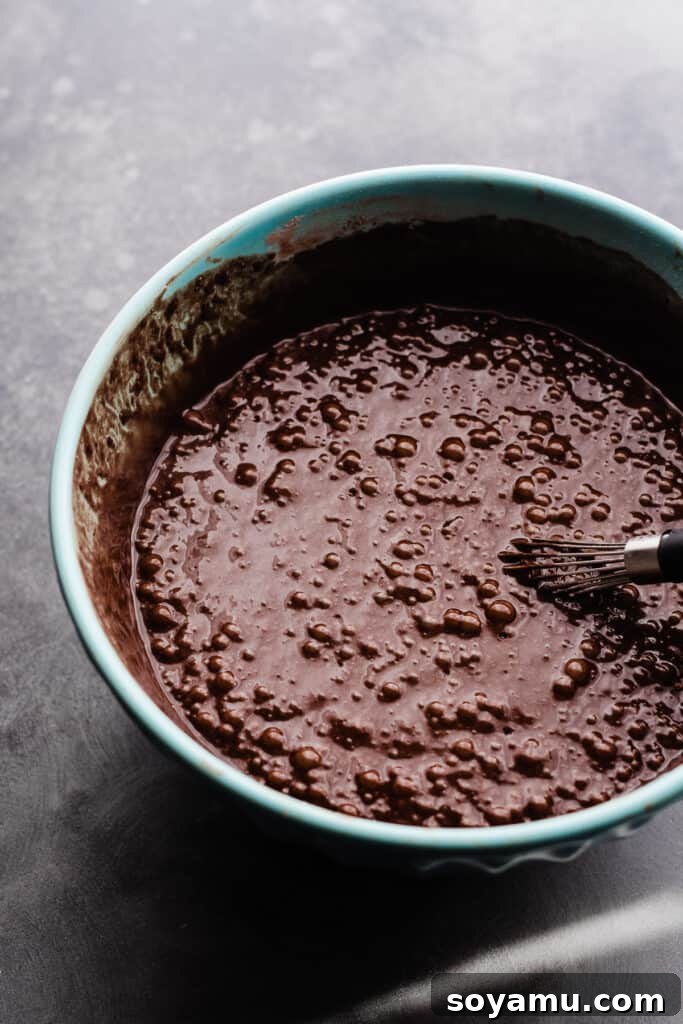
Step 3: Bake Perfect Cake Layers Infused with Cookie Dough
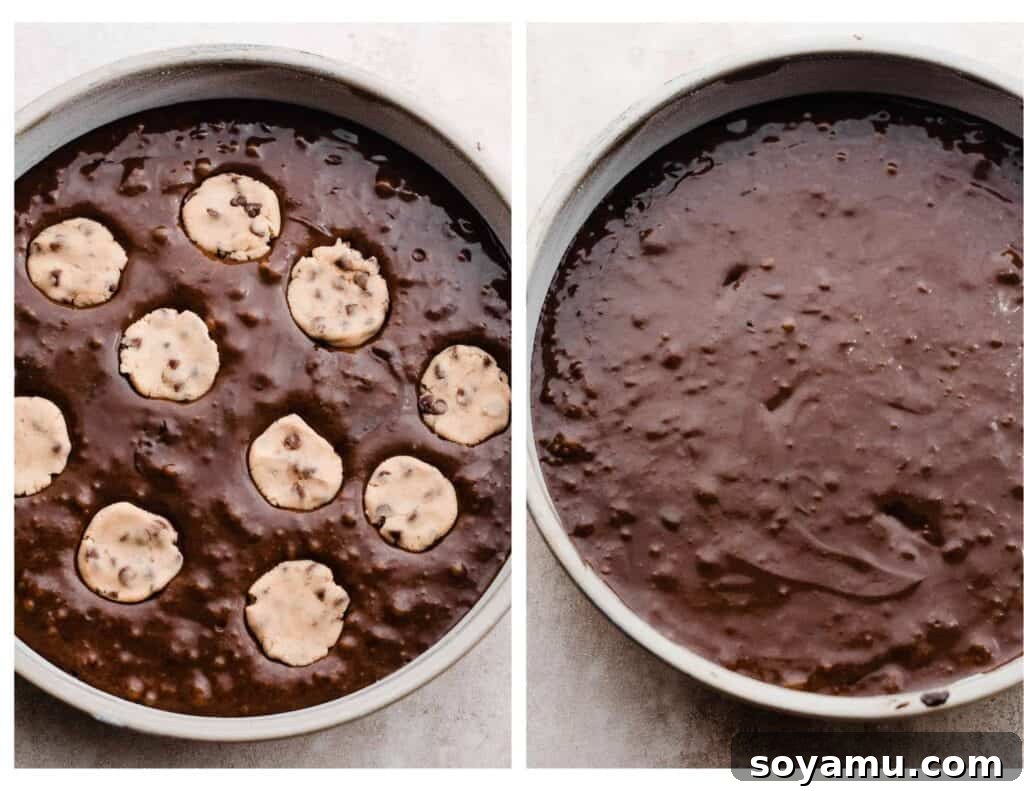
Divide the chocolate cake batter evenly among your three prepared 9-inch cake pans. For precision, especially when making a layered cake, use a kitchen scale to weigh the total batter and then divide that weight by three to ensure each pan receives an identical amount. Gently press 8 of the small cookie dough discs (prepared in Step 1) into each cake layer, ensuring they are suspended somewhat in the middle and covered by the batter. This ensures pockets of delicious cookie dough are distributed throughout the baked cake. Bake for 23 to 27 minutes, or until a toothpick inserted into the center of a cake layer comes out with moist crumbs attached – not wet batter, but not completely clean either, indicating a moist cake.
Once baked, allow the cake layers to cool in their pans on wire racks for exactly 10 minutes. This allows them to firm up slightly, making them easier to handle. After 10 minutes, carefully run a butter knife around the edge of each pan to loosen the cakes, then invert them onto cooling racks to cool completely. Cooling fully is critical before frosting, as warm cakes will melt your buttercream. Tip: Ovens often have hot spots. To ensure an even bake and consistent rise, rotate your cake pans halfway through the baking time. Credit to Butternut Bakery, who first popularized the brilliant idea of baking cookie dough discs directly into cake layers!
Step 4: Prepare the Dreamy Cookie Dough Frosting
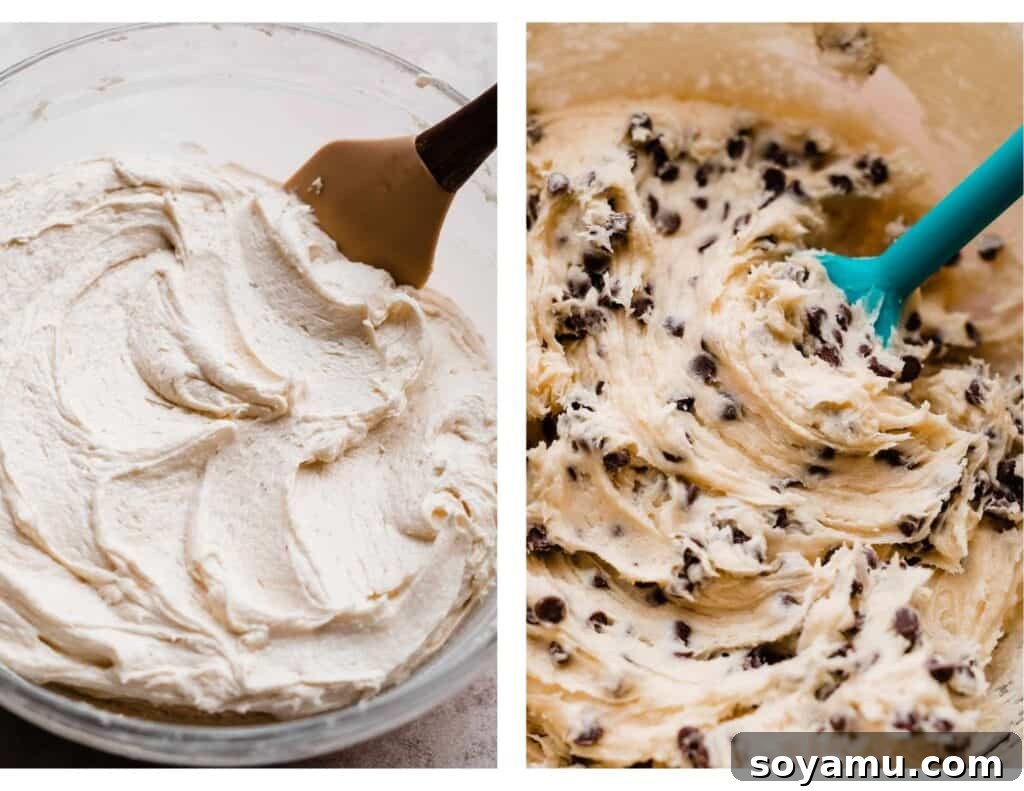
In a large mixing bowl, beat the softened butter on high speed until it becomes light and creamy, approximately 2-3 minutes. Gradually add the powdered sugar, about 2 cups at a time, mixing well after each addition until fully incorporated and smooth. If the frosting seems too stiff, add 1-2 tablespoons of milk or heavy cream to achieve a smooth, workable consistency. Next, incorporate the pre-heat-treated flour (from Step 1) and the brown sugar. These ingredients are key to giving the buttercream its authentic, irresistible cookie dough flavor. Mix until just combined. Finally, add the vanilla extract and a pinch of salt to enhance the flavors, then beat in the softened cream cheese until the frosting is silky smooth and light. Be careful not to overmix once the cream cheese is added. Set aside the mini chocolate chips for now; they will be added later for the final exterior frosting layer. This versatile cookie dough frosting will be used both as an internal filling and to coat the entire cake.
Step 5: Master the Art of Cake Assembly
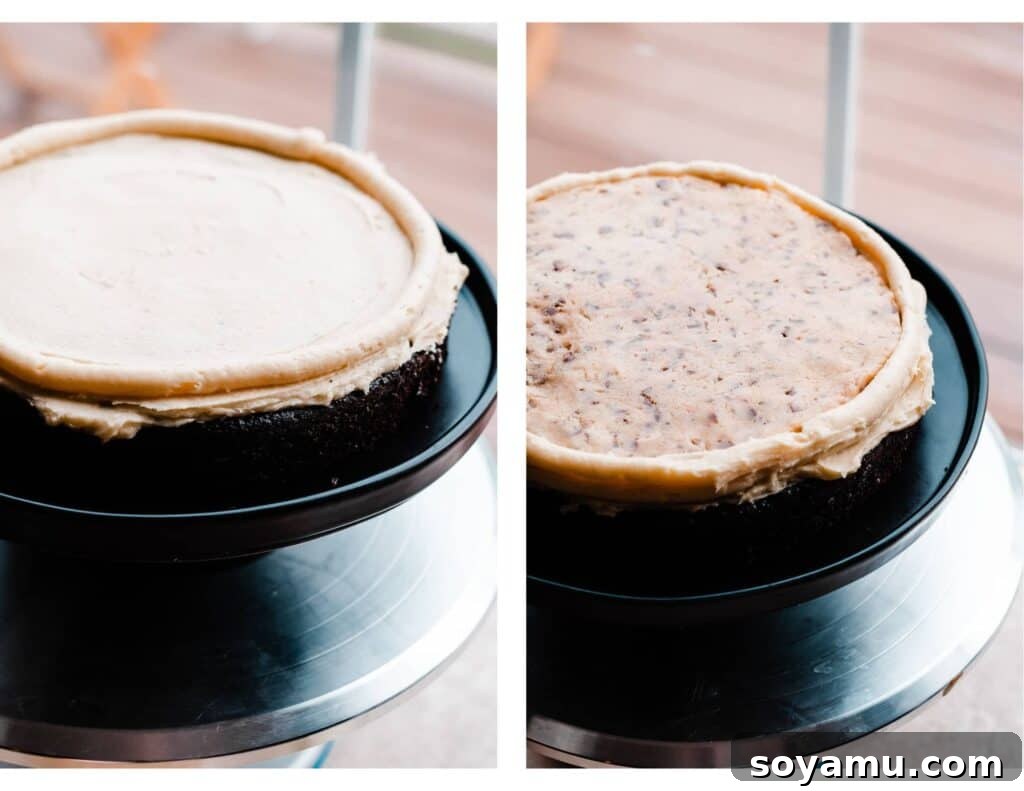
To assemble your cake, place the first cooled chocolate cake layer onto a cake stand or serving plate, preferably positioned on a cake turntable for ease of frosting. Spread about 1 and 1/4 cups of your prepared cookie dough frosting evenly over this layer. Using a piping bag fitted with a round tip (or a Ziploc bag with the corner snipped), pipe a border of frosting around the very edge of the cake layer. Carefully place one of the large, chilled cookie dough discs (from Step 1) inside this piped frosting border. The border acts as a dam, keeping the cookie dough filling neatly contained.
Gently place the second cake layer directly on top. For optimal stability during assembly, especially with multiple layers, chill the cake in the fridge for 5-10 minutes at this point. This helps set the frosting and prevents the layers from shifting. Repeat the frosting and cookie dough disc placement with the second layer. Finally, add the third cake layer on top, preferably placing it upside down to create a perfectly flat top surface for your cake.
Apply a thin, even layer of the remaining cookie dough frosting over the top and sides of the entire cake. This initial thin coat is known as the crumb coat; its purpose is to trap any loose crumbs, ensuring a smooth, clean finish for your final frosting layer. Don’t worry if it’s not perfect at this stage. Use an offset spatula and a cake scraper to smooth it out and remove any excess frosting. Chill the cake in the fridge for at least 30 minutes, or until the crumb coat is firm to the touch. This firming process is crucial for a professional finish. While the cake chills, stir the reserved mini chocolate chips into the remaining cookie dough frosting. Once the crumb coat is set, retrieve the cake and apply the chocolate chip-infused frosting to the top and sides using an offset spatula, then smooth it beautifully with a cake scraper. Return the fully frosted cake to the fridge to chill for another 30 minutes, or until this final layer of frosting is completely set, before moving on to the ganache drip. Tip: If at any point your buttercream becomes too soft while you’re working, simply pop it back into the fridge for a short period to firm up.
Step 6: Add the Stunning Chocolate Ganache Drip
The chocolate ganache drip adds a professional and irresistible touch to your ultimate cookie dough cake. Ensure your cake has been chilled in the fridge for at least 30 minutes, or up to 24 hours, before attempting the drip. A cold cake is essential for the ganache to set beautifully and create those perfect drips.
To prepare the ganache, finely chop your semi-sweet chocolate and place it in a small, heatproof bowl. In a small saucepan, gently heat the heavy cream over medium heat until it just begins to simmer around the edges – do not let it boil vigorously. Pour the hot cream directly over the chopped chocolate and let it sit undisturbed for 4 minutes. This allows the heat from the cream to melt the chocolate evenly. After 4 minutes, gently stir the mixture with a whisk or spatula, starting from the center and working your way outwards, until it is completely smooth, glossy, and emulsified. If the ganache seems too thick for a pourable consistency, stir in 1-2 teaspoons of vegetable oil until it reaches the desired flow.
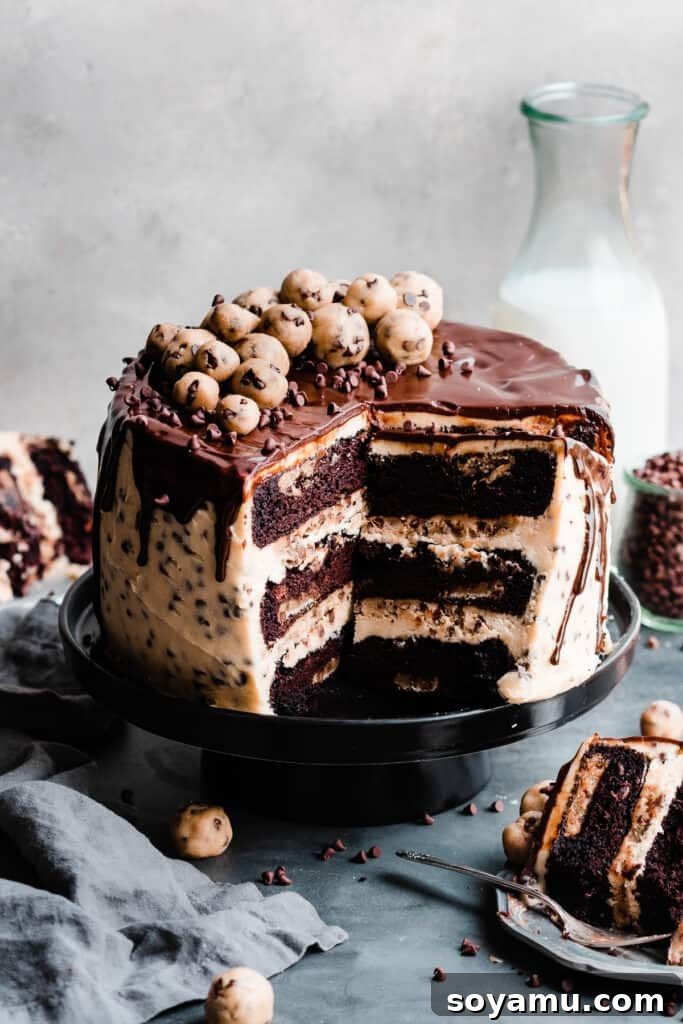
Place your chilled cake back on the turntable. Carefully pour the ganache into the center of the top of the cake. Using an offset spatula, gently push the ganache towards the edges, allowing it to naturally drip down the sides. For a controlled drip, you can also use a spoon or a squeeze bottle to apply the ganache directly to the edges. Work quickly but precisely. Allow the cake to chill in the fridge for another 20-30 minutes, or until the ganache drip is completely set and firm to the touch.
Serving and Storing Your Decadent Cookie Dough Cake:
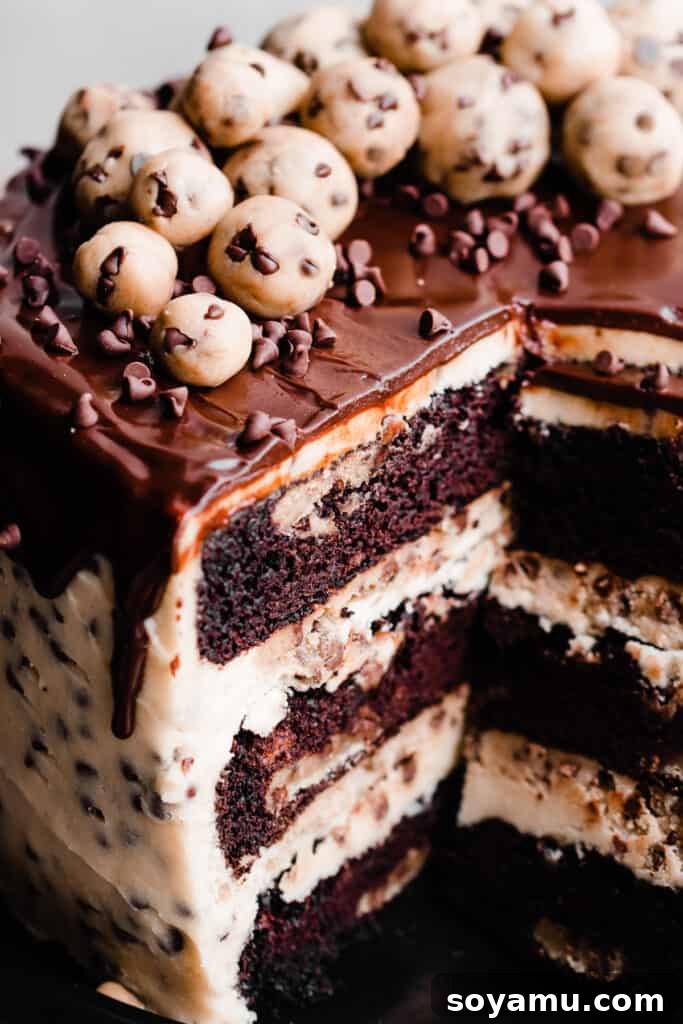
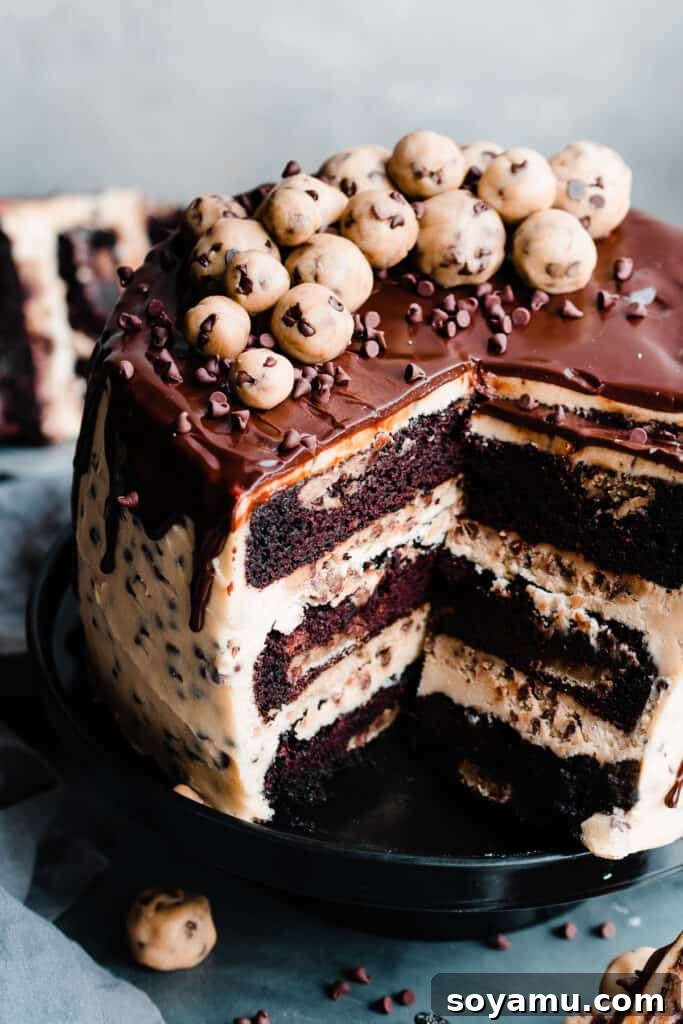
Once your chocolate ganache drip has completely set (after about 20-30 minutes of chilling), it’s time for the final touches! Carefully arrange the reserved cookie dough balls on top of the cake, perhaps with an artistic flourish, and sprinkle with a handful of extra mini chocolate chips for added visual appeal and texture. Then, slice into generous portions and serve this magnificent dessert! While leftovers are a rare occurrence with a cake this delicious, any remaining slices should be stored in an airtight container in the refrigerator. Properly stored, your cookie dough cake will remain fresh and delightful for 3-4 days, allowing you to savor its incredible flavors for a little longer.
Expert Success Tips for Perfect Baking:
Achieving baking perfection often comes down to a few key insights and tools. Here are some expert tips to ensure your Ultimate Cookie Dough Cake turns out flawlessly every time:
- Calibrate Your Oven with an Oven Thermometer – One of the most common reasons for baking mishaps is an inaccurate oven temperature. An oven thermometer is an inexpensive tool that will accurately tell you if your oven is running hot or cold compared to the temperature you set. Consistent and accurate oven temperature is paramount for most baking, especially for cakes, so keeping an oven thermometer in your oven at all times allows you to monitor its calibration and adjust accordingly.
- Embrace a Kitchen Scale for Precision – For consistent and professional-level baking results, a food scale is indispensable. Measuring flour by weight (grams) rather than volume (cups) is the most accurate method, as the amount of flour in a cup can vary significantly based on how it’s scooped and even the specific measuring cup used. This precision ensures your cake and cookie dough achieve the perfect texture every time.
- Ensure Room Temperature Ingredients – For cakes and buttercreams, ingredients like butter, eggs, milk, and sour cream should almost always be at room temperature. This allows them to emulsify properly, creating a smooth, cohesive batter and a light, airy frosting, preventing lumps and achieving optimal texture.
- Don’t Overmix – Especially when adding dry ingredients to wet, mix only until just combined. Overmixing develops gluten in flour, which can lead to a tough, dense cake texture rather than a light, tender crumb.
- Chill is Your Friend – Don’t rush the chilling steps! Chilling the cookie dough helps it hold its shape, and chilling the cake layers (especially the crumb coat) ensures clean, stable frosting application and a beautiful final appearance.
Frequently Asked Questions (FAQs):
Absolutely! This recipe is easily scalable. You can halve all the ingredient quantities and bake the cake in two 8-inch cake pans instead of three 9-inch pans. Alternatively, you could bake the halved recipe in one 9×9 inch square pan. If using a square pan, I recommend slicing the cooled cake horizontally through the middle once cooled to create two layers, as it will be quite thick otherwise. Adjust baking times slightly for smaller pans, typically reducing them by a few minutes, and always rely on the toothpick test for doneness.
Yes, it is highly recommended and a crucial step for food safety when consuming raw flour. Raw flour can sometimes contain harmful bacteria, which is why eating raw cookie dough made with untreated flour is generally discouraged. Heat treating the flour in the oven or microwave effectively kills these potential pathogens, making your edible cookie dough safe and worry-free. You can heat treat it by baking the flour at 350°F (175°C) for 10 minutes, or by microwaving it in 30-second intervals for 1-2 minutes until an instant-read thermometer inserted into the flour registers 165°F (74°C). Always allow the heat-treated flour to cool completely before using it in your cookie dough or frosting.
Yes, this recipe is quite flexible and perfect for make-ahead planning! The chocolate cake layers can be baked up to 24 hours before assembly. Once completely cooled, place each layer on a dinner plate, wrap it tightly in plastic wrap, and store at room temperature. The edible cookie dough (for both the discs and balls) can also be made 24 hours in advance and stored, covered, in the refrigerator. For the best flavor and texture, I recommend preparing the cookie dough frosting and the chocolate ganache drip fresh on the day you plan to assemble and serve the cake, as their consistency is best right after preparation.
Delightful Recipe Variations for Your Cookie Dough Cake:
While the classic Ultimate Cookie Dough Cake is a showstopper, these variations allow you to customize it to your taste or simplify the process:
- Transform it into a Vanilla Cake – If vanilla is more your style, you can easily adapt this recipe. Simply substitute the chocolate cake base with a rich vanilla cake. I recommend using the vanilla cake recipe from my Peach Cobbler Cake recipe, ensuring you omit the cinnamon, nutmeg, and cloves to maintain a pure vanilla flavor profile. The edible cookie dough and buttercream will pair beautifully with a light vanilla sponge.
- Rich Chocolate Frosting – For the ultimate chocolate indulgence, you can opt for a decadent chocolate frosting instead of the cookie dough buttercream. Consider using the luscious chocolate frosting from my Tuxedo Cake recipe. This intense chocolate pairing will create an even richer dessert experience for true chocoholics.
- Streamline the Steps for a Simpler Bake: If you’re short on time or prefer a less complex recipe, there are several ways to simplify this cake. You can reduce the amount of edible cookie dough you make to approximately two-thirds of the recipe if you decide to omit the layers of cookie dough baked *into* the cake layers, and only use it for the filling and topping. Alternatively, feel free to use your favorite high-quality chocolate or vanilla box cake mix for the cake layers, and then focus your efforts on creating the homemade edible cookie dough, cookie dough buttercream, and chocolate ganache drip from scratch. This allows you to achieve a spectacular dessert with fewer homemade components.
Essential Special Tools for Cake Decorating:
While you can certainly make this cake with basic kitchen equipment, having a few specialized tools can make the assembly and decorating process much easier and yield a more professional-looking finish:
- Offset Spatula – An offset spatula is a baker’s best friend. Its angled blade allows you to effortlessly spread frosting evenly across cake layers and apply smooth crumb coats. It’s also incredibly useful for spreading batters in pans, making it a versatile addition to your toolkit.
- Cake Turntable – If you bake layered cakes more than once a year, a cake turntable is a worthwhile investment. It allows you to rotate the cake smoothly as you apply and smooth frosting, making the entire decorating process faster, easier, and much more precise for beautifully even sides and tops.
- Piping Bag & Piping Tip – For creating neat frosting borders, like the dam for the cookie dough filling, a reusable piping bag and a large round piping tip (like a Wilton 1A or 2A) are invaluable. In a pinch, you can always use a sturdy plastic freezer bag with one corner snipped off, but a proper piping bag offers more control.
More Chocolate Chip Cookie Recipes to Love:
If you can’t get enough of chocolate chip cookie dough, explore these other fantastic recipes:
- No-Bake Cookie Dough Bites
- Chocolate Cookie Dough Cups
- Salted Caramel Chocolate Chip Cookies
- Jumbo Bakery-Style Chocolate Chip Cookies
- Chocolate Chip Cookie Cups (Nutella filled!)
Did you make this ultimate cookie dough cake recipe? We’d love to see your creations and hear your thoughts! Snap a photo and leave a comment below!
Be sure to follow bluebowlrecipes on Instagram and tag #bluebowlrecipes with your photo! You can also post a photo of your recipe to the bluebowlrecipes Facebook page. Your baking inspires us, and we’d love to see what you create!
Ultimate Cookie Dough Cake
Stephanie Simmons
1 hour
30 minutes
23 minutes
12
+ slices
Saved
Pin
Rate
Ingredients
For the Edible Cookie Dough
-
2 and 2/3
cups
all-purpose flour, spooned & leveled,
347 grams -
1
cup
salted butter, softened at room temperature ,
226 grams -
3/4
cup
light brown sugar, packed,
163 grams -
3/4
cup
granulated sugar ,
155 grams -
1 and 1/2
tsp
vanilla extract -
2
tbsp
corn starch -
1/4
cup
+ 2 tbsp warm water -
1
tsp
baking soda -
1/4
tsp
salt -
1 and 1/2
cups
mini semi-sweet chocolate chips
Chocolate Cake
-
2
cups
hot water,
472 mL -
1 and 1/2
cups
+ 2 tbsp cocoa powder,
157 grams -
3
cups
cake flour,
330 grams -
2 and 1/4
cups
light brown sugar, packed,
488 grams -
1
cup
granulated sugar ,
206 grams -
3
tsp
baking soda -
1 and 1/2
tsp
baking powder -
3/4
tsp
salt -
2
tsp
espresso powder -
1 and 1/2
cups
full fat sour cream, at room temperature,
360 grams -
1/4
cup
milk,
60 mL -
4
large
eggs, at room temperature -
1/2
cup
vegetable oil,
106 mL -
1 and 1/2
tsp
vanilla extract
For the Cookie Dough Buttercream
-
2 and 1/4
cups
salted butter,
4 and 1/2 sticks, 509 grams -
5 and 1/2 to 6
cups
powdered sugar,
660 to 720 grams -
2
tbsp
milk,
or heavy cream -
1
cup
light brown sugar, packed,
214 grams -
1 and 1/4
cups
all-purpose flour flour, spooned & leveled,
163 grams -
1
tbsp
vanilla extract -
pinch
of
salt,
to taste -
6
ounces
cream cheese, softened,
170 grams -
1
cup
mini chocolate chips
For the Chocolate Drip:
-
4
ounces
semi-sweet chocolate, finely chopped,
113 grams -
1/2
cup
heavy cream,
4 ounces, 118 mL -
1-2
tsp
vegetable oil
Instructions
-
Make Edible Cookie Dough: To ensure food safety, spread the flour designated for both the edible cookie dough and the cookie dough frosting evenly across two cookie sheets. Bake them in a preheated oven at 350℉ (175°C) for 10 minutes to heat-treat the flour. Alternatively, you can achieve this by microwaving the flour in 30-second intervals for 1-2 minutes, until an instant-read thermometer reads 165°F (74°C). It is crucial to allow the heat-treated flour to cool completely before incorporating it into any mixtures!
In a small bowl, whisk together the cornstarch and warm water until the cornstarch is fully dissolved. This mixture serves as our safe-to-eat egg substitute.
In a large bowl, cream the softened butter with an electric mixer on high speed until light and fluffy. Add both the brown and granulated sugars and continue mixing until the mixture is well-creamed and aerated, which typically takes at least 1 minute. Beat in the vanilla extract, then add the cornstarch egg substitute, mixing on medium speed for about 1 minute until well combined. Gradually incorporate the cooled, heat-treated dry ingredients (flour, baking soda, and salt) and mix on low speed until a dough begins to form. It may appear somewhat crumbly initially, but keep mixing until it comes together into a cohesive dough. Finally, fold in the mini chocolate chips until they are evenly distributed throughout the dough.
Portion the cookie dough into 24 small balls, each approximately 2 teaspoons in size; flatten these into discs for baking into the cake layers. Take two larger portions of cookie dough, each weighing about 265 grams (or 1 cup), and flatten them into large discs – these will be used as delicious filling layers between your cake. Wrap all cookie dough portions tightly in plastic wrap and chill them in the fridge. Form any remaining cookie dough into small balls to use for topping the finished cake, storing them in a sealed container in the fridge until needed.
-
Make the Chocolate Cake: Preheat your oven to 350 ℉ (175°C). Prepare three 9-inch cake pans by thoroughly greasing them with shortening or butter. Place a parchment paper circle in the bottom of each pan, then grease over the parchment. Finally, dust the inside of each pan generously with flour, tapping out any excess.
Measure the hot water into a 4-cup glass measuring cup or a large bowl, then whisk in the cocoa powder until it is completely dissolved and smooth. Set this mixture aside to allow it to cool down to room temperature. In a separate large mixing bowl, whisk together all the dry ingredients for the cake: cake flour, light brown sugar, granulated sugar, baking soda, baking powder, salt, and espresso powder. Ensure they are well combined. Next, add all the wet ingredients, including the room temperature sour cream, milk, large eggs, vegetable oil, and vanilla extract. Finally, pour in the cooled (not steaming hot!) cocoa and water mixture. Whisk everything together until just combined. A few small lumps in the batter are perfectly normal and acceptable; do not overmix.
-
Bake Cake Layers: Divide the cake batter evenly between the three prepared cake pans. For precise distribution, use a kitchen scale to weigh the total amount of batter, then divide that weight by 3 for perfectly uniform layers. Gently press 8 of the small cookie dough discs into the batter in each pan, ensuring they are suspended somewhat in the middle and covered by the cake batter. Bake for 23 to 27 minutes, or until a toothpick inserted into the center of a cake layer comes out with moist crumbs attached (not wet batter, but not completely clean, indicating a moist cake). Let the cakes cool in their pans on wire racks for 10 minutes before carefully running a butter knife around the edges to loosen them and inverting them onto a cooling rack. Allow them to cool completely before proceeding with frosting.
Tip: To ensure even baking, I highly recommend rotating your cake pans halfway through the baking time, as most ovens have hot spots.
-
Make the Cookie Dough Frosting: In a large mixing bowl, beat the softened butter on high speed until it is creamy and light, about 2-3 minutes. Gradually add the powdered sugar, 2 cups at a time, mixing well between each addition until the frosting is smooth and lump-free. If the frosting appears too thick, add 1-2 tablespoons of milk or heavy cream to achieve a smooth, spreadable consistency. Next, add the heat-treated flour (prepared earlier), the light brown sugar, vanilla extract, and a pinch of salt; mix until these ingredients are fully combined. Finally, beat in the softened cream cheese until the frosting is completely smooth and fluffy. Reserve the mini chocolate chips to mix into the frosting for the exterior coat later.
-
Assemble Cake: Place the first cooled cake layer onto a cake stand or a serving plate, ideally on a cake turntable for easier frosting. Spread about 1 and 1/4 cups of the prepared cookie dough frosting evenly over this layer. Using a piping bag with a round tip (or a Ziploc bag with the corner snipped), pipe a border of frosting around the very edge of the cake layer. Carefully place one of the large, chilled cookie dough discs in the center, inside the piped frosting border. Place the second cake layer on top. To help set the layers and prevent sliding, chill the cake in the fridge for 5-10 minutes at this stage. Repeat the frosting and cookie dough disc placement for the second layer. Add the final cake layer on top, placing it upside down for a perfectly flat surface.
Apply a thin, even layer of the remaining cookie dough frosting over the entire cake (top and sides). This is your crumb coat, which traps any loose crumbs and provides a smooth base for the final frosting layer. Don’t worry about perfection at this stage; simply aim for an even coverage. Use an offset spatula and a cake scraper to smooth and remove any excess frosting. Pop the cake into the fridge for at least 30 minutes, or until the crumb coat is firm to the touch. Once chilled, stir the mini chocolate chips into the remaining frosting. Apply this chocolate chip-infused frosting to the top and sides of the cake using an offset spatula, then use a cake scraper to achieve a smooth and professional finish. Chill the entire cake in the fridge for another 30 minutes, or until the frosting is fully set, before adding the chocolate drip.
Tip: If your frosting starts to become too soft or difficult to work with at any point, simply place it back in the fridge for a short period to firm up.
-
Chocolate Drip: Add finely chopped semi-sweet chocolate to a small, heatproof bowl. In a small pot, heat the heavy cream over medium heat until it is just simmering around the edges (do not bring to a rolling boil). Pour the hot cream directly over the chopped chocolate and let it sit undisturbed for 4 minutes to allow the chocolate to melt. After 4 minutes, gently stir the mixture until it is completely smooth, glossy, and fully emulsified. If the ganache seems too thick for a pourable consistency, stir in 1-2 teaspoons of vegetable oil until it reaches your desired flow. Place your thoroughly chilled cake back on the turntable. Pour the ganache into the center of the top of the cake. Slowly spin the cake while gently pushing the ganache towards the edges with an offset spatula, allowing it to elegantly drip down the sides. Let the cake chill in the fridge for another 20-30 minutes, or until the ganache drip is completely set.
-
Serve & Store: Once the ganache is set, adorn the chilled cake with your reserved cookie dough balls and a sprinkle of mini chocolate chips for a decorative flourish. Slice generously and serve this magnificent dessert! Any unlikely leftovers should be stored in an airtight container in the refrigerator for 4-5 days to maintain freshness. Enjoy!
Nutrition
Serving:
1
slice
,
Calories:
1497
kcal
,
Carbohydrates:
251
g
,
Protein:
18
g
,
Fat:
96
g
,
Saturated Fat:
54
g
,
Polyunsaturated Fat:
9
g
,
Monounsaturated Fat:
24
g
,
Trans Fat:
2
g
,
Cholesterol:
242
mg
,
Sodium:
1132
mg
,
Potassium:
681
mg
,
Fiber:
9
g
,
Sugar:
181
g
,
Vitamin A:
2208
IU
,
Vitamin C:
0.4
mg
,
Calcium:
242
mg
,
Iron:
7
mg
Nutrition information is automatically calculated, so should only be used as an approximation.
Like this? Leave a comment below!