
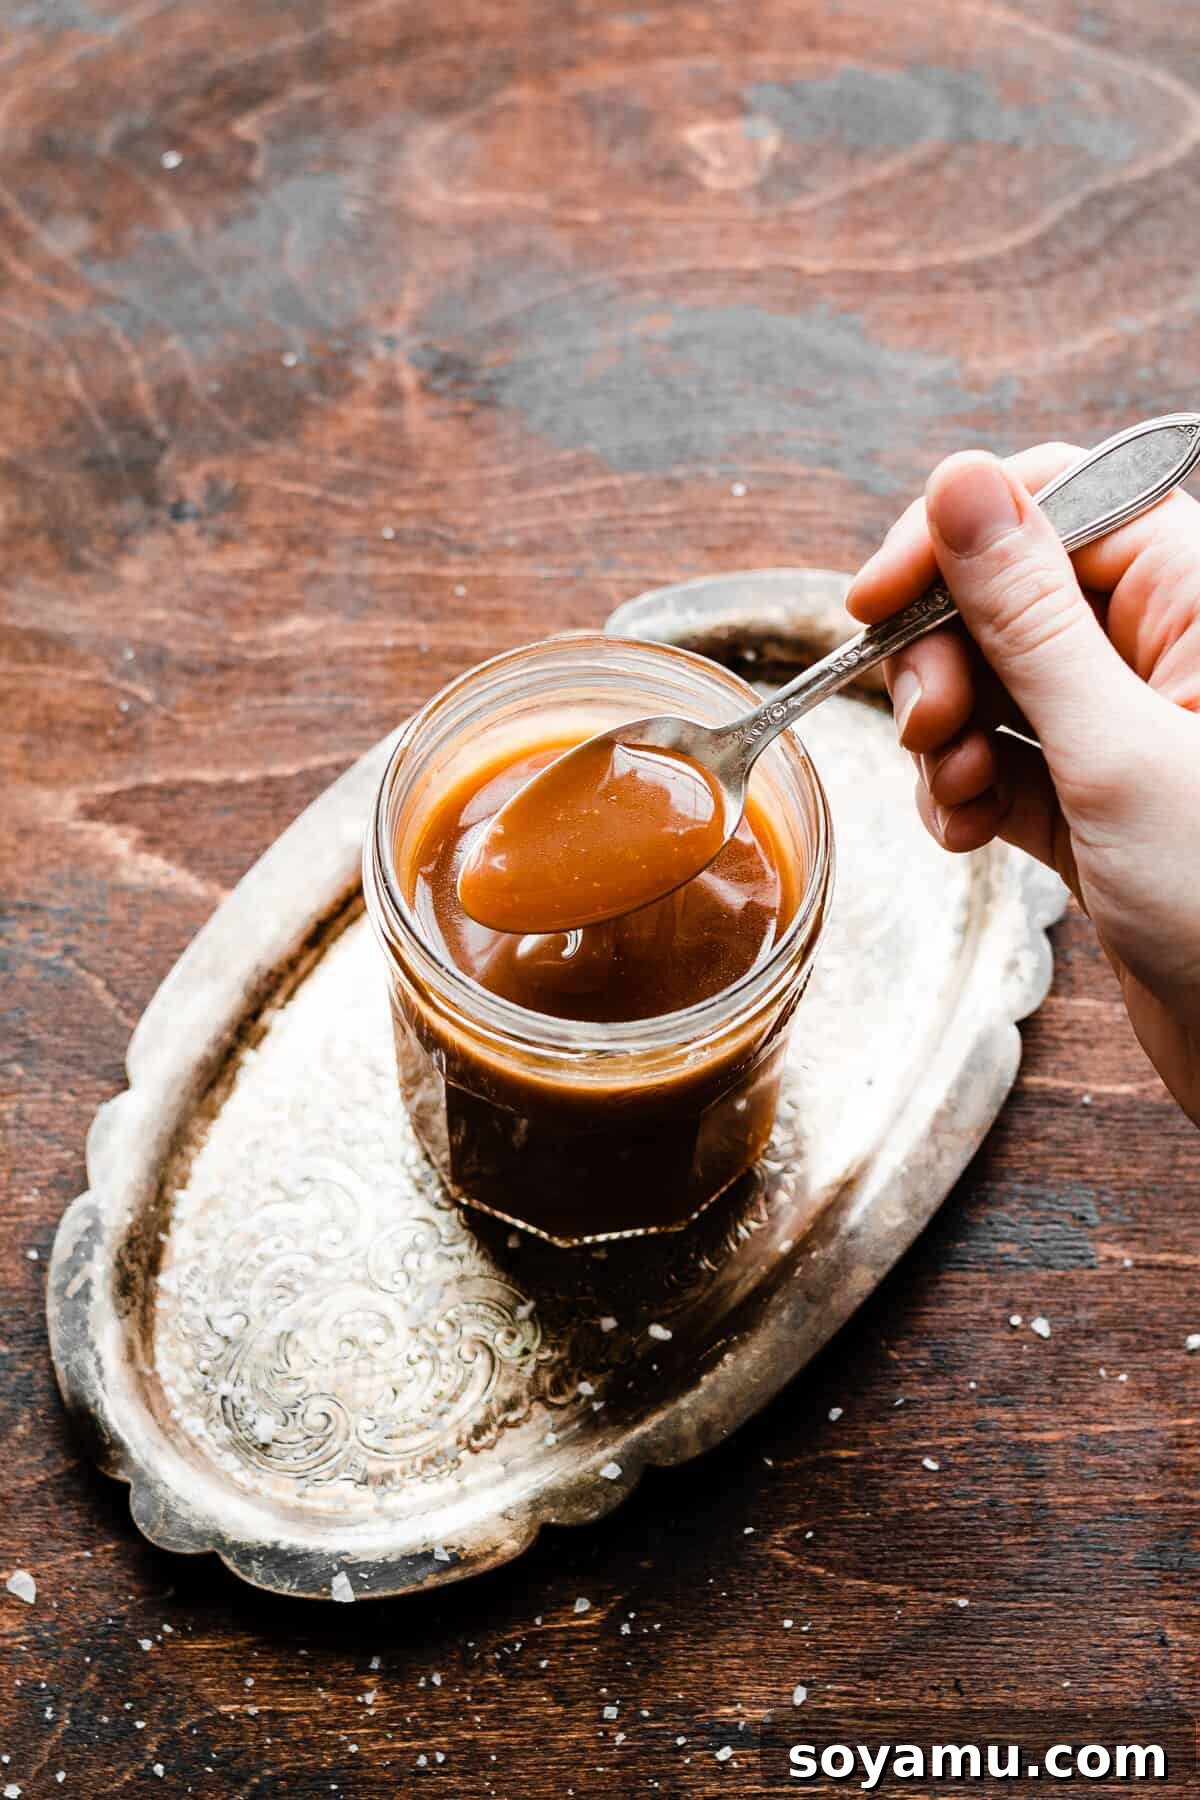
The Easiest 10-Minute Salted Caramel Sauce: A Quick & Delicious Homemade Recipe
Indulge in the luxurious taste of homemade Salted Caramel Sauce, a rich, velvety topping that comes together in an astonishingly quick 10 minutes with just 4 basic ingredients. Forget complicated techniques and intimidating candy thermometers – this recipe is designed for ease and guaranteed deliciousness. Whether you’re looking to elevate your favorite desserts or prepare a thoughtful, gourmet homemade holiday gift, this simple salted caramel sauce is your secret weapon. Its perfect balance of sweet and salty notes will transform everything it touches, making it an essential addition to any home baker’s repertoire. Get ready to impress with minimal effort!
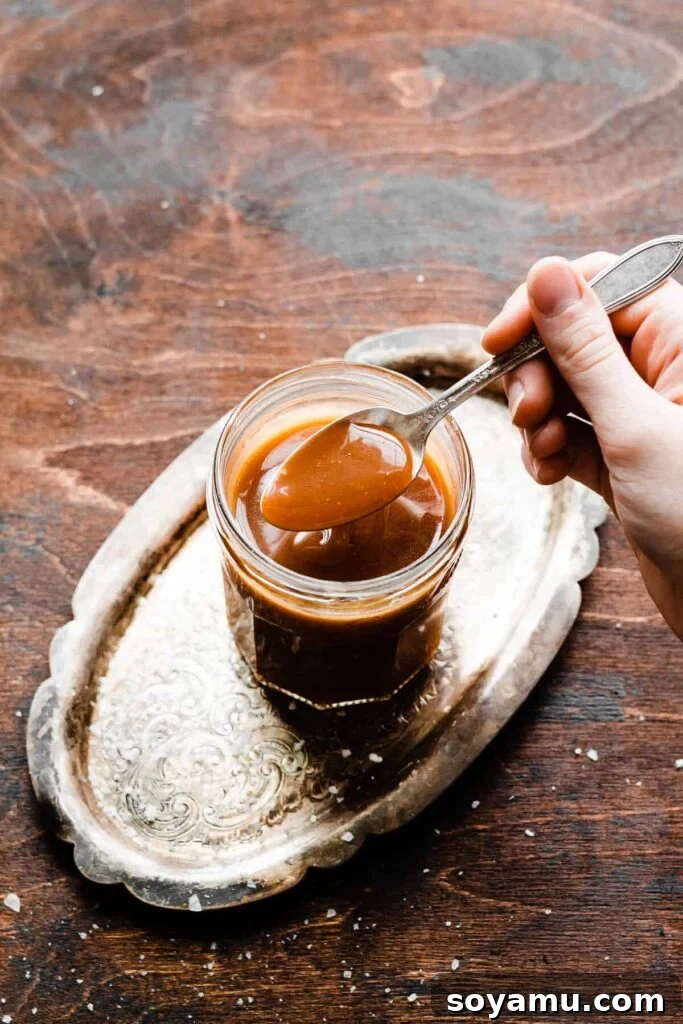
Why You’ll Fall in Love with This Homemade Caramel Sauce
Once you experience the sheer simplicity and incredible flavor of this homemade salted caramel, you’ll wonder why you ever bought it from the store. Here’s why this recipe will become your go-to:
- Unbelievably Fast: A True 10-Minute Recipe – Say goodbye to lengthy cooking times and hello to instant gratification! This Salted Caramel recipe is genuinely a 10-minute wonder. From melting the sugar to achieving that perfect, glossy sauce, the process is streamlined and quick. It’s perfect for those spontaneous dessert cravings or when you need a last-minute gourmet touch. Once you see how effortless homemade caramel can be, you’ll never consider store-bought again.
- Made with Just 4 Simple Ingredients – You don’t need a pantry full of exotic items for this culinary masterpiece. This recipe relies on just four basic, readily available ingredients: butter, granulated sugar, heavy cream, and a pinch of salt. What’s even better? There’s absolutely no need for a tricky candy thermometer, a common hurdle in many traditional caramel recipes. This keeps the process accessible for even novice cooks.
- Incredibly Versatile for All Your Culinary Creations – This magic elixir is more than just a sauce; it’s a versatile enhancement for almost any dessert. Drizzle it generously over warm apple pie, transform a simple bowl of ice cream into a gourmet sundae, or elevate cakes, cobblers, and cookies to new heights. It’s also fantastic stirred into coffee, hot chocolate, or as a dip for apple slices. My personal favorite way to enjoy it is generously poured over a warm Caramel Apple Galette, where its rich flavor truly shines.
- Perfect for Thoughtful Homemade Gifts – Looking for a charming and delicious gift for the holidays or a special occasion? This homemade salted caramel sauce, bottled in a pretty jar with a ribbon, makes an exquisite present. It’s a thoughtful, edible gift that shows care and effort, and it’s always a crowd-pleaser.
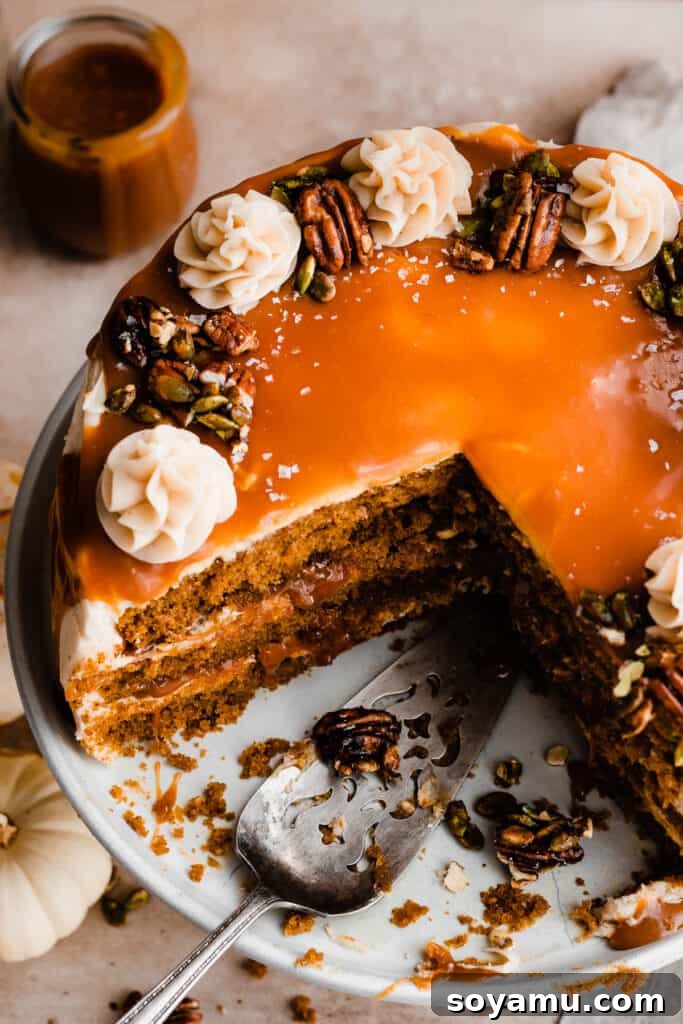
Ingredient Deep Dive: What You’ll Need
Crafting the perfect salted caramel sauce starts with understanding each ingredient and its role. This recipe intentionally keeps the list short, focusing on quality and functionality. The full recipe with precise measurements and directions can be found in the recipe card at the bottom of this post.
- Granulated Sugar: This is the foundation of our caramel. For the best and most authentic caramel flavor and color, granulated sugar is essential. I strongly advise against using other types of sugar. Specifically, if you opt for brown sugar, you’ll end up with a rich butterscotch sauce, not caramel. If butterscotch is what you’re after, check out my 10-Minute Butterscotch Sauce recipe!
- Butter (Salted, Cubed): I always reach for salted butter when making salted caramel sauce. The butter not only adds incredible richness and depth of flavor but also helps prevent crystallization. Using salted butter from the start helps achieve that perfect sweet-and-salty balance without needing to add too much additional salt later. While unsalted butter can be used, you might find the flavor less robust and may need to increase the final pinch of flaky sea salt. Ensure your butter is cubed for easier melting and incorporation into the hot sugar.
- Heavy Cream (Full-Fat): The heavy cream is crucial for transforming the molten sugar and butter into a smooth, pourable sauce. Always use full-fat heavy cream (typically 36% fat or higher) for optimal richness, texture, and stability. Lighter creams or milk will result in a thinner sauce and may impact the overall quality and shelf life. The temperature of the cream is important: while it doesn’t need to be warm, be prepared for a vigorous reaction when it hits the hot caramel.
- Flaky Sea Salt: This is where the “salted” in salted caramel truly shines. I adore Maldon sea salt flakes for their delicate crunch and potent burst of salinity, which beautifully cuts through the sweetness of the caramel. However, any good quality flaky sea salt will work wonderfully. If you can’t find flaky sea salt, a small pinch of regular table salt can be used, but note that the texture and flavor impact will be slightly different. Add it at the end to preserve its distinct crunch and ensure proper seasoning.
- Vanilla Extract (Optional but Recommended): While not strictly one of the “four ingredients,” a splash of pure vanilla extract (about 1/4 teaspoon) stirred in at the very end with the sea salt can add a beautiful aromatic depth and warmth to your caramel sauce. It complements the other flavors without overpowering them.
Recipe Substitutions & Creative Variations
This simple salted caramel recipe is incredibly flexible. While the classic version is perfect as is, feel free to experiment with these substitutions and variations to tailor it to your dietary needs or flavor preferences:
- Dairy-Free Adaptation: While I haven’t personally tested a dairy-free version, this recipe is adaptable. You could achieve a delicious dairy-free caramel using high-quality dairy-free butter sticks (like Miyoko’s Kitchen or Earth Balance sticks) and full-fat dairy-free heavy cream alternatives (such as coconut cream from a can – make sure it’s full-fat and chilled, scooping only the thick cream, or a trusted dairy-free heavy cream substitute). Be aware that the texture might vary slightly.
- Naturally Gluten-Free: Good news for those with gluten sensitivities! This salted caramel sauce recipe is naturally gluten-free, making it a safe and delicious treat for almost everyone.
- Vanilla Extract Boost: As mentioned in the ingredient overview, a touch of vanilla extract (1/4 to 1/2 teaspoon) stirred in alongside the flaky sea salt at the very end can significantly enhance the caramel’s depth and aroma. Use pure vanilla extract for the best results.
- Spiced Caramel: For an autumnal or festive twist, consider adding a pinch of ground cinnamon, nutmeg, or even a tiny amount of pumpkin pie spice blend at the end of the cooking process, just before the salt. This creates a warm, inviting spiced caramel.
- Bourbon or Rum Caramel: For an adult-friendly variation, stir in 1-2 teaspoons of your favorite bourbon or dark rum with the heavy cream. The alcohol will cook off, leaving behind a wonderfully complex flavor.
Crafting Your Perfect Salted Caramel Sauce: A Step-by-Step Guide
Making salted caramel from scratch might sound daunting, but with this straightforward method, you’ll be amazed at how easily it comes together. Precision and patience are key for that perfect amber hue and smooth consistency.
Before You Begin: Essential Prep
Gather all your ingredients and have them ready before you start cooking. This “mise en place” is crucial when making caramel, as the process moves quickly. You’ll want your butter cubed and your heavy cream measured. They don’t need to be at room temperature, but it’s fine if they sit out for a few minutes while you prepare. Have a clean, heavy-bottomed saucepan and a sturdy whisk (or wooden spoon) within reach. A non-stick saucepan can be particularly forgiving for melting sugar.
Step 1: Gently Cook the Sugar to a Rich Amber Hue. Add the granulated sugar to your clean, dry, heavy-bottomed saucepan. Place the pan over medium heat on your stovetop. Resist the urge to crank up the heat; patience here is vital to prevent burning. Initially, it might seem like nothing is happening, but soon the sugar will begin to melt around the edges, forming clear liquid patches. Continue to cook, stirring gently and lazily with a wooden spoon or heat-proof spatula. The sugar will start to clump, then gradually melt down into a deep amber-colored liquid. It’s crucial that all the sugar crystals are completely dissolved and liquified before proceeding. Any remaining clumps will result in a grainy caramel. Aim for a color similar to an old penny or amber – don’t let it get too dark, or it will taste burnt!
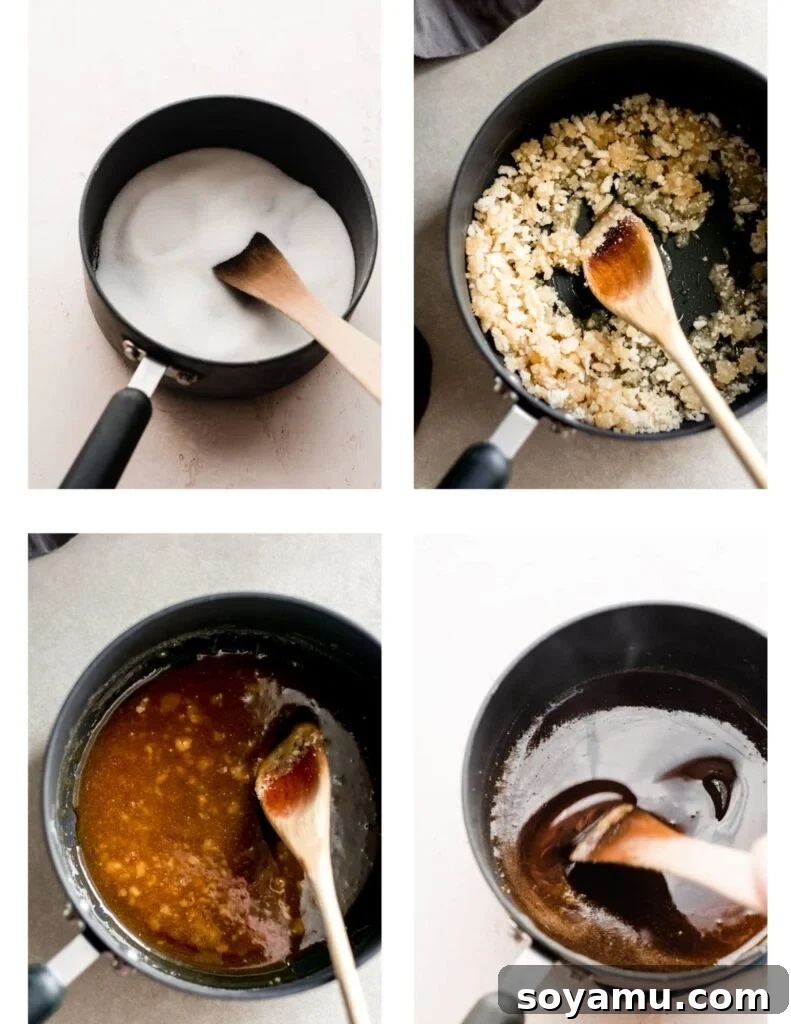
Step 2: Incorporate the Butter for Richness. As soon as your sugar has reached that beautiful deep amber color and is completely liquid, immediately reduce the burner to medium-low heat. Carefully add the cubed butter to the melted sugar. Whisk constantly and vigorously until the butter is completely melted and mostly incorporated. Don’t be alarmed if the mixture appears to separate slightly or look a bit oily; this is normal in the process. Just keep whisking your best to combine it, and trust that it will come together in the next step.
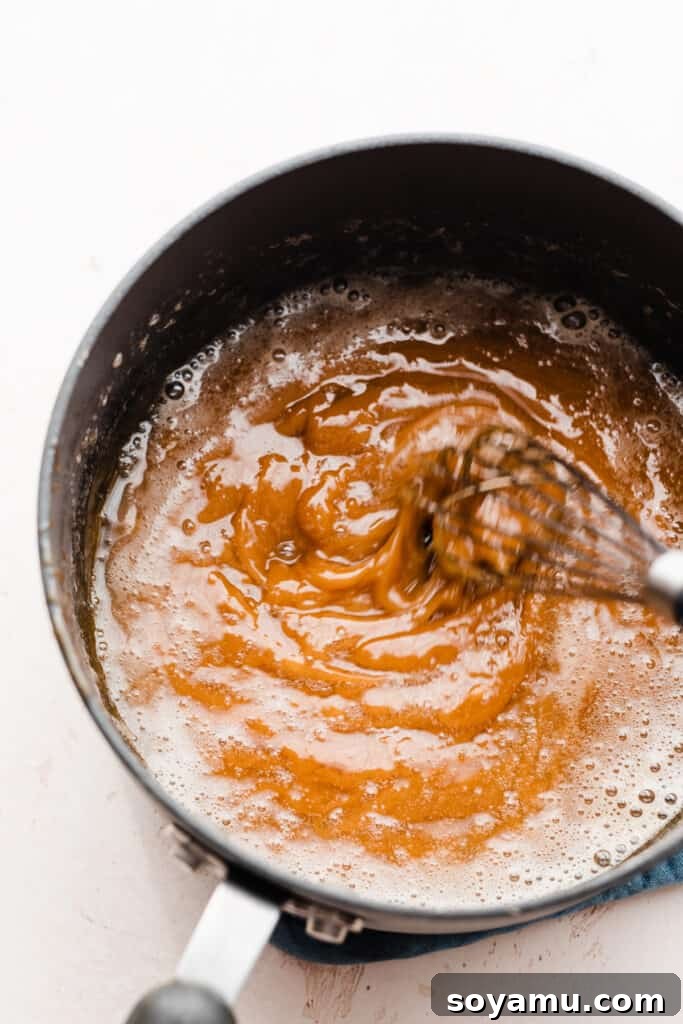
Step 3: Introduce the Heavy Cream (Carefully!). Remove the pot from the heat. This is a crucial safety step to prevent bubbling over. Slowly, and with extreme caution, pour the heavy cream into the hot sugar-butter mixture while continuously whisking. Be prepared for a vigorous reaction: the caramel will bubble up intensely and steam will rise. It’s also common for some of the caramel to seize up and harden into clumps upon contact with the colder cream. This is perfectly normal and nothing to worry about! The hardened bits will melt back down as we continue to heat the mixture.
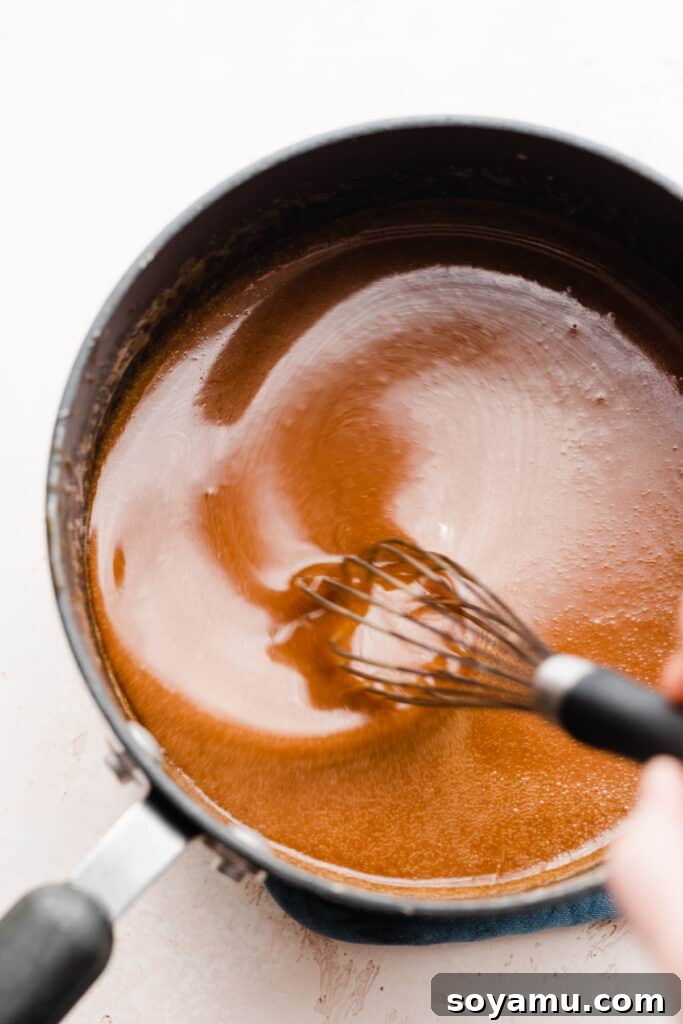
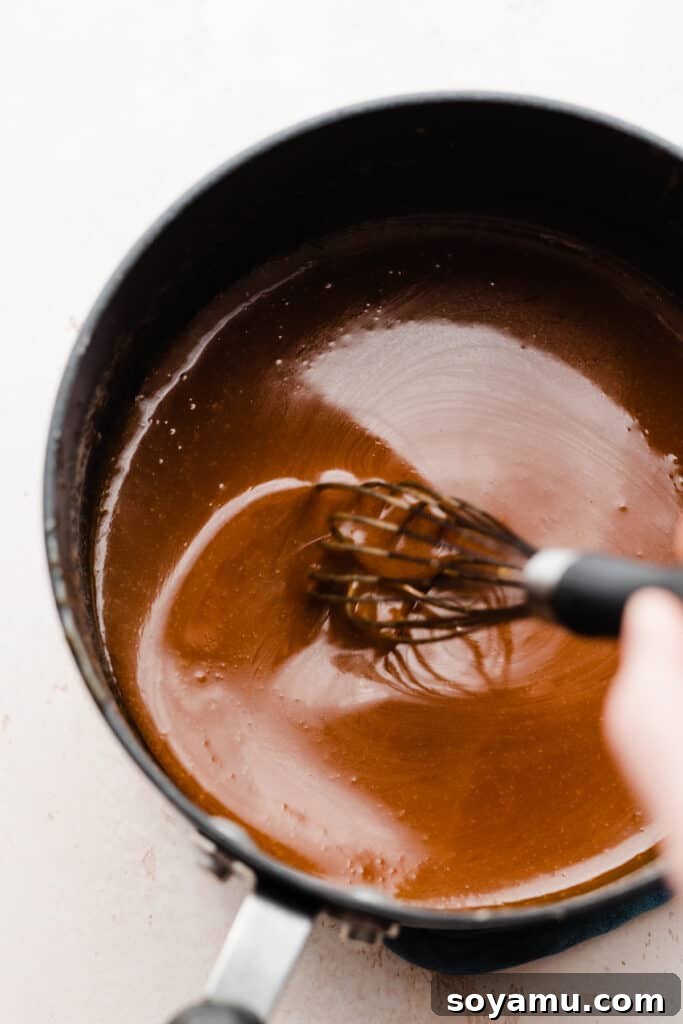
Step 4: Finish and Season Your Caramel Sauce. Return the pot to medium heat. Continue to cook for about another minute, whisking constantly, allowing any hardened caramel clumps to melt back into a smooth, homogeneous sauce. This final minute of cooking will also help the caramel thicken slightly. Once smooth and bubbly, remove the pot from the heat. Now, stir in your desired amount of flaky sea salt, to taste. If using, incorporate the vanilla extract at this stage too. The caramel will appear thin at this point, but don’t worry – it will thicken considerably as it cools. Allow the sauce to cool for 10-15 minutes before using it.
Serving Suggestions & Storage Guidelines
Your freshly made salted caramel sauce is incredibly versatile and stores beautifully, making it perfect for meal prep or gifting.
Serving Your Caramel
Allow the caramel to cool for at least 10-15 minutes after cooking before using. This initial cooling period allows it to thicken slightly to a perfect pourable consistency. Drizzle it warm over ice cream, pancakes, waffles, fruit, or any dessert that needs a touch of golden sweetness. It’s also wonderful as a dip for apple slices or pretzels. For a truly decadent experience, try it with my Caramel Apple Cider Cookies or Salted Caramel Apple Cheesecake – they are a match made in heaven!
Storing Your Homemade Sauce
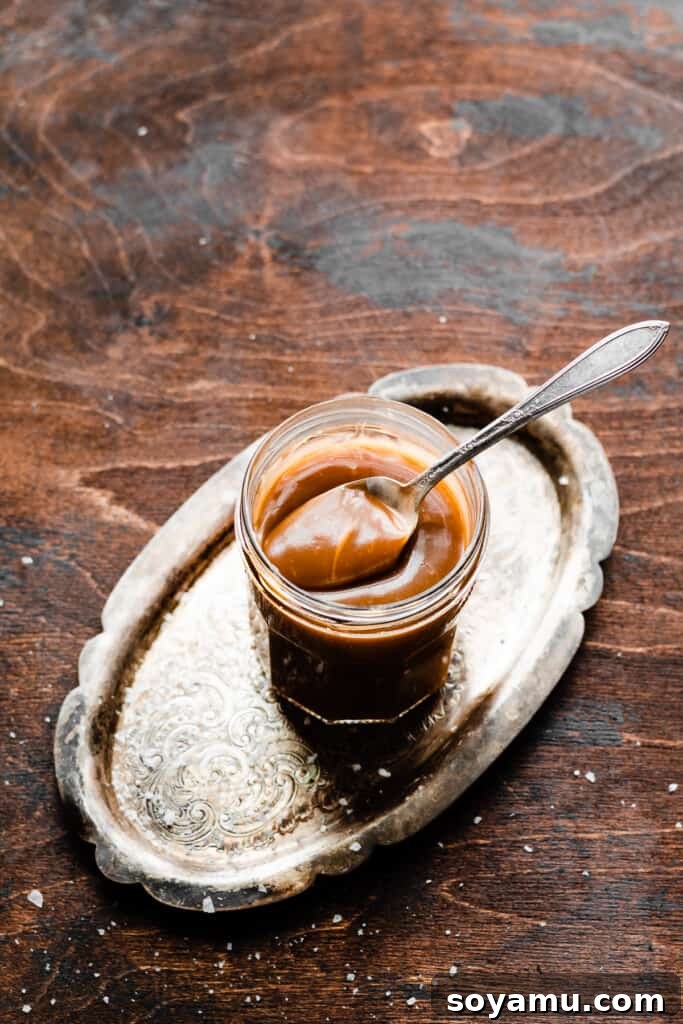
Once cooled to room temperature, transfer your salted caramel sauce into a clean, airtight glass jar or container. Store it in the refrigerator for up to one month. The caramel will naturally firm up and become quite solid when chilled. To restore its luscious, pourable consistency, simply microwave it in 15-30 second intervals, stirring well after each, until it reaches your desired texture. This allows you to enjoy warm, gooey caramel anytime!
Gifting Homemade Caramel
This caramel sauce is one of my absolute favorite recipes to gift. Pour it into cute little mason jars, tie a rustic ribbon around the neck, and perhaps add a small, handwritten tag with reheating instructions. It’s a beautiful, thoughtful, and utterly delicious homemade holiday gift that far surpasses any store-bought caramel. Plus, it’s never sickly sweet, offering a perfectly balanced flavor profile.
Expert Tips for Caramel Making Success
Even though this is an easy recipe, a few insider tips can make all the difference between good caramel and truly exceptional caramel:
- Patience is Key: Don’t Crank the Heat! It can be tempting to increase the heat to speed up the sugar melting process, but resist this urge at all costs. High heat can cause the sugar to melt unevenly, leading to some parts burning before others have even fully dissolved. A burnt sugar taste is irreversible and will ruin your entire batch of caramel. If you accidentally burn the sugar (it will smell acrid and turn very dark), it’s best to discard it safely (pour it into a disposable container once slightly cooled, not down the sink!) and start over.
- Respect the Recipe Yield: Avoid Doubling When it comes to candy making, the chemistry of the ingredients is very precise. It’s generally not recommended to double candy recipes, as the increased volume can drastically change cooking times, temperature distribution, and the final texture. I have never personally doubled this recipe, and to ensure consistent, perfect results, I strongly advise making a few separate batches if you need more than the approximately 1 and 1/4 cups this recipe yields.
- Read the Entire Recipe First Even for seasoned bakers, familiarizing yourself with the entire recipe instructions and potential outcomes before you start can prevent common pitfalls. This is especially true for caramel, where timing and observation are crucial. Knowing what to expect at each step, from the sugar clumping to the reaction with the cream, will make the process much smoother and more enjoyable, ensuring a perfect batch every time.
- Use a Heavy-Bottomed Pan A heavy-bottomed saucepan distributes heat more evenly, which is essential for melting sugar without burning it. This helps achieve that consistent amber color without hot spots.
- Clean Pan, Clean Start Ensure your saucepan is perfectly clean and dry before adding the sugar. Even tiny food particles can encourage sugar crystallization.
Common Questions & Troubleshooting for Salted Caramel Sauce
Don’t fret if you encounter a minor hiccup during your caramel-making adventure. Many common issues are easily resolved!
Help! My caramel sauce hardened up when I added the cream!
This is a very common occurrence and absolutely nothing to worry about! When the cold heavy cream hits the extremely hot sugar-butter mixture, the sudden temperature change can cause the sugar to solidify rapidly. Simply return the pot to medium heat and continue to gently whisk. The hardened sugar will gradually melt back into a smooth, luscious consistency within a minute or two. Keep whisking until all the clumps are gone.
The butter isn’t fully incorporating into the sauce!
It’s normal for the butter to appear slightly separated or oily when you first whisk it into the melted sugar. Don’t strive for 100% immediate incorporation at this stage. Just do your best to combine it, and trust that it will fully emulsify and come together beautifully once the heavy cream is added and the mixture is reheated slightly.
Can I double this recipe to make a larger batch?
I strongly advise against doubling this recipe. Candy making is a delicate process where precise ratios and cooking times are critical. Doubling the ingredients can significantly alter the heat distribution and reaction times, potentially leading to burnt sugar, crystallization, or an inconsistent texture. If you need a larger quantity, it’s best to make multiple separate batches to ensure consistent, high-quality results.
My caramel turned grainy, what happened?
Grainy caramel typically happens if not all the sugar crystals completely dissolved in Step 1, or if sugar crystals splashed onto the sides of the pan and didn’t melt back into the mixture. To prevent this, ensure you stir constantly but gently while the sugar melts, and don’t rush the process. If crystals stick to the sides of the pan, you can quickly brush them down with a wet pastry brush.
My caramel tastes burnt! Can I fix it?
Unfortunately, once sugar is burnt, there’s no way to rescue the flavor. Burnt sugar will impart a bitter, acrid taste to the entire sauce. This usually occurs if the heat was too high or the sugar was cooked for too long in Step 1. It’s best to discard the burnt batch and start fresh, being more mindful of the heat and the color of the melting sugar.
Helpful Tools for Homemade Caramel
While you don’t need many specialized gadgets for this recipe, a couple of items can make the process even smoother:
- Heavy-Bottomed Saucepan: As mentioned, this is ideal for even heat distribution and preventing burnt sugar.
- Sturdy Whisk or Wooden Spoon: Essential for stirring the melting sugar and incorporating ingredients.
- Mason Jars: Perfect for storing your delicious caramel and for creating charming homemade gifts. (Affiliate link)
- Heat-Resistant Spatula: Useful for scraping down the sides of the pan if sugar crystals form.
- Oven Mitt: Keep one handy when adding the heavy cream, as significant steam will be released.
Recipes That Pair Perfectly with Salted Caramel Sauce
Once you’ve mastered this incredible salted caramel sauce, the possibilities for its use are endless. Here are some of my favorite recipes that are absolutely transformed by a generous drizzle:
- Dutch Caramel Apple Pie: The ultimate comfort dessert, enhanced with rich caramel.
- Best Ever 5-Ingredient Brownies: Take simple brownies to a gourmet level.
- Pumpkin Swirl Cheesecake with Gingersnap Crust: A seasonal favorite that sings with caramel.
- Caramel Apple Turnovers: Flaky pastry and sweet apples meet salty caramel.
- Salted Caramel Pretzel Brownies: The perfect sweet, salty, and crunchy combo.
- Pumpkin Snickerdoodles with Rum Caramel: A spiced twist for holiday indulgence.
- Salted Caramel Apple Galette: A rustic dessert made even more irresistible.
- Homemade Apple Cider Donuts: Drizzle over warm donuts for a decadent breakfast or dessert.
Did you make this incredible Salted Caramel Sauce recipe? I would love to hear about it!
Please share your experience by leaving a comment and a star rating below. Your feedback helps my small business immensely and helps others discover this amazing recipe. I take all feedback seriously and appreciate your support!
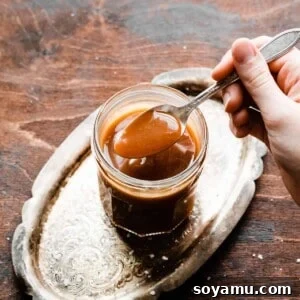
10-Minute Salted Caramel Sauce
By Stephanie Simmons
Salted Caramel Sauce is incredibly easy to make at home! It comes together in just 10 minutes and requires only four simple ingredients. It’s the perfect topping for all your favorite desserts, and it makes an amazing homemade holiday gift.
Prep: 2 mins | Cook: 10 mins | Total: 12 mins
Yields: Approximately 1 1/4 cups (8 servings)
Average Rating: 4.97 from 31 votes
Rate this Recipe | Print Recipe
Ingredients
- 1 cup granulated sugar (210 grams)
- 6 tbsp salted butter, cubed (85 grams)
- 1/2 cup + 1 tbsp heavy cream
- Pinch of flaky sea salt, optional but highly recommended
- 1/4 tsp vanilla extract (optional)
Instructions
- Prep: Set out all your ingredients before you begin. Cubing the butter and measuring the cream in advance will streamline the process.
- Melt the Sugar: Add the granulated sugar to a clean, medium, heavy-bottomed saucepan. Cook over medium heat, stirring lazily with a wooden spoon or heat-proof spatula. For the first few minutes, the sugar will clump, but eventually, it will completely melt into a coppery-amber liquid. Ensure all sugar crystals are completely dissolved for a smooth caramel.
- Add the Butter: Once the sugar is fully melted and amber, immediately reduce the heat to medium-low. Carefully add the cubed salted butter and whisk constantly until completely melted and mostly incorporated. It’s normal for it to look slightly separated at this stage.
- Add Heavy Cream: Remove the pan from the heat. Slowly pour in the heavy cream while whisking continuously. The mixture will bubble up and create steam. Some caramel may harden, which is normal.
- Finish: Return the pot to medium heat. Cook for about one minute more, stirring constantly, until any hardened bits of caramel have melted back down and the sauce is smooth and slightly thickened. Remove from heat.
- Season: Stir in a pinch of flaky sea salt (and vanilla extract, if using) to taste.
- Cool & Serve: Allow the caramel to cool for 10-15 minutes before using, as it will thicken as it cools.
- Store: Store cooled caramel in an airtight container in the fridge for up to 1 month. When ready to use, microwave for 15-30 seconds to make it pourable again. This recipe yields approximately 1 1/4 cups of caramel sauce.
Notes
- Safety First: When adding the heavy cream, significant steam will rise, and your whisk (especially if metal) will get very hot. Keep an oven mitt nearby for safety.
- Do Not Double: As with most candy recipes, I do not recommend doubling this recipe. If you need more, make multiple separate batches to ensure the best results.
Nutrition Information (Approximate)
- Serving: 1 serving (approx. 2 tbsp)
- Calories: 222 kcal
- Carbohydrates: 25g
- Protein: 1g
- Fat: 14g
- Saturated Fat: 9g
- Polyunsaturated Fat: 1g
- Monounsaturated Fat: 4g
- Trans Fat: 0.3g
- Cholesterol: 39mg
- Sodium: 72mg
- Potassium: 17mg
- Sugar: 25g
- Vitamin A: 481IU
- Vitamin C: 0.1mg
- Calcium: 13mg
- Iron: 0.03mg
Nutrition information is automatically calculated and should only be used as an approximation.
I hope you enjoy making and savoring this wonderfully easy 10-minute Salted Caramel Sauce! It’s a recipe that promises to bring a touch of gourmet delight to your home with minimal fuss. Happy cooking!