
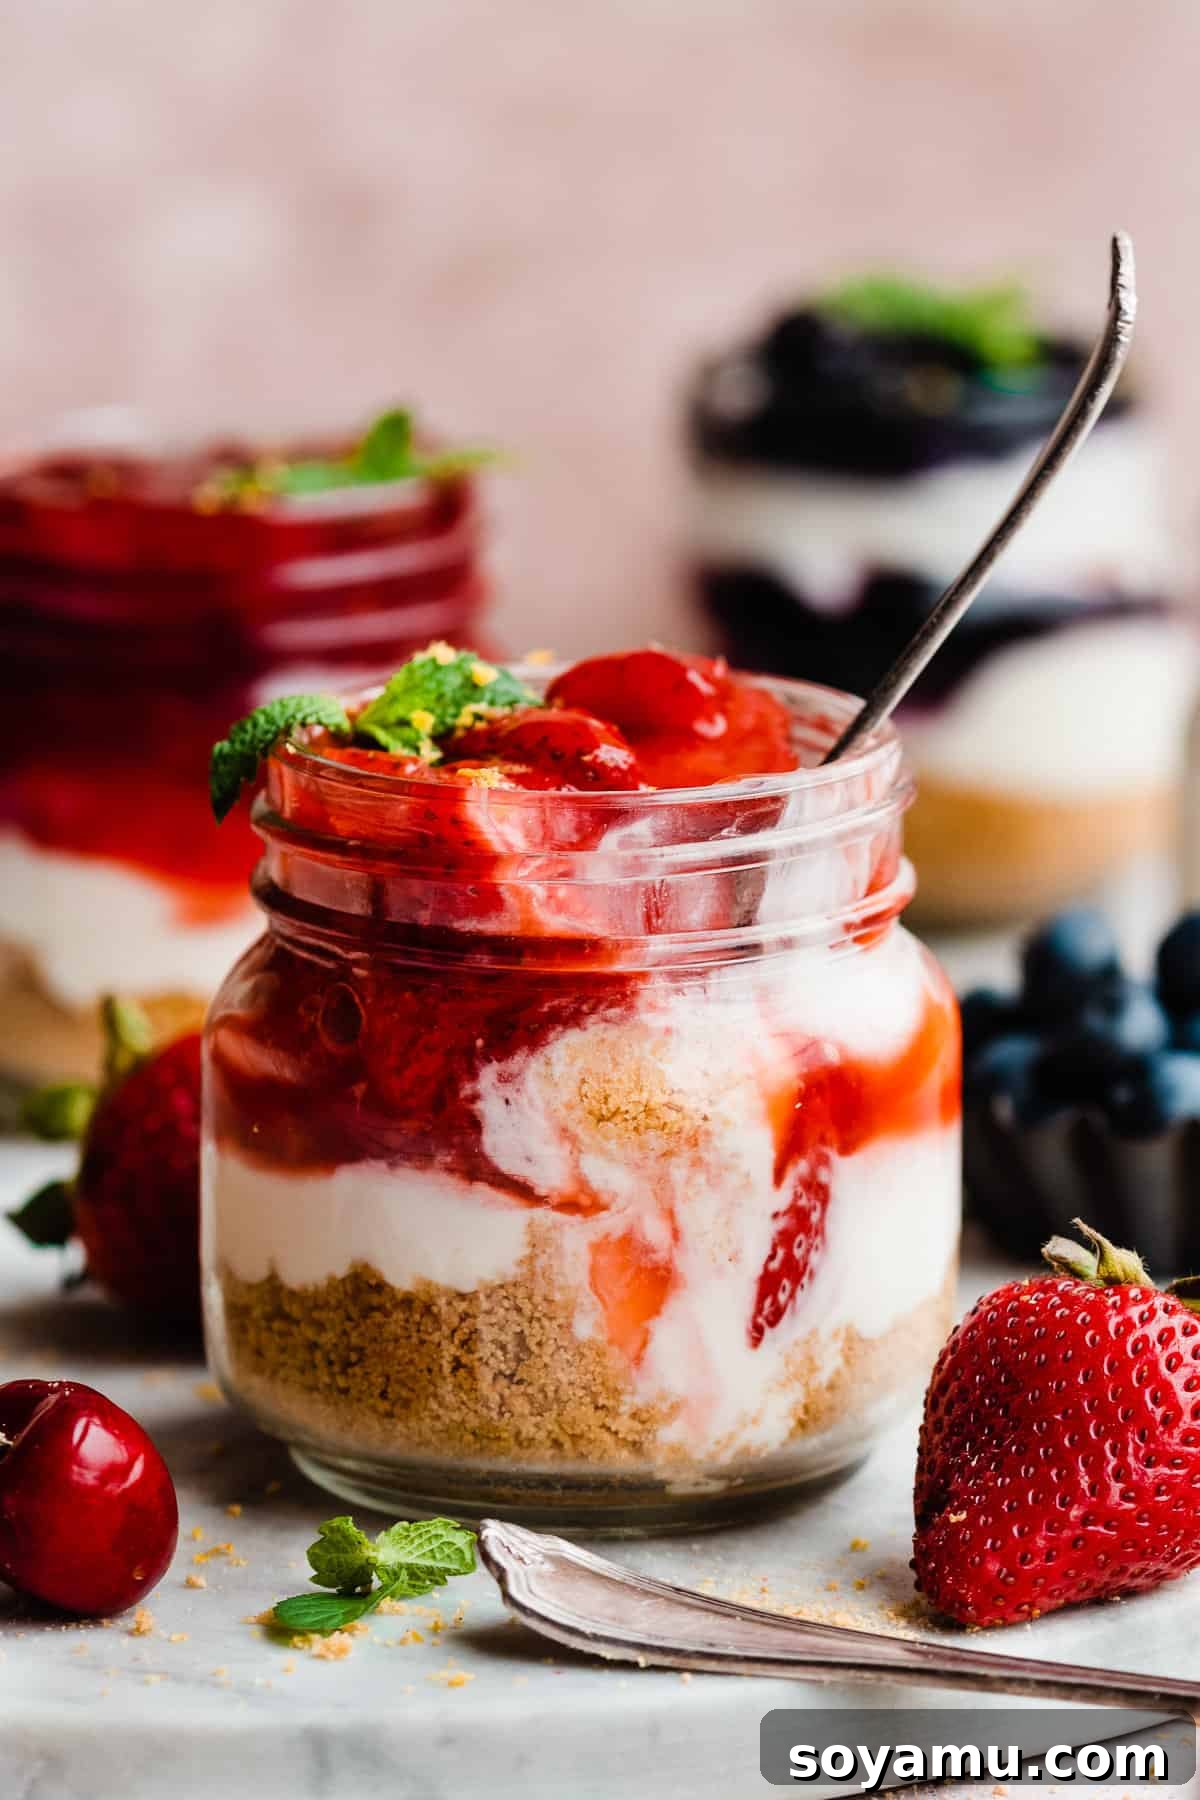
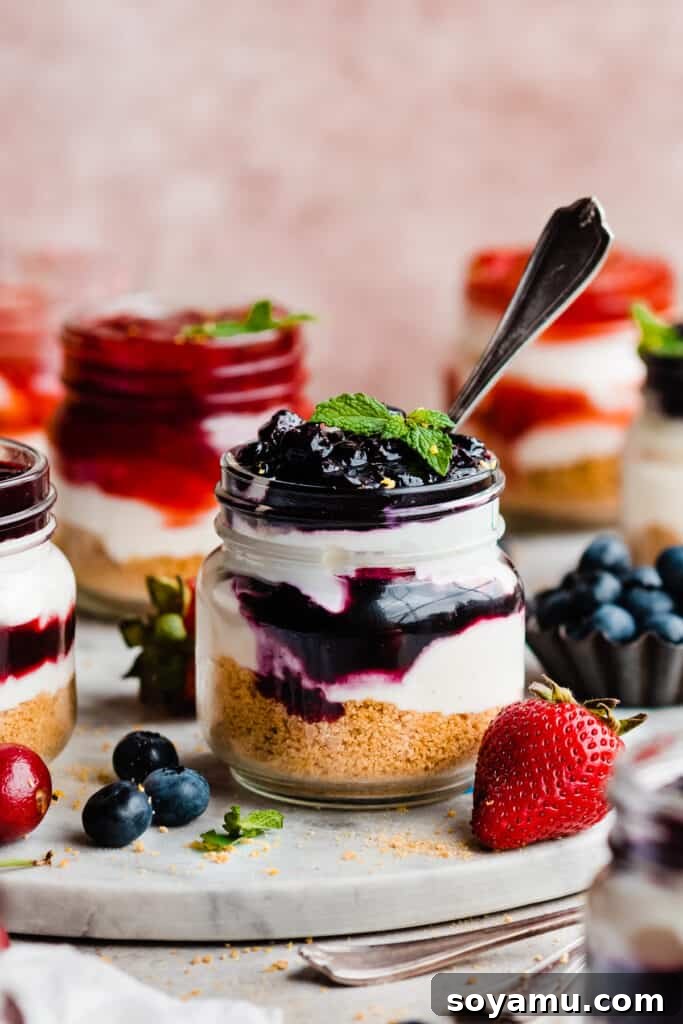
Mini Cheesecakes are an absolute dream come true for dessert lovers! These delightful individual treats are completely no-bake, featuring a perfectly buttery graham cracker crust and a luxuriously creamy, rich cheesecake filling. Perfectly portioned and served in charming mini mason jars, they offer endless possibilities for customization with your favorite toppings. Imagine a vibrant strawberry compote, a luscious blueberry sauce, or a zesty lime curd elevating each bite. This recipe delivers a sophisticated yet incredibly easy dessert that’s perfect for any occasion, from casual gatherings to elegant dinner parties. Dive into the world of effortless elegance with these irresistible cheesecake jars!
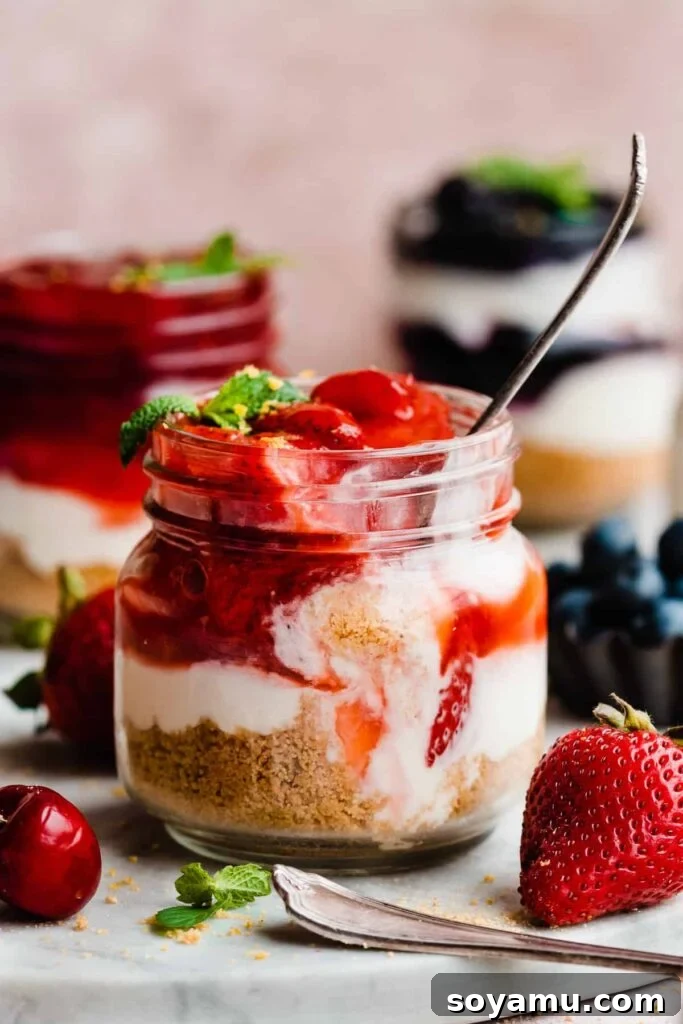
Why You’ll Adore This No-Bake Mini Cheesecake Recipe
If you’re searching for an impressive yet incredibly simple dessert, look no further than these fantastic mini cheesecakes. They combine convenience with gourmet appeal, making them a standout choice for any sweet craving. Here’s why this recipe will quickly become your new favorite:
- Effortlessly Creamy Filling – The heart of these mini cheesecakes is their incredibly silky and smooth no-bake cheesecake layer. Crafted with rich cream cheese and whipped to perfection, this filling offers a delightful melt-in-your-mouth texture that’s surprisingly easy to achieve. Forget about cracks, water baths, or oven temperature worries – this luscious filling comes together beautifully every time, delivering that classic cheesecake indulgence without the fuss.
- Boundless Topping Possibilities – One of the greatest joys of these individual cheesecakes is the freedom to customize. From vibrant fruit compotes and fresh seasonal berries to decadent chocolate ganache or gooey salted caramel, the options are truly endless. You can even prepare a single batch of cheesecake and offer a variety of toppings, allowing each guest to personalize their dessert. This versatility makes them perfect for parties, ensuring there’s a flavor to satisfy every palate.
- Truly No-Bake Perfection – This recipe is a dream for anyone who loves cheesecake but dreads the baking process. Every component, from the crunchy graham cracker crust to the airy filling and delightful toppings, requires absolutely no oven time. This means less heat in your kitchen, especially during warmer months, and a significantly quicker, stress-free dessert preparation. It’s the ideal solution for busy home cooks and a fantastic entry point for novice bakers.
- The Ultimate Make-Ahead Dessert – Planning an event or simply want to have a delicious treat ready when a craving strikes? These mini cheesecakes are your answer! They are an excellent make-ahead dessert that actually benefits from chilling. Prepare them a day in advance, let them firm up in the refrigerator, and then simply add your favorite toppings just before serving. This convenience allows you to enjoy your time without last-minute dessert preparations.
- Perfectly Portioned Individual Treats – Serving desserts can often be a messy affair, but these mini cheesecakes eliminate any hassle. Presented in individual mason jars, they are not only charmingly rustic but also incredibly practical. Each person gets their own perfectly sized dessert, ensuring easy distribution and a clean eating experience. This format also makes them ideal for potlucks, picnics, or any gathering where individual servings are preferred.
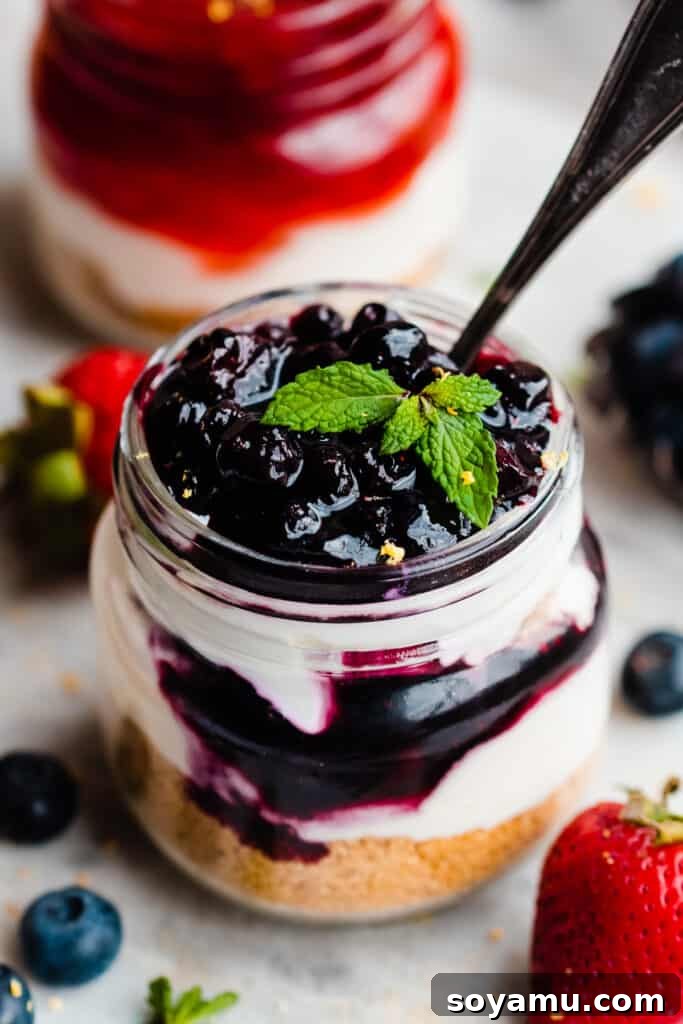
Essential Ingredients for Your No-Bake Mini Cheesecakes
Crafting these irresistible no-bake mini cheesecakes requires just a few key ingredients. Quality matters, as each component contributes to the overall texture and flavor profile. Below is a detailed look at what you’ll need to create this delightful dessert. Remember, for precise measurements and detailed instructions, refer to the comprehensive recipe card at the bottom of this article.
- Graham Crackers – These form the classic, buttery base of our cheesecake. For the finest crumbs, pulse whole graham crackers in a food processor until evenly ground. Alternatively, you can place them in a freezer bag and crush them using a rolling pin for a more rustic texture. If you’re short on time, pre-crushed graham cracker crumbs are also available at most grocery stores, making preparation even quicker.
- Butter – Melted butter binds the graham cracker crumbs together to create a firm yet yielding crust. I personally prefer using salted butter as its subtle saltiness beautifully complements the sweetness of the crackers and the richness of the cheesecake filling, adding an extra layer of flavor. However, feel free to use unsalted butter if you prefer to control the salt content.
- Cream Cheese – The star of our creamy filling! It’s crucial to use full-fat, block-style cream cheese for the best results. Low-fat or whipped cream cheese varieties tend to have a higher water content, which can result in a runny or less stable filling. Ensure your cream cheese is at room temperature before mixing; this allows it to beat smoothly without lumps, creating that desired silky texture.
- Heavy Cream – This is essential for achieving the light, airy, and stable whipped cream component of our filling. Always make sure your heavy cream is **cold**, straight from the fridge, before you begin whipping it. Cold cream whips up more easily and holds its volume much better, contributing to the cheesecake’s incredible light texture.
- Vanilla Extract – A touch of real vanilla extract elevates the flavor of the cheesecake filling, adding a warm, aromatic depth that balances the richness of the cream cheese. Opt for pure vanilla extract over imitation for the best, most authentic taste.
- Granulated Sugar – Sweetens the cream cheese mixture, ensuring a perfectly balanced sweetness that isn’t overpowering.
- Powdered Sugar – Used to sweeten and stabilize the whipped cream, helping it hold its stiff peaks.
- Sour Cream – A secret ingredient that adds a delightful tang and helps achieve that signature creamy, slightly tart cheesecake flavor. Ensure it’s also at room temperature for smooth incorporation.
- Lemon Juice – A small amount of fresh lemon juice brightens the flavor profile, cutting through the richness and adding a subtle, refreshing zest to the filling. You can adjust this to your preference for a more pronounced tang.
Clever Ingredient Substitutions for Your Mini Cheesecakes
Don’t have all the ingredients on hand, or need to accommodate dietary restrictions? No problem! These mini cheesecakes are wonderfully adaptable. Here are some easy substitutions to help you create a delicious dessert that suits your needs.
- Gluten-Free Alternative – Making this recipe gluten-free is incredibly simple. Just swap out traditional graham crackers for your favorite brand of gluten-free graham crackers. The crust will be just as delicious and sturdy, ensuring everyone can enjoy these delightful treats.
- Dairy-Free Option – For those following a dairy-free diet, this recipe can still be enjoyed! Utilize your preferred, trusted dairy-free cream cheese (often found in block form), dairy-free heavy cream alternatives for whipping, dairy-free butter, and dairy-free sour cream. Be sure to select brands that you know work well in no-bake applications to ensure the best texture and flavor.
- Whipped Cream Substitute – While homemade whipped cream offers the freshest taste and best texture, you can use a store-bought alternative in a pinch. Cool Whip is a popular choice; approximately 1 ½ (8-ounce) tubs should be equivalent to the amount of homemade whipped cream required in this recipe.
-
Crust Alternatives – Graham crackers are classic, but they’re not the only option for a fantastic crust.
- Vanilla Wafers: Offer a milder, sweeter flavor.
- Digestive Biscuits: A common choice in the UK, these provide a similar texture to graham crackers.
- Oreo Cookies: For a decadent chocolate twist, crush entire Oreo cookies (filling included) and combine with melted butter for a rich, dark chocolate crust. This is especially popular for chocolate lovers!
- Shortbread Cookies: For a delicate, buttery crust, shortbread cookies are an excellent choice.
Crafting Your Cheesecake Jars: A Step-by-Step Guide
Creating these beautiful and delicious mini cheesecakes is a straightforward process, perfect for beginners and seasoned dessert makers alike. Follow these simple steps to assemble your no-bake treats.
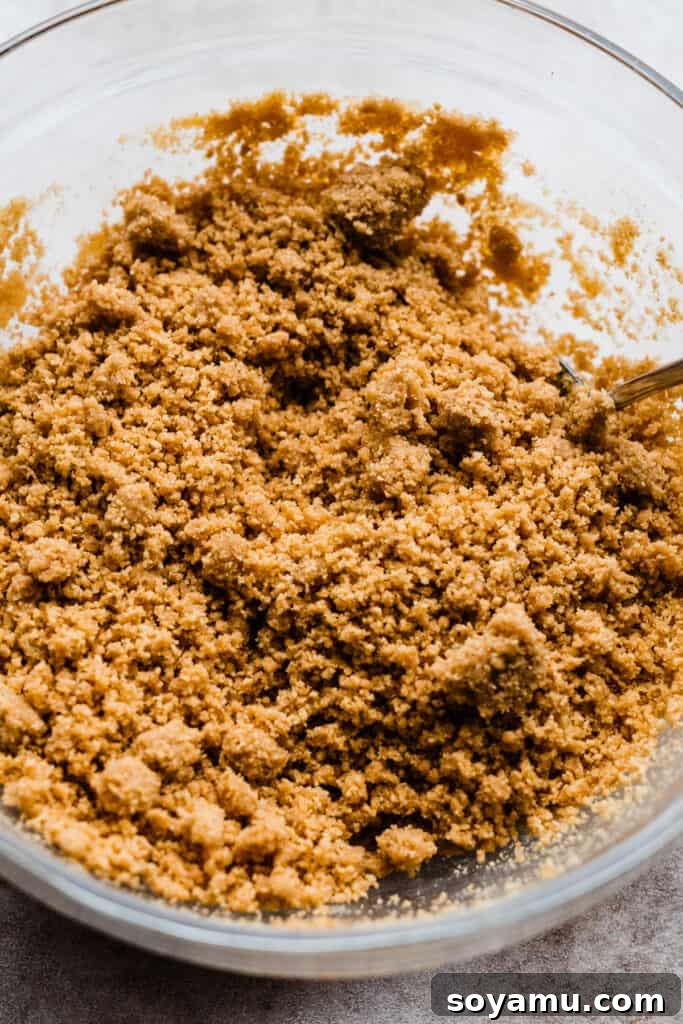
Step 1: Prepare the Perfect Crust. Begin by combining your melted butter and graham cracker crumbs in a medium-sized mixing bowl. Stir them thoroughly until the mixture resembles wet sand – it should hold together when pressed. This ensures your crust is firm and flavorful. Once mixed, set this aside while you prepare the creamy filling.
Step 2: Create the Luscious Cheesecake Filling. This step involves two main parts to achieve that signature light and creamy texture.
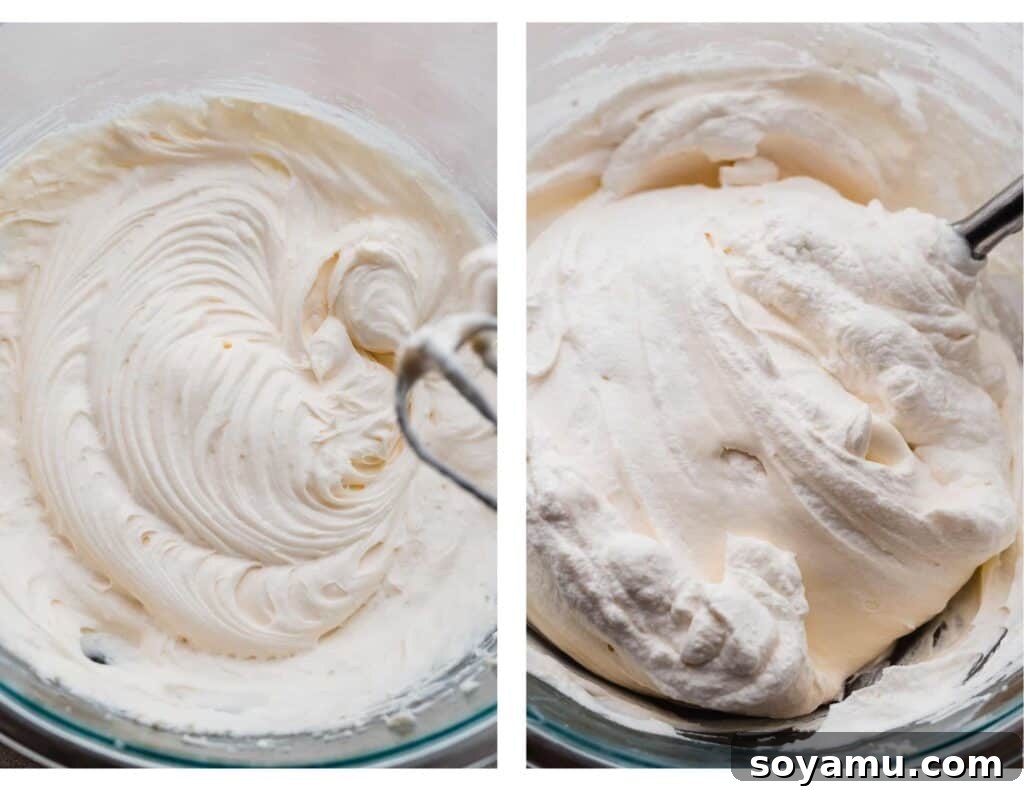
First, in a medium mixing bowl, pour your cold heavy cream and add the powdered sugar. Using an electric mixer, beat the mixture on medium-high speed until firm, stiff peaks form. Be careful not to over-beat, as this can turn the cream grainy. Set the perfectly whipped cream aside.
Next, in a separate large bowl, combine the softened cream cheese, granulated sugar, room-temperature sour cream, fresh lemon juice, and vanilla extract. Beat these ingredients together on medium speed until the mixture is smooth, creamy, and free of any lumps.
Finally, gently fold the prepared whipped cream into the cream cheese mixture. Use a rubber spatula, sliding it down the side of the bowl, across the bottom, and up the other side, then cutting through the mixture. This delicate folding technique preserves the air incorporated into the whipped cream, ensuring your cheesecake filling remains light and airy. Continue folding just until everything is combined and no streaks remain.
Step 3: Assemble Your Individual Cheesecakes and Add Toppings. Now for the fun part – assembly!
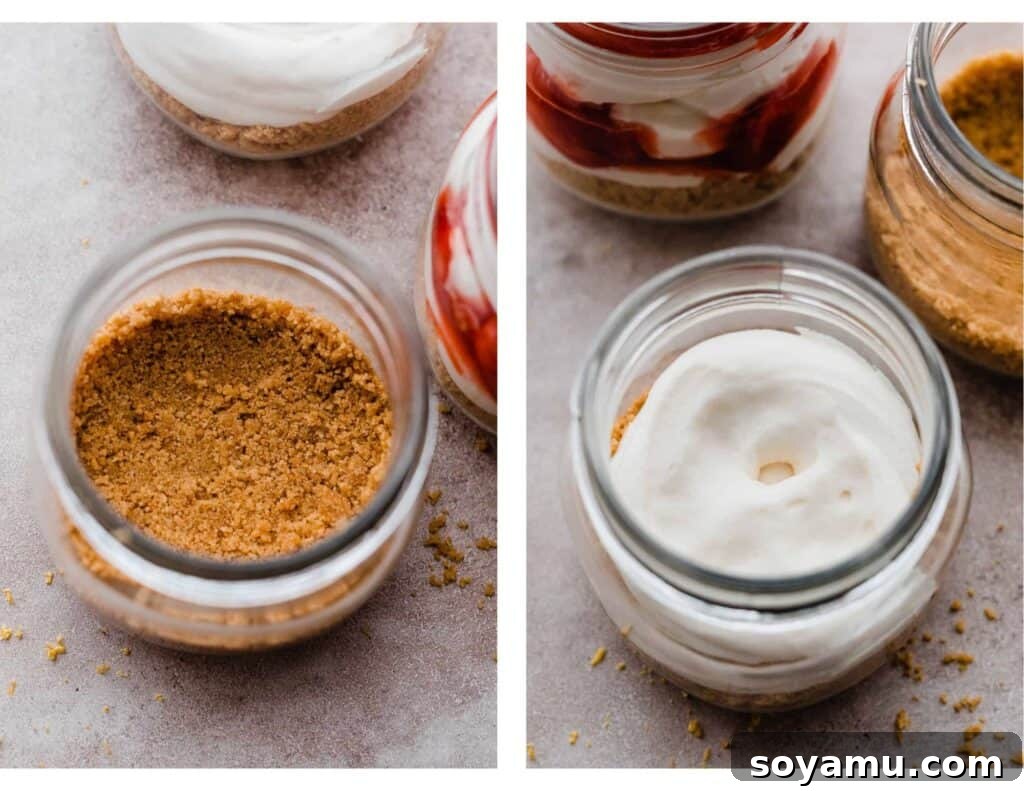
Start by pressing about 2 tablespoons of the graham cracker crust mixture evenly into the bottom of each mini mason jar. Use the back of a spoon or your fingertips to compact it firmly.
For easy and neat filling, transfer your cheesecake batter into a large ziploc bag and snip off one corner to create a makeshift piping bag. Alternatively, a small cookie scoop or ice cream scoop works well for portioning. Pipe or scoop the creamy cheesecake filling into each jar, leaving a little room at the top for your chosen toppings.
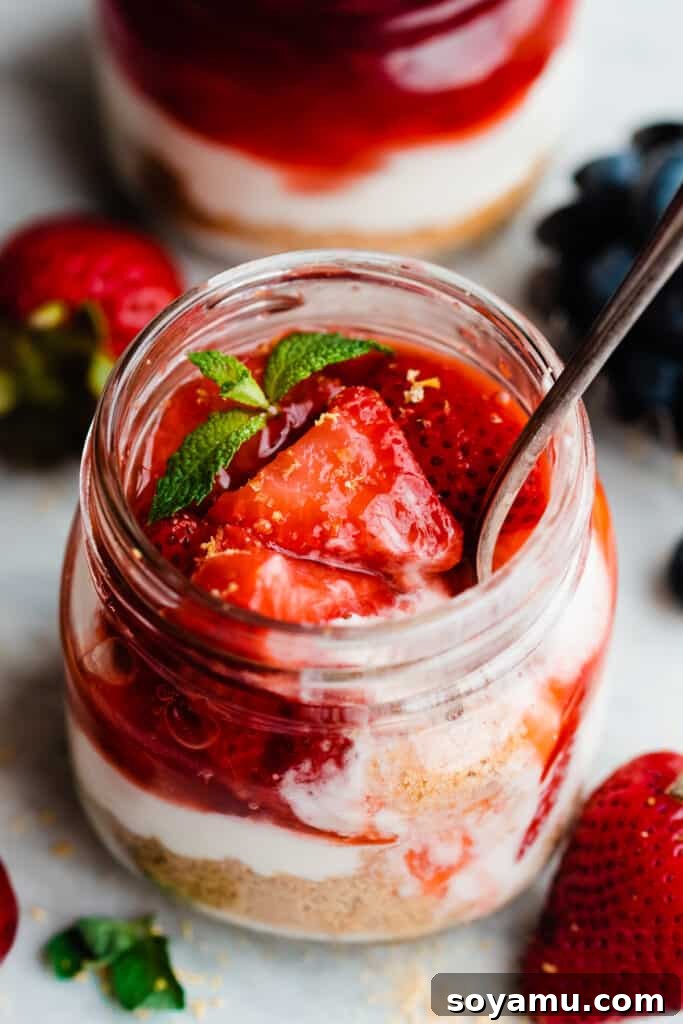
This is where your creativity shines! Top each individual cheesecake generously with your desired toppings. For a visually stunning effect, you can also alternate layers of cheesecake filling and topping, as shown in the accompanying photos, creating beautiful parfaits.
Serving and Storing Your Mini Cheesecakes
To ensure your no-bake mini cheesecakes have the best possible texture and flavor, a little chilling time is essential. Once assembled, allow them to firm up in the refrigerator for at least 20-30 minutes before serving. This brief chill time helps the filling set perfectly, providing that desirable creamy yet stable consistency. For an even more developed flavor and firmer texture, especially if you’re layering with sauces, these cheesecakes can be prepared a full day ahead of time.
When it comes to leftovers (if there are any!), simply cover the jars with plastic wrap or transfer the cheesecakes to an airtight container. They will keep beautifully in the refrigerator for 2-3 days, making them perfect for enjoying over a few days or for meal prepping your desserts. Avoid leaving them at room temperature for extended periods, as the dairy-based filling requires refrigeration.
Expert Tips for Perfect No-Bake Mini Cheesecakes
Achieving a flawless no-bake cheesecake is simpler than you think, especially with a few insider tricks. Follow these expert tips to ensure your mini cheesecakes are consistently delicious and picture-perfect.
- Gentle Folding is Key – When combining the whipped cream with the cream cheese mixture, the golden rule is to fold gently. Use a rubber spatula to carefully incorporate the whipped cream, preserving all the air you worked hard to whip in. This prevents the delicate whipped cream from deflating, which is essential for a light, airy, and fluffy cheesecake filling. Over-mixing at this stage can lead to a dense or runny consistency.
- Room Temperature Cream Cheese – Always ensure your full-fat block cream cheese and sour cream are at room temperature. This is critical for a smooth, lump-free filling. Cold cream cheese will be difficult to beat and can result in a chunky texture, no matter how long you mix it. Just 20-30 minutes out of the fridge is usually enough.
- Chill Your Heavy Cream – Conversely, heavy cream must be very cold to whip properly and achieve stiff peaks. Keep it in the fridge until you are ready to beat it. Even chilling your mixing bowl and whisk for 10-15 minutes beforehand can help achieve maximum volume and stability.
- Firm Crust, No Sag – To prevent a soggy crust, ensure your melted butter is fully incorporated into the graham cracker crumbs. Press the mixture firmly into the bottom of the jars. For those using a muffin tin and desiring a slightly sturdier crust that can be picked up, consider baking the crusts for 5 minutes at 350°F (175°C) and then letting them cool completely before adding the filling. This extra step helps the crust set more firmly.
- Don’t Skimp on Chilling Time – While these are “no-bake,” a brief chill is necessary for the filling to set. While 20-30 minutes is sufficient for serving, allowing them to chill for 2-4 hours, or even overnight, will yield the best, most stable, and flavorful results. This is especially true if you plan to layer toppings.
- Taste and Adjust Sweetness/Tang – Before folding in the whipped cream, taste a small amount of the cream cheese mixture. You can always add a little more sugar for sweetness or a touch more lemon juice for an extra tangy kick, adjusting to your personal preference.
Frequently Asked Questions About No-Bake Mini Cheesecakes
Yes, you can absolutely halve this recipe if you only need a smaller batch of mini cheesecakes. This will yield a perfect amount for a smaller gathering or just a few personal treats. However, I generally do not recommend doubling the recipe. The volume of ingredients might become too large for a standard mixing bowl, making it difficult to properly combine everything. More importantly, when folding in the whipped cream, there’s a higher risk of over-folding a large mixture, which can deflate the air and result in a less airy, denser cheesecake filling. If you need a large quantity, it’s best to prepare two separate batches.
Folding is a gentle mixing technique crucial for incorporating delicate ingredients like whipped cream or egg whites without deflating them. To fold, use a rubber spatula and slide it down one side of the mixing bowl, across the bottom, and then up the opposite side, gently turning the mixture over itself. Then, cut through the center of the mixture with the side of your spatula. Rotate the bowl and repeat this motion until the ingredients are just combined. The key is to be gentle and avoid stirring vigorously, as this preserves the maximum amount of air in the whipped cream, leading to a light and airy cheesecake.
Absolutely! Using a muffin pan is a fantastic alternative if you don’t have mini jars or prefer a more traditional cupcake-style presentation. Simply line a standard muffin pan with cupcake liners before proceeding with the recipe directions. You’ll press the graham cracker crust into the bottom of each liner and then pipe or scoop in the cheesecake filling. Since muffin tin cheesecakes are typically smaller than those in jars, you might not be able to create alternating layers of filling and topping, but you’ll get double the yield, making them perfect for larger crowds. Remember, for a firmer crust in muffin tins, you can bake the crusts for 5 minutes at 350°F (175°C) and let them cool completely before adding the filling.
While these are no-bake, they do require chilling to set properly. A minimum of 20-30 minutes in the refrigerator is recommended before serving to achieve the best texture. For optimal firmness and flavor development, especially if you plan to transport them or layer multiple toppings, chilling for at least 2-4 hours, or even overnight, is ideal. The longer they chill, the firmer and more stable the filling will become.
Yes, you can freeze these mini cheesecakes! For best results, freeze them without the toppings. Place the filled jars (without lids) in the freezer until solid, about 2-3 hours. Once frozen, you can cover them tightly with plastic wrap or transfer them to an airtight freezer-safe container. They can be stored in the freezer for up to 1 month. To serve, thaw them in the refrigerator for a few hours or overnight, then add your desired toppings.
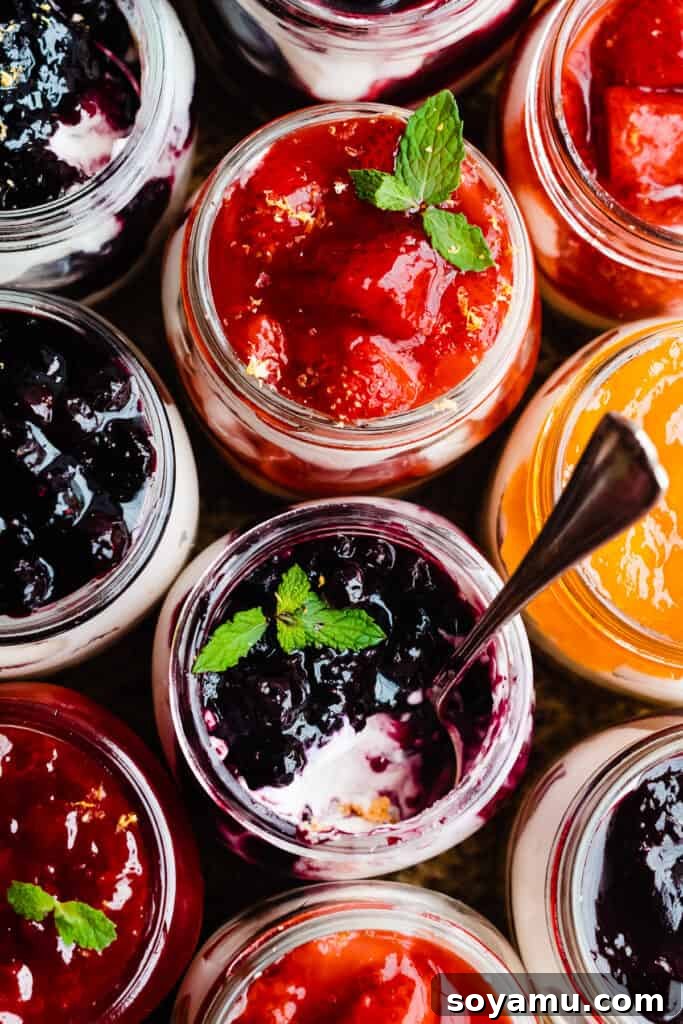
Endless Recipe Variations: Get Creative with Toppings!
The beauty of these no-bake mini cheesecakes lies in their incredible versatility. While delicious on their own, the choice of topping can transform them into a completely different dessert experience. Don’t limit yourself to just one; experiment with different flavors to create a stunning dessert spread! Beyond homemade options, don’t hesitate to use convenient store-bought choices like canned cherry pie filling or blueberry pie filling for quick and easy deliciousness. Here are just a few suggestions to inspire your culinary creativity:
-
Classic Fruit Compotes & Sauces:
- Strawberry Topping: Sweet and vibrant, a perennial favorite.
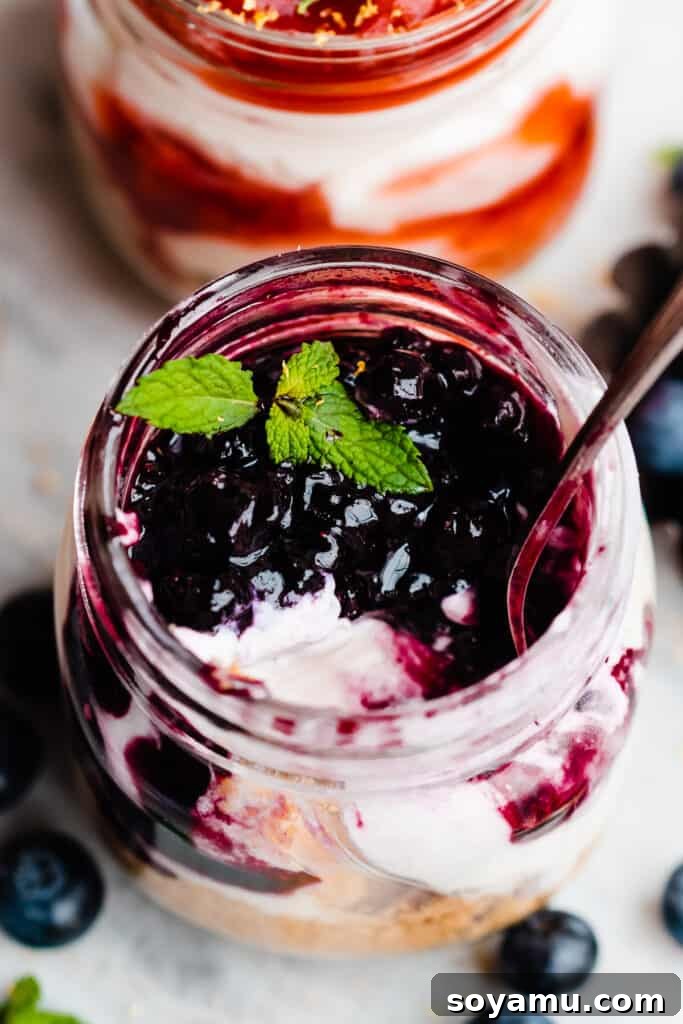
- Blueberry Sauce: Juicy and rich, perfect with the creamy filling.
- Cherry Compote: Tart and sweet, for a classic flavor combination.
- Raspberry Coulis (Sauce): Bright, tangy, and elegant.
- Strawberry Rhubarb Sauce: A beautiful balance of sweet and tart, especially good in spring.
-
Zesty & Tropical Delights:
- Lime Curd: Adds a wonderful tart and refreshing kick.
- Pineapple Sauce (from my Piña Colada Cake): For a tropical escape, sweet and tangy.
-
Caramel & Nutty Indulgences:
- Salted Caramel Sauce: A decadent, salty-sweet treat that pairs beautifully with cheesecake.
- Pecan Pie Topping: A rich, nutty, and slightly chewy topping perfect for fall.
-
Comforting Pie-Inspired Toppings:
- Peach Pie Topping: Warm, comforting, and subtly sweet.
- Apple Pie Topping: Classic autumnal flavors that complement cream cheese beautifully.
-
Chocolate Lover’s Dream:
- Chocolate Ganache (from my S’mores Cookies): A rich, glossy, and intensely chocolatey topping.
- Mini chocolate chips, shaved chocolate, or a drizzle of chocolate syrup can also be simple yet effective additions.
-
Fresh Fruit & Simple Garnishes:
- Fresh Berries: A mix of raspberries, blueberries, and blackberries adds natural sweetness and a pop of color.
- Citrus Zest: Lemon, lime, or orange zest can add a burst of freshness.
- Chopped Nuts: Pecans, walnuts, or almonds for a textural crunch.
- Whipped Cream & Sprinkles: A simple dollop of extra whipped cream and colorful sprinkles for a festive touch.
Recommended Tools for Making Mini Cheesecakes
While these cheesecakes are no-bake and relatively simple, having the right tools can make the process even smoother and more enjoyable. Here are a few recommended items to help you create your perfect mini cheesecake jars:
- Mini Jars – These charming 8-ounce jars are ideal for individual servings and present a beautiful dessert. You can also opt for slightly smaller 6-ounce jars if you wish to stretch the yield of your recipe or offer smaller portions. The transparency of the jars also allows the beautiful layers of crust, filling, and topping to shine through.
- Electric Mixer – Essential for easily whipping the heavy cream to stiff peaks and ensuring your cream cheese mixture is smooth and lump-free. Both a stand mixer and a hand-held electric mixer will work perfectly.
- Food Processor (Optional) – While not strictly necessary, a food processor makes quick work of crushing graham crackers into fine, even crumbs for your crust. If you don’t have one, a sturdy freezer bag and a rolling pin work just as well for crushing.
- Rubber Spatula – Indispensable for gently folding the whipped cream into the cream cheese mixture, ensuring your filling remains light and airy without deflating the delicate air bubbles.
- Piping Bag (or Ziploc Bag) – For neat and efficient filling of your jars, a piping bag with a snipped tip (or a large Ziploc bag with a corner cut off) is highly recommended. This allows for precise layering and keeps the jar sides clean.
- Measuring Cups and Spoons – Accurate measurements are key in baking and no-bake desserts alike, ensuring the perfect balance of flavors and textures.
Discover More Irresistible Cheesecake Recipes
If you’ve fallen in love with these mini cheesecakes, you’re in for a treat! The world of cheesecake is vast and wonderfully diverse. Explore these other fantastic cheesecake recipes, ranging from more individual delights to grand showstopping desserts, perfect for every cheesecake aficionado.
- Mini S’mores Cheesecakes: A campfire classic transformed into an elegant dessert with toasted marshmallow meringue.
- Strawberry Cheesecake: The quintessential classic, often paired with a vibrant homemade strawberry sauce.
- Swirled Key Lime Pie Cheesecake: A refreshing and tangy twist, perfect for summer.
- Bailey’s Chocolate Cheesecake: Indulgent and rich, with a hint of Irish cream liqueur.
- Biscoff Cheesecake: A unique and spiced delight for cookie butter lovers.
- Triple Nutella Cheesecake: For the ultimate chocolate-hazelnut obsession, layered with Nutella goodness.
- Lemon Blueberry Cheesecake: A bright and fruity combination that’s both refreshing and satisfying.
More Fantastic No-Bake Desserts to Enjoy
Beyond the world of cheesecakes, there’s a whole realm of delicious desserts that require no oven at all! Perfect for warm weather or when you just want to skip the baking, these no-bake recipes are simple, quick, and incredibly satisfying. Expand your repertoire with these delightful oven-free treats.
- Black Forest Pie: A rich chocolate and cherry delight that’s wonderfully decadent.
- No-Bake Peanut Butter Pie: Creamy, dreamy, and perfect for peanut butter enthusiasts.
- Homemade Popsicles (Blender Recipe!): A refreshing and customizable treat, ideal for hot days, made easily in your blender.
Enjoyed this recipe? Your feedback means the world to us!
Please take a moment to leave a comment and a star rating below. Simply click the little stars in the header of the recipe card to share your experience. Every rating helps our small business grow and allows us to continue bringing you delicious recipes! Thank you for your support.
Mini Cheesecakes (Cheesecake Jars!)
Saved
Pin
Rate
Ingredients
For the Buttery Graham Cracker Crust:
- 1/2 cup salted butter, melted, 113 grams (for best flavor, but unsalted works too)
- 2 cups graham cracker crumbs, 230 grams (or digestive biscuits, vanilla wafers, or crushed Oreos for variations)
For the Velvety Cheesecake Filling:
- 16 ounces full-fat cream cheese, softened at room temperature , Use block style; needs 20-30 minutes at room temp for best blending.
- 1 cup granulated sugar, 210 grams
- 3 tbsp sour cream, at room temperature , 45 grams (adds a lovely tang and creaminess)
- 2 tsp pure vanilla extract
- 2 tsp fresh lemon juice, more to taste (for brightness and tang)
- 2 cups cold heavy cream, 480 mL (essential for whipping to stiff peaks)
- 1/4 cup powdered sugar, 29 grams (for sweetening and stabilizing whipped cream)
Prevent your screen from going dark
Instructions
-
Preparation: You can use either mini mason jars or a muffin tin for this recipe. If using jars, no special preparation is needed. If opting for a muffin pan, line each well with cupcake liners for easy removal.
-
Prepare Toppings in Advance: To allow ample time for cooling, it’s best to prepare your chosen toppings first. Refer to the “Recipe Variations” section above for a comprehensive list of ideas. Some popular choices include Cherry Compote, Strawberry Compote, Blueberry Sauce, Lime Curd, and Salted Caramel Sauce. I recommend selecting one or two toppings for a delightful variety.
-
Assemble the Crust: In a medium bowl, thoroughly stir together the melted butter and graham cracker crumbs until they are well combined and resemble wet sand. Press approximately 2 tablespoons of this crust mixture firmly into the bottom of each mini jar. If using a muffin tin, use about 1 1/2 tablespoons per liner. Set the prepared crusts aside.
(See notes section for specific tips on baking the crust if using a muffin tin for a sturdier base.)
1/2 cup salted butter, melted, 2 cups graham cracker crumbs -
Prepare the Cheesecake Filling: In a large mixing bowl, beat together the softened cream cheese and granulated sugar until the mixture is smooth and creamy. Incorporate the room-temperature sour cream, vanilla extract, and lemon juice, mixing just until fully combined. In a separate medium bowl, beat the cold heavy cream and powdered sugar on medium-high speed until firm, stiff peaks form. Finally, very gently fold the whipped cream mixture into the cream cheese mixture using a rubber spatula, taking care not to deflate the air. Continue until no streaks of cream cheese or whipped cream are visible.
(Refer to the FAQs section if you need a refresher on the proper folding technique.)
16 ounces cream cheese, softened at room temperature, 1 cup granulated sugar, 3 tbsp sour cream, at room temperature, 2 tsp vanilla extract, 2 tsp lemon juice, more to taste, 2 cups cold heavy cream, 1/4 cup powdered sugar -
Fill the Jars: For a clean and easy filling process, transfer the cheesecake mixture into a large piping bag (or a sturdy ziploc bag) and snip off the tip. Pipe the creamy filling into each prepared jar or muffin well, leaving enough space at the top for your chosen toppings. For an appealing visual, you can also create alternating layers of cheesecake filling and topping, as beautifully demonstrated in the recipe photos.
-
Chill, Serve & Store: Allow your assembled cheesecakes to chill in the refrigerator for a minimum of 20-30 minutes before serving. For optimal texture and flavor, especially with layered toppings, chilling for several hours or even overnight (up to 24 hours) is recommended. Any leftover cheesecakes should be covered with plastic wrap or stored in an airtight container in the fridge for 2-3 days.
Notes
Optional Baked Crust for Muffin Tins: If you’re using a muffin tin and desire a crust that’s sturdy enough to be picked up and eaten by hand (rather than with a fork), consider pre-baking your crusts. After pressing the graham cracker mixture into the muffin liners, bake them for 5 minutes at 350°F (175°C). Let them cool completely before adding the cheesecake filling. This step is only necessary for the muffin tin variation; jars typically provide enough support for the no-bake crust.
Nutrition Information: Please note that the provided nutrition information below only covers the crust and the cheesecake filling. It does not include the caloric or nutritional values for any toppings, as these will vary widely based on your selection. The information should be used as an approximation.
Nutrition
Nutrition information is automatically calculated, so should only be used as an approximation.
Love this recipe? Tell us about it!