

As the leaves begin to turn and a crisp chill fills the air, our culinary cravings often shift towards warm, comforting dishes that celebrate the bounty of autumn. This **Butternut Squash Galette with Asiago and Parmesan** perfectly encapsulates the essence of the season, offering a delightful blend of sweet, savory, and herbaceous flavors wrapped in a golden, flaky crust. It’s more than just a meal; it’s a celebration of fall, making it a spectacular choice for a cozy family dinner, an impressive Thanksgiving side dish, or a show-stopping centerpiece for any autumn gathering.
Imagine tender, earthy butternut squash, caramelized to perfection with aromatic sage and thyme, nestled over a bed of rich Asiago and Parmesan cheeses. All of this deliciousness is then enveloped in a rustic, buttery pie crust and baked until deeply golden brown. The result is a savory galette that promises both visual appeal and an unforgettable taste experience. This recipe embraces simplicity without sacrificing elegance, proving that some of the most impressive dishes are often the easiest to create.

Why This Butternut Squash Galette is Your New Fall Favorite
There’s something inherently charming about a galette. Unlike its more formal cousin, the pie, a galette embraces imperfection with its free-form, rustic edges, making it approachable for even novice bakers. This Butternut Squash Galette offers numerous reasons to fall in love:
- **Seasonal Flavor Profile:** Butternut squash is a quintessential fall ingredient, and when combined with the warm notes of sage and thyme, it creates an irresistible aroma and taste that perfectly captures the season.
- **Impressive Yet Easy:** Despite its sophisticated appearance, this galette is surprisingly simple to make. The rustic nature means no need for perfect crimping or intricate designs, reducing baking stress.
- **Versatile Serving:** It shines equally brightly as a vegetarian main course for a weeknight dinner, a unique and flavorful side dish for Thanksgiving or Friendsgiving, or even a sophisticated appetizer for holiday entertaining.
- **Texture Harmony:** Enjoy the delightful contrast between the crisp, buttery pie crust, the creamy melted cheeses, and the tender, slightly sweet roasted butternut squash.
- **Crowd-Pleaser:** Its beautiful presentation and delicious flavors are guaranteed to impress guests and earn rave reviews from everyone at the table.

Mastering the Components: Ingredients & Tips
Crafting this galette involves three main components: the flaky pie crust, the perfectly roasted butternut squash, and the savory cheese filling. Each plays a crucial role in creating the final, harmonious dish.
1. The Flaky Galette Crust: The Foundation of Flavor
A truly exceptional galette begins with an outstanding crust. Our recipe calls for a simple yet robust pie dough that yields a wonderfully tender and flaky result. The secret lies in using cold ingredients—cold butter, cold sour cream, and ice-cold water. These elements prevent the butter from melting too quickly, allowing it to create pockets of steam during baking, which results in those coveted flaky layers.
Using full-fat sour cream adds a touch of richness and helps make the dough more pliable, contributing to a tender texture that is less prone to cracking. Don’t be afraid if the dough looks a little “scrappy” initially; a gentle gathering is all it needs. Proper chilling time is paramount, so ensure your dough rests in the freezer for at least an hour or in the refrigerator for two hours before rolling. This step allows the gluten to relax and the butter to firm up, making the dough much easier to work with and ensuring maximum flakiness.
2. Roasting the Butternut Squash: Sweet & Savory Perfection
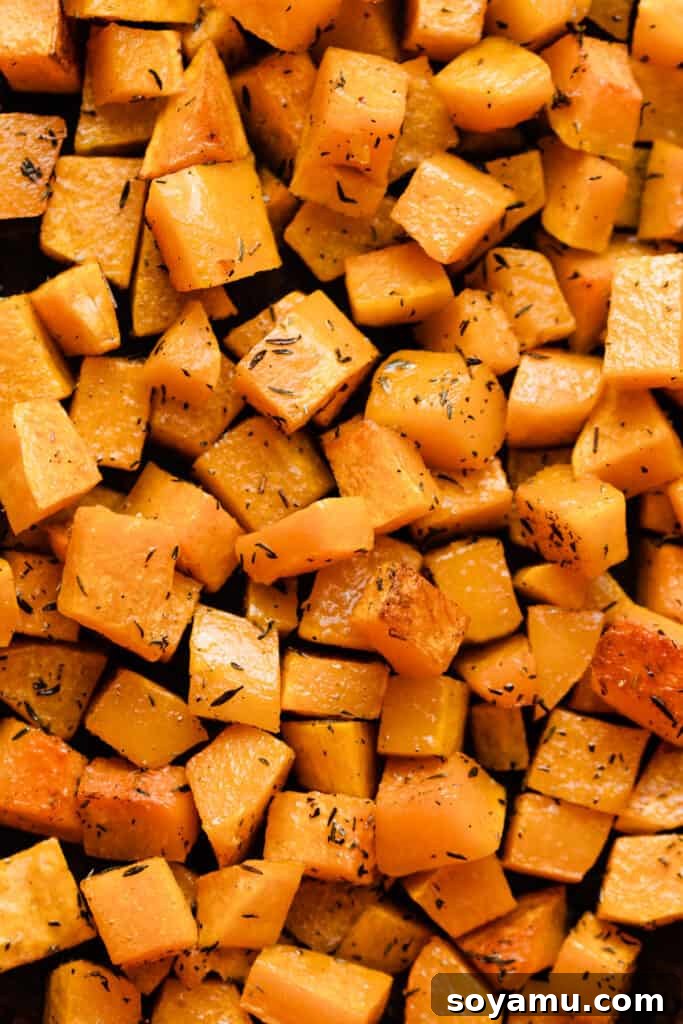
The star of our galette is the butternut squash. Roasting the squash before assembling the galette is a critical step that intensifies its natural sweetness and develops a beautiful caramelized exterior. The process also ensures the squash is perfectly tender when the galette is finished baking, avoiding any raw or undercooked texture.
For convenience, consider buying pre-cut butternut squash from your grocery store. While slightly more expensive, it’s a fantastic time-saver, especially on busy days. If you’re starting with a whole squash, peel it thoroughly with a vegetable peeler, halve it, scoop out the seeds, and then cut it into uniform cubes. Uniformity is key for even cooking. Toss the squash with good quality olive oil, minced garlic, dried thyme, dried sage, salt, and pepper. These seasonings infuse the squash with a warm, herbaceous flavor that complements its inherent sweetness beautifully. Roasting it at a higher temperature (400°F) helps achieve that desirable caramelization quickly.
3. Asiago and Parmesan Cheese: The Creamy, Tangy Heart
The combination of Asiago and Parmesan cheese provides a rich, savory, and slightly tangy counterpoint to the sweet butternut squash. Parmesan offers a sharp, nutty flavor, while Asiago brings a mild, slightly sweeter nuttiness and a wonderful melt. Using grated cheese, particularly the finer shreds rather than the powdery variety, ensures an even melt and distribution throughout the galette.
These cheeses not only add incredible flavor but also create a creamy layer that binds the squash to the crust, making every bite satisfyingly decadent.
Assembling Your Rustic Butternut Squash Galette: Step-by-Step
Once your dough is chilled and your squash is roasted, the assembly process is straightforward and fun. Remember, the beauty of a galette lies in its rustic nature, so don’t strive for perfection!
How to Make the Galette:
Begin by preheating your oven to 375°F and lining a large baking sheet with parchment paper or a silicone baking mat. This prevents sticking and makes cleanup a breeze.
- **Roll Out the Dough:** On a lightly floured countertop, gently roll out your chilled pie dough. Turn the dough frequently and sprinkle more flour underneath as needed to prevent sticking. Aim for a roundish shape, about 12 to 14 inches in diameter and roughly 1/8 inch thick. Don’t worry if it’s not a perfect circle; remember, rustic is good! Carefully transfer the rolled-out dough onto your prepared baking sheet.
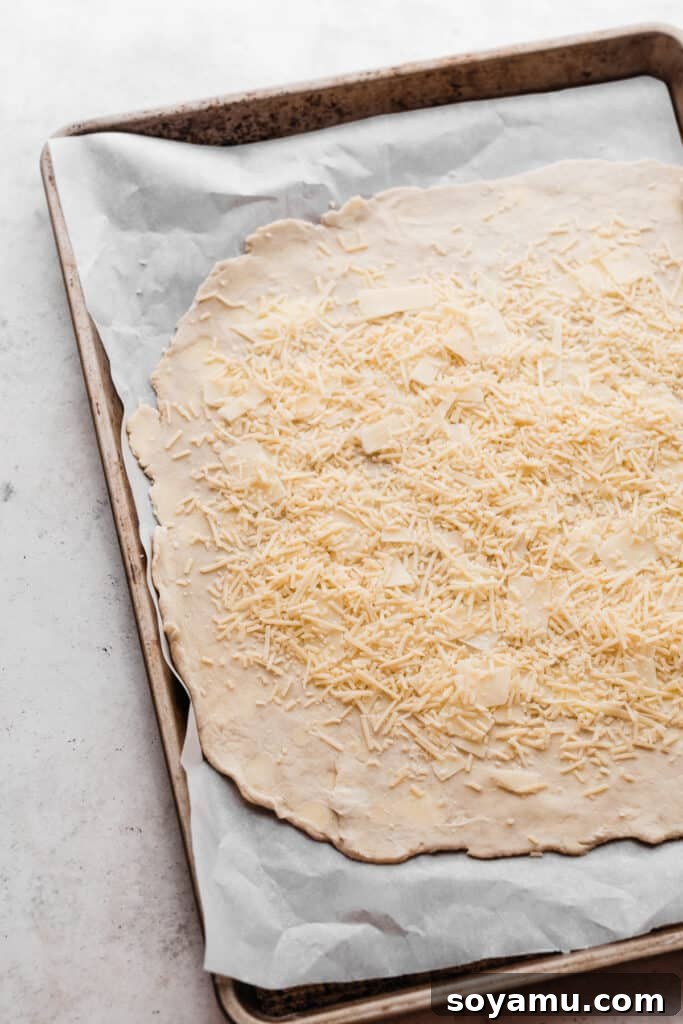
- **Add the Cheese:** Evenly spread the grated Asiago and Parmesan cheese over the dough, leaving a border of about 2-3 inches around the edges. This border will be folded over to create the galette’s crust.
- **Arrange the Squash:** Once your butternut squash is roasted and slightly cooled, evenly distribute the cubes over the cheese layer. Try to create a relatively even layer to ensure consistent cooking.
- **Fold the Edges:** This is where the rustic charm comes in! Carefully fold the edges of the dough over the filling, working in small sections. Gently pleat the dough as you go, creating a beautiful, free-form crust that partially encloses the filling. Don’t press too hard, just enough to secure the edges.

- **Chill and Egg Wash:** To ensure a crisp crust, chill the assembled galette, uncovered, in the fridge for 15 minutes before baking. This re-chills the butter in the crust. While it’s chilling, beat one egg in a small bowl to create an egg wash. Once chilled, brush the egg wash generously over the folded edges of the crust. This will give it that gorgeous golden sheen during baking.
- **Bake to Golden Perfection:** Bake the galette for 48 to 58 minutes, or until the crust is a deep golden brown and feels crisp when lightly tapped. Keep an eye on it; if the top of the squash pieces or the crust start to brown too much around the 40-minute mark, you can loosely cover the galette with foil to prevent over-browning. You can also gently lift a corner of the crust with a spatula to check for browning underneath. A properly baked crust is the key to an irresistible galette!
Don’t be alarmed if you notice a little melted butter around the base of the galette on your baking sheet. This is completely normal and won’t affect the crispness of your crust.

Serving, Storing, and Enjoying Your Galette
Once your Butternut Squash Galette emerges from the oven, allow it to cool for a few minutes before sprinkling on a little extra fresh thyme and grated Parmesan for a final flourish. Then, slice and serve immediately! This galette is truly at its absolute best when enjoyed warm, fresh out of the oven, allowing the flavors to meld and the crust to maintain its delightful crispness.
Serving Suggestions:
- **Thanksgiving/Holiday Table:** It makes a unique and vegetarian-friendly addition to your holiday spread, offering a refreshing alternative to traditional side dishes.
- **Cozy Dinner:** Serve it as the main course with a simple green salad dressed with a light vinaigrette.
- **Appetizer:** Cut into smaller wedges and serve as an elegant appetizer at your next gathering.
- **Pairing:** A crisp white wine like a Sauvignon Blanc or an unoaked Chardonnay would complement the flavors beautifully.
Make-Ahead and Storage Tips:
While this galette is undeniably best when fresh, you can plan certain components ahead:
- **Dough:** The pie dough can be made 2-3 days in advance and stored in the refrigerator, or frozen for up to two months. If frozen, thaw it overnight in the fridge before use.
- **Roasted Squash:** You can roast the butternut squash up to 1 day ahead of time. Allow it to cool completely, then store it in an airtight container in the refrigerator.
- **Assembled Galette:** It is not recommended to assemble the entire galette and bake it later, as the crust will lose its optimal crispness. However, you can assemble it up to the egg wash step and keep it in the fridge for an hour or so before baking, just to ensure the butter stays cold.
Leftovers can be stored in an airtight container in the refrigerator for a few days. For best results when reheating, place slices on a baking sheet in a preheated oven (around 300°F-325°F) for 10-15 minutes until warmed through and the crust regains some crispness. Microwaving is generally not recommended as it can make the crust soggy.

Butternut Squash Galette with Asiago and Parmesan Recipe

Butternut Squash Galette with Asiago and Parmesan
By Stephanie Simmons
Prep Time: 45 mins | Dough Chilling: 1 hr | Servings: 8 slices
Ingredients
For the Galette Crust:
- 1 and 1/4 cups all-purpose flour
- 3/4 tsp salt
- 1 tsp granulated sugar
- 1/2 cup cold salted butter (1 stick, 8 tbsp, or 113 grams), cut into chunks
- 1/4 cup full-fat cold sour cream
- 5 tbsp ice cold water, plus more as needed
For the Roasted Butternut Squash:
- 2 lbs butternut squash, cubed (about 6 cups)
- 2 tbsp olive oil
- 2 large cloves garlic, minced
- 1/2 tsp dried thyme
- 1/2 tsp dried sage
- 1/2 tsp salt
- 1/4 tsp pepper
For the Rest of the Galette:
- 2/3 cup grated parmesan cheese (the little shreds, not the powdery stuff)
- 2/3 cup grated asiago cheese
- 1 egg, for egg washing the crust
Instructions
- Make the Pie Dough: In a medium mixing bowl, whisk together the flour, salt, and sugar. Add the cold butter chunks to the dry ingredients. Use a pastry cutter or your clean fingertips to cut the butter into the flour mixture until it resembles coarse crumbs with some pieces of butter roughly the size of small blueberries (some may be slightly larger or smaller). Drizzle in the 5 tablespoons of ice water and add the sour cream. Toss with a fork until the dough is just moistened and the sour cream is incorporated. Gently gather the dough into a ball. If it holds together when pressed, it’s ready. If it’s too dry and crumbles, add an additional 1-2 tablespoons of ice water, one tablespoon at a time, until it comes together. Gently flatten the dough into a 1-inch thick disc. It might look a bit rustic, but it should hold its shape. Wrap the disc tightly in plastic wrap and chill in the freezer for at least 1 hour, or in the refrigerator for at least 2 hours. If freezing for only an hour, move it to the fridge afterwards if your filling isn’t ready, to prevent it from freezing solid.
- Roast the Squash: Pre-heat your oven to 400°F (200°C). Add the cubed butternut squash to a large baking sheet in a single, even layer. Toss the squash with the olive oil, minced garlic, dried thyme, dried sage, salt, and pepper, ensuring all pieces are well coated. Roast for 20-30 minutes, or until the squash is fork-tender and lightly caramelized at the edges. Remove from oven and set aside.
- Roll Out the Dough and Assemble the Galette: Reduce oven temperature to 375°F (190°C) and line a clean large baking sheet with parchment paper or a silicone baking mat. Lightly flour your countertop and a rolling pin. Unwrap the chilled dough and lightly dust it with flour. Gently roll out the dough, rotating it continuously and adding more flour underneath as needed to prevent sticking. Continue rolling until the dough is approximately 12 to 14 inches in diameter and about 1/8 inch thick. Carefully roll the dough onto your rolling pin and unroll it onto the prepared baking sheet. Evenly spread the grated Parmesan and Asiago cheeses over the dough, leaving a clear border of about 2-3 inches around the edges. Distribute the roasted butternut squash evenly over the cheese. Carefully fold the edges of the dough over the filling, working in small sections and creating natural pleats as you go. Remember, a rustic look is desired, so don’t worry about making it perfect.
- Chill and Egg Wash: Place the assembled galette, uncovered, into the refrigerator for 15 minutes to re-chill the dough. While it chills, whisk the egg in a small bowl to create an egg wash. Once chilled, brush the egg wash generously over the folded crust edges of the galette.
- Bake: Bake for 48 to 58 minutes. If the top of the squash pieces or the crust edges begin to brown too quickly (around the 40-minute mark), loosely cover the galette with aluminum foil. The galette is done when the crust is a deep golden brown and feels crisp when gently tapped. You can also carefully lift a corner of the crust with a spatula to check that it is browned underneath.
- Serve + Store: Remove the galette from the oven and allow it to cool for a few minutes before slicing. For an extra touch, sprinkle with fresh thyme and additional grated Parmesan if desired. This galette is truly best served immediately, warm from the oven. Leftovers can be stored in an airtight container in the refrigerator for up to 3 days and gently reheated in a 300-325°F (150-160°C) oven until warmed through.
- Make-Ahead Tips: While the assembled and baked galette isn’t ideal for making completely ahead due to crust crispness, you can prepare the dough and roast the squash in advance as detailed in step 1 and 2 notes. This significantly cuts down on day-of preparation time.
We hope you enjoy this delightful Butternut Squash Galette with Asiago and Parmesan. It’s a dish that embodies the warmth and flavors of autumn, perfect for sharing with loved ones. Happy Thanksgiving, or happy cooking!
Did you make this recipe? Share your creations and let us know what you think!