
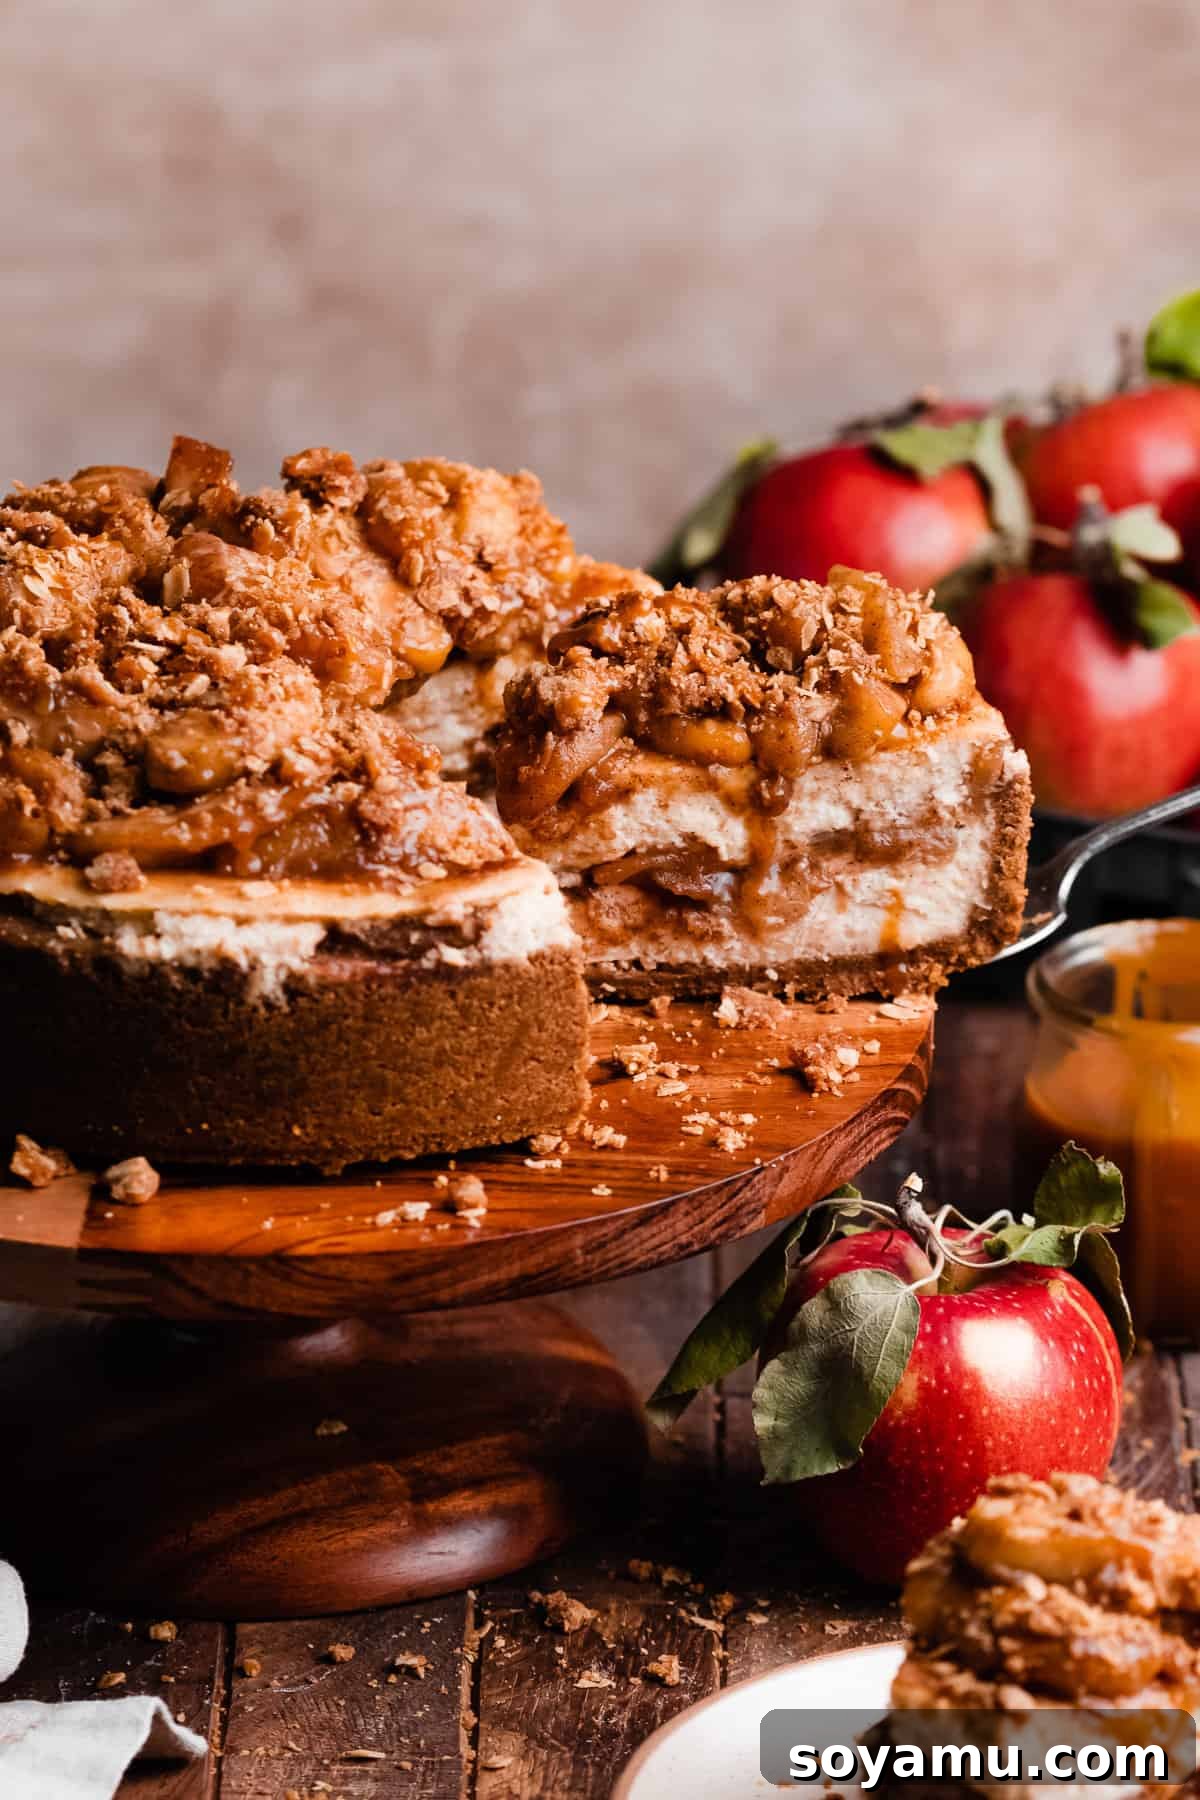
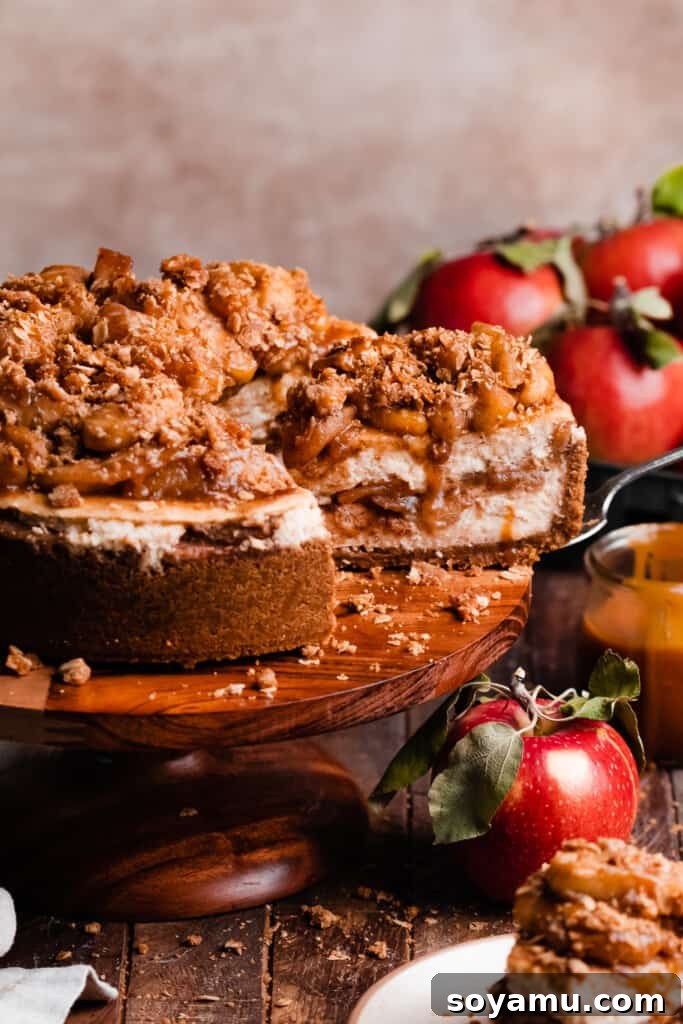
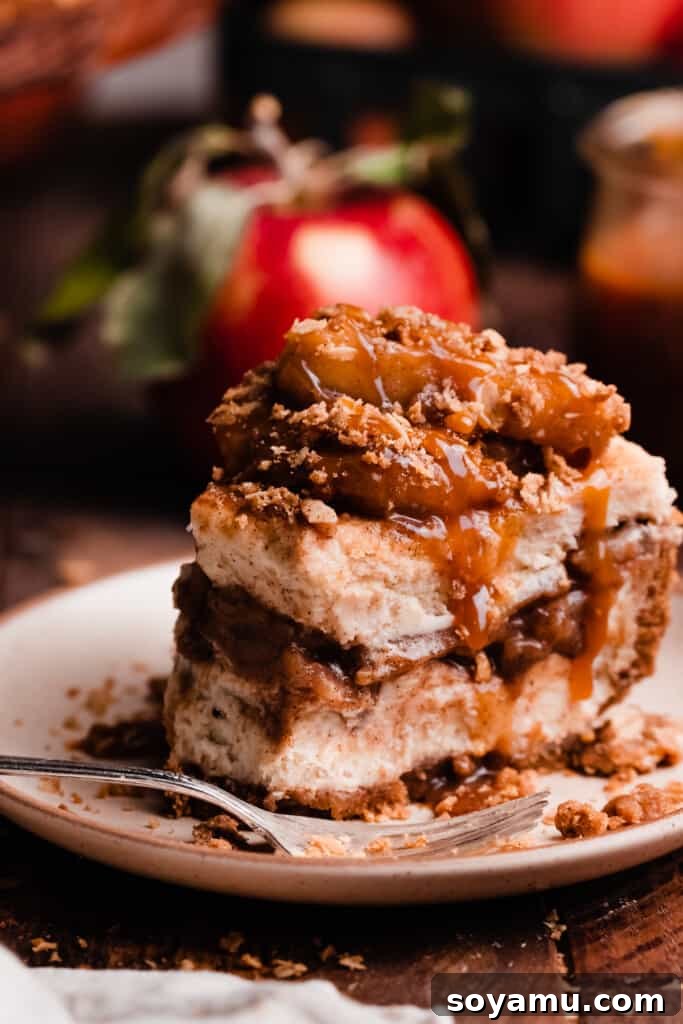
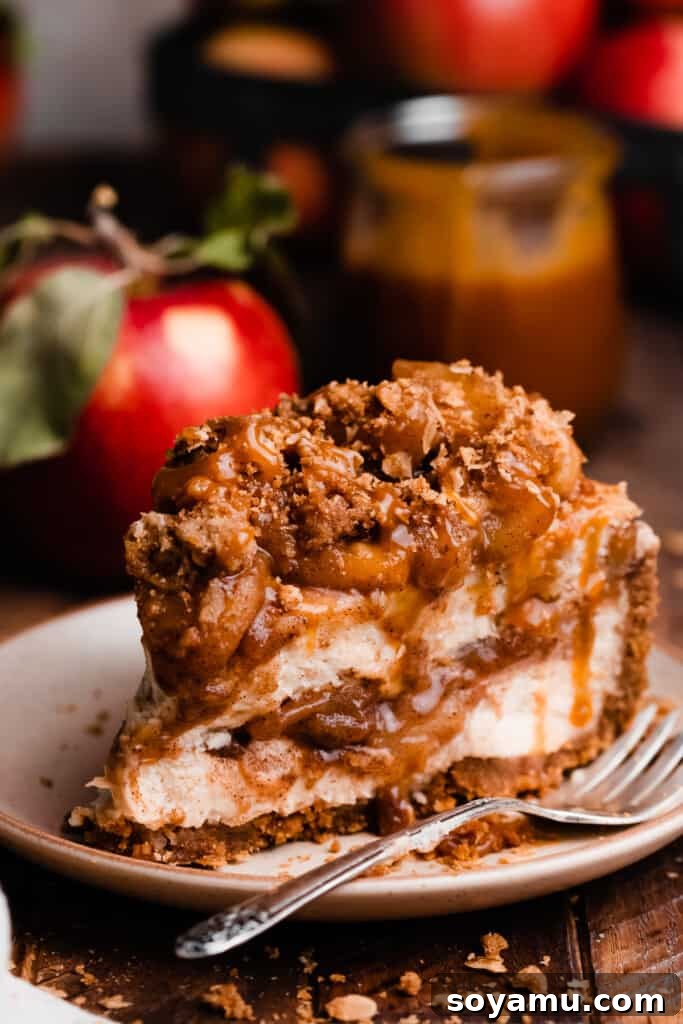
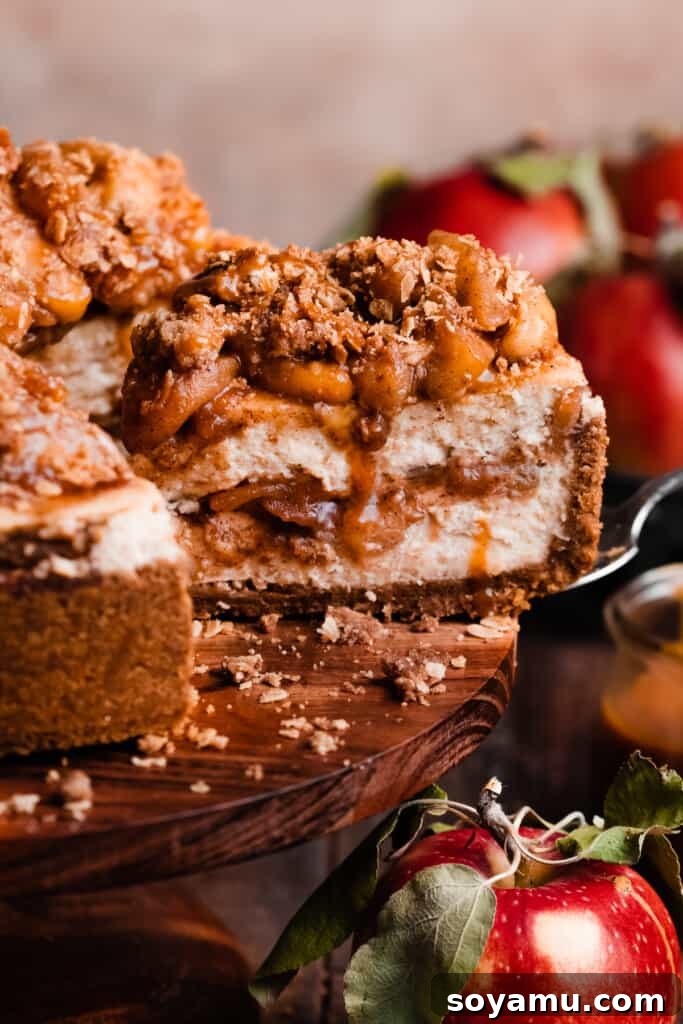
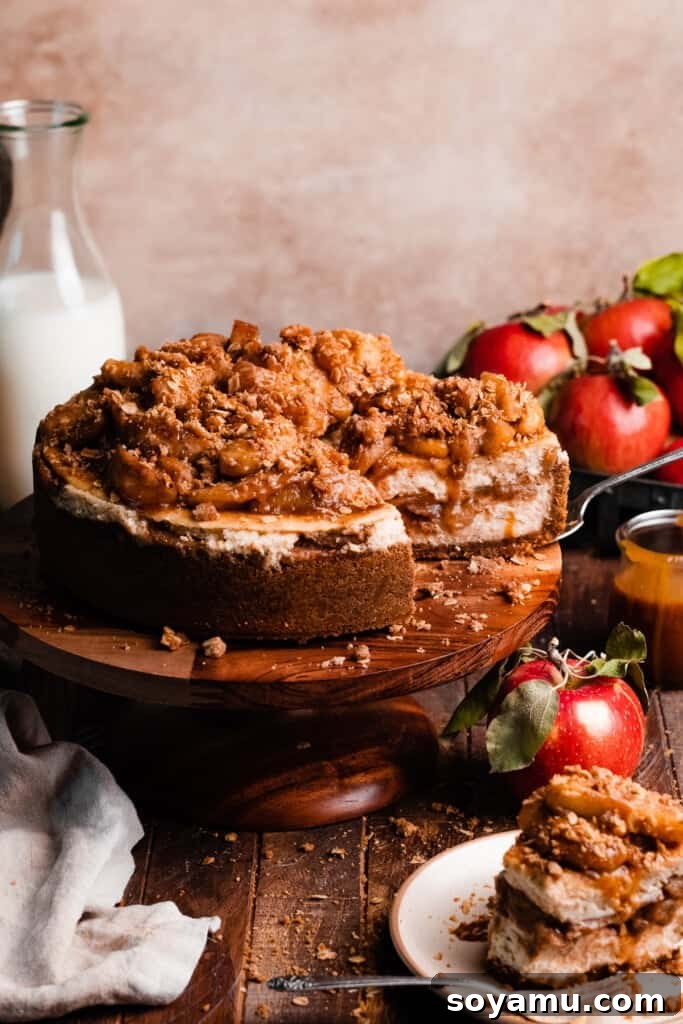
Prepare to fall in love with the Salted Caramel Apple Pie Cheesecake, a truly show-stopping dessert that embodies the cozy flavors of autumn. This isn’t just any cheesecake; it’s a sublime fusion of classic apple pie charm and the luxurious creaminess of a perfectly baked cheesecake. Imagine sinking your teeth into a slice where a perfectly baked, incredibly creamy vanilla cinnamon cheesecake filling gracefully encases layers of tender, caramelized apples. All of this rests upon a delightfully crisp cinnamon-spiced graham cracker crust. But the indulgence doesn’t stop there! This magnificent creation is crowned with another generous layer of warmly spiced apples, a golden, buttery oat crumble, and a generous drizzle of homemade salted caramel sauce. It’s an unforgettable dessert that delivers all the comforting taste of homemade apple pie without the fuss of a traditional pie crust, making it an ideal centerpiece for any fall gathering or holiday feast. Say goodbye to the struggles of pie dough and hello to effortless elegance with this irresistible caramel apple cheesecake.
Why You’ll Adore This Salted Caramel Apple Pie Cheesecake Recipe
This isn’t just another dessert; it’s an experience. Every component of this apple pie cheesecake has been meticulously crafted to deliver a symphony of flavors and textures that will leave your guests asking for the recipe. Here’s why this particular cheesecake stands out as a true fall favorite and the ultimate homemade treat:
-
Luscious Caramelized Apple Pie Filling & Topping: We start with fresh, crisp apples, transformed on the stovetop into a tender, sticky, and deeply flavorful caramelized apple filling. Infused with rich brown sugar and a blend of warm, cozy spices like cinnamon, nutmeg, cloves, and allspice, this homemade apple pie filling is truly unparalleled. It provides a burst of natural fruitiness and a delightful chewiness that contrasts beautifully with the smooth cheesecake. You get a generous layer within the cheesecake, providing a sweet surprise, and a bountiful topping, ensuring apple goodness in every single bite. The careful caramelization process brings out the best in the apples, making them tender but still firm enough to provide structure.
-
Velvety Vanilla Cinnamon Cheesecake Filling: The heart of this dessert is an exquisitely creamy, baked vanilla cinnamon cheesecake. Its rich, dense texture and subtle spice notes perfectly complement the sweet and tart apples. We use full-fat cream cheese and ensure all dairy ingredients are at room temperature to achieve that signature silky-smooth consistency that cheesecake lovers crave. The hint of cinnamon woven into the vanilla-infused batter provides a warm, comforting undertone that perfectly harmonizes with the autumnal apple flavors.
-
Perfectly Crisp Cinnamon Graham Cracker Crust: Forget soggy crusts! Our recipe features a robust graham cracker crust with an added hint of cinnamon that elevates its flavor profile. This crust is pre-baked to achieve a perfect crispness and golden-brown hue, providing a delightful textural counterpoint to the creamy filling and ensuring it holds up beautifully under the weight of the cheesecake layers. It’s the ideal foundation for this towering dessert, offering both stability and a burst of spiced flavor with every forkful.
-
Irresistible Buttery Oat Crumble Topping: A generous sprinkle of homemade oat crumble topping adds another layer of texture and flavor, bringing a delightful “apple crumble” element to this cheesecake. This buttery, golden streusel, made with hearty oats, flour, rich brown sugar, and aromatic cinnamon, bakes to a satisfying crispness. It provides a wonderful crunch that contrasts with the soft apples and creamy cheesecake, making each bite a multi-textured delight.
-
Decadent Salted Caramel Sauce Drizzle: To complete this masterpiece, a luxurious drizzle of homemade salted caramel sauce ties all the flavors together. The slight saltiness perfectly balances the sweetness of the caramelized apples and rich cheesecake, adding a touch of sophisticated indulgence that makes every mouthful utterly divine. This glistening golden topping is not only visually appealing but also delivers a complex, sweet-and-salty flavor that elevates the entire dessert to gourmet status.
Ingredient Spotlight: Crafting the Perfect Apple Cheesecake
Using the right ingredients is paramount to achieving the best flavor and texture in your Salted Caramel Apple Pie Cheesecake. Here’s a detailed look at what you’ll need and why specific choices matter, ensuring your homemade cheesecake is nothing short of perfect:
-
Apples – The Heart of the Pie: The type of apple you choose significantly impacts the final taste and texture of your filling and topping. Avoid overly soft varieties like McIntosh, as they tend to become mushy and lose their structure when cooked. Instead, opt for firm, flavorful baking apples that hold their shape well and offer a good balance of sweetness and tartness. Excellent choices for this recipe include Jonathan, Golden Delicious, Honeycrisp, Gala, or Fuji. These varieties will soften beautifully without turning to a sauce. While some bakers swear by Granny Smith for its tartness, I personally find its flavor profile a bit too sharp for this particular recipe unless it’s carefully balanced with sweeter apples or if you specifically prefer a very tart apple component.
-
Graham Crackers – The Foundation of Flavor: The graham cracker crust provides a sweet, crunchy base that is both easy to prepare and incredibly delicious. Using cinnamon graham crackers adds an extra layer of warm spice that perfectly complements the apple and cheesecake flavors, creating a cohesive taste experience from bottom to top. For an exciting twist and unique flavor profile, consider experimenting with crushed Biscoff cookies for a buttery, spiced caramel note, or gingersnap cookies for a bolder, spicier kick that truly sings with fall flavors.
-
Butter – The Secret to Richness: I always recommend using salted butter for both the apple filling and the crust, as it naturally enhances the overall flavor of the dessert and adds a subtle depth that makes everything taste richer. The salt crystals in salted butter help to bring out the sweetness and spice. However, if you prefer to precisely control the salt content in your baking, unsalted butter works perfectly – just be sure to add a small pinch of fine sea salt to your crust and fillings to taste, compensating for the lack of salt in the butter.
-
Cream Cheese – The Key to Creaminess: For that quintessential rich and creamy cheesecake texture, it’s absolutely crucial to use full-fat block-style cream cheese. Whipped or spreadable cream cheese contains too much air and water, which can lead to a runny batter that won’t set properly. Absolutely ensure your cream cheese is at room temperature before you begin mixing. Cold cream cheese will result in a lumpy, unattractive batter that won’t bake smoothly and will struggle to emulsify with other ingredients.
-
Eggs – The Binding Agent: Large eggs, also at room temperature, are essential for binding the cheesecake batter and contributing to its smooth, custardy texture. Adding them one at a time and mixing until just incorporated helps prevent overmixing. Overmixing can introduce too much air into the batter, causing the cheesecake to rise excessively during baking and potentially crack as it cools, diminishing its flawless appearance.
-
Sour Cream – The Tangy Touch: Full-fat sour cream, brought to room temperature, adds a crucial tanginess that perfectly balances the sweetness of the cheesecake. It also contributes significantly to the incredibly moist and creamy consistency, preventing the cheesecake from becoming too dense or dry. The acidity in sour cream also helps to tenderize the cream cheese proteins, leading to a silkier texture.
-
Vanilla Extract – The Aroma of Comfort: Always use real, high-quality vanilla extract for the best flavor. Pure vanilla extract deepens the overall aroma and taste profile of the cheesecake, providing a warm, comforting note that pairs beautifully with cinnamon and apples. Avoid artificial vanilla essences, as they can impart an undesirable chemical taste.
Creative Twists and Adaptations for Your Apple Pie Cheesecake
While this Salted Caramel Apple Pie Cheesecake recipe is perfect as is, it’s also wonderfully adaptable! Don’t hesitate to personalize it based on dietary needs or seasonal preferences. Here are some creative ideas to inspire your culinary journey and make this delicious cheesecake truly your own:
-
Dairy-Free Delight: Crafting a dairy-free version of this cheesecake requires careful selection of ingredients. While I haven’t personally tested a dairy-free adaptation for this specific recipe, experienced dairy-free bakers might confidently substitute their favorite trusted dairy-free cream cheese, butter, and sour cream alternatives. Look for products specifically designed for baking. If you’re new to dairy-free baking, I highly recommend finding a reliable, established dairy-free or vegan cheesecake base recipe and then incorporating my delicious apple filling, crumble, and caramel topping for a successful outcome, minimizing trial and error.
-
Gluten-Free Goodness: Making this entire dessert gluten-free is surprisingly simple! The only modification needed is to use certified gluten-free graham crackers for the crust. Most major grocery stores now carry a variety of excellent gluten-free graham cracker options. All other ingredients are naturally gluten-free, allowing you to enjoy this magnificent dessert without compromise and serve it to guests with dietary restrictions.
-
Peach Cobbler Cheesecake Inspiration: If you adore seasonal fruit cheesecakes, you’ll be thrilled to know this recipe has a popular cousin: my highly-rated Peach Cobbler Cheesecake recipe. Boasting over 110 five-star reviews, it features a similar construction with succulent peach filling and a delightful crumble topping. It’s perfect for summer and early fall when fresh peaches are at their peak, offering a sunny, sweet alternative to the apple version.
-
Tropical Pineapple Upside-Down Cheesecake: For a vibrant, tropical escape, explore my Pineapple Upside Down Cake Cheesecake. This unique creation shares a similar layered fruit-in-the-middle and on-top structure, offering a bright and zesty flavor profile that’s perfect for those who enjoy a departure from traditional fruit desserts. It’s a fantastic choice when you’re craving something exotic and refreshing.
-
Elevated Whipped Cream Embellishments: A dollop of freshly whipped cream can elevate the presentation and add another layer of luxurious texture to your cheesecake. The light, airy cream provides a delightful contrast to the dense cheesecake and rich apples. If you’ve opted for thinner apple slices for your topping, you can spread them evenly over the cheesecake, add the crumble and caramel drizzle, then pipe a beautiful whipped cream border or elegant dollops around the edges for a truly professional finish. For the silkiest, most delicious whipped cream, try my easy whipped cream recipe – it’s simple to make and adds a professional touch to any dessert.
How to Master This Apple Pie Cheesecake: Step-by-Step Guide
Creating this spectacular Apple Pie Cheesecake involves several steps, but each one is straightforward and rewarding. By breaking it down, you’ll find the process enjoyable and the results absolutely stunning. Let’s walk through it together, ensuring every layer contributes to a perfect dessert:
Preparation is Key
Before you begin any mixing or cooking, thoroughly read through the entire recipe from start to finish. This will help you understand the flow of the process and ensure you have all necessary ingredients and tools at hand. This recipe has several components that can be prepared in advance, which helps to spread out the work over a day or two and makes baking day significantly less stressful. Most importantly, ensure all cold ingredients for the cheesecake (cream cheese, eggs, sour cream) are removed from the refrigerator at least 1-2 hours before you plan to start. This is absolutely vital for achieving a smooth, lump-free cheesecake batter and a creamy final texture.
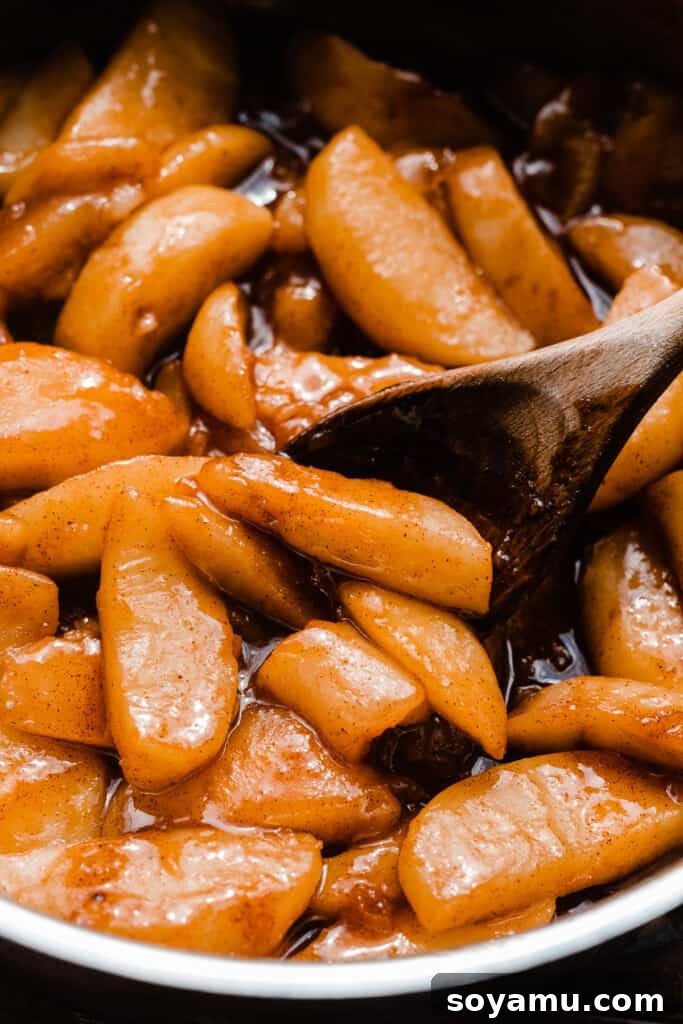
Step 1: Craft the Irresistible Apple Filling (for the cheesecake’s interior)
The apple filling is a cornerstone of this cheesecake’s flavor, providing a burst of spiced fruitiness within the creamy layers. Begin by meticulously peeling and slicing your chosen baking apples. For the filling that goes inside the cheesecake, aim for consistent slices about 1/4 to 1/2 inch thick; this thickness allows them to cook down beautifully and meld seamlessly with the cheesecake texture without becoming overly mushy or remaining too crunchy. In a medium saucepan, combine these sliced apples with the specified amounts of salted butter, light brown sugar, and a generous blend of warm, cozy spices including cinnamon, nutmeg, ground cloves, and allspice. Add 1-2 tablespoons of apple cider (or water, but *never* apple cider vinegar) to provide a little moisture and flavor. Cook this mixture over medium-high heat for approximately 10-16 minutes, stirring occasionally to prevent sticking and ensure even cooking. The apples should become tender and wonderfully caramelized, releasing their fragrant juices, which will thicken into a glorious syrup. If, towards the end of cooking, the mixture appears too dry, simply add another splash of apple cider or water to keep it saucy. To achieve a perfectly spoonable, thickened consistency for the juices, create a slurry: in a small bowl, dissolve 2 teaspoons of cornstarch in 2 teaspoons of cold water until smooth. Stir this slurry into the hot apple mixture and continue to cook, stirring, for an additional 30-60 seconds until the juices visibly thicken. Transfer this aromatic apple filling along with its thickened juices to a medium bowl and allow it to cool completely at room temperature. If preparing ahead, cover and refrigerate.
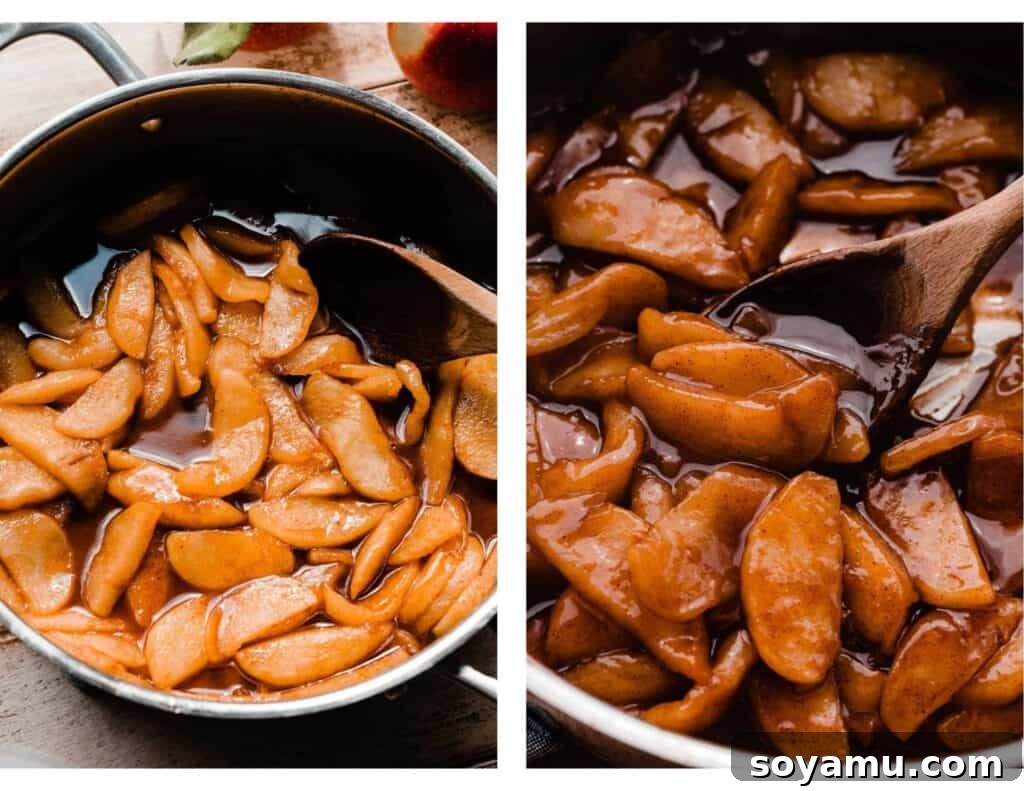
(A Note on Apple Slices for Topping: You will prepare a second batch of cooked apples specifically for the topping later in the recipe. For the most visually appealing presentation and a more substantial texture for the topping, I highly recommend making those apple slices slightly thicker – ideally about 1/2 to 3/4 inch thick. This creates a beautiful, mounded appearance of apples on top of the finished cheesecake. If you don’t mind thinner slices for your topping, and want to save a step, you can prepare a double batch of the thinner slices from the very beginning of this step and simply reserve half of the cooled mixture for the topping later. However, I find the thicker slices perform best as a topping and don’t recommend baking them *inside* the cheesecake, which is why two separate batches are suggested for optimal results.)
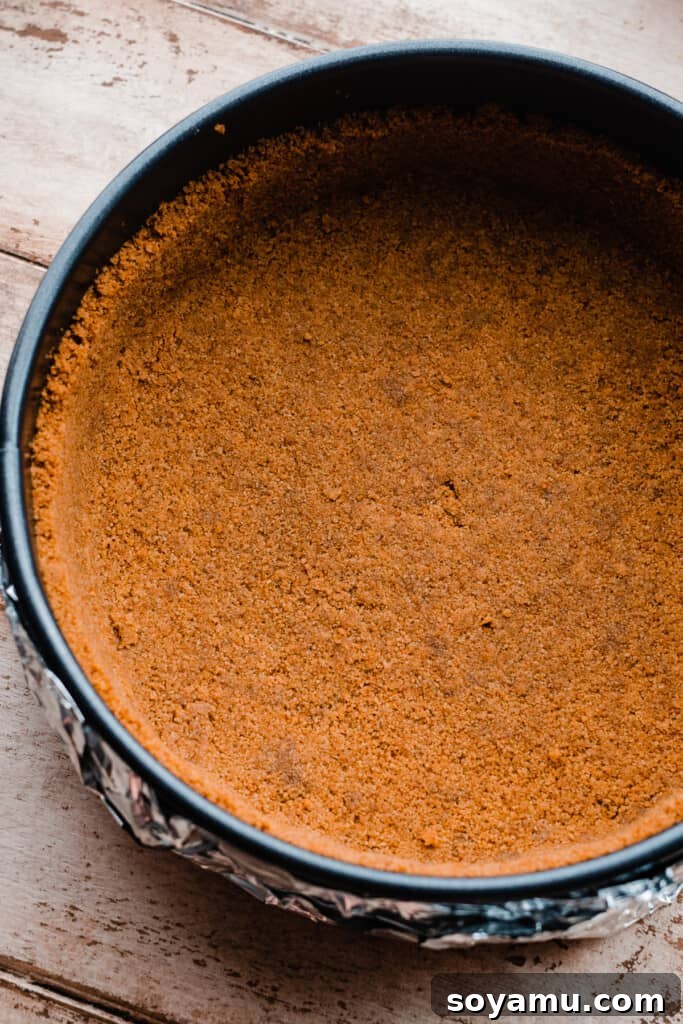
Step 2: Construct the Sturdy Cinnamon Graham Cracker Crust
Preheat your oven to 350°F (175°C). Prepare a 9-inch springform pan by lightly spraying the interior with nonstick baking spray and ensuring the bottom is securely fastened to the sides. In a medium bowl, combine the finely crushed cinnamon graham cracker crumbs with the melted salted butter and a small pinch of granulated sugar. Mix these ingredients thoroughly using a fork or your hands until the crumbs are evenly moistened and resemble wet sand. Transfer this mixture into the prepared springform pan. Using the bottom of a flat-bottomed glass or your fingers, press the mixture firmly and evenly into the bottom of the pan, and extend it slightly up the sides to create a well-defined crust. This firm pressing is absolutely key to creating a sturdy crust that won’t crumble when sliced and provides a good barrier for the creamy filling. Bake the crust in the preheated oven for 10 minutes to set it and give it a slight crispness. Once baked, remove it from the oven and set it aside to cool slightly on a wire rack. It’s important to keep your oven on at 350°F, as you’ll be using it again shortly for the cheesecake itself. Now is also an excellent time to get a large pot of water heating on your stovetop for the crucial water bath, and retrieve a large roasting pan.
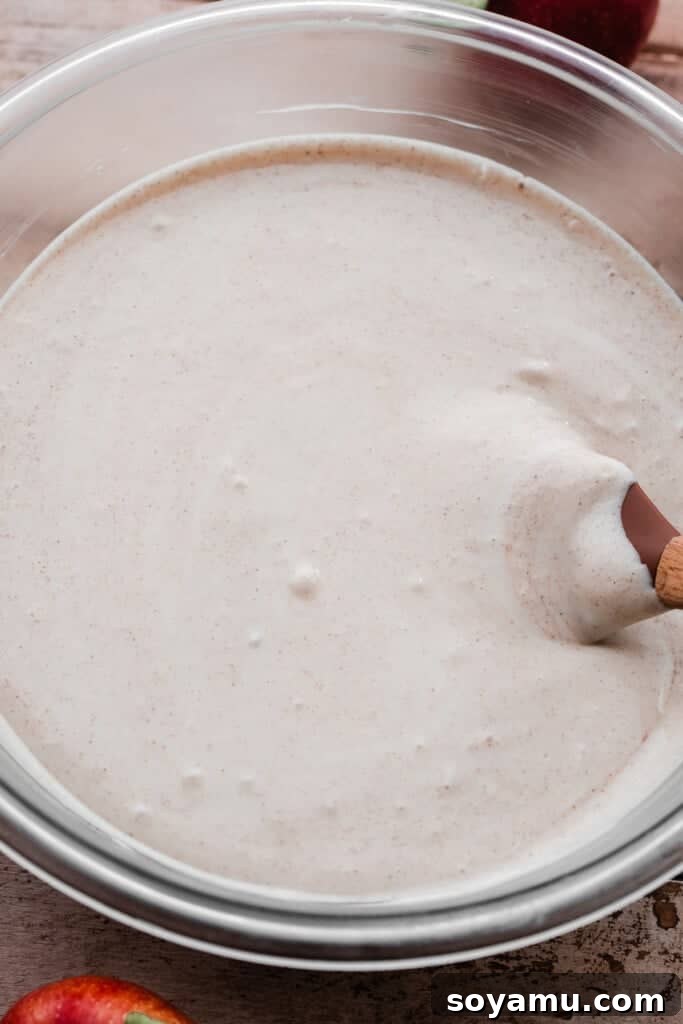
Step 3: Prepare the Silky Cheesecake Batter
The secret to a lump-free and incredibly smooth cheesecake batter lies in using perfectly room temperature ingredients and employing proper mixing technique. In a large mixing bowl, or the bowl of a stand mixer fitted with the paddle attachment, begin by beating the softened full-fat cream cheese on high speed with an electric mixer for 1-2 minutes until it is perfectly creamy, light, and smooth, with no visible lumps. Next, gradually add the granulated sugar to the cream cheese, mixing on medium speed for about 1 minute until it’s fully incorporated and the mixture is light and fluffy. Remember to scrape down the sides and bottom of the bowl frequently with a rubber spatula to ensure everything is thoroughly combined and no pockets of unmixed ingredients remain. Now, add the large eggs one at a time, mixing on medium speed just until each egg is fully incorporated into the batter before adding the next. This gentle approach helps prevent overmixing. Avoid overmixing once the eggs are added, as this can introduce too much air into the batter, which can cause the cheesecake to puff up excessively in the oven, leading to a sunken center or, more commonly, unsightly cracks as it cools. Finally, mix in the pure vanilla extract, cornstarch, room temperature full-fat sour cream, and the warm spices (cinnamon, nutmeg, ground cloves). Beat on low speed until just combined and smooth. A few tiny lumps from the sour cream or spices are acceptable, but the batter should predominantly be silky and uniform in consistency.
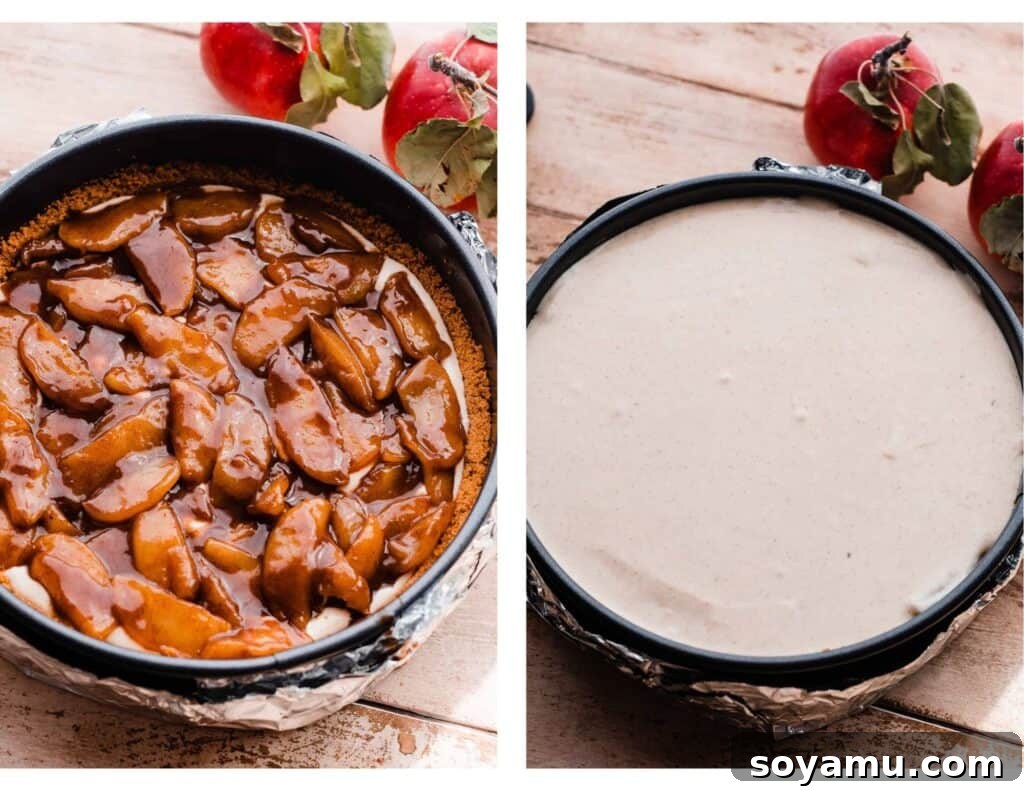
Step 4: Assemble and Bake Your Masterpiece with a Water Bath
With your crust baked and apple filling and cheesecake batter ready, it’s time to assemble this magnificent dessert. Begin by pouring half of the prepared cheesecake batter over the cooled, pre-baked graham cracker crust in the springform pan. Carefully and evenly spoon the cooled apple filling over the batter layer. Ensure the apples are spread out without creating large gaps. Then, gently pour the remaining cheesecake batter over the apples, carefully spreading it smoothly with an offset spatula or the back of a spoon to create an even top layer. Now, prepare your water bath (bain-marie) for baking. A water bath is absolutely crucial for cheesecake as the steam it produces helps the cheesecake to cook very gently and evenly, preventing the edges from baking faster and drying out compared to the center. More importantly, it helps prevent the dreaded cracks that can form on the surface of cheesecakes due to rapid temperature changes or uneven baking. There are two highly effective ways to set this up to avoid leaks and ensure a perfect bake:
- The most protective and ideal method is to wrap the base of your springform pan very securely with several layers of heavy-duty aluminum foil to prevent any water seepage. Then, place this foil-wrapped springform pan inside a slightly larger (e.g., 10-inch) regular cake pan. You then place this entire setup (the outer cake pan with the springform inside) into your large roasting pan. Carefully pour boiling water into the roasting pan, ensuring the water level comes about halfway up the sides of the outer cake pan. This double-layer protection is incredibly reliable.
- An alternative, though slightly less protective, method is to simply place your roasting pan, filled with boiling water, on the oven rack directly below where your cheesecake will sit. This still creates a steamy environment without direct contact, significantly reducing the risk of leaks.
Once your water bath is set, carefully transfer your cheesecake pan (or the roasting pan setup) onto a rack in the center of your preheated 350°F (175°C) oven. Bake for approximately 1 hour and 30 minutes to 1 hour and 50 minutes. The cheesecake is done when its edges are slightly raised and set, the top appears matte, and there’s only a slight wobble in the very center when gently nudged. An instant-read thermometer inserted halfway into the center should register between 150°F and 155°F (65°C and 68°C). Don’t be alarmed if the top browns slightly, especially with this recipe, as this is normal for a full pan and doesn’t necessarily indicate overbaking, as long as the internal temperature is correct. Once baked, turn off the oven, crack the door open (using a wooden spoon to prop it open slightly), and allow the cheesecake to cool slowly inside the oven for 1 hour. This gradual cooling prevents sudden temperature changes that can cause cracks on the surface. After this, remove the cheesecake from the oven, carefully unwrap the foil, and let it cool completely on a wire rack at room temperature. Once entirely cool (this can take several hours), cover it tightly with aluminum foil or plastic wrap and transfer it to the refrigerator to chill for at least 6 hours, but ideally overnight or up to 1 full day. This long chilling period is critical for the cheesecake to fully set, firm up, develop its full complex flavor, and achieve its perfect dense, creamy texture before you attempt to slice and serve it.
Step 5: Prepare the Buttery Oat Crumble Topping
While your cheesecake bakes and chills, you can effortlessly prepare the delicious crumble topping, adding another layer of texture and flavor to your masterpiece. Preheat your oven to 350°F (175°C) and line a small sheet pan with parchment paper for easy cleanup. In a medium mixing bowl, whisk together all the dry ingredients for the crumble: all-purpose flour, old-fashioned rolled oats (not instant), light brown sugar, ground cinnamon, and a small pinch of salt. Ensure they are well combined. Next, add the cold, unsalted or salted butter that has been cut into small cubes. Using a pastry blender, your fingertips, or two forks, work the butter into the dry mixture until it resembles coarse crumbs with some larger, pea-sized pieces of butter still visible. This is crucial for a tender, flaky crumble. Spread this crumble mixture evenly onto your prepared cookie sheet. Bake for approximately 12 to 20 minutes, stirring gently halfway through the baking time to ensure even browning. The crumble should turn a beautiful golden brown and become wonderfully fragrant. Keep a close eye on it, as baking times can vary significantly between ovens. Once baked to perfection, remove it from the oven and let it cool completely on the sheet pan. It will crisp up beautifully as it cools, developing that irresistible crunch.
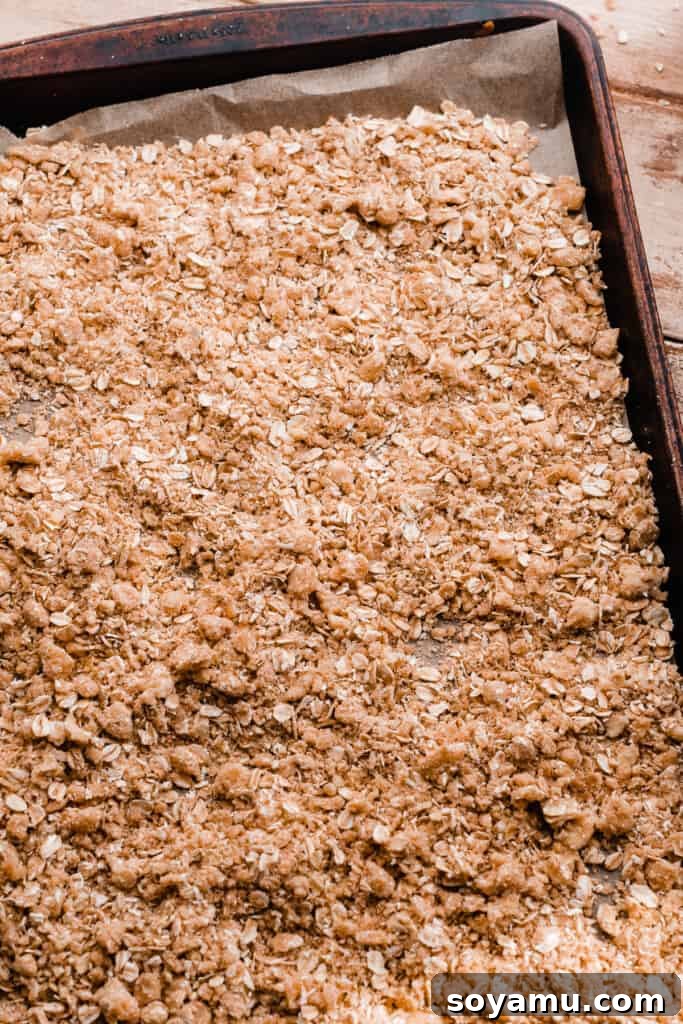
Step 6: Make the Rich Salted Caramel Sauce
No Salted Caramel Apple Pie Cheesecake is truly complete without a velvety, homemade salted caramel sauce. This adds a luxurious finish, a beautiful sheen, and a complex sweet-and-salty flavor that ties all the components together. While the process is straightforward, precise timing and careful attention are key. In a medium, heavy-bottomed saucepan, melt granulated sugar over medium heat. Allow the sugar to melt and cook without stirring too much, swirling the pan occasionally, until it caramelizes to a rich, amber color. Watch it carefully to prevent burning. Once achieved, immediately remove from heat and carefully whisk in the cubed salted butter until it is fully melted and smoothly combined. The mixture will bubble vigorously, so be cautious. Then, slowly pour in the warm heavy cream, whisking continuously until the sauce is smooth and uniform. Again, it will bubble, but continue whisking. Finish by stirring in a pinch of flaky sea salt; this subtle saltiness enhances the flavors of both the caramel and the entire dessert. For a more detailed, step-by-step guide with helpful troubleshooting tips, please refer to my comprehensive 10-minute Salted Caramel Sauce recipe. Allow the caramel to cool completely to room temperature, where it will thicken further, before drizzling generously over your chilled cheesecake.
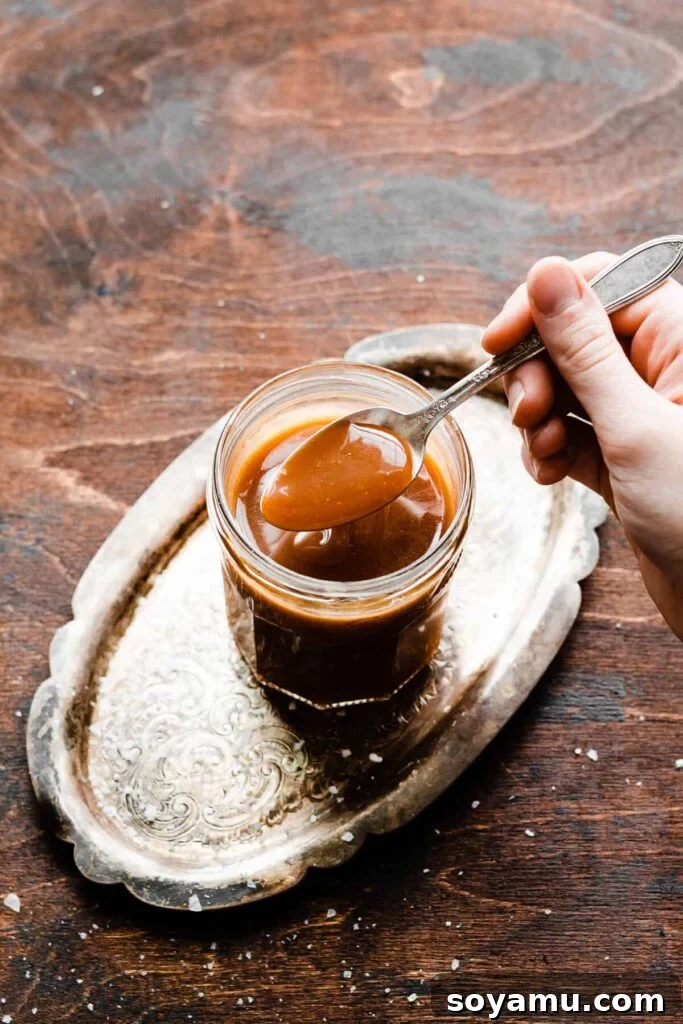
Serving and Storing Your Decadent Apple Pie Cheesecake
Once your Apple Pie Cheesecake has chilled sufficiently and you’re ready to impress, it’s time for the grand finale! Carefully remove the cheesecake from its springform pan. Artfully arrange the second batch of warmly spiced apple topping (the one made with thicker slices, if you followed that method) over the top of the chilled cheesecake. Ensure an even and appealing layer. Then, shower it generously with the golden, buttery oat crumble. For an extra thoughtful touch of hospitality, consider placing a small bowl of extra crumble on the table, allowing your guests to add even more to their individual slices if desired – crumble lovers will appreciate this! Finish this magnificent creation by drizzling a generous amount of your cooled, homemade salted caramel sauce over the entire top. Slice into elegant wedges, serve, and savor every exquisite bite! To store any leftover cheesecake, which is unlikely given its deliciousness, place it in an airtight container. It will keep beautifully in the refrigerator for 3-4 days. This cheesecake is a fantastic make-ahead dessert, perfect for reducing stress on special occasions, allowing you to enjoy your guests without last-minute baking. Make the most of apple season by exploring other delightful recipes like my comforting Apple Upside Down Cake or my popular Salted Caramel Apple Pie Bars, ensuring no apple goes to waste!
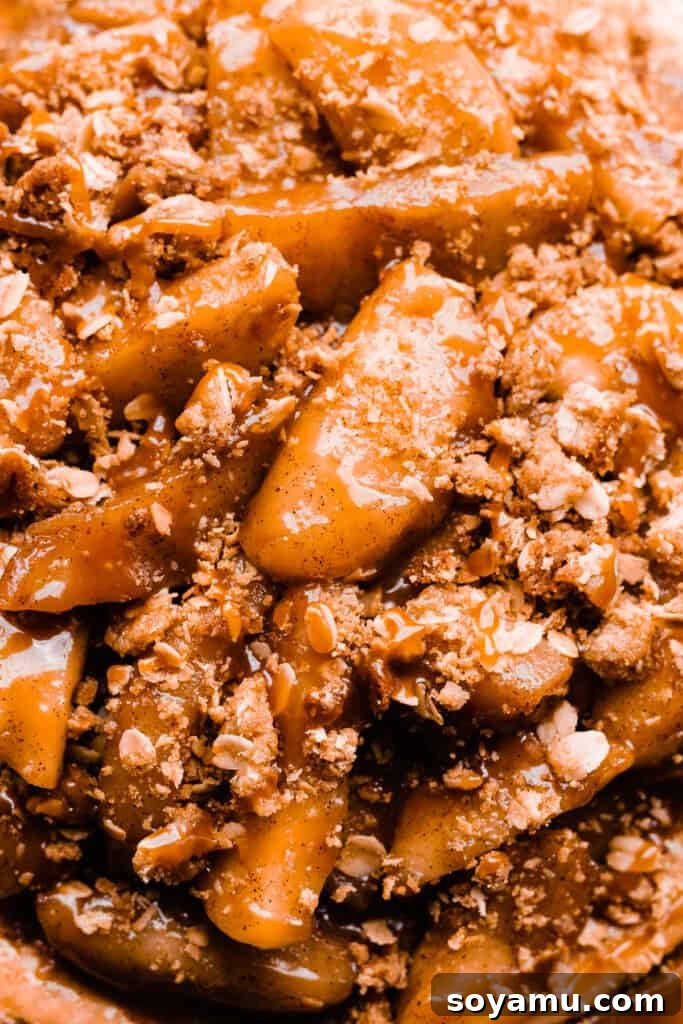
Expert Tips for Cheesecake Success
Achieving a flawless cheesecake can sometimes feel daunting, but with these expert tips, you’ll be baking like a seasoned pro in no time. These insights will help ensure your Salted Caramel Apple Pie Cheesecake turns out perfectly golden, creamy, and crack-free every single time, making you the star of any gathering:
-
Invest in an Oven Thermometer: Many home ovens, even brand new ones, do not consistently run at the temperature they indicate on their dial. This discrepancy can significantly impact delicate bakes like cheesecake. An inexpensive but invaluable oven thermometer is a game-changer. It accurately displays your oven’s true internal temperature, allowing you to adjust your oven settings accordingly to match the recipe. Accurate oven temperature is absolutely critical for delicate bakes like cheesecake to ensure even cooking, proper setting, and to prevent issues like cracking or improper cooking. I recommend leaving an oven thermometer in your oven at all times to continuously monitor its calibration.
-
Embrace a Kitchen Scale for Precision: For consistently professional baking results, a food scale is an invaluable tool. Measuring ingredients by weight, especially dry ingredients like flour and sugar, is far more accurate than measuring by volume (cups). Flour, for instance, can compact differently in a measuring cup depending on how it’s scooped, leading to significant variations in weight and, consequently, affecting the final texture of your crust and cheesecake batter. Weighing your ingredients ensures you use the precise amount every single time, leading to more predictable and successful bakes.
-
Always Use Room Temperature Ingredients: This tip cannot be overstated and is perhaps the most crucial for a smooth, creamy cheesecake! Cold ingredients, particularly cream cheese, eggs, and sour cream, will not emulsify properly with the other ingredients in the batter. This leads to a lumpy, inconsistent batter that will negatively impact the cheesecake’s texture, making it less smooth and more prone to cracks. Plan ahead and take these dairy ingredients and eggs out of the refrigerator at least an hour or two before you intend to start baking, allowing them ample time to come to true room temperature.
-
Avoid Overmixing the Batter: When adding eggs to your cheesecake batter, mix them in one at a time and only until they are just combined and no streaks of egg yolk remain. Overmixing at this stage, or at any point after the cream cheese has been fully softened, incorporates too much air into the batter. This excess air can cause the cheesecake to puff up excessively in the oven, leading to a sunken center as it cools, or, more commonly, unsightly cracks on the surface. Gentle, low-speed mixing is the key to a smooth, dense, and crack-free cheesecake.
-
Master the Art of Not Overbaking: Overbaking is a very common culprit for dry, rubbery cheesecake and often leads to the formation of cracks. Pay close attention to the doneness cues provided in the recipe card: the edges of the cheesecake should be set and slightly raised, the top should appear matte (not shiny), and the center should have only a slight, gentle jiggle when the pan is lightly nudged. For ultimate precision, an internal instant-read thermometer inserted halfway down into the center should register between 150°F and 155°F (65°C and 68°C). Don’t be alarmed if the top of your cheesecake appears slightly browned, especially with this recipe, it’s generally due to the fullness of the pan and the longer bake time, and not necessarily a sign of overbaking, as long as the internal temperature is correct.
Frequently Asked Questions (FAQs) About Apple Pie Cheesecake
Yes, you absolutely can halve this recipe if you wish to make a smaller batch! If you choose to do so, simply cut all the recipe ingredients in half – including the apples, butter, sugars, cream cheese, eggs, and all other components. However, I highly recommend baking it in a 9×9 inch square pan rather than attempting to squeeze a half quantity into a 6-inch springform pan, as a half quantity might still be a bit too much for the smaller round pan and could overflow during baking. When baking in a 9×9 inch pan, the cheesecake layers will be thinner and will therefore bake faster. Start checking for doneness around 32-40 minutes, and add more time as needed. Use the same visual cues (set edges, matte top, slight center wobble) and the internal temperature test (150-155°F or 65-68°C) as outlined in the main recipe to determine when it’s perfectly baked.
Yes, the extensive chilling period is absolutely non-negotiable and is one of the most crucial steps for any baked cheesecake to reach its optimal texture and flavor. After baking and slowly cooling in the oven, it’s imperative to transfer the cheesecake to the refrigerator to chill for at least a minimum of 6 hours, and ideally 12 hours or even up to a full day (24 hours) before attempting to slice and serve. This prolonged chilling time allows the cheesecake to fully set, firm up to a dense consistency, and develop its rich, complex, and creamy texture. It also ensures that you can achieve clean, neat slices without the cheesecake falling apart or getting messy. While this might seem like a slight annoyance or require a bit of patience, this characteristic actually makes cheesecake an ideal dessert for making ahead, significantly reducing stress on the day you plan to serve it for a special occasion or holiday.
A water bath, also known as a bain-marie, is a baker’s best friend when it comes to cheesecake. Its primary and most important purpose is to create a moist, steamy environment inside the oven. This steam helps the delicate cheesecake to cook very gently and evenly, preventing the edges from baking faster and drying out compared to the center. More critically, it helps prevent the dreaded cracks that can often form on the surface of cheesecakes due to rapid temperature changes or uneven baking. The gentle, consistent heat transfer from the water bath ensures a smooth, creamy, and uniformly cooked cheesecake without unsightly imperfections. It acts as a buffer against the harsh, dry heat of the oven, resulting in a perfectly tender, silky dessert.
Preventing water from seeping into your cheesecake crust, which can result in a soggy and unpleasant base, is a common concern for bakers, but there are highly effective methods to ensure a dry crust. My preferred method, which provides the best and most reliable protection, is to wrap the base of your springform pan very securely with several layers of heavy-duty aluminum foil. Ensure the foil comes up the sides a few inches. Then, place this foil-wrapped springform pan inside a slightly larger (e.g., 10-inch) regular cake pan. You then place this entire assembly (the outer cake pan with the springform inside) into your large roasting pan. Carefully pour boiling water *only* into the roasting pan, ensuring the water level comes about halfway up the sides of the outer cake pan. This double-layer protection is incredibly reliable and virtually eliminates the risk of leaks. An alternative, though slightly less protective, method is to simply place your roasting pan filled with boiling water on the oven rack directly below your cheesecake. This creates a steamy environment without direct contact, significantly reducing the risk of leaks. Avoid placing a foil-wrapped springform pan directly into a water bath without the added protection of another pan, as even tightly wrapped foil can sometimes allow small amounts of water to seep through.
Essential Baking Tools for Cheesecake Perfection
Having the right equipment can make all the difference in your baking journey, transforming a challenging task into a smooth and enjoyable process. For this Salted Caramel Apple Pie Cheesecake, one tool is absolutely non-negotiable for success and presentation:
-
The Springform Pan: Your Cheesecake’s Best Friend. This recipe specifically calls for a 9-inch springform pan. Its unique design, featuring a removable bottom and sides that can be unlatched, is absolutely essential for easily releasing delicate desserts like cheesecake without damaging their structure, shape, or pristine presentation. This makes transferring your beautifully baked cheesecake to a serving platter effortless. You absolutely must use a pan of this specific size, or even a 10-inch springform pan if that’s what you have. Do not attempt to use a standard 9-inch cake pan or a 9-inch pie dish; these are far too shallow and small to accommodate the generous volume of this cheesecake batter and would inevitably overflow during baking, leading to a significant mess and a ruined dessert. The springform pan ensures a beautiful, tall, and perfectly formed cheesecake every single time, making it worth the investment for any cheesecake enthusiast.
Explore More Irresistible Cheesecake Recipes
If you’ve fallen in love with the magic of cheesecake and are eager to explore more creamy, dreamy desserts, there’s a whole world of possibilities waiting for you. Expand your repertoire and discover new favorites with these other fantastic cheesecake creations:
- Key Lime Pie Cheesecake
- Classic Strawberry Cheesecake
- Pecan Pie Cheesecake
- Bailey’s Chocolate Cheesecake
- Biscoff Cheesecake
- Triple Nutella Cheesecake
- Lemon Blueberry Cheesecake
Did you make this recipe? Leave a comment & star rating!
Your feedback is incredibly valuable! Please share your thoughts and rate this recipe using the stars below. Your comments and ratings help my small business grow immensely and inspire other home bakers to try this delicious cheesecake.
Salted Caramel Apple Pie Cheesecake Recipe
By Stephanie Simmons
This Caramel Apple Pie Cheesecake is the ultimate fall dessert! A perfectly baked, creamy vanilla cinnamon cheesecake filling surrounds layers of caramelized apples, atop a crisp graham cracker crust. Top off this beauty with a layer of spiced apples, a buttery oat crumble, and a drizzle of salted caramel sauce. It’s a delicious apple pie in cheesecake form – without any of the hassle of pie crust!
Prep Time: 50 minutes | Cook Time: 1 hour 45 minutes | Total Time: 2 hours 35 minutes (plus chilling time of at least 6 hours)
Yields: 12 Slices
Ingredients
For the Apple Filling (for the interior of the cheesecake):
- 4 medium apples (approx. 588 grams sliced), good baking varieties like Jonathan, Honeycrisp, or Fuji
- 3 tbsp salted butter (42 grams)
- 1-2 tbsp apple cider (or water – apple cider vinegar is not the same thing, do not use it!)
- 1/3 cup light brown sugar, packed (73 grams)
- 1 ¼ tsp ground cinnamon
- ½ tsp ground nutmeg
- ¼ tsp ground cloves
- ⅛ tsp allspice
- 1-2 tsp lemon juice, to taste
- 2 tsp cornstarch
- 2 tsp water
For the Cinnamon Graham Cracker Crust:
- 3 cups cinnamon graham cracker crumbs (300 grams) – See note below for making your own crumbs
- ½ cup + 3 tbsp salted butter, melted (155 grams)
For the Creamy Cheesecake Batter:
- 32 ounces (4 blocks) full-fat cream cheese, at room temperature
- 1 ½ cups granulated sugar (308 grams)
- 4 large eggs, at room temperature
- 2 tsp pure vanilla extract
- 1 ½ tsp cornstarch
- ¾ cup full-fat sour cream, at room temperature (180 grams)
- 1 tsp ground cinnamon
- ¼ tsp ground nutmeg
- ⅛ tsp ground cloves
For the Buttery Oat Crumble Topping:
- ¼ cup all-purpose flour (33 grams)
- ½ cup old-fashioned whole rolled oats (48 grams)
- ¼ cup brown sugar, packed (55 grams)
- ½ tsp ground cinnamon
- ⅛ tsp salt
- ¼ cup cold salted butter, cubed (4 tbsp or 57 grams)
For the Homemade Salted Caramel Sauce:
- 1 cup granulated sugar (210 grams)
- 6 tbsp salted butter, cubed (85 grams)
- ½ cup + 1 tbsp heavy cream (135 grams), warmed
- Pinch of flaky sea salt
For the Apple Topping (for serving):
- 4 medium apples (approx. 588 to 625 grams sliced), sliced slightly thicker (1/2 to 3/4 inch) for topping
- 3 tbsp salted butter (42 grams)
- 1-2 tbsp apple cider (or water – apple cider vinegar is not the same thing, do not use it!)
- 1/3 cup brown sugar, packed (73 grams)
- 1 ¼ tsp ground cinnamon
- ½ tsp ground nutmeg
- ¼ tsp ground cloves
- ⅛ tsp allspice
- 1-2 tsp lemon juice, to taste
- 2 tsp water
- 2 tsp cornstarch
Instructions
- Prepare in Advance: Read through the entire recipe thoroughly. Ensure all cold ingredients for the cheesecake (cream cheese, eggs, sour cream) are brought to room temperature before you begin.
- Make the Apple Filling (for inside the cheesecake): Peel and slice 4 apples (1/4 to 1/2 inch thick). In a medium saucepan over medium-high heat, combine the sliced apples, 3 tbsp salted butter, 1-2 tbsp apple cider (or water), 1/3 cup light brown sugar, 1 1/4 tsp cinnamon, 1/2 tsp nutmeg, 1/4 tsp ground cloves, 1/8 tsp allspice, and 1-2 tsp lemon juice. Cook for 8-14 minutes, stirring occasionally, until the apples are tender and caramelized, and the juices have thickened. If the juices aren’t thick enough, dissolve 2 tsp cornstarch in 2 tsp water to create a slurry, stir it into the apple mixture, and cook for 30-60 seconds until thickened. Transfer the apple filling to a medium bowl and let it cool completely at room temperature (or refrigerate if making ahead).
- Prepare the Cinnamon Graham Cracker Crust: Preheat your oven to 350°F (175°C). Lightly spray a 9-inch springform pan with nonstick spray and ensure the bottom is securely fastened. In a bowl, combine 3 cups cinnamon graham cracker crumbs and 1/2 cup + 3 tbsp melted salted butter. Mix until thoroughly moistened. Press this mixture firmly and evenly into the bottom and slightly up the sides of the prepared pan. Bake for 10 minutes to set. Remove from the oven and set aside to cool slightly. Keep the oven on at 350°F. Begin heating water for your water bath in a large pot on the stovetop.
- Mix the Creamy Cheesecake Batter: In a large mixing bowl, or the bowl of a stand mixer fitted with the paddle attachment, beat the 32 oz room temperature cream cheese on high speed with an electric mixer until it is perfectly creamy and smooth (about 1-2 minutes). Add 1 1/2 cups granulated sugar and mix for about 1 minute until well incorporated, scraping down the sides of the bowl frequently. Add the 4 large room temperature eggs one at a time, mixing on medium speed only until each egg is just incorporated before adding the next. Avoid overmixing once eggs are added. Stir in 2 tsp vanilla extract, 1 1/2 tsp cornstarch, 3/4 cup room temperature sour cream, 1 tsp cinnamon, 1/4 tsp nutmeg, and 1/8 tsp ground cloves until just combined and smooth. A few tiny lumps are acceptable.
- Assemble the Cheesecake Layers: Pour half of the prepared cheesecake batter over the cooled, pre-baked crust in the springform pan. Carefully spoon the cooled apple filling (from Step 2) in an even layer over the batter. Then, gently pour the remaining cheesecake batter over the apples, spreading it smoothly with an offset spatula to create an even top layer.
- Set Up and Bake with a Water Bath: To prevent leaks and ensure a creamy cheesecake, wrap the base of your springform pan securely with several layers of heavy-duty aluminum foil. Place this foil-wrapped pan inside a 10-inch regular cake pan. Place this entire assembly into a large roasting pan. Carefully pour boiling water into the roasting pan, ensuring the water level comes about halfway up the sides of the 10-inch cake pan. Place the roasting pan setup onto a rack in the center of your 350°F (175°C) oven. Bake for approximately 1 hour 30 minutes to 1 hour 50 minutes. The cheesecake is done when the edges are slightly raised and set, the top appears matte, and there’s only a slight wobble in the very center when gently nudged. An instant-read thermometer inserted halfway into the center should read 150-155°F (65-68°C).
- Cool and Chill Thoroughly: Once baked, turn off the oven and crack the door open (you can use a wooden spoon to prop it open). Let the cheesecake cool inside the oven for 1 hour. Remove from the oven, carefully unwrap the foil, and let it cool completely on a wire rack at room temperature. Once entirely cool, cover it tightly with foil or plastic wrap and transfer it to the refrigerator to chill for at least 6 hours, or preferably 12 hours to 1 full day, before removing from the pan and serving. This long chilling is crucial for setting and flavor development.
- Prepare the Buttery Oat Crumble Topping: While the cheesecake bakes and chills, preheat your oven to 350°F (175°C). Line a sheet pan with parchment paper. In a medium bowl, whisk together 1/4 cup all-purpose flour, 1/2 cup old-fashioned rolled oats, 1/4 cup brown sugar, 1/2 tsp cinnamon, and 1/8 tsp salt. Cut in 1/4 cup cold, cubed salted butter using a pastry blender or two forks until the mixture resembles coarse crumbs. Spread this evenly onto the prepared sheet pan. Bake for 12-20 minutes, stirring halfway through, until golden brown and fragrant. Let cool completely.
- Make the Homemade Salted Caramel Sauce: Prepare the caramel sauce according to my detailed 10-minute Salted Caramel Sauce Recipe using 1 cup granulated sugar, 6 tbsp cubed salted butter, 1/2 cup + 1 tbsp warmed heavy cream, and a pinch of flaky sea salt. Allow the caramel to cool completely before using on the cheesecake.
- Make the Apple Topping (for serving): Peel and slice 4 apples (1/2 to 3/4 inch thick for a substantial topping). In a medium pan over medium-high heat, combine these sliced apples with 3 tbsp salted butter, 1-2 tbsp apple cider (or water), 1/3 cup brown sugar, 1 1/4 tsp cinnamon, 1/2 tsp nutmeg, 1/4 tsp ground cloves, 1/8 tsp allspice, and 1-2 tsp lemon juice. Cook for 8-14 minutes, stirring, until tender and caramelized. Thicken juices with a slurry of 2 tsp cornstarch and 2 tsp water if desired (as in Step 2). Transfer to a medium bowl and cool completely.
- Serve and Enjoy: Once the cheesecake is thoroughly chilled, carefully remove it from the springform pan. Artfully arrange the cooled apple topping (from Step 10) over the top of the cheesecake. Then, add a generous sprinkle of the buttery oat crumble topping. Finish by drizzling a generous amount of the cooled salted caramel sauce over the top. Slice and enjoy your magnificent Salted Caramel Apple Pie Cheesecake!
- Make-Ahead and Storage Tips:
- Apple Filling/Topping: This can be made up to 1 day ahead of time. Store it in an airtight container in the refrigerator. If it stiffens too much, gently microwave it for 10-15 seconds at a time and stir before using.
- Caramel Sauce: The homemade salted caramel sauce can be made up to 5 days in advance. Cool it completely and store it in a sealed mason jar in the refrigerator. Gently warm to a pourable consistency before serving.
- Crumble Topping: The oat crumble can be made 2-3 days ahead. Once completely cooled, store it in an airtight container at room temperature to maintain its crispness.
- Leftover Cheesecake: Store any leftover cheesecake in an airtight container in the refrigerator for 3-4 days.
Notes
- Baking Pan Alternatives: You must use a 9-inch springform pan, not a 9-inch cake pan or a 9-inch pie dish – both of those are far too small to hold this generous recipe and will overflow. You can, however, use a 9×13 inch baking pan instead of a 9-inch springform to make a cheesecake bar-style dessert. If using a 9×13 pan, the layers will be thinner, so adjust the baking time significantly. Start with approximately 40 minutes less bake time and check for doneness (set edges, matte top, slight jiggle in the center, 150-155°F internal temperature) in the same way as listed in the main recipe.
- Apple Filling/Topping Strategy: If you don’t mind thinner apple slices for your topping, you can make a single, larger batch of apple filling/topping all at once (doubling the ingredient amounts for apples, butter, sugar, spices, etc., from the “For the Apple Filling” section) in a large pan. Cook it down, and then reserve half of the cooled mixture for topping the cheesecake once it’s baked and chilled. My personal preference, which I’ve written into the separate steps, is to make two distinct batches because I wanted significantly thicker slices for the topping to create a more substantial and visually appealing mound of apples. I don’t recommend putting slices that thick inside the cheesecake, as they might not soften uniformly during baking, which is why I advise making two separate batches for optimal texture and presentation.
- Crust Customization: If you are unable to find cinnamon graham cracker crumbs or prefer a different flavor, you can pulse plain graham crackers in a food processor until fine crumbs are formed. In this case, add 1/2 to 1 tsp of ground cinnamon to the crust mixture, to taste, to replicate the spiced flavor. Note that if you crush whole graham crackers yourself, you may need to add an extra 1-3 tablespoons of melted butter to the mixture, as homemade crumbs tend to be drier than ready-made, pre-packaged crumbs for some reason, and need more binding moisture.
- Storing Make-Ahead Apple Filling: If you’re planning to store the cooked apple filling or topping in the refrigerator for a day or more before using, be sure to scrape the pan well to get all the thickened juices into your airtight storage container. This ensures your apples stay juicy and don’t dry out. Before using, you may want to gently microwave the chilled filling (10-15 seconds at a time) and then stir everything around to get it saucy and pliable again after being chilled.
Nutrition
Nutrition information is an approximation based on 12 servings:
- Serving: 1 slice
- Calories: 822 kcal
- Carbohydrates: 85g
- Protein: 10g
- Fat: 51g
- Saturated Fat: 29g
- Polyunsaturated Fat: 2g
- Monounsaturated Fat: 14g
- Trans Fat: 1g
- Cholesterol: 195mg
- Sodium: 573mg
- Potassium: 366mg
- Fiber: 4g
- Sugar: 63g
- Vitamin A: 1822 IU
- Vitamin C: 6mg
- Calcium: 156mg
- Iron: 2mg
Nutrition information is automatically calculated and should be used as an approximation only. Individual results may vary based on ingredient brands and exact measurements.