
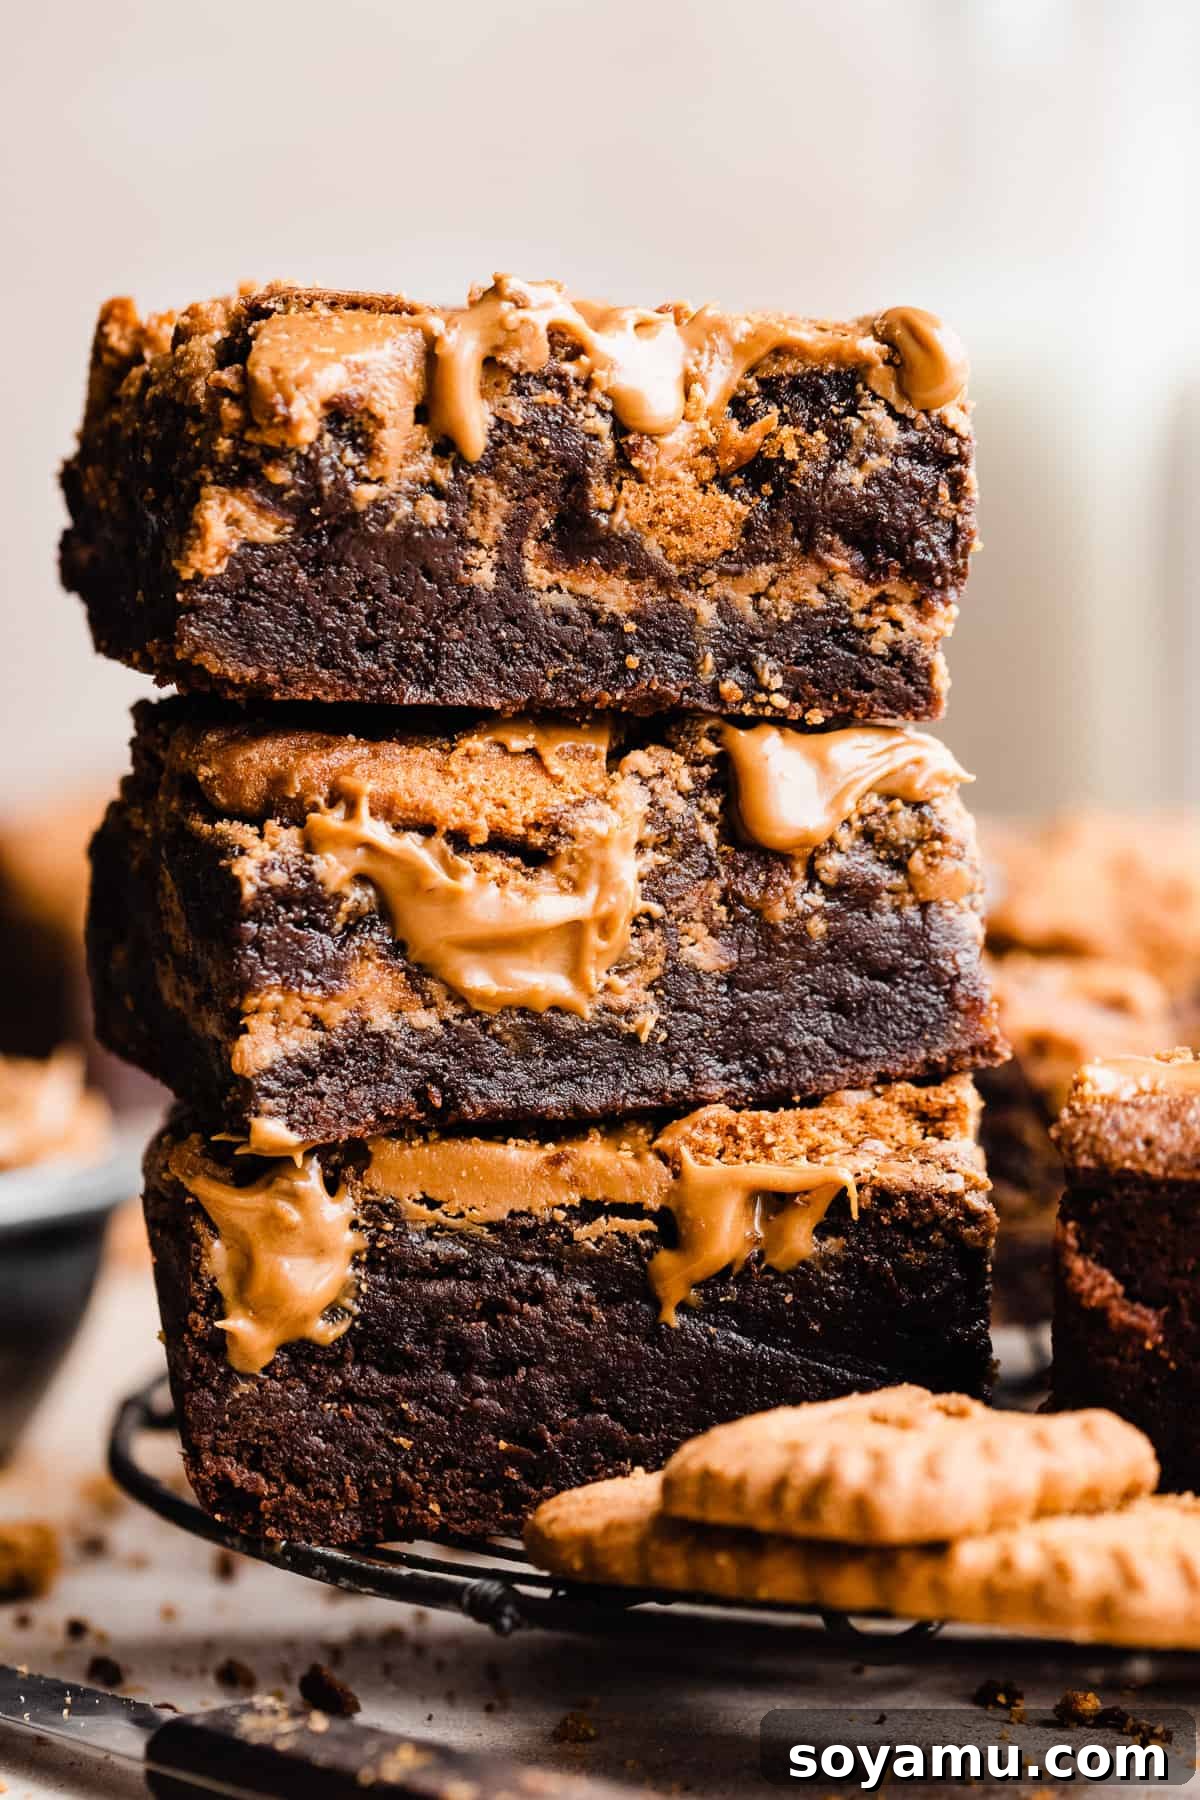
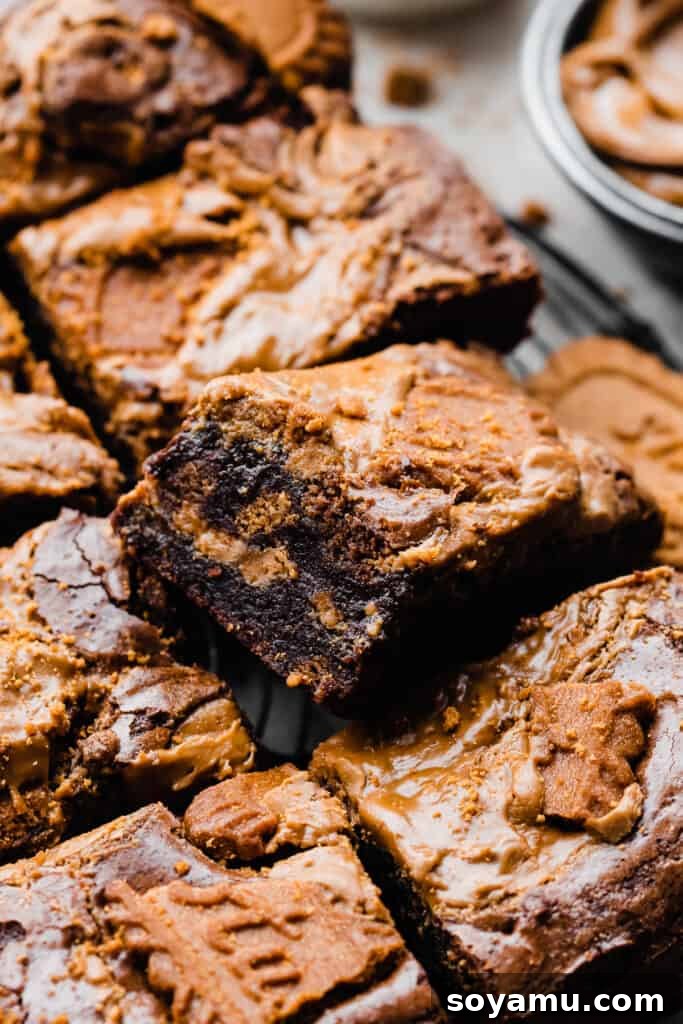
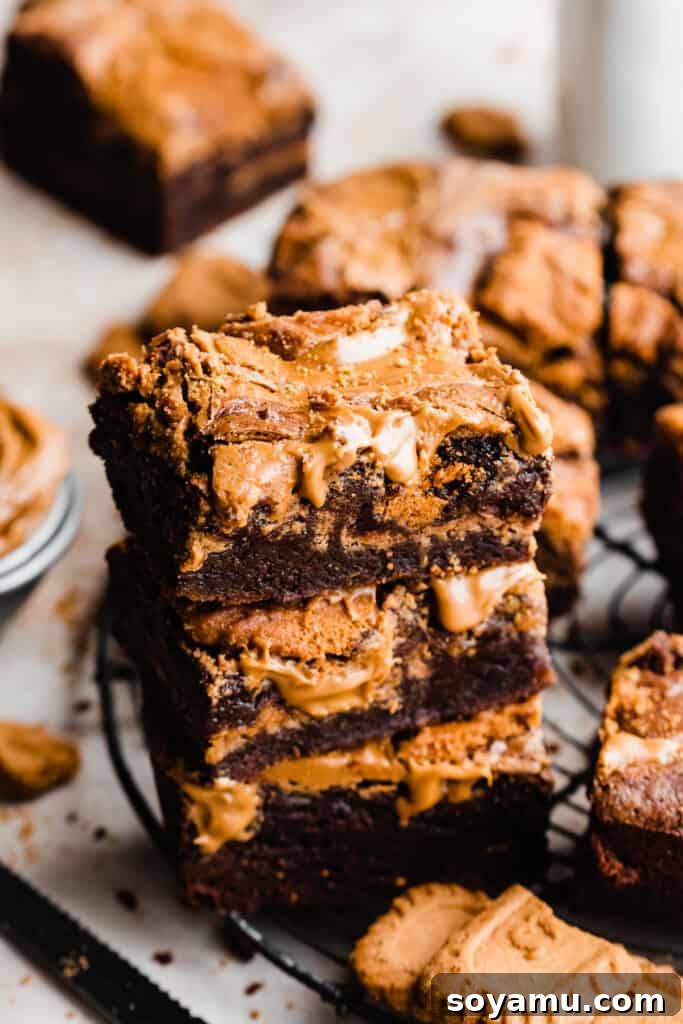
Get ready to indulge in the most extraordinary dessert experience with these **Irresistible Biscoff Brownies**! Imagine ultra-fudgy chocolate brownies, rich and decadent, generously studded with chunks of beloved Biscoff cookies and luscious swirls of creamy cookie butter in every single bite. This isn’t just a brownie; it’s a symphony of textures and flavors designed to delight every cookie butter enthusiast and brownie connoisseur alike.
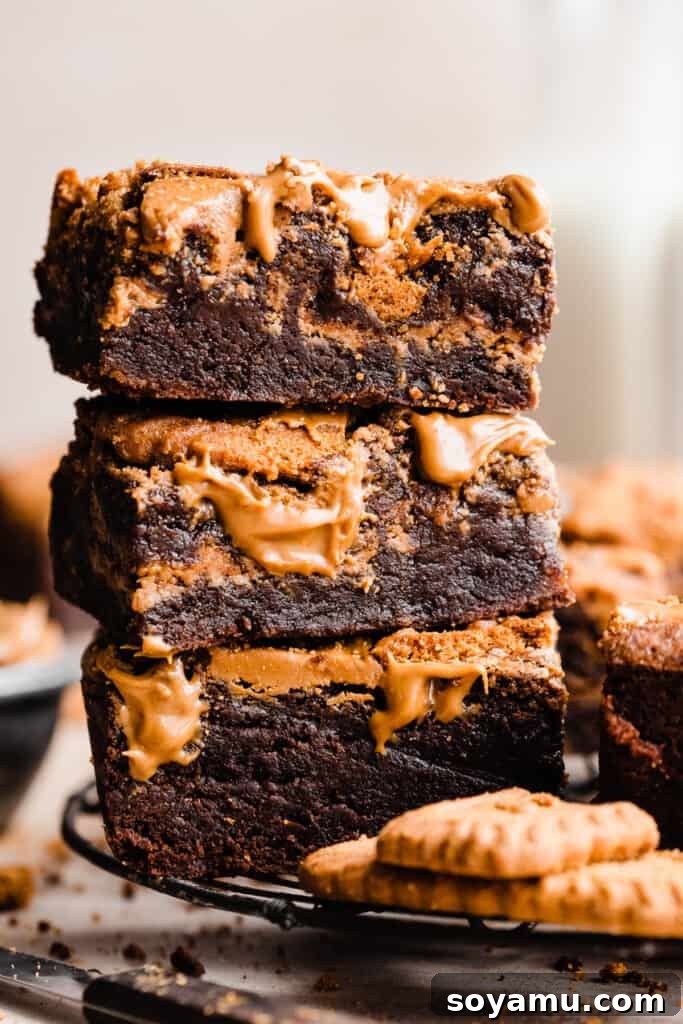
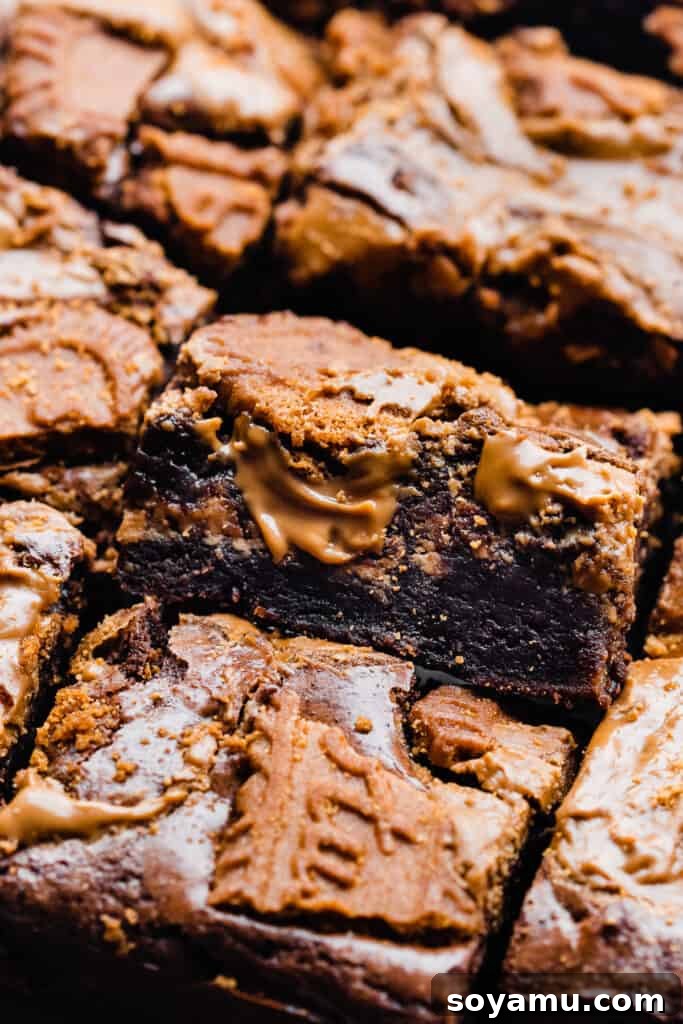
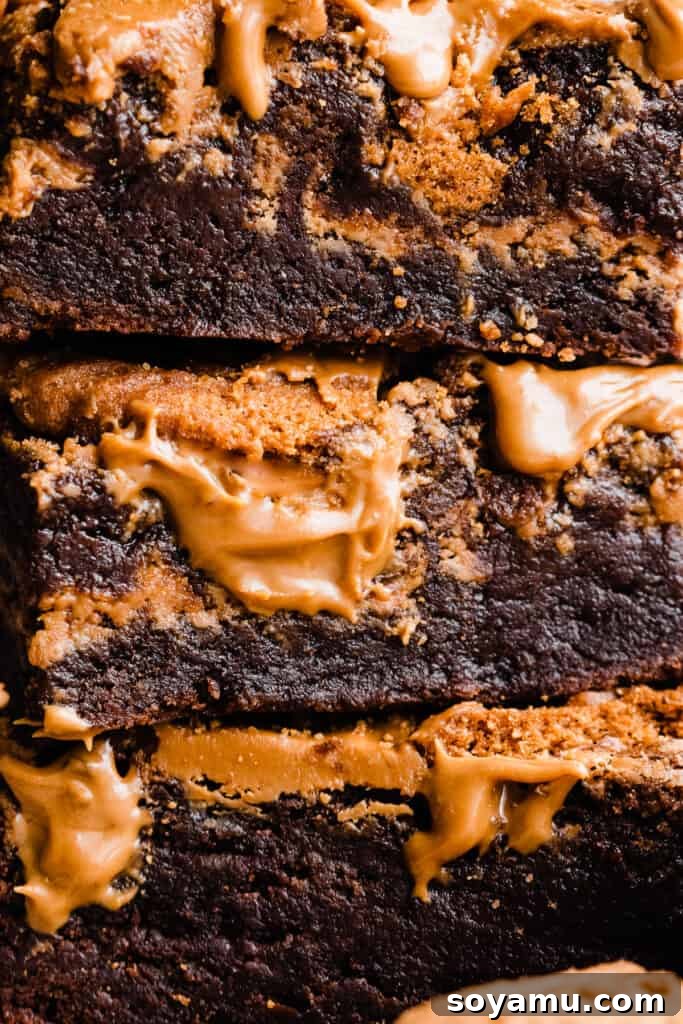
Our Biscoff Brownies feature crushed Biscoff cookie crumbs meticulously folded into the rich chocolate batter, ensuring that signature spiced cookie flavor permeates every inch. But the cookie butter journey doesn’t stop there! Silky smooth cookie butter is artfully swirled through the center of the brownies, creating pockets of melt-in-your-mouth delight, and then again on top, where it caramelizes slightly to add another layer of depth. Finally, a generous sprinkle of Biscoff cookie pieces crowns these beauties, providing an irresistible crunch that perfectly contrasts the fudgy interior.
These truly swoon-worthy cookie butter brownies are guaranteed to be the star of any gathering. They disappear so quickly, you might want to bake a double batch! The combination of intense chocolate, warm spices from Biscoff, and the creamy texture of cookie butter is a match made in dessert heaven. Let’s embark on this delicious baking adventure!
Why You’ll Fall in Love with These Biscoff Brownies:
Beyond their undeniable deliciousness, these homemade Biscoff brownies offer several compelling reasons to become your new go-to dessert:
- A Cookie Butter Extravaganza: If you’re a fan of Biscoff, prepare for pure bliss. Every single element of these brownies is infused with that irresistible cookie butter flavor. We incorporate crushed Biscoff cookies into the brownie batter itself, guaranteeing a consistent spiced sweetness throughout. Then, generous swirls of smooth cookie butter are layered both within the brownie and on top, creating pockets of creamy indulgence that melt in your mouth. Finally, a crisp layer of Biscoff cookie pieces adds a delightful textural contrast and intensifies the Biscoff experience. It’s a triple threat of cookie butter goodness!
- Effortlessly Easy Brownie Recipe: Don’t let the gourmet appearance fool you – these Lotus Biscoff brownies are incredibly simple to make. With straightforward steps and common pantry ingredients, even novice bakers can achieve spectacular results. The process is designed to be enjoyable, leading to a stunning dessert without any fuss. You’ll be amazed at how quickly you can whip up this impressive treat.
- The Epitome of Fudgy Brownies: Say goodbye to dry, cakey brownies! Our recipe delivers the ultimate fudgy texture that everyone craves. Each bite is dense, moist, and intensely chocolatey, melting on your tongue. We’ve also perfected the technique to ensure that sought-after “crinkle top” – a beautiful, delicate crust that adds visual appeal and a slight crispness, signaling the perfect brownie beneath.
- Perfect for Any Occasion: Whether it’s a casual weeknight treat, a potluck showstopper, a birthday celebration, or a cozy evening in, these Biscoff brownies fit every scenario. Their unique flavor profile and appealing presentation make them a crowd-pleaser that will always earn rave reviews.
- Unforgettable Flavor Combination: The deep, rich chocolate base pairs exquisitely with the warm, spiced notes of Biscoff cookies and the creamy sweetness of cookie butter. It’s a harmonious blend that creates a truly unique and addictive dessert that stands out from traditional brownies.
Key Ingredients for Your Biscoff Brownies:
Creating truly exceptional Biscoff brownies starts with understanding the role of each ingredient. Here’s a detailed look at what you’ll need:
- Butter: For the best flavor, we recommend using **salted butter**. The hint of salt perfectly balances the sweetness of the brownies and enhances the chocolate notes. If you only have unsalted butter, simply add an extra pinch (about ¼ teaspoon) of salt to the dry ingredients. Make sure your butter is at room temperature for smooth melting and incorporation.
- Chocolate: The quality of your chocolate significantly impacts the final taste. Opt for a good quality **baking bar** (semi-sweet or milk chocolate, or a combination as suggested in the recipe) rather than just chocolate chips. Baking bars melt more smoothly and provide a richer, more profound chocolate flavor. However, if you’re in a pinch, high-quality chocolate chips can work, though they might not melt as seamlessly.
- Sugar: We use a strategic blend of **granulated sugar** and **light brown sugar**. Granulated sugar contributes to the essential structure and sweetness of the brownie, helping to create that desirable crinkly top. Brown sugar, on the other hand, adds moisture, chewiness, and a deeper, more caramel-like flavor, enhancing the complexity of the brownie’s profile.
- Eggs: **Large eggs** are crucial for both structure and moisture. They bind the ingredients together, contribute to the fudgy texture, and help achieve that signature shiny, crackled top. Ensure your eggs are at **room temperature**; this helps them emulsify better with the melted butter and sugar, leading to a smoother batter and a more even bake.
- All-purpose flour: Proper measurement of flour is key to avoiding dry brownies. For the most accurate results, use a **kitchen scale** to weigh your flour. If measuring by volume, always remember to **spoon and level** your flour. This means gently spooning the flour into your measuring cup and then leveling off the top with a straight edge, rather than scooping the cup directly into the flour bag, which can compact it and lead to using too much.
- Cocoa Powder: Stick with **unsweetened cocoa powder**. This allows the natural bitterness of the cocoa to shine through and provides a deep, intense chocolate flavor without making the brownies overly sweet. Dutch-processed cocoa powder can also be used for a darker color and milder chocolate flavor.
- Vanilla Extract: Don’t skimp on this! **Real vanilla extract** makes a noticeable difference in flavor, adding warmth and depth that complements the chocolate and Biscoff beautifully. Avoid imitation vanilla for the best results.
- Biscoff Spread (Cookie Butter): This is the star of the show! Use authentic **Lotus Biscoff cookie butter** or any other brand of cookie butter you enjoy. Its creamy texture and spiced caramelized flavor are essential for the unique taste and swirling effect in these brownies.
- Lotus Biscoff Cookies: The namesake crunchy element! You’ll need original **Biscoff biscuits (cookies)** or a similar off-brand spiced cookie you love. These are crushed and folded into the batter and used as a topping for added crunch and flavor.
- Salt: A small amount of salt is vital for enhancing all the other flavors, especially the chocolate. It prevents the brownies from tasting flat and brings out their richness.
- Espresso Powder (Optional but Recommended): A touch of espresso powder doesn’t make the brownies taste like coffee; instead, it **deepens the chocolate flavor** and makes it more intense. It’s a secret ingredient many bakers use to elevate chocolate desserts.
Recipe Substitutions & Exciting Variations:
While the classic Biscoff Brownie recipe is divine, don’t hesitate to get creative with these delicious variations and mindful substitutions to suit dietary needs or simply explore new flavors:
- Dairy-Free Option: Making these brownies dairy-free is surprisingly simple! Just substitute the regular butter with your favorite **dairy-free butter sticks**. Ensure the brand you choose is suitable for baking and has a good fat content for optimal texture. The Biscoff spread and cookies are generally dairy-free, but always double-check the labels for specific brands if allergies are a concern.
- Gluten-Free Exploration: While I haven’t personally tested a gluten-free version of this specific recipe, it’s theoretically possible with a few adjustments. You would need to use a high-quality **gluten-free all-purpose flour blend** (one that contains xanthan gum for structure) in place of regular flour. However, remember that traditional Biscoff cookies and cookie butter contain wheat. For a truly gluten-free brownie, you’d need to find gluten-free spiced cookies or gingersnap cookies to replace the Biscoff cookies, and a gluten-free cookie butter alternative (or omit the cookie butter and use another nut/seed butter that is certified gluten-free).
- Other Nut/Seed Butters: If Biscoff isn’t your preference, or you’re looking for a different flavor profile, feel free to experiment with other creamy spreads. **Peanut butter** or **almond butter** can make fantastic fudgy brownies. If you go this route, I recommend omitting the Biscoff cookies, as their distinct spiced flavor might not harmonize as well with nut butters. Instead, consider adding chopped peanuts, almonds, or chocolate chunks to complement your chosen butter.
- Elevate with Chocolate Chunks: For an extra layer of chocolatey indulgence, you can replace the crushed Biscoff cookies folded into the batter with an equal amount of **chocolate chunks** or **dark chocolate chips**. This creates delightful pockets of melted chocolate throughout the brownies, adding another dimension of richness. You could even do half Biscoff cookies and half chocolate chunks for the best of both worlds!
- White Chocolate Swirl: Instead of cookie butter, try swirling melted **white chocolate** into the brownie batter. The creamy sweetness of white chocolate would provide a lovely contrast to the dark fudgy brownie.
- Spiced Variations: Enhance the warm spice profile by adding a pinch of **cinnamon**, **nutmeg**, or **cardamom** to the dry ingredients. These spices naturally complement the Biscoff flavor and add an extra layer of cozy aroma.
- Sea Salt Finish: A sprinkle of flaky **sea salt** on top of the baked (or even unbaked) brownies can elevate the flavors, cutting through the sweetness and enhancing the chocolate and caramel notes of the Biscoff.
How to Make Biscoff Brownies: A Step-by-Step Guide:
Creating these sensational Biscoff brownies is a joyful process. Follow these detailed steps for a perfect batch every time:
Preparation is Key:
Before you begin, preheat your oven to 350°F (175°C). This ensures your oven is at the correct temperature when the brownies are ready to bake, which is crucial for even cooking. Prepare a 9×9 inch ceramic or metal baking pan by spraying it thoroughly with nonstick cooking spray. For easy removal and clean slices, line the pan with parchment paper, leaving an overhang on two sides to create “slings.” This will allow you to lift the entire batch of brownies out of the pan once cooled. Set aside your cookie butter, ensuring it’s at a consistency that’s easy to swirl; if it’s too firm, a quick zap in the microwave for 10-15 seconds can help.
Step 1: Create the Luscious Brownie Batter.
In a large, microwave-safe mixing bowl, combine your measured butter and both types of chopped chocolate (semi-sweet and milk chocolate). Melt them together in 30-second intervals in the microwave, stirring well after each interval, until the mixture is completely smooth and glossy. Be careful not to overheat the chocolate, as it can seize. Once melted, whisk in the granulated sugar and light brown sugar until thoroughly combined. The mixture should be warm, but not hot enough to cook the eggs. Next, crack in the large, room-temperature eggs, one at a time, incorporating each fully before adding the next. Stir in the vanilla extract. Now, here’s a secret for that beautiful crinkly top: continue whisking the mixture vigorously for a full **2 minutes**. This incorporates air and helps create that iconic shiny, crackled crust. Finally, gently fold in your dry ingredients – all-purpose flour, unsweetened cocoa powder, salt, and the optional espresso powder. Use a rubber spatula to fold until just the last streaks of flour disappear. Overmixing at this stage can lead to tough brownies. Then, carefully fold in 1 cup of your crushed Biscoff cookies, distributing them evenly throughout the rich batter.
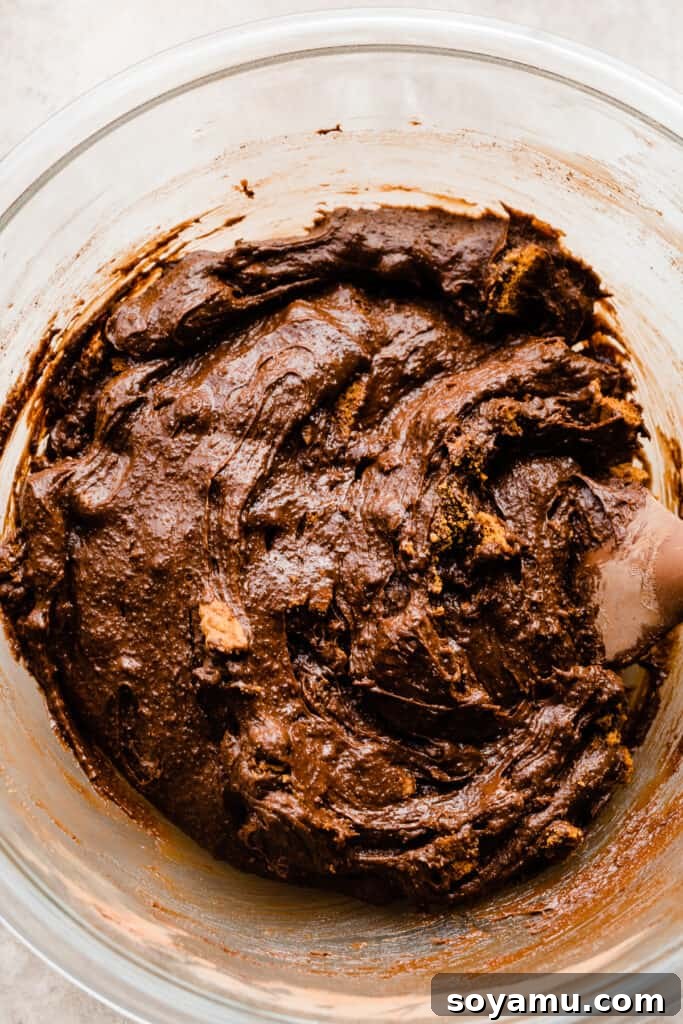
Step 2: Layer and Swirl with Cookie Butter Perfection.
Pour approximately half of your prepared brownie batter evenly into the lined 9×9 inch pan. Using a spoon or small spatula, dollop about 1/3 cup of the Biscoff cookie butter over the surface of this first layer of batter. Take a butter knife or a skewer and gently swirl the cookie butter into the brownie batter, creating beautiful marbled patterns. Don’t over-swirl, as you want distinct pockets of cookie butter. Carefully spread the remaining brownie batter over the swirled layer, doing your best to cover it without disturbing the cookie butter too much. Once the top is relatively smooth, sprinkle the remaining larger Biscoff cookie pieces over the surface. Then, dollop the remaining cookie butter on top and swirl it again with your knife or skewer. This creates an inviting, visually stunning top layer that promises incredible flavor in every bite.
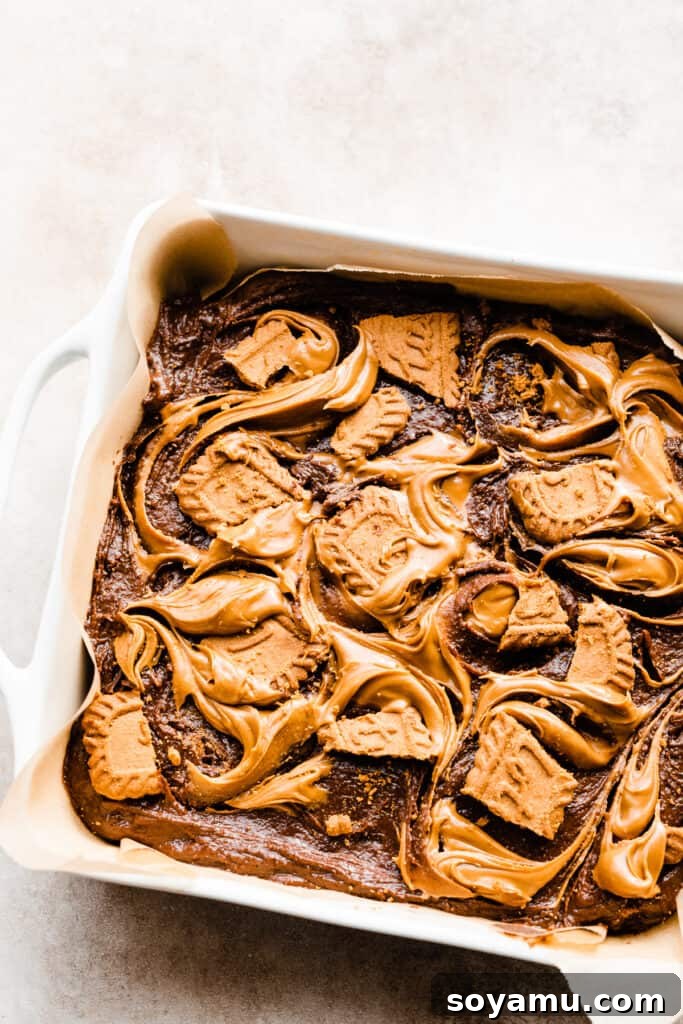
Step 3: Bake to Fudgy Perfection.
Carefully transfer your pan to the preheated oven. Bake for approximately **35-43 minutes**. Baking brownies can be tricky, as you want them to be perfectly fudgy without being undercooked or overbaked. Here’s how to check for doneness: The edges of the brownies should appear set and slightly pulled away from the sides of the pan. When you insert a toothpick or a thin knife into the edges of the brownie, it should come out clean. When inserted into the center, the toothpick should come out with moist fudgy crumbs attached, but not wet batter. If it comes out completely clean from the center, your brownies are likely overbaked and will be less fudgy. You can also gently jiggle the pan; the center should have a slight wobble but not be liquid. If you’re unsure, it’s better to slightly underbake than overbake for maximum fudginess!
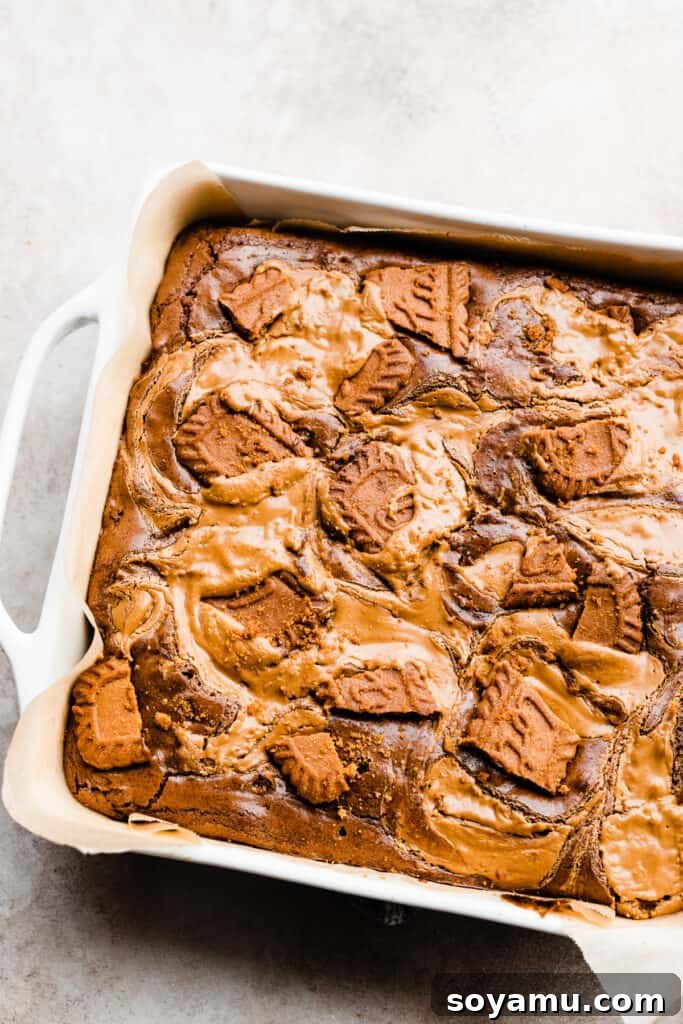
Serving Your Biscoff Brownies & Storage Tips:
Patience is a virtue, especially when it comes to brownies! While it’s tempting to dig in immediately, letting your Biscoff brownies cool properly makes all the difference in texture and presentation.
Serving: Allow the brownies to cool in the pan for at least **30 minutes to 1 hour** before slicing. This cooling period allows them to set up, firming their texture and making them much easier to cut into neat, clean squares. Warm brownies are incredibly delicious – that melted cookie butter is pure heaven! Serve them slightly warm with a scoop of vanilla bean ice cream for an extra decadent treat, or alongside a hot cup of coffee or tea. If you prefer super clean slices for a presentation, let them cool completely, even chilling them in the fridge for a short while, before cutting. For that “warm from the oven” feel the next day, simply pop a slice into the microwave for 10-15 seconds.
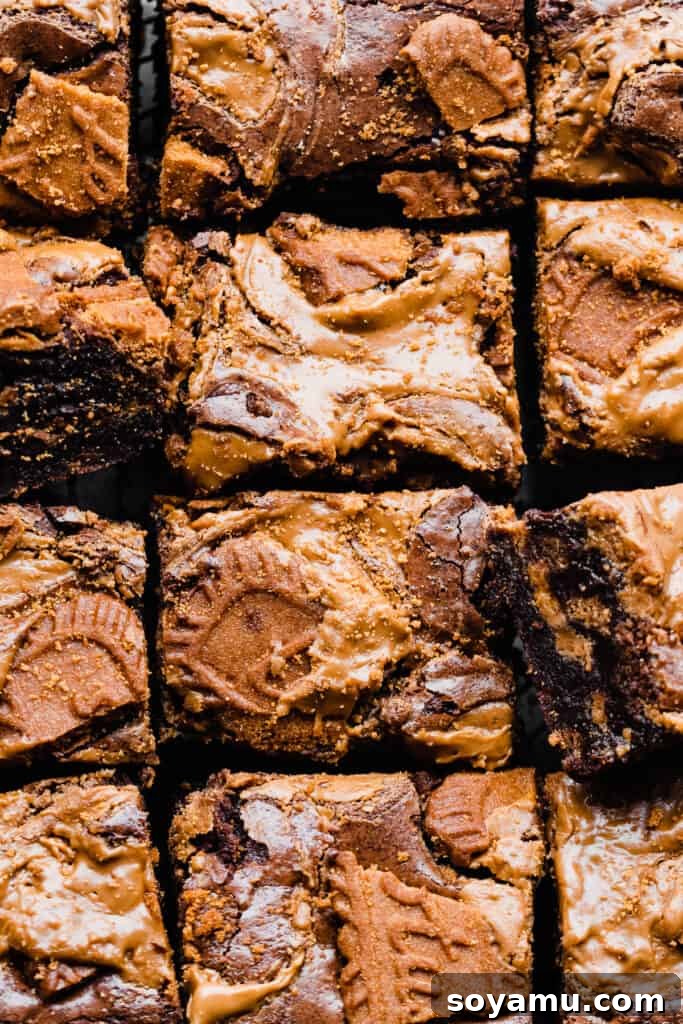
Storing: Store your cooled Biscoff brownies in an **airtight container** at room temperature for optimal freshness. They will remain wonderfully fudgy and delicious for **4-5 days**. If you need to extend their shelf life, you can store them in the refrigerator for **5-6 days**. When stored in the fridge, they will become firmer, so allow them to come to room temperature or gently reheat them in the microwave for a few seconds before serving to restore their soft, fudgy texture. For longer storage, individual brownie squares can be wrapped tightly in plastic wrap and then placed in an airtight freezer-safe bag or container for up to 3 months. Thaw at room temperature or gently reheat.
Expert Tips for Brownie Perfection:
Achieving the perfect fudgy Biscoff brownies is easy with these insider baking tips:
- Do Not Overbake: This is arguably the most critical rule for fudgy brownies! Brownies continue to set and firm up as they cool. If you bake them until a toothpick comes out completely clean from the center, they will likely be dry and cakey once cooled. Aim for moist crumbs, not wet batter, on the toothpick from the center. Trust the process – they’ll be perfectly set once cool.
- Mind the Yield: These brownies are incredibly rich and decadent. While the recipe suggests a certain number of servings, you can easily slice them into smaller pieces to stretch the yield, especially if serving a crowd or alongside other desserts. Despite their richness, they are perfectly balanced in sweetness, preventing them from being cloying.
- Invest in an Oven Thermometer: Many home ovens are not calibrated accurately, meaning the temperature you set might not be the actual temperature inside. An oven thermometer is an inexpensive tool that will tell you if your oven is running hot or cold. Accurate oven temperature is absolutely crucial for most baking, ensuring your brownies bake evenly and to the correct texture. Keep one in your oven at all times to monitor its calibration.
- Use a Kitchen Scale for Accuracy: While measuring cups are common, the amount of flour you get can vary significantly based on how it’s scooped and the specific measuring cup used. A food scale is the most reliable way to ensure you’re using the precise amount of flour (and other dry ingredients) called for in the recipe, leading to consistent and perfect results every time. It eliminates guesswork and is a game-changer for serious bakers.
- Room Temperature Eggs: As mentioned in the ingredient overview, room temperature eggs emulsify better with the melted butter and sugar, creating a smoother batter and contributing to the desired crinkly top. If you forget to take them out ahead of time, you can quickly warm them by placing them in a bowl of warm (not hot) water for 5-10 minutes.
- Don’t Skip the Whisking Time: The 2 minutes of whisking the sugar, eggs, and melted chocolate mixture is vital for that shiny, crackled top. This step helps dissolve the sugar, create an emulsion, and incorporate air, all contributing to the perfect brownie appearance.
- Cool Completely for Clean Slices: While warm brownies are fantastic, if you want Instagram-worthy, perfectly clean-cut squares, allow the brownies to cool completely in the pan, then transfer to the fridge for 30 minutes to an hour before slicing. A warm, sharp knife can also help ensure clean cuts.
Frequently Asked Questions (FAQs):
Got questions about these delicious Biscoff Brownies? We’ve got answers!
Absolutely! This recipe is quite versatile. You can easily halve it and bake it in a loaf pan for extra thick brownies, or even in the same 9×9 inch pan for a thinner layer. If halving, reduce your bake time to approximately 18-20 minutes, then add time as needed, checking for doneness as indicated in the recipe instructions. To double the recipe, simply multiply all ingredients by two and bake in a larger 9×13 inch pan. The bake time should be quite similar to the original recipe, but always keep an eye on them and check for doneness.
Yes, these Biscoff brownies are an excellent make-ahead dessert! You can bake them a day in advance. Once fully baked, allow them to cool completely at room temperature in their pan. Once cool, cover the pan tightly with foil or plastic wrap. When you’re ready to serve the next day, simply slice and enjoy. In fact, some people find that brownies taste even better the next day as the flavors have had more time to meld.
You have a few options! For finely crushed crumbs, a food processor works best. For larger, more textural pieces, place the cookies in a zip-top bag and gently crush them with a rolling pin or the bottom of a heavy pan. This allows for a mix of textures in your brownies, which is delightful!
The most common culprit for cakey brownies is overbaking. Brownies are prone to drying out quickly. Make sure you’re checking for doneness at the lower end of the baking time range, and pull them out when a toothpick inserted in the center still has moist crumbs (not wet batter). Using a kitchen scale for accurate ingredient measurements, especially flour, also helps prevent a cakey texture.
Recommended Baking Tools:
While not strictly essential, these tools can make your brownie-making experience even smoother and more enjoyable:
- 9×9 Inch Pan: A high-quality ceramic or metal 9×9 square baking pan is ideal for this recipe. The size ensures the correct brownie thickness, and a good quality pan promotes even baking and browning.
- Offset Spatula: An offset spatula is a baker’s best friend! It makes spreading thick brownie batter evenly in the pan an absolute breeze, especially when working with layers. You’ll find yourself reaching for it for countless other baking tasks, from frosting cakes to smoothing out bars.
- Kitchen Scale: As mentioned in our tips, a food scale is indispensable for precise ingredient measurements, particularly for flour. This ensures consistent results and prevents common baking errors that can affect texture.
- Whisk: A good sturdy whisk is essential for combining wet ingredients and creating that airy texture necessary for the crinkly top.
- Rubber Spatula: For gently folding in dry ingredients and crushed cookies without overmixing, a flexible rubber spatula is perfect.
More Biscoff Recipes to Satisfy Your Cravings:
If you’ve fallen head over heels for the spiced caramelized goodness of Biscoff, you’re in luck! Explore these other delightful Biscoff-inspired creations from our kitchen:
- Quick & Easy Biscoff Mug Cake
- Decadent Biscoff Swirled Blondies
- Festive Biscoff Snack Cake with Cookie Butter Frosting
- Ultimate Triple Biscoff Cheesecake
Even More Irresistible Brownie Recipes:
- Gooey S’mores Brownies
- Fudgy Gluten-Free Brownies
- Rich Black Forest Brownies
- Fudgy Red Velvet Oreo Brownies
- Fudgy Triple Chocolate Skillet Brownie
- Salted Caramel Pretzel Brownies
- Best Ever 5-Ingredient Brownies
Loved this recipe? Share your creations and thoughts!
We’d absolutely love to see your beautiful Biscoff Brownies! Be sure to follow us on Instagram at @bluebowlrecipes and tag your photos with #bluebowlrecipes. You can also share your culinary masterpieces on our Facebook page. Your feedback and photos inspire us!
Biscoff Stuffed Brownies
By Stephanie Simmons
Ultra fudgy chocolate brownies are studded with cookie butter & Biscoff cookies in every bite! Biscoff cookie crumbs are folded into the batter, cookie butter is swirled in the center & on top, & they’re finished with a layer of Biscoff cookie pieces for crunch. Cookie butter lovers & brownie lovers will rejoice over this perfect marriage of flavors!
Prep Time: 25 mins
Cook Time: 38 mins
Total Time: 1 hr 3 mins
Yields: 9 to 18 brownies
Ingredients
- 3/4 cup salted butter (170 grams)
- 2 ounces semi-sweet chocolate, chopped (can substitute chocolate chips)
- 2 ounces milk chocolate, chopped (can substitute chocolate chips)
- 1 and 1/2 cups granulated sugar (315 grams)
- 1/2 cup light brown sugar, packed (110 grams)
- 4 large eggs, at room temperature
- 1 and 1/2 tsp vanilla extract
- 1 cup all-purpose flour (130 grams)
- 2/3 cup cocoa powder (56 grams)
- 1/2 tsp salt
- 1/8 tsp espresso powder (optional, but recommended for deeper chocolate flavor)
- 2/3 cup cookie butter, divided in half (205 grams in total)
- 1 cup crushed biscoff cookies (80 grams)
- 3-4 additional biscoff cookies, broken into larger pieces, for topping
Instructions
- Prep: Preheat your oven to 350°F (175°C). Spray a 9×9 inch ceramic or metal pan with nonstick spray and line with parchment paper, leaving an overhang on two sides for easy removal.
- Make the Brownie Batter: Melt the butter and both chocolates in a microwave-safe large bowl in 30-second intervals, stirring between each, until fully melted and smooth. Whisk in the granulated and brown sugar until combined. Add the eggs and vanilla extract, and whisk until combined, then continue whisking vigorously for 2 minutes to create that signature crackly top on the brownies. Add the flour, salt, cocoa powder, and espresso powder (if using), and fold in gently with a rubber spatula until the last streaks of flour just disappear into the batter. Do not overmix. Fold in 1 cup of the crushed biscoff cookies.
- Assemble & Bake: Spread half of the brownie batter evenly into your prepared pan. Dollop half (about 1/3 cup) of the cookie butter on top of this layer. Use a butter knife or skewer to gently swirl the cookie butter into the batter. Carefully spread the remaining brownie batter over the top. Add the remaining biscoff cookie pieces for topping, then dollop on the remaining cookie butter and swirl it into the top layer.
- Bake for 35-43 minutes. The brownies are done when the edges appear set and a toothpick inserted into the edges comes out clean. When a toothpick is inserted into the center, it should pull out moist fudgy crumbs, not wet batter.
- Serve & Store: Let the brownies rest in the pan for about 30-40 minutes before attempting to slice. For cleaner cuts, allow them to cool completely before slicing and serving. Store cooled brownies in an airtight container at room temperature for 3-4 days or in the fridge for 5-6 days.
Nutrition
Nutrition information is automatically calculated and should only be used as an approximation.
Serving: 1 slice
- Calories: 636 kcal
- Carbohydrates: 86g
- Protein: 8g
- Fat: 31g
- Saturated Fat: 16g
- Polyunsaturated Fat: 1g
- Monounsaturated Fat: 7g
- Trans Fat: 1g
- Cholesterol: 124mg
- Sodium: 361mg
- Potassium: 264mg
- Fiber: 4g
- Sugar: 59g
- Vitamin A: 596IU
- Calcium: 53mg
- Iron: 3mg