
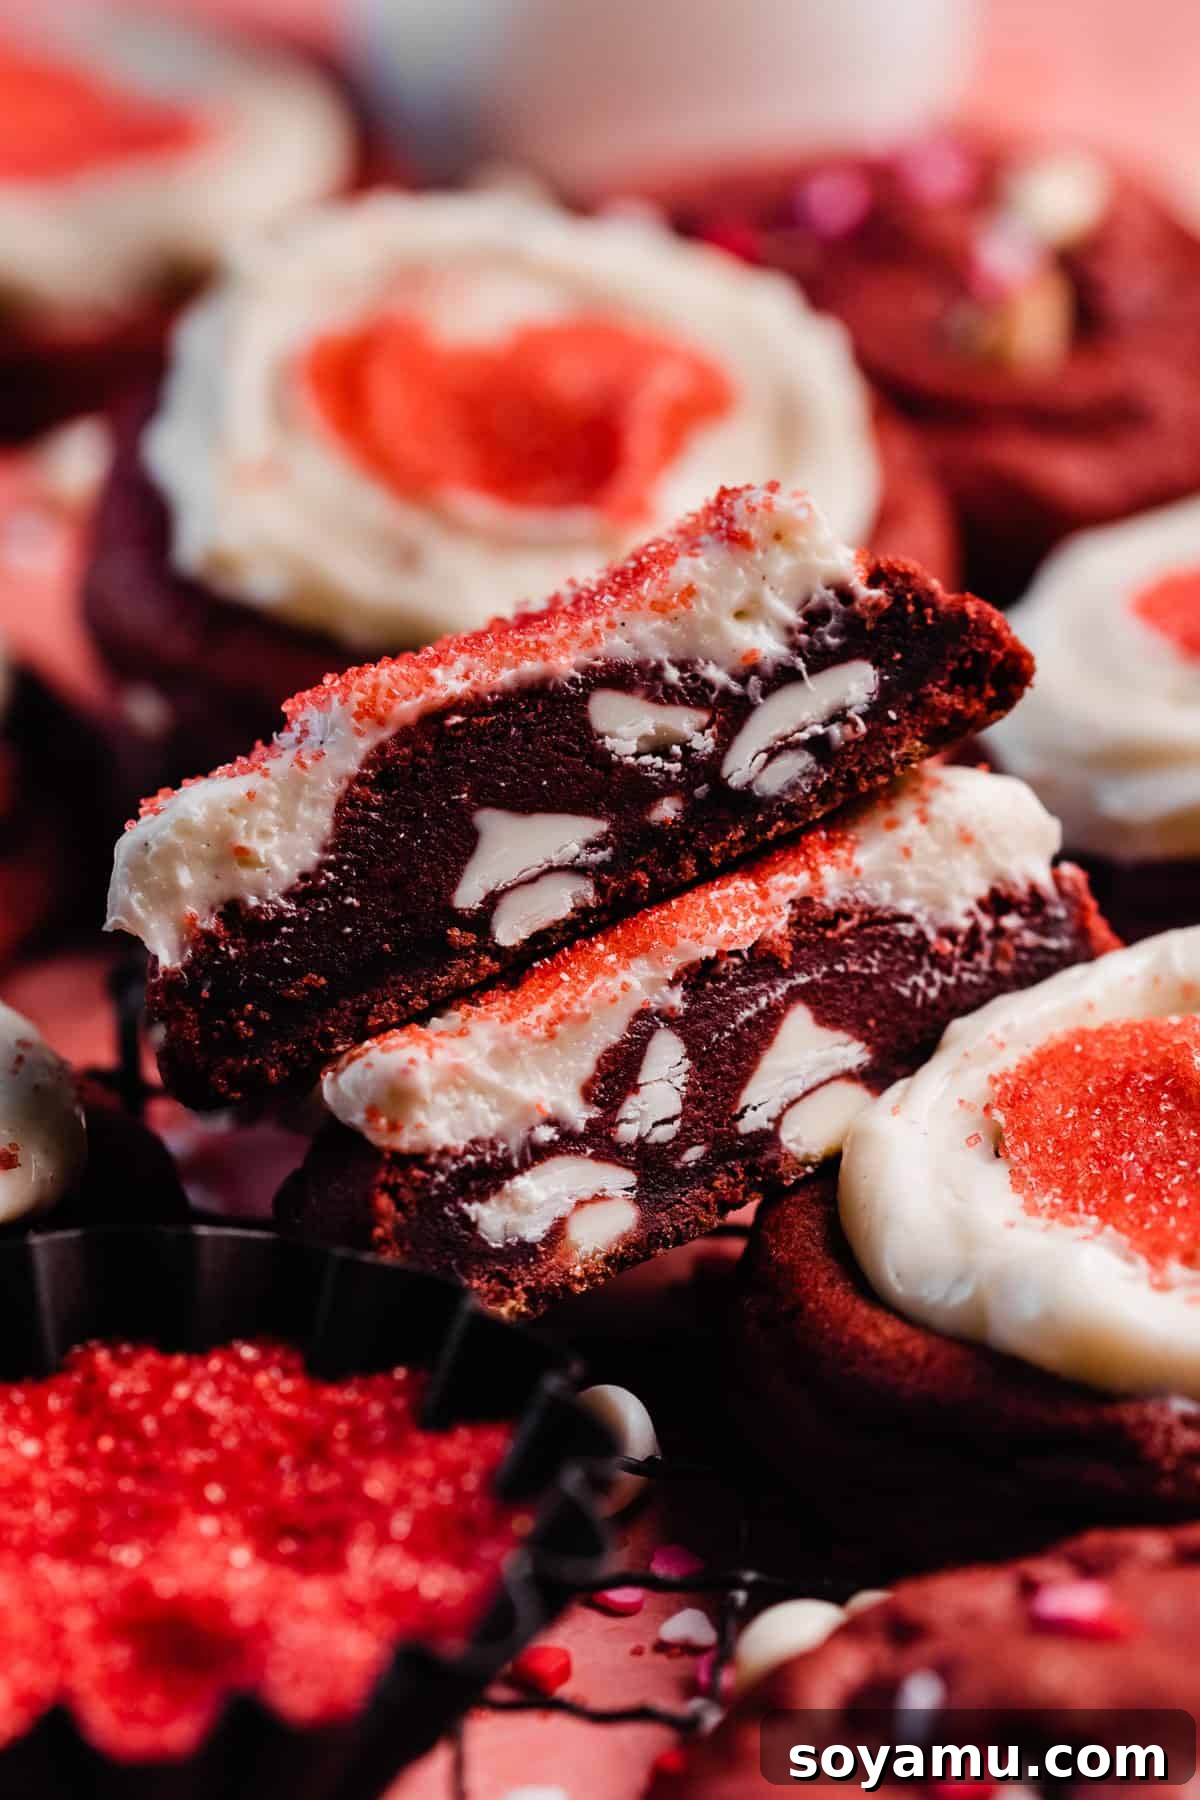
Red Velvet Cookies are a delightful dream come true for any dessert lover. Imagine sinking your teeth into a thick, ultra-fudgy cookie, generously studded with sweet white chocolate chips, and elegantly topped with the silkiest, most heavenly cream cheese frosting you’ve ever tasted. This isn’t just another cookie recipe; it’s a culinary experience designed to bring pure joy to your palate. Our unique split baking temperature technique is the secret weapon, guaranteeing authentic bakery-style cookies every time – a crisp exterior giving way to an incredibly soft, moist, and fudgy interior that retains its perfect texture even after cooling completely. Get ready to impress with these irresistibly beautiful and delicious treats!

Why You’ll Fall in Love with These Easy Red Velvet Cookies
Prepare to add these incredible Red Velvet Cookies to your permanent baking repertoire. They are more than just a sweet treat; they’re a celebration of flavor and texture, designed for maximum enjoyment with minimal fuss. Here’s why these cookies will become your new favorite:
- Unrivaled Chewy and Fudgy Texture: A truly great red velvet cookie should offer a delightful contrast of textures. This recipe delivers exactly that – a cookie that boasts a subtle crispness around the edges, yielding to an incredibly thick, wonderfully chewy, and almost fudgy center. Each bite offers a satisfying richness, complemented by the perfect balance of a subtle cocoa flavor and that signature tangy hint. The baked-in white chocolate chips melt perfectly, adding pockets of creamy sweetness that elevate the experience to pure bliss.
- Accessible and Simple Ingredients: We believe exceptional baking shouldn’t require a scavenger hunt for rare components. This recipe relies predominantly on common pantry staples that you likely already have on hand, or can easily find at any local grocery store. From butter and sugar to flour and eggs, these simple ingredients come together to create something truly extraordinary, proving that gourmet taste doesn’t have to mean complicated shopping.
- Dreamy Silky Cream Cheese Frosting: What’s red velvet without its iconic cream cheese frosting? Our recipe features a luscious, silky-smooth cream cheese frosting that is both tangy and sweet, striking the perfect chord against the cookie’s subtle chocolate notes. It’s light, airy, and utterly addictive, transforming these cookies into a taste experience that perfectly mimics a classic red velvet cake, but in a convenient, handheld form.
- Effortless and Charming Decoration: You don’t need to be a professional baker to make these cookies look absolutely stunning. We’ve included a genius decorating hack using a mini heart cookie cutter as a stencil for red sprinkles, making it incredibly easy to create festive, picture-perfect cookies. This simple trick is ideal for special occasions like Valentine’s Day, anniversaries, or just to add a touch of love to your everyday baking. And if you’re truly short on time, they’re equally delicious unfrosted, or you can check out our even simpler Fudgy Red Velvet Brownies for a no-decoration delight!

Ingredient Overview for Perfect Red Velvet Cookies:
Crafting these exceptional Red Velvet Cookies starts with understanding the role each ingredient plays. Below is a closer look at the key components that contribute to their incredible flavor and texture. Remember, precision in baking is key, so always refer to the full recipe card at the bottom of this post for exact measurements and detailed instructions.
- Butter: For the most robust and satisfying flavor, we consistently recommend using salted butter in our recipes. The hint of salt truly enhances the overall taste profile of the cookies. However, if unsalted butter is your preference or what you have on hand, simply add an extra pinch of salt to the dry ingredients to achieve a similar flavor balance. Ensure your butter is properly melted and then slightly cooled as instructed for optimal dough consistency.
- All-Purpose Flour: The foundation of our chewy cookies, all-purpose flour needs to be measured precisely. Avoid scooping your measuring cup directly into the flour bag, as this compacts the flour and can lead to an excess amount, resulting in dry, dense cookies. For best results, spoon the flour lightly into your measuring cup, then level it off with a flat utensil. Even better, for professional-level accuracy, use a digital kitchen scale to weigh your flour.
- Gel Food Coloring: Achieving that iconic, deep red hue is crucial for red velvet. Forget the liquid food coloring found in standard grocery aisles; it’s too diluted and can thin out your cookie dough, affecting its texture. Instead, opt for high-quality gel food coloring. Its concentrated pigment means you only need a few drops to achieve a vibrant, rich red without altering the dough’s consistency.
- Sugar (Granulated & Brown): The magic behind the perfect cookie texture often lies in the sugar blend. Our recipe uses a combination of granulated sugar and light brown sugar. Granulated sugar provides crispness and helps with spread, while brown sugar, with its molasses content, contributes to the cookies’ chewiness, fudgy texture, and rich, moist interior. This duo ensures a balanced sweetness and ideal cookie structure.
- Cocoa Powder: Essential for the “velvet” in red velvet, cocoa powder provides that subtle, distinctive chocolate flavor without overpowering the other notes. It also plays a role in the overall color. Using good quality unsweetened cocoa powder will make a noticeable difference.
- Eggs: Eggs act as binders and add richness, moisture, and structure to the cookies. Ensure they are at room temperature, as this allows them to incorporate more easily and evenly into the wet ingredients, leading to a smoother dough and better final texture.
- White Vinegar: This might seem like an unusual addition, but white vinegar is key to the traditional red velvet tang and helps to activate the baking soda, contributing to the cookie’s lift and tenderness. Don’t skip it!
Exciting Red Velvet Cookie Recipe Variations:
While the classic Red Velvet Cookie with Cream Cheese Frosting is pure perfection, sometimes it’s fun to experiment! Here are a few ways you can adapt this recipe to suit different dietary needs, flavor preferences, or decorative desires:
- Dairy-Free Adaptation: For those following a dairy-free diet, these cookies can be easily adapted. Simply substitute your favorite trusted brand of dairy-free butter and dairy-free cream cheese. Many high-quality plant-based alternatives are available today that will yield excellent results, maintaining the rich flavor and creamy texture you expect from red velvet treats.
- Gluten-Free Exploration: While this specific recipe hasn’t been personally tested with gluten-free flour, we’ve had great success with readers adapting many of our other cookie recipes using a 1:1 gluten-free all-purpose flour blend, such as Bob’s Red Mill. If you decide to try a gluten-free version, ensure your chosen blend contains xanthan gum (or add it separately) to help with structure, and be mindful that slight adjustments to liquid or baking time might be necessary.
- Custom Chocolate Chip Choices: The recipe calls for white chocolate chips, which perfectly complement the tangy cream cheese frosting and offer a delightful flavor contrast within the fudgy red velvet base. However, feel free to customize! We’ve made these cookies plain for a simpler taste, and with semisweet chocolate chips for a more pronounced chocolate flavor. If white chocolate isn’t your favorite, omitting them entirely or swapping for semisweet, milk chocolate, or even dark chocolate chips will still result in a fantastic cookie. Experiment to find your ultimate combination!
- Elegant White Chocolate Drizzle: If you prefer a lighter topping or need to store your cookies at room temperature, a melted white chocolate drizzle is a fantastic alternative to cream cheese frosting. To prepare, melt approximately 2/3 cup of white chocolate chips or melting wafers in a microwave-safe bowl. Heat in 20-second intervals, stirring thoroughly after each, until almost fully melted. Continue stirring vigorously; the residual heat will melt the remaining bits. For a smoother, drizzly consistency, stir in 1-2 teaspoons of vegetable oil. This makes for an equally beautiful and delicious presentation, and cookies decorated this way can be stored at room temperature without worry.
How to Master Making These Delicious Red Velvet Cookies:
Creating these thick, fudgy Red Velvet Cookies is a straightforward and rewarding process. Follow these detailed steps to ensure bakery-quality results every single time.
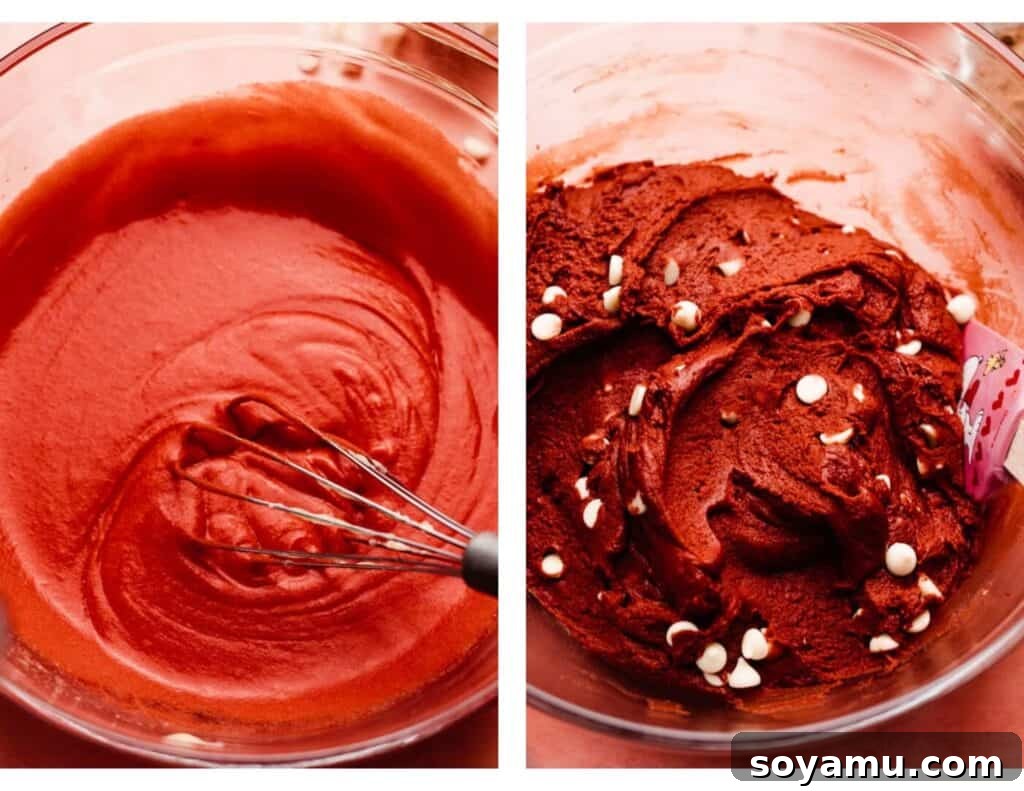
Step 1: Prepare the Irresistible Cookie Dough. Begin by melting your butter in a large mixing bowl, then allow it to cool slightly for 5-10 minutes. This cooling step is important to prevent cooking the eggs prematurely. Once cooled, add both granulated and light brown sugars to the melted butter and whisk vigorously until they are well combined and smooth. Next, incorporate the room-temperature eggs, vanilla extract, and white vinegar. Whisk for about 30-45 seconds until the mixture is fully emulsified and smooth. Now for the signature color: add 4-7 drops of red gel food coloring. Whisk it in thoroughly; you’ll notice a vibrant red hue that will become slightly muted once the dry ingredients are introduced. Finally, gradually stir in the dry ingredients – the all-purpose flour, cocoa powder, baking soda, baking powder, and salt. The dough might seem a bit stiff and reluctant to come together at first, requiring some arm power. Keep mixing, and it will eventually form a cohesive dough. Stir in the white chocolate chips last, distributing them evenly throughout the dough. You can use a stand mixer with a paddle attachment for this step if you prefer ease over elbow grease!
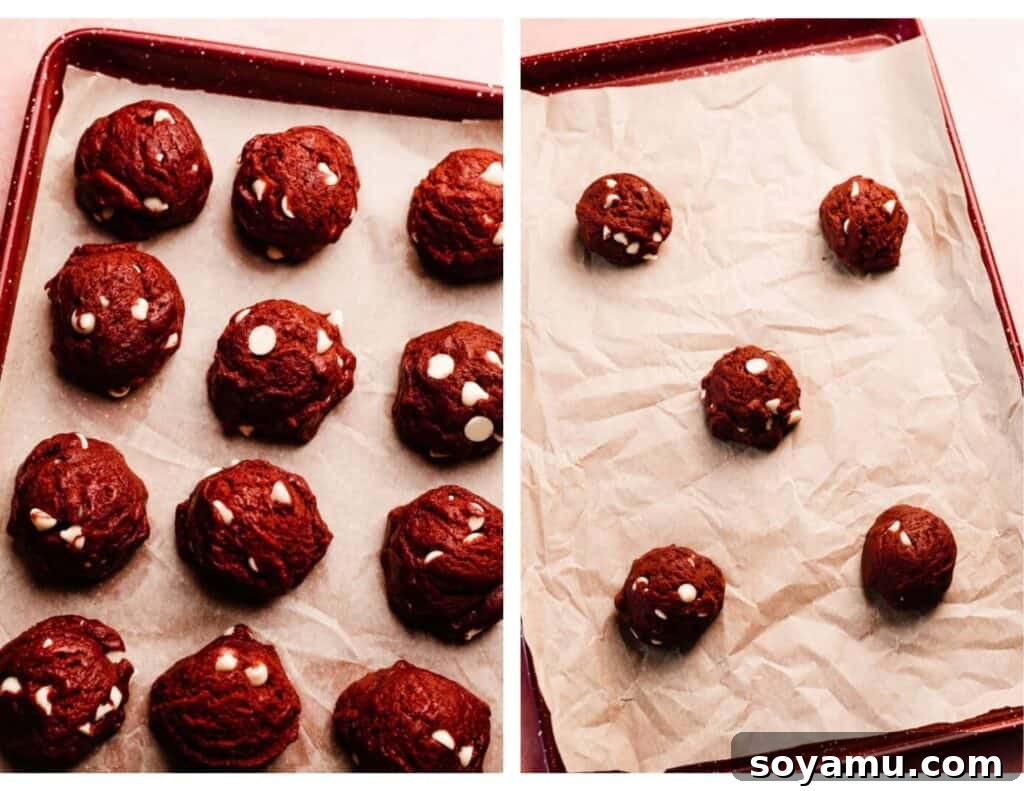
Step 2: Chill the Cookie Dough for Perfect Texture. Once your dough is mixed, it’s time to prepare it for baking and ensure that perfect thick, chewy texture. Scoop the dough into uniform balls, aiming for about 65 grams each, which is approximately 2.5 tablespoons. This consistency in size ensures even baking. Arrange the cookie dough balls in an airtight container lined with parchment paper to prevent sticking. Place the container in the refrigerator to chill for a minimum of 2 hours. Chilling the dough is a crucial step that prevents the cookies from spreading too much in the oven, concentrating their flavor, and contributing to that desirable chewy, fudgy texture. If you’re planning ahead, the dough can be refrigerated for up to 2 days or frozen for up to 2 months. When baking from frozen, simply add an extra 1-2 minutes to the second part of the baking time.
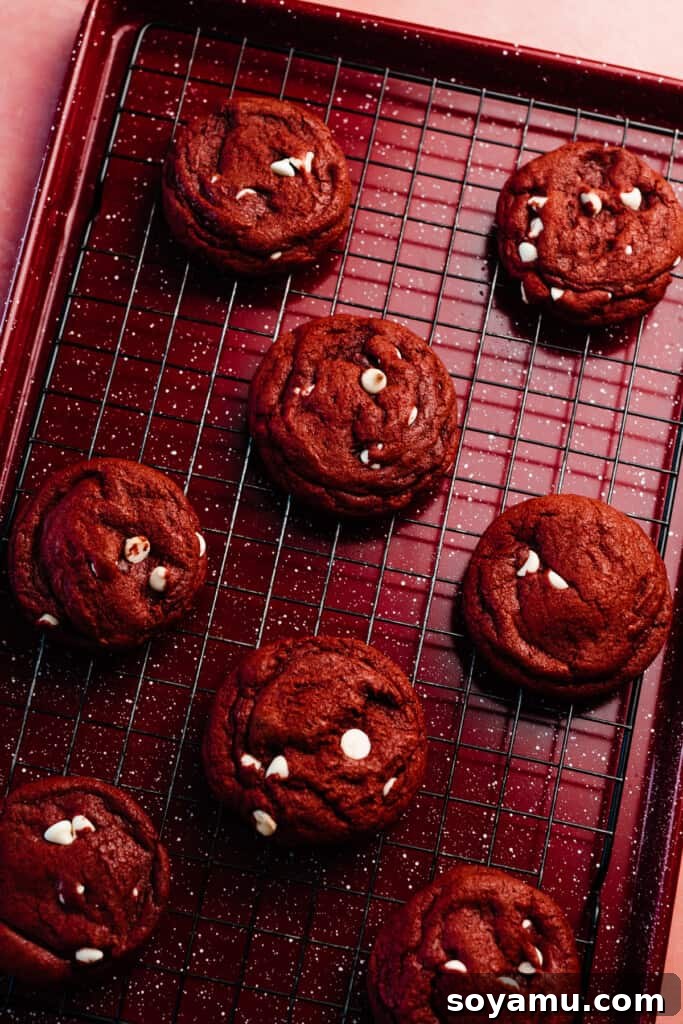
Step 3: Bake to Bakery-Style Perfection. Preheat your oven to 400°F (200°C). Arrange 5-6 chilled cookie dough balls on a baking sheet lined with parchment paper, ensuring enough space between each for spreading. We recommend baking one sheet at a time for optimal results. The secret to a truly bakery-style cookie with a crisp exterior and a fudgy, soft interior lies in our split baking temperature trick: Bake the cookies for the initial 4 minutes at 400°F. Immediately after, reduce the oven temperature to 365°F (185°C) and continue baking for another 4 to 5 minutes. The edges of the cookies should appear and feel just set, and the tops will look mostly set but still slightly soft in the center. For perfectly round cookies, as soon as they emerge from the oven, use a round cookie cutter or an upside-down glass slightly larger than the cookie to gently swirl around each cookie. This coaxes any uneven edges back into a beautiful circular shape. Once baked, let the cookies cool on the baking sheet for about 10 minutes, allowing them to firm up slightly. Then, transfer them to a wire rack to cool completely before frosting. Or, if you can’t wait, enjoy them warm after a 10-15 minute cool-down period!
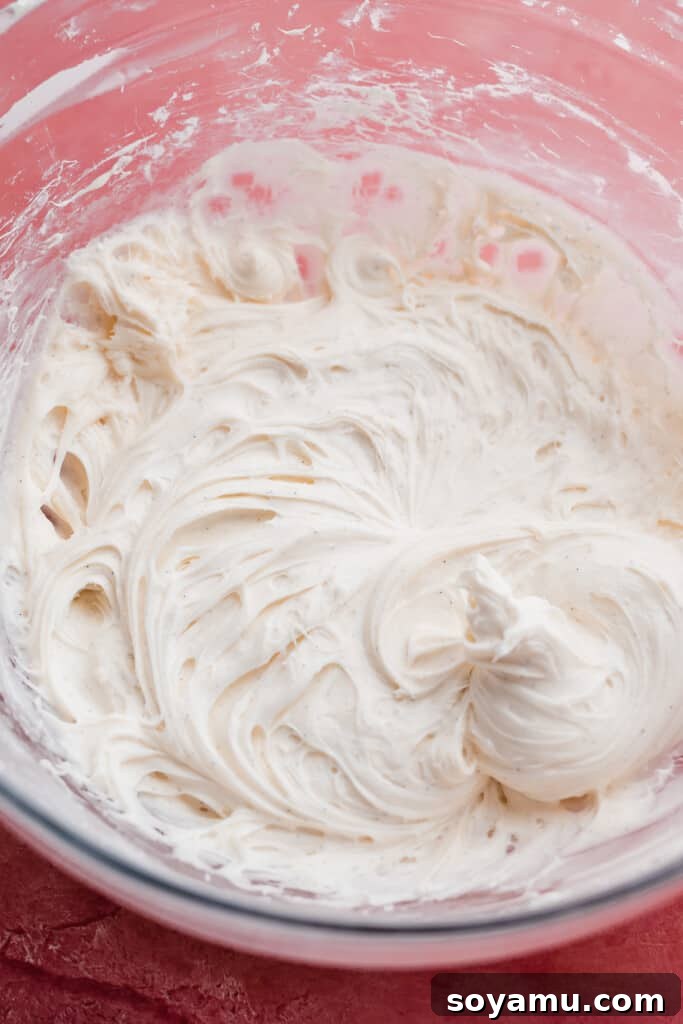
Step 4: Craft the Silky Cream Cheese Frosting. While your cookies are cooling, prepare the star topping: the cream cheese frosting. In a medium bowl, combine softened salted butter, softened cream cheese, powdered sugar, vanilla extract, and a tiny pinch of salt. Using an electric mixer (handheld or stand mixer), beat these ingredients together on medium speed until the mixture is beautifully smooth, light, and creamy. It’s important not to overmix the frosting, as this can make it too thin or “weepy.” If your frosting does become a bit too soft, simply pop the bowl into the refrigerator or freezer for a few minutes to allow it to firm up quickly before proceeding. The goal is a spreadable, luxurious consistency.
Step 5: Decorate Your Red Velvet Masterpieces. Once your cookies are completely cooled (this is critical, as warm cookies will melt the frosting!), it’s time for the fun part: decorating! Using a small cookie scoop or a spoon, place a dollop of cream cheese frosting onto the center of each cookie. Then, take an offset spatula (this tool makes frosting incredibly easy!) and gently spread the frosting outwards, leaving a small border of the red cookie visible around the edges. For that charming, festive touch, carefully place a small heart-shaped cookie cutter directly onto the center of the frosted cookie. Fill the inside of the cookie cutter with vibrant red sanding sugar sprinkles. Gently tap off any excess sprinkles before carefully lifting the cookie cutter straight up. This leaves behind a perfectly shaped sprinkle heart, making each cookie a delightful work of art. Repeat for all your beautiful cookies, and get ready to enjoy the admiration!

Serving and Storing Your Red Velvet Delights:
These delectable Red Velvet Cookies are best enjoyed fresh, but they also store beautifully. Once frosted, the cookies are ready to be savored immediately. For optimal freshness and safety, any frosted cookies must be stored in an airtight container in the refrigerator. They will maintain their deliciousness and texture for 4-5 days. The chilling of the frosting is essential to keep it firm and delicious. If you have any unfrosted cookies, you can store them in an airtight container at room temperature for 3-4 days. This makes them a versatile treat for planning ahead or for enjoying over several days. They make fantastic gifts for the holidays, party favors, or simply a sweet indulgence for yourself and your loved ones. Alongside treats like our Homemade Black Forest Chocolate Truffles, these red velvet cookies are sure to be a hit at any gathering.
Expert Success Tips for Flawless Red Velvet Cookies:
Achieving bakery-quality Red Velvet Cookies is easier than you think with these professional tips and tricks:
- Invest in an Oven Thermometer: Many home ovens are not calibrated accurately, meaning the temperature you set might not be the actual temperature inside. An oven thermometer is an inexpensive tool that provides an accurate reading of your oven’s internal temperature, which is absolutely critical for consistent baking results. Leaving one in your oven at all times allows you to monitor its calibration and make adjustments as needed, ensuring your cookies bake perfectly every time.
- The Magic of Split Temperature Baking: This is our secret weapon for achieving that coveted bakery-style texture. By baking the cookies for the first 4 minutes at a higher temperature of 400°F (200°C), you quickly set the exterior, creating a slightly crisp shell. Then, immediately dropping the temperature to 365°F (185°C) for the remaining 4-5 minutes allows the interior to continue baking more gently, resulting in a soft, moist, and fudgy center. This two-stage process yields a superior contrast of textures that truly elevates the cookie.
- Embrace the Precision of a Kitchen Scale: For truly consistent baking, especially with flour, a food scale is your best friend. The weight of flour can vary dramatically depending on how it’s measured (scooped vs. spooned and leveled), and even different measuring cups can have slight variations. Using a scale to measure your flour by weight ensures you’re adding the exact amount specified in the recipe, preventing dry, dense cookies or overly spread ones.
- Choose Gel Food Coloring Over Liquid: To achieve that rich, deep red color without compromising the cookie dough’s consistency, always use red gel food coloring. Standard liquid food coloring is much less concentrated, meaning you’d need to add a significant amount (sometimes half a bottle!) to get a vibrant hue. This excess liquid can drastically alter the moisture content of your dough, leading to overly thin or spread-out cookies. Gel coloring, being highly concentrated, requires only a few drops to achieve a stunning, true red velvet shade.

Frequently Asked Questions (FAQs):
Absolutely! This versatile cookie recipe is very forgiving and scales beautifully. You can easily double the ingredients to bake a large batch for parties or holidays, or halve it if you’re only looking for a small batch to satisfy a craving. Just ensure you accurately adjust all ingredient measurements proportionally.
Red velvet flavor is uniquely delicious – it’s often described as a subtle, muted chocolate flavor with a distinctive tangy undertone. In our cookies, this tang comes from a touch of white vinegar, which reacts with the cocoa and baking soda to create that signature depth of flavor. It’s a delicate balance that is traditionally, and perfectly, complemented by a rich and tangy cream cheese frosting, just like we’ve done here!
The most common reason for a dull red velvet color is using liquid food coloring instead of gel. Liquid food coloring is less concentrated, requiring a large amount that can dilute your dough and still not yield a vibrant hue. Always opt for a high-quality gel food coloring; a few drops are often enough to achieve a deep, rich red without impacting the cookie’s texture.
Yes, both the cookie dough and baked cookies can be frozen! For dough, scoop into balls and freeze in an airtight container for up to 2 months. Bake directly from frozen, adding a couple of extra minutes to the bake time. Frosted cookies should not be frozen, as the frosting texture can change. Unfrosted baked cookies can be frozen in an airtight container for up to 1 month; thaw at room temperature before frosting.

Special Tools to Elevate Your Red Velvet Cookies:
While many of these tools are standard kitchen items, a few specialized pieces can truly enhance your baking and decorating experience for these Red Velvet Cookies:
- High-Quality Red Gel Food Coloring: As mentioned in our expert tips, this is a non-negotiable for achieving that iconic deep red hue. Unlike watery liquid food coloring, a good deep red gel food coloring is intensely concentrated, meaning you’ll only need a few drops to get a vibrant, true red without adding unnecessary liquid to your dough. This particular one comes in a convenient dropper bottle for precise control.
- Small Heart Cookie Cutter Set: Our clever decorating trick relies on a small cookie cutter to create the perfect sprinkle stencil. We used the smallest heart from this versatile set of heart cookie cutters. Beyond these red velvet cookies, you’ll find endless uses for the other sizes – for instance, they’re perfect for making our Raspberry Lemon Heart Sugar Cookies!
- Vibrant Red Sprinkles (Sanding Sugar): To make those adorable heart designs pop, we recommend using red sanding sugar sprinkles. The coarse texture and sparkling finish of sanding sugar provide a beautiful contrast to the smooth frosting. Of course, you can get creative – pink sprinkles, mixed sprinkles, or even different colored sanding sugars can be used to suit your occasion!
- Offset Spatula: This handy little tool is a game-changer for frosting cookies and cakes with ease and precision. An offset spatula allows you to spread frosting smoothly and evenly without your knuckles dragging through the frosting. It’s also fantastic for spreading batters in pans or leveling off ingredients.

Explore More Unique Cookie Recipes:
If you’re a cookie enthusiast like us, you’ll love diving into these other creative and delicious cookie recipes:
- Magical Butterbeer Cookies with Salted Butterscotch Frosting
- Sweet and Spiced Peach Cobbler Cookies
- Festive Birthday Cheesecake Stuffed Funfetti Cookies
- The Best Ever Eggless Chocolate Chip Cookies
- Warm Caramel Apple Cider Cookies
- Decadent Black Forest Cookies
Did you whip up these incredible Red Velvet Cookies? We’d love to hear from you!
Please take a moment to leave a comment and a star rating below! Simply click on the little stars in the header of the recipe card to share your feedback. Your honest reviews help our small business immensely and let us know how much you enjoyed the recipe!

Red Velvet Cookies with Cream Cheese Frosting
Rate
Ingredients
For the Cookies
- 1/2 cup 7 tbsp salted butter, melted & cooled slightly, 211 grams, or 15 tbsp
- 3/4 cup granulated sugar, 156 grams
- 3/4 cup light brown sugar, packed, 163 grams
- 2 large eggs, at room temperature
- 1 and 1/2 tsp vanilla extract
- 2 tsp white vinegar, 10 mL
- 4-7 drops red gel food coloring
- 2 and 3/4 cups + 2 tbsp all-purpose flour, spooned & leveled or weighed out, 374 grams
- 1/4 cup cocoa powder, 22 grams
- 1 tsp baking soda
- 1 tsp baking powder
- 1/2 tsp salt
- 1 cup white chocolate chips
For the Cream Cheese Frosting
- 1/4 cup salted butter, softened at room temperature, 57 grams
- 8 ounces cream cheese, 226 grams
- 2 cups powdered sugar, 230 grams
- 1 tbsp vanilla extract
- pinch of salt
For Decorating
- 1 small heart cookie cutter
- red sanding sugar sprinkles
Instructions
-
Make Cookie Dough: Melt butter in a large mixing bowl and allow it to cool for 5-10 minutes. Add both granulated sugar and light brown sugar, whisking well until fully combined. Incorporate the room-temperature eggs, vanilla extract, and white vinegar, whisking for 30-45 seconds until smooth. Stir in the red gel food coloring until a vibrant red color is achieved. Finally, add the all-purpose flour, cocoa powder, baking soda, baking powder, and salt. Mix until just combined, then fold in the white chocolate chips. The dough will be thick and may require some effort to bring together.
-
Scoop & Chill: Scoop the dough into uniform balls, each weighing about 65 grams (approximately 2.5 tbsp). Place the dough balls in an airtight container lined with parchment paper to prevent sticking. Refrigerate for at least 2 hours, or for up to 2 days. For longer storage, freeze the dough balls for at least 30 minutes, or up to 2 months. Bake frozen dough by adding 1-2 minutes to the second part of the bake time.
-
Bake Cookies: Preheat your oven to 400 ℉. Place 5-6 cookie dough balls on a parchment paper-lined baking sheet, ensuring adequate spacing. Bake for 4 minutes at 400 ℉. Then, reduce the oven temperature to 365 ℉ and continue baking for another 4 to 5 minutes. The cookies should have set edges and tops that appear mostly firm but still slightly soft in the center. For perfectly round cookies, immediately after removing them from the oven, use a slightly larger round cookie cutter or an upside-down glass to gently swirl around each cookie, shaping any uneven edges. Let cool on the baking sheet for 10 minutes before transferring to a wire rack to cool completely.
-
Make Cream Cheese Frosting: In a medium bowl, beat together the softened salted butter, cream cheese, powdered sugar, vanilla extract, and a pinch of salt until the frosting is smooth, creamy, and well combined. Be careful not to overmix, as this can make the frosting too thin. If it becomes a bit too soft, place it in the refrigerator for a short period to firm up before use.
-
Decorate Cookies: Once the cookies are completely cooled, drop a small ball of frosting onto each cookie using a cookie scoop or spoon. Use an offset spatula to gently spread the frosting evenly across the top, leaving a small edge of the cookie visible. To create the heart design, place a small heart cookie cutter in the center of the frosted cookie. Fill the inside of the cutter with red sanding sugar sprinkles. Gently tap off any excess sprinkles before carefully lifting the cookie cutter straight up to reveal a crisp heart shape.
-
Serve & Store: Enjoy your beautifully decorated Red Velvet Cookies immediately after frosting! If storing, transfer frosted cookies to an airtight container and refrigerate. They will stay fresh for 4-5 days. Unfrosted cookies can be kept in an airtight container at room temperature for 3-4 days.
Nutrition
Calories: 368kcal,
Carbohydrates: 53g,
Protein: 4g,
Fat: 16g,
Saturated Fat: 10g,
Polyunsaturated Fat: 1g,
Monounsaturated Fat: 4g,
Trans Fat: 0.3g,
Cholesterol: 56mg,
Sodium: 270mg,
Potassium: 108mg,
Fiber: 1g,
Sugar: 37g,
Vitamin A: 439IU,
Vitamin C: 0.1mg,
Calcium: 63mg,
Iron: 1mg
Nutrition information is automatically calculated, so should only be used as an approximation.
Enjoyed this recipe? Leave a comment below!