
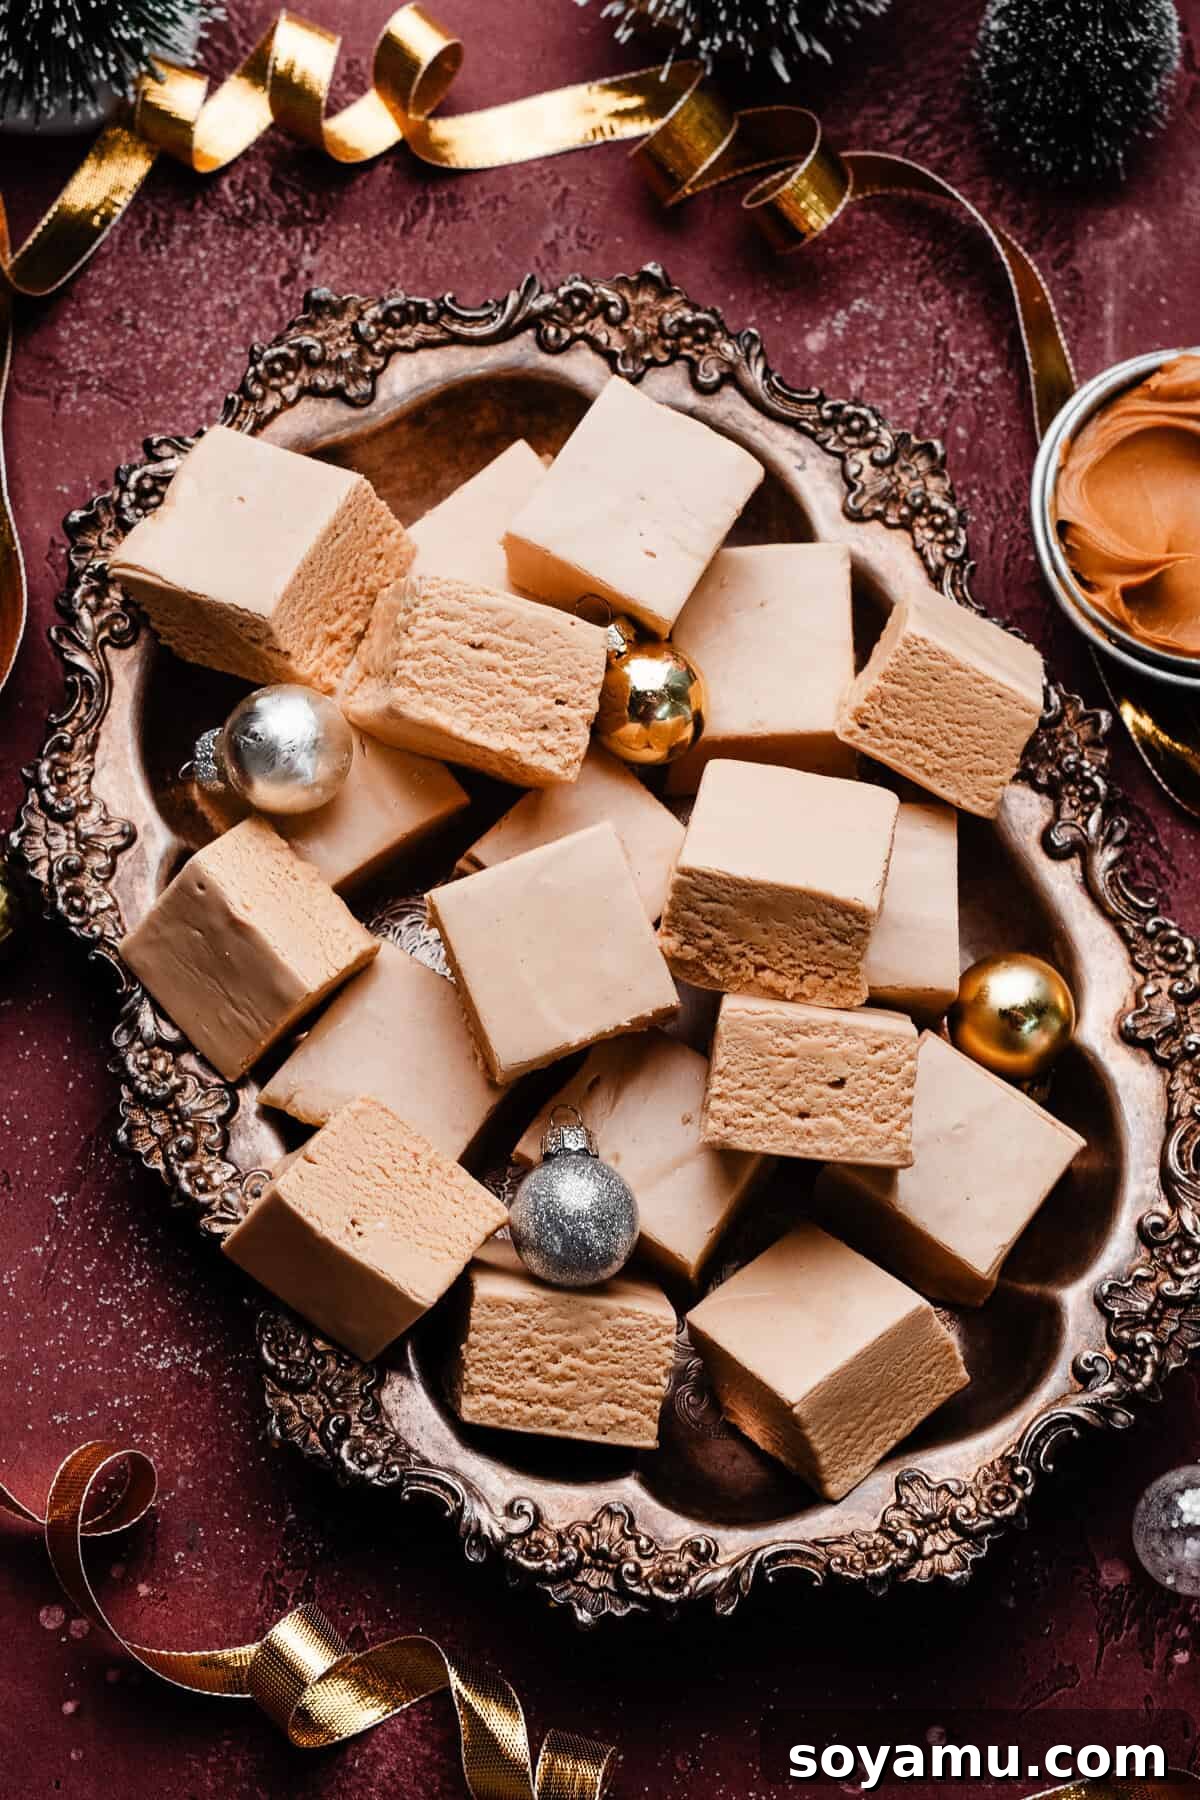
Grandma’s Famous Peanut Butter Fudge: An Easy, Foolproof Holiday Treat
Step into a world of nostalgic sweetness with our incredibly easy and utterly delicious Peanut Butter Fudge. This isn’t just any fudge recipe; it’s a cherished family secret, passed down from my Grandma, guaranteed to be the best-tasting peanut butter fudge you’ll ever experience. With its smooth, creamy texture and rich, irresistible peanut butter flavor, it’s the perfect addition to your Christmas cookie plates, holiday gatherings, or simply for satisfying that undeniable sweet tooth. Prepare to be amazed by how quickly and effortlessly this iconic confection comes together, making you a fudge-making superstar in just minutes!
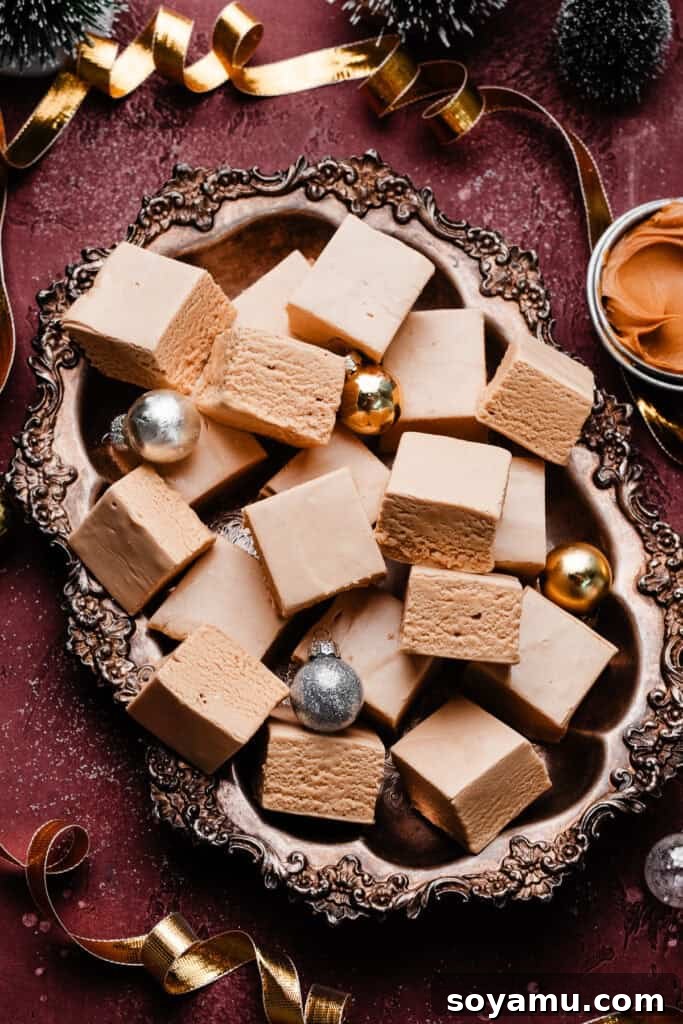
Why This Peanut Butter Fudge Recipe Will Become Your Go-To:
There are countless reasons why this particular peanut butter fudge recipe stands out and quickly becomes a family favorite. It expertly combines simplicity with exceptional taste, making it ideal for both seasoned candy makers and those new to the kitchen. Get ready to impress everyone with minimal effort!
- Unbelievably Easy & Quick: Forget complicated steps, temperamental sugar syrups, or lengthy baking times. This delightful fudge comes together on the stovetop in a mere 15 minutes of active cooking. It’s an absolute game-changer for those busy moments when you need a show-stopping dessert without the fuss, perfect for impromptu gatherings or last-minute holiday preparations.
- Minimal, Wholesome Ingredients: You won’t find any obscure or hard-to-find ingredients here! This recipe calls for just a handful of common pantry staples that you likely already have on hand: whole milk, granulated sugar, creamy peanut butter, marshmallow fluff, and a touch of pure vanilla extract. We deliberately skip the corn syrup and sweetened condensed milk, allowing the rich, authentic flavors to shine through naturally and keeping the ingredient list refreshingly short and sweet.
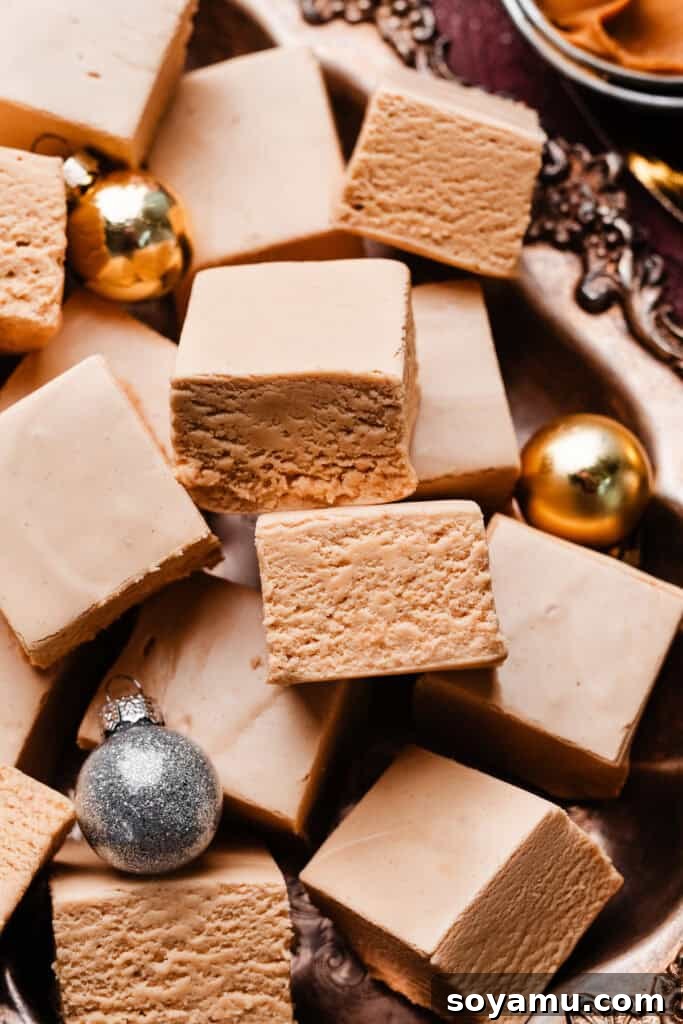
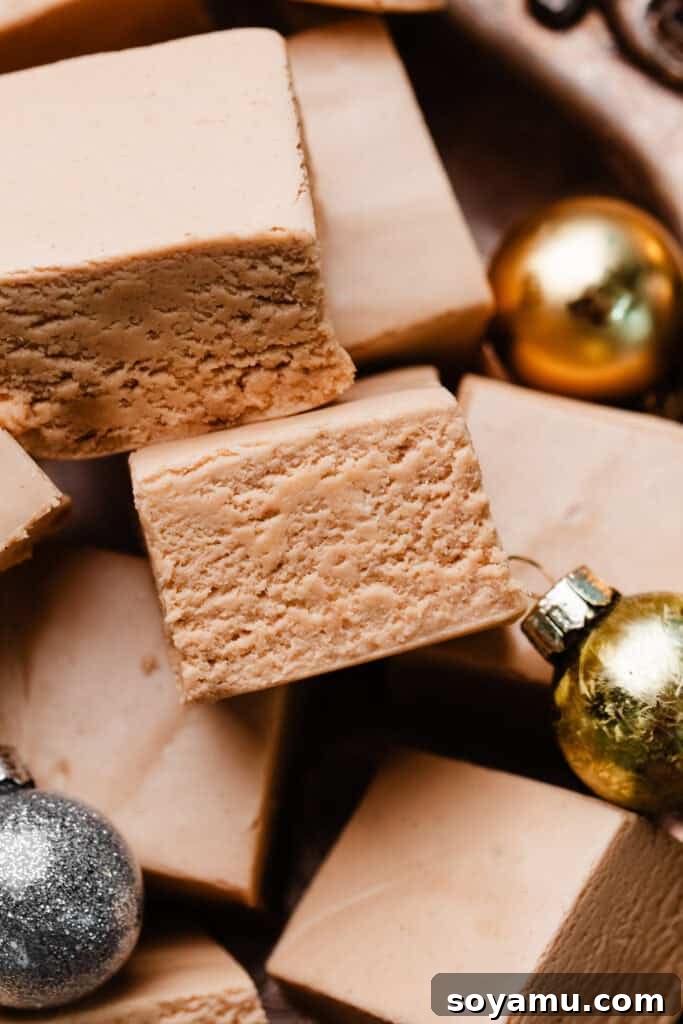
- Heavenly, Irresistible Texture: The secret to this fudge’s unparalleled, luxurious creaminess lies in the marshmallow fluff. This magical ingredient creates a uniquely smooth, melt-in-your-mouth texture that is never dry, crumbly, or overly firm. It provides a delightful lightness and an almost ethereal quality that truly elevates this fudge into a divine experience. If you haven’t tried a marshmallow fluff-based fudge yet, you are truly missing out on sheer heaven!
- Perfect for Holiday Prep & Gifting: Planning ahead for the notoriously busy holiday season? This peanut butter fudge is your ultimate answer! It’s incredibly sturdy and can be made well in advance, sliced, and stored in the refrigerator for 1-2 weeks, maintaining its perfect texture and flavor. For even longer freshness, it freezes beautifully for 3-6 weeks. This makes it an ideal candidate for thoughtful homemade gifts, festive cookie exchanges, and impressive dessert platters that everyone will rave about.
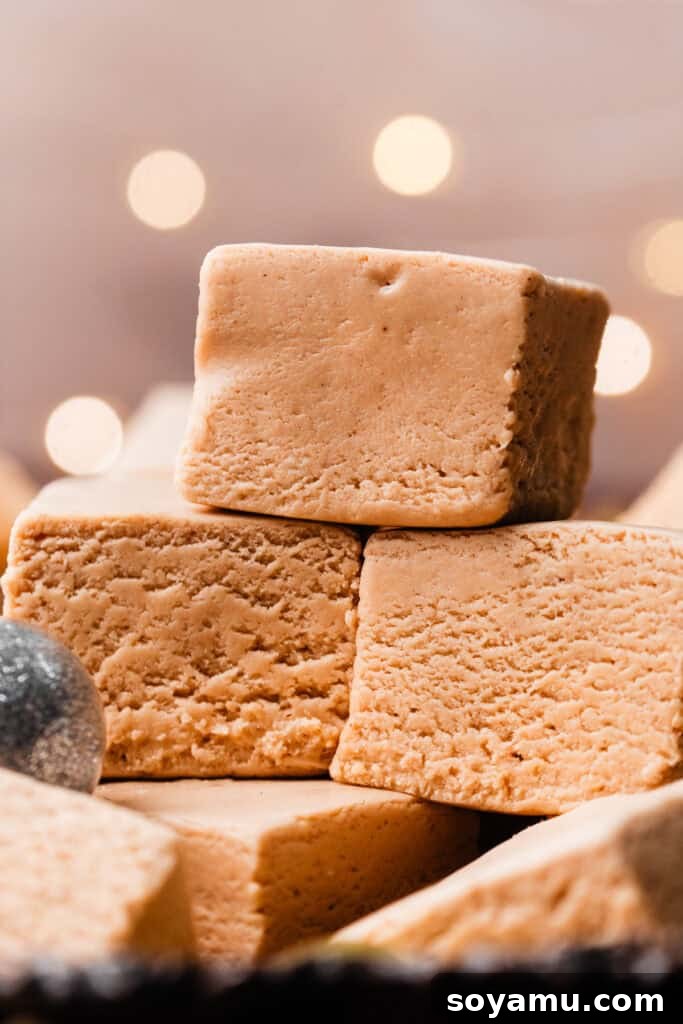
Key Ingredients for the Best Peanut Butter Fudge:
Crafting truly exceptional fudge starts with understanding your ingredients. While this recipe boasts a refreshingly short list, each component plays an indispensable role in achieving that signature smooth texture and rich, balanced flavor. Don’t be tempted to make substitutions unless explicitly noted, as candy making is a science that demands precision!
- Whole Milk: This is a critical ingredient and, frankly, non-negotiable. The higher fat content in whole milk is absolutely crucial for creating the fudge’s desired creamy, luxurious consistency and actively helps prevent a grainy, unappealing texture. Skim or 2% milk simply lack the necessary richness and fat to yield the same luscious results, so please stick to full-fat whole milk for this recipe – your fudge will thank you!
- Creamy Peanut Butter: For that perfectly smooth, melt-in-your-mouth fudge, creamy peanut butter (such as Jif or Skippy) is paramount. Natural peanut butter, with its inherent tendency for oil separation and often drier texture, can significantly alter the fudge’s final consistency, potentially leading to a greasier or harder, less desirable result. Similarly, crunchy peanut butter will introduce textural elements that deviate from the traditional smooth fudge experience. Opt for a classic, shelf-stable creamy variety for consistent perfection.
- Marshmallow Fluff (or Marshmallow Creme): If you’ve never experienced the transformative magic of marshmallow fluff in fudge, prepare to be utterly amazed! This ingredient is the undisputed secret to achieving an incredibly smooth, uniquely light, and truly melt-in-your-mouth texture that is simply divine. It acts as a stabilizer and provides a delightful, airy quality, making this fudge truly heavenly. Avoid substituting with actual marshmallows or other binders if you want the exact described superior texture and consistency.
- Granulated Sugar: As the primary sweetener, granulated sugar is the fundamental building block for any fudge recipe. Its crystalline structure, when dissolved and cooked to the precise temperature, forms the delicious candy matrix that defines fudge.
- Vanilla Extract: A splash of pure vanilla extract is more than just an accent; it’s a flavor enhancer. It deepens and rounds out all the other flavors, adding a wonderful warmth and aromatic complexity that beautifully complements the sweet and nutty profile of the peanut butter.
Recipe Adaptations & Creative Twists:
While we consistently recommend following the recipe precisely for optimal and consistent results, especially when venturing into the precise world of candy making, there are a few considerations for dietary needs and exciting flavor explorations once you’ve mastered the basic technique.
- Naturally Gluten-Free: Excellent news for those with dietary restrictions! This recipe is inherently gluten-free, making it a safe and deliciously indulgent option for individuals with gluten sensitivities or celiac disease. You can serve it with confidence at any gathering.
- Dairy-Free Considerations: Crafting successful dairy-free fudge can be a notoriously tricky endeavor. While some adventurous home bakers have experimented with dairy-free milks (like full-fat coconut milk or oat milk) and plant-based butter alternatives, candy-making processes are highly sensitive to precise fat, protein, and sugar ratios. We have not personally tested a dairy-free version of this specific recipe, so we cannot guarantee identical results. If you choose to experiment, please proceed with caution and understand that the final texture and set may vary significantly from the original.
- Strict Adherence for Initial Success: For your very first attempt, and indeed for any candy recipe, your absolute best bet for achieving the described perfect, smooth texture and rich flavor is to follow the recipe exactly as written. Once you’re comfortable and confident with the core technique and have successfully made the classic version, then feel free to unleash your creativity and experiment with the exciting variations outlined below!
Fun Variations & Flavor Enhancements to Try:
- Chocolate Swirl Perfection: For the ultimate peanut butter chocolate combination, melt about ½ cup of semi-sweet chocolate chips (or dark chocolate for a richer contrast). Drizzle the melted chocolate over the fudge immediately after pouring it into the pan, then use a skewer or knife to gently swirl it through the peanut butter fudge.
- Nutty Crunch Addition: If you enjoy a textural contrast, fold in about ½ cup of finely chopped peanuts, pecans, or walnuts along with the peanut butter in Step 3. This adds a delightful crunch to every creamy bite.
- Mini Chocolate Chip Delight: Stir in ½ to ¾ cup of mini chocolate chips (milk, dark, or semi-sweet) directly into the fudge mixture just before pouring it into the pan. The small chips distribute beautifully and add pockets of chocolatey goodness.
- Flaky Sea Salt Finish: For a sophisticated sweet and salty flavor profile, sprinkle a generous pinch of flaky sea salt (like Maldon) over the top of the fudge immediately after pouring and smoothing it in the pan. The salt crystals provide a delightful textural pop and enhance the peanut butter flavor.
- White Chocolate Drizzle: After the fudge has set and been sliced, melt some white chocolate and drizzle it decoratively over the top for an elegant finish and an extra layer of sweetness.
How to Make Old-Fashioned Peanut Butter Fudge: Your Step-by-Step Guide to Perfection
Making homemade fudge might sound like a daunting task, typically reserved for seasoned confectioners. However, with Grandma’s time-tested, foolproof method, it’s surprisingly simple and incredibly rewarding. The key to success lies in thorough preparation and working efficiently once the mixture reaches its critical temperature. Let’s walk through each step with detailed guidance to ensure your fudge turns out perfectly every single time.
Step 1: Prepare Your Pan and Gather All Ingredients (Mise en Place)
Before you even think about turning on the stove, get everything ready. This “mise en place” (everything in its place) approach is crucial for candy making. First, lightly spray an 8×8-inch baking pan with a good quality nonstick cooking spray. Next, line the pan with aluminum foil, making sure to leave a generous overhang on the sides – these will act as convenient “handles” for effortless fudge removal later. Butter the foil thoroughly and evenly; this creates a non-stick surface preventing any sticking. Now, measure out all your ingredients precisely and have them arranged neatly and within arm’s reach on your countertop. You’ll need a medium to large heavy-bottomed saucepan (to prevent scorching), a reliable instant-read thermometer, a sturdy wooden spoon for constant stirring, and two spatulas (one of which you should lightly spray with nonstick spray – this clever trick makes handling the incredibly sticky marshmallow fluff a breeze!).
Step 2: Boil Milk and Sugar to the Critical Soft Ball Stage
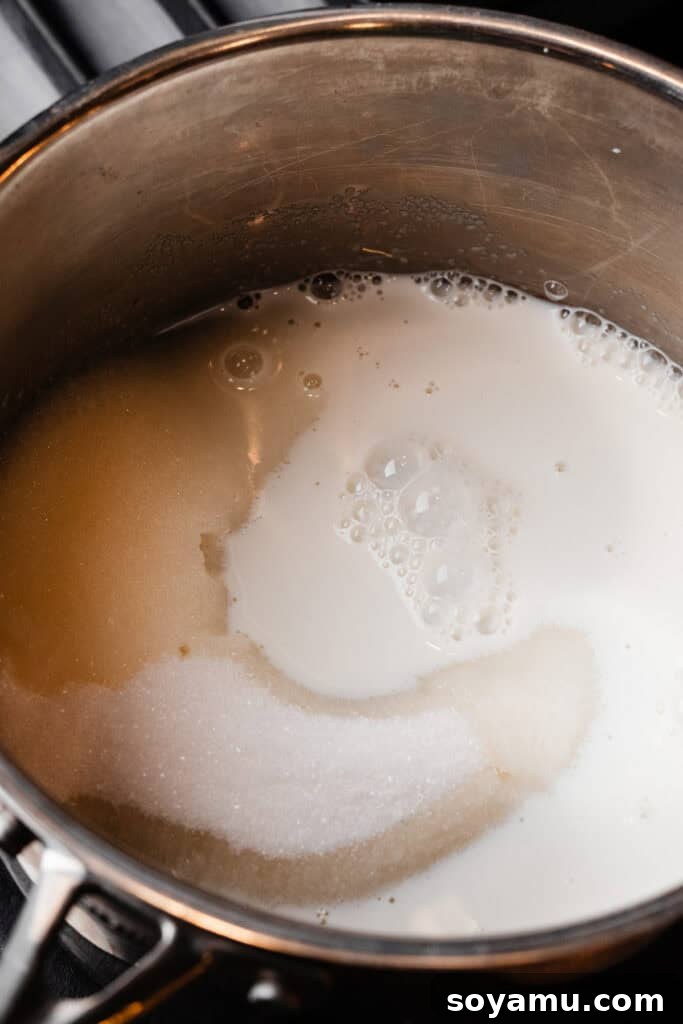
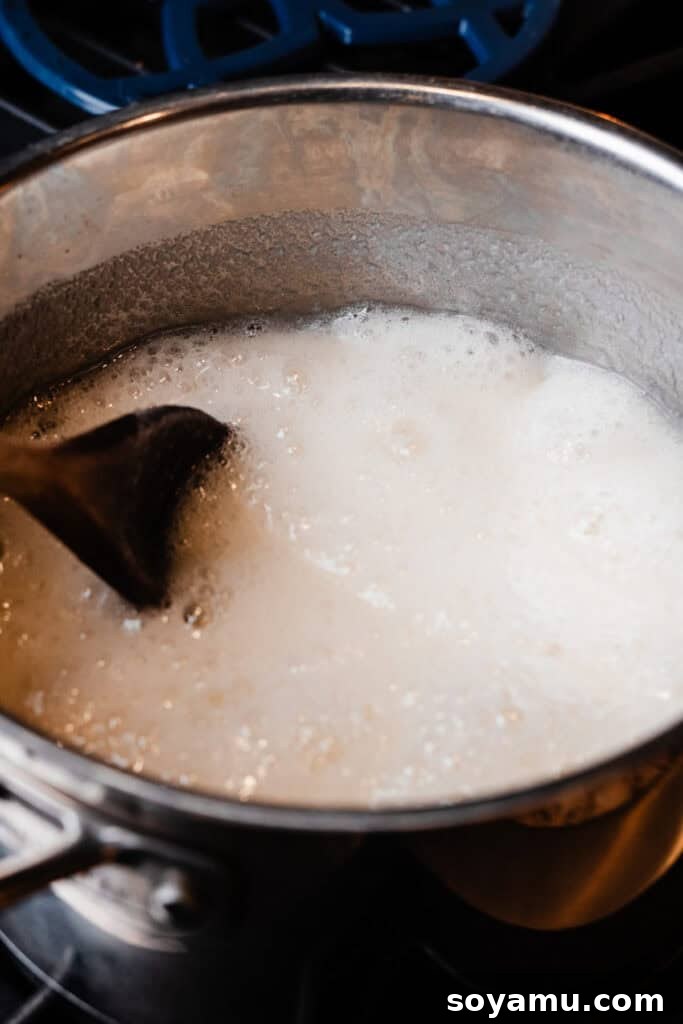
In your prepared heavy-bottomed saucepan, combine the granulated sugar and the essential whole milk. Place the saucepan over medium-high heat. Begin stirring constantly and diligently. This continuous stirring is absolutely crucial for two main reasons: it prevents the sugar from scorching and sticking to the bottom of the pan, and it ensures that the sugar dissolves evenly, preventing premature crystallization. Attach your instant-read thermometer to the side of the pot, making sure the tip is submerged in the mixture but doesn’t touch the bottom of the pan. Continue to cook and stir until the mixture reaches precisely 235 degrees Fahrenheit (113 degrees Celsius). This specific temperature corresponds to the “soft ball stage” in candy making, a point where a small amount of the hot syrup dropped into cold water forms a soft, pliable ball. Do not let the temperature go beyond this mark, as even a few degrees higher can result in dry, crumbly, or overly hard fudge.
Step 3: Incorporate Peanut Butter, Vanilla, and Marshmallow Creme – The Magic Blend
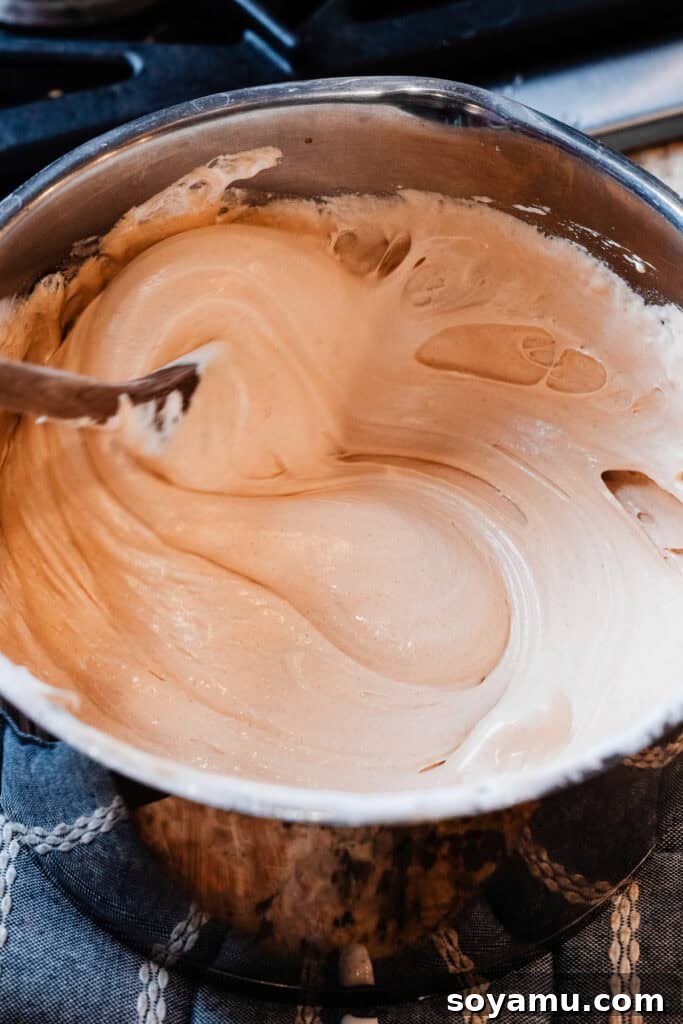
As soon as the mixture hits that precise 235°F, remove the saucepan from the heat immediately. This step demands swift and decisive action. Without any delay, add the creamy peanut butter, the pure vanilla extract, and the entire jar of marshmallow creme into the piping hot sugar mixture. Using your sturdy wooden spoon or the lightly sprayed spatula, stir vigorously and continuously. The goal is to ensure all the ingredients are completely combined, and the fudge mixture transforms into a smooth, uniform, and beautifully glossy mass. Keep stirring until no streaks of peanut butter or marshmallow creme remain. You’ll notice it becoming thick and cohesive. Work efficiently, as the fudge will begin to set as it cools, and you want to achieve that perfect blend before it starts to firm up.
Step 4: Pour and Set the Fudge with Care
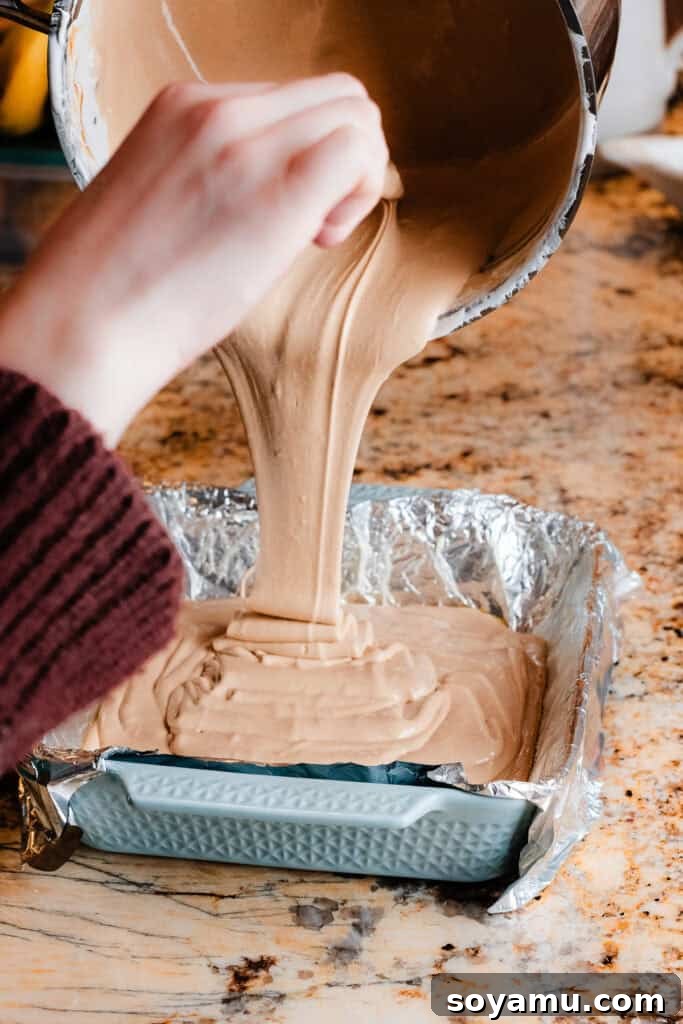
Immediately after mixing, pour the hot, smooth fudge mixture into your prepared 8×8-inch pan. Do this quickly but carefully. Using the spatula you lightly sprayed with nonstick spray (this prevents sticking and makes the job much easier!), quickly spread the fudge evenly across the bottom of the pan, ensuring it fills the corners and reaches a uniform thickness. Smooth the top surface for a beautiful presentation. Again, efficiency is key here, as the fudge will rapidly begin to set as it cools, and you want a smooth, unblemished top.
Step 5: Cool and Chill to Perfection for Slicing
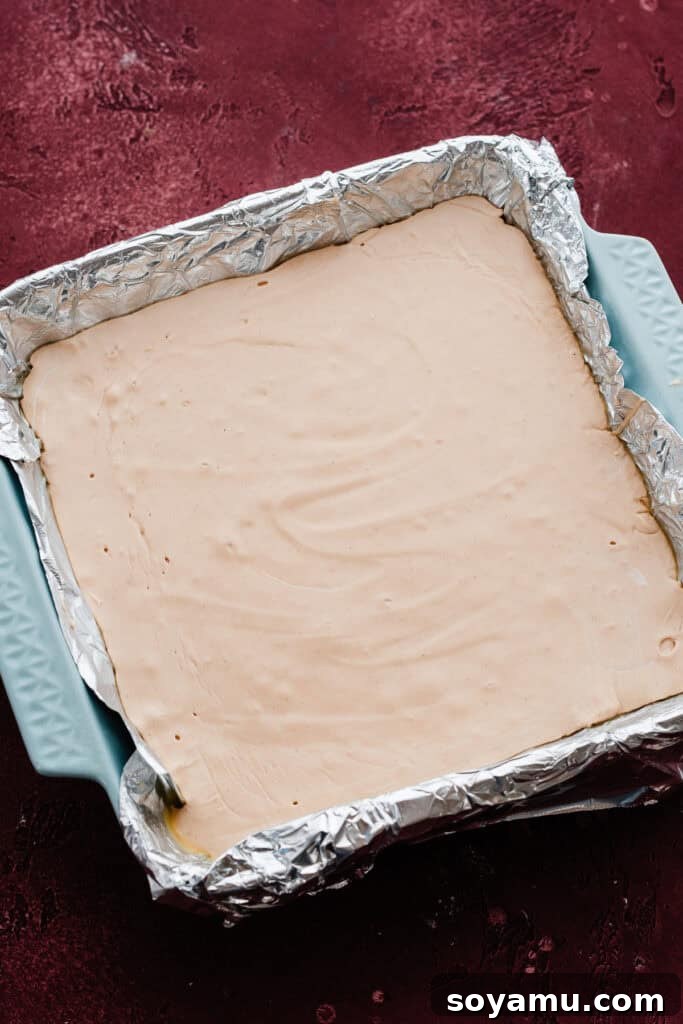
Allow the fudge to cool undisturbed on your kitchen counter for approximately 1-2 hours. This initial cooling at room temperature helps it firm up gradually, promoting a smoother texture. Once it’s no longer warm to the touch (it should feel cool or only slightly warm), transfer the pan to the refrigerator. Chill for an additional 2-3 hours, or until the fudge is completely solid and firm enough to slice easily without crumbling or sticking. The colder and firmer the fudge is, the cleaner and more precise your cuts will be.
Serving Suggestions & Storage Best Practices:
Once your irresistible peanut butter fudge has chilled to absolute perfection, it’s ready to be savored! Here’s how to serve up this delightful treat and ensure it stays fresh and delicious for as long as possible.
Serving Your Fudge:
Using the convenient foil overhangs, gently lift the entire block of set fudge out of the pan and place it onto a clean cutting board. For the cleanest, most precise cuts, use a sharp, thin-bladed knife. For extra neatness, run the knife under hot water and wipe it dry before each cut. This warm blade will glide through the fudge more smoothly. Slice into desired squares or rectangles. This fudge is an absolute showstopper for any occasion:
- Holiday Cookie & Dessert Platters: A classic and beloved inclusion for festive assortments, adding a vibrant peanut butter pop.
- Homemade Edible Gifts: Package individual pieces or small batches in decorative boxes, cellophane bags, or tins for thoughtful and cherished homemade presents that truly come from the heart.
- Party Dessert Spreads: A guaranteed crowd-pleaser that’s perfectly portioned and easy for guests to pick up and enjoy without extra utensils.
- Alongside Coffee or Hot Cocoa: Pair a rich piece of fudge with your favorite warm beverage – coffee, tea, or a creamy hot chocolate – for an indulgent moment.
- Ice Cream Topping: Roughly chop the fudge and sprinkle over vanilla or chocolate ice cream for an incredible texture and flavor boost.
Storing Your Homemade Fudge:
Proper storage is paramount to maintaining the fudge’s delightful creamy texture and intense flavor, ensuring every bite is as good as the first:
- Refrigeration (Short-Term): Store leftover fudge in an airtight container in the fridge for 1-2 weeks. To prevent pieces from sticking together and to maintain their individual integrity, place wax paper or parchment paper between layers of fudge. This also helps preserve freshness.
- Freezing for Longer Shelf Life (Long-Term): For extended storage, first wrap individual pieces or a larger block of fudge tightly in plastic wrap. Then, place the wrapped fudge into a freezer-safe airtight container or a heavy-duty freezer bag. It will keep beautifully in the freezer for 3-6 weeks. When you’re ready to enjoy, simply thaw the frozen fudge in the refrigerator overnight.
Are you a chronic peanut butter lover, always seeking new and delightful ways to enjoy that creamy, nutty goodness? Then you’ll also adore my incredibly popular Peanut Butter Blossoms or my fun and flavorful PB&J Thumbprint Cookies – perfect for expanding your peanut butter dessert repertoire!
Expert Tips for Foolproof Peanut Butter Fudge:
Even the simplest recipes can benefit immensely from a few insider tips and tricks to ensure absolute perfection. Follow these expert pointers closely, and you’ll achieve the best peanut butter fudge every single time, delighting everyone who tries a piece:
- Embrace a Kitchen Scale for Precision: While volumetric cup measurements are provided for convenience, a food scale is truly the gold standard for accuracy in all baking and especially in the precise world of candy making. Measuring sugar and milk by weight (grams) ensures precise ingredient ratios, which are critically important for fudge to set correctly and achieve its ideal texture. Volume measurements can vary significantly depending on how ingredients are scooped and the specific measuring cup used.
- The Undeniable Importance of Mise en Place: “Mise en place” is a fundamental French culinary term meaning “everything in its place.” For this fast-paced fudge recipe, this step is absolutely non-negotiable. Begin by reading the entire recipe thoroughly from start to finish to understand each step. Then, measure out all your ingredients precisely, prepare your baking pan (lined and buttered), and have all your necessary tools (saucepan, thermometer, spoons, spatulas) laid out and within easy reach. Once the sugar and milk are boiling, you’ll need to move quickly, and you simply won’t have time to search for ingredients or equipment.
- Temperature Control is Paramount: A reliable instant-read thermometer is your absolute best friend for this recipe. Reaching precisely 235°F (the soft ball stage) is the most crucial step. Cooking the fudge base to too low a temperature will result in fudge that won’t set properly and remains sticky or gooey. Conversely, cooking it to too high a temperature will lead to fudge that is dry, crumbly, or overly hard. Trust your thermometer – don’t eyeball it!
- Stir Constantly While Boiling: When you’re boiling the sugar and milk mixture, continuous and consistent stirring is vital. This prevents the sugar from scorching on the bottom of the pan and ensures that the sugar crystals dissolve completely and evenly into the milk, preventing a grainy final texture.
- Resist Scraping the Sides of the Pot: After you remove the saucepan from the heat, make a conscious effort to avoid scraping down the sides of the pot with your spatula or spoon. Any sugar crystals that may have clung to the sides during boiling can, if introduced back into the cooling fudge, act as “seed crystals” and cause the entire batch to become grainy.
- Allow Proper Cooling: Be patient and allow the fudge to cool fully. While it’s tempting to cut into it early, rushing the cooling process can affect its final set and texture. Chilling in the refrigerator ensures a firm, easy-to-slice consistency.
Frequently Asked Questions About Peanut Butter Fudge:
While it’s incredibly tempting to scale recipes up or down, candy-making, and especially fudge, is an incredibly sensitive process to batch size. Changing the proportions can drastically affect crucial elements like cooking times, the rate at which the mixture reaches specific temperatures, and ultimately, the final set and texture of your fudge. For the absolute best chance of success and to consistently achieve that perfect, smooth, and creamy texture, we strongly recommend sticking to the recipe exactly as written. If you find yourself in need of a larger quantity of this delicious treat, it’s often far better and more reliable to make multiple individual batches rather than attempting to double the recipe, ensuring each batch is perfect.
Grainy fudge is a common and frustrating issue, most often caused by undissolved sugar crystals. This can happen if the mixture isn’t stirred constantly and thoroughly while it’s boiling, allowing sugar to crystallize on the sides of the pan. Another frequent culprit is scraping down the sides of the pot with a spatula after it’s been removed from the heat, reintroducing those tiny sugar crystals back into the smooth mixture. To prevent this, ensure continuous stirring during cooking and avoid scraping the sides. Additionally, cooking the fudge mixture slightly past the soft ball stage (above 235°F) can sometimes contribute to a grainy texture.
If your fudge isn’t setting up properly and remains too soft or gooey, the most likely culprit is not reaching the correct temperature during the boiling stage. It is absolutely crucial that the sugar and milk mixture boils to precisely 235°F (the soft ball stage). If it doesn’t reach this precise temperature, the sugar won’t be sufficiently concentrated, and the syrup won’t have the proper structure to crystallize and firm up correctly as it cools. This underscores the critical importance of using a reliable instant-read thermometer for this recipe.
We strongly advise against using natural peanut butter for this specific recipe. We highly recommend sticking to classic creamy peanut butter brands (like Jif or Skippy). Natural peanut butter tends to separate its oils and has a different, often drier, consistency, which can lead to a greasier or harder fudge that simply doesn’t set as intended. Its varying fat and sugar content can disrupt the delicate balance and precise chemistry required for achieving the perfect, smooth, and creamy marshmallow fluff-based fudge this recipe promises.
While some traditional fudge recipes suggest room temperature storage to avoid drying, this particular marshmallow fluff-based recipe holds up beautifully in the fridge. In fact, we find its texture is even more enjoyable when cold, and it maintains its creamy consistency without drying out. The primary cause of dry or crumbly fudge is typically overcooking the sugar mixture beyond the 235°F mark, not refrigeration. Storing in an airtight container in the fridge also ensures optimal freshness and food safety.
Essential Tools for Perfect Fudge Making:
While the ingredients for this peanut butter fudge are wonderfully simple, having the right tools on hand will make the entire fudge-making process significantly smoother, more enjoyable, and ultimately, more successful. Don’t skip these essential items!
- Instant-Read Thermometer: This is, without a doubt, the most critical tool for this recipe. Precision in temperature is paramount for fudge. You don’t necessarily need a traditional, old-fashioned candy thermometer (though it certainly works), as any reliable instant-read digital thermometer will do the trick perfectly. We personally prefer instant-read digital thermometers for their quick and precise readouts, eliminating all guesswork and ensuring you hit that crucial 235°F mark exactly.
- Heavy-Bottomed Saucepan: A sturdy, heavy-bottomed saucepan is essential. Its construction helps distribute heat much more evenly across the bottom, which is vital for preventing the sugar mixture from scorching or burning, especially during the boiling stage. A medium-to-large size (at least 3-quart capacity) ensures there’s enough space for the mixture to boil vigorously without the risk of overflowing.
- Sturdy Wooden Spoon or Heat-Resistant Spatula: You’ll need a robust utensil for constant stirring during the boiling phase and for vigorously mixing in the final ingredients (peanut butter, vanilla, marshmallow fluff). A wooden spoon or a high-quality silicone spatula that can withstand high heat is ideal.
- 8×8 Inch Baking Pan: This specific size is perfect for this batch of fudge, yielding squares of an ideal thickness. Lining it with aluminum foil and buttering it thoroughly (as instructed) ensures that your beautifully set fudge can be easily lifted out and sliced cleanly without any frustration.
More Festive Candy Recipes to Enjoy:
If you’ve fallen completely in love with the magic of homemade fudge, or if you’re eagerly looking to expand your holiday candy repertoire with other impressive yet approachable treats, here are some fantastic recipes that are sure to delight and impress everyone on your list:
- Decadent Black Forest Chocolate Truffles
- Double Chocolate Swirled Peppermint Bark
- Creamy Bailey’s Chocolate Fudge
- White Chocolate Peppermint Pretzels
Made this delightful fudge? We’d love to hear from you!
Please leave a comment and a star rating below to let us know how you enjoyed this recipe. Your feedback is invaluable and greatly supports our small business in creating more delicious content for you!
Rate this recipe:
⭐⭐⭐⭐⭐
Grandma’s Famous Peanut Butter Fudge Recipe
Stephanie Simmons
This incredibly easy and foolproof peanut butter fudge recipe, passed down from Grandma, uses marshmallow fluff for the BEST tasting, heavenly textured fudge. Perfect for holidays and gifting, it comes together quickly with minimal ingredients.
10 mins
10 mins
3 hrs
3 hrs 20 mins
25 to 35 pieces
Pin Recipe
Rate This Recipe
Print Recipe
Ingredients
- 2 cups (420 grams) granulated sugar
- 2/3 cup (160 grams) whole milk (Must use whole milk, not skim or 2%)
- 1 tsp vanilla extract
- 1 cup (250 grams) creamy peanut butter (Do not use natural or crunchy peanut butter)
- One 7-ounce jar (198 grams) marshmallow fluff
Instructions
-
Prep Your Station: Lightly spray an 8×8-inch baking pan with nonstick spray, then line it with aluminum foil, leaving an overhang on the sides. Butter the foil generously. Read through the entire recipe before you begin, as quick action is needed once cooking starts. Measure out all your ingredients (sugar, milk, vanilla, peanut butter, marshmallow fluff) and have them ready. Gather a medium pot, an instant-read thermometer, a sturdy wooden spoon, and two spatulas (lightly spray one with nonstick spray for handling marshmallow fluff).
-
Cook the Fudge Base: In your medium/large saucepan, combine the granulated sugar and whole milk. Place over medium-high heat and stir constantly until the mixture reaches precisely 235℉ (113°C) on your instant-read thermometer. This is the “soft ball stage.” Do not cook past this temperature to prevent dry, crumbly fudge.
-
Finish the Fudge: Immediately remove the saucepan from the heat. Without delay, add the vanilla extract, creamy peanut butter, and the marshmallow creme. Stir vigorously and continuously with your wooden spoon or sturdy spatula until all ingredients are completely combined and the fudge mixture is smooth and glossy. Work quickly as it will begin to set.
-
Pour & Smooth: Promptly pour the hot, smooth fudge mixture into your prepared 8×8-inch pan. Using the lightly sprayed spatula, quickly spread the fudge evenly across the bottom of the pan and smooth the top surface.
-
Chill to Perfection: Let the fudge cool on the counter for 30-60 minutes, or until it’s no longer warm to the touch. Then, transfer the pan to the refrigerator and chill for another 1-2 hours, or until the fudge is completely cool and firm enough to slice easily.
Note: Some prefer not to store fudge in the fridge, fearing it might dry out. However, with this marshmallow fluff-based recipe, that has never been an issue. Overcooking beyond 235℉ is a more common cause of dry or crumbly fudge. We love it cold from the fridge, and it ensures optimal freshness and food safety!
-
Serve & Store: Once thoroughly chilled, lift the fudge out of the pan using the foil overhangs. Slice into desired squares and enjoy! Keep leftover fudge in an airtight container in the fridge for 1-2 weeks, using wax paper between layers. For longer storage, freeze in a freezer-safe container for 3-6 weeks, thawing overnight in the fridge before enjoying.
Nutrition Information (per serving)
- Serving: 1 slice
- Calories: 128 kcal
- Carbohydrates: 19g
- Protein: 3g
- Fat: 6g
- Saturated Fat: 1g
- Polyunsaturated Fat: 1g
- Monounsaturated Fat: 3g
- Cholesterol: 1mg
- Sodium: 47mg
- Potassium: 69mg
- Fiber: 0.5g
- Sugar: 17g
- Vitamin A: 11IU
- Calcium: 13mg
- Iron: 0.2mg
Nutrition information is automatically calculated and should be used as an approximation.
Enjoyed this recipe? Leave a comment below!
Your feedback means the world to us and helps other home bakers discover this amazing fudge.